
Affiliate link disclosure – The BMW Repair Guide uses affiliate links in their site. For more information on affiliate links, please click here.
Repair Summary
The following article gives detailed instructions on performing a BMW E90 trunk leak repair in a 3 series car. Even though we have used a 2013 BMW E92 M3 to perform this repair, this article can be applied to any BMW E9x 3 series vehicle (excluding the touring wagon) produced from 2007-2013, including the 328i, 330i, 335i and M3 sedans, coupes, and convertibles.
See all vehicles this article applies to
E90 3 Series M3
E90 3 Series 318d
E90 3 Series 335i
E90 3 Series 335xi
E90 3 Series 335d
E90 3 Series 330xd
E90 3 Series 330xi
E90 3 Series 330i
E90 3 Series 330d
E90 3 Series 328xi
E90 3 Series 328i
E90 3 Series 325xi
E90 3 Series 325i
E90 3 Series 323i
E90 3 Series 325d
E90 3 Series 320i
E90 3 Series 320si
E90 3 Series 320d
E90 3 Series 318i
E90 3 Series 316i
E90N 3 Series M3 CRT
E90N 3 Series 318i
E90N 3 Series M3
E90N 3 Series 335xi
E90N 3 Series 335i
E90N 3 Series 335d
E90N 3 Series 330xd
E90N 3 Series 330xi
E90N 3 Series 330i
E90N 3 Series 328xi
E90N 3 Series 330d
E90N 3 Series 328i
E90N 3 Series 325d
E90N 3 Series 325i
E90N 3 Series 325xi
E90N 3 Series 323i
E90N 3 Series 320xd
E90N 3 Series 320i
E90N 3 Series 320d ed
E90N 3 Series 320d
E90N 3 Series 318d
E90N 3 Series 316i
E90N 3 Series 316d
E92 3 Series M3
E92 3 Series 325d
E92 3 Series 335xi
E92 3 Series 335i
E92 3 Series 335d
E92 3 Series 330xi
E92 3 Series 330xd
E92 3 Series 330i
E92 3 Series 330d
E92 3 Series 328xi
E92 3 Series 328i
E92 3 Series 325xi
E92 3 Series 325i
E92 3 Series 323i
E92 3 Series 320xd
E92 3 Series 320i
E92 3 Series 320d
E92 3 Series 316i
E92N 3 Series M3
E92N 3 Series 323i
E92N 3 Series 335xi
E92N 3 Series 335is
E92N 3 Series 335i
E92N 3 Series 335d
E92N 3 Series 330xi
E92N 3 Series 330xd
E92N 3 Series 330i
E92N 3 Series 330d
E92N 3 Series 328xi
E92N 3 Series 328i
E92N 3 Series 325xi
E92N 3 Series 325i
E92N 3 Series 320xd
E92N 3 Series 325d
E92N 3 Series 320d
E92N 3 Series 320i
E92N 3 Series 318i
E92N 3 Series 316i
A BMW E90 trunk leak caused by one of the tail lights not sealing correctly is a very common issue that effects all 3 series cars produced from 2007-2013.
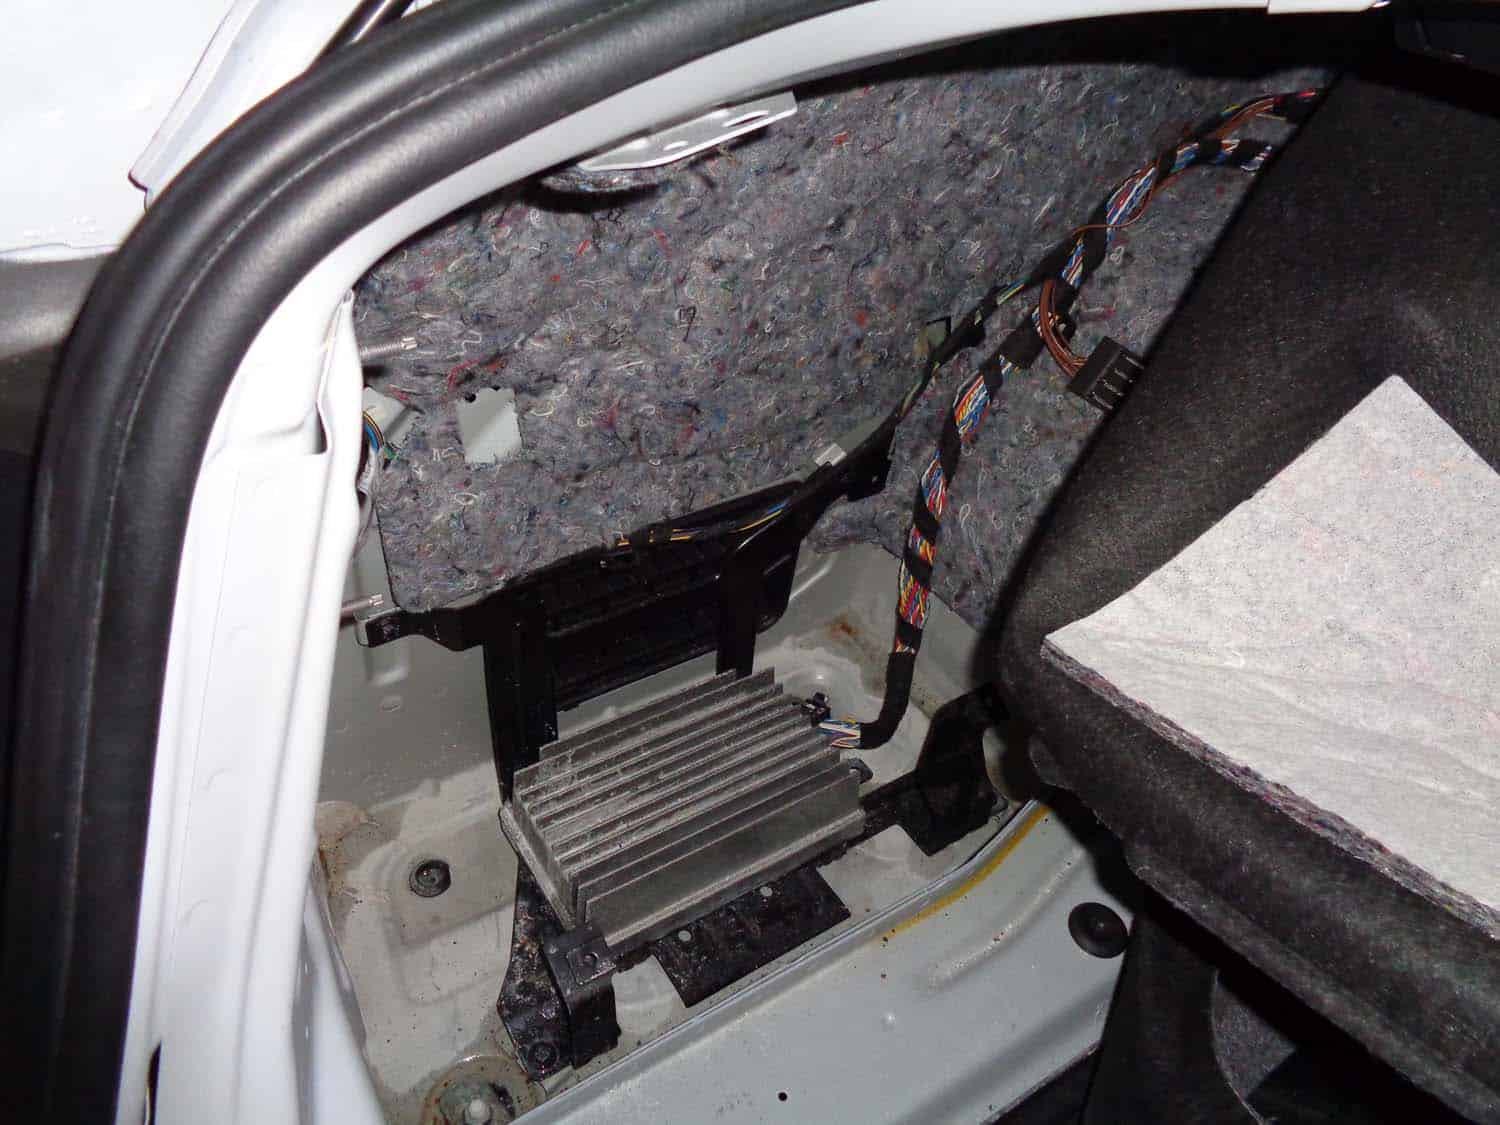
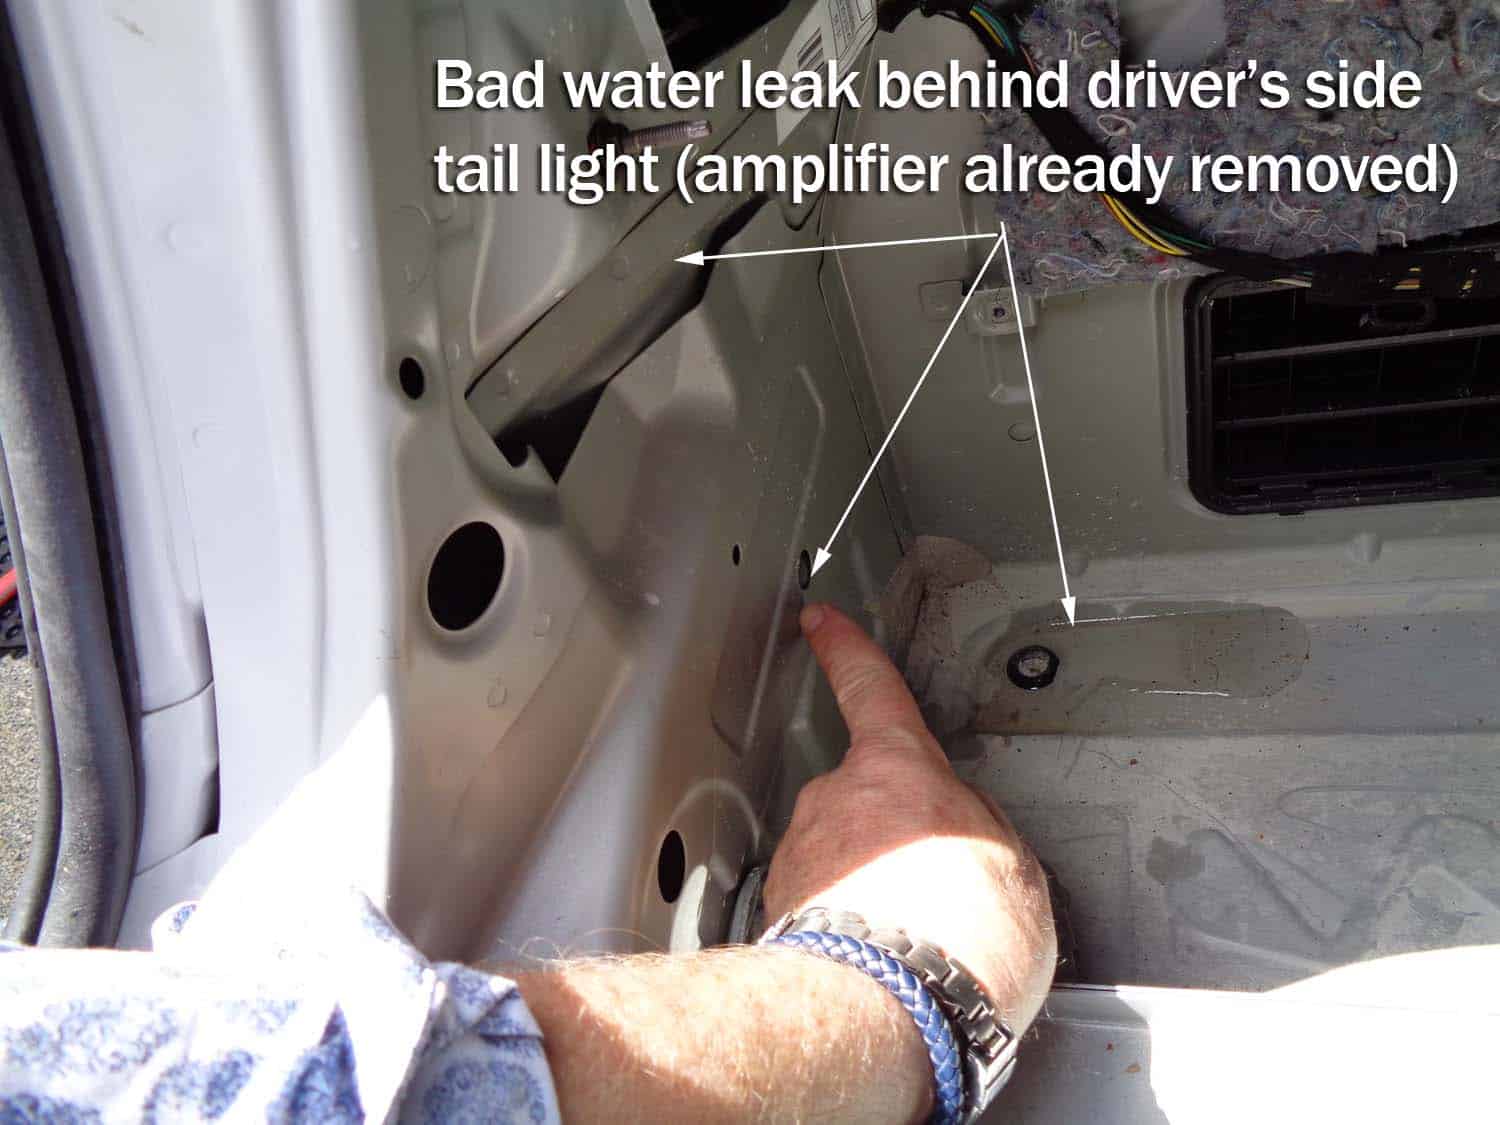
On a very rainy South Florida day, the sound system in our BMW Repair Guide 2013 BMW E92 M3 went completely silent. We, unfortunately, diagnosed the problem as a water-damaged amplifier due to a trunk leak (see our article Amplifier Water Damage Repair). Approximately an inch of water had accumulated in the left side trunk-well where the amplifier is mounted.
After cleaning up the mess, we started a careful visual inspection of the car to see if there were any obvious clues to the source of the trunk leak. There was no visible damage or wear to the trunk lid gasket, and even more perplexing was that none of the interior trunk liner was damp. The trunk leak seemed to be isolated to the left side trunk well behind the tail light.
We decided to do a water hose test to see if we could get the trunk leak to reveal itself. With the trunk lid closed, we ran water over the tail light, focusing near the top of the light and trunk lid to simulate rainwater runoff. Bingo. When we opened the trunk and looked in the trunk well, we could see water pouring in through a small hole behind the tail light.
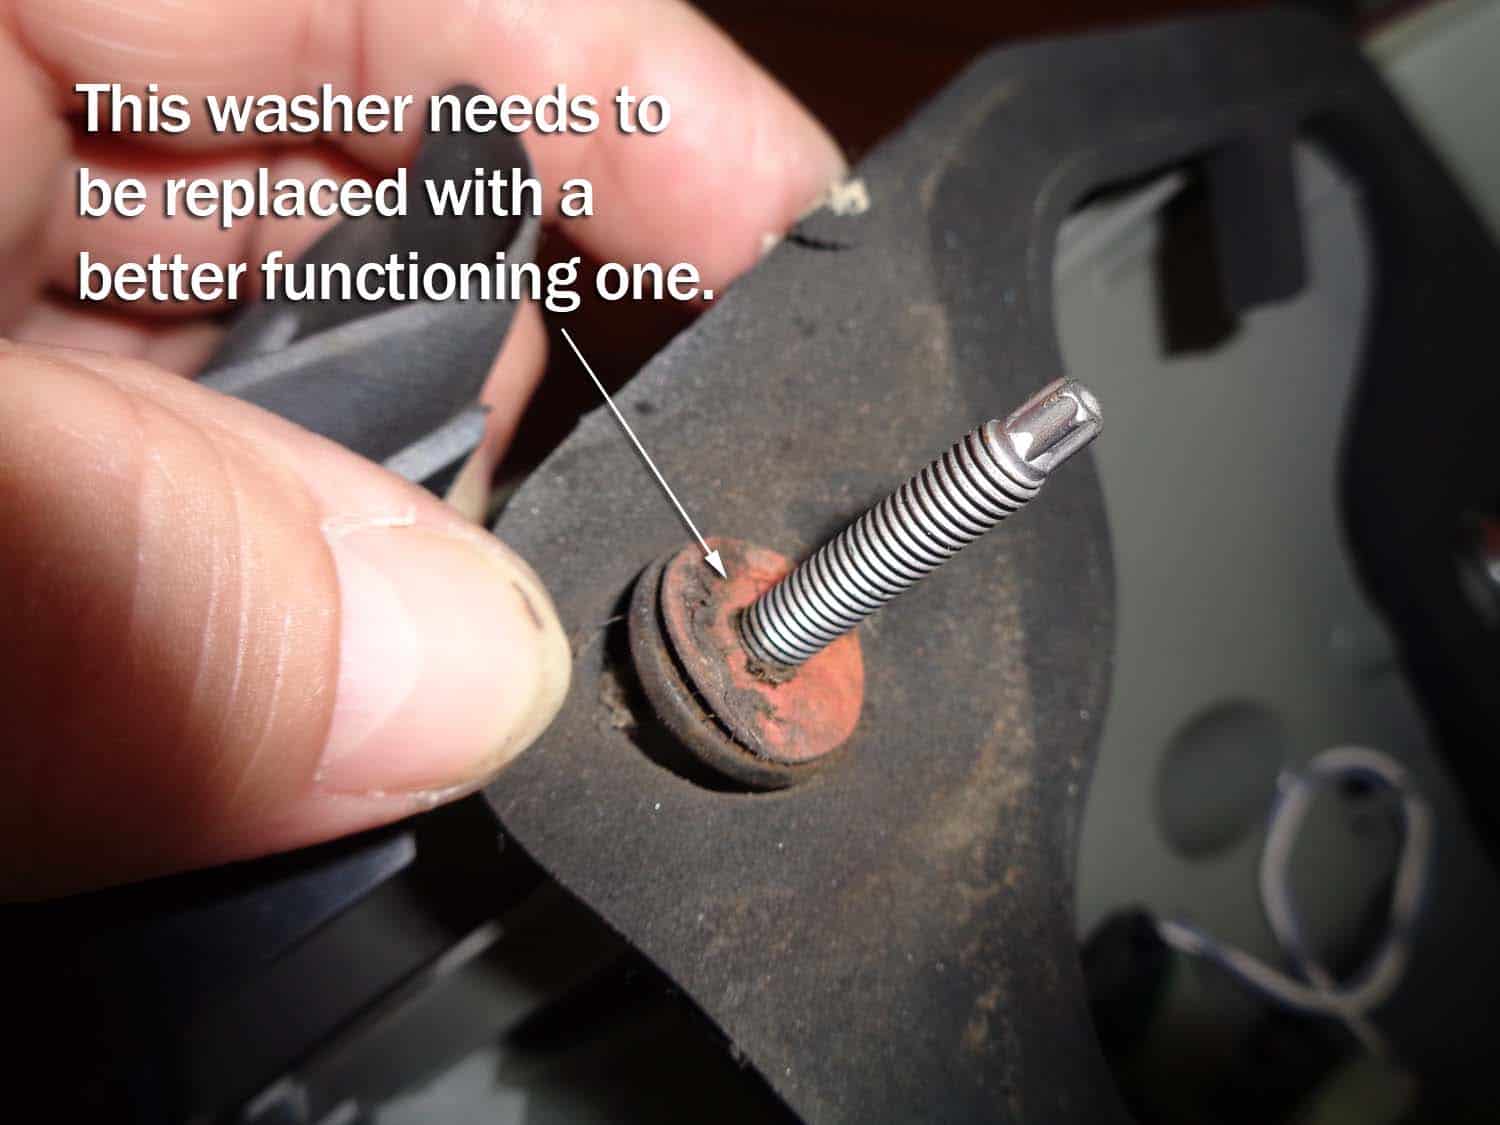
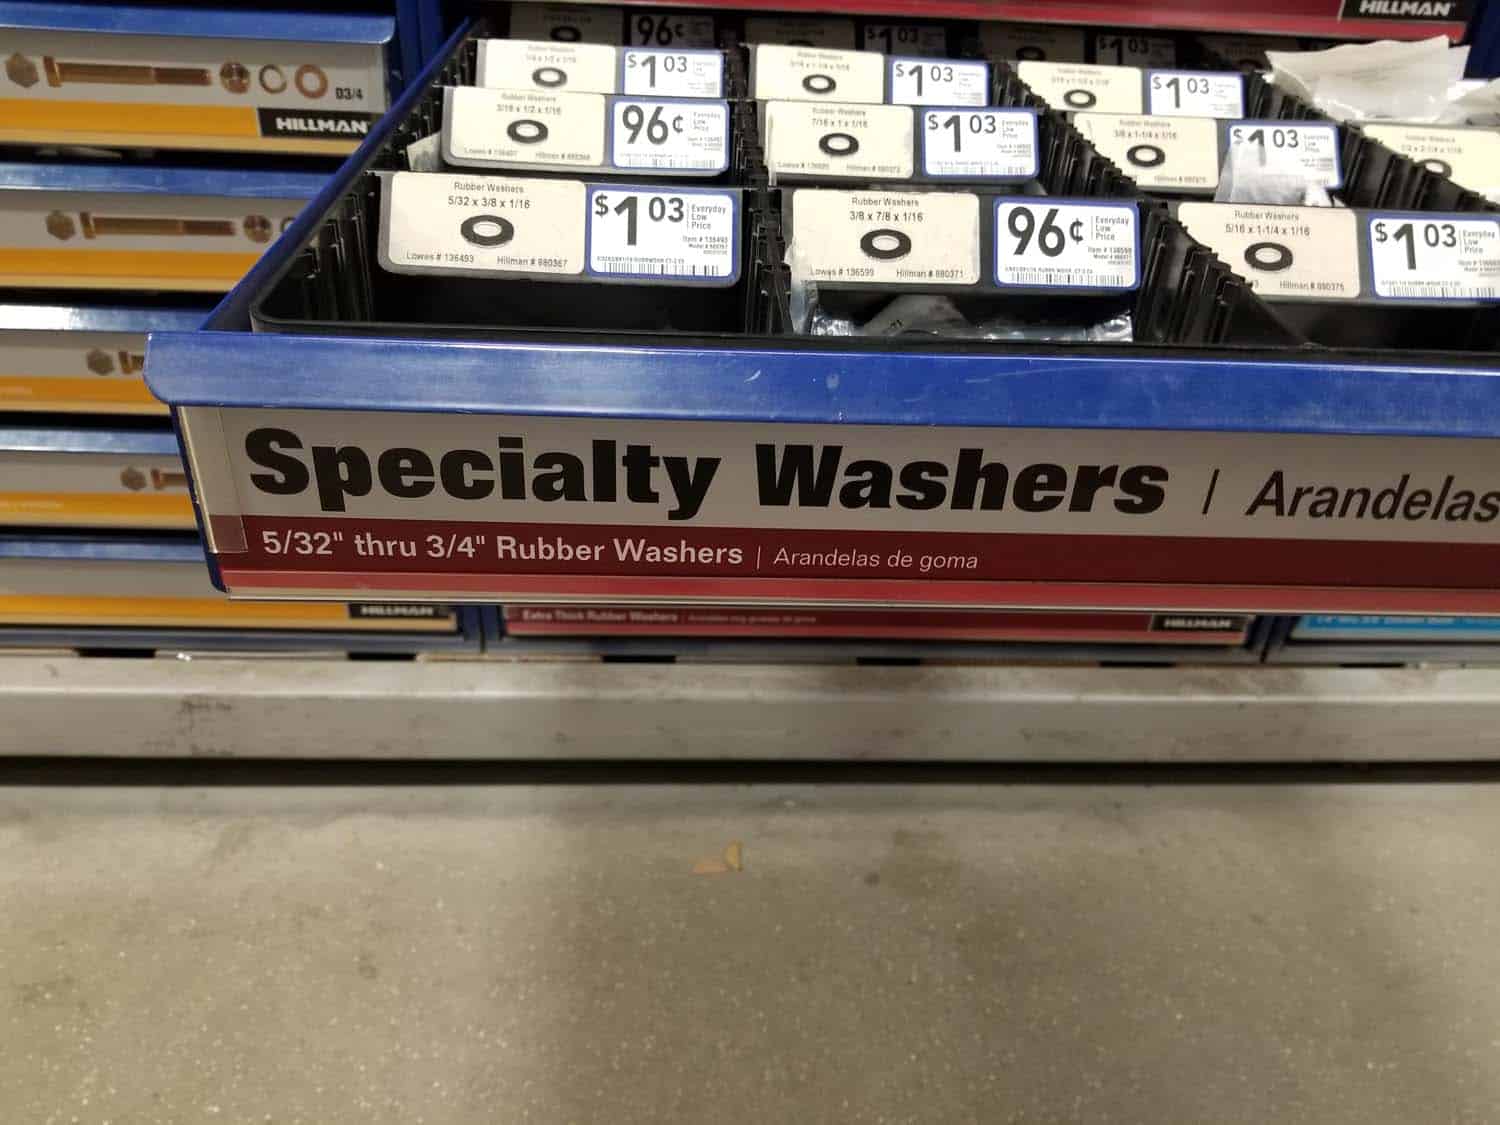
The repair for this was surprisingly easy. The cause was a worn tail light seal (gasket) that needed replacement. But we also noticed another issue; one of the three threaded studs that mount the tail light to the body was also leaking. There is a thin synthetic washer that is supposed to seal the mounting studs against the body, but the top one had failed. Unfortunately that synthetic washer is part of the $250 tail light assembly and can't be purchased separately...not a price we're willing to pay for (another) BMW engineering miscue. With a little ingenuity and about $3 spent at the local home improvement store, we were able to come up with a solution using a rubber flat washer that makes the tail light studs watertight again. All of this is discussed in the following repair instructions.


View the detailed parts diagram for this repair.
Includes detailed part diagrams, part numbers and links to purchase all of the required components needed to complete this repair.

Before starting this repair, you must have the following required parts.
All BMW vehicles
These are the same factory bulbs that would be installed at the BMW dealership. Single filament bulb used in most BMWs.
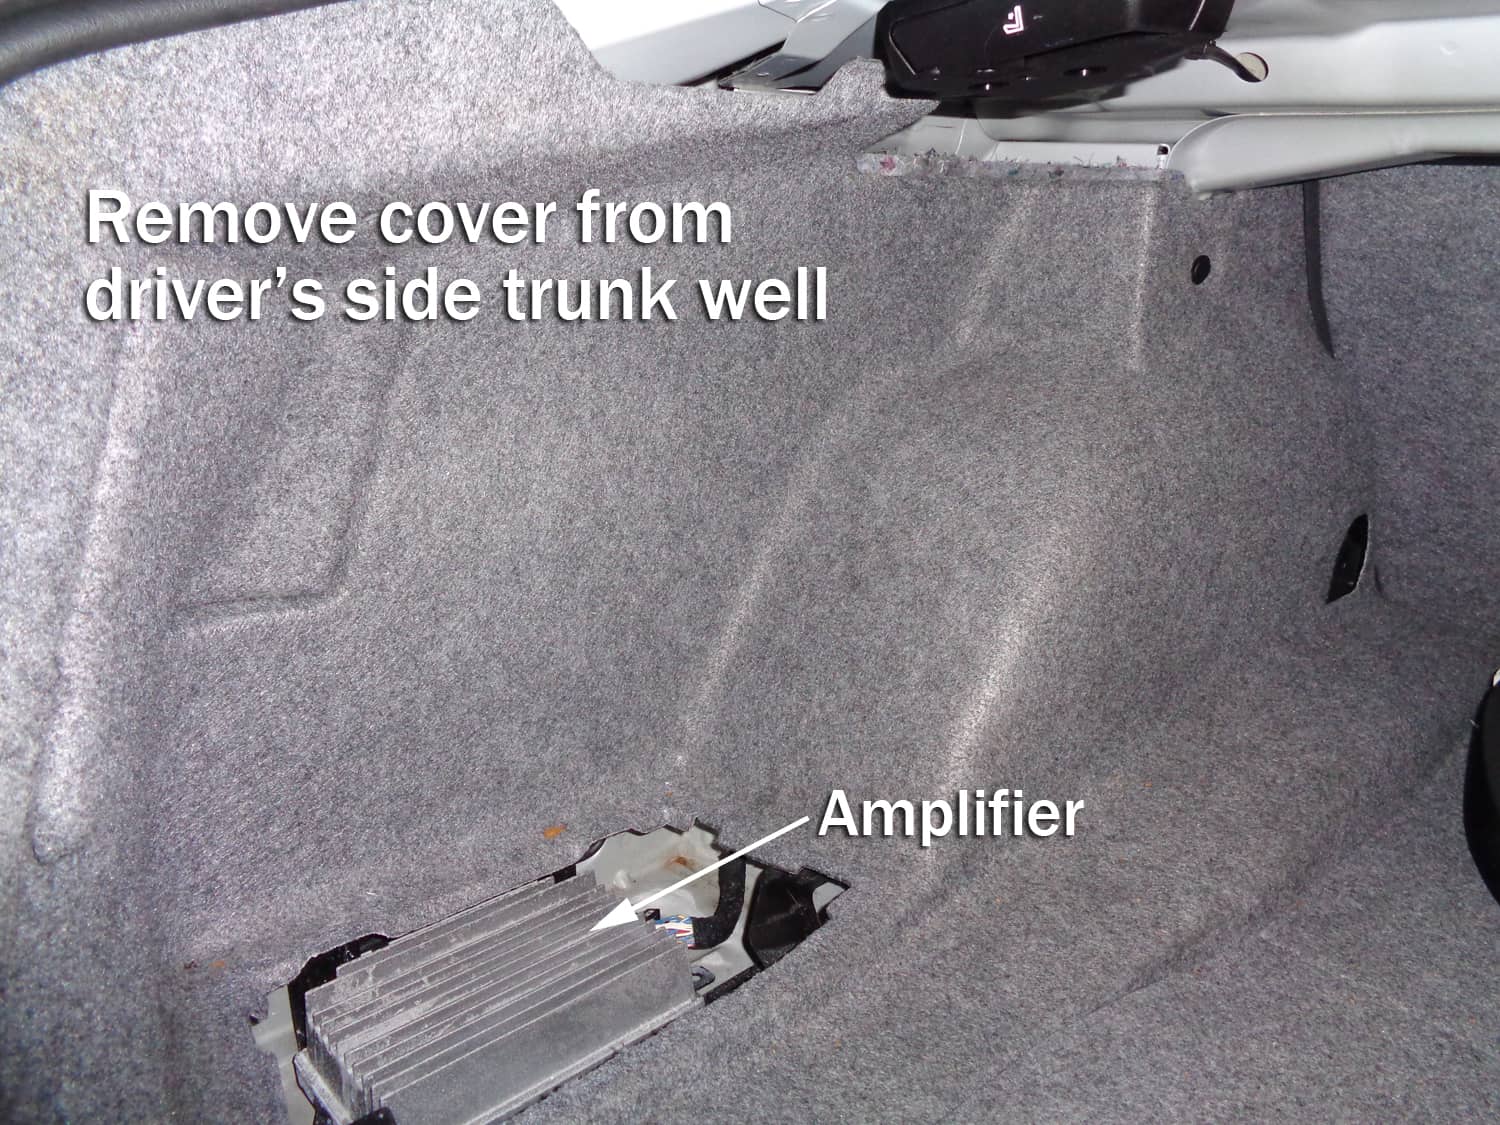
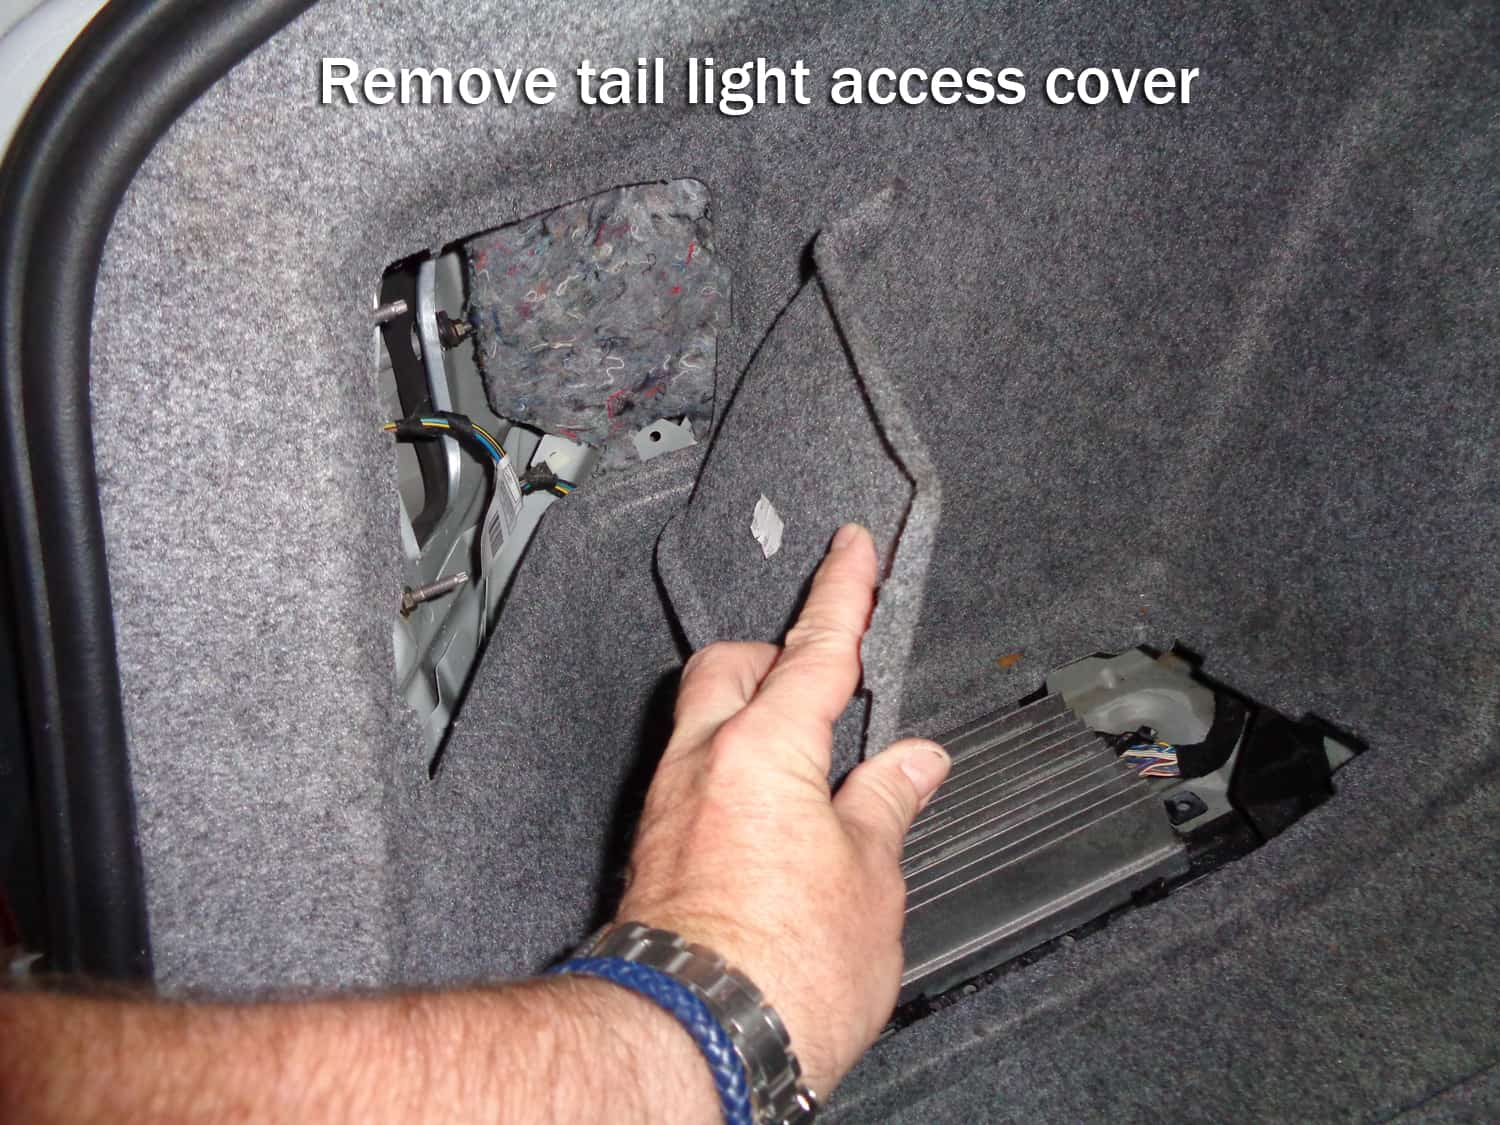
Section 1 - Trunk Side Liner Removal
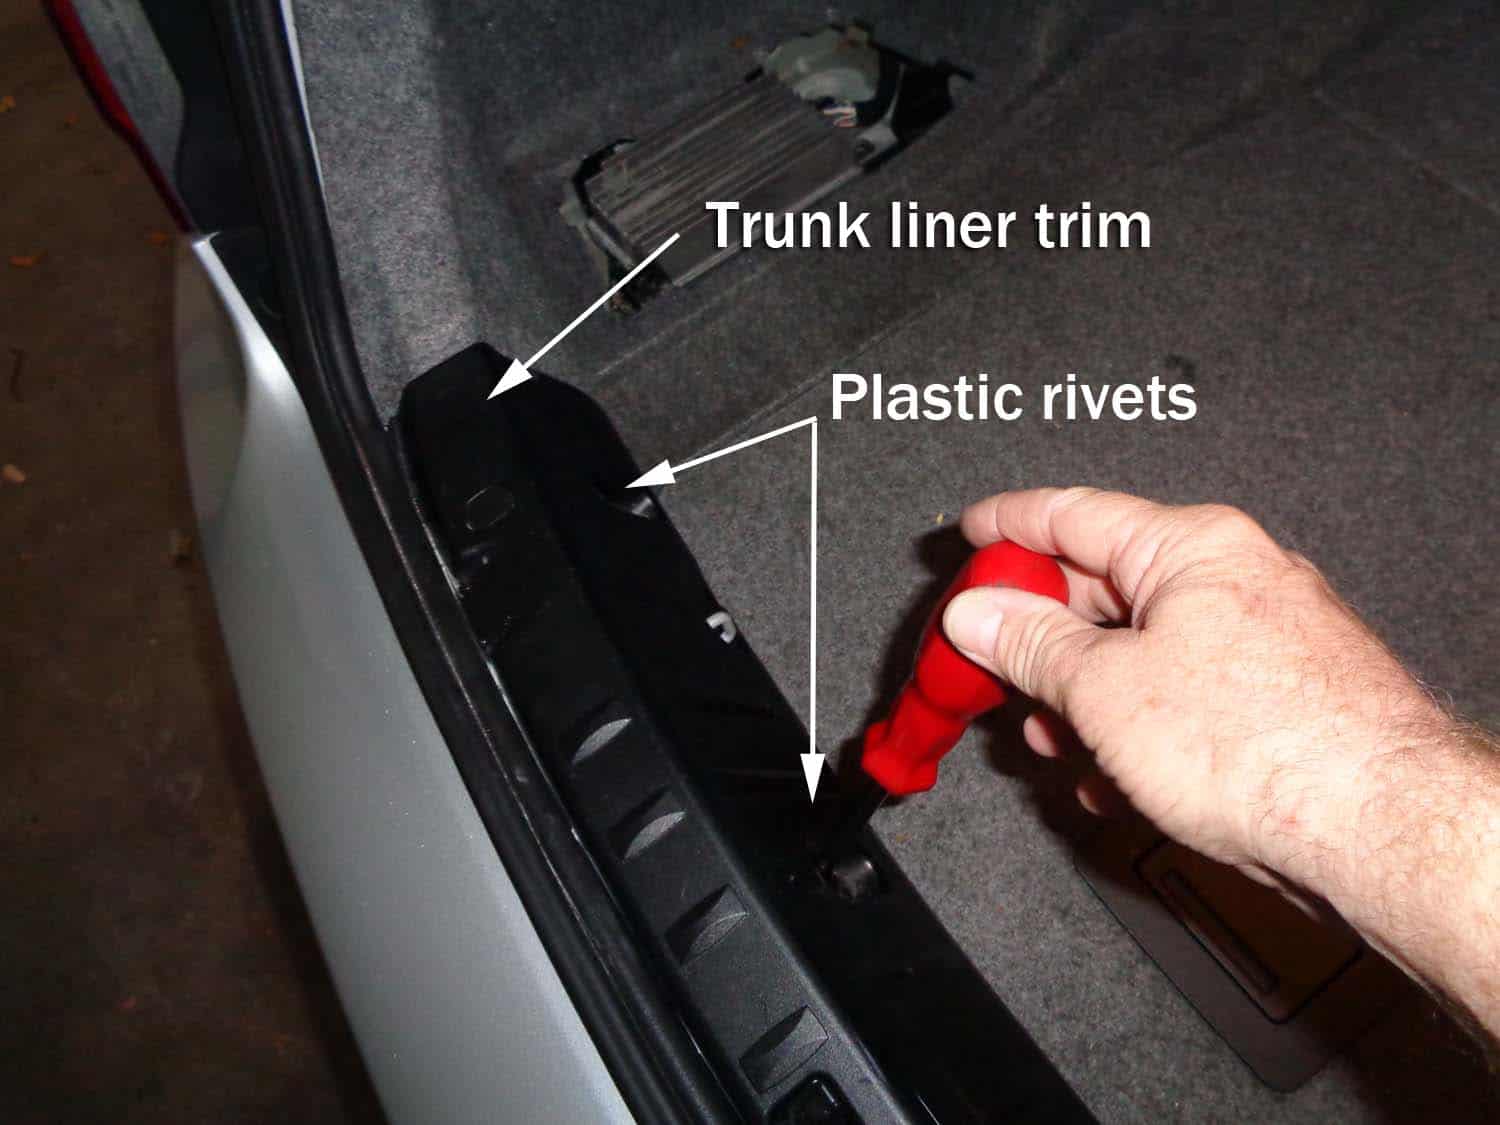
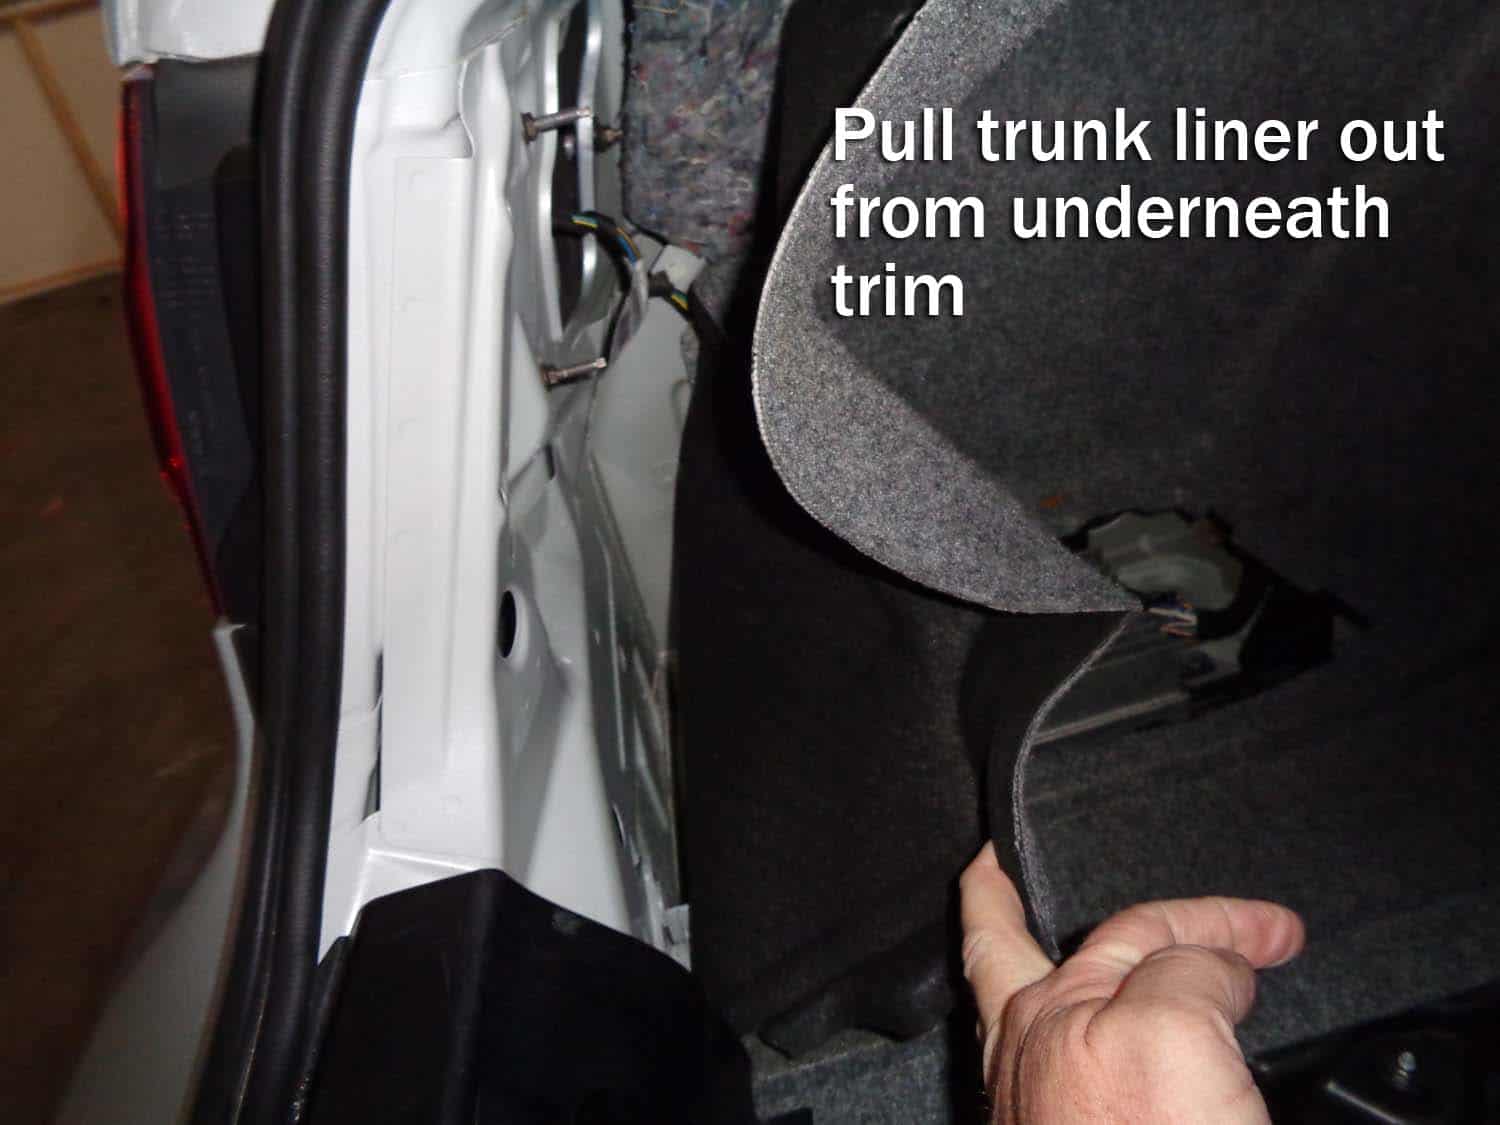
- Left side trunk liner - Remove amplifier cover and tail light cover. Remove first two plastic rivets on black trunk liner trim. Grasp liner and pull out from underneath trim. Fold back neatly exposing amplifier.
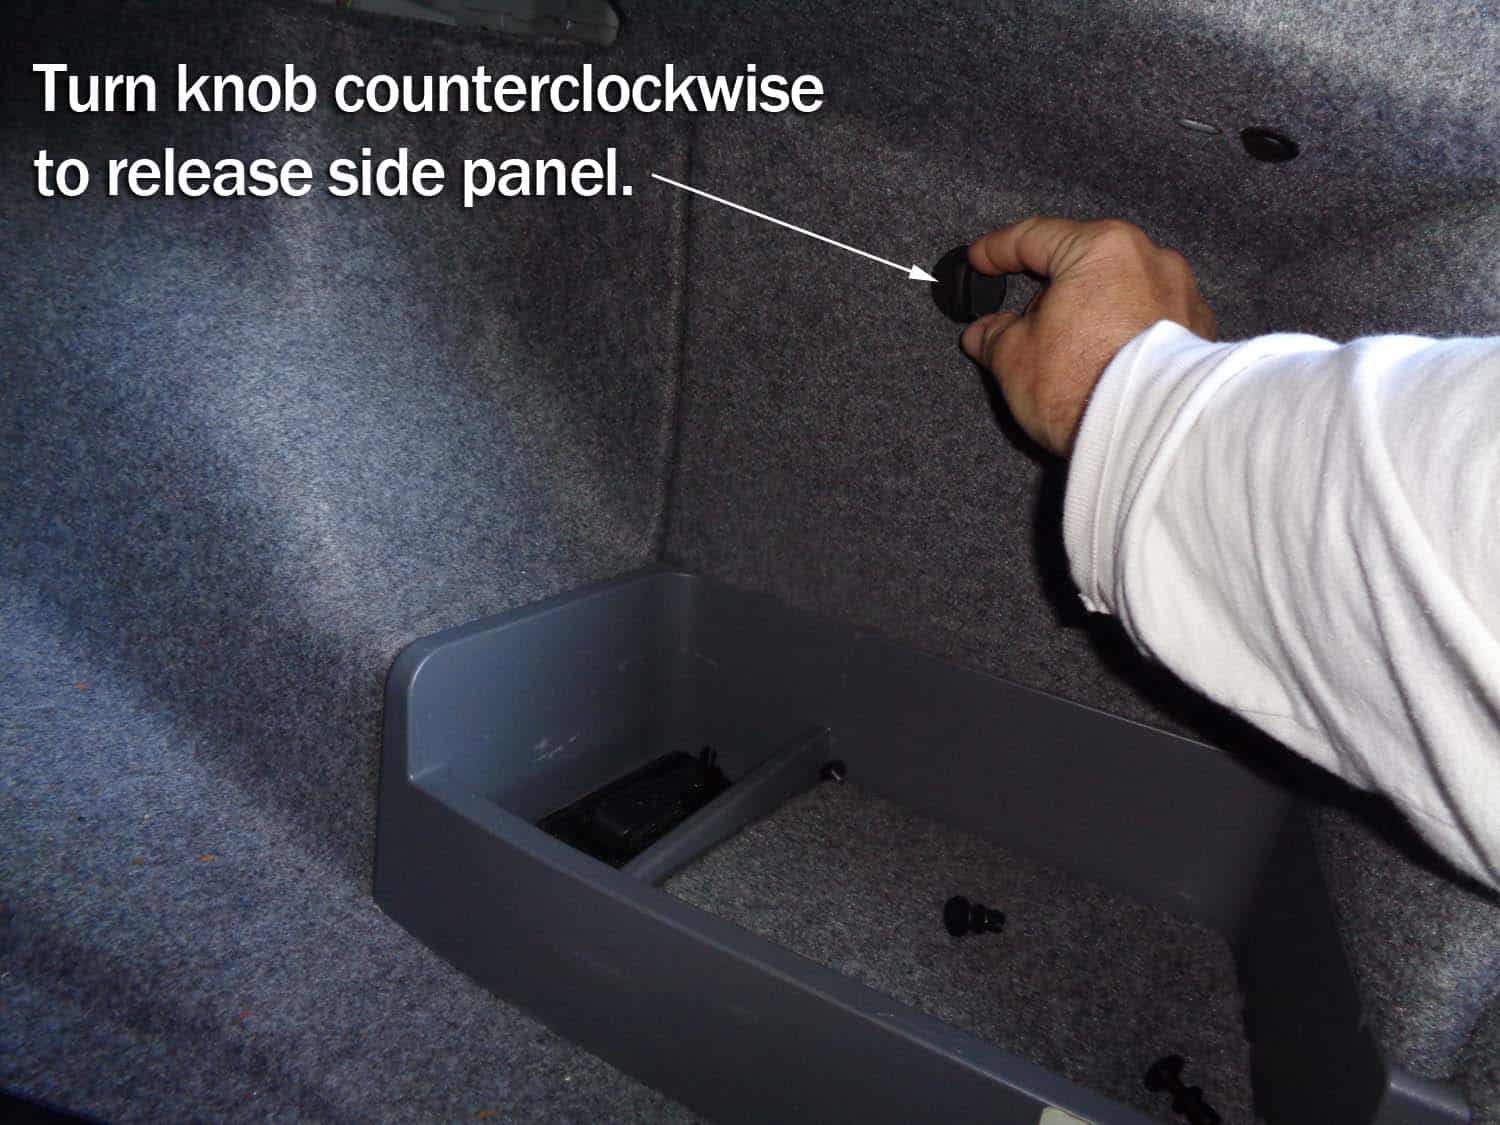
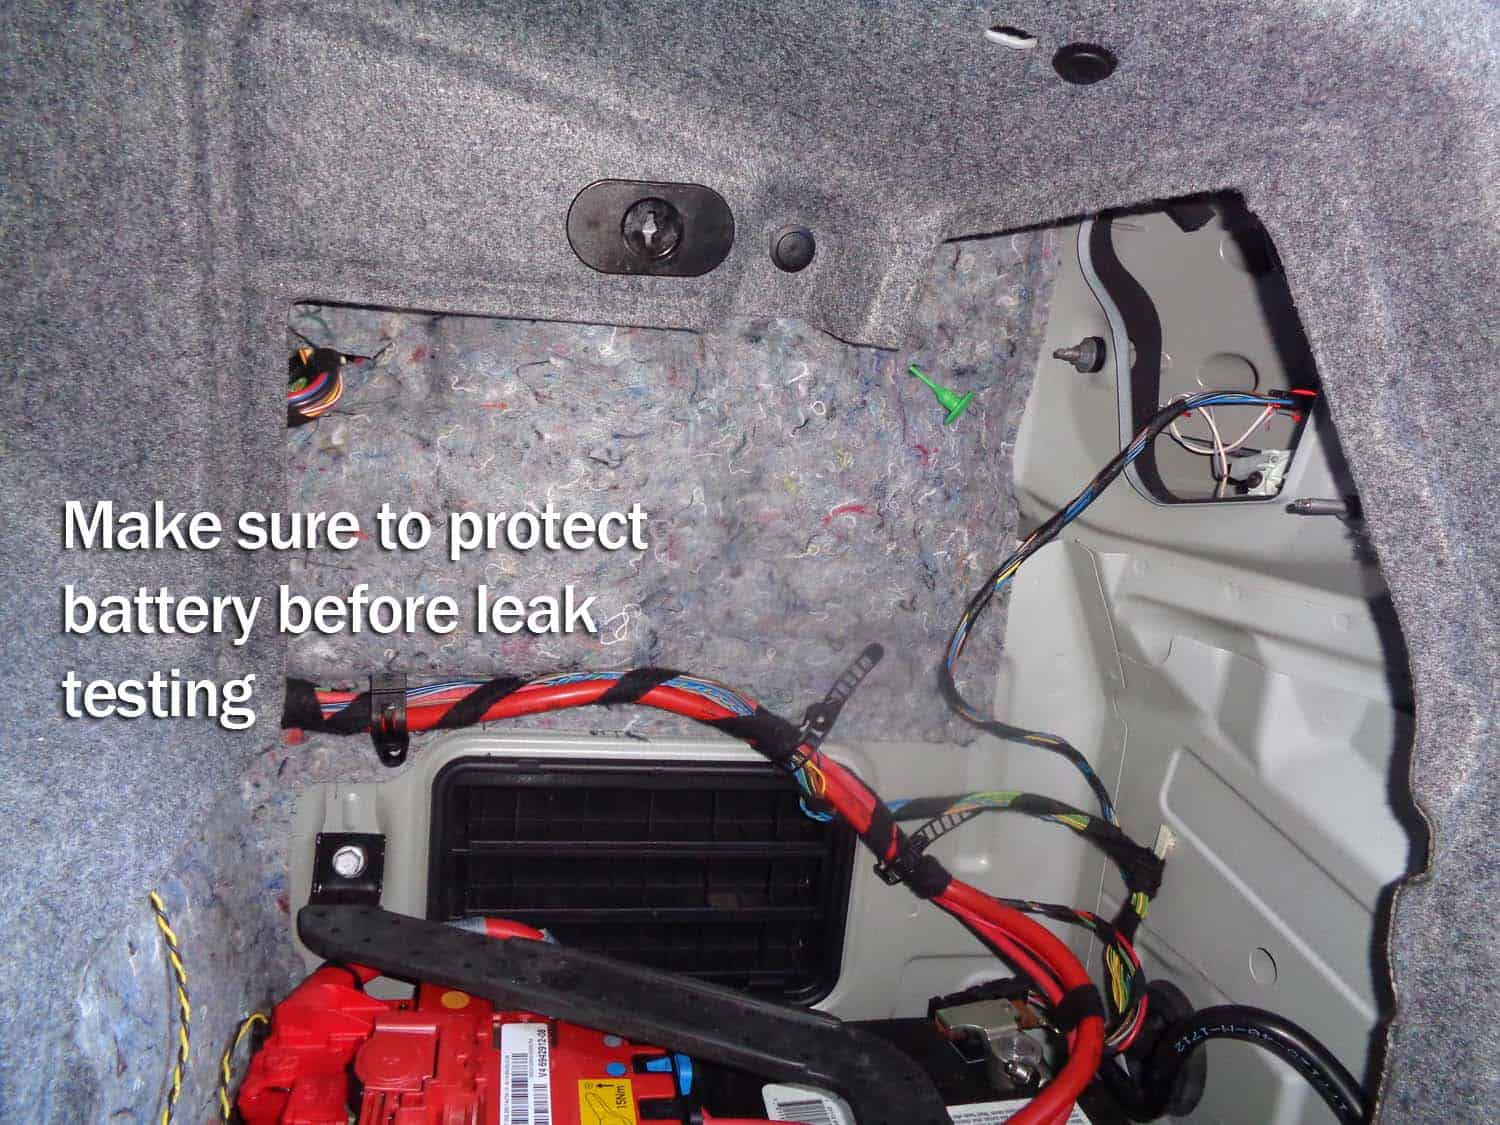
- Right side trunk liner - Just one easy step on this side! Turn latch counterclockwise and remove side panel from trunk. ***Remember to protect your battery from water if you are leak testing on this side. Either remove the battery from the vehicle, or cover tightly with a weatherproof tarp.
Section 2 - BMW E90 Trunk Leak Detection
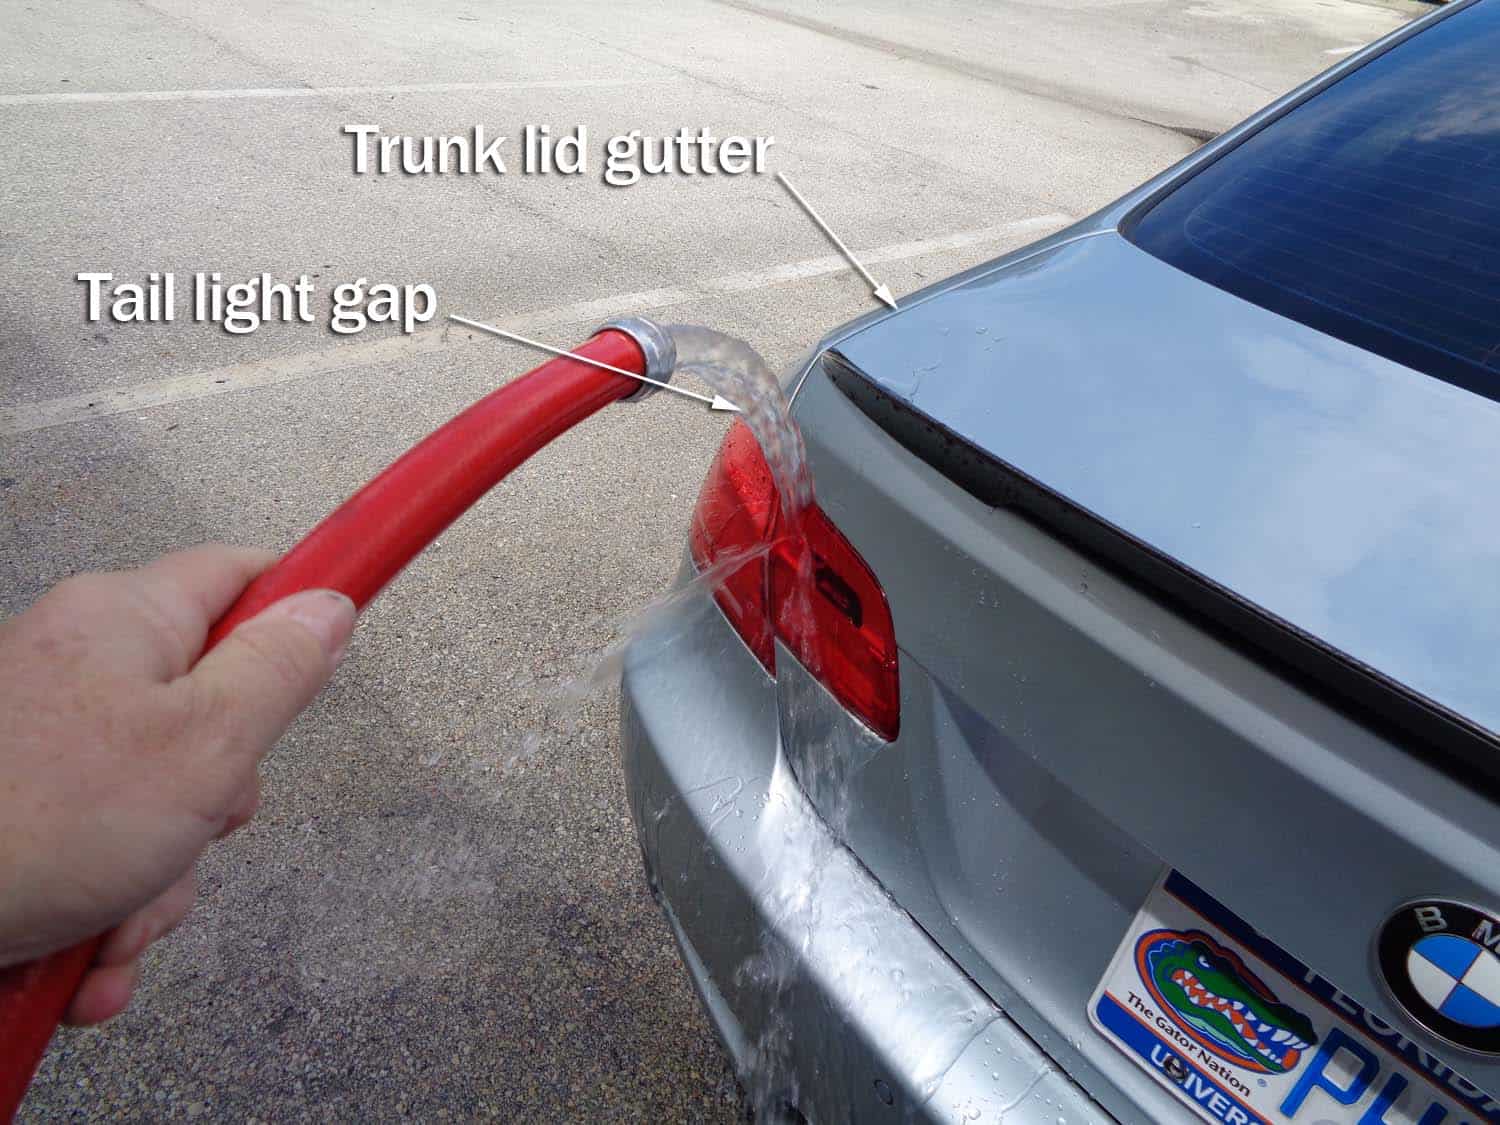
- Make sure your trunk is closed! Using a garden hose, drench the tail light with water. Pay particular attention to the gap at the top of the tail light and the gutter that runs around the trunk lid and empties behind the tail light.
- Do the water test for about ten seconds, then stop and inspect inside of trunk. If you see water starting to trickle out from behind the tail light into the trunk well, you have a bad tail light seal that will need to be fixed. As you can see in the following image, water was pouring into the left trunk well behind the tail light in our E92 M3.
Section 3 - Tail Light Removal and Inspection
- Using an 8mm open end wrench, loosen the 3 nuts holding the tail light assembly to the frame. All you have to do is loosen them...they should be able to be spun off by hand.

- Unplug the electrical connector from back of light (it pulls straight out).
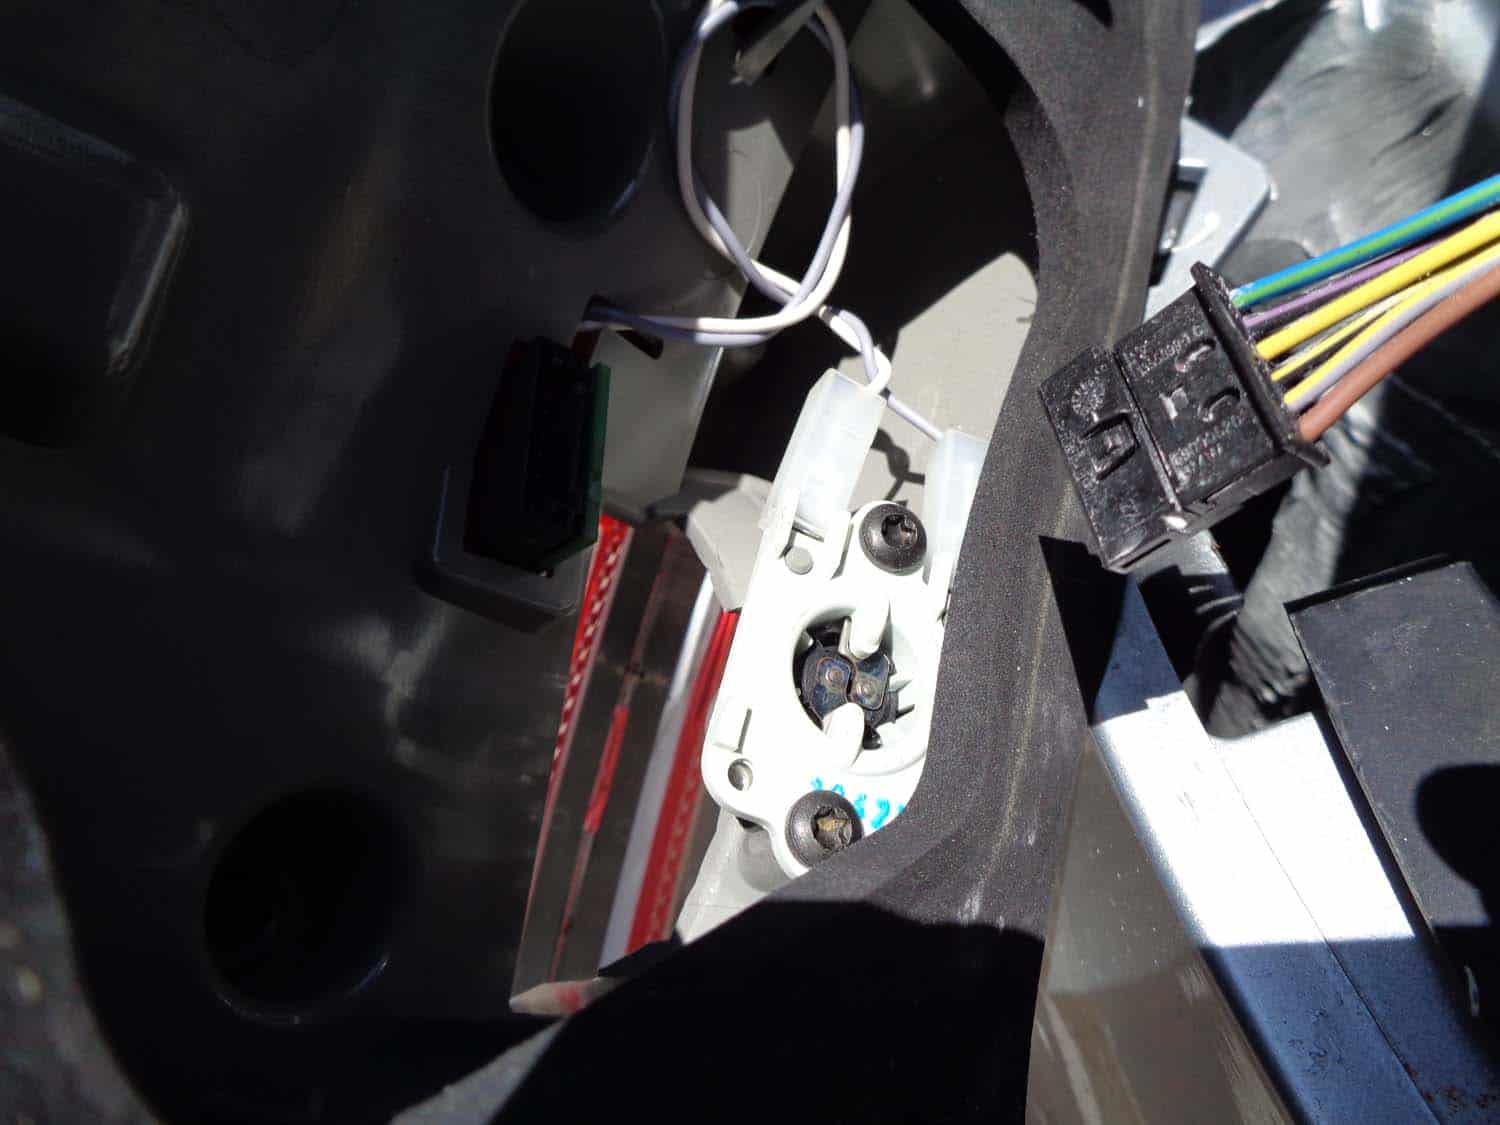
- Grasp tail light and remove it from the car.

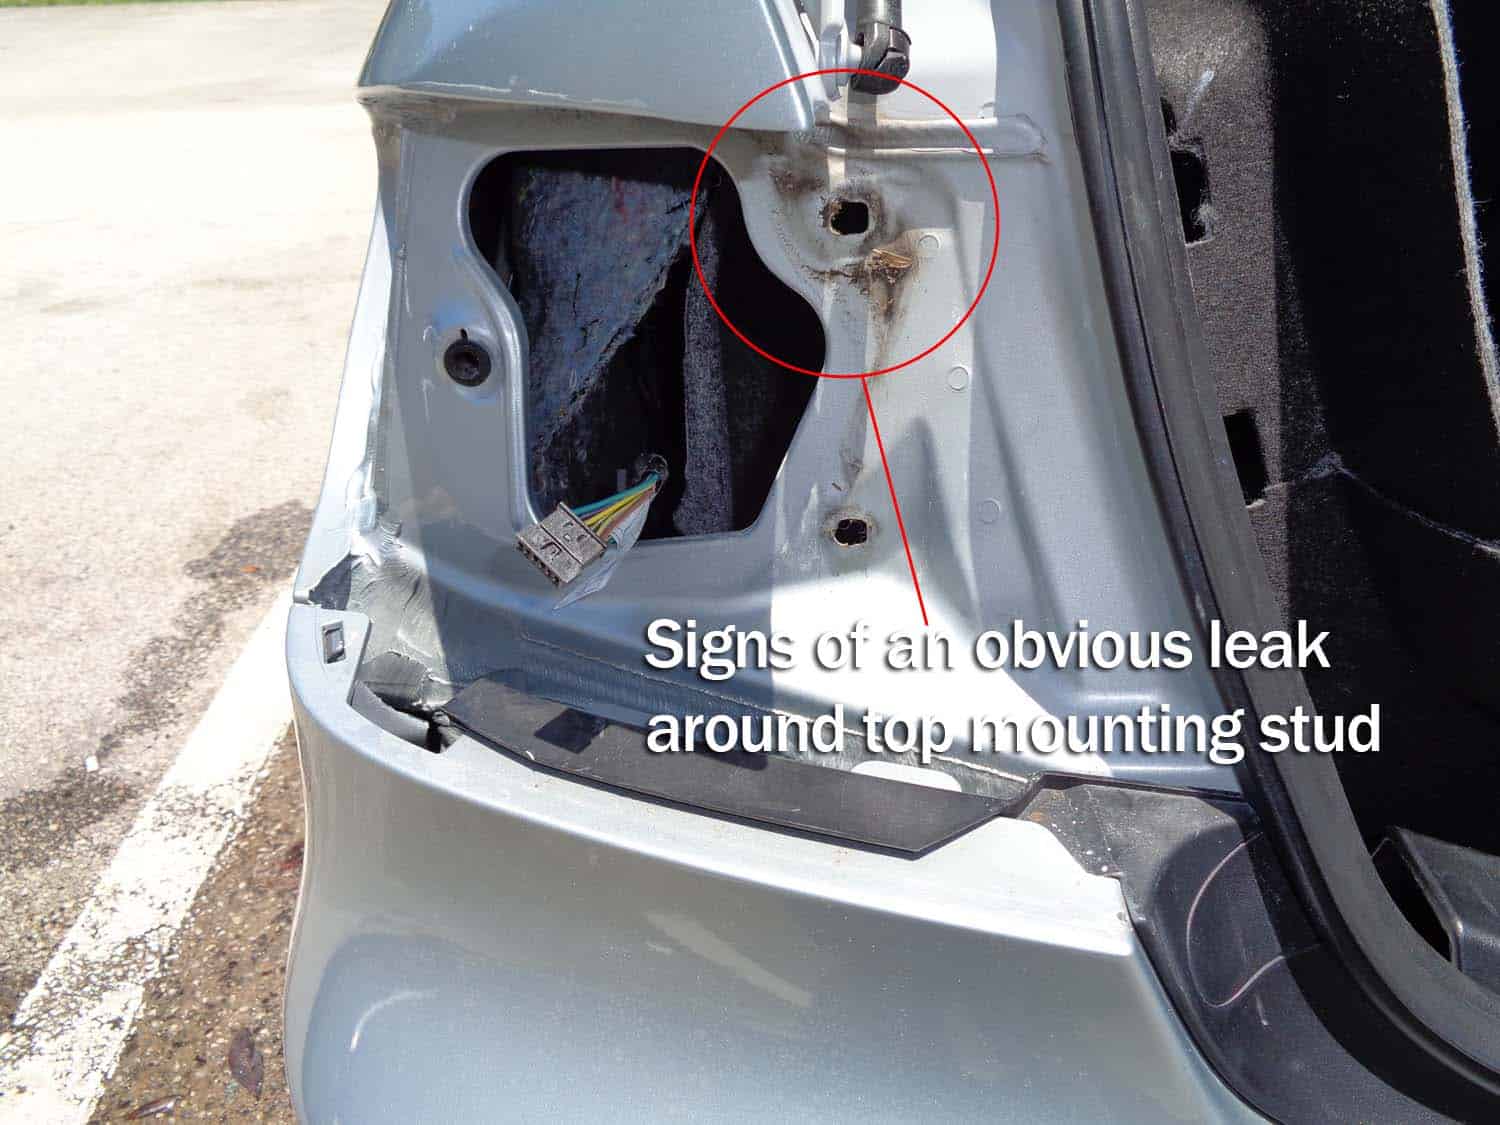
- Usually a visual inspection of the tail light and the car body will tell you really quick where your leak is. Look at this photo of the tail light mounting holes on the back of our M3...it is very clear where the leak is. The top mounting hole if full of dirt and leaves...a dead giveaway that water is getting trapped and making its way into the trunk.
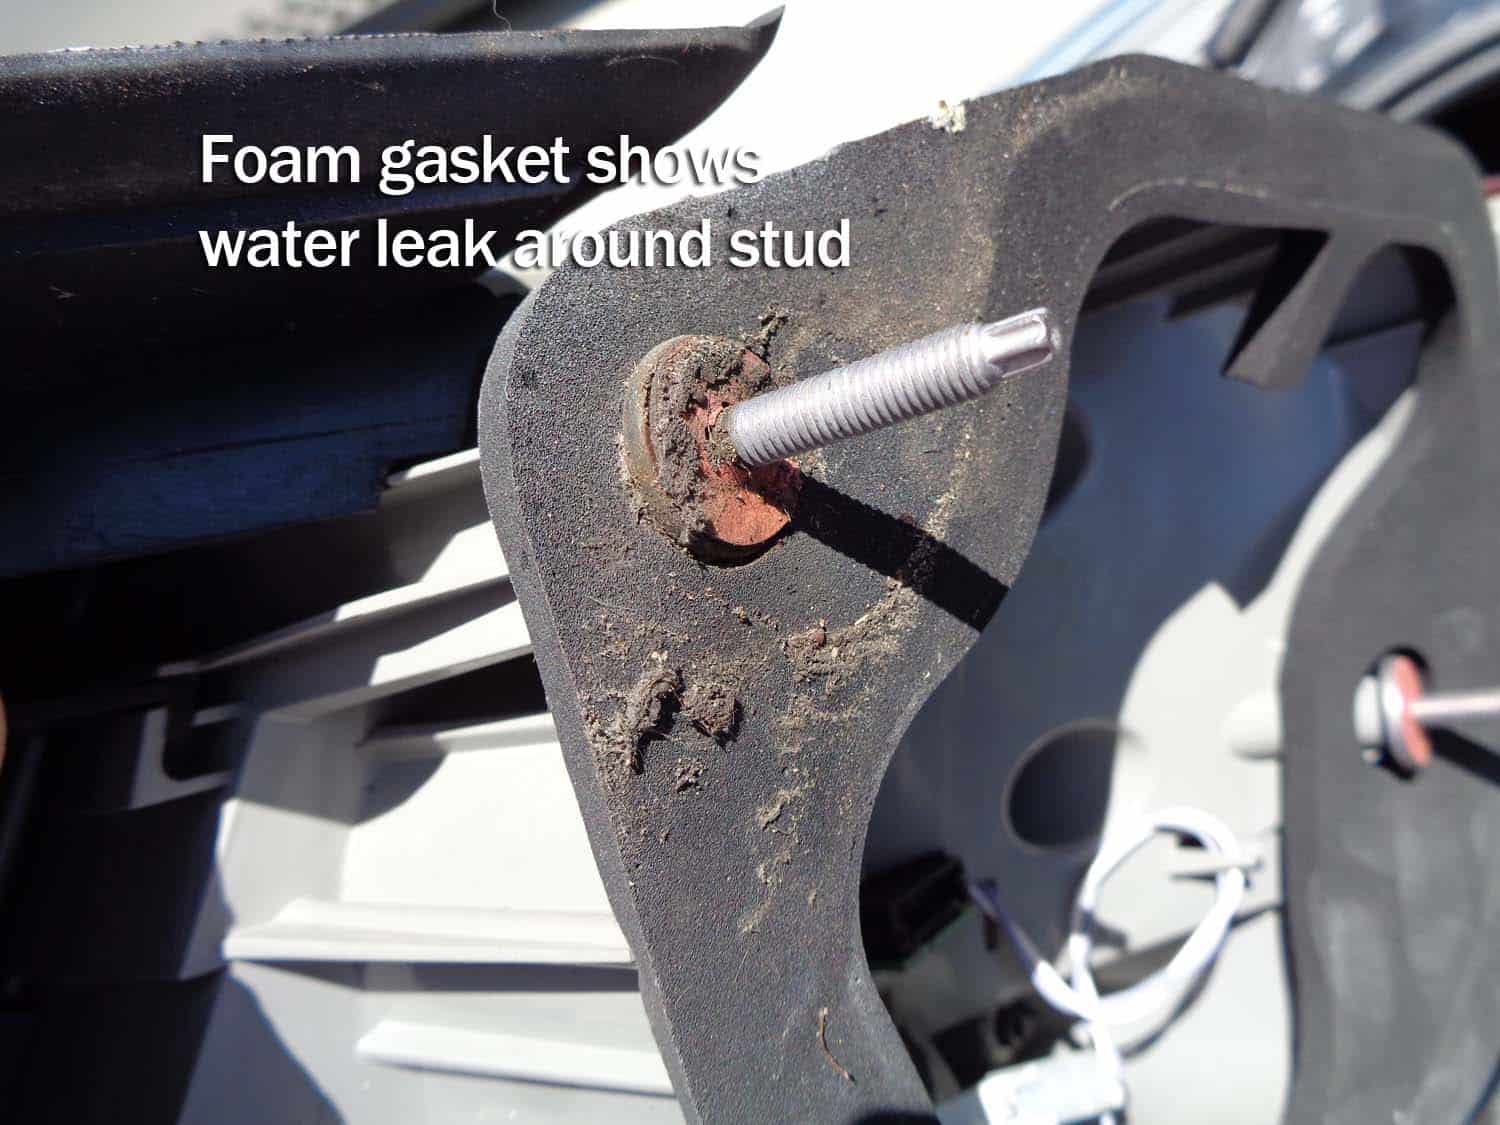
- A visual inspection of the back of the tail light also shows water damage to the seal. Another concern is the poor quality of the synthetic washer that seals the mounting stud. This will need to be dealt with as well.
Section 4 - Tail Light Repair
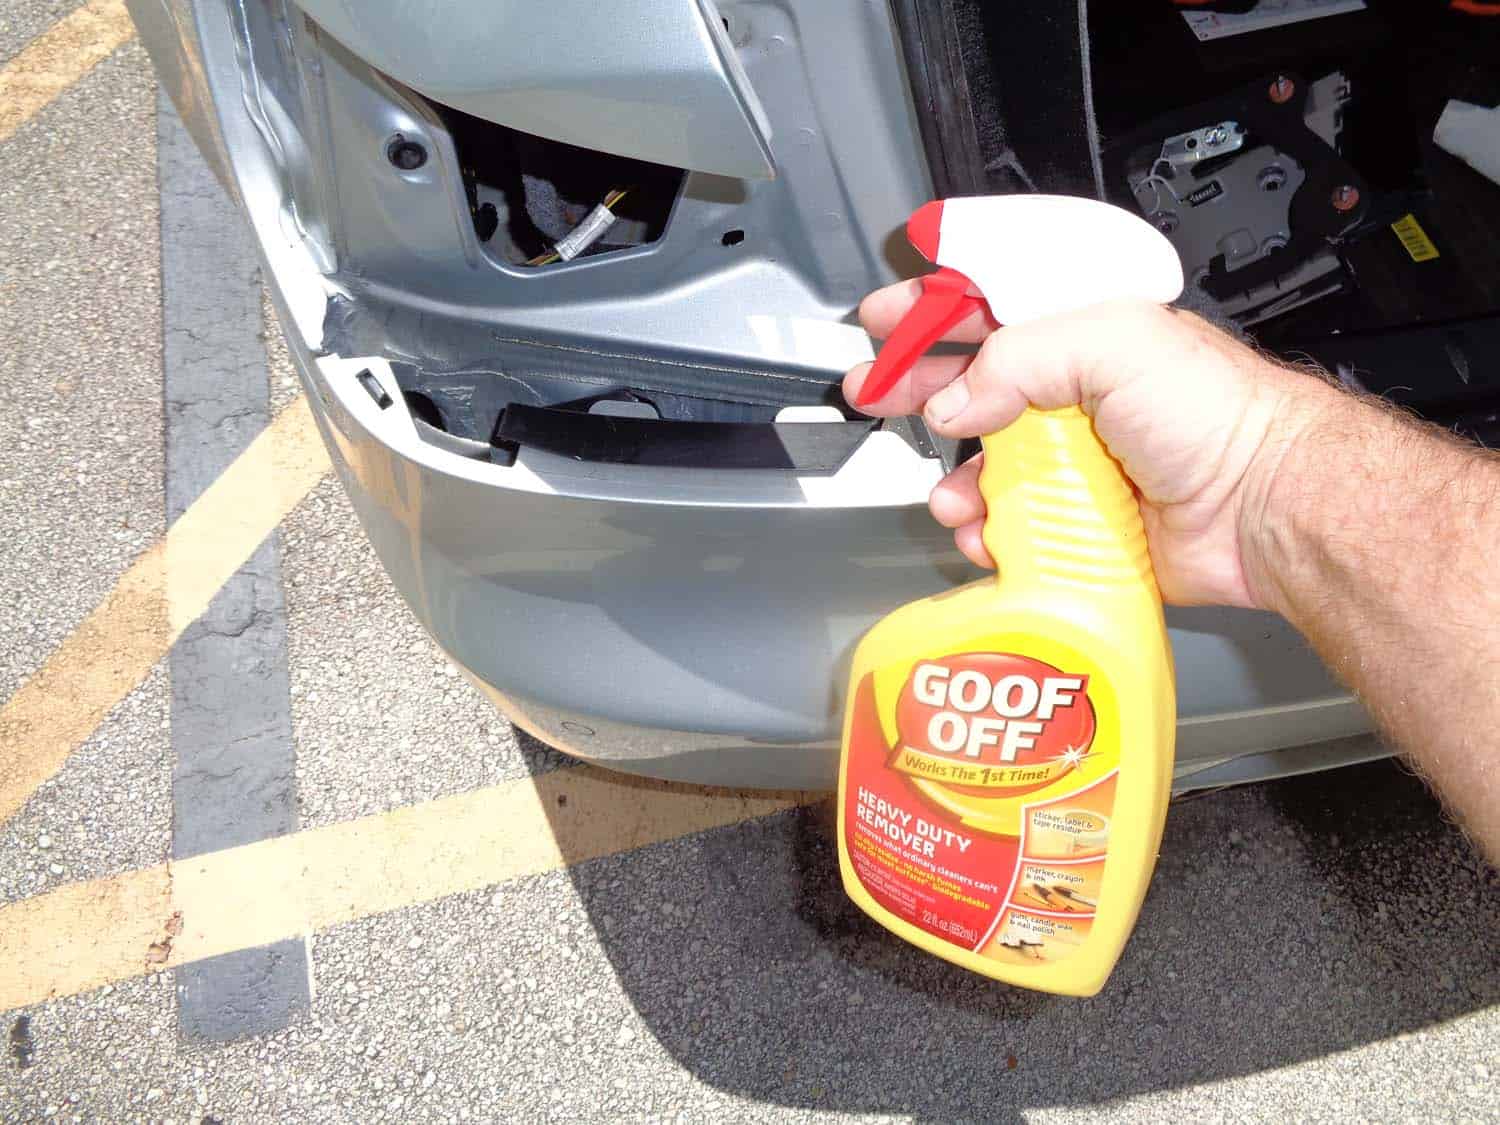
- Use a "paint safe" cleaner to remove any old adhesive still stuck to the back of the tail light after removing the old seal. Make sure the car body and mounting studs are also well cleaned - you want to make sure you do not have any existing dirt or debris that may effect getting a water tight seal when reassembled.
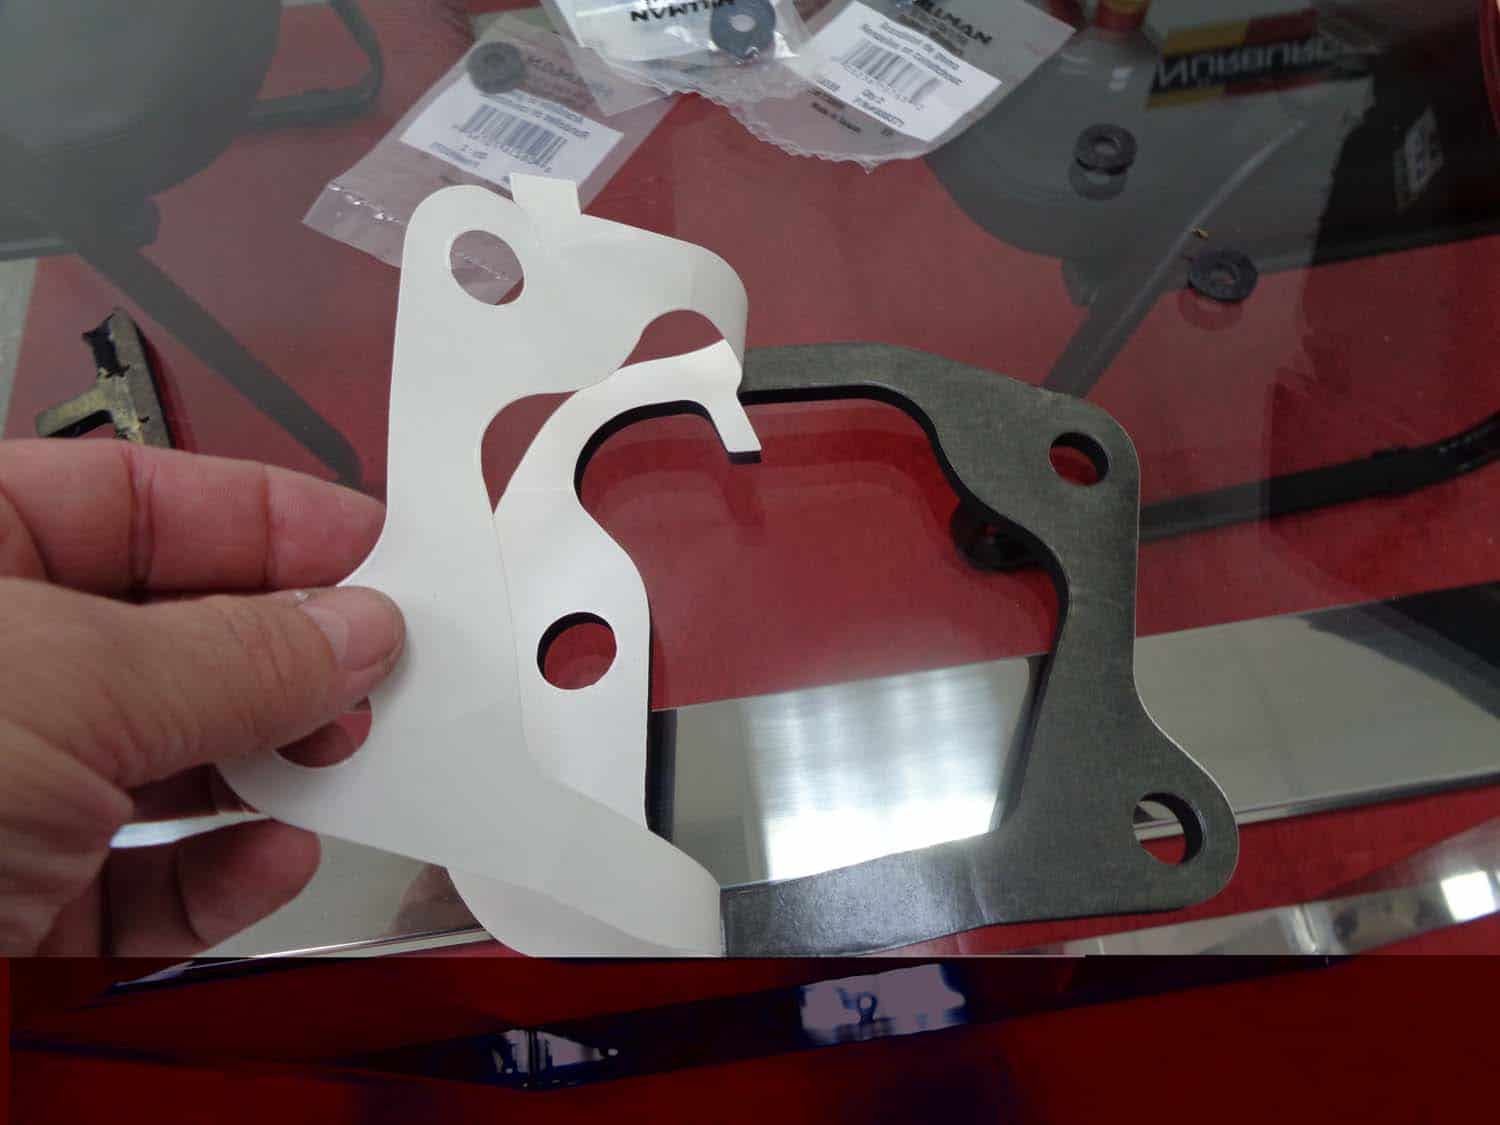
- Peel the back off of the new foam seal, and install on tail light as shown in the following images.
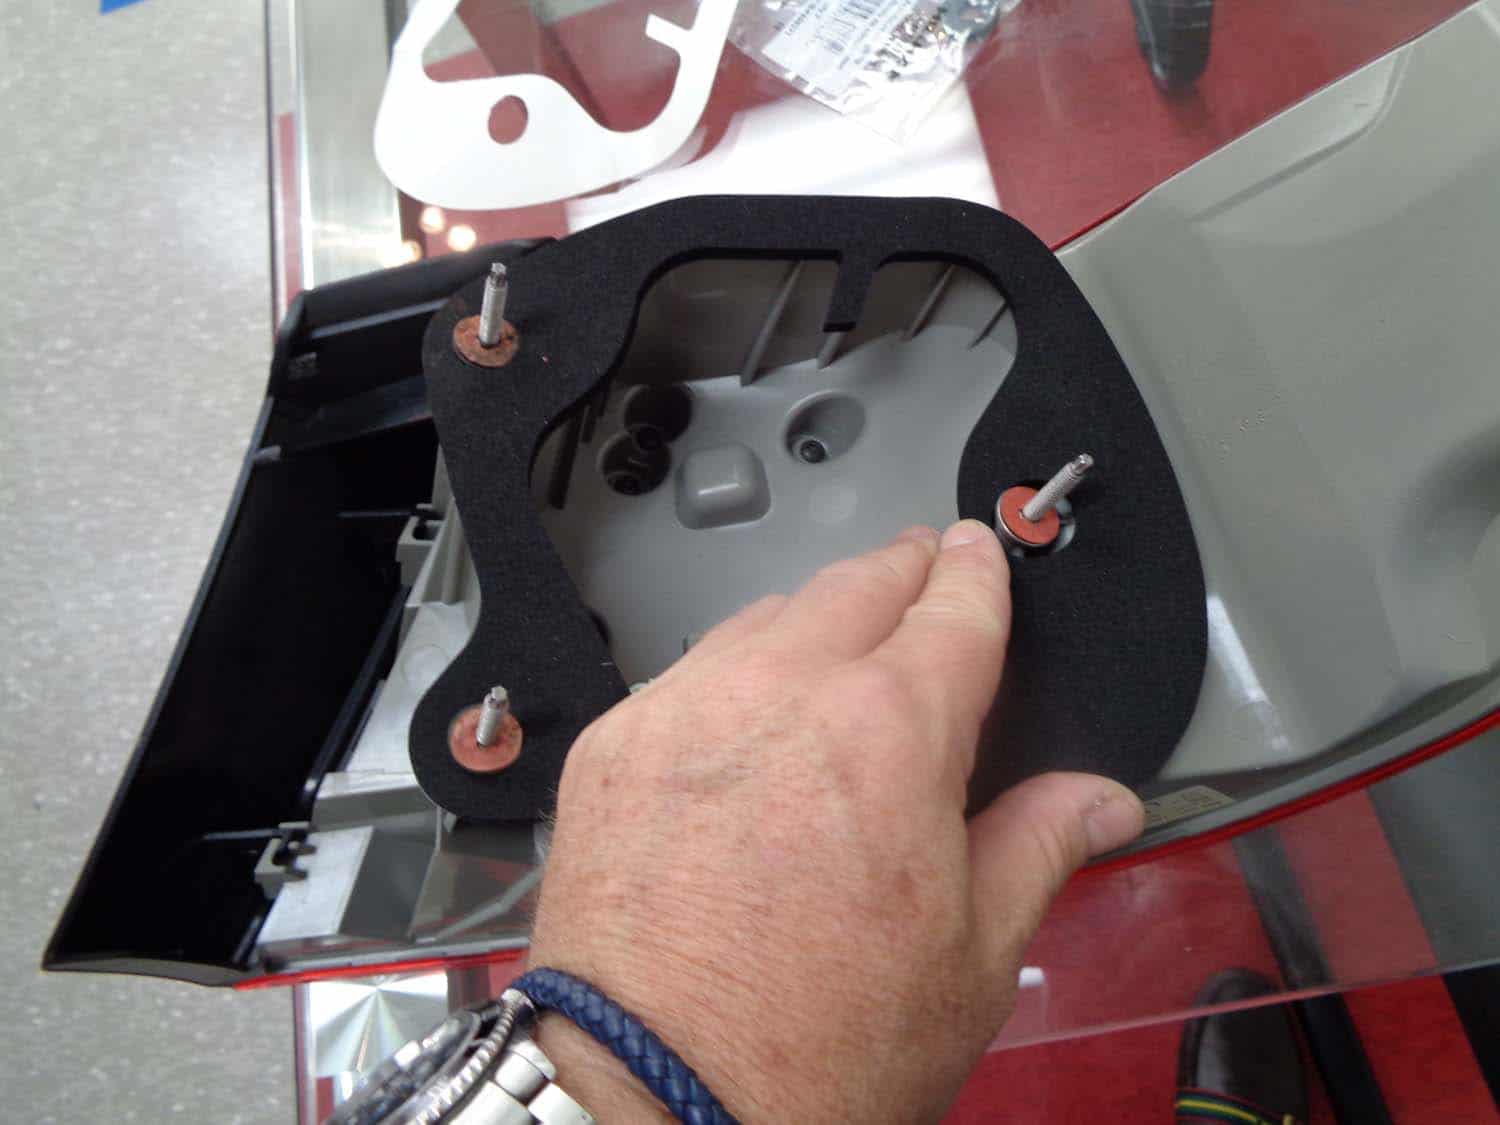
- Place a 5/16" x 3/4" rubber washer on each of the three mounting studs. This is a BMW Repair Guide suggested modification to cure the issue of the stock nylon washer leaking. We have found the stock nylon washers to be insufficient long term in preventing leaks around the mounting studs. We cured the problem by purchasing these rubber washer from our local home improvement store and installing them on top of the nylon washers:

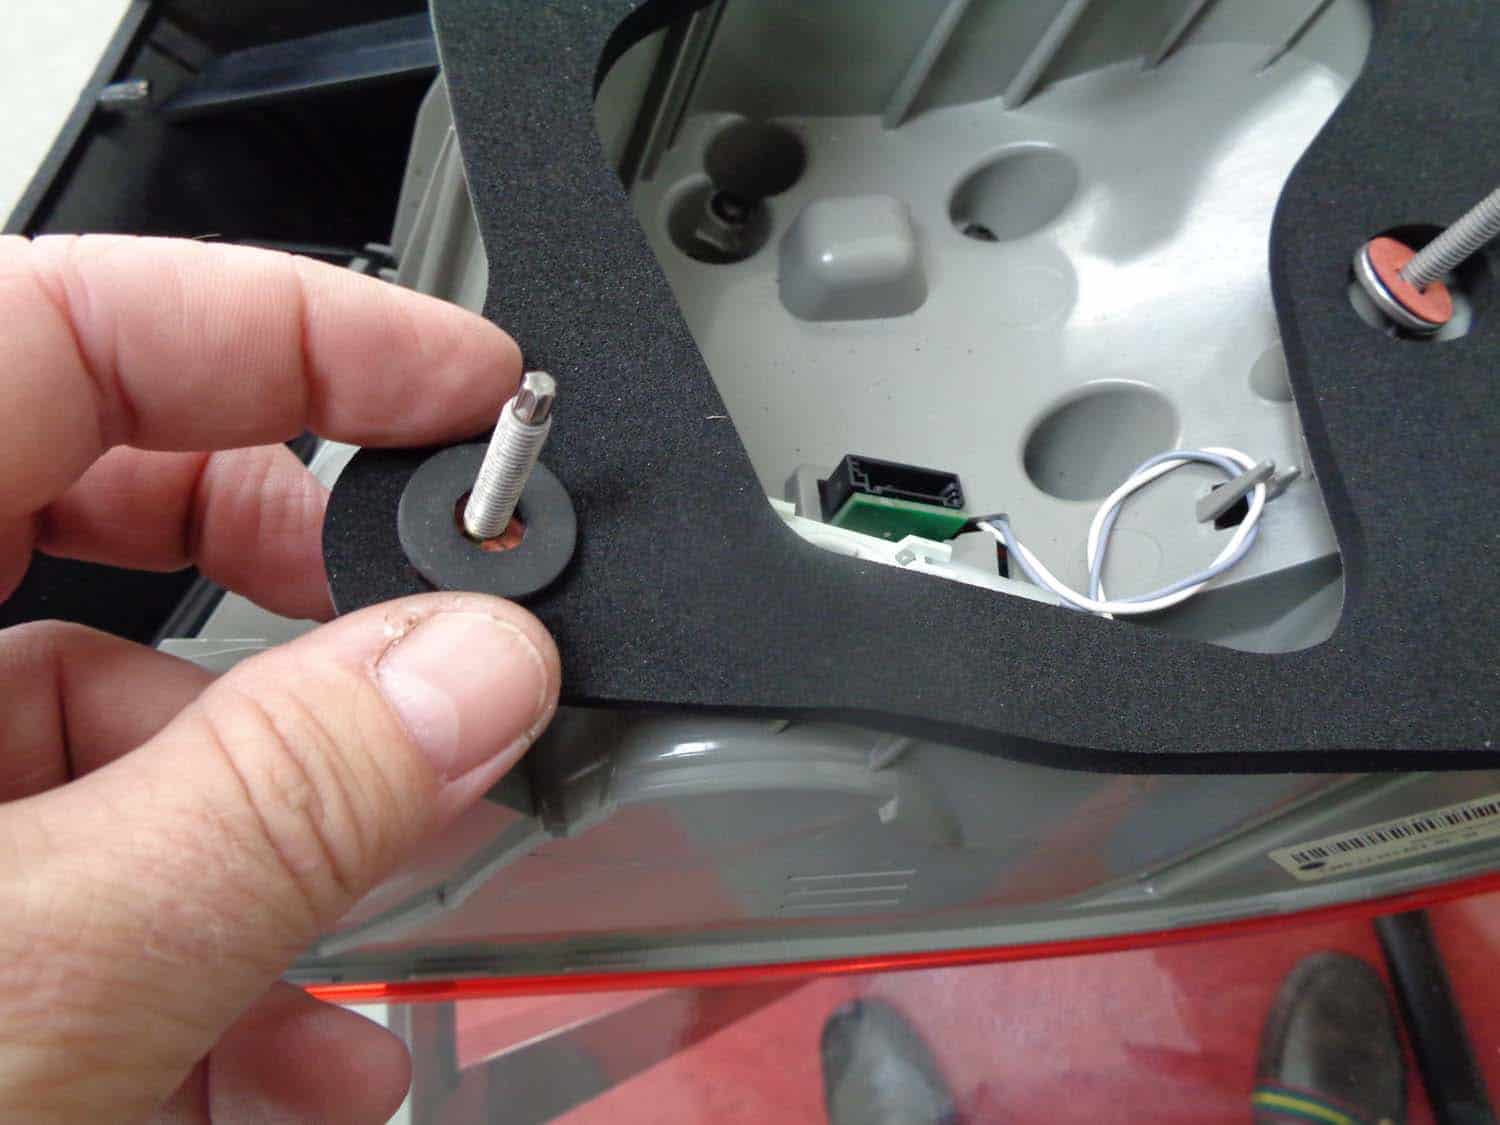
- Carefully remount the tail light on the car, making sure none of your rubber washers fall off or become pinched. A good trick is to put pressure on the tail light with your hand while you spin the nuts back on the studs - this compresses the washers and makes tightening with your wrench easier. Make sure the nuts are tight (don't over tighten, you will break the tail light) to complete the water tight seal.
- Reconnect tail light electrical connector
- Perform another BMW E90 trunk leak test with the garden hose to confirm everything was reassembled correctly.
- Reassemble trunk liner.
BMW E90 Trunk Leak Repair Finished