
Affiliate link disclosure – The BMW Repair Guide uses affiliate links in their site. For more information on affiliate links, please click here.
Repair Summary
The following article gives detailed instructions on repairing a water damaged amplifier in a BMW E9x 3 series car. Even though we have used a 2013 BMW E92 M3 to perform this repair, this article can be applied to any BMW E9x 3 series vehicle produced from 2007-2013, including the 328i, 330i, 335i and M3 sedans, coupes, convertibles and touring wagons.This article only includes the repair and installation of the standard BMW hifi amplifier (S676A). It does not cover the Top Hifi (Harmon Kardon S688A/Professional DSP S677A) or the premium Individual Audio System (S752A).
See all vehicles this article applies to
E90 3 Series M3
E90 3 Series 318d
E90 3 Series 335i
E90 3 Series 335xi
E90 3 Series 335d
E90 3 Series 330xd
E90 3 Series 330xi
E90 3 Series 330i
E90 3 Series 330d
E90 3 Series 328xi
E90 3 Series 328i
E90 3 Series 325xi
E90 3 Series 325i
E90 3 Series 323i
E90 3 Series 325d
E90 3 Series 320i
E90 3 Series 320si
E90 3 Series 320d
E90 3 Series 318i
E90 3 Series 316i
E90N 3 Series M3 CRT
E90N 3 Series 318i
E90N 3 Series M3
E90N 3 Series 335xi
E90N 3 Series 335i
E90N 3 Series 335d
E90N 3 Series 330xd
E90N 3 Series 330xi
E90N 3 Series 330i
E90N 3 Series 328xi
E90N 3 Series 330d
E90N 3 Series 328i
E90N 3 Series 325d
E90N 3 Series 325i
E90N 3 Series 325xi
E90N 3 Series 323i
E90N 3 Series 320xd
E90N 3 Series 320i
E90N 3 Series 320d ed
E90N 3 Series 320d
E90N 3 Series 318d
E90N 3 Series 316i
E90N 3 Series 316d
E92 3 Series M3
E92 3 Series 325d
E92 3 Series 335xi
E92 3 Series 335i
E92 3 Series 335d
E92 3 Series 330xi
E92 3 Series 330xd
E92 3 Series 330i
E92 3 Series 330d
E92 3 Series 328xi
E92 3 Series 328i
E92 3 Series 325xi
E92 3 Series 325i
E92 3 Series 323i
E92 3 Series 320xd
E92 3 Series 320i
E92 3 Series 320d
E92 3 Series 316i
E92N 3 Series M3
E92N 3 Series 323i
E92N 3 Series 335xi
E92N 3 Series 335is
E92N 3 Series 335i
E92N 3 Series 335d
E92N 3 Series 330xi
E92N 3 Series 330xd
E92N 3 Series 330i
E92N 3 Series 330d
E92N 3 Series 328xi
E92N 3 Series 328i
E92N 3 Series 325xi
E92N 3 Series 325i
E92N 3 Series 320xd
E92N 3 Series 325d
E92N 3 Series 320d
E92N 3 Series 320i
E92N 3 Series 318i
E92N 3 Series 316i
BWW E90 amplifier water damage is a serious issue caused by a trunk leak around the driver's side rear tail light. This situation can usually be repaired without the need of replacing the amplifier.
If you are driving your BMW E9x car and the sound system starts losing speakers, begins buzzing or whining, or you lose sound altogether, you may have a leak in the trunk that has caused amplifier water damage. Don't panic. Your amplifier water damage may be easily repaired without the need of purchasing a new unit.
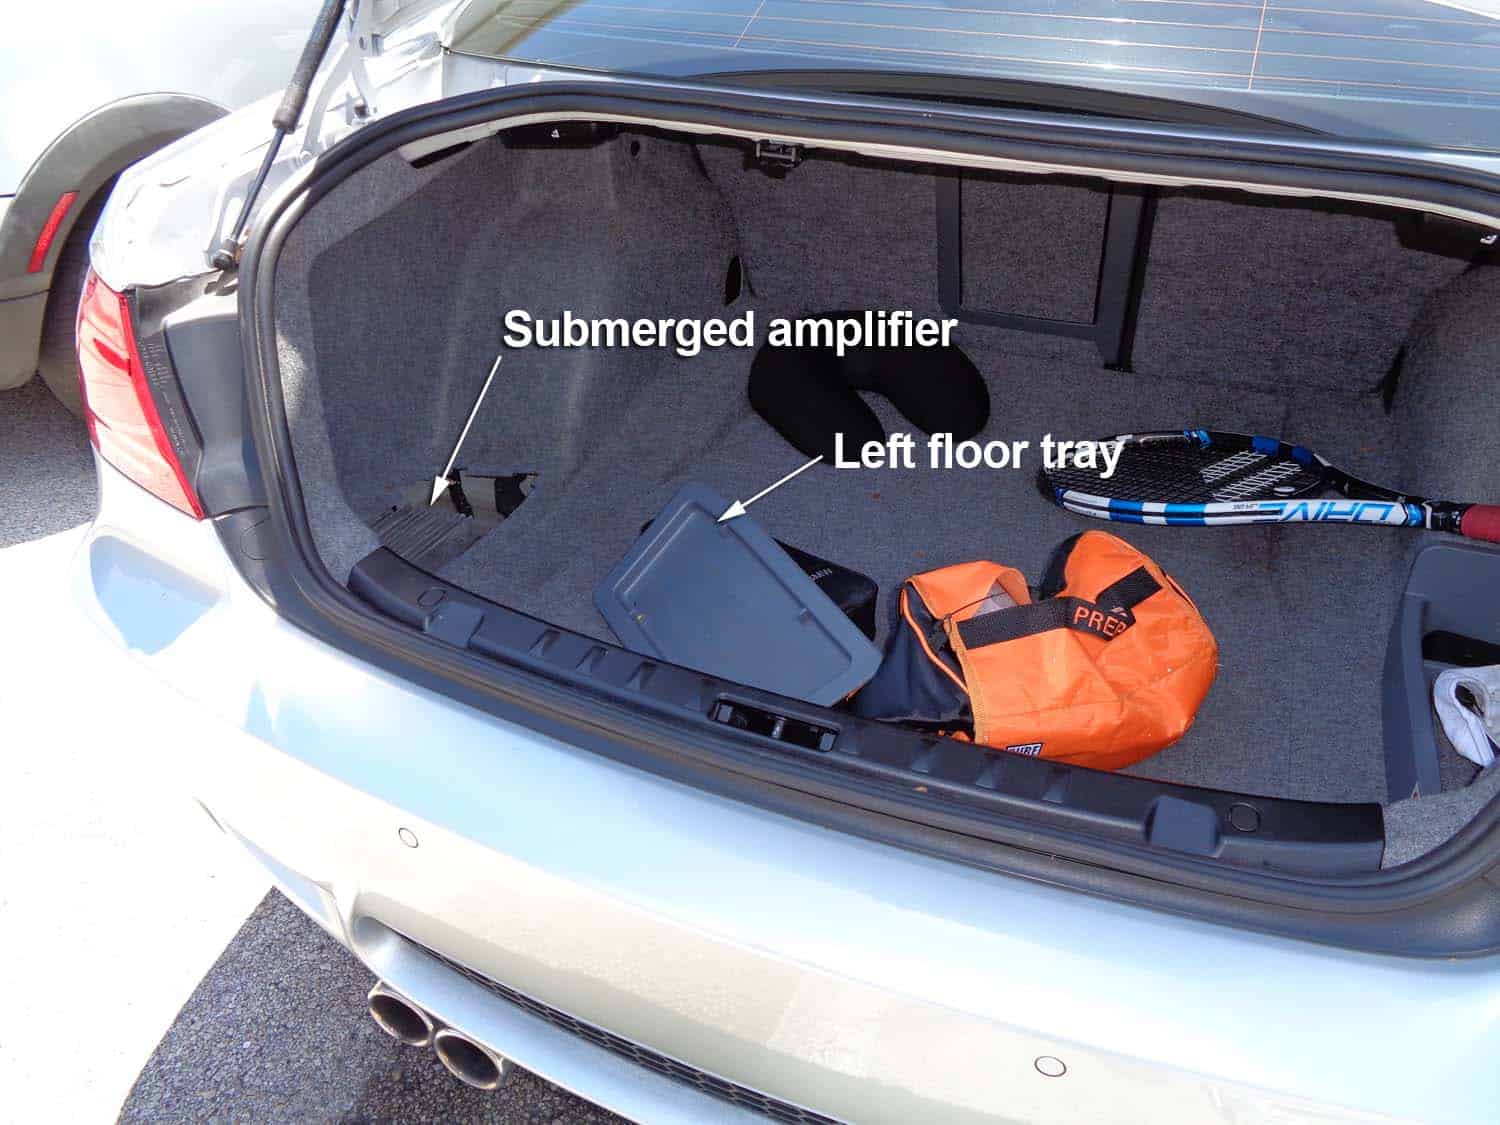
After a recent five-day tropical depression here in "sunny" South Florida saturated our BMW Repair Guide M3, we noticed that the two rear speakers were not working during a routine test drive. As we continued down the street, a gratuitous pothole in the road not only knocked out the rest of the speakers but created an irritating buzzing sound - even when the sound system volume was turned all the way down. What was strange was that the iDrive display and the stereo head unit were working fine. We had just lost all sound in the car.
A quick investigation in the trunk quickly revealed the culprit. Approximately an inch of water had accumulated in the left trunk well under the storage tray leaving the amplifier partially submerged. Water infiltration into the amplifier had caused it to short out, effectively shutting down the sound system.
After considerable research on cleaning water-damaged electronics, we were successful in completing a BMW E90 amplifier water damage repair for very little cost and have documented the entire process in this article. Please note that this article only deals with repairing the water-damaged amplifier...the cause of the water leak must also be addressed. To fix the leak in the taillight of your BMW E9x 3 series car, please refer to our article diagnosing and repairing a trunk leak in your BMW E9x 3 series vehicle.
***Note about Required Parts***
If you are only performing a BMW E90 amplifier water damage repair, then no parts are required. If you have determined that your standard BMW HiFi amplifier is damaged beyond repair, we have provided links below to purchase a new unit.
Since this article only includes the repair and installation of the standard BMW HiFi amplifier (S676A) we do not offer links to the Top Hifi (Harmon Kardon S688A/Professional DSP S677A) or the premium Individual Audio System (S752A).


View the detailed parts diagram for this repair.
Includes detailed part diagrams, part numbers and links to purchase all of the required components needed to complete this repair.

Before starting this repair, you must have the following required parts.
Fits most BMW E90 sedans. Please see description for part number cross reference,
This is the same factory amplifier that would be installed at the BMW dealership.
Fits most BMW E91 touring wagons. Please see description for part number cross reference,
This is the same factory amplifier that would be installed at the BMW dealership.
Fits most BMW E92 coupes. Please see description for part number cross reference,
This is the same factory amplifier that would be installed at the BMW dealership.
Fits most BMW E93 convertibles. Please see description for part number cross reference
This is the same factory amplifier that would be installed at the BMW dealership.
All E9x Models
Genuine BMW locking brackets anchor your sound system amplifier to its mounting bracket.
All E9x Models
Genuine BMW mounting bracket secures your sound system amplifier to the body of the vehicle.
Section 1 - Amplifier Removal
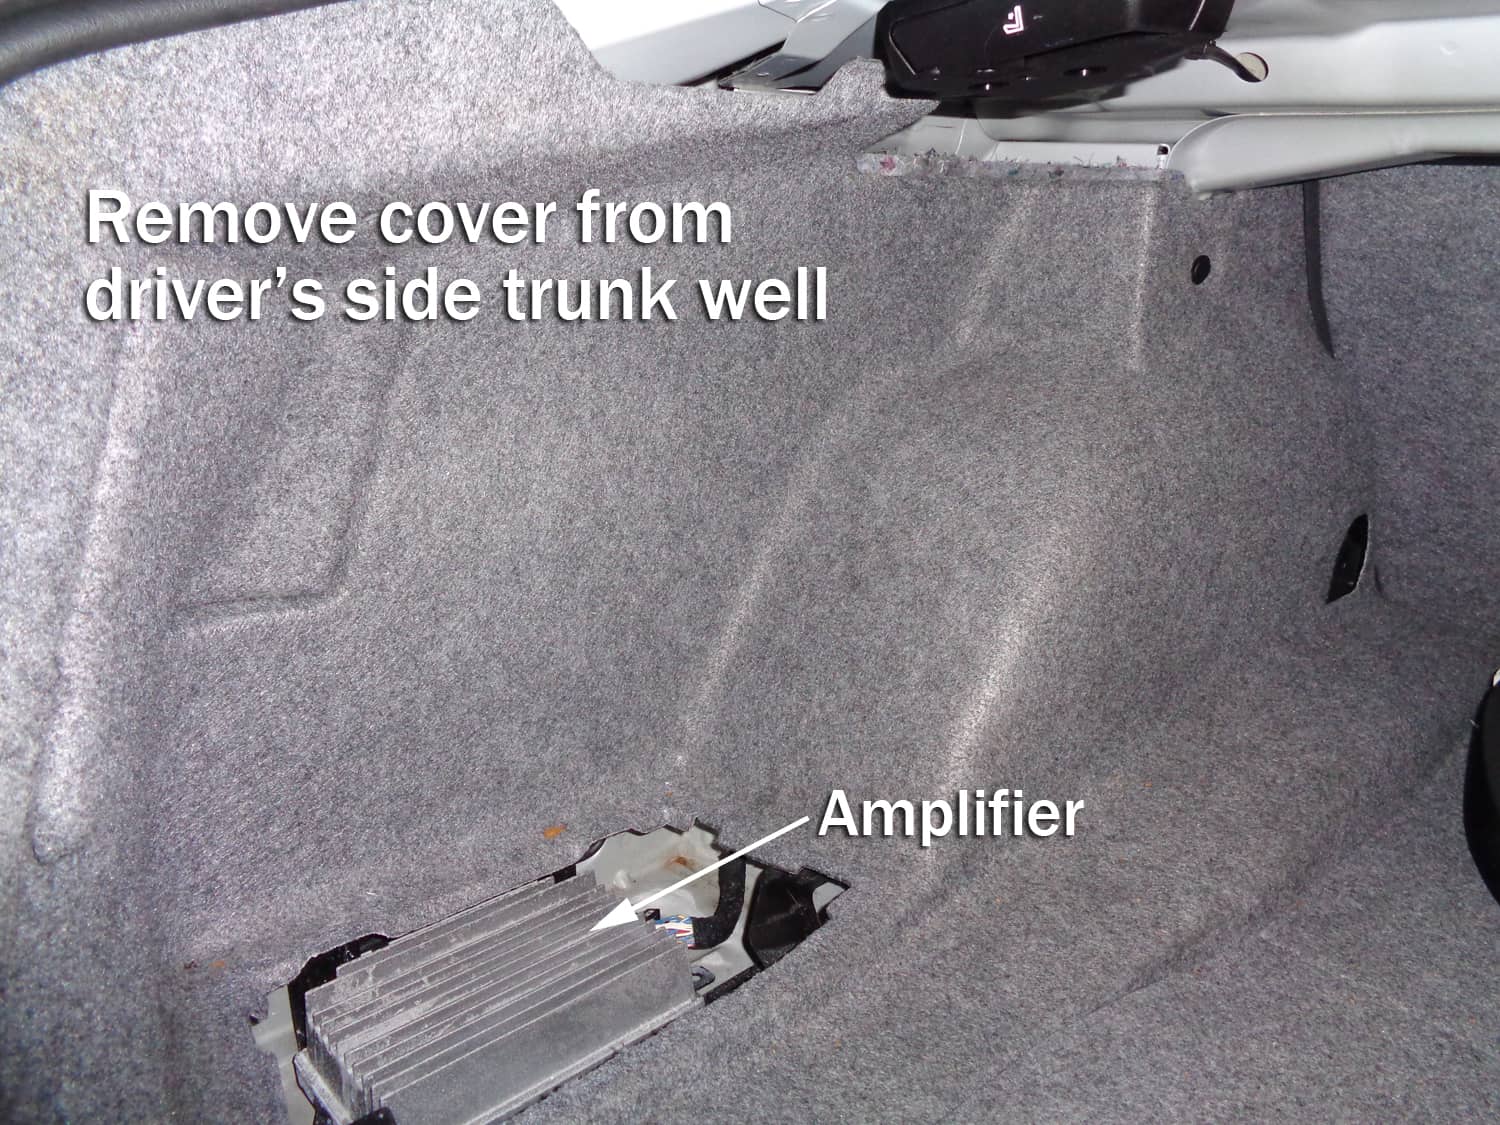
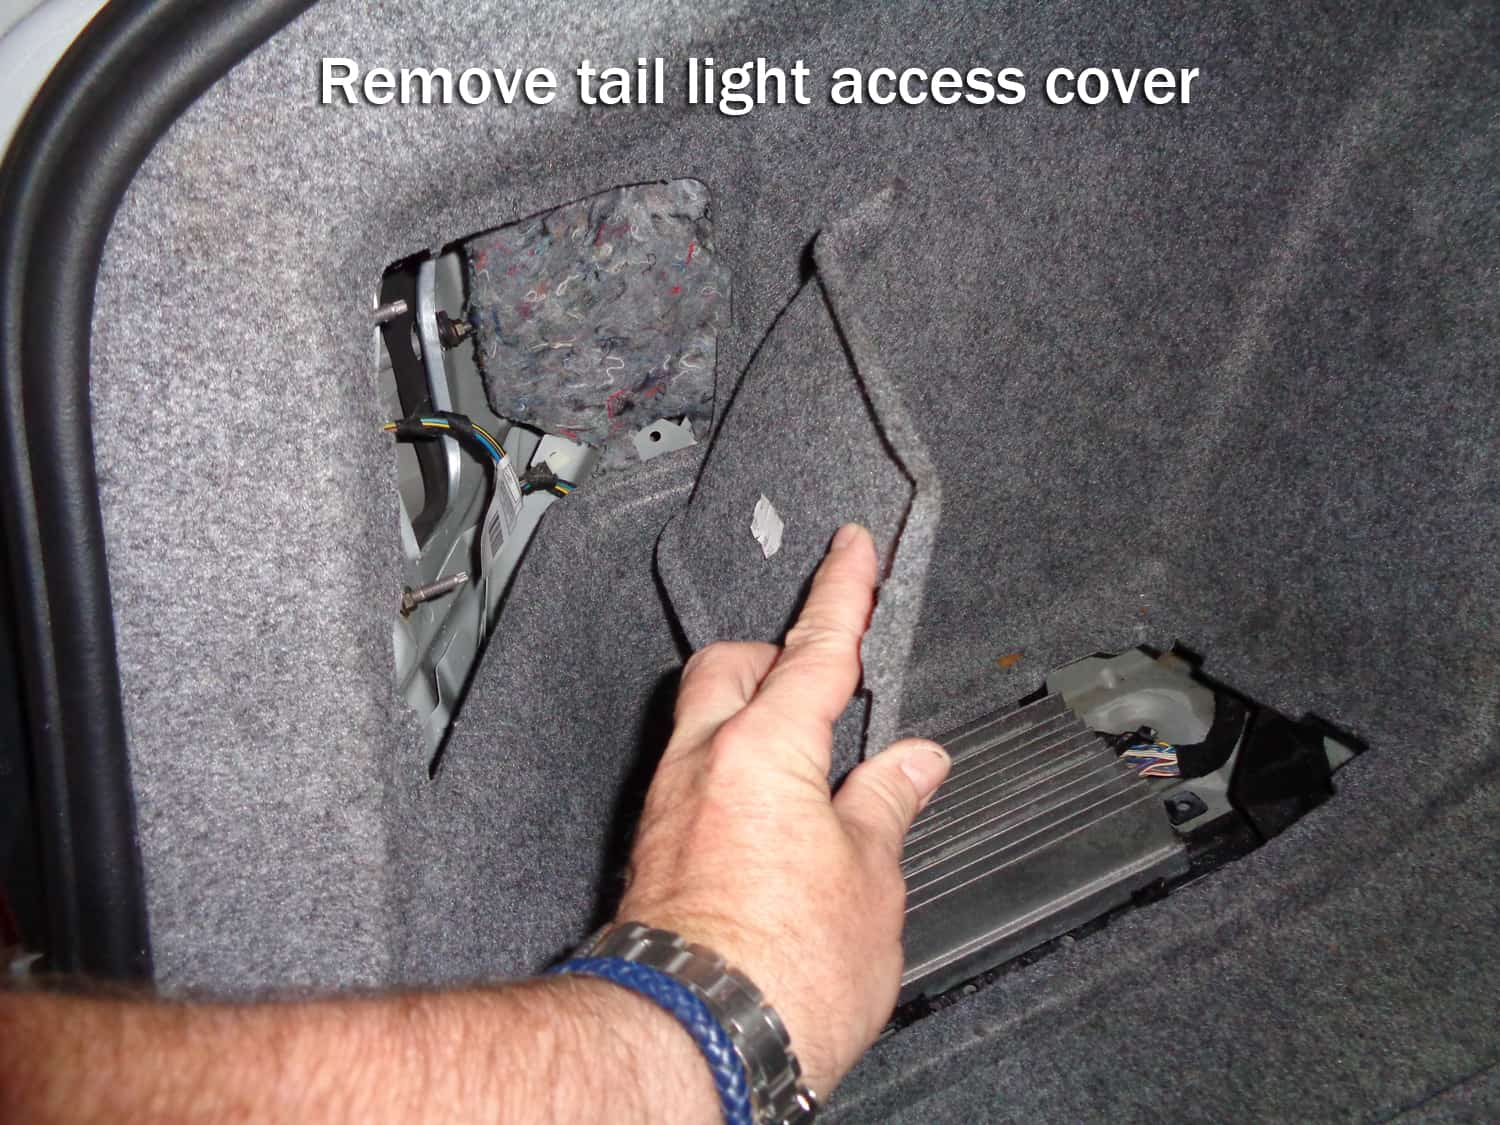
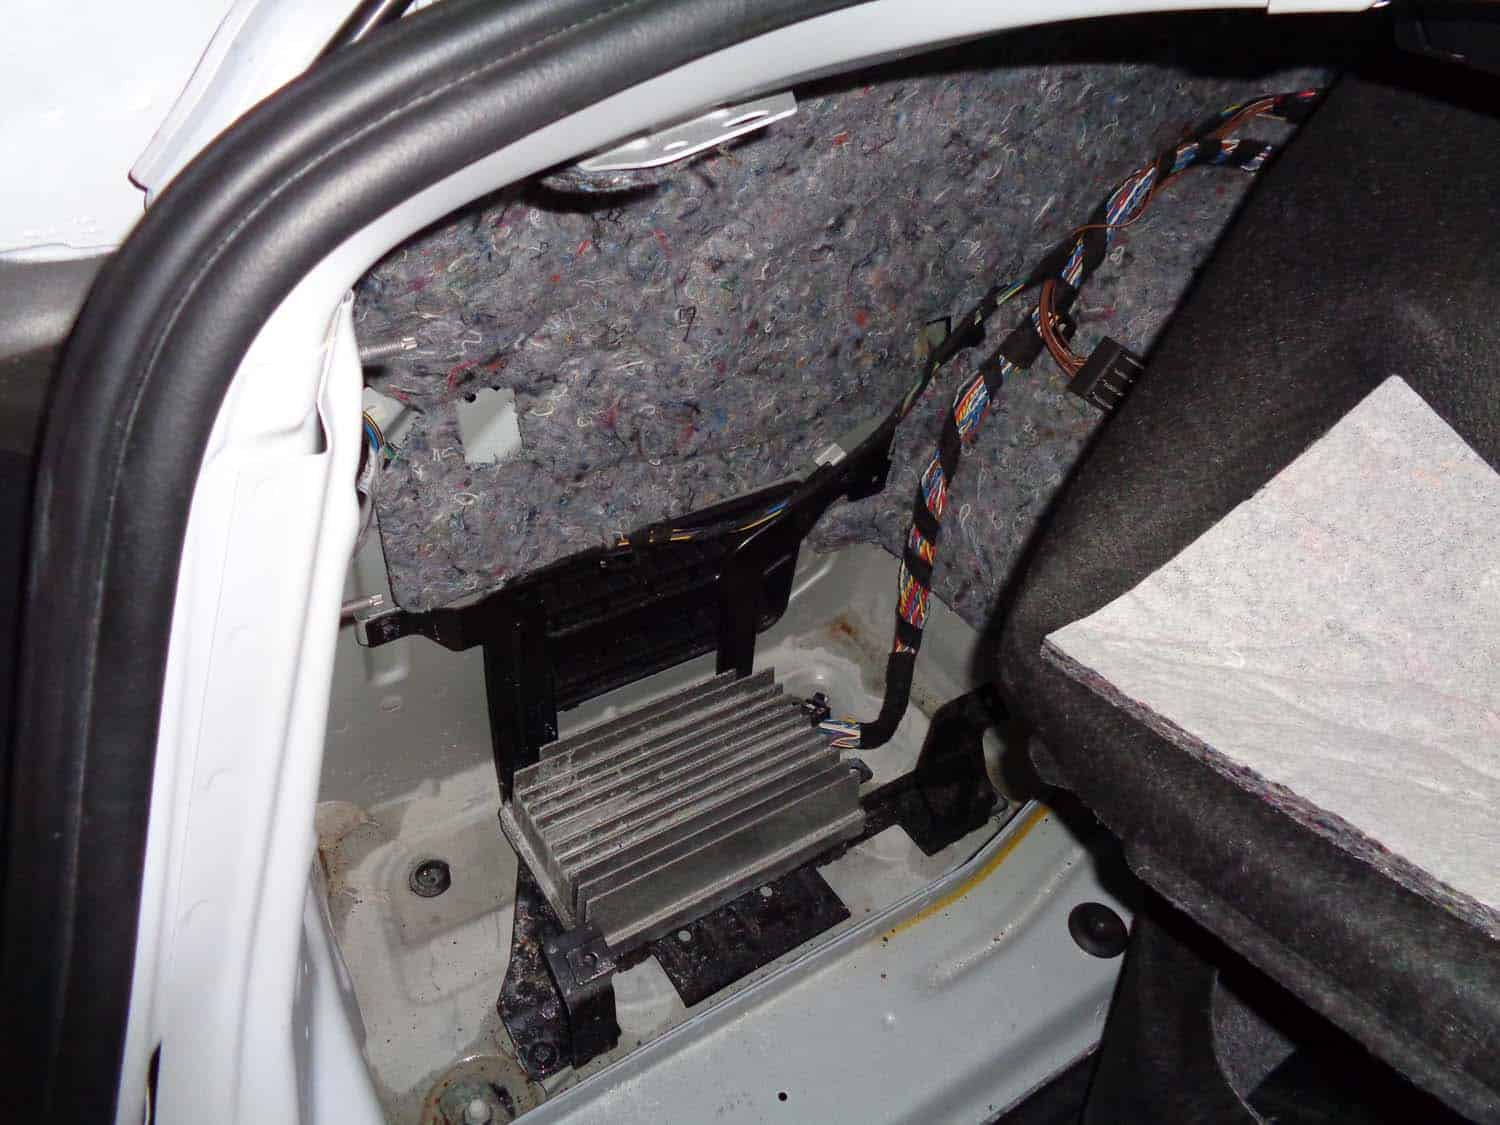
- Remove plastic cover off of left side trunk well that houses amplifier. Also remove the left side tail light access cover.
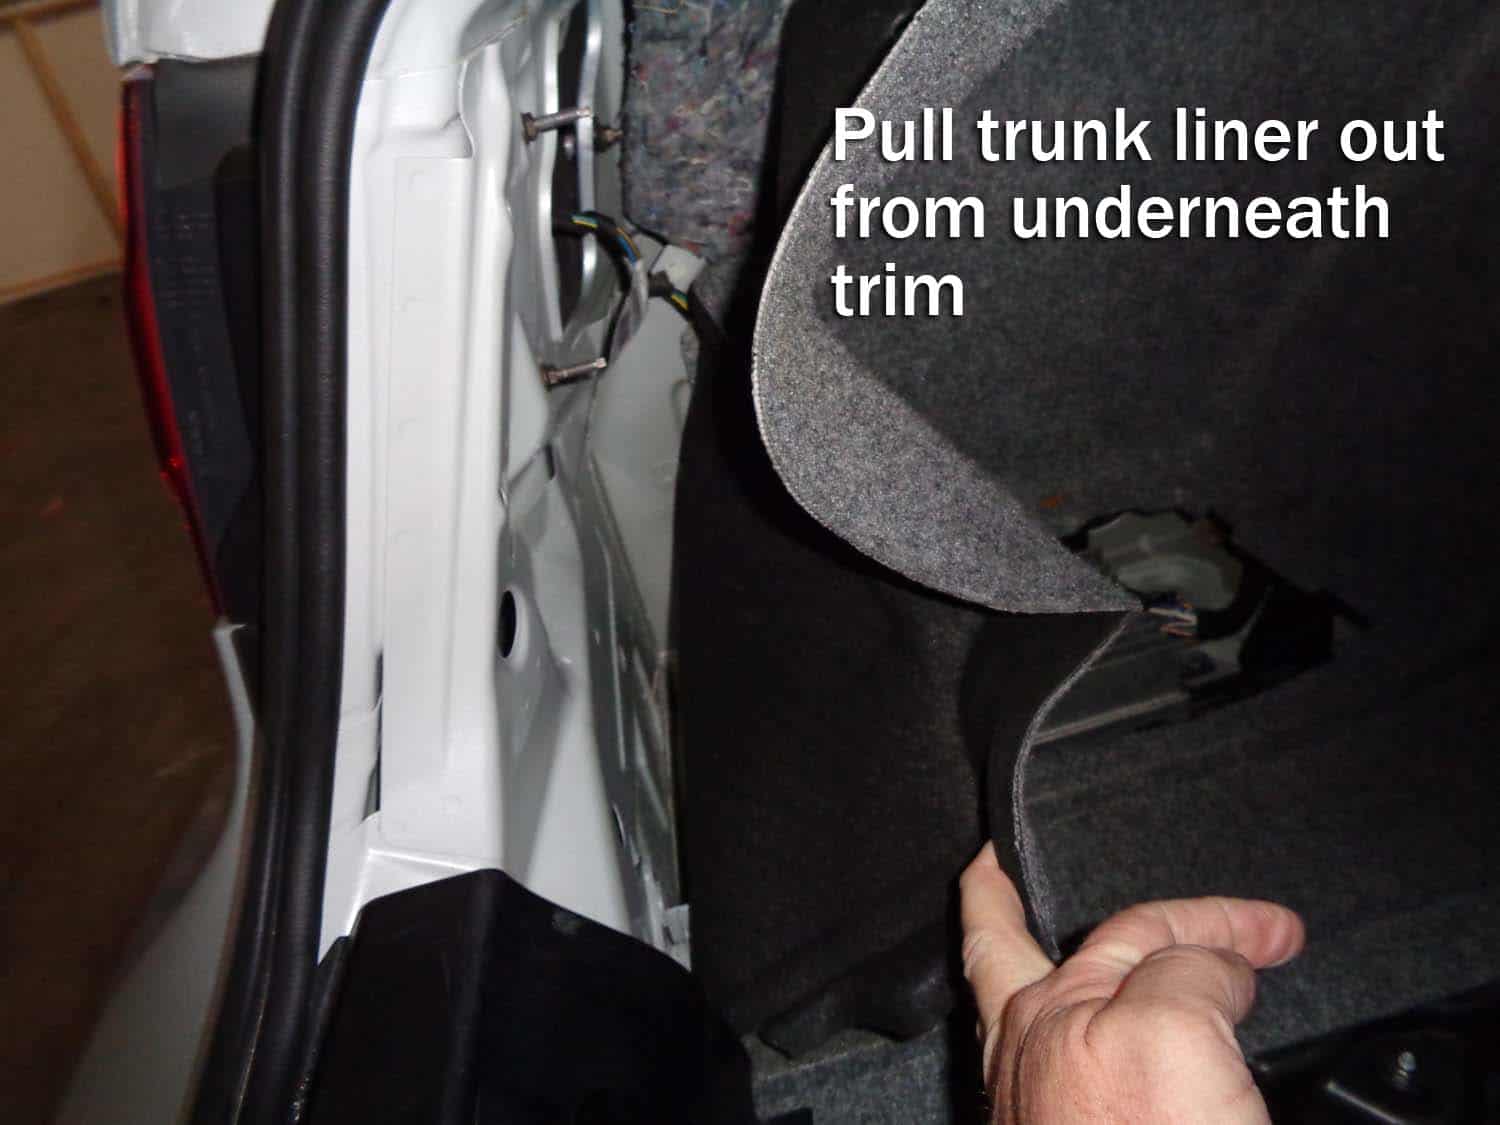
- Using an auto trim removal tool, remove the first two plastic rivets securing the black trunk liner trim on left side of car.
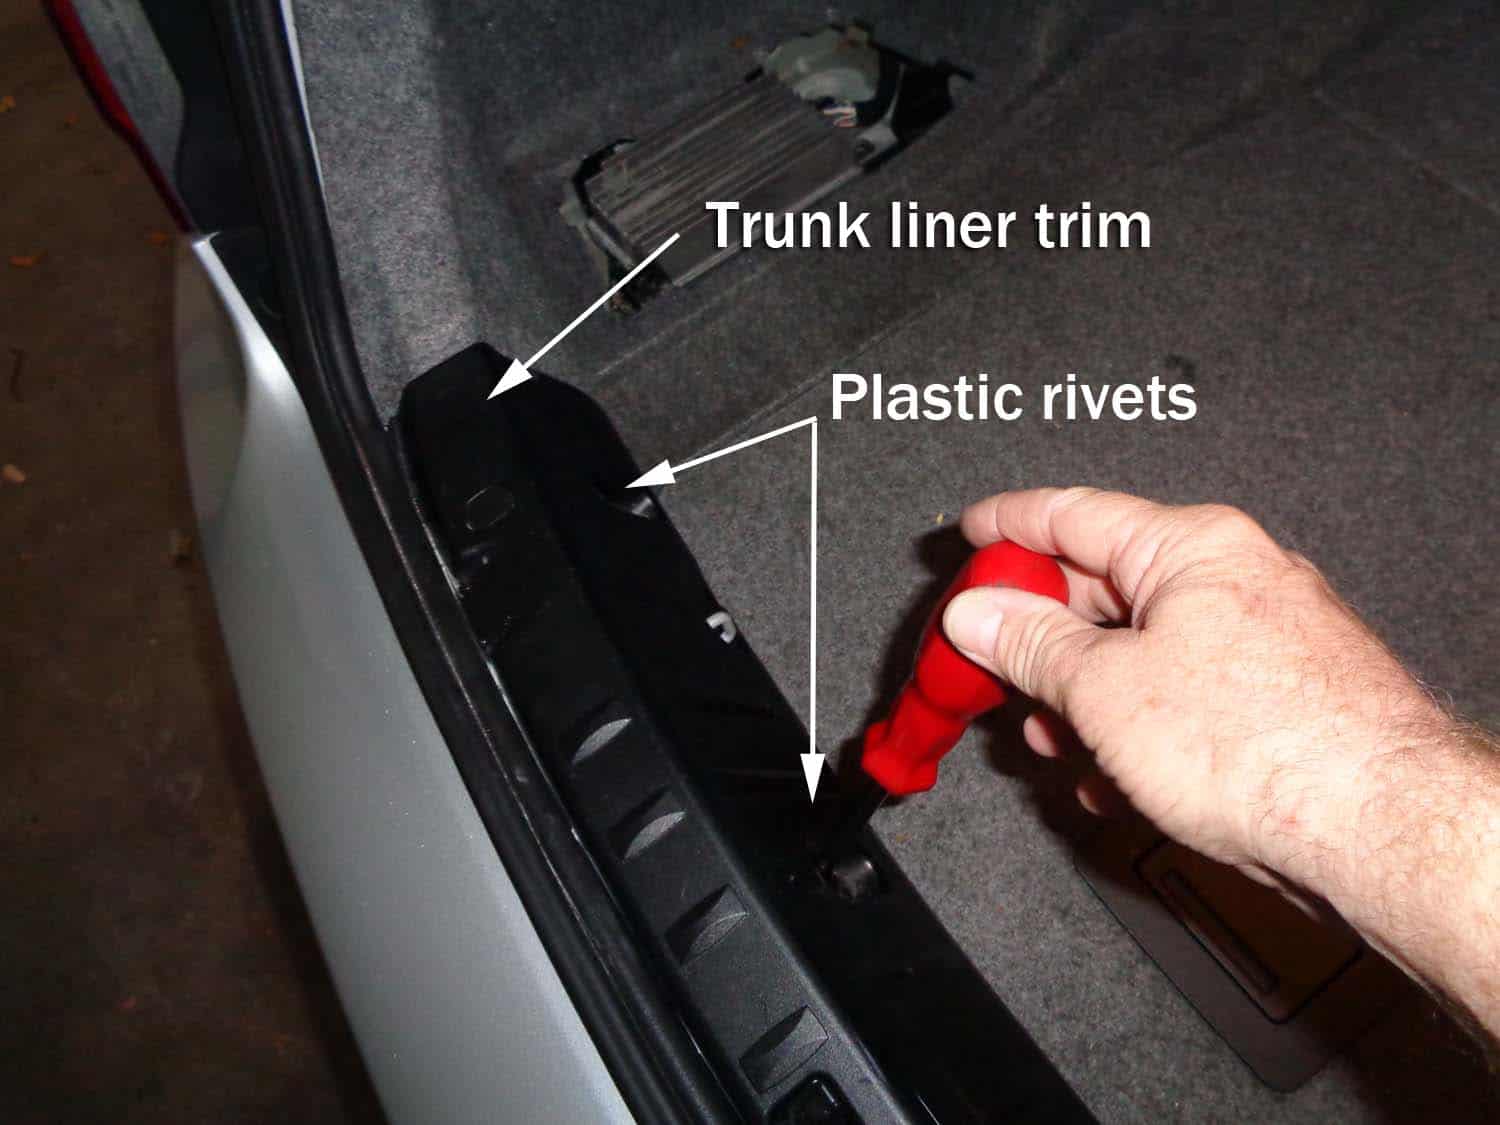
- Grasp trunk liner and pull out from underneath trim. Fold back so you have clear access to amplifier.
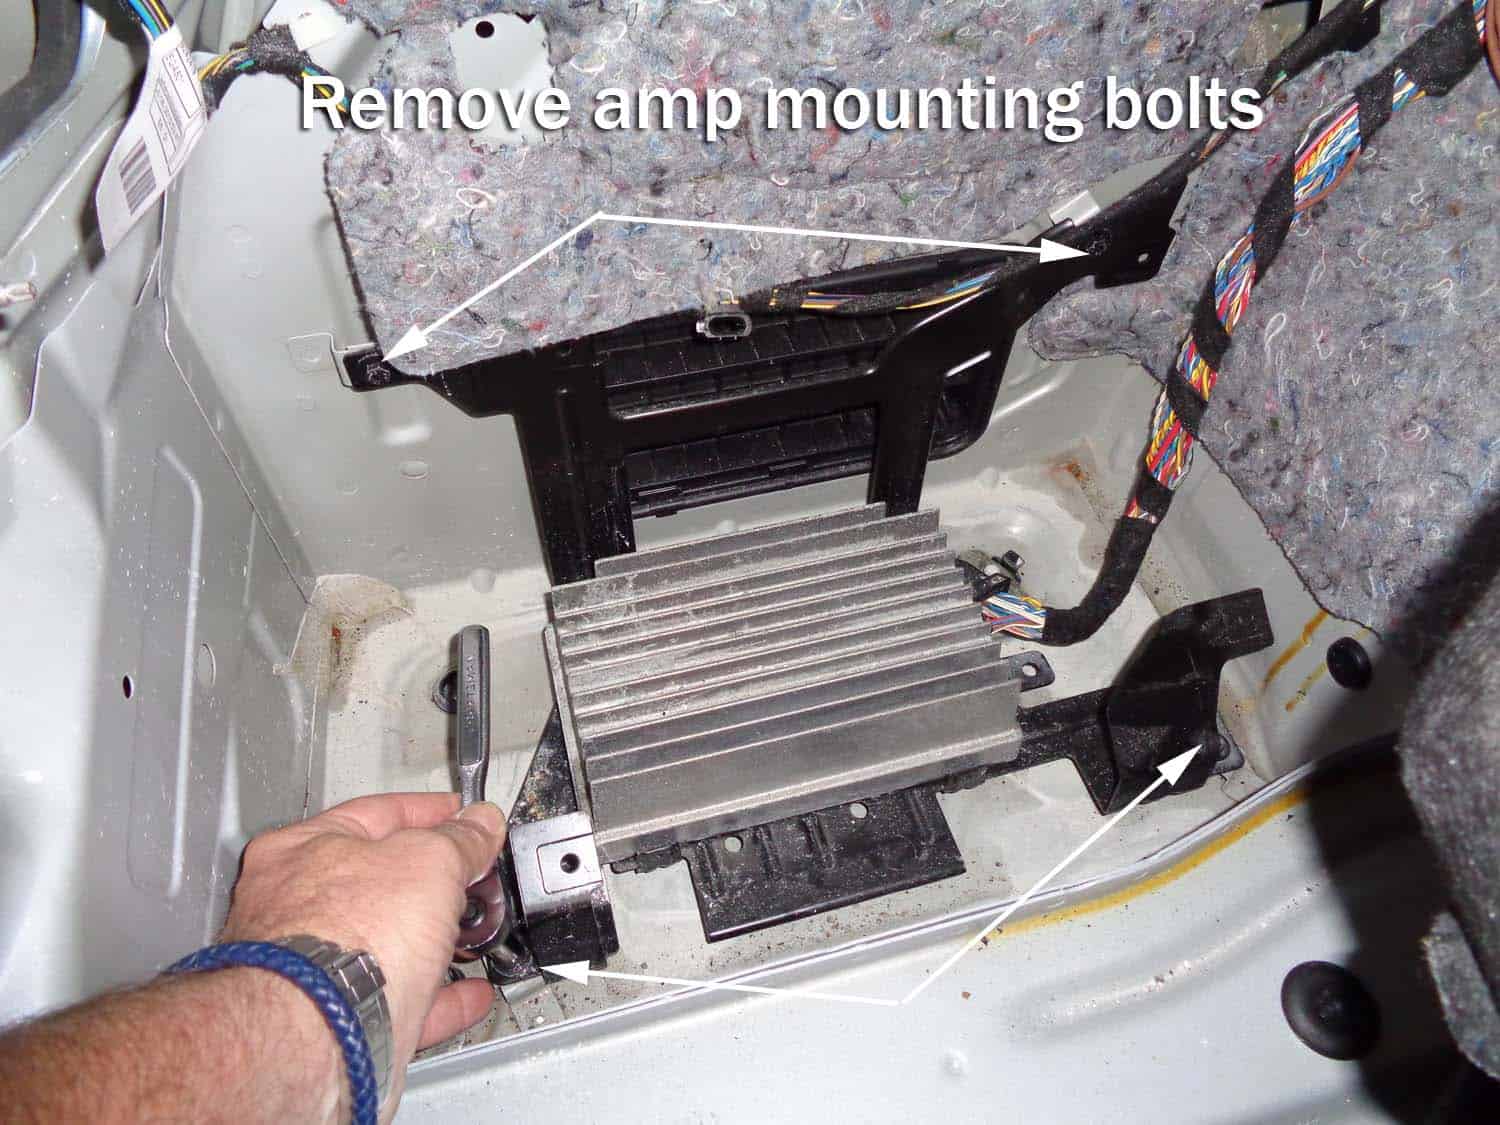
- Using an 8mm socket, remove the four amplifier bracket mounting bolts.
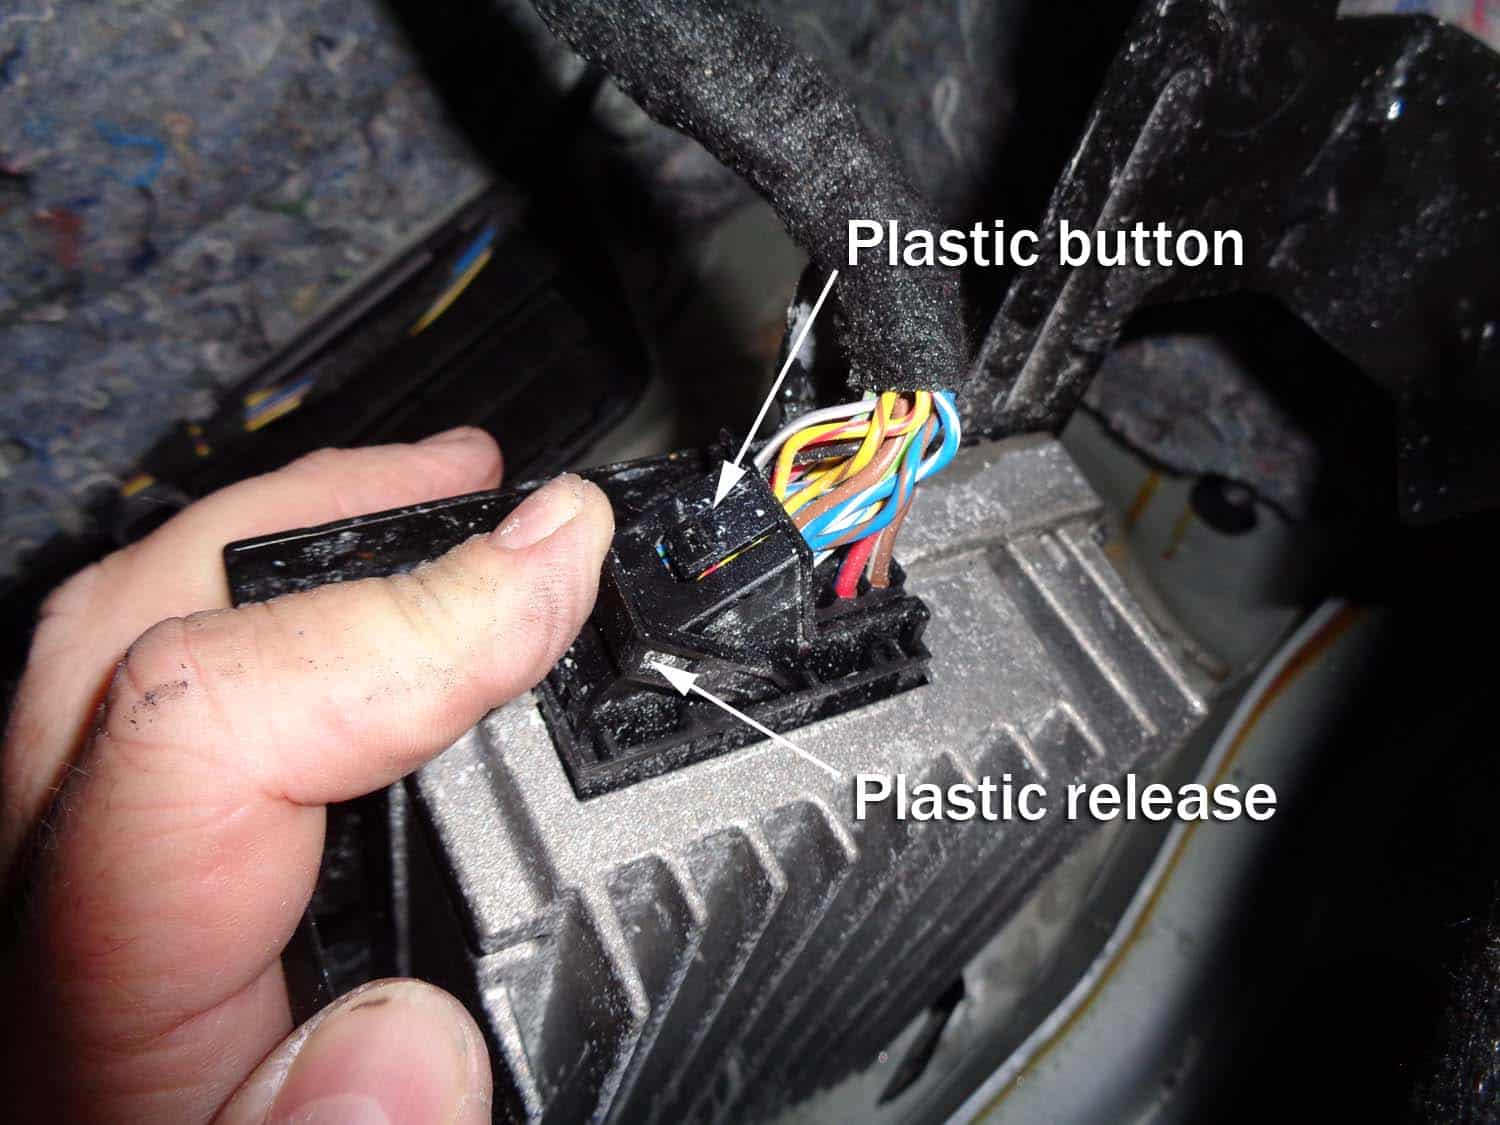
- Remove the amplifier electrical connector by pushing down on the small button and pulling the plastic release down.
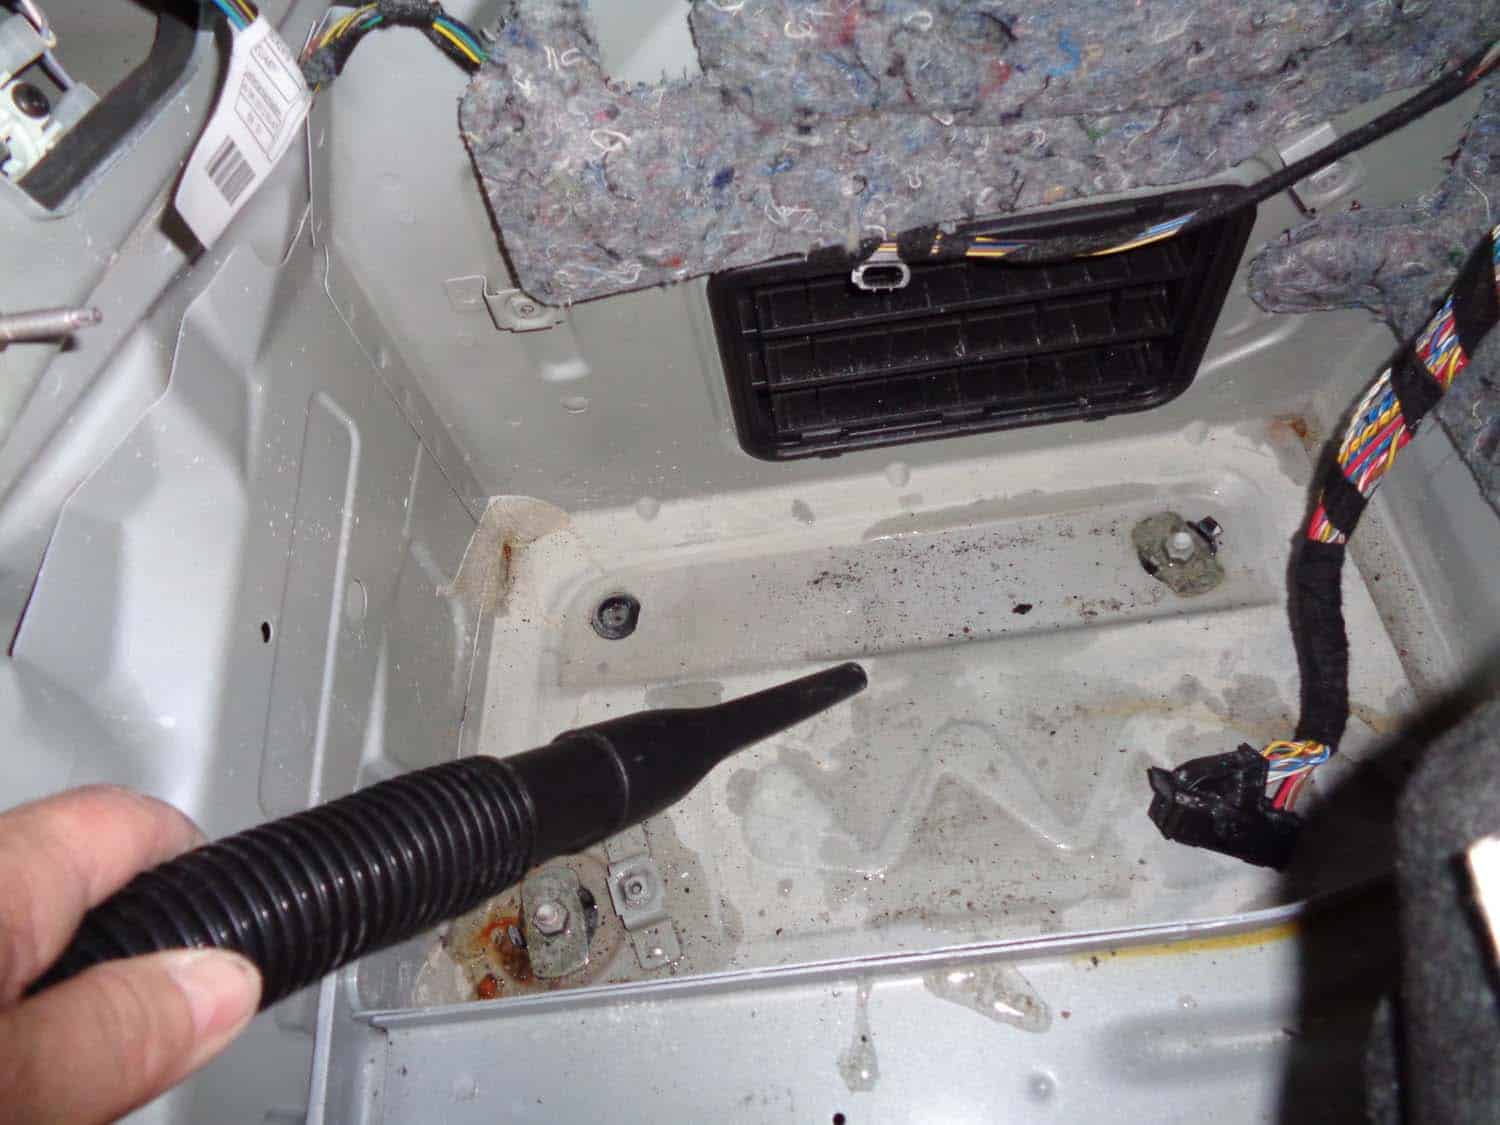
- Using a vacuum, remove all of the standing water from the trunk well. Use paper towels to thoroughly wipe down and dry.
Section 2 - BMW E90 Amplifier Water Damage Repair
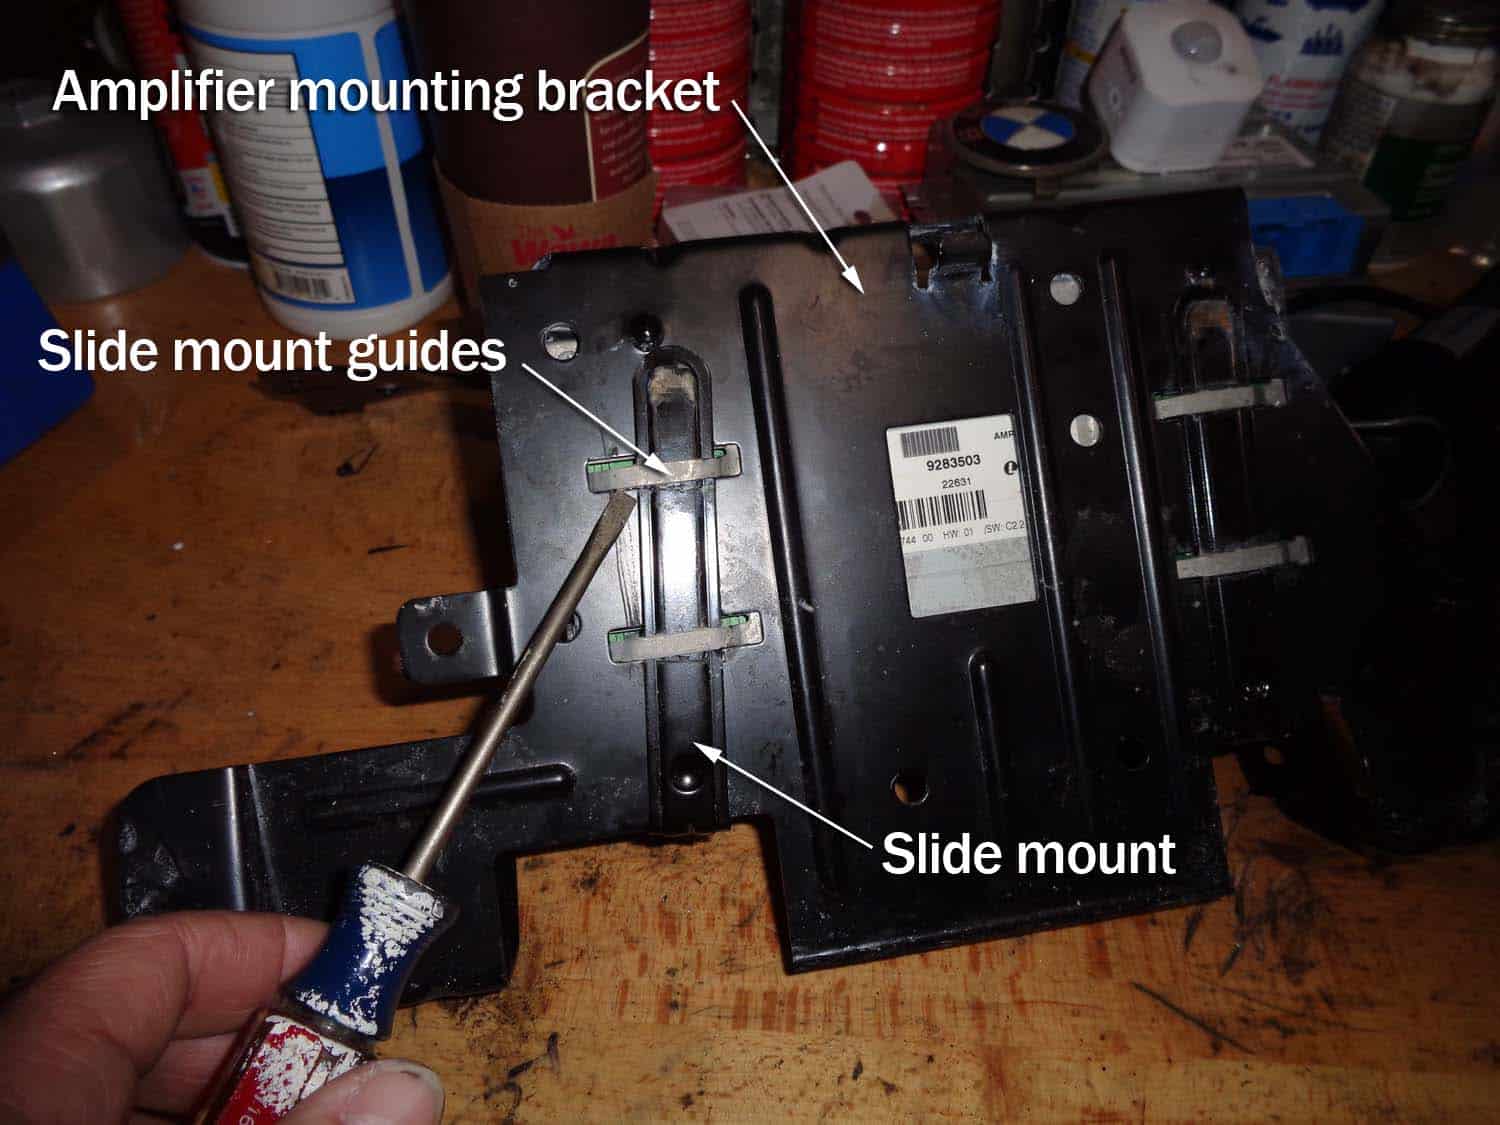
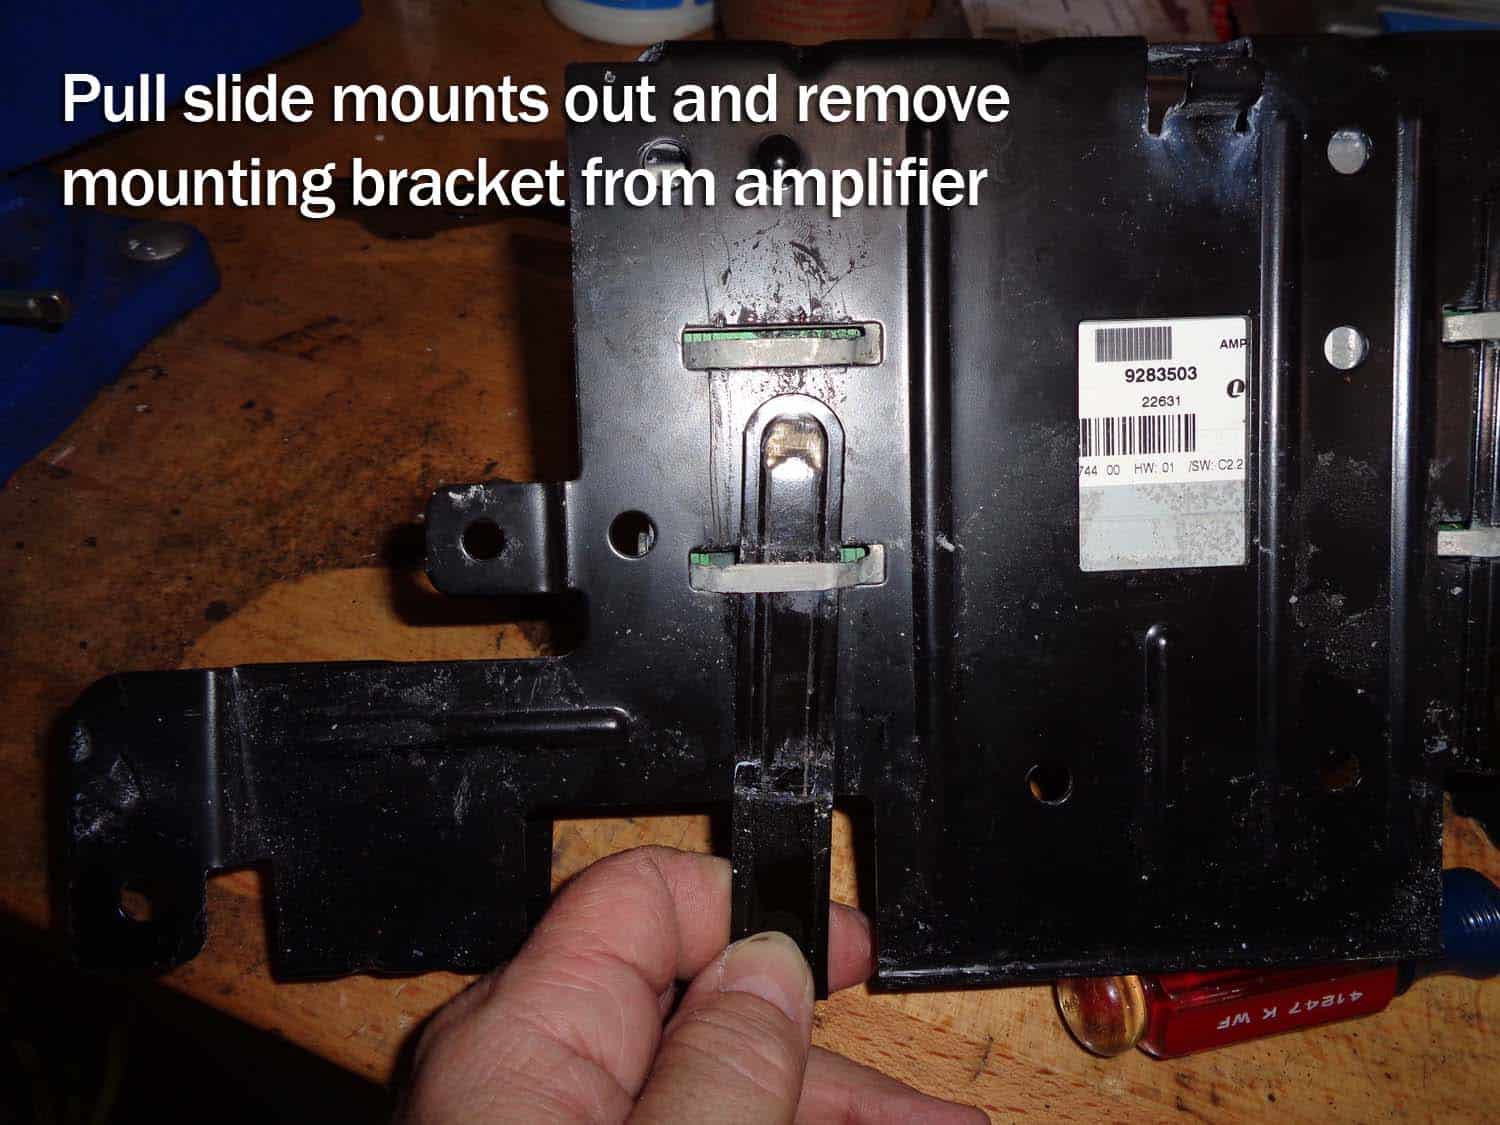
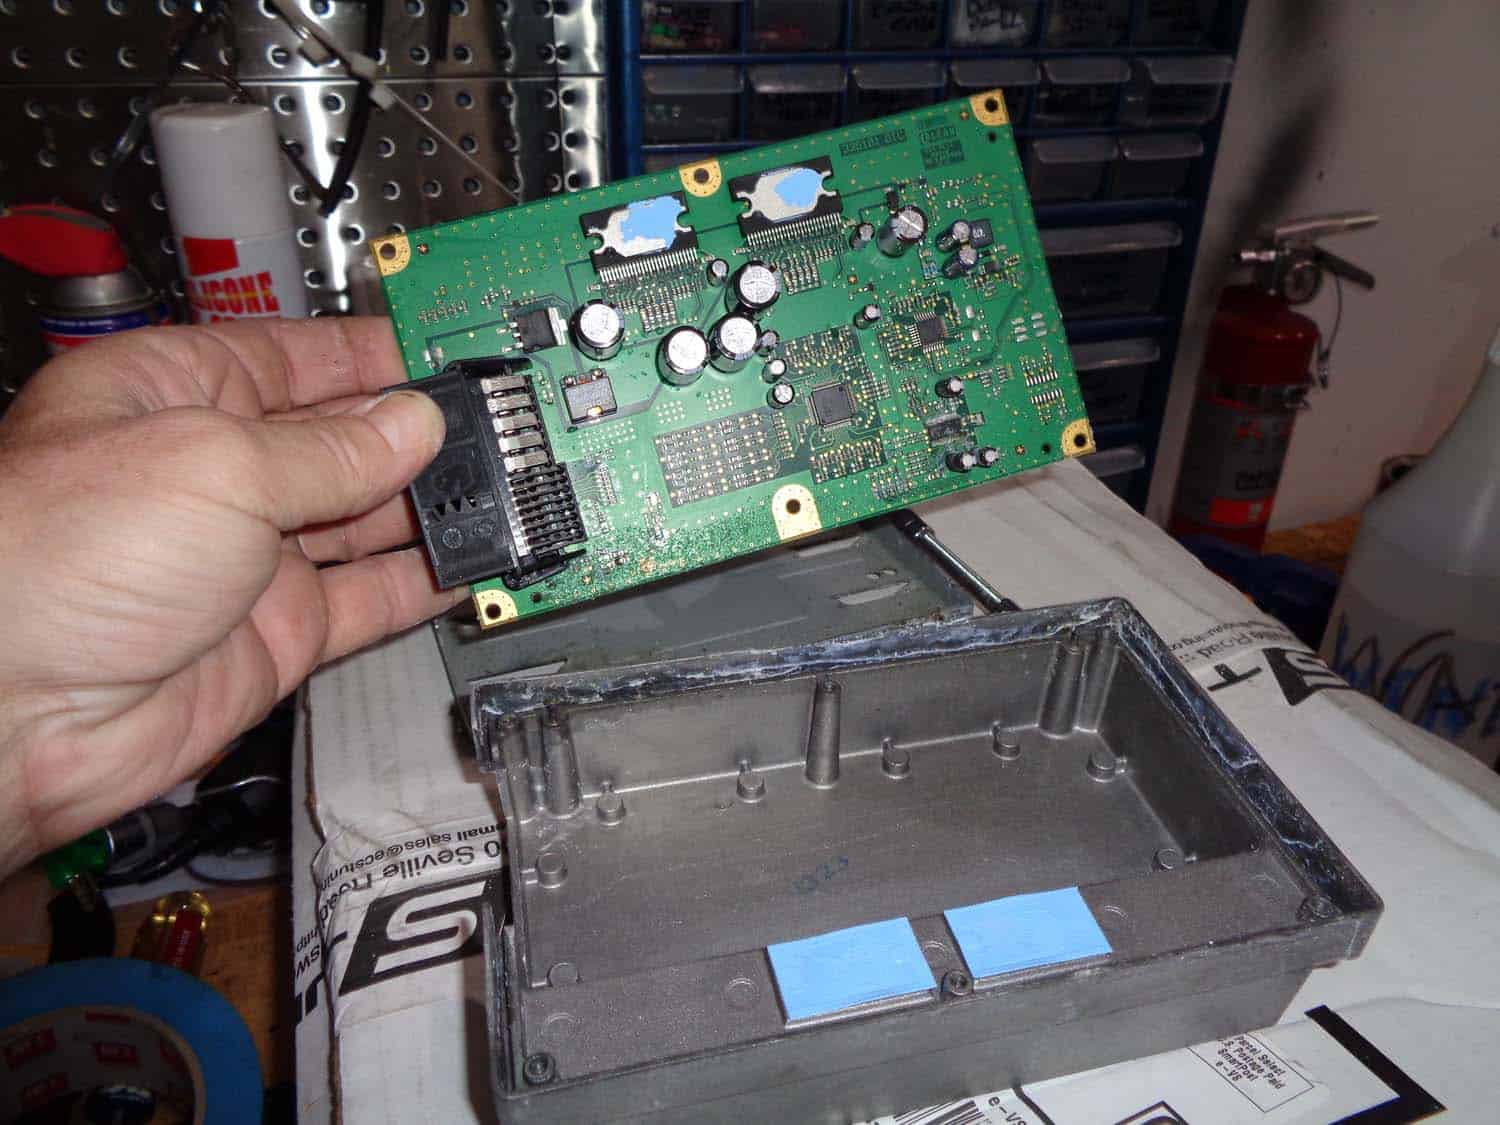
Your BMW amplifier is an expensive electronic part. The repair is relatively simple...but use extreme care while performing the following steps. Be focused and patient, taking your time with each step. Take extra care with the amplifier's circuit board - it is fragile and can break easily.- Place the amplifier upside down on a work bench or table. Using a small flat blade screwdriver, gently pry up the four metal slide mount guides. The goal is to loosen them just enough so the slide mounts can be pulled out and the amplifier mounting bracket removed.
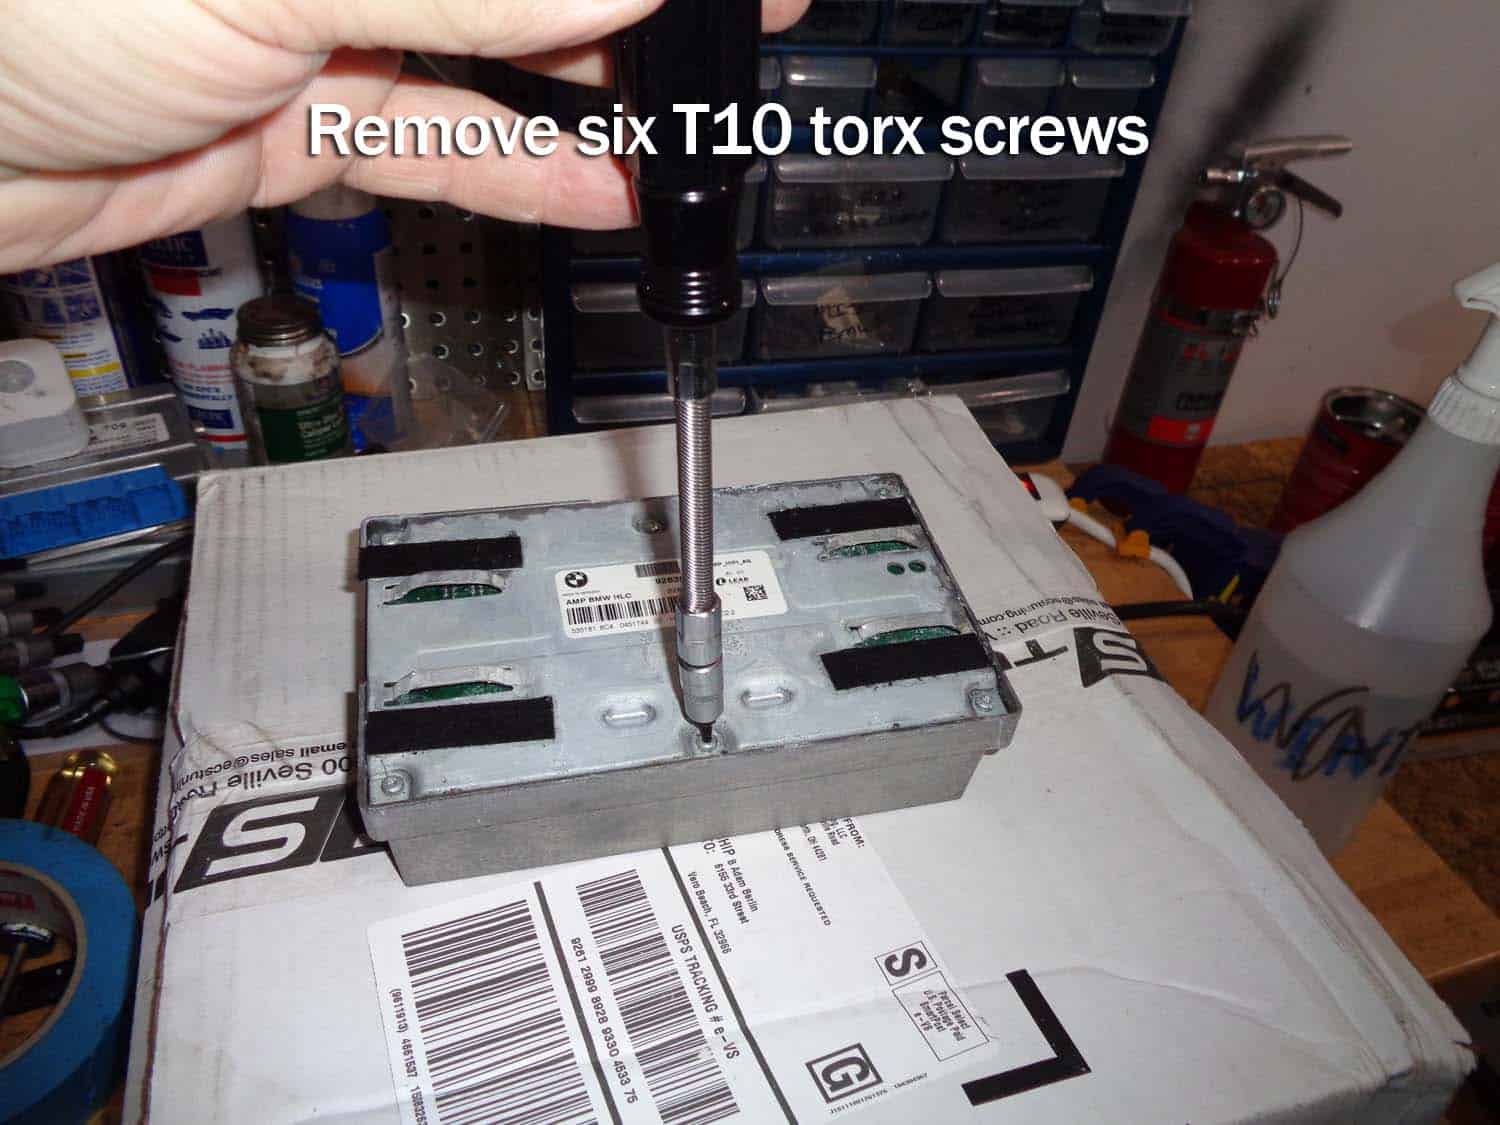
- Place the amplifier upside down on a workbench. Remove the six T10 screws securing the bottom plate to the amplifier.
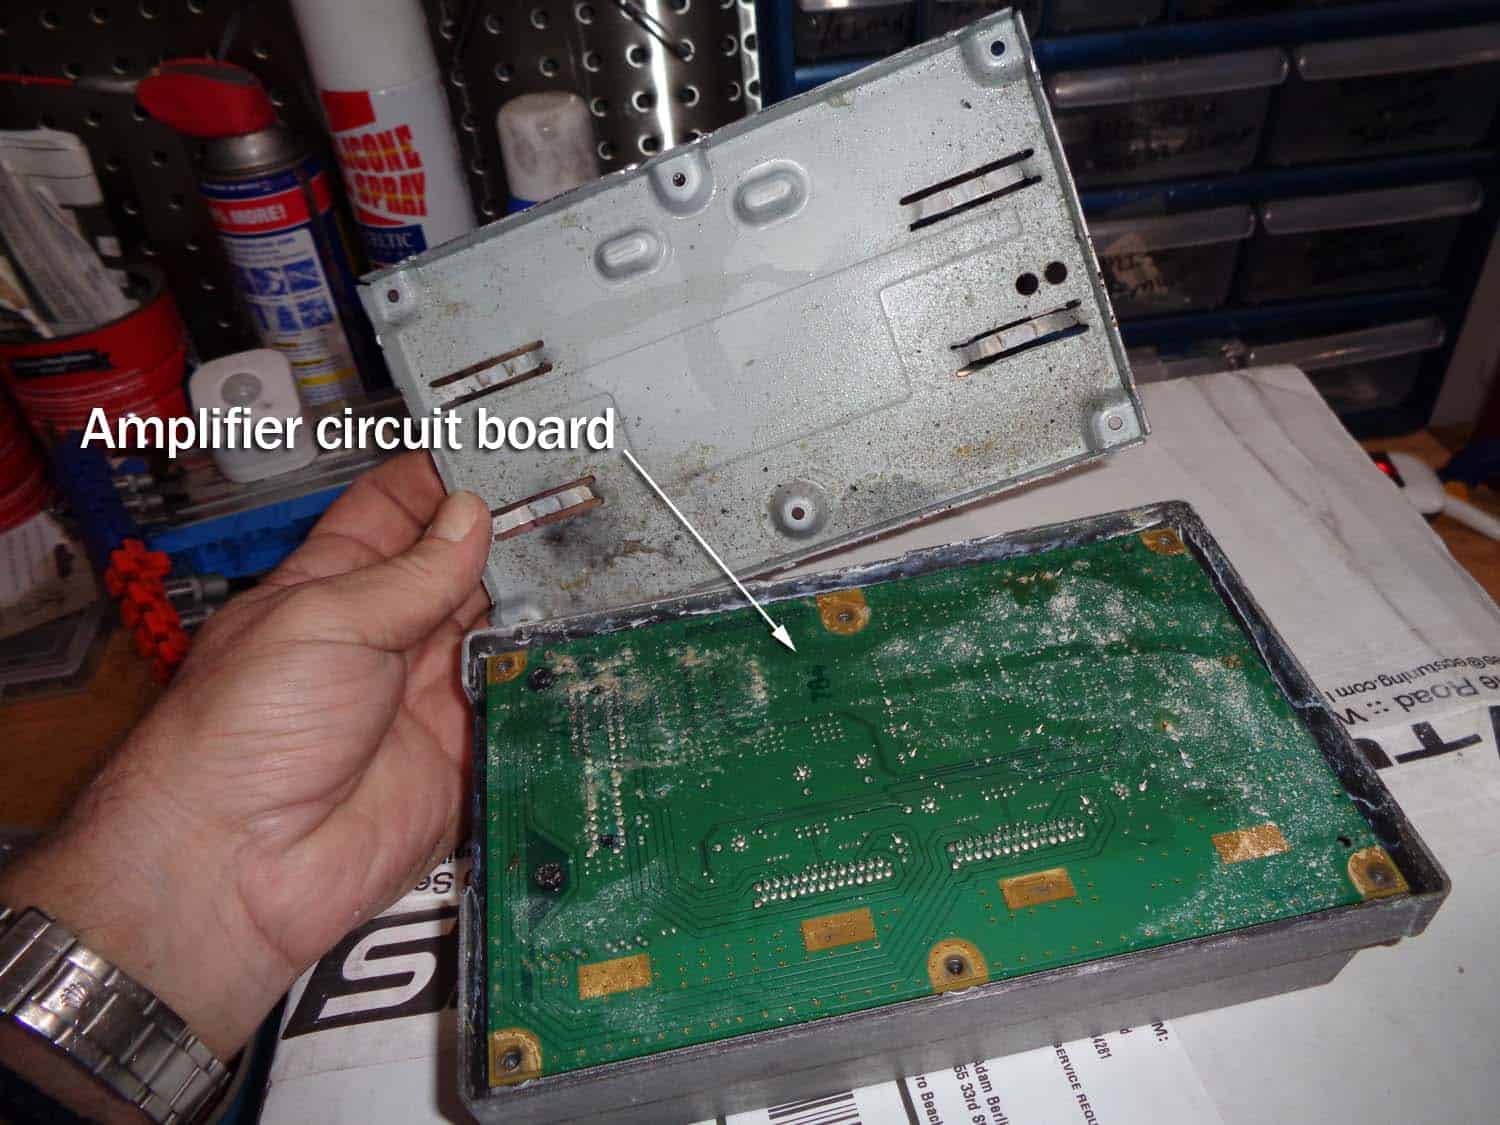
- Remove the two black T10 torx screws that secure the electrical connector to the circuit board. These screws really do not need to be removed....but I removed them anyway just in case there was water trapped under the black plastic connector.
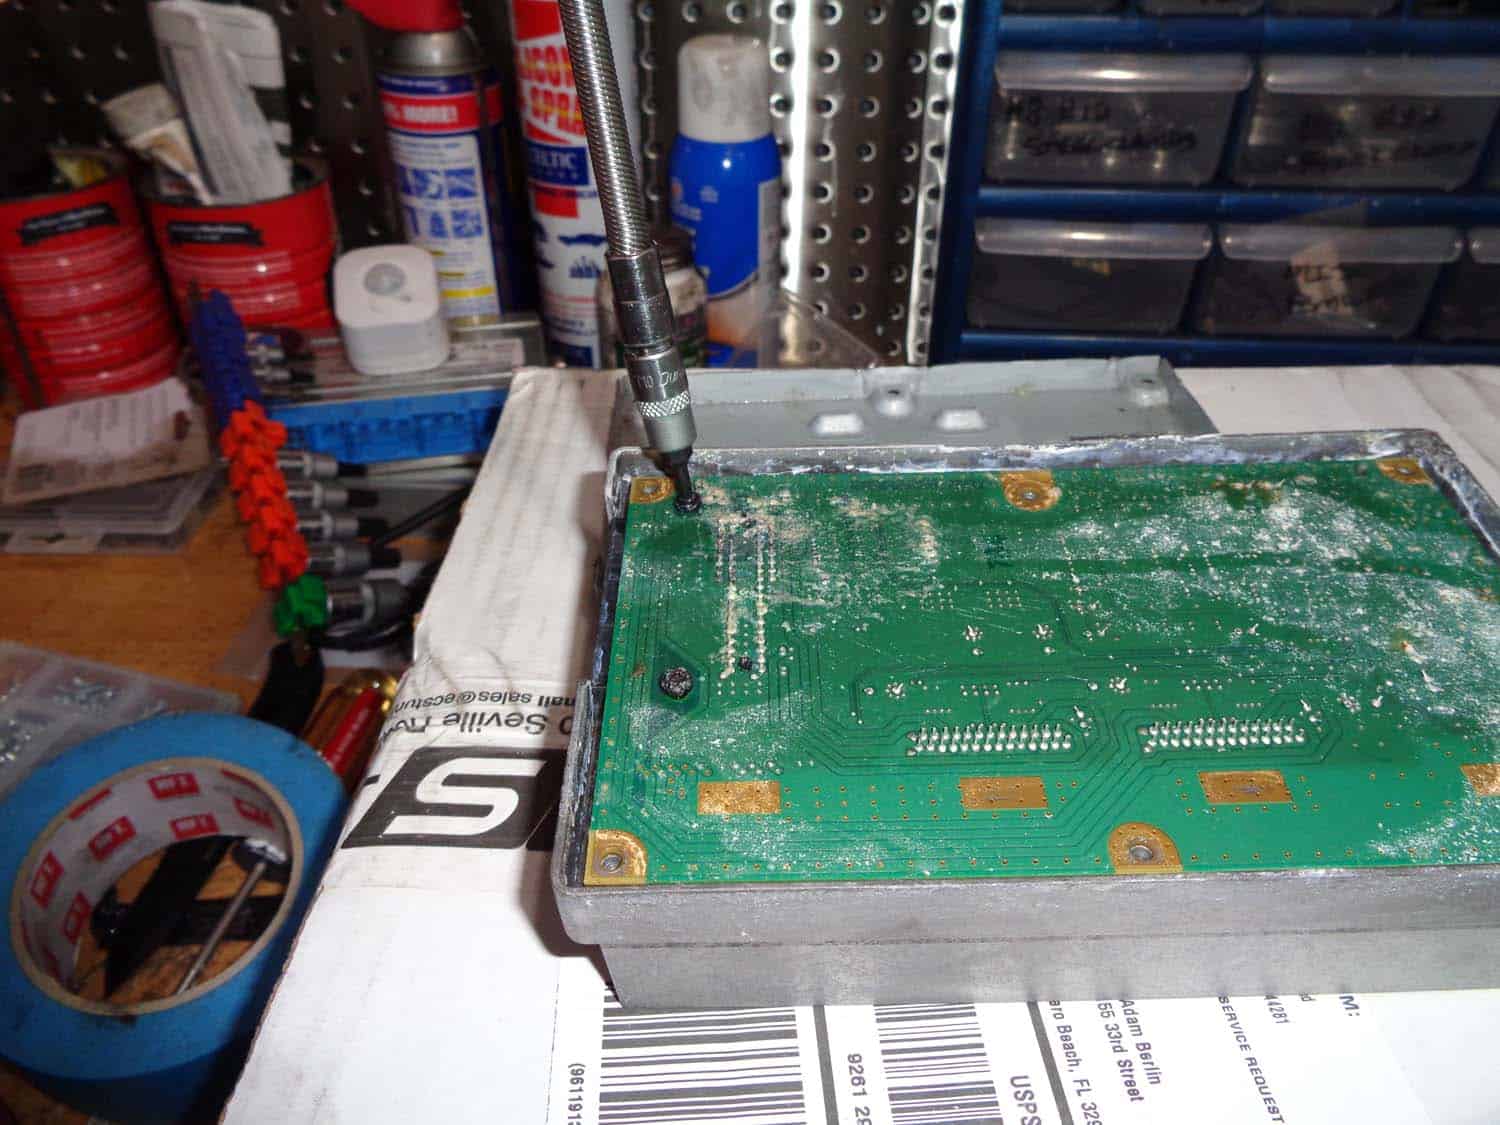
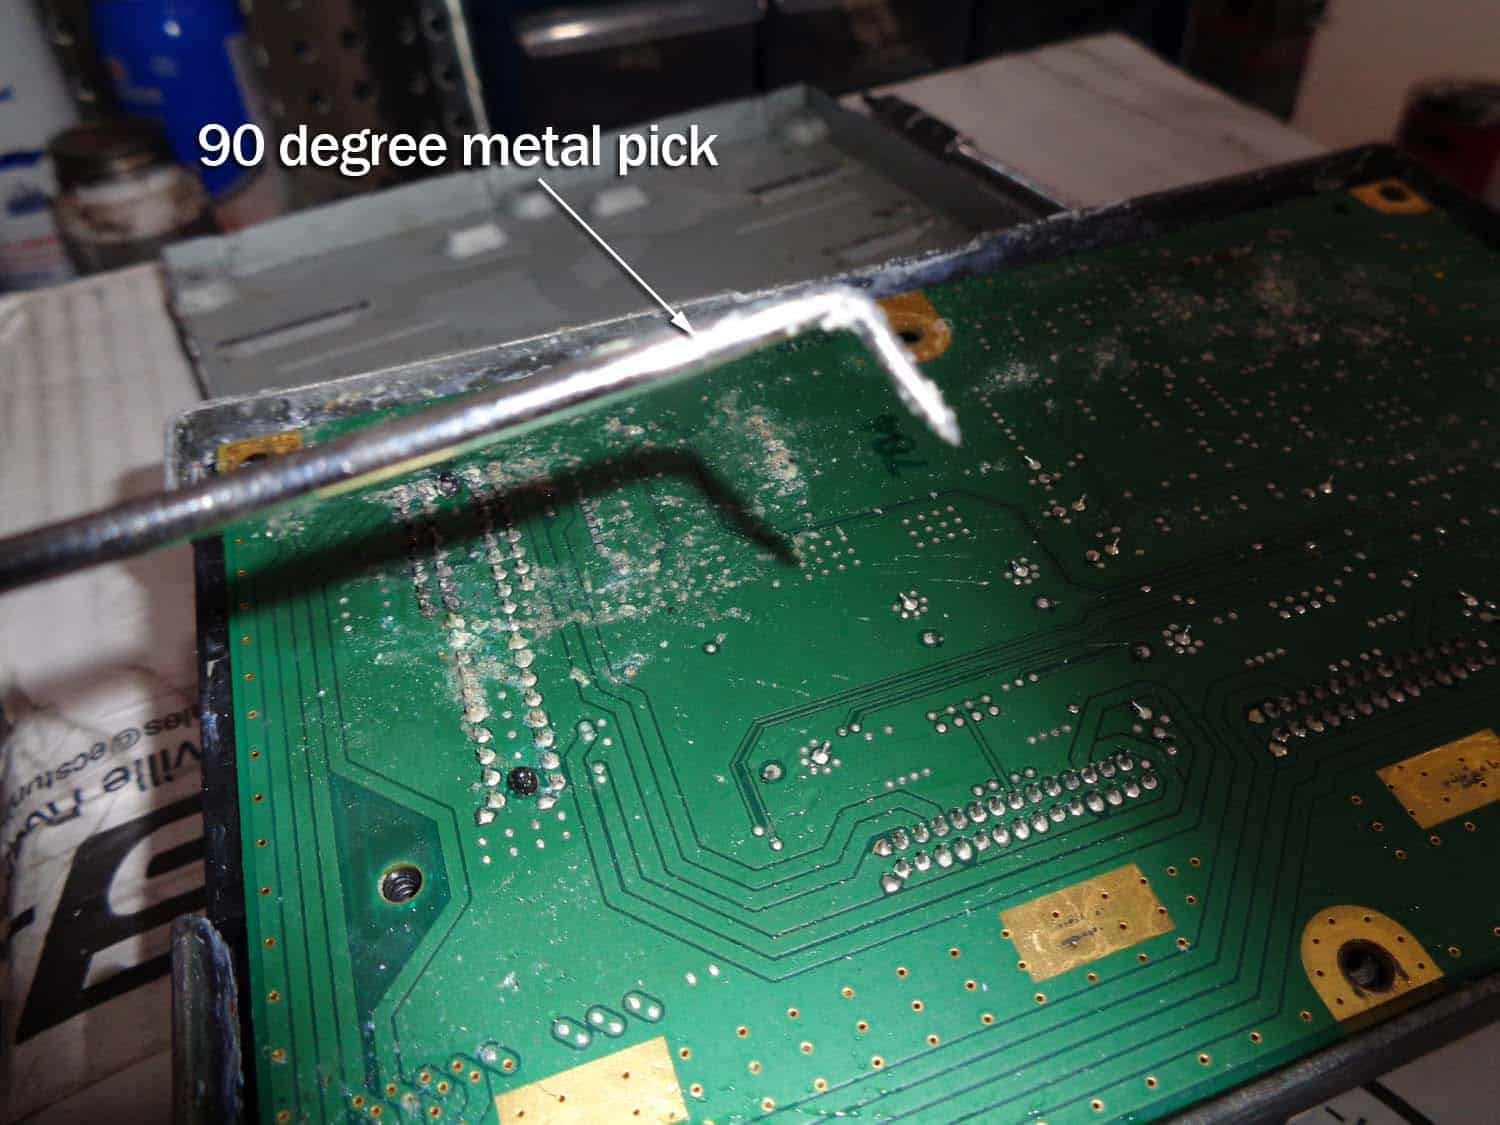
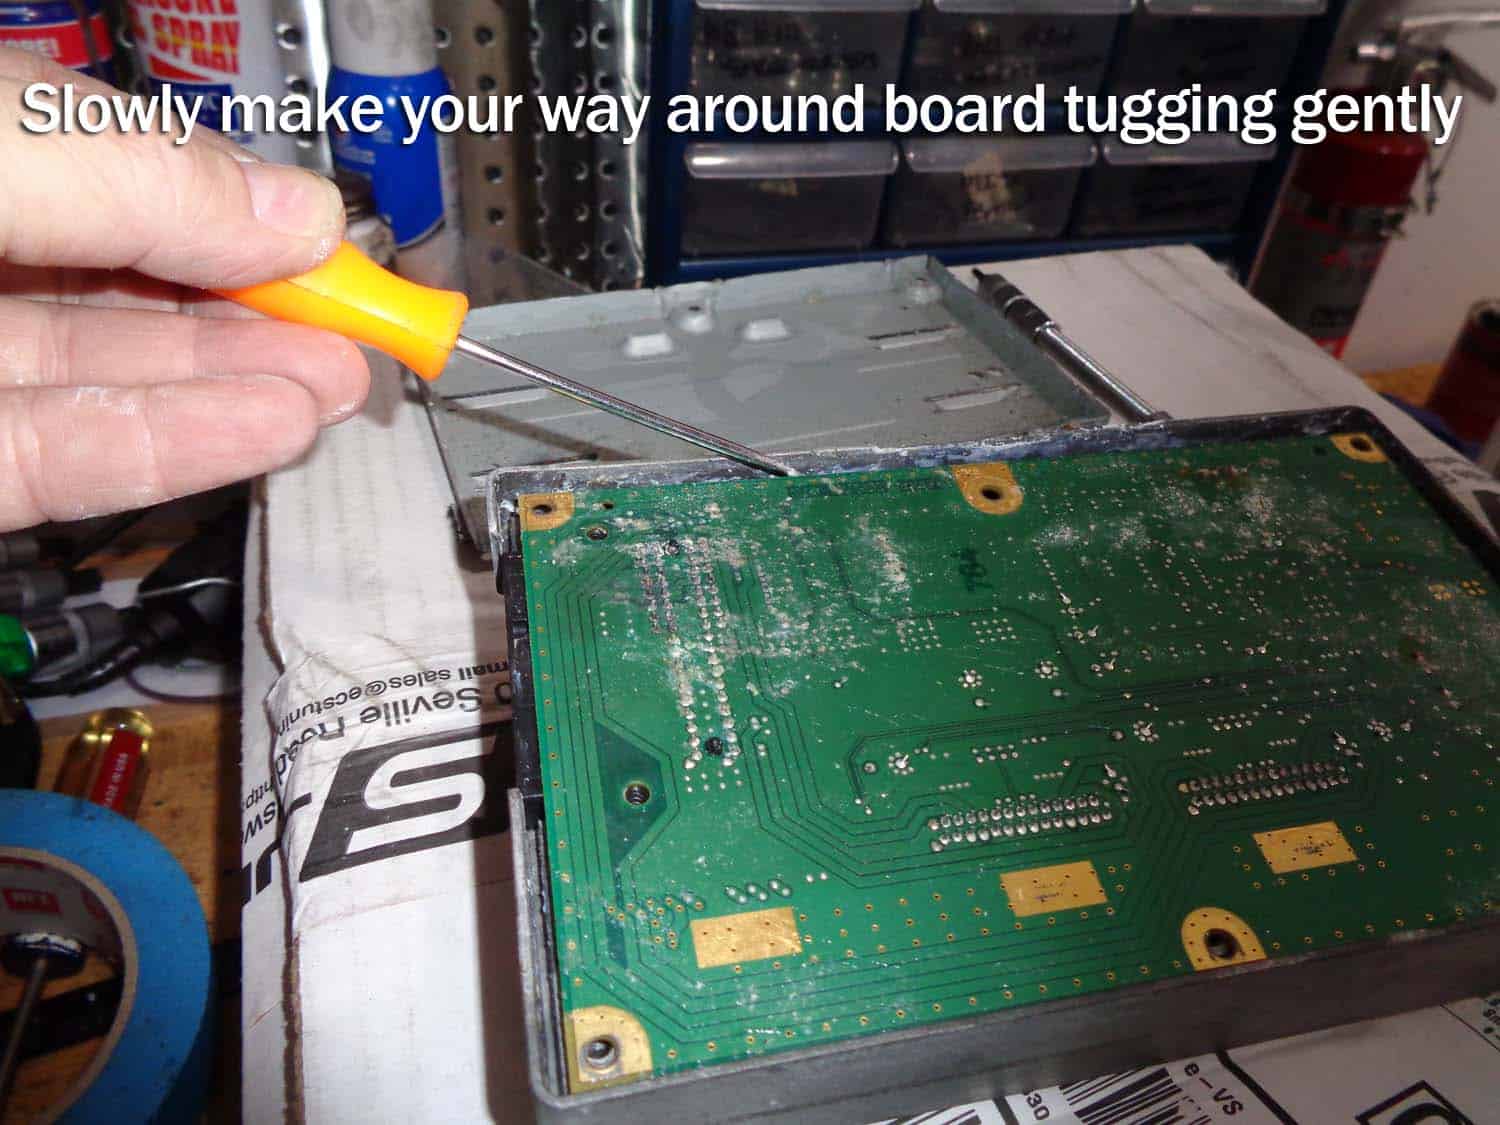
- PLEASE USE CARE ON THIS STEP! The circuit board needs to be removed from the metal amplifier cover. It is held down with double sided adhesive tape. Using a 90 degree metal pick, GENTLY and METHODICALLY start tugging at the edges of the circuit board. Slowly make your way way around, using very little pressure. It took me about five minutes but the board finally popped off of the cover. If you get frustrated...walk away and take a breather. The last thing you want to do is pull too hard and crack the board.
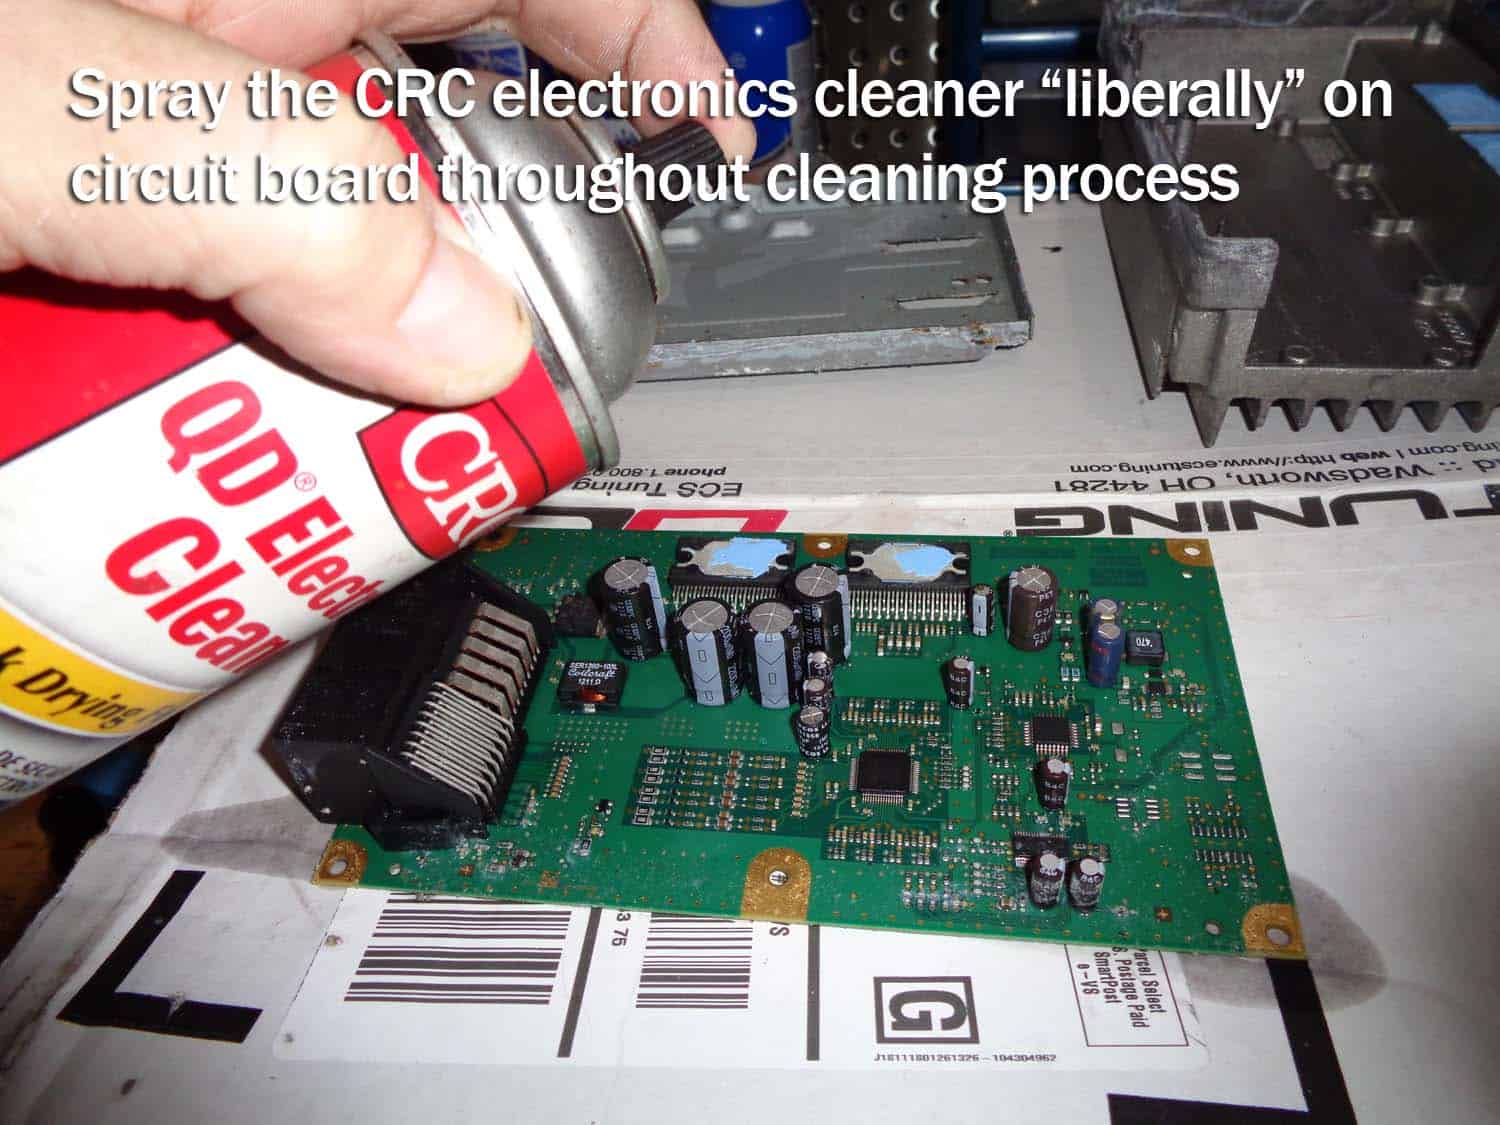
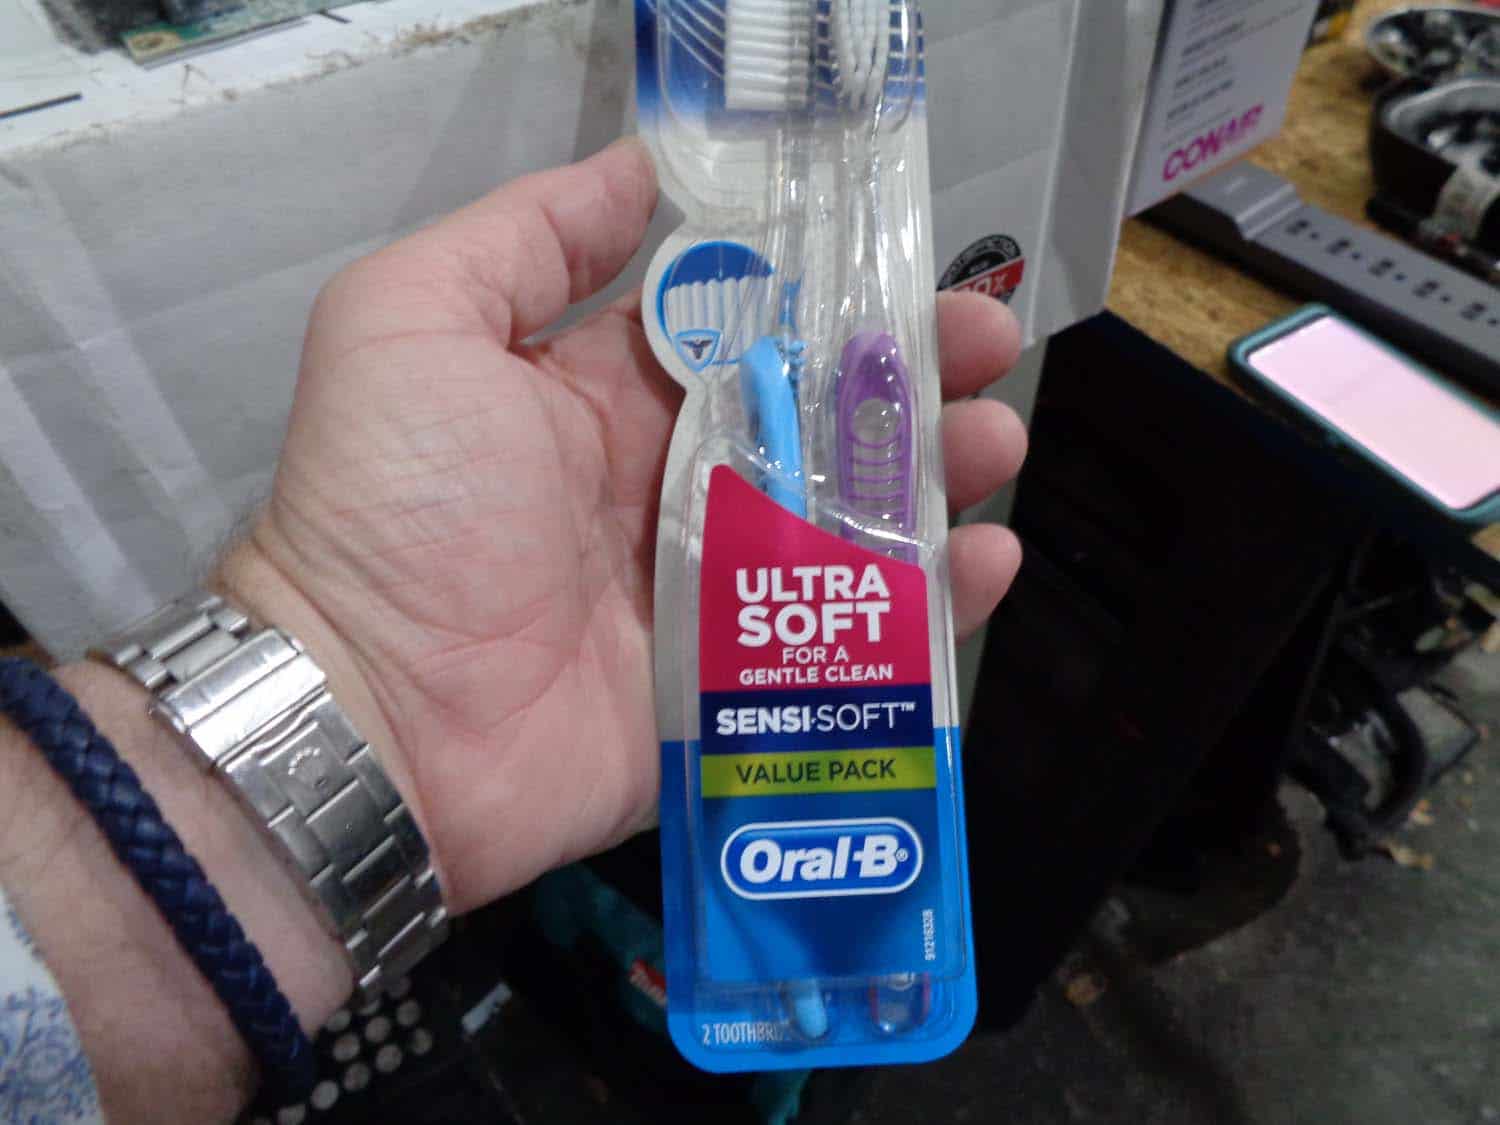
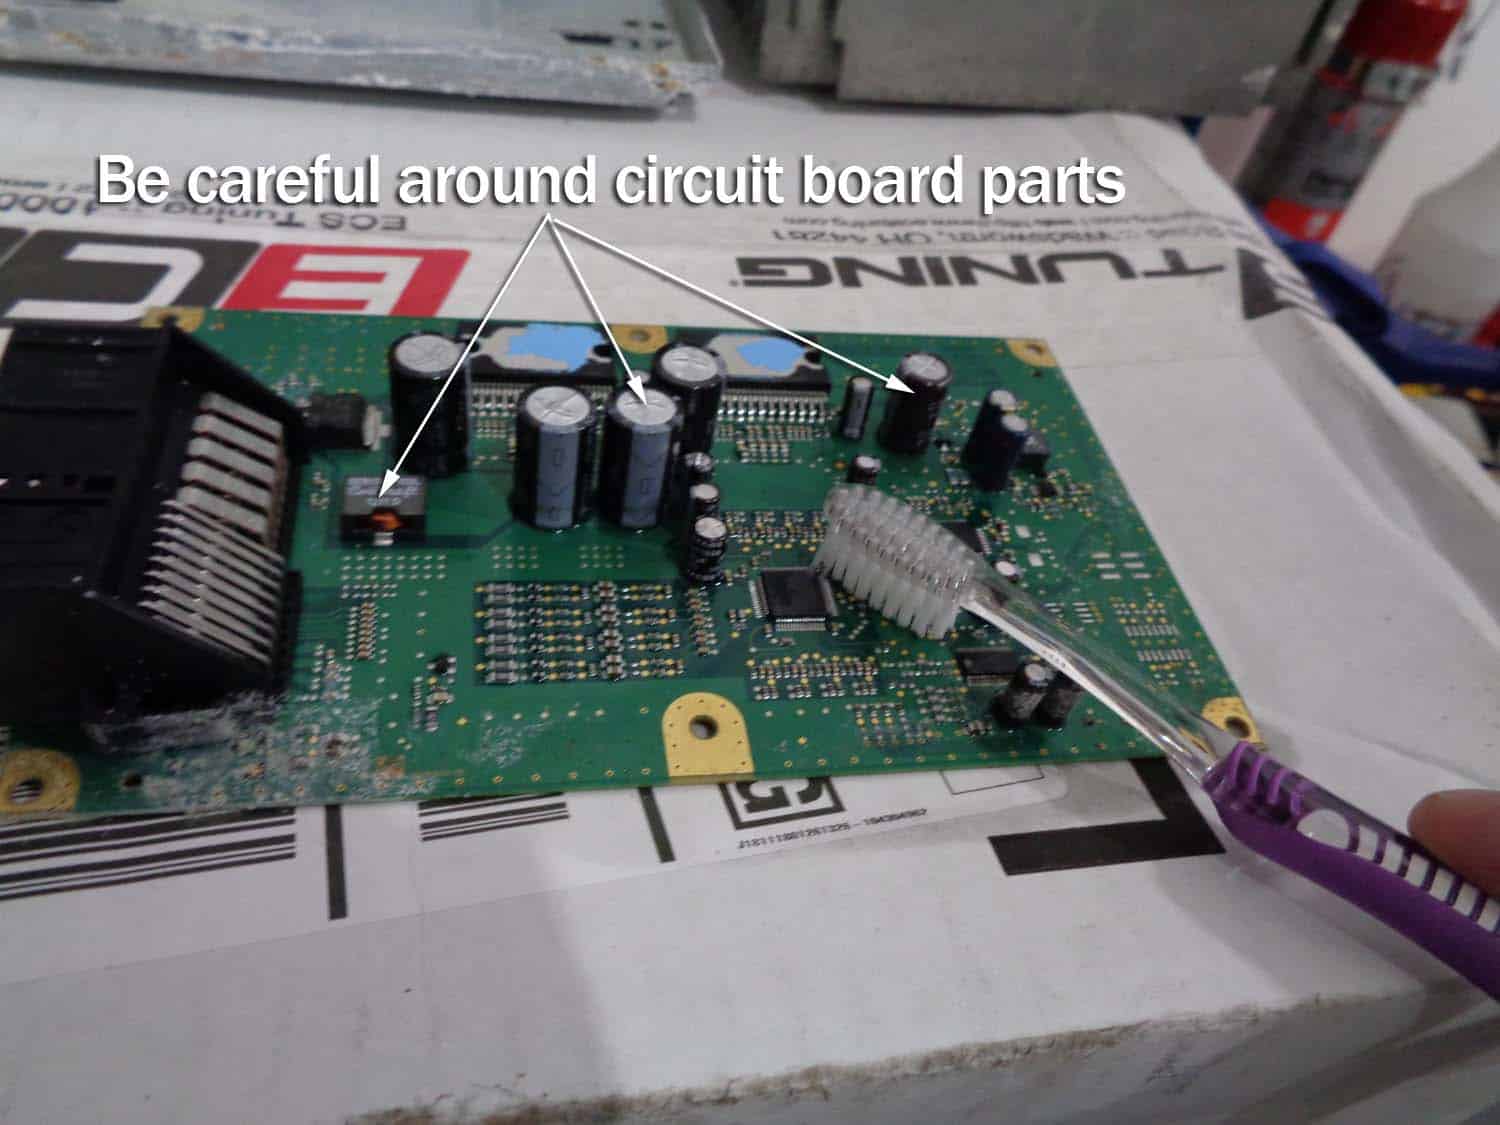
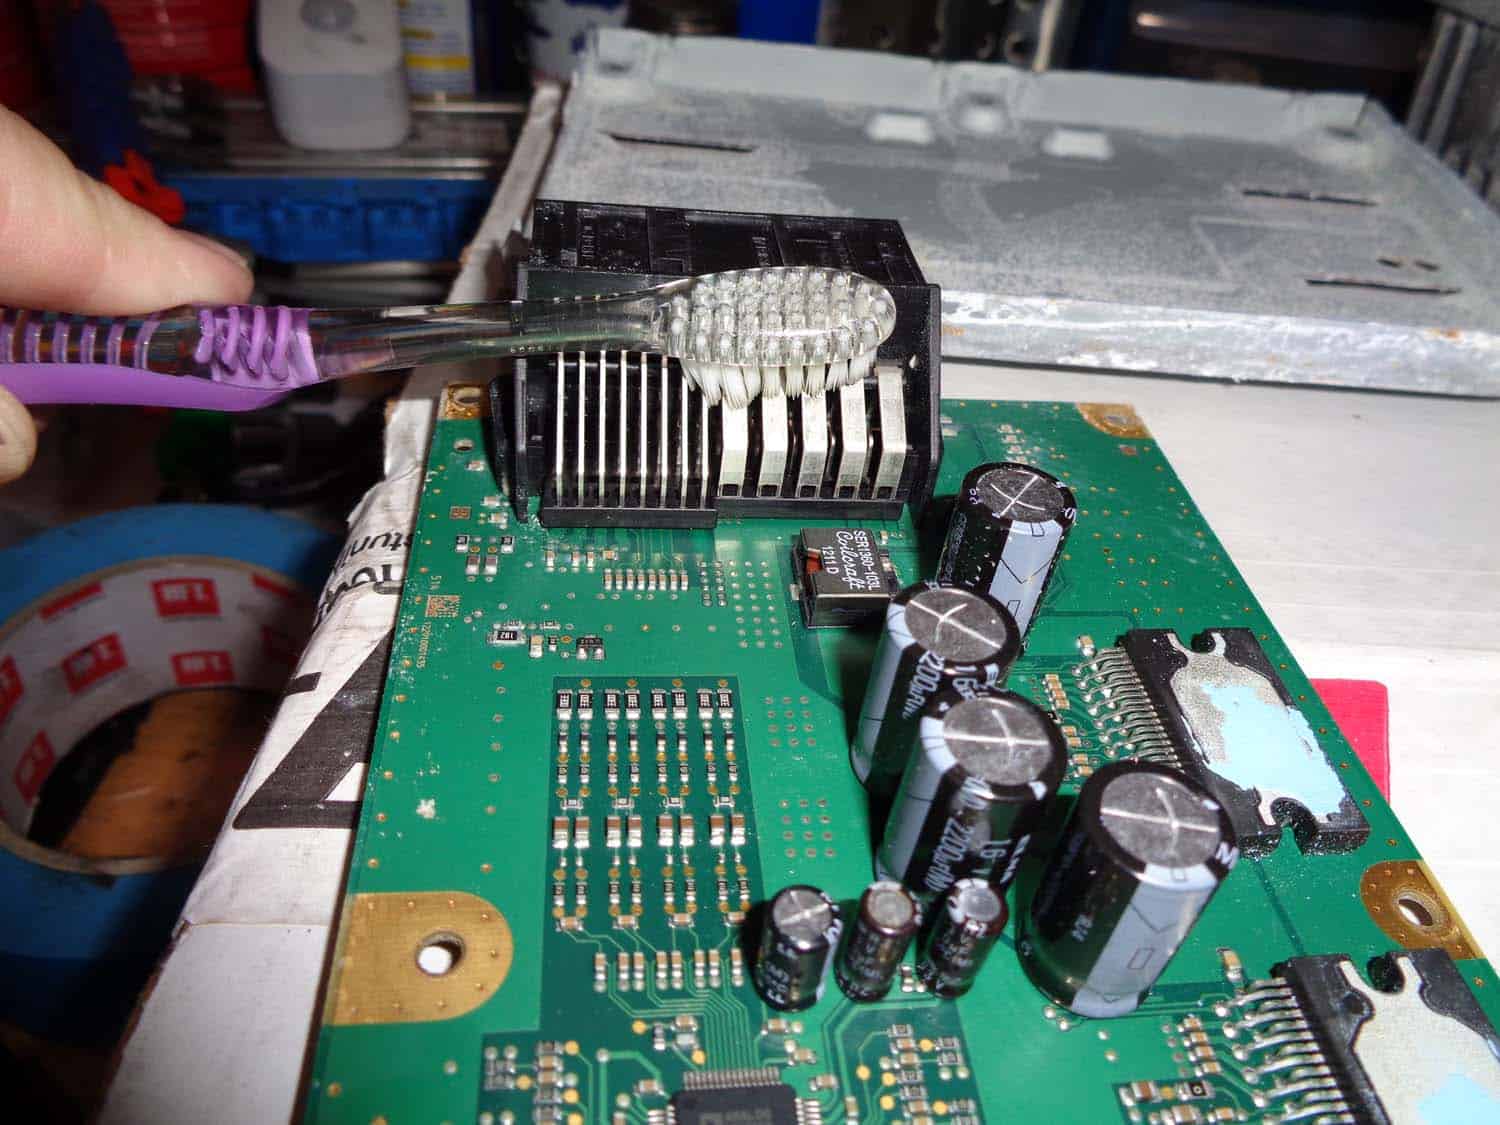
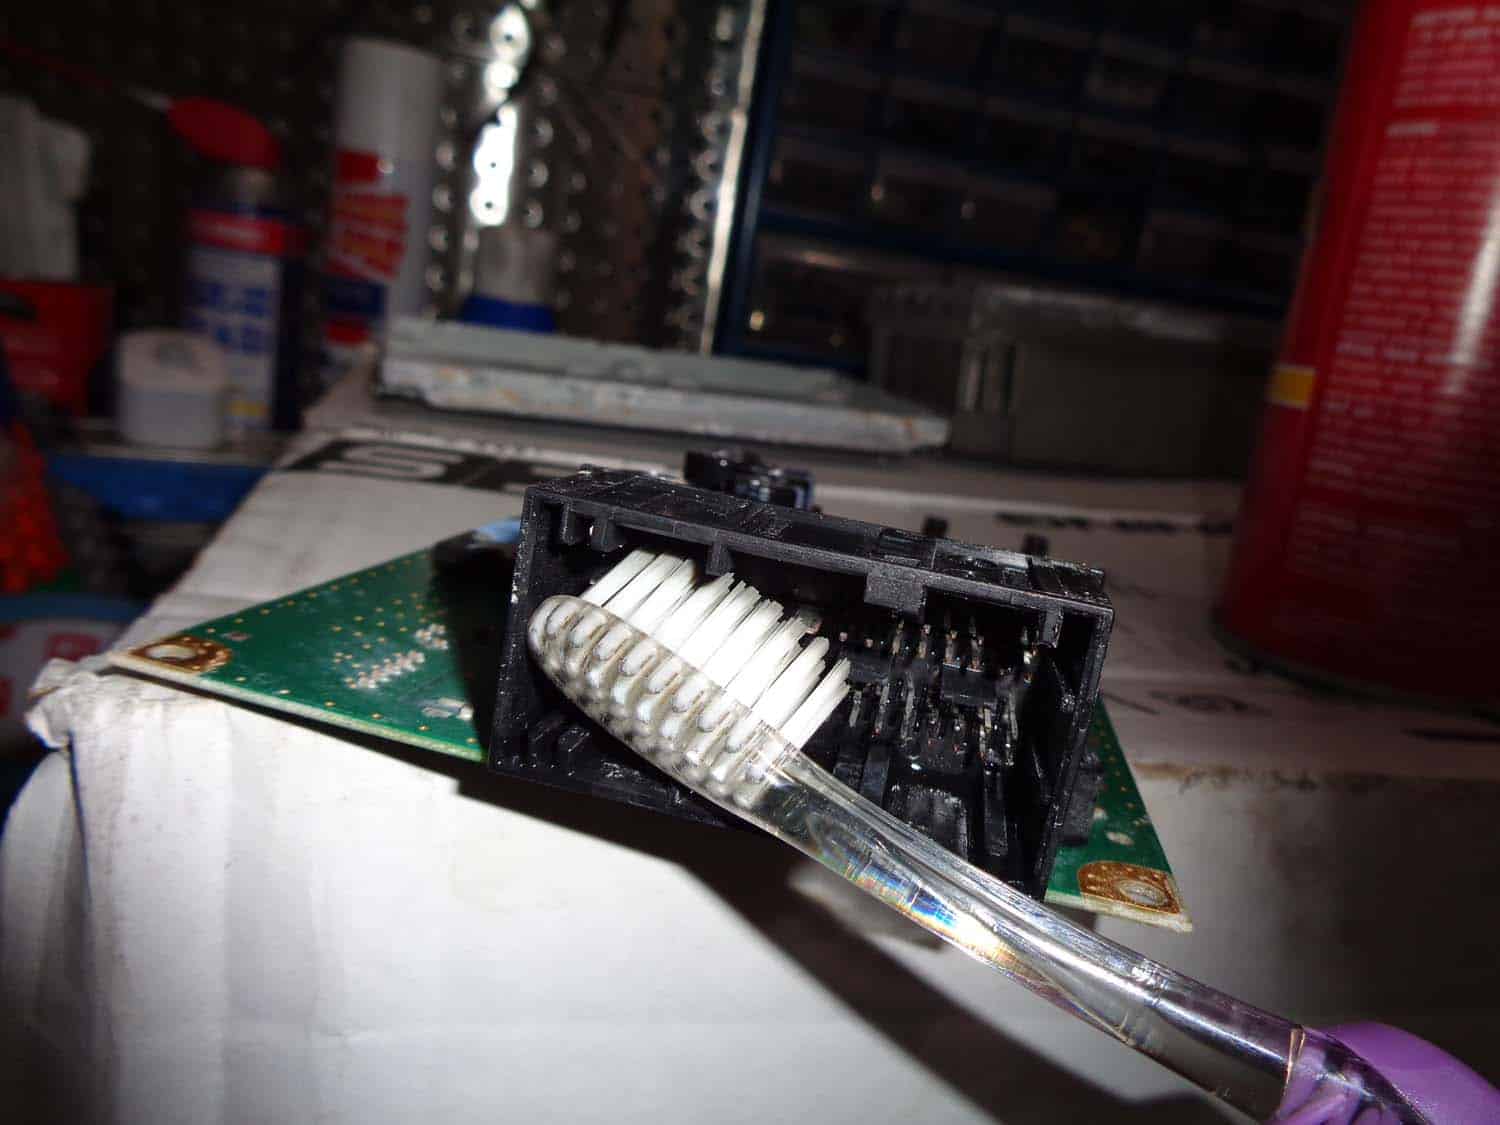
- Thoroughly clean the board with CRC electronics cleaner and a new clean toothbrush. Don't be afraid to use the CRC liberally, getting it in every nook and crevice. Be careful around resistors and other electronic parts attached to the board. Take your time making sure to scrub both sides of the circuit board and the black plastic electrical connector.
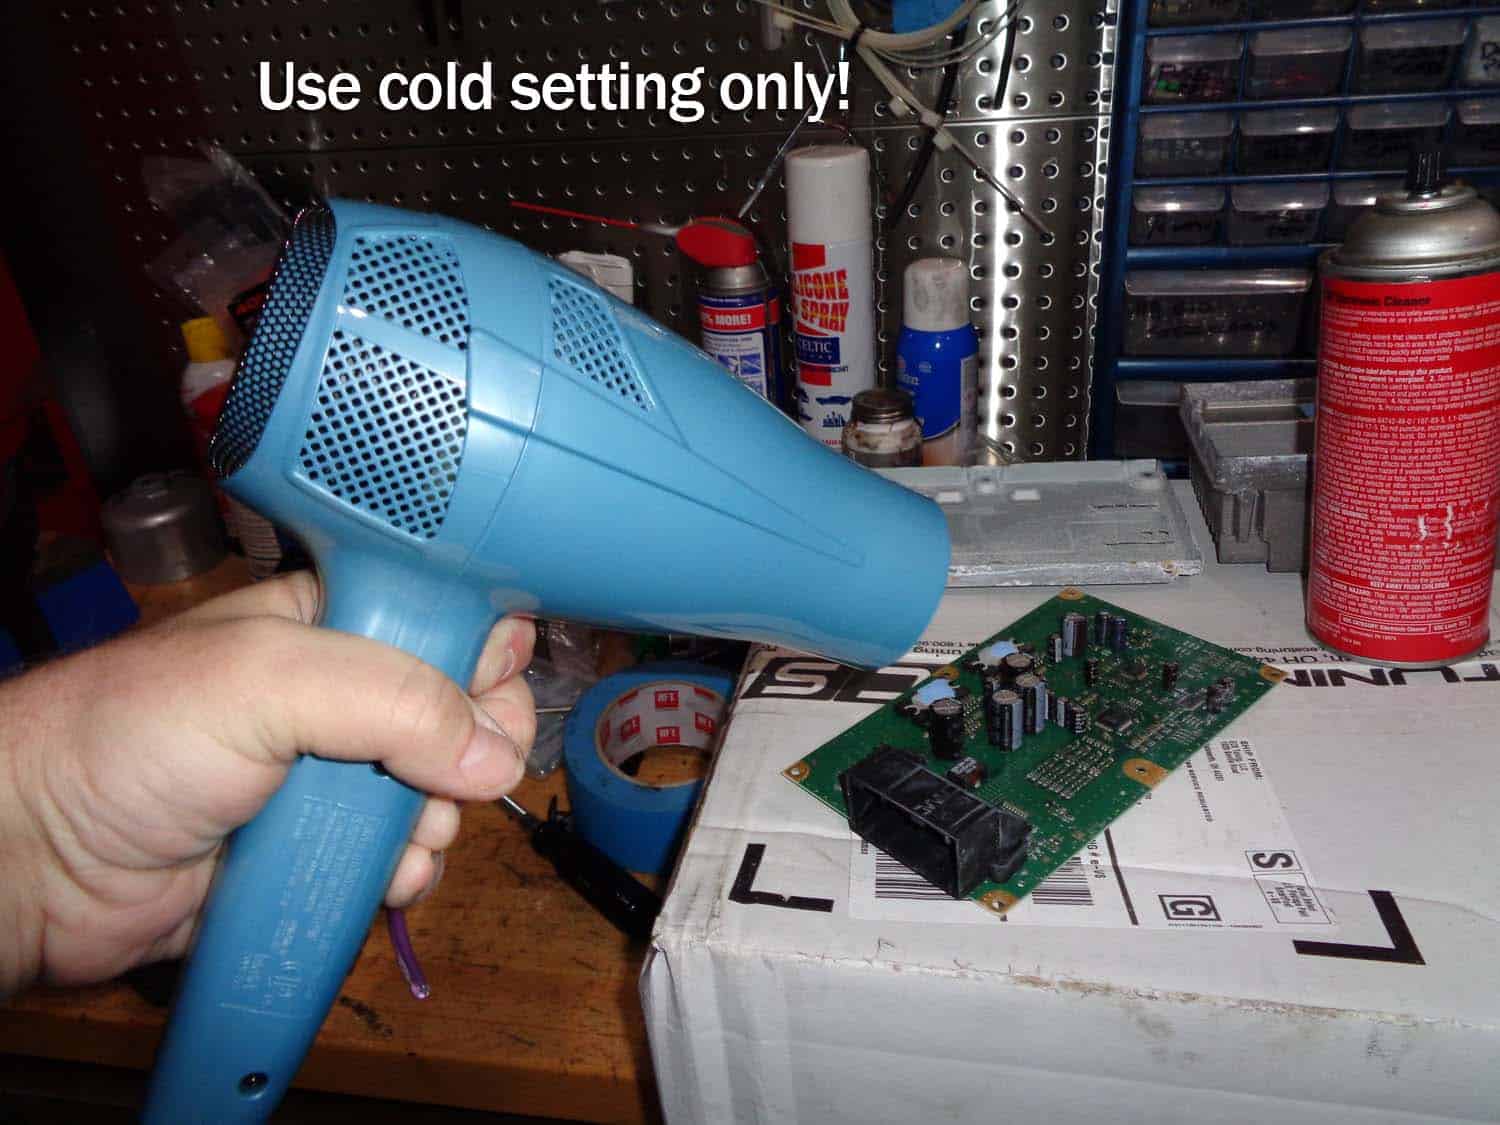
- Using the cold setting on the hair dryer, thoroughly dry the circuit board off.
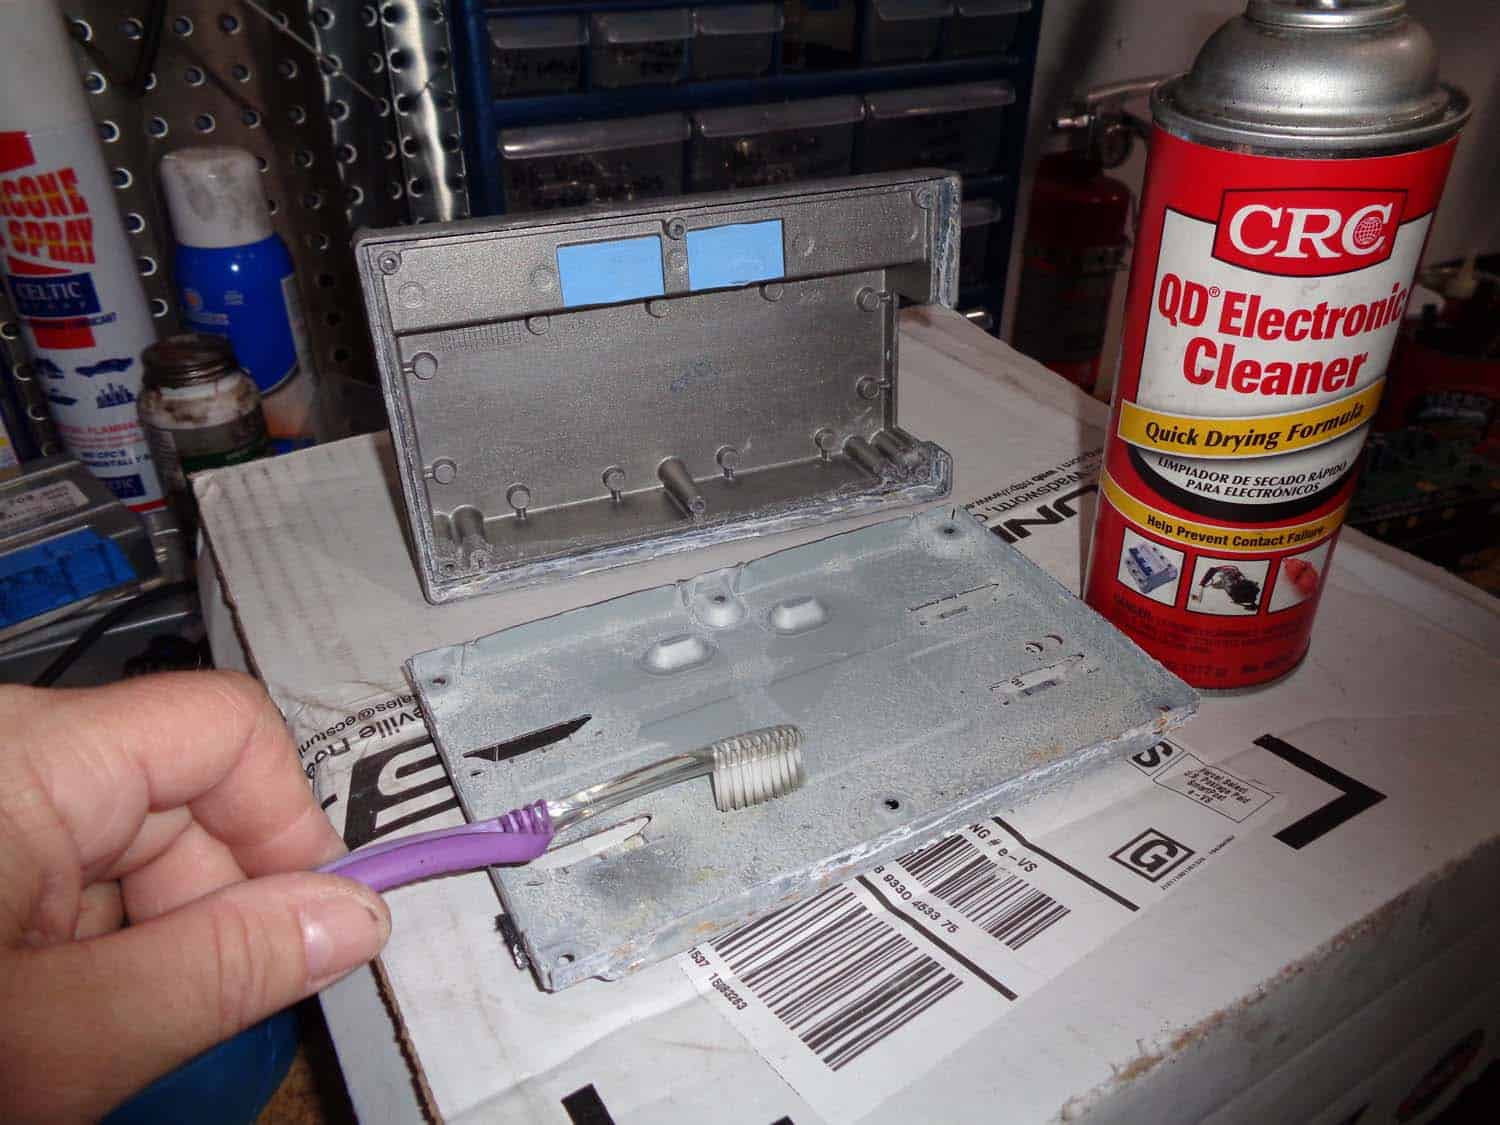
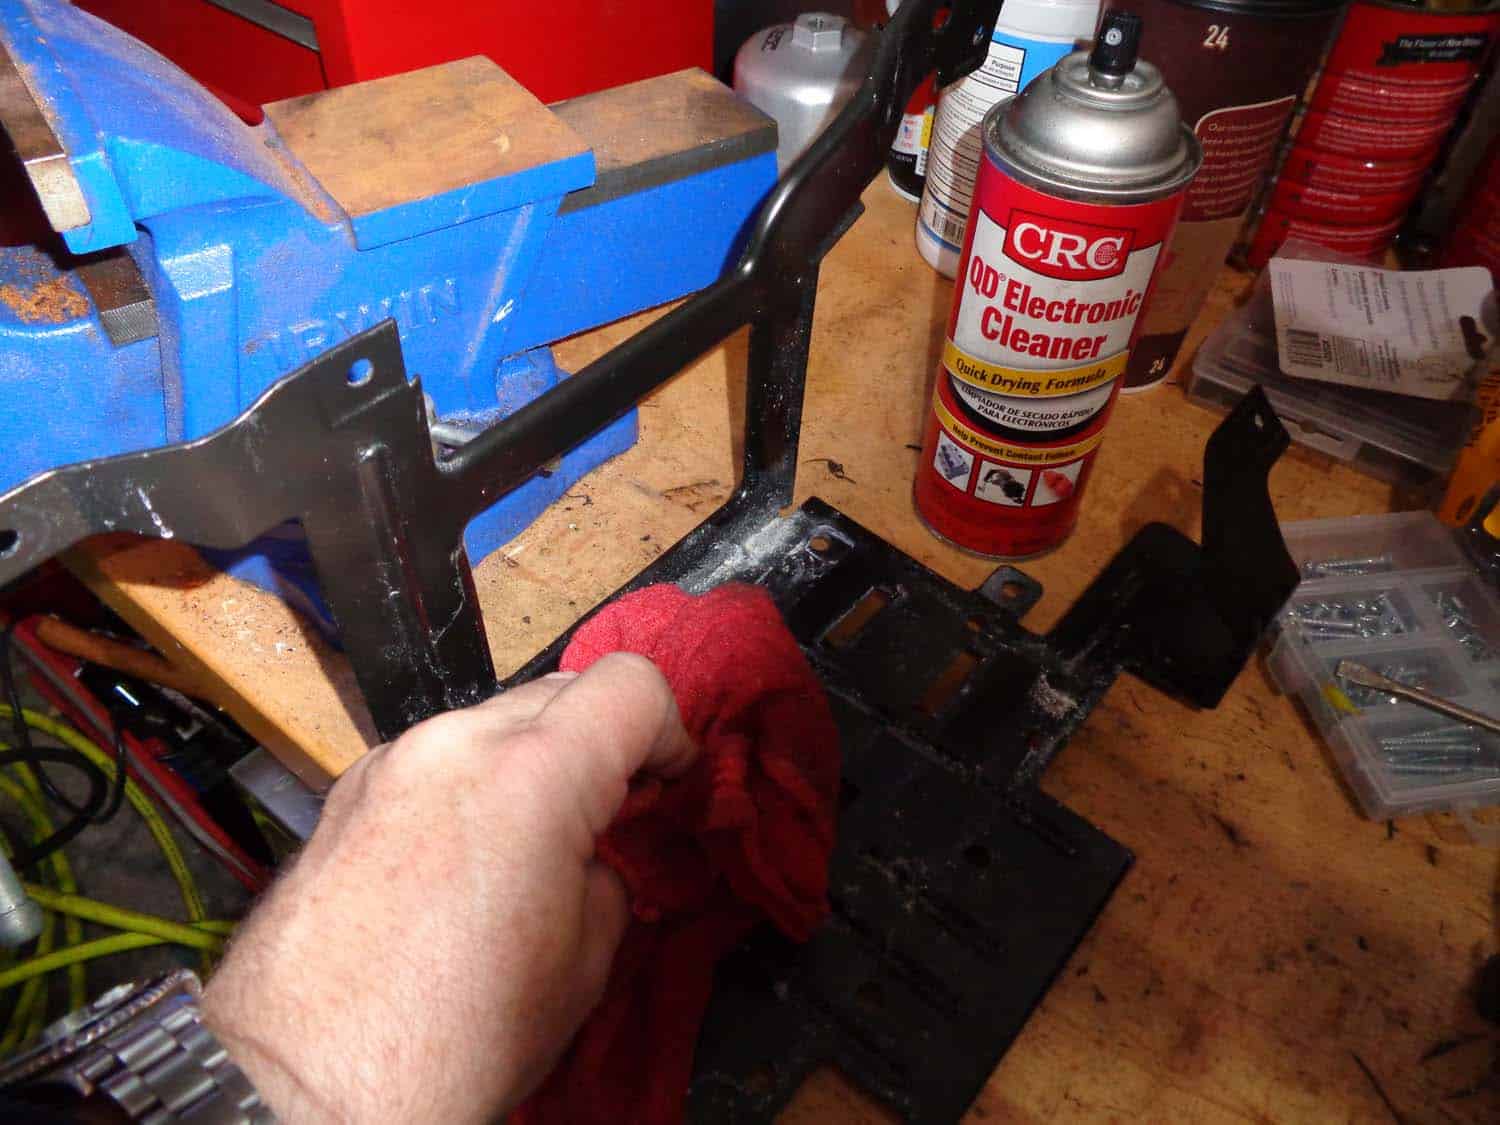
- Spray amplifier cover and mounting bracket with CRC and scrub with toothbrush to remove water and mineral deposits. Wipe with a clean rag.
- Reassemble the amplifier in reverse of steps 1-3 above. Attach car's electrical connector to amplifier and test. Your amplifier should be working perfectly now. DO NOT bolt amplifier back into trunk well. You do not want to reinstall until you find and fix the source of the trunk leak.
BMW E90 Amplifier Water Damage Repair Finished