
Affiliate link disclosure – The BMW Repair Guide uses affiliate links in their site. For more information on affiliate links, please click here.
Repair Summary
This article gives detailed instructions on putting the MINI R56/R57 into its service position. Even though we used a 2007 MINI Cooper to perform this repair, this article can be applied to any 2006-2013 MINI vehicle with minor modifications to the repair steps.
Putting your MINI R56 in the service position is necessary prior to starting most repairs to the engine.
We would like to start off this article with a riddle; How do you repair a 251.3 pound, 4 cylinder Franco/German designed engine crammed sideways into the front of a compact car built in England? The answer is...you don't unless you pull the front of the car off so you can get your hands in the engine compartment.
The engines in the generation 2 MINI R56 (and its turbocharged sibling R57) were produced through a joint venture between the BMW Group and PSA Peugeot Citroën. The goal was to produce a compact fuel-efficient engine that could reduce CO2 emissions without sacrificing modern engine technologies. This new breed of small power units would carry over many of the advanced features found in the BMWs line of straight six engines.
The result of this cooperative effort between BMW and Peugeot was the creation of the Prince engine, more commonly known as the N12 and turbocharged N14. They were the main powerplants found in all generation 2 Mini Coopers and MINI Cooper S models produced between 2006 and 2013.
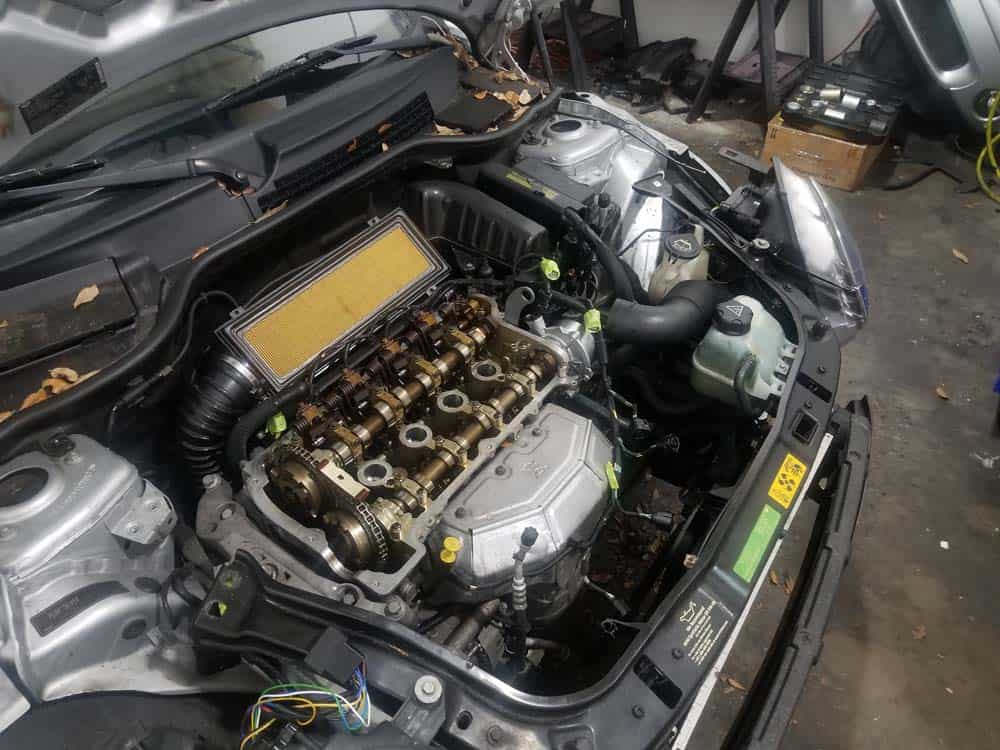
Due to the compact design of its body, it is virtually impossible to do any type of service or repair work on the sides of the MINI Cooper's engine in its natural configuration. To overcome this issue, BMW designed the front end of the MINI to be unbolted, allowing the front bumper and radiator support to slide out and away from the engine compartment. This action is called putting the MINI in its "service position".
A MINI R56 service position procedure is very straightforward, and with a little practice can be done quickly and efficiently. It will take about an hour your first time doing it...but with practice, it can easily be done in 30 minutes or less. It involves disconnecting any parts connected to the bumper and radiator support of the vehicle, then unbolting the front end and sliding it out and away from the vehicle. It is a necessary evil that must done when performing many maintenance and repair items inside the engine compartment including oil filter housing gasket replacements and the infamous timing chain replacement. You do not have to perform a MINI R56 service position procedure for any repair on the top of the engine, such as tune-ups or valve cover gasket replacements.
There are no parts needed for this repair, although we do suggest purchasing some wheel arch trim clips to keep on hand. The front wheel arch trims must be removed during a MINI R56 service position procedure, and you will most likely break a couple of their plastic clips during this process. We have provided a link below to purchase them for your convenience.


View the detailed parts diagram for this repair.
Includes detailed part diagrams, part numbers and links to purchase all of the required components needed to complete this repair.

Before starting this repair, you must have the following required parts.
All MINI R56/R57 models
This trim clip attaches and secures many piece of trim on your MINI exterior. Great to have in case of replacement or removal of trim panels as these tend to break on removal.
Section 1 - Removing the Front Fender Trims
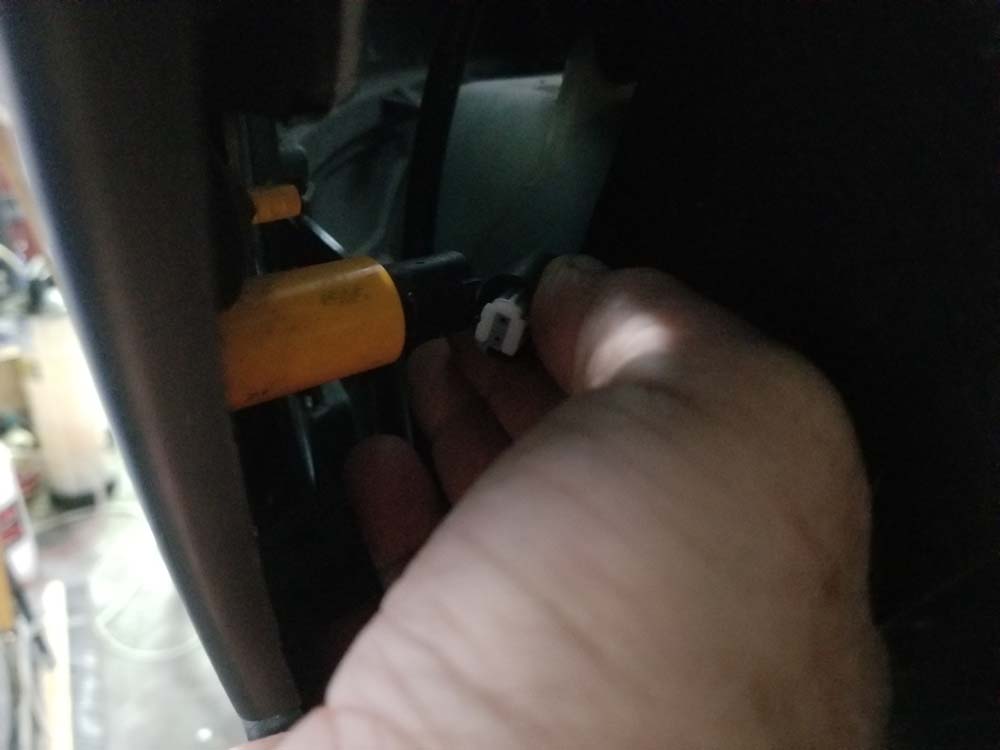
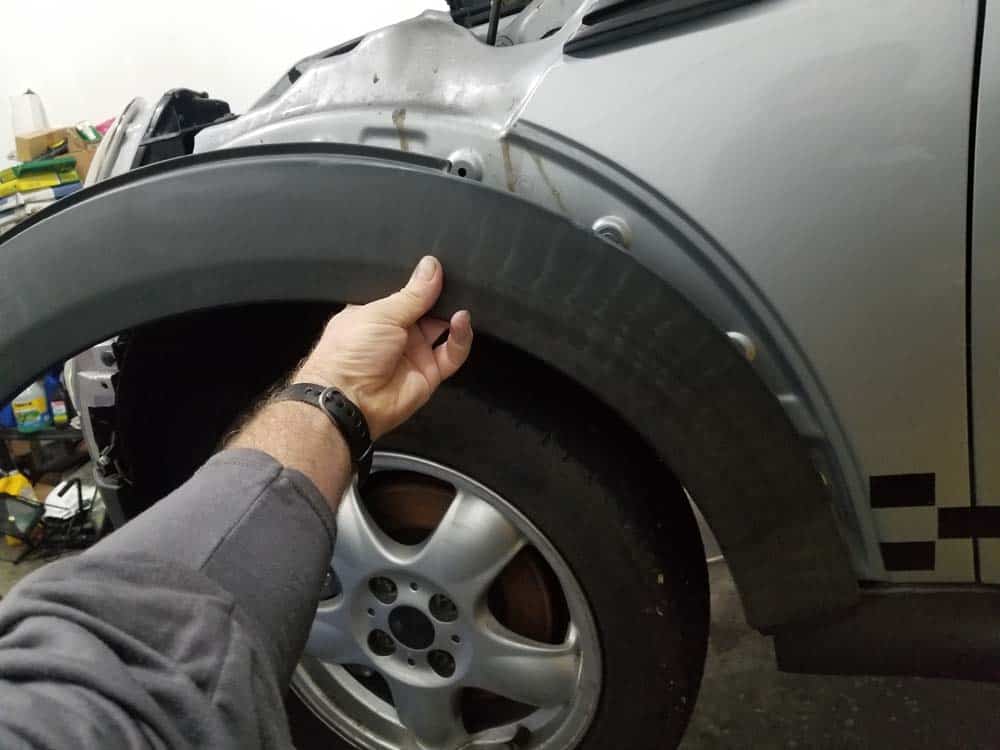
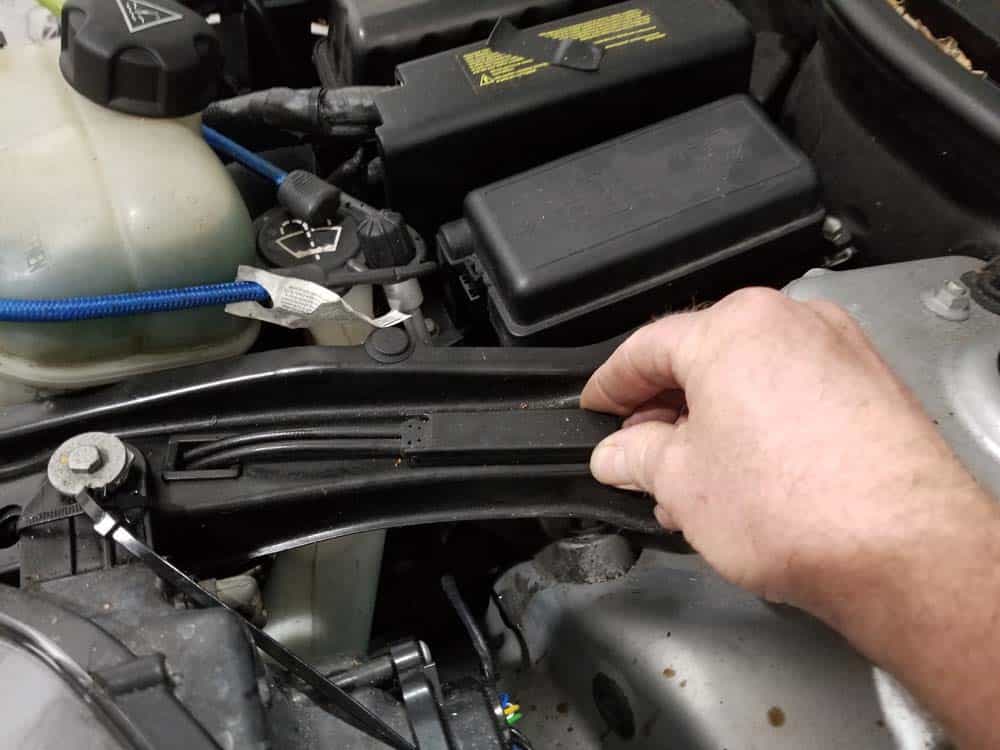
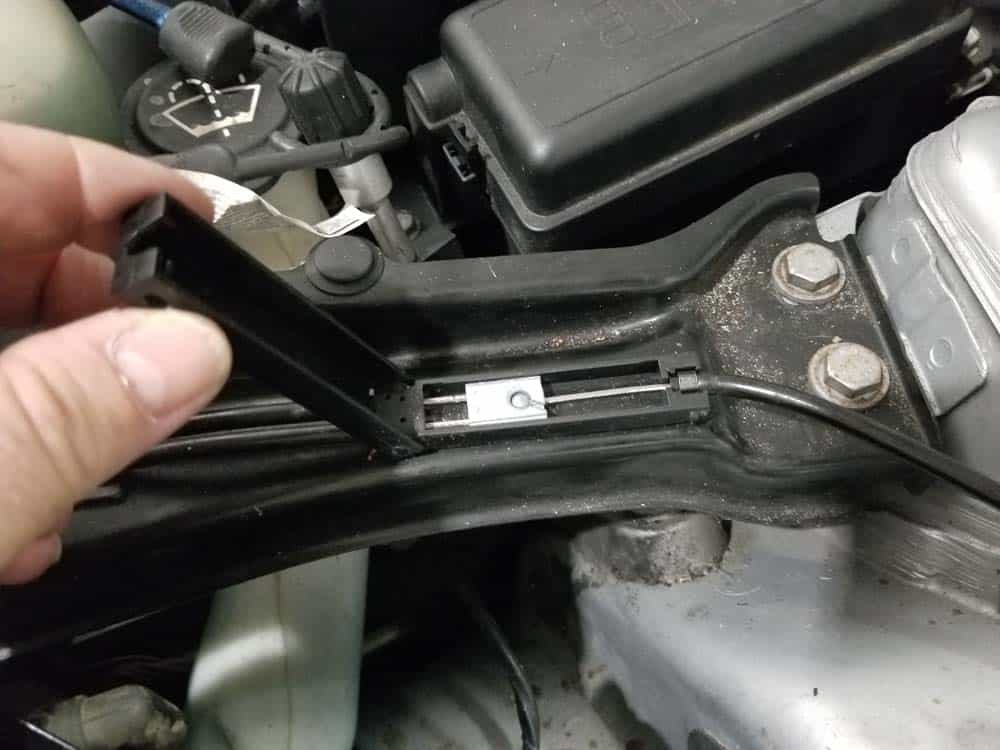
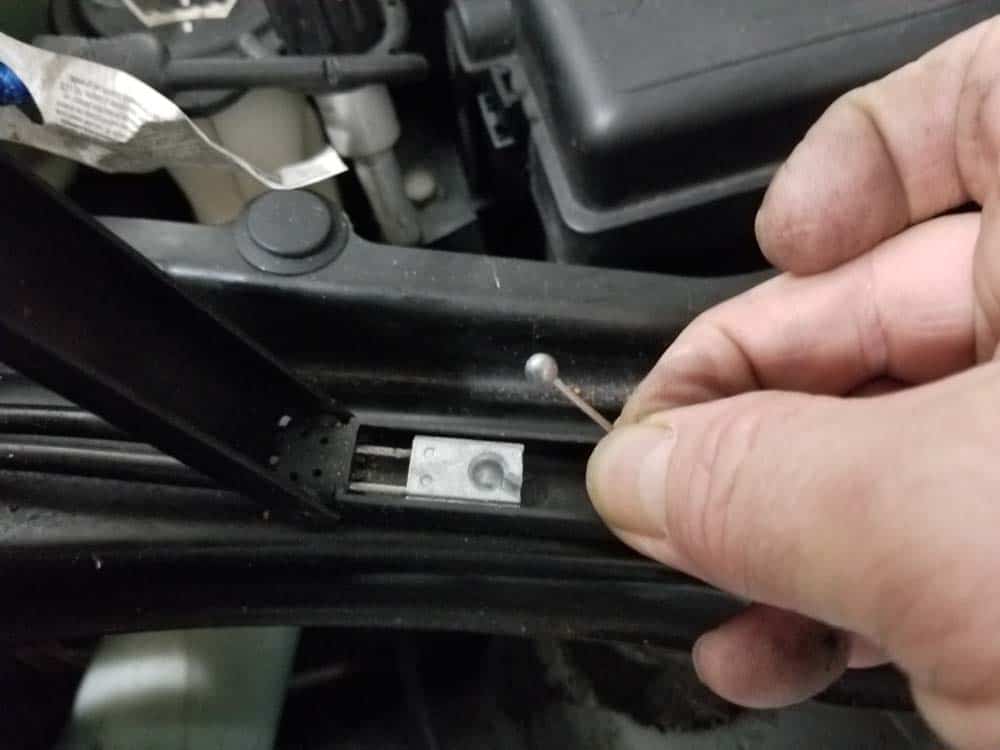
Two of the bolts securing the front end in place are located underneath the front fender trims. Fender trim removal is easy...just remember that you will probably break a couple plastic clips in the process. We have once again supplied a re-order link below for the clips.- Start on the left side of the car. Gently pull back the wheel liner to expose the side marker light electrical connection. Disconnect the light.
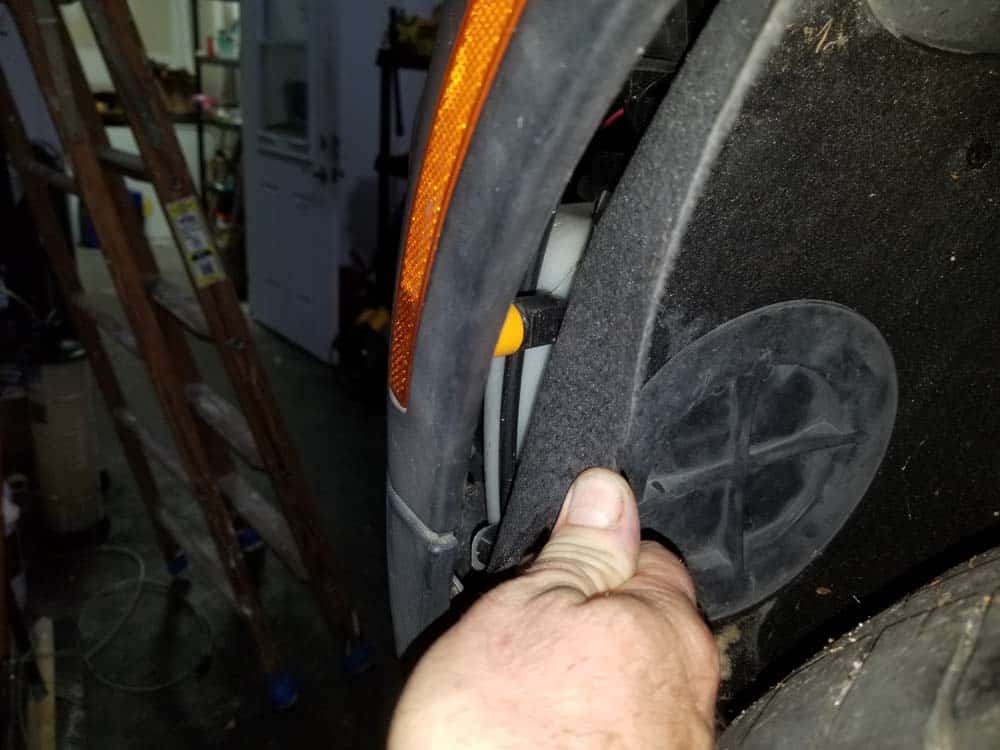
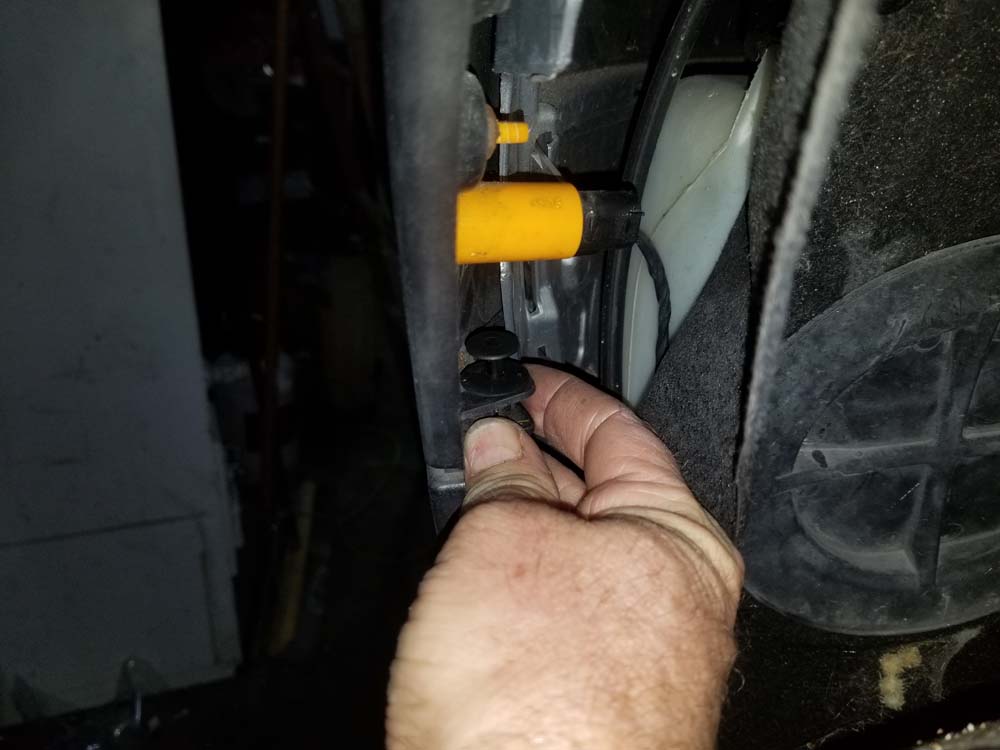
- Remove the black plastic rivet under the marker light.
- Grab the front of the fender trim and pull directly away from the car until the plastic trim clips release from the vehicle. Continue pulling until the trim is completely free from fender. You will most likely break some trim clips while removing...you can reorder new clips here.

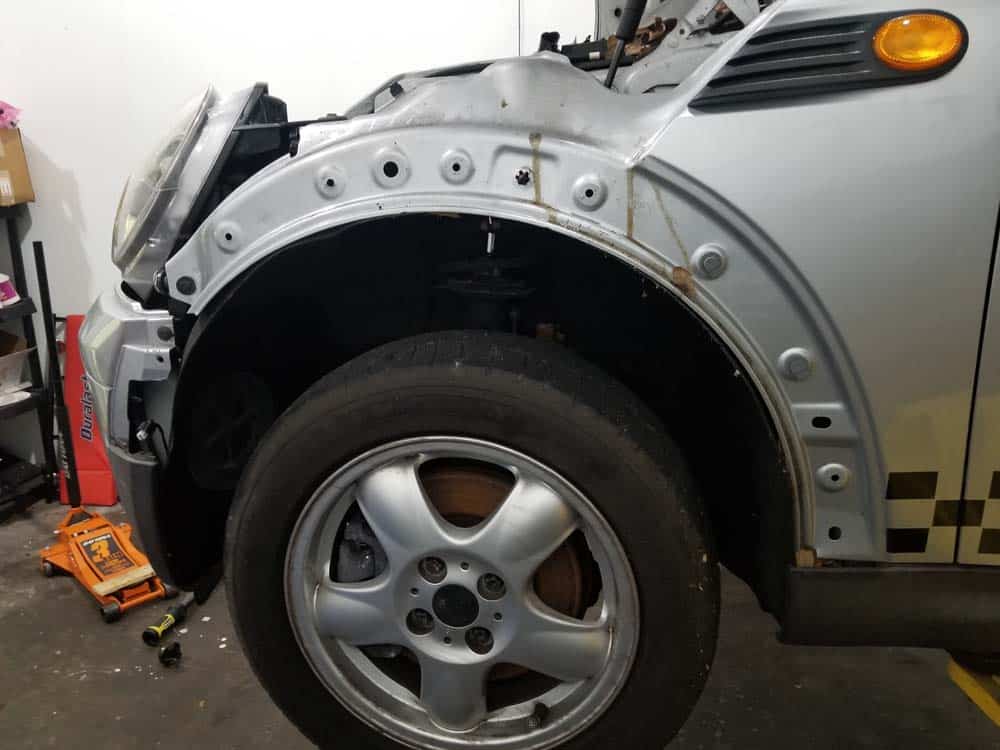
- Next, remove the 10mm bolt connecting the front of the fender to the bumper.
- Repeat on right side fender trim.
Section 2 - Removing the Front Bumper Cover
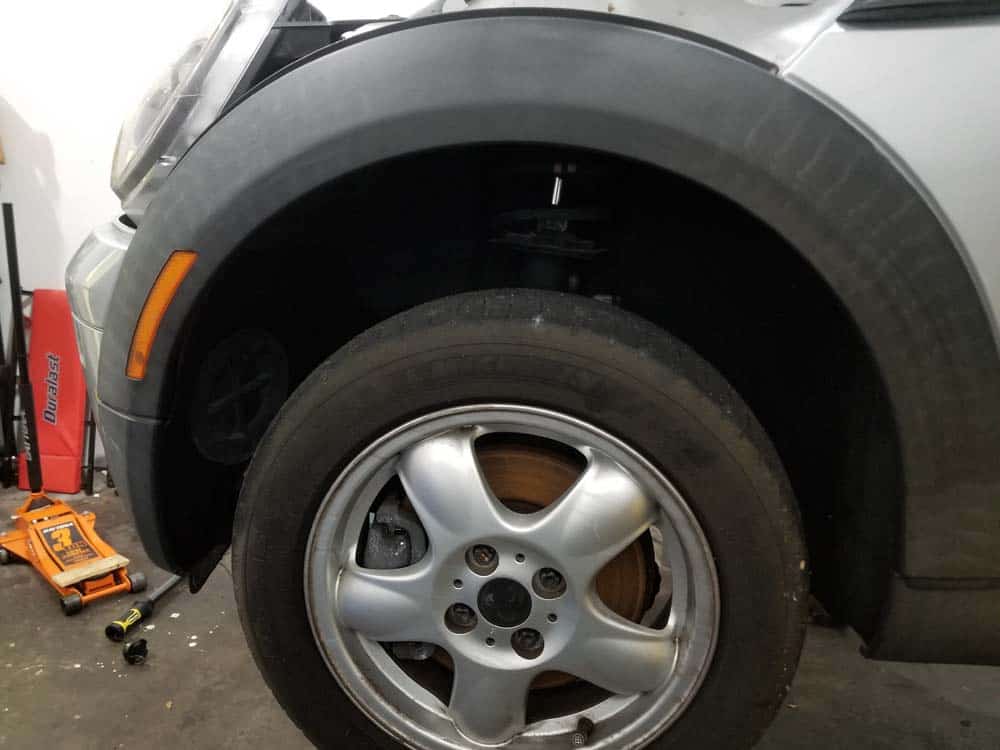
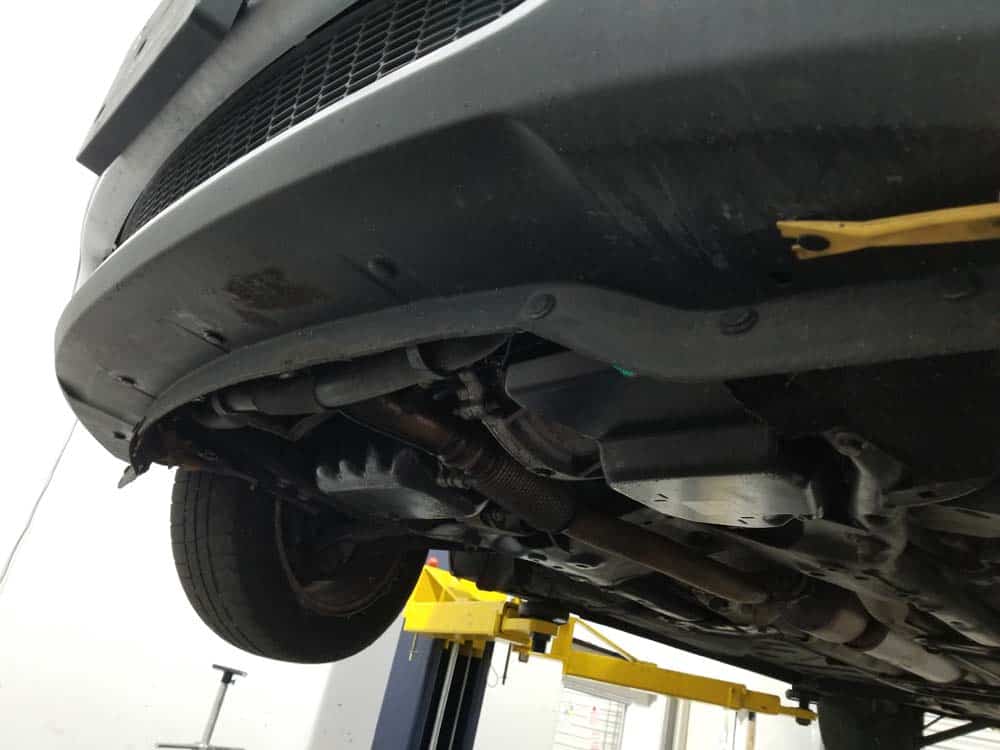
The front bumper cover must be removed to access more bolts anchoring the front end of the vehicle to the frame.- Jack and support the front of your vehicle using the jack stand method as shown in our article BMW Jacking and Supporting for Repairs and Maintenance.
- Starting on the left side of the vehicle, use a T25 torx bit to remove the bolt anchoring the side of the bumper to the frame. Repeat on the right side.
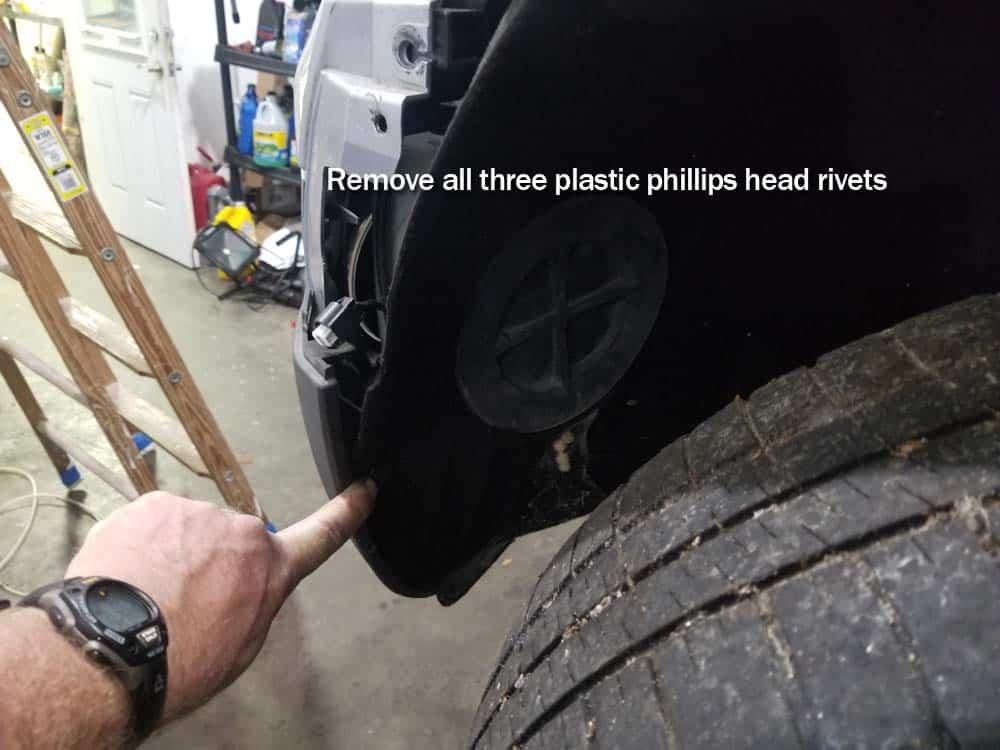
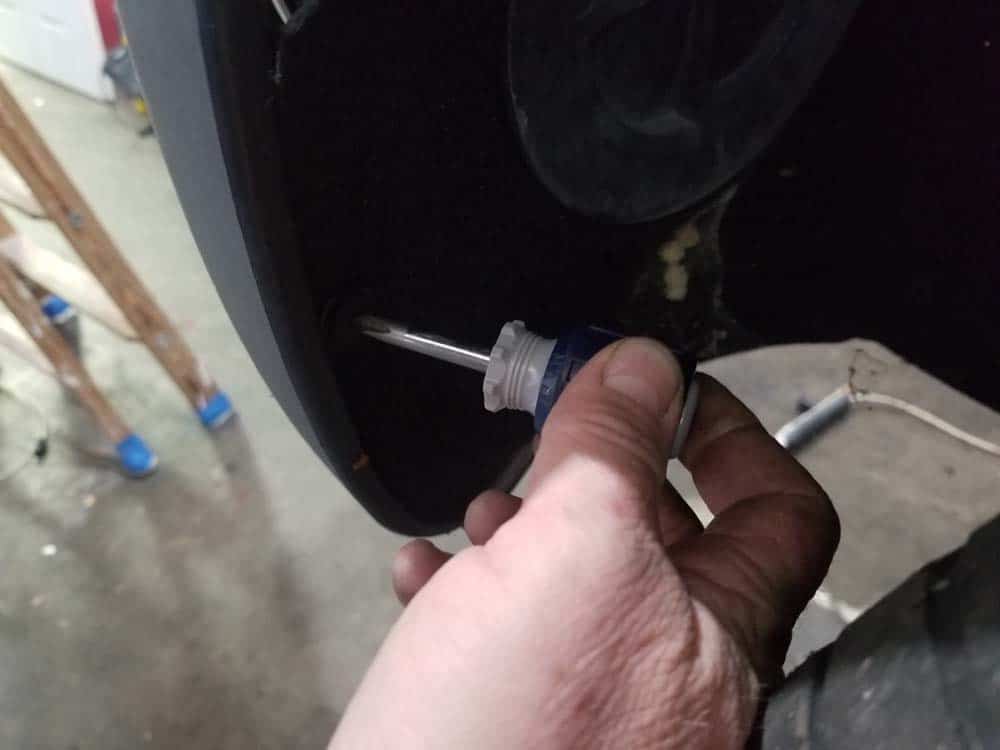
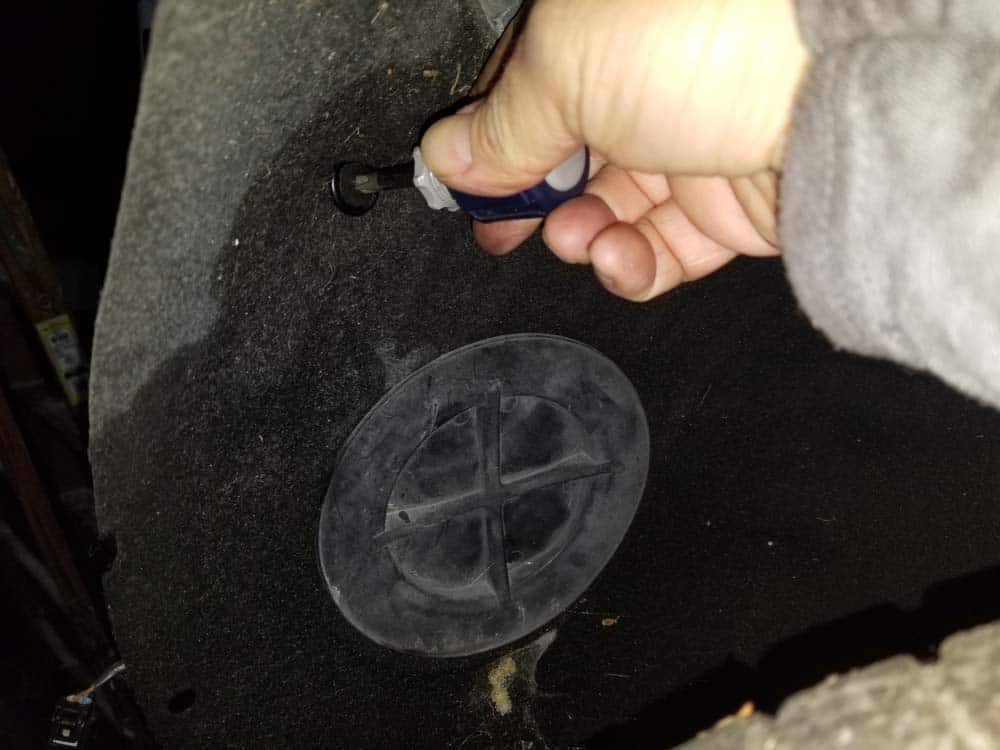
- Next, remove all three plastic phillips head rivets located in the wheel well in front of the tire. Even though only the bottom one is holding the bumper cover, the other two must be removed in order to slide the front end of the car into its service position (see section 4 below). They should come out with a phillips screwdriver...if not they may need a little “help” with a plastic trim removal tool. Repeat on the right side.
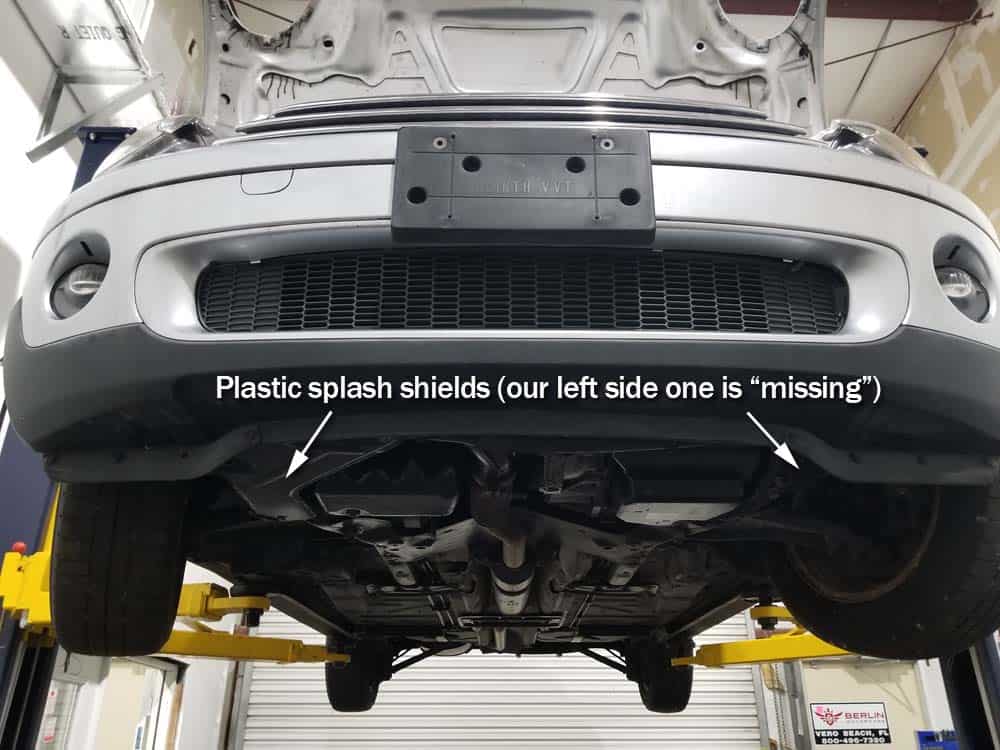
- Move underneath the front end of the vehicle. Start by using a phillips screwdriver to remove the engine splash shields (if they are present...on a lot of cars one, or both, may have “disappeared” over the years).

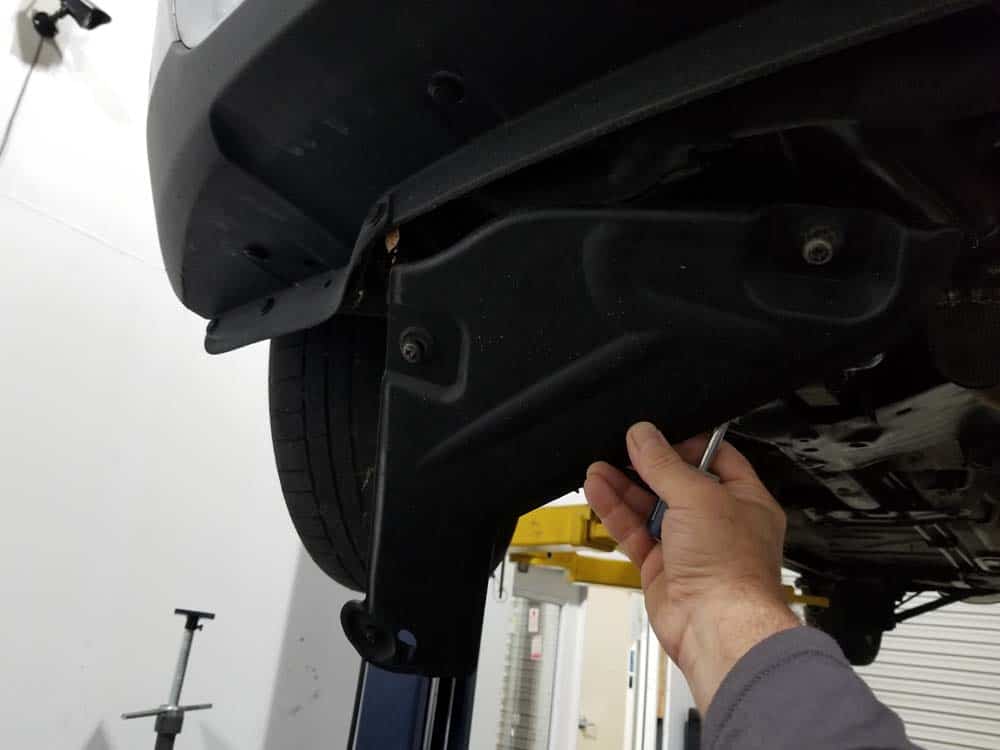
- Next, use a plastic trim tool to remove the five plastic rivets securing the bottom of the bumper cover to the frame of the vehicle.
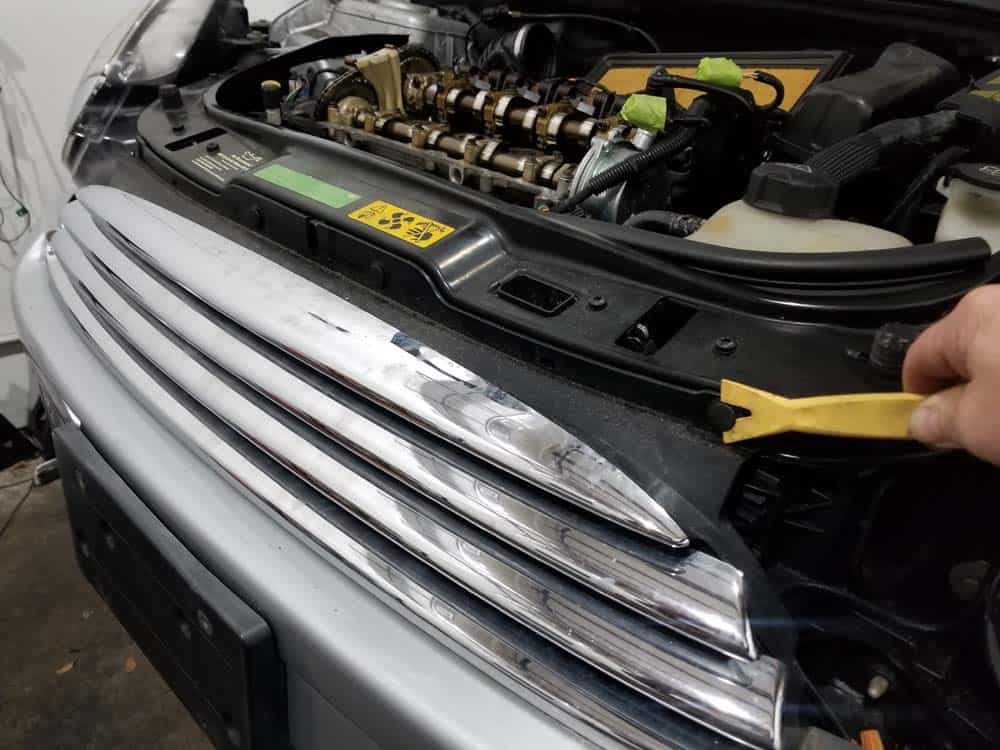
- Remove the four plastic rivets attaching the top of the grill to the radiator support.
- Finally, reach behind the bumper cover and disconnect the two fog lamps. The electronic connectors release by pressing down on the plastic tab as shown below.
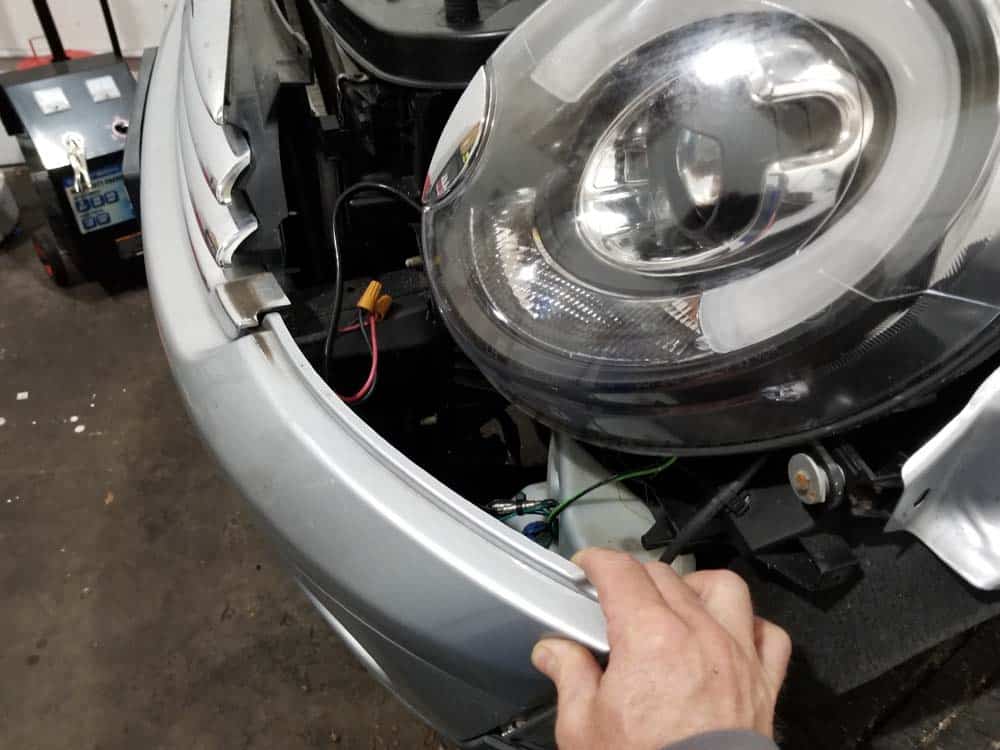
- Grasp the bumper cover and remove from the vehicle.

Section 3 - Disconnecting Engine Compartment Components
Disconnecting the engine compartment components attached to the front end of vehicle is a very simple task. The goal is to make sure there is nothing attached to the bumper or radiator support that will impede sliding the front end out away from the car.- Moving to the engine compartment, start by removing the rubber weatherstriping from the radiator support.
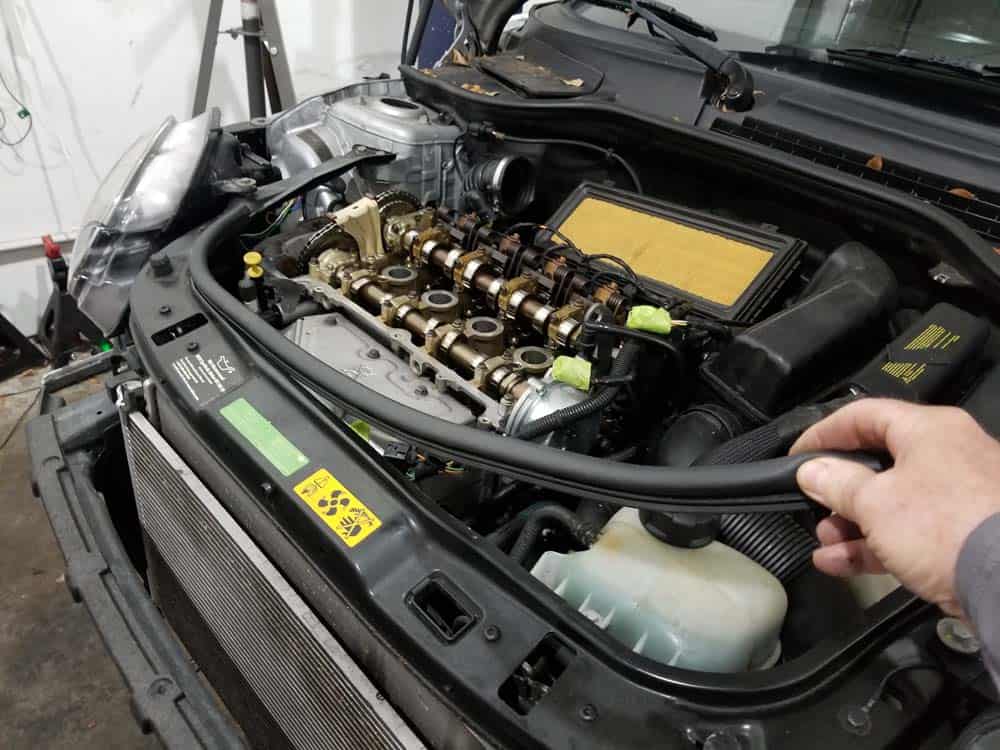
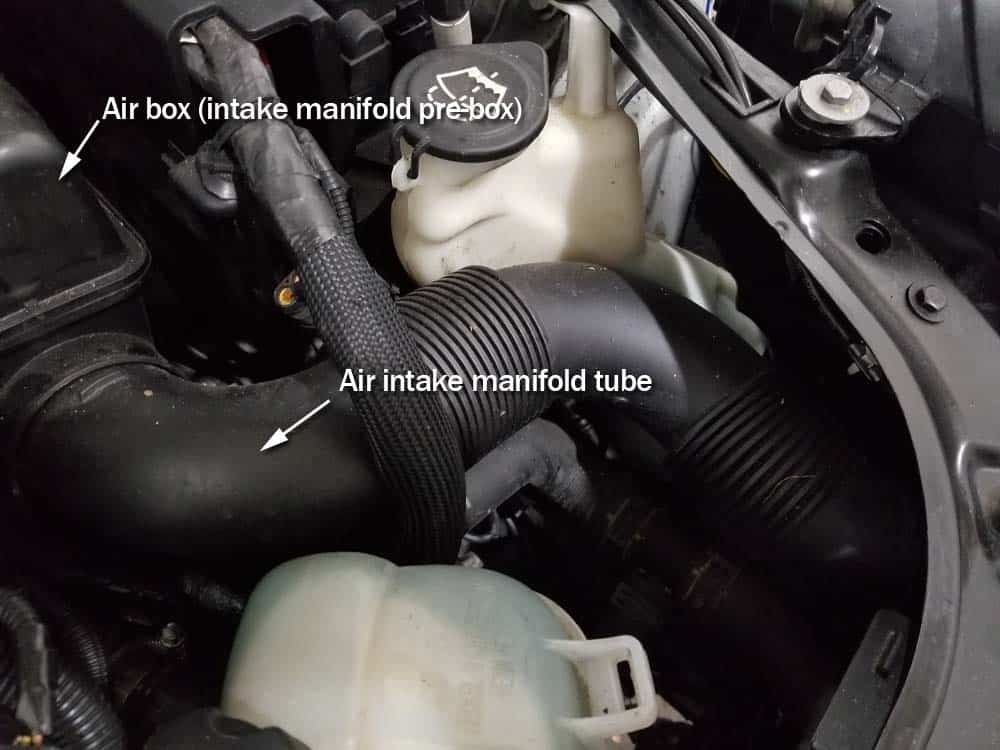
- Remove the air intake manifold tube from the air box (a.k.a. intake manifold pre-box). It simply pulls loose. Note - Since we are removing the intake manifold tube from the air box and not the bumper, there is no need to remove the coolant fluid reservoir from it’s bracket.
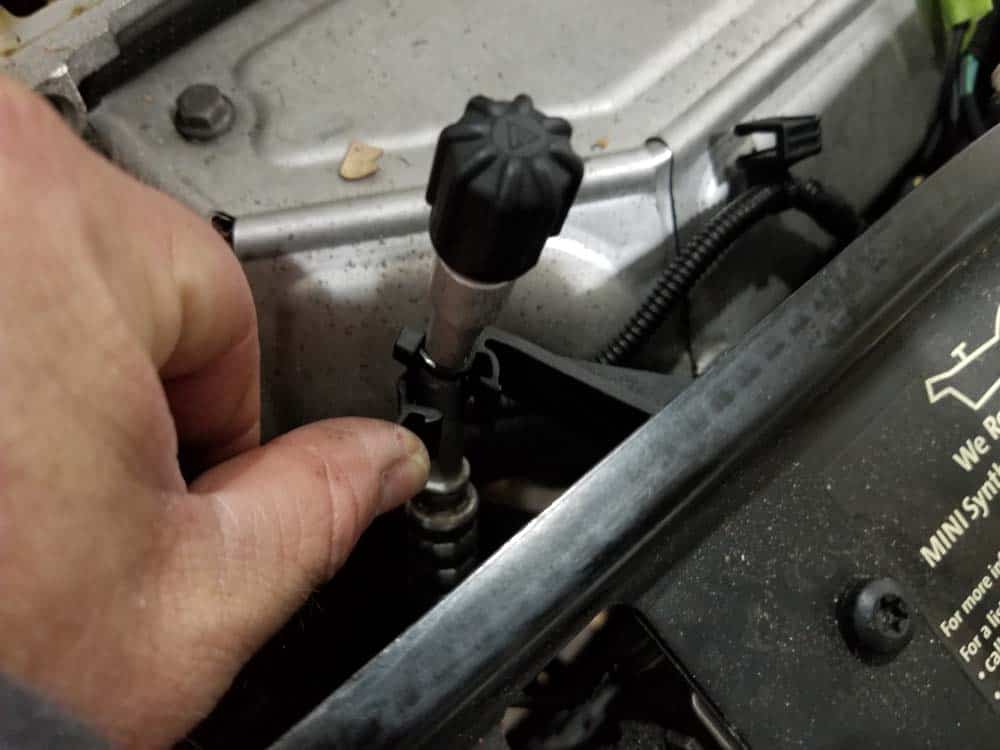
- Disconnect the hood release cable by opening the lid on the plastic housing and removing the cable (see images below).
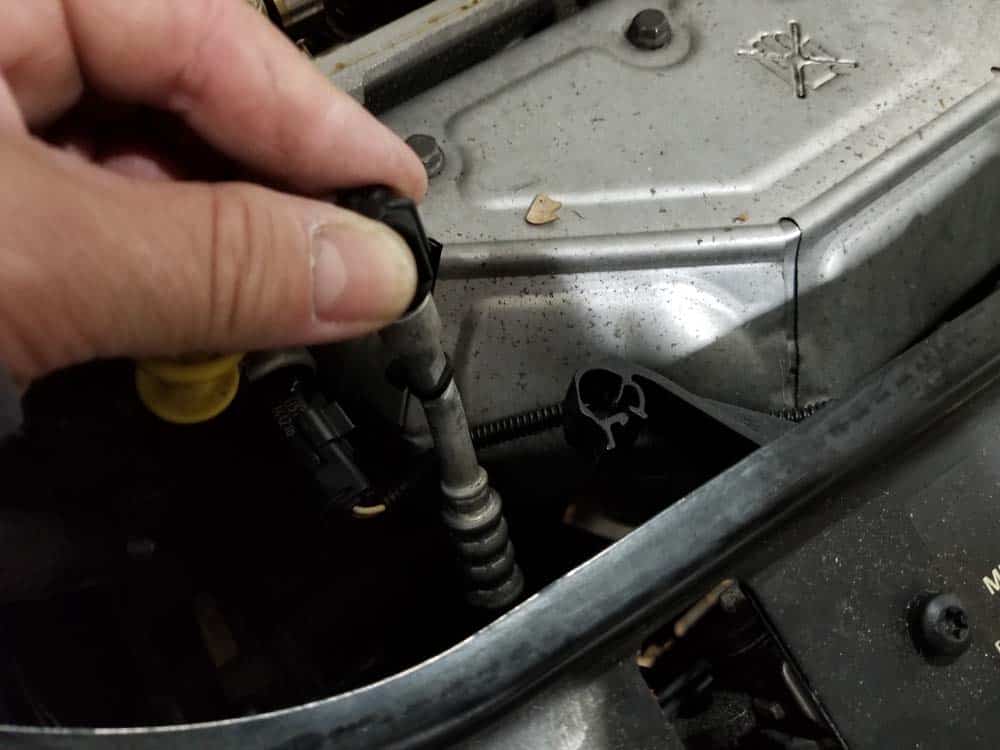
- Remove the air-conditioning suction pipe by releasing the plastic clip and gently pushing out of the way.
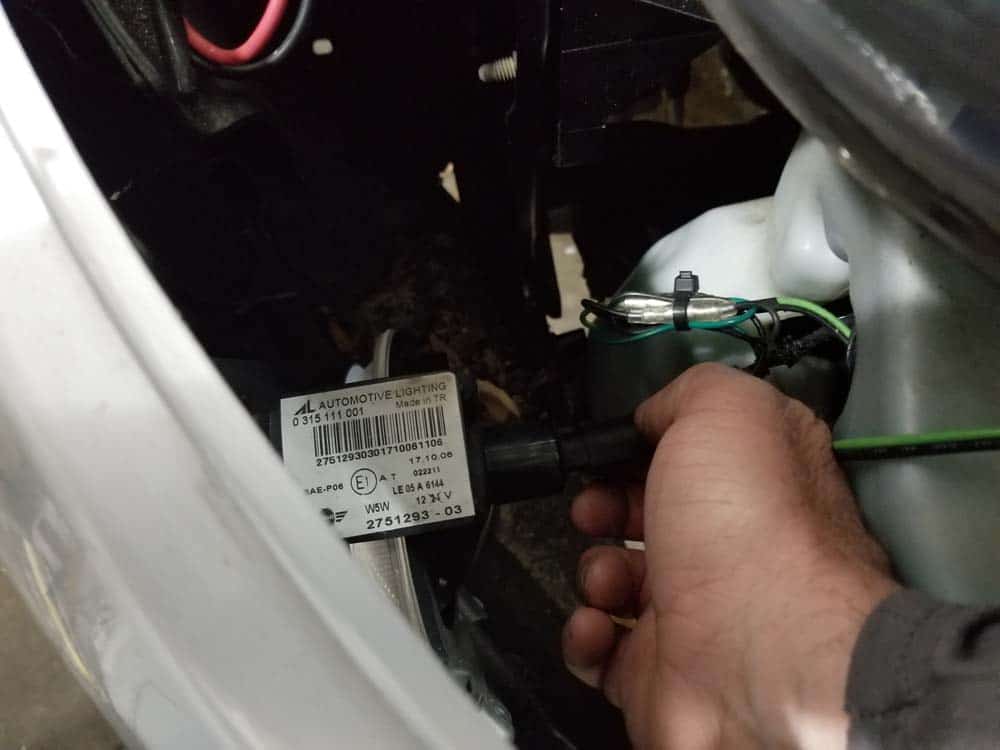
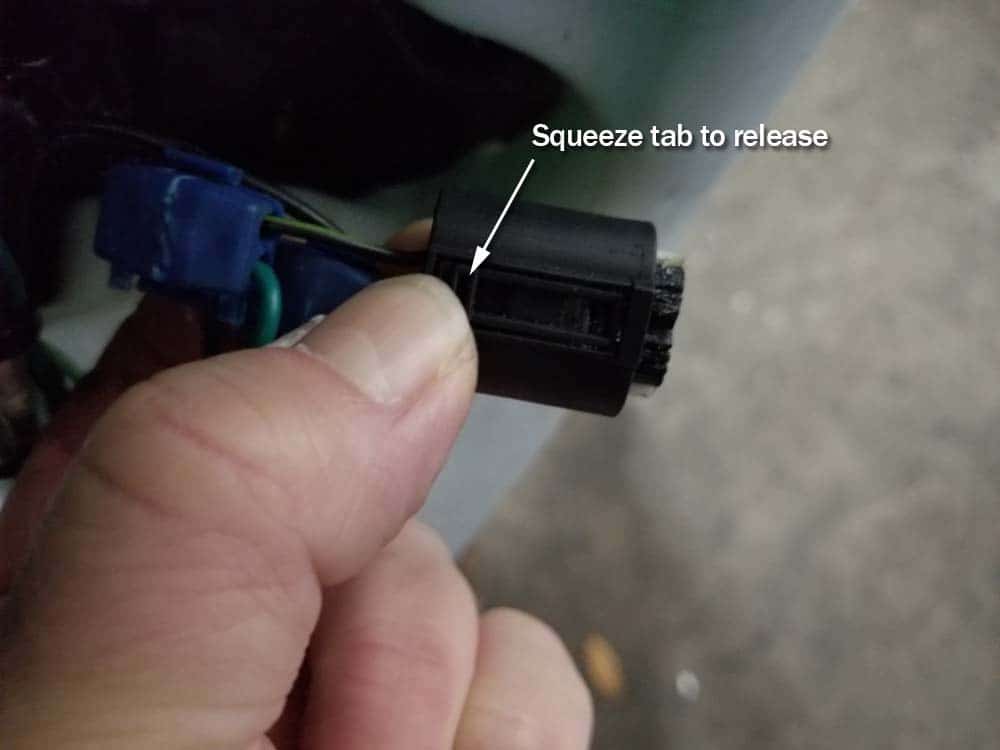
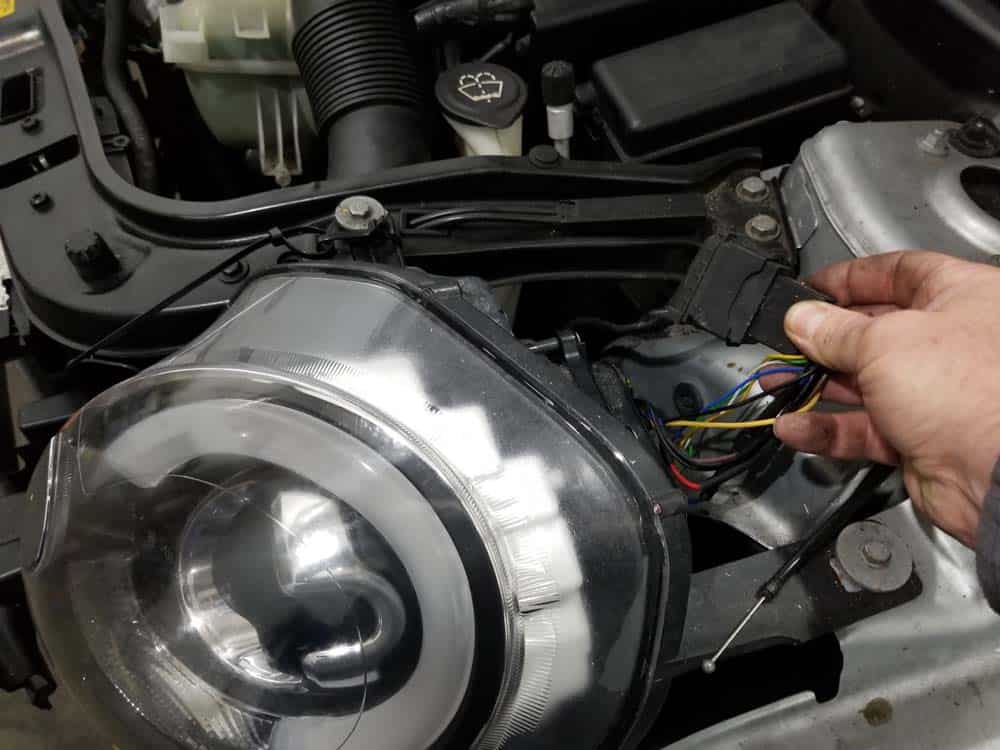
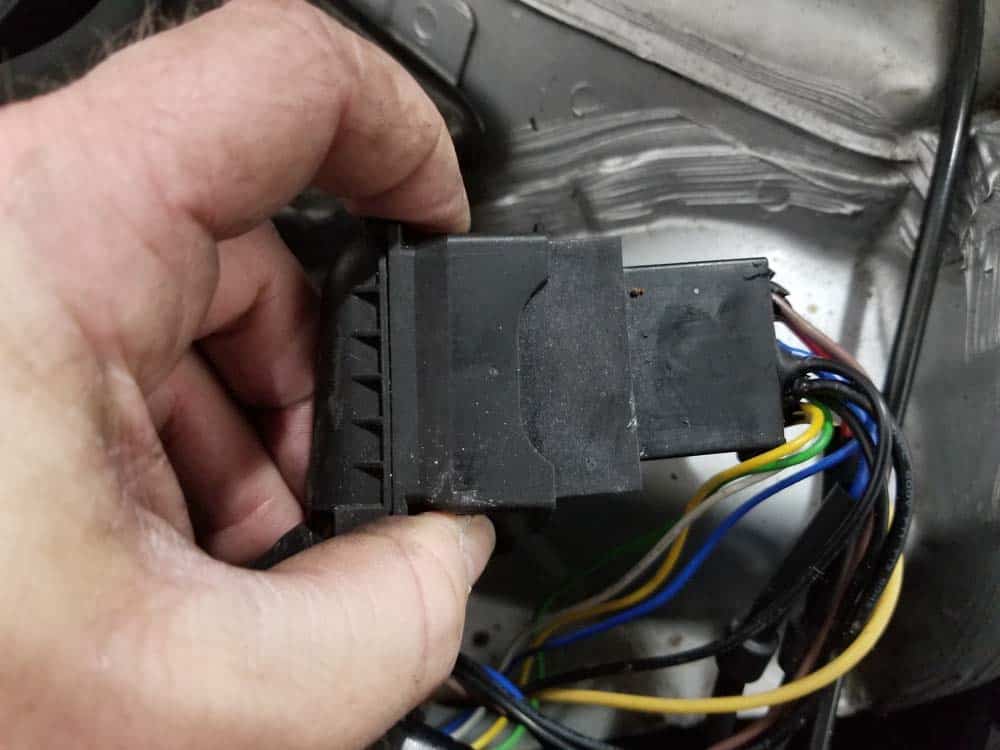
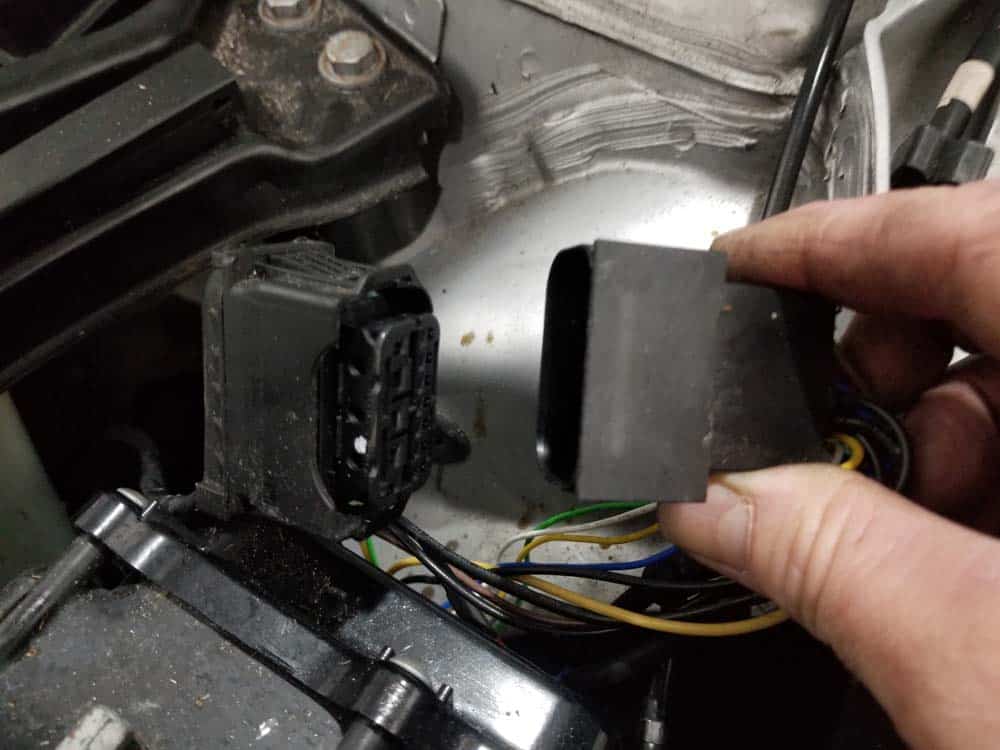
- Disconnect the headlights by squeezing the connector with two fingers to release (see images below).
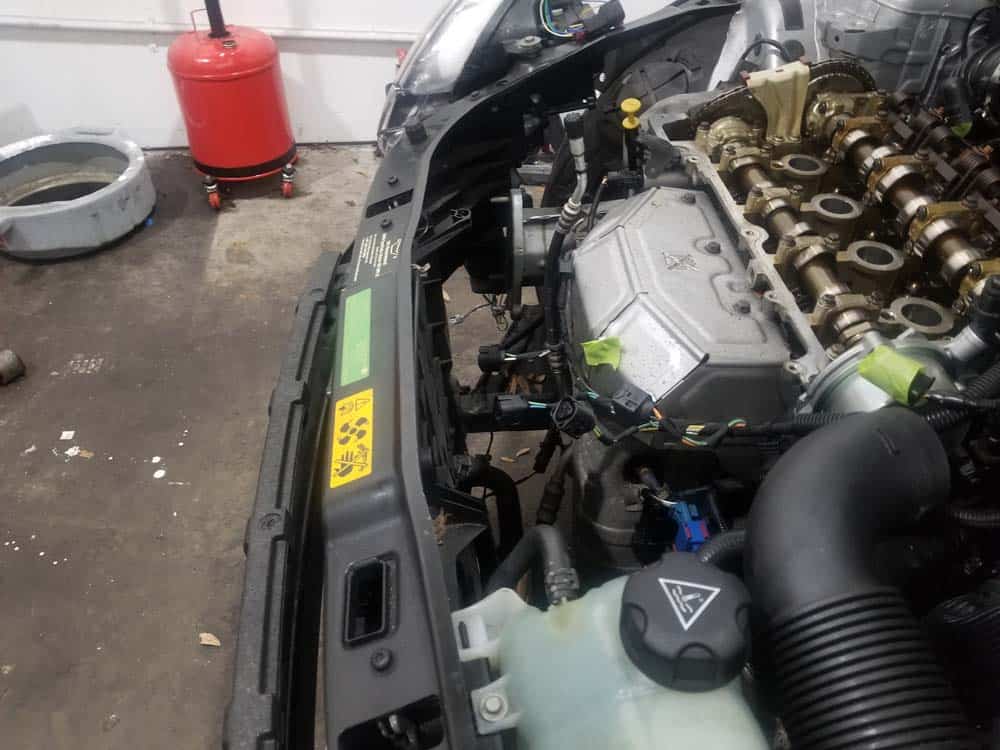
Section 4 - Sliding Frame Into the MINI R56 Service Position
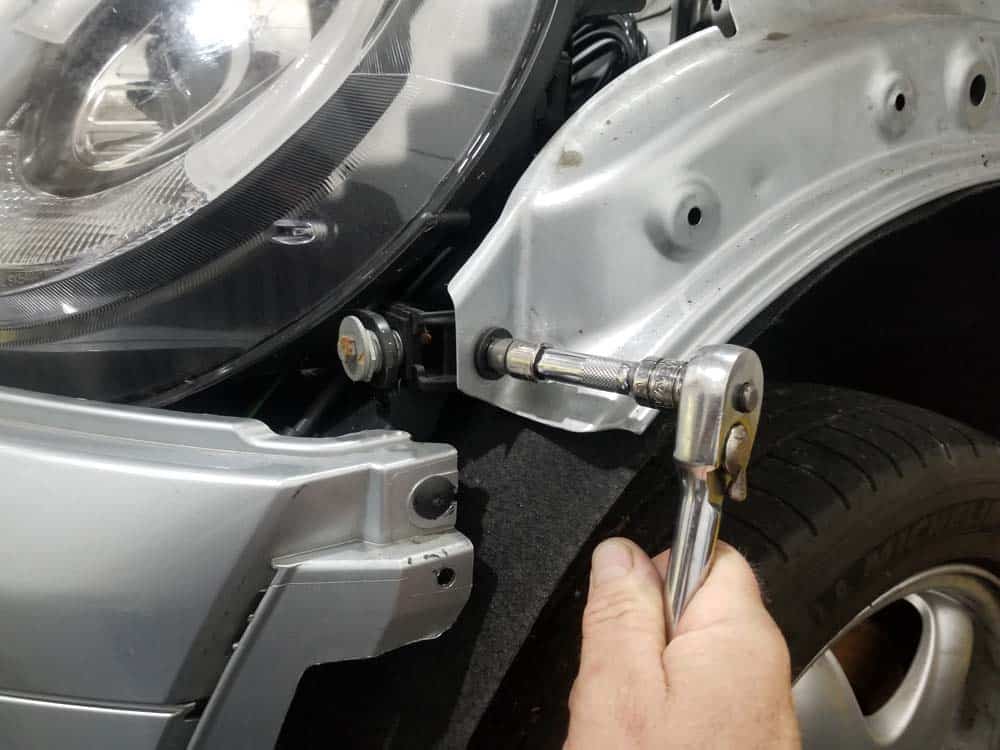
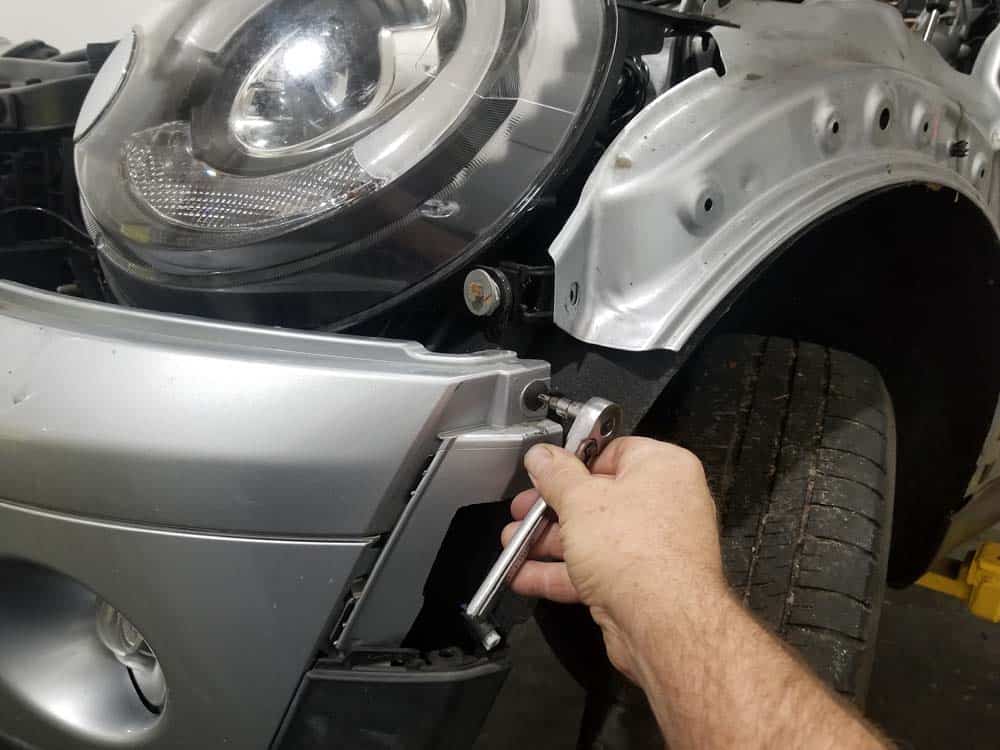
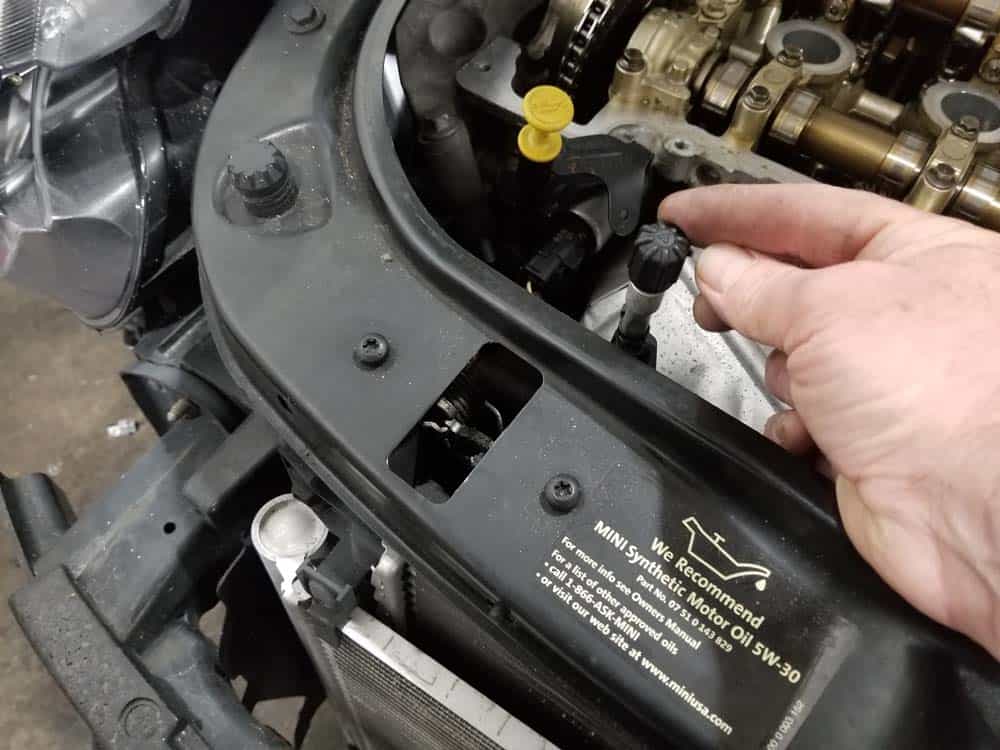
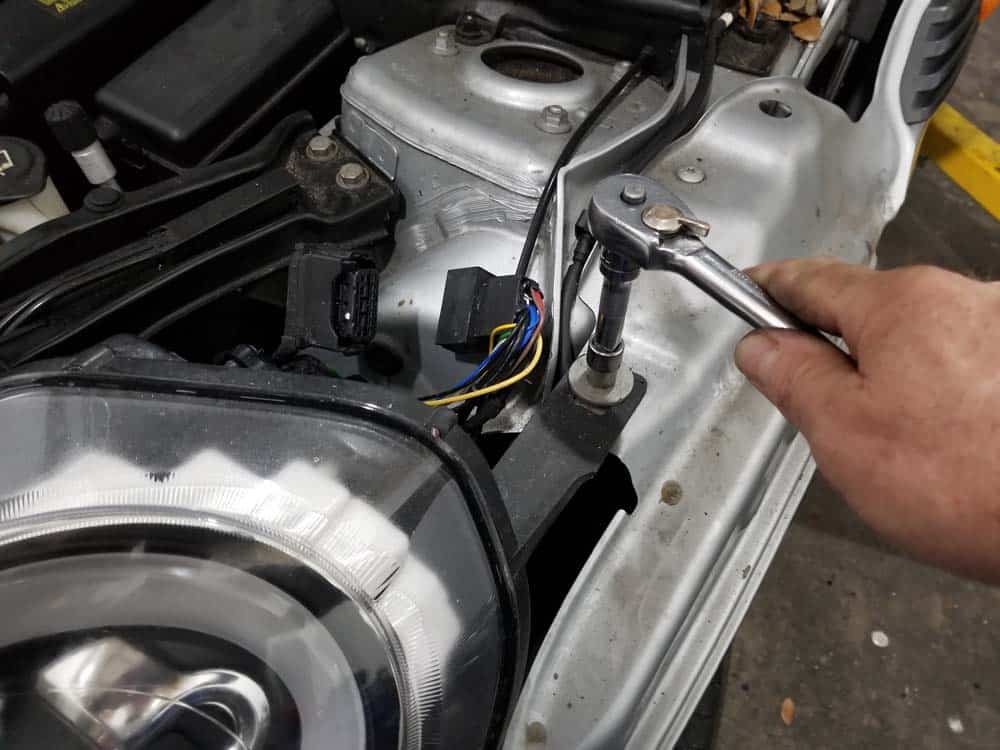
The final steps in the MINI service position procedure require removing the last nuts and bolts securing the front end to the vehicle. Once these are removed, the front end can be safely pulled away from the vehicle.- Using a 10mm socket wrench, remove the two M6 bolts anchoring the headlight frames to the body of the car. The torque values for these bolts when you reinstall them is 10 Nm (7.5 ft-lb).
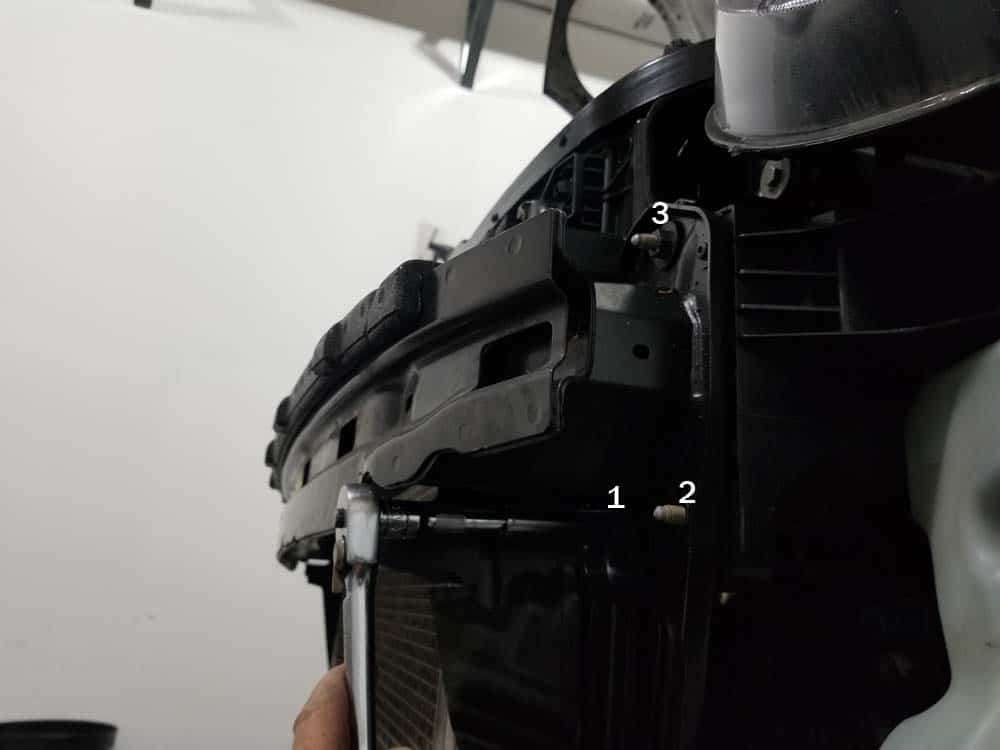
- Use a 13mm socket wrench to remove the two M8 bolts securing both sides of the radiator support to the body of the vehicle. The torque values for these bolts when you reinstall them is 24 Nm (18 ft-lb).
- Moving to the lower section of the front end, use a 13mm socket wrench to remove the three nuts anchoring both sides of the bumper to the frame of the car. The torque value on these nuts when you go back to reinstall them is 24 Nm (18 ft-lb).
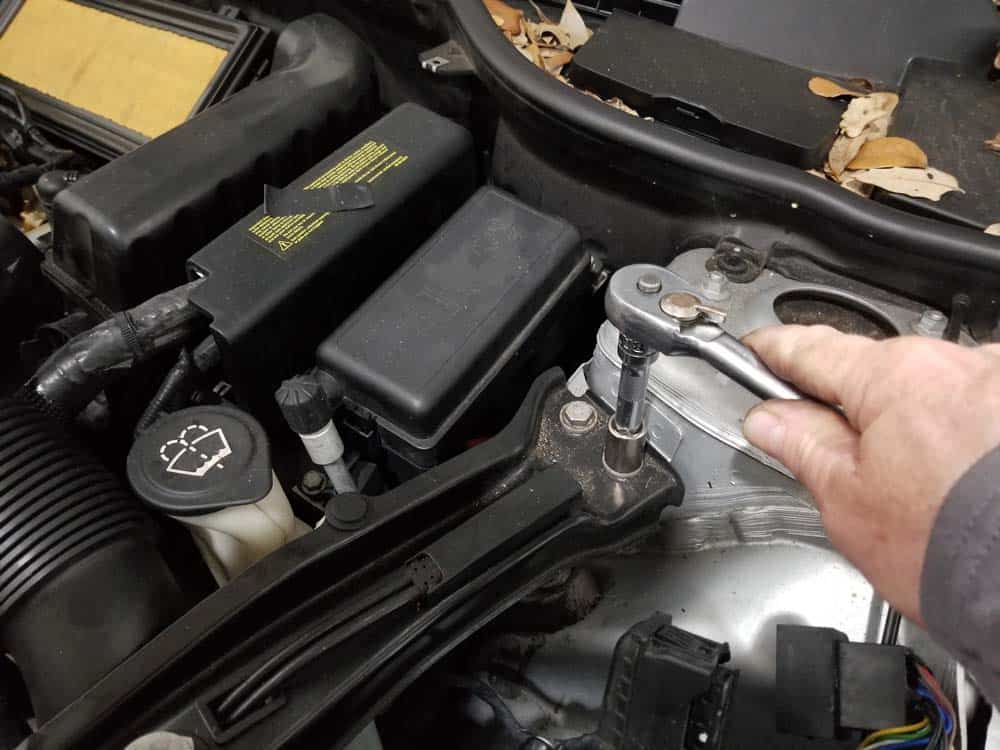
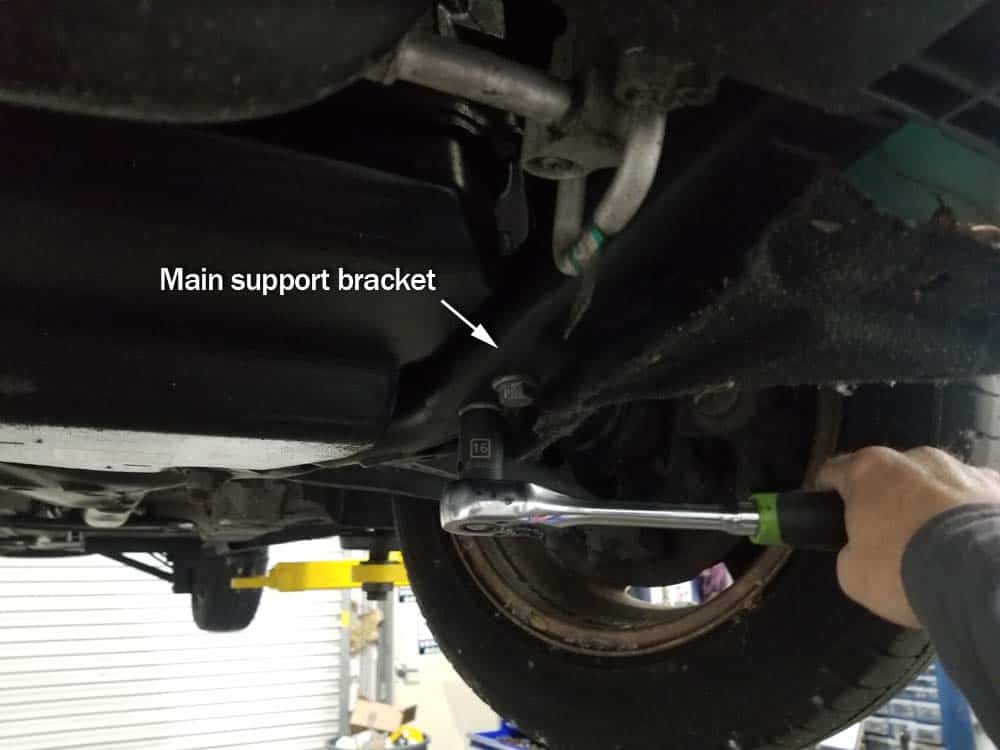
- Finally, moving back under the car, use a 16mm socket wrench on each side of the frame to remove the main support bolts. These bolts can be torqued tight...use a breaker bar if necessary. The torque values for these bolts when you reinstall them is 115 Nm (84 ft-lb).
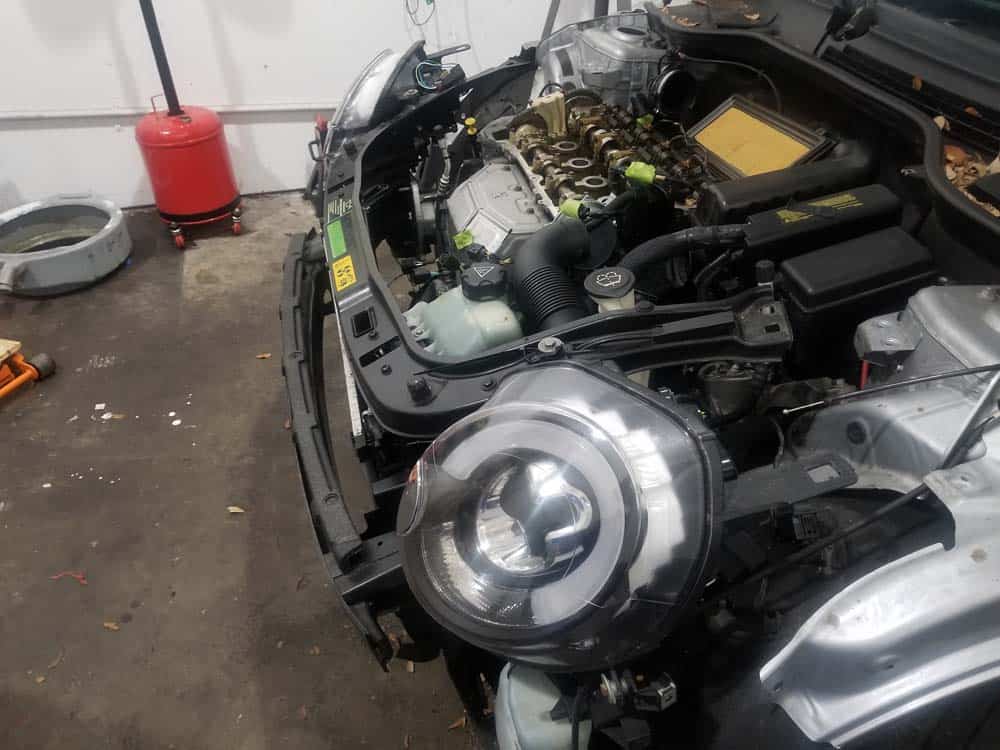
- Stand at the front of the vehicle and grasp the bumper with both hands (like the fat guy is doing in the photo below). Pull on the bumper until the front end of the car slides out of the lower main support and away from the engine compartment. If it is stuck, try rocking the bumper back and forth while pulling.

- The car is now in its service position.
Section 5 - Reassembling the Vehicle
Reassembling the vehicle is done in the exact reverse of the steps above. We have included torque values (for the bolts and nuts that require it) in the above steps. Here they are again for your convenience:
Main support bolts M12 - 115 Nm (84 ft-lb)
Bumper to frame nuts M8 - 24 Nm (18 ft-lb)
Radiator support bolts M8 - 24 Nm (18 ft-lb)
Headlight frame bolts M6 - 10 Nm (7.5 ft-lb)MINI R56 Service Position Procedure Finished