
Affiliate link disclosure – The BMW Repair Guide uses affiliate links in their site. For more information on affiliate links, please click here.
Repair Summary
The following article gives detailed instructions on replacing the intake manifold gaskets in a MINI R56 Cooper car. Even though we have used a 2007 MINI Cooper to perform this repair, this article can be applied to any 2006-2013 (second generation) MINI R56/57 vehicle with minor modifications.
A MINI R56 intake manifold gasket replacement may be necessary if your Generation 2 Cooper is experiencing a rough idle, stalling or exhibiting overall poor performance.
One of the main causes of a rough idling engine in MINI Generation 2 cars is leaking intake manifold gaskets. As the intake manifold gaskets age, they become hard and brittle, losing their elasticity. This loss of elasticity causes the intake manifold to lose its airtight seal with the cylinder head, allowing unmetered air to be sucked into the engine.
Since the cylinder's air to fuel ratio is precisely monitored and controlled by your MINI's DME (engine control module), any unmetered air that enters the system can create issues. Symptoms of leaking intake manifold gaskets include a rough idle, backfiring, stalling, and overall poor performance. Leaking intake manifold gaskets may also trigger the "service engine light" in the instrument cluster, as well as display several fault codes on a diagnostic scanner.
Removing the MINI R56 intake manifold is necessary in order to access the four sealing gaskets. It is a relatively straightforward repair that does not require putting the MINI in its "service position"; the intake manifold can be easily accessed from the top of the engine. We do strongly recommend replacing the gasket on the throttle body when performing this repair; the MINI R56 throttle body gasket is another common source of air leakage that is easily replaced.


View the detailed parts diagram for this repair.
Includes detailed part diagrams, part numbers and links to purchase all of the required components needed to complete this repair.

Before starting this repair, you must have the following required parts.
All MINI R56/57 vehicles
This gasket fits between the engine head and the composite material intake manifold. Needed when there is an air leak or removing the intake for installation.
All MINI R56/57 vehicles
This single profile gasket mounts to the side of the intake manifold near the throttle housing.
All MINI R56/57 vehicles
The air filter removes soot, carbon, abrasives and other contaminants from the air before the air mixes with fuel in the engine induction system. Like oil filters, air filters can be easily overlooked. They often don't get replaced until they are absolutely clogged with dirt and soot and this simply isn’t good for your vehicle.
Section 1 - Preparing the Engine for Removing the Intake Manifold
The MINI R56 intake manifold is located on the back of the engine behind the valve cover. The MINI R56 engine compartment is very compact, so there are several components that need to be cleared out of the way to make room for removing the intake manifold. Since the fuel injectors will need to be removed for this repair, now is a great time to replace them if they are due for servicing. For more information on replacing your fuel injectors, please see our article MINI R56 Fuel Injector Replacement – 2006-2013 Cooper – N12 (Non-Turbo).- Since you will be unplugging several critical electronic engine sensors during this repair, you must disconnect the negative battery terminal before starting. Disconnecting the battery can prevent serious damage to sensitive electronics.
- Using a 10mm socket wrench, remove the negative terminal from the battery and wrap it in a rag to avoid it from inadvertently touching the terminal.


- In order to get to the MINI R56 intake manifold, some engine parts need to be cleared out of the way. Start by pinching in the plastic tabs and removing the intake manifold tube from the intake manifold pre-box.
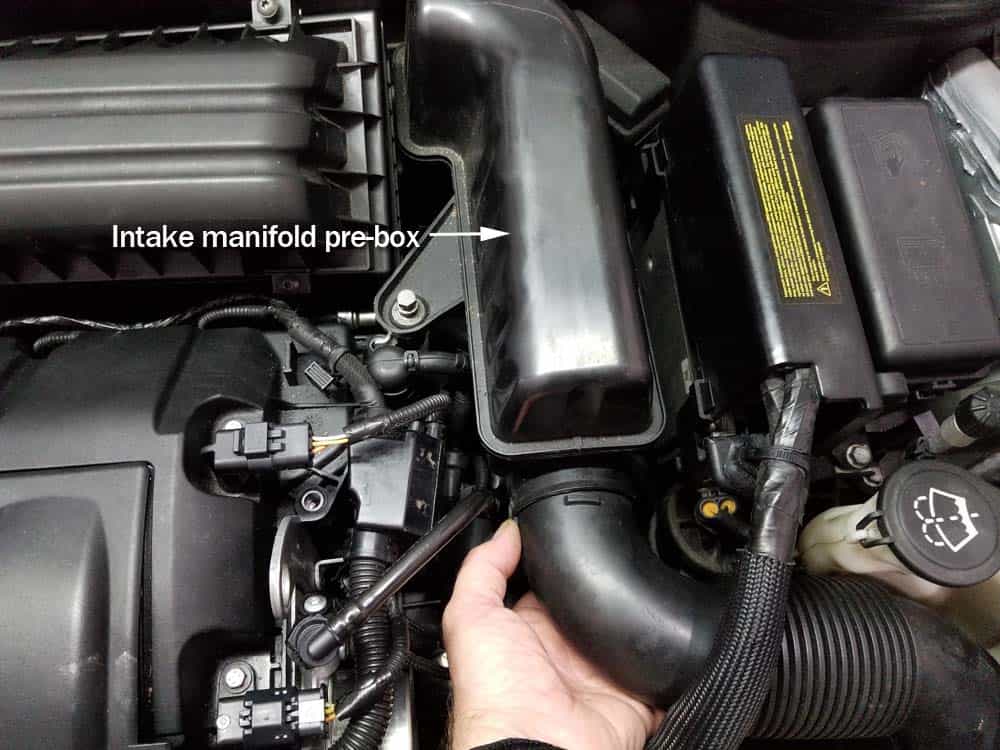
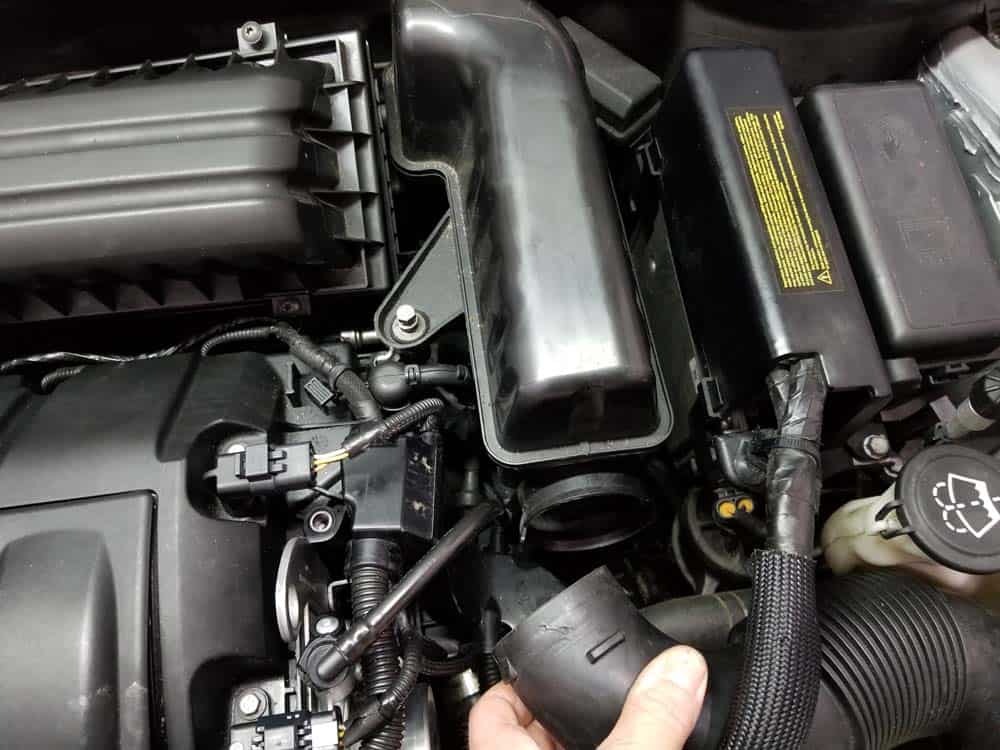
- Using a 10mm socket wrench, remove the bolt anchoring the intake manifold pre-box to the engine. Grasp the pre-box and pull free from the intake muffler.
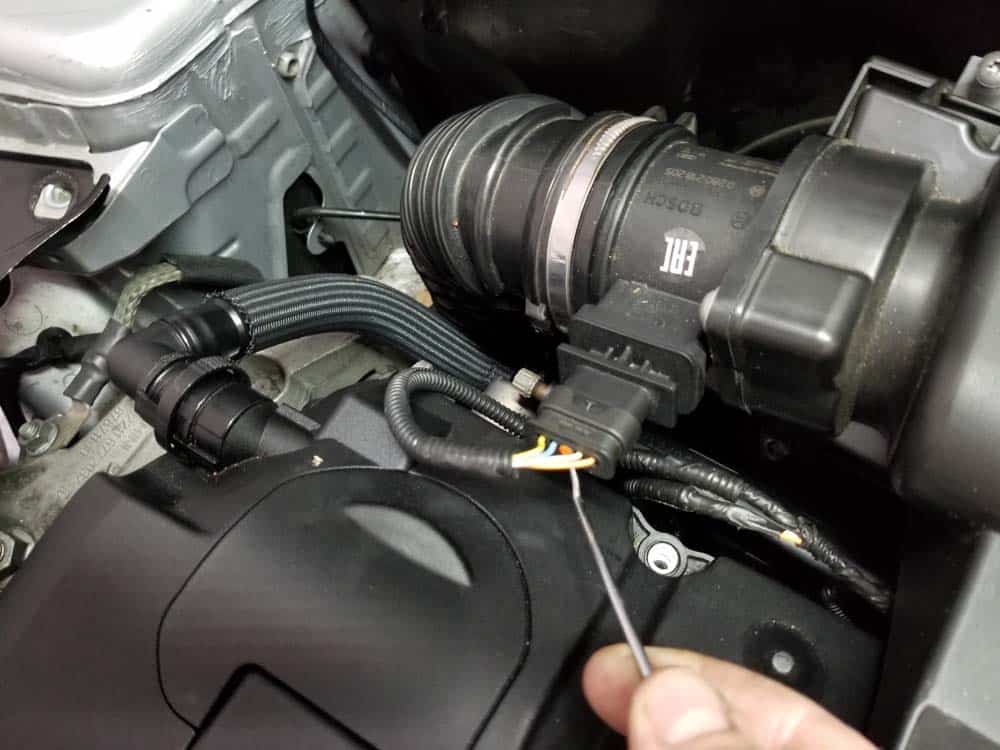
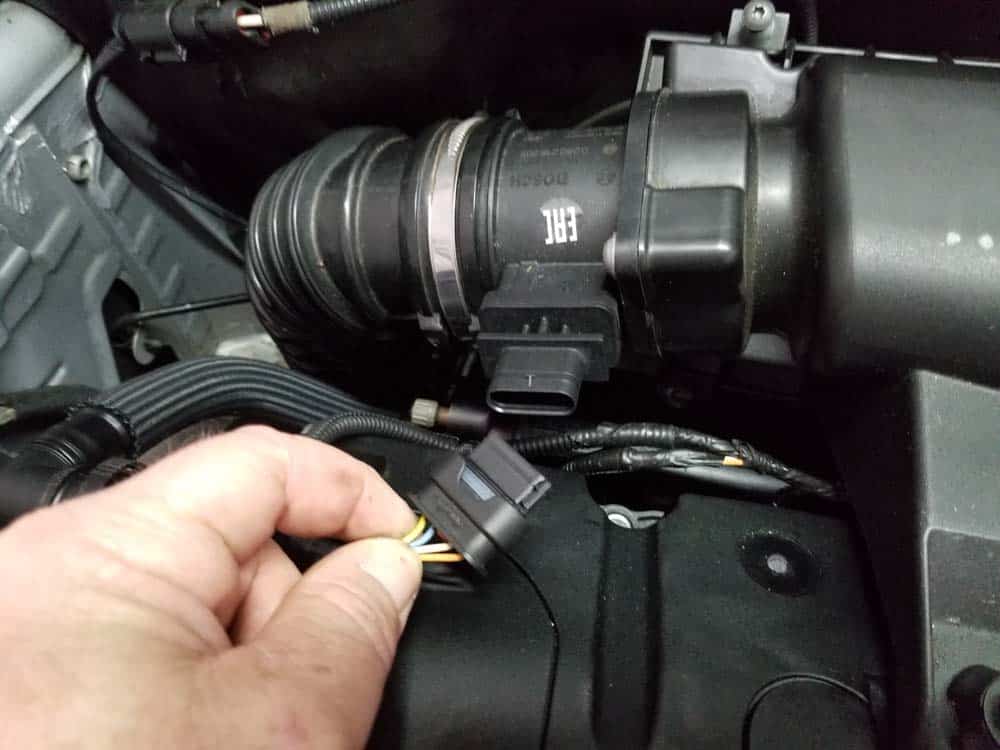
- Disconnect the mass air flow (MAF) sensor. This connection can be a little tricky...the release is under the plug. Try using a metal pick to depress the release then pull the plug free.
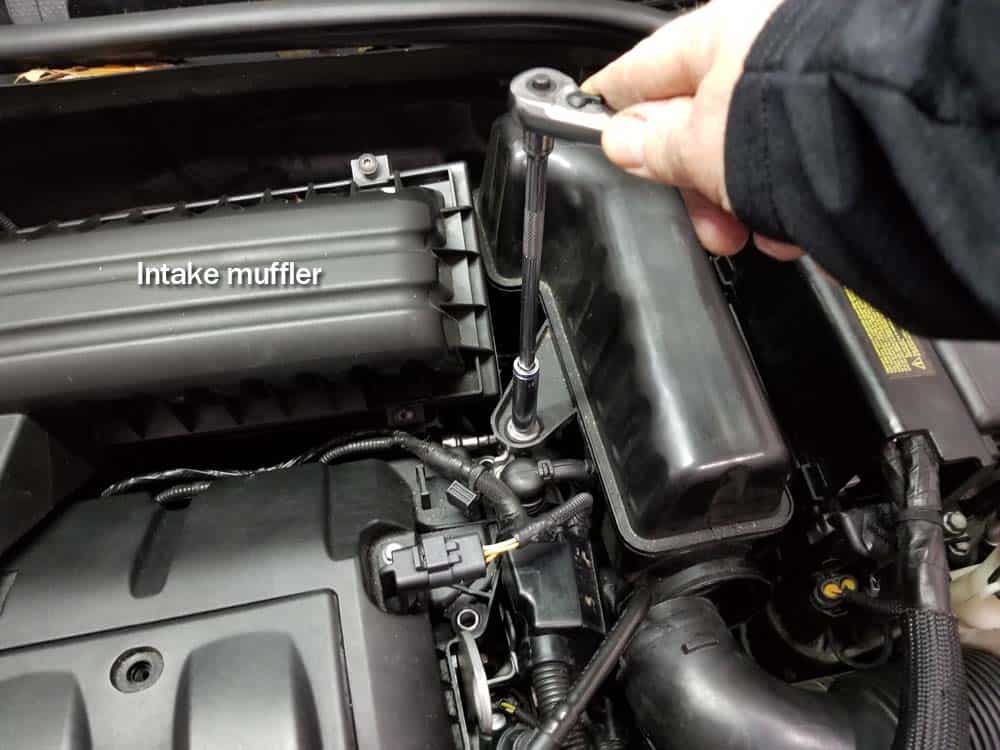
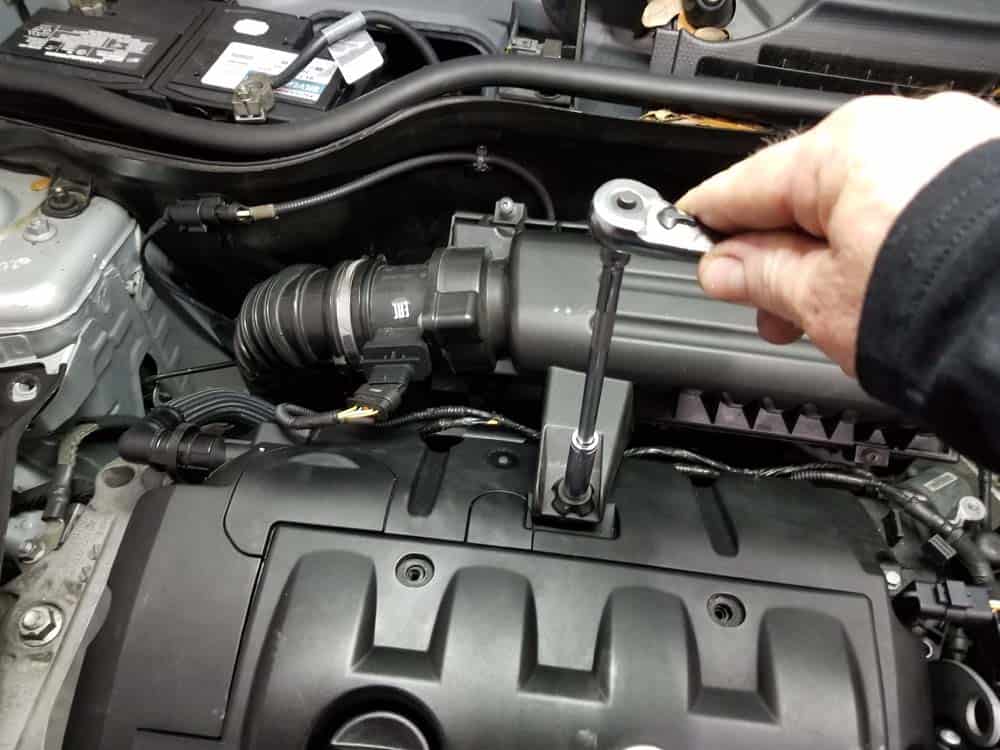
- Use a 10mm socket wrench to loosen the bolt anchoring the intake muffler to the engine.
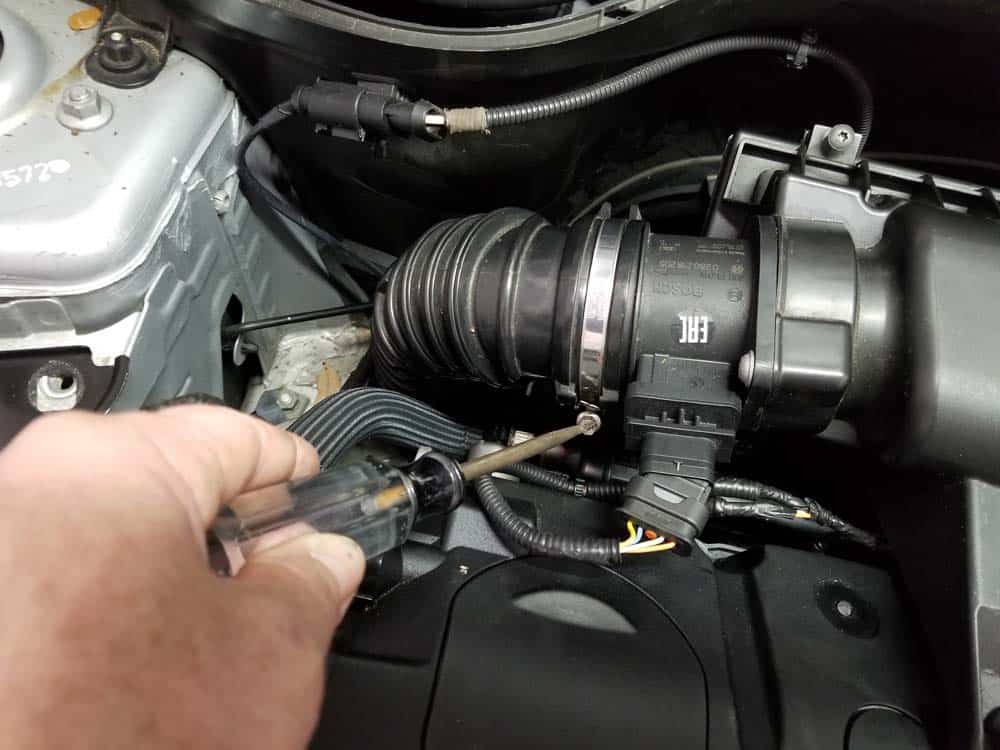
- Loosen the hose clamp connecting the intake muffler to the rubber boot.
- Use a T25 torx bit to loosen the four intake muffler lid screws. Remove the lid off of the intake muffler.
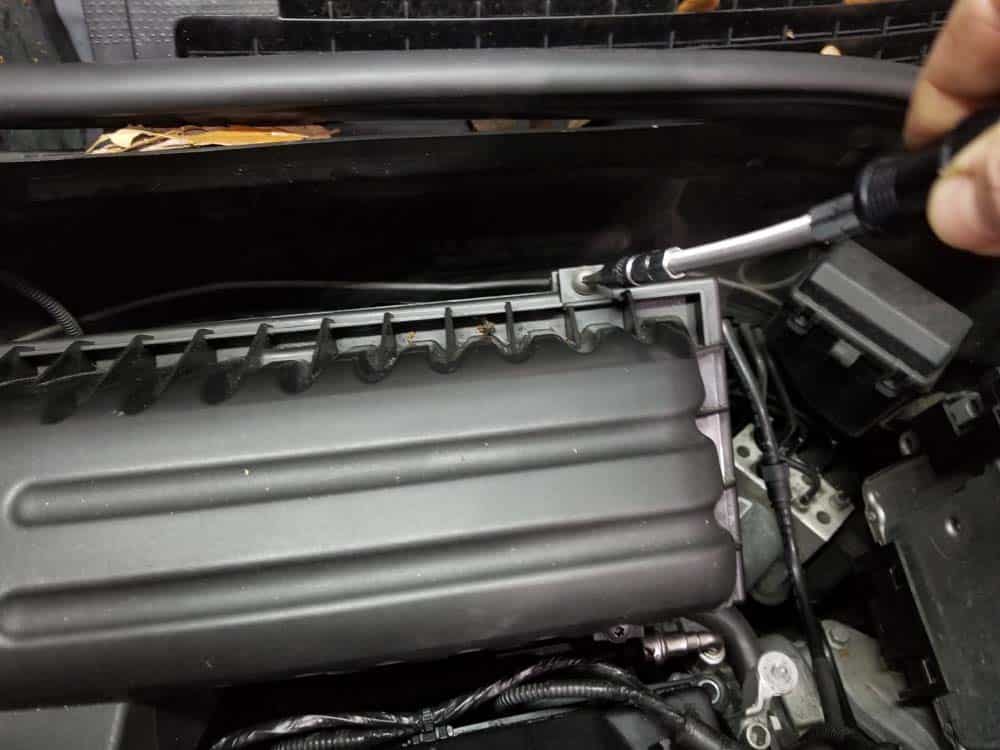
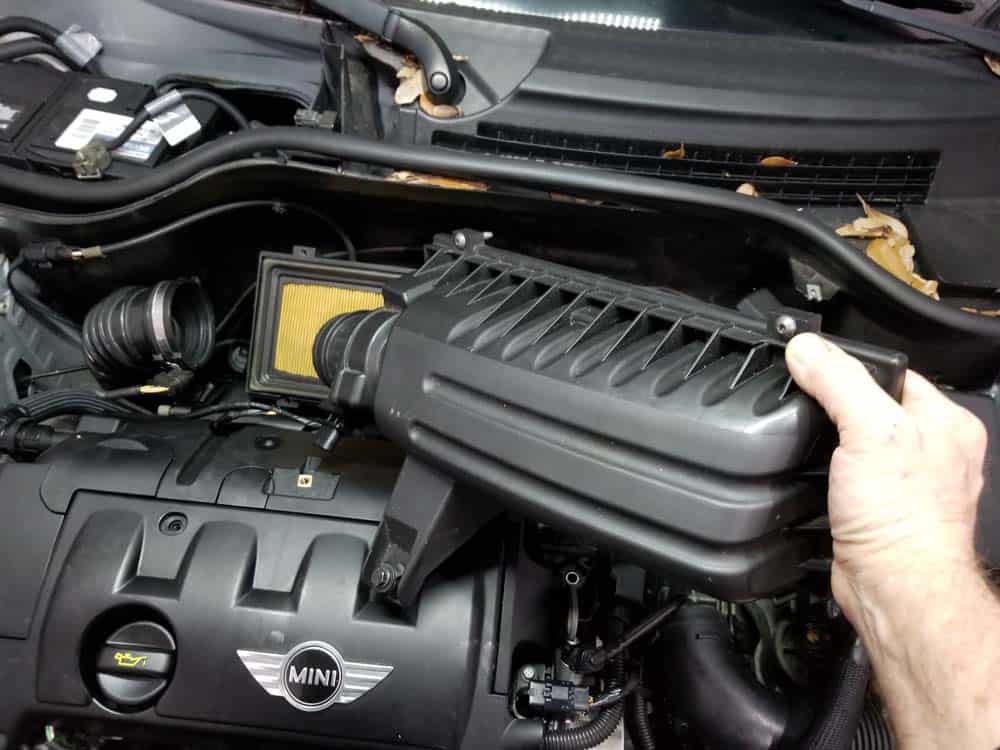
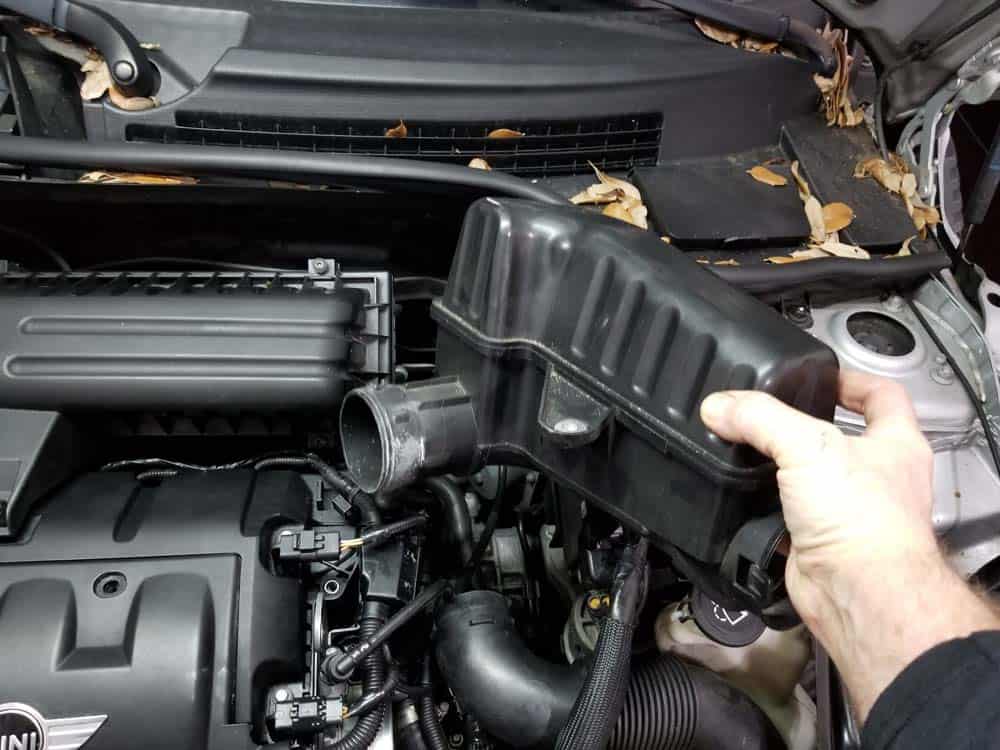
- Grasp the base of the intake muffler and pull it loose from the body of the car. It is held in place by two rubber grommets.
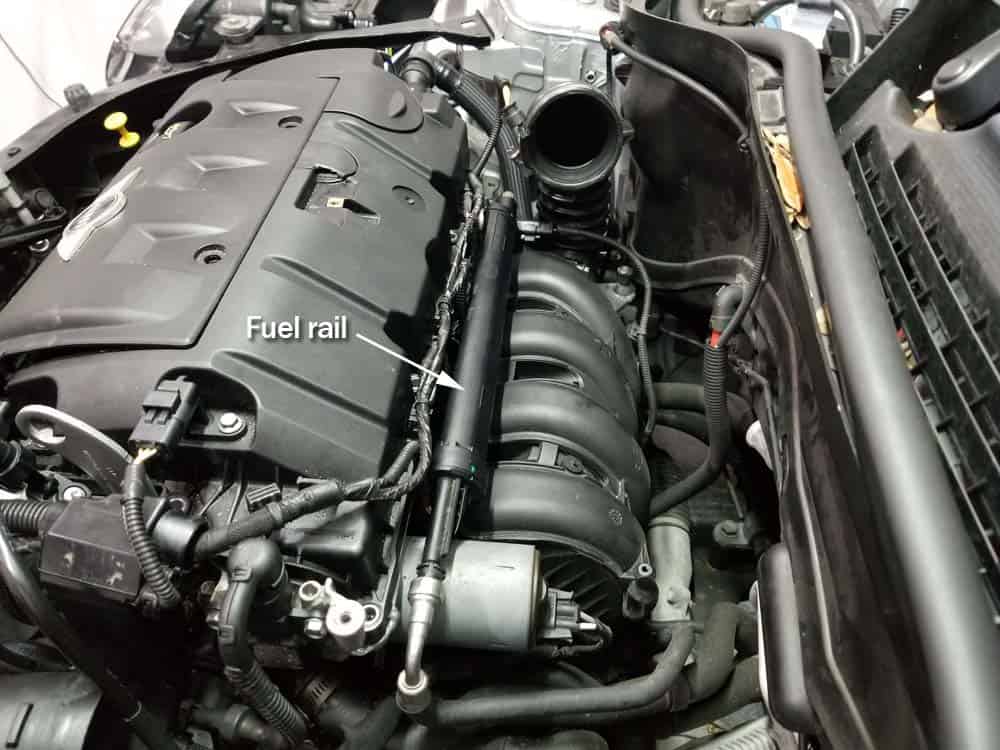
- The next step is to remove the fuel rail from the back of the engine. The fuel rail must be removed to access the upper intake manifold mounting bolts.
- Before disconnecting the fuel rail, it is good practice to release any fuel pressure that might be left in the system. This is done by simply depressing the Schrader valve located on the end of the rail. First, locate the Schrader valve and remove its protective cap.
- Lay a rag under the Schrader valve to catch any fuel that may be ejected when releasing the pressure. Press the valve stem in with a small screwdriver or metal pick to release the pressure in the fuel rail (it's like releasing the pressure from a tire valve). Replace the cap when you are finished.
- Remove the fuel line from the end of the fuel rail by retracting the black lock ring and pulling it free as shown below. Have a rag ready to catch any fuel that may spill out.
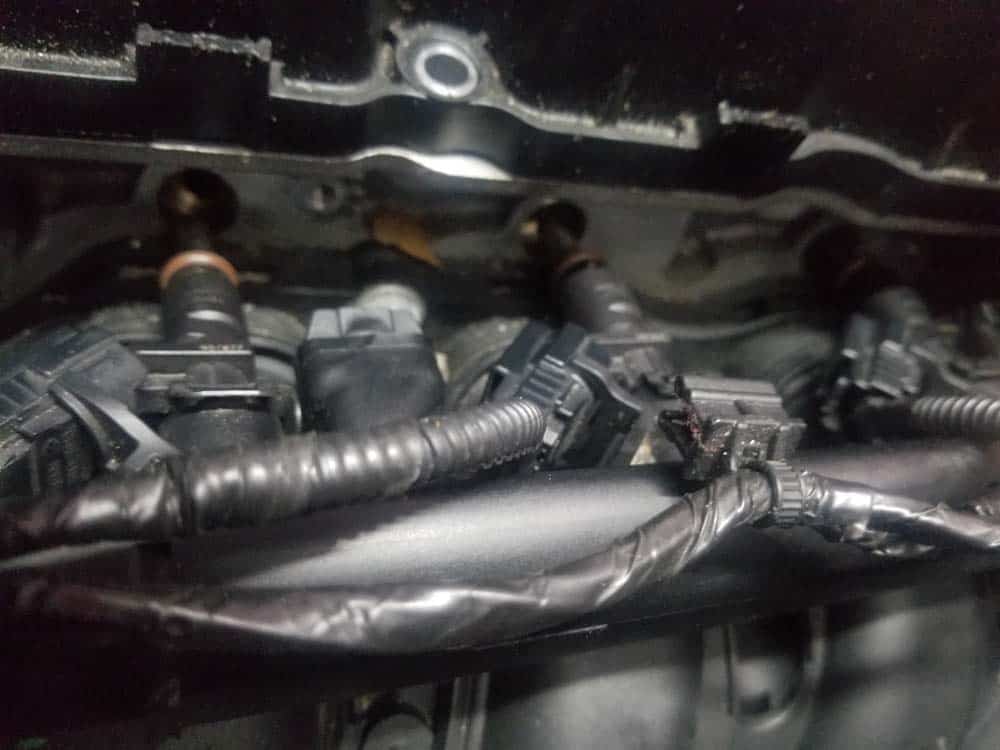
- The next step requires removing the two T30 bolts anchoring the fuel rail to the cylinder head. The two bolts are difficult to see since they are behind the engine...use an inspection mirror to locate them if necessary.
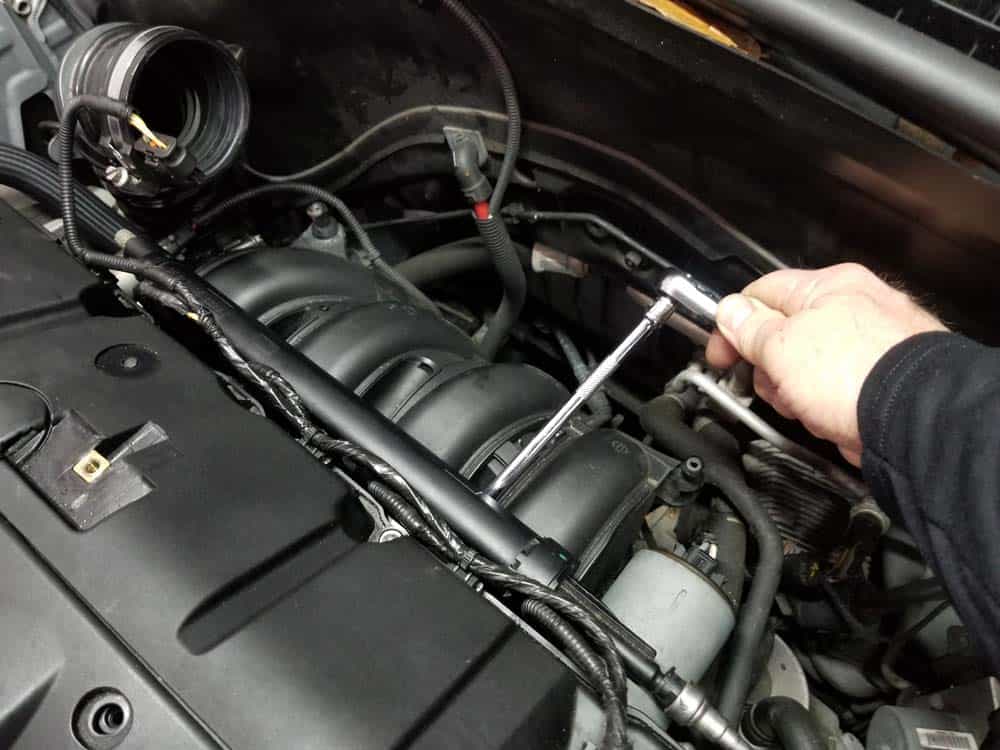
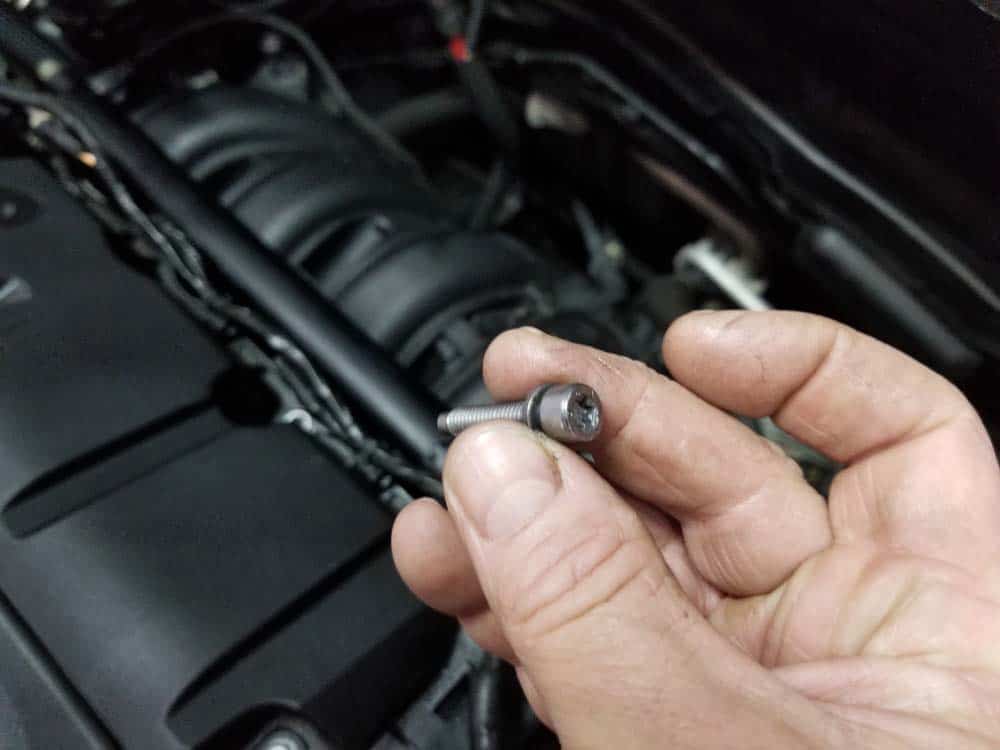
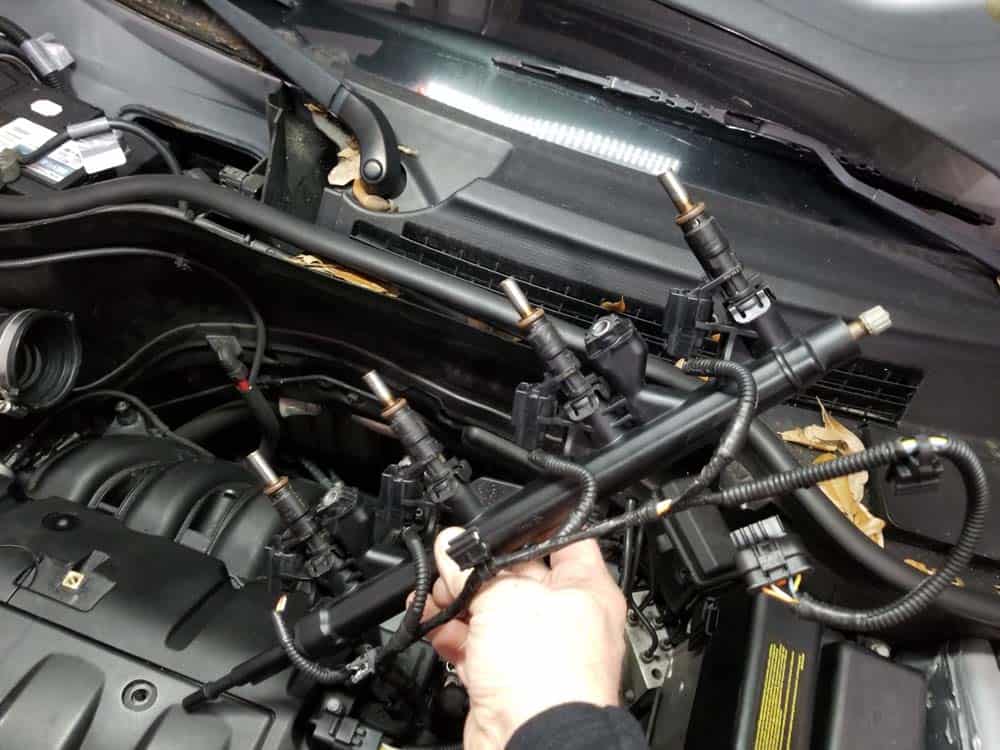
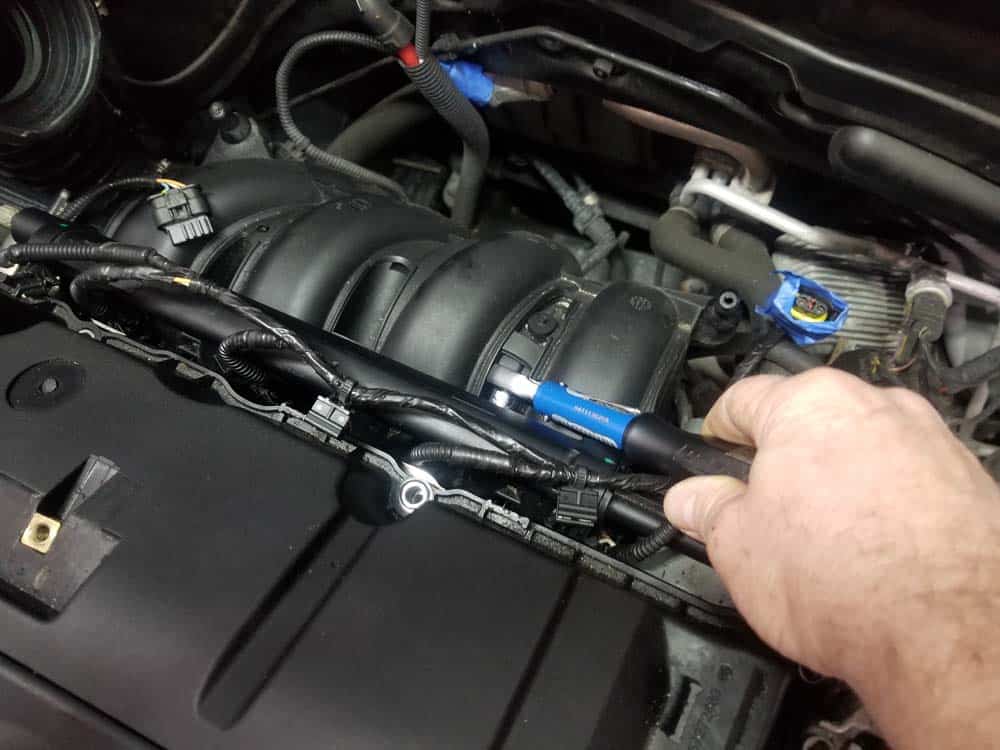
- When you have removed the two T30 mounting bolts, grasp the fuel rail with both hands and pull the injectors free from the cylinder head. You may have to gently rock it back and forth while pulling to get the injectors to release.
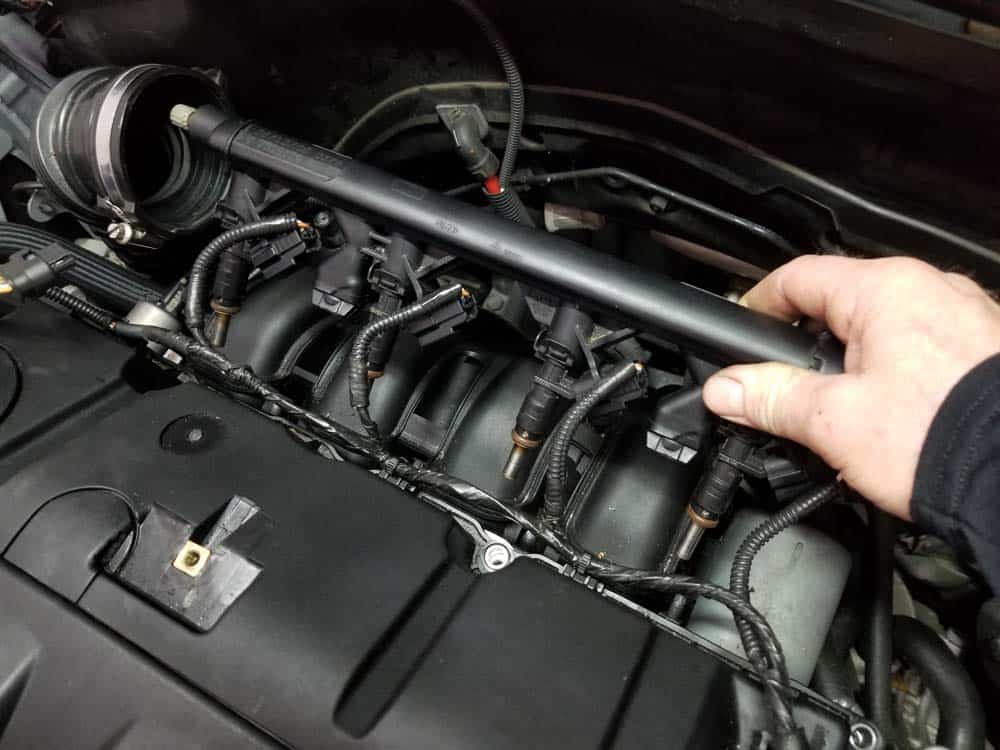
- Unclip the wiring harness from the back of the valve cover and gently lay the fuel rail and injectors safely out of the way. Now is a great time to replace your fuel injectors...it is just a couple more easy steps. If you are interested in replacing them, please read our article MINI R56 Fuel Injector Replacement – 2006-2013 Cooper.
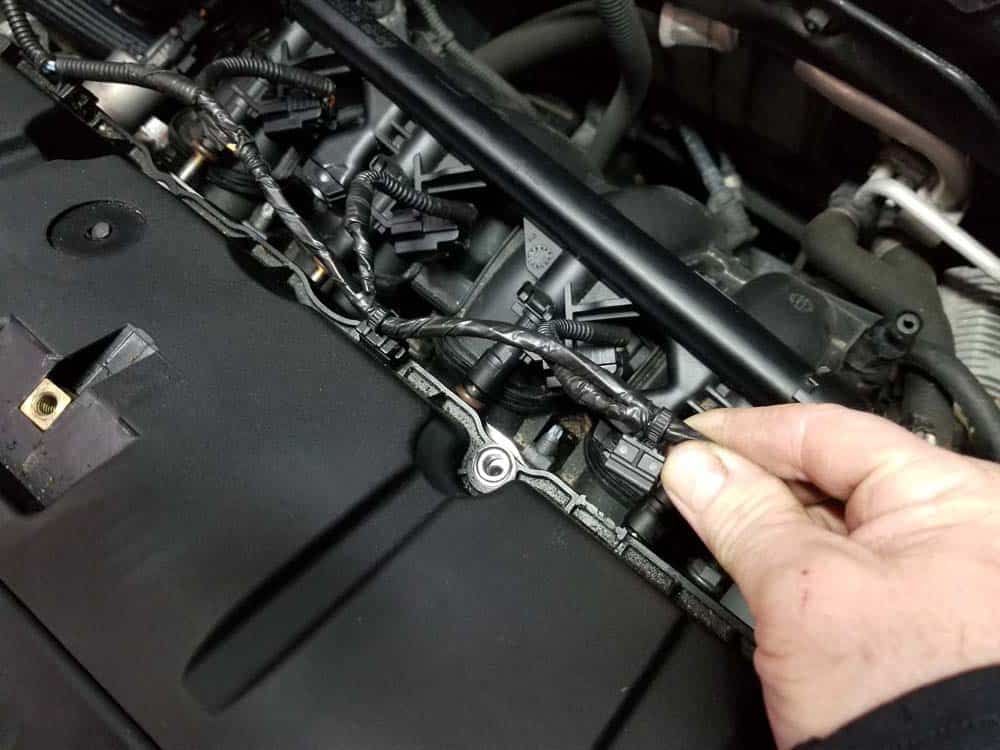
- Use a metal pick to raise the plastic lock on the intake (rear) VANOS solenoid sensor. Pull the sensor plug out of the solenoid and unclip it from the valve cover.
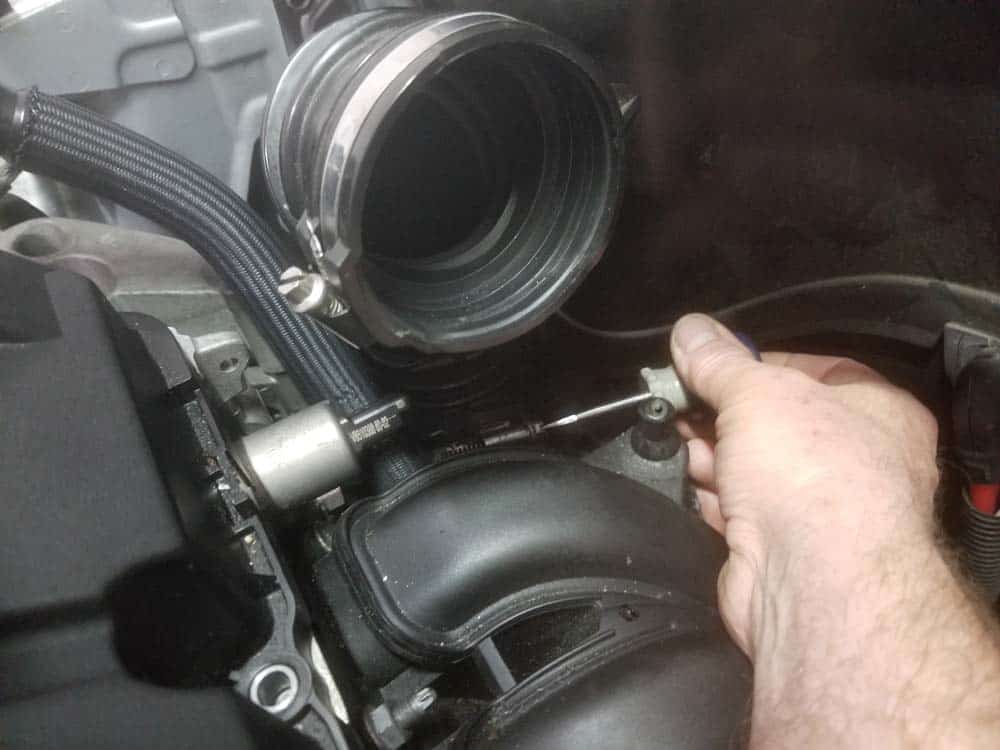
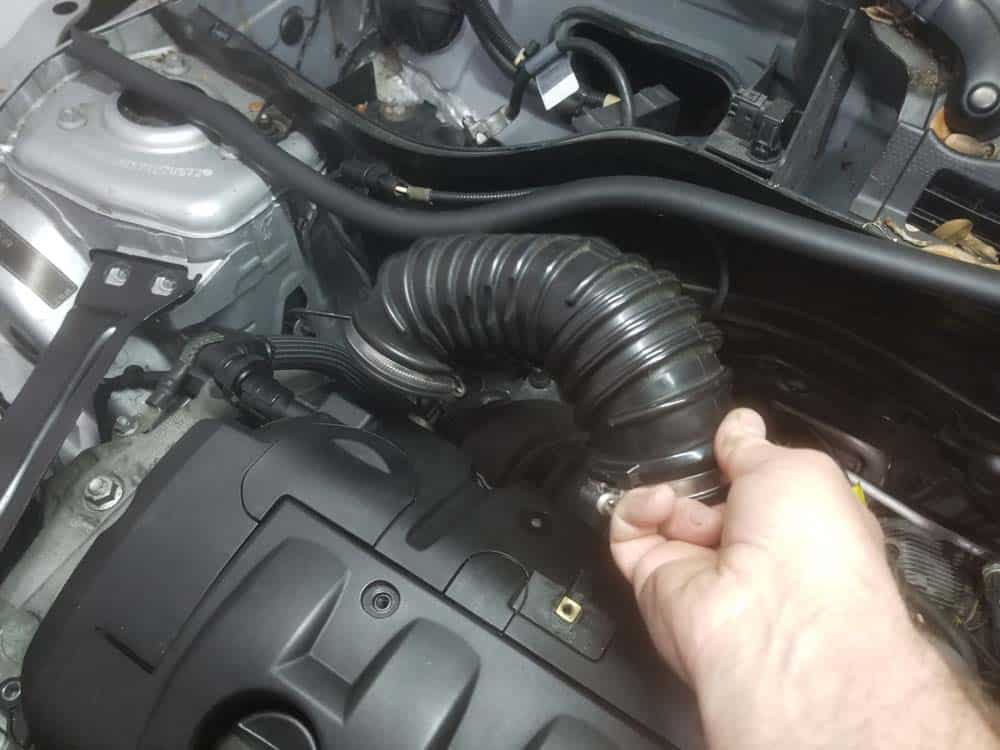
- Use a flat blade screwdriver to loosen the hose clamp on the rubber intake boot. Remove the boot from the vehicle.
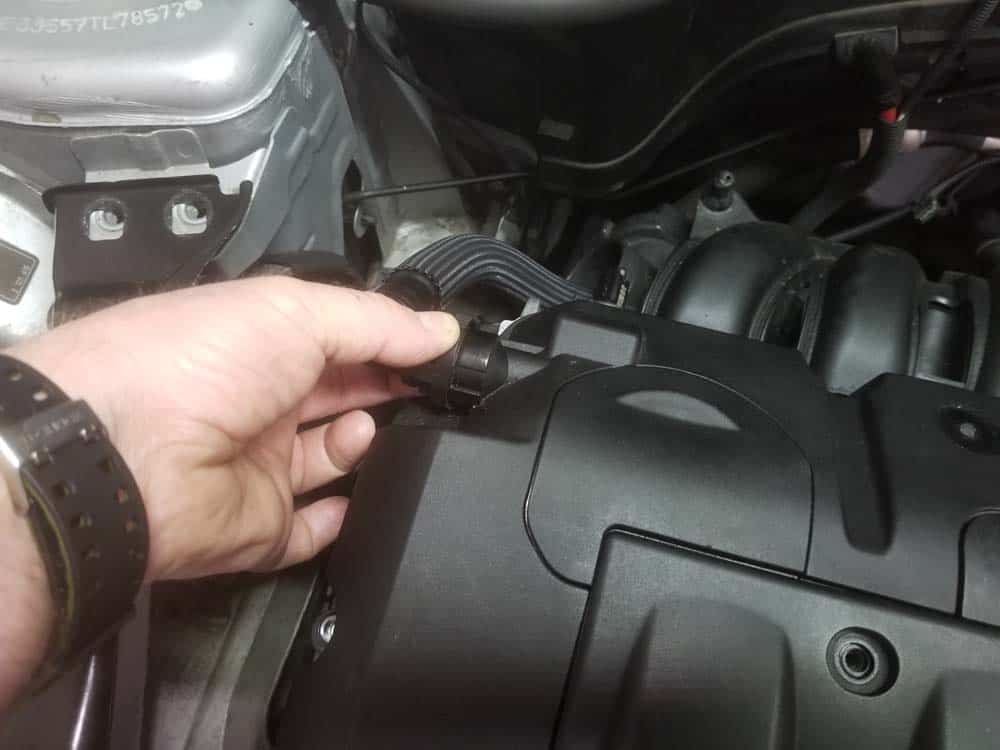
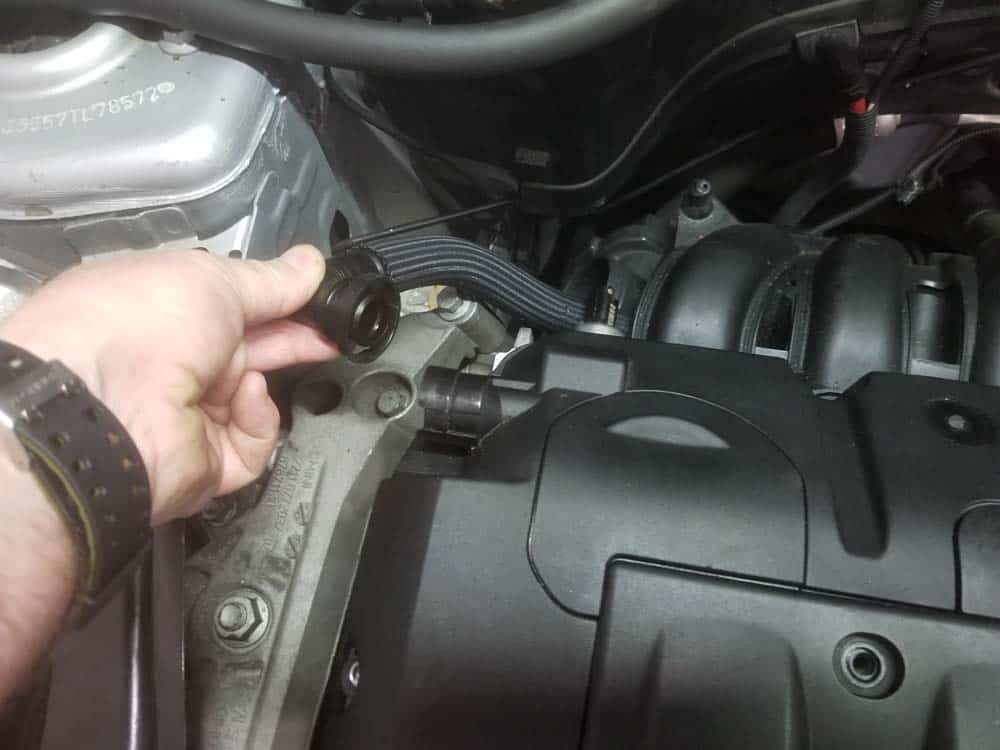
- Disconnect the crankcase breather hose from the valve cover by squeezing the plastic locking ring and pulling it free.
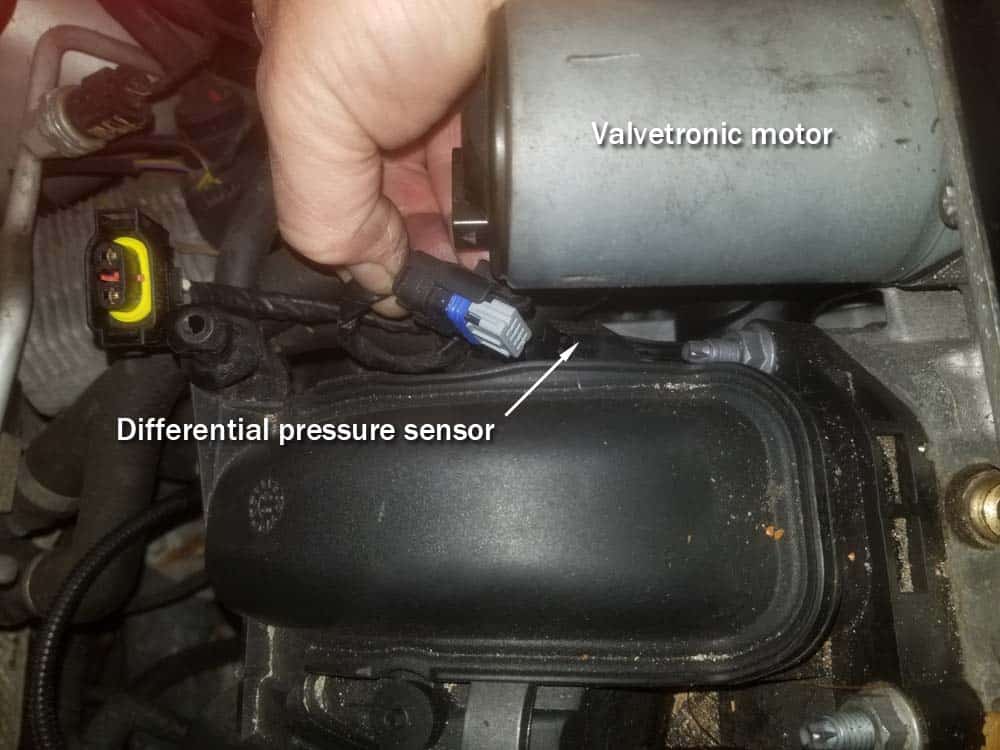
- Disconnect the Valvetronic motor sensor on the back of the engine.
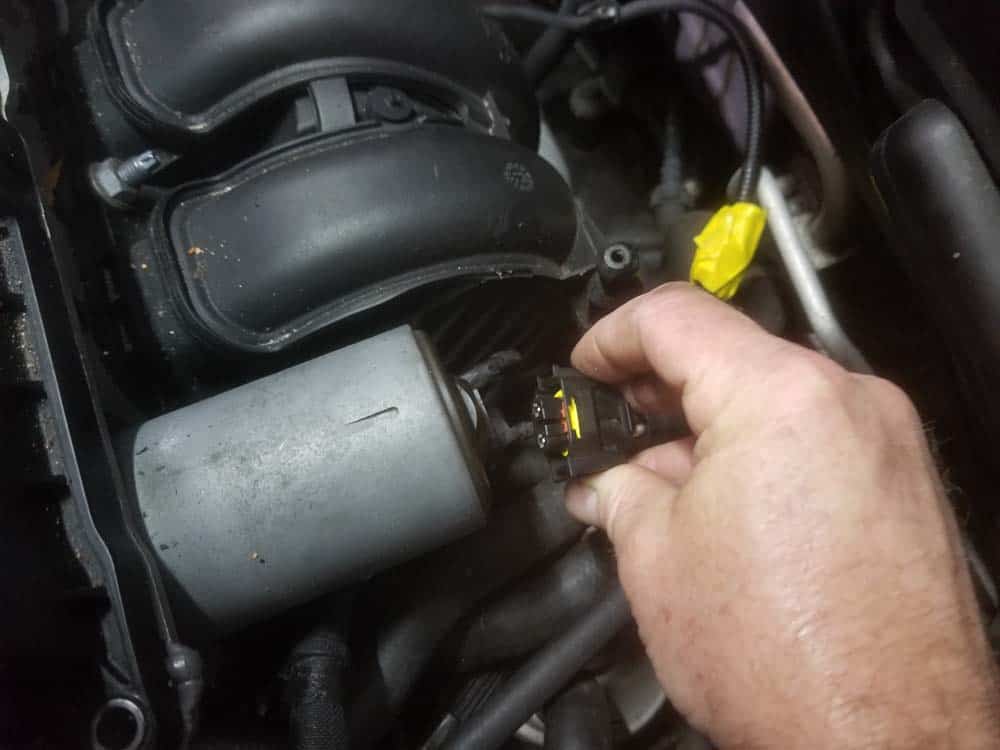
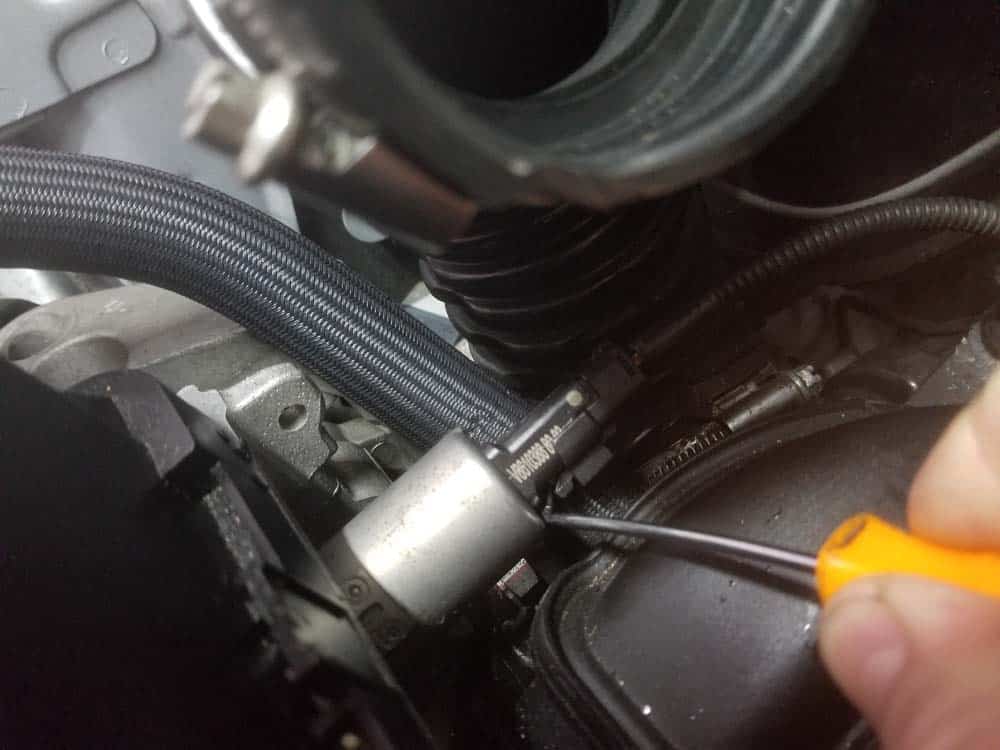
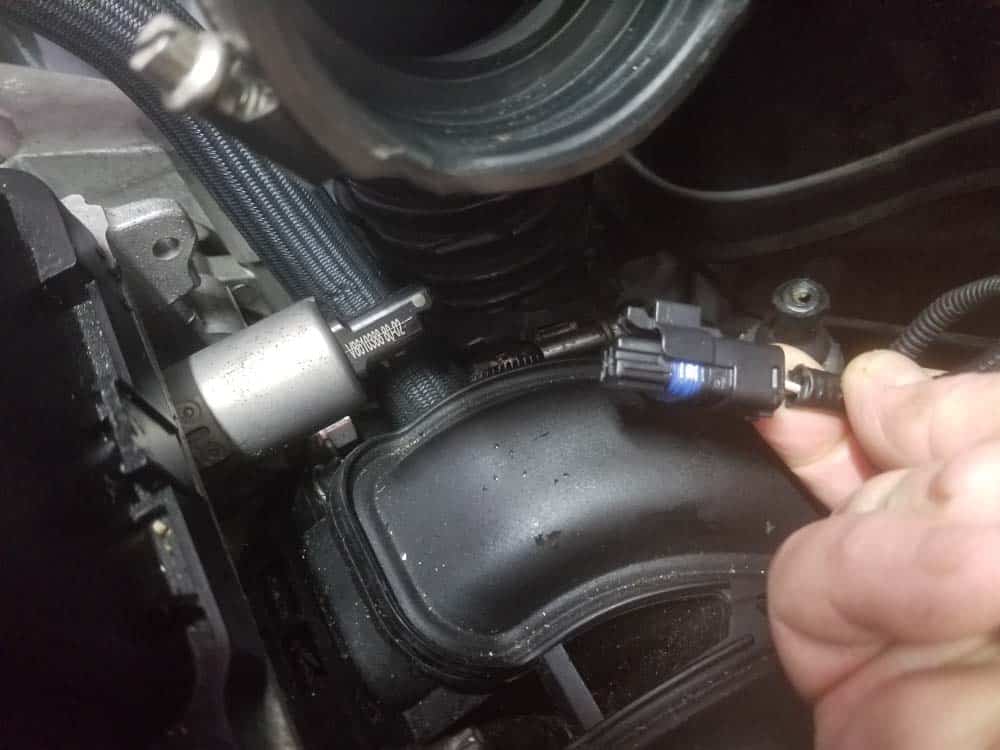
- Reaching down underneath the Valvetronic motor, use a metal pick to raise the plastic locking tab on the differential pressure sensor plug. Pull the plug free of the sensor.
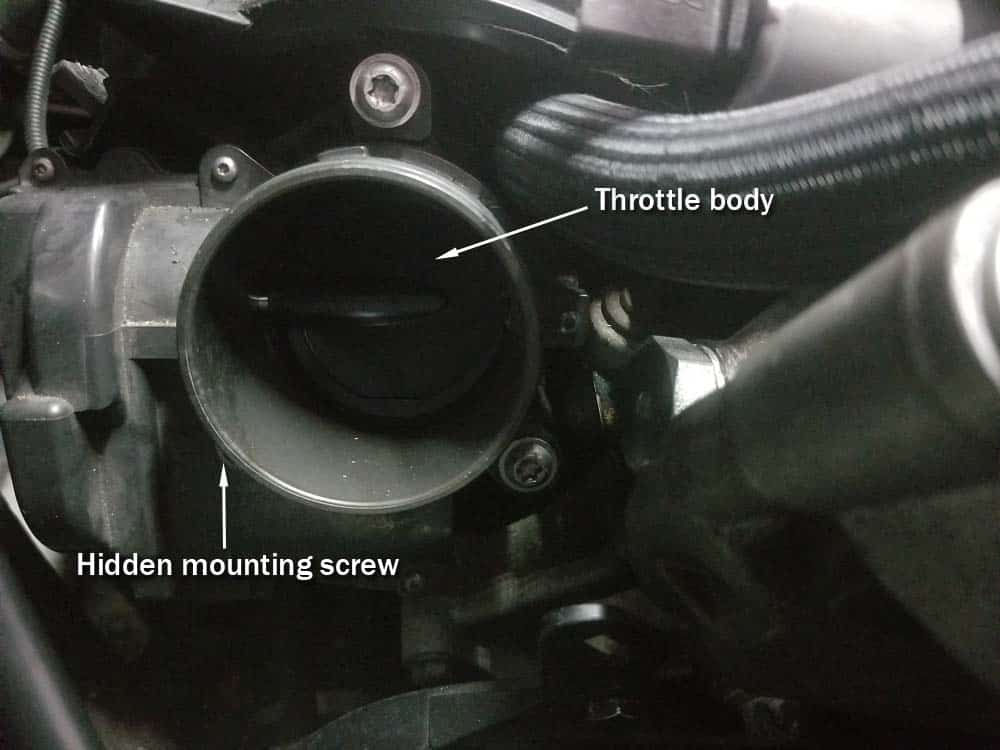
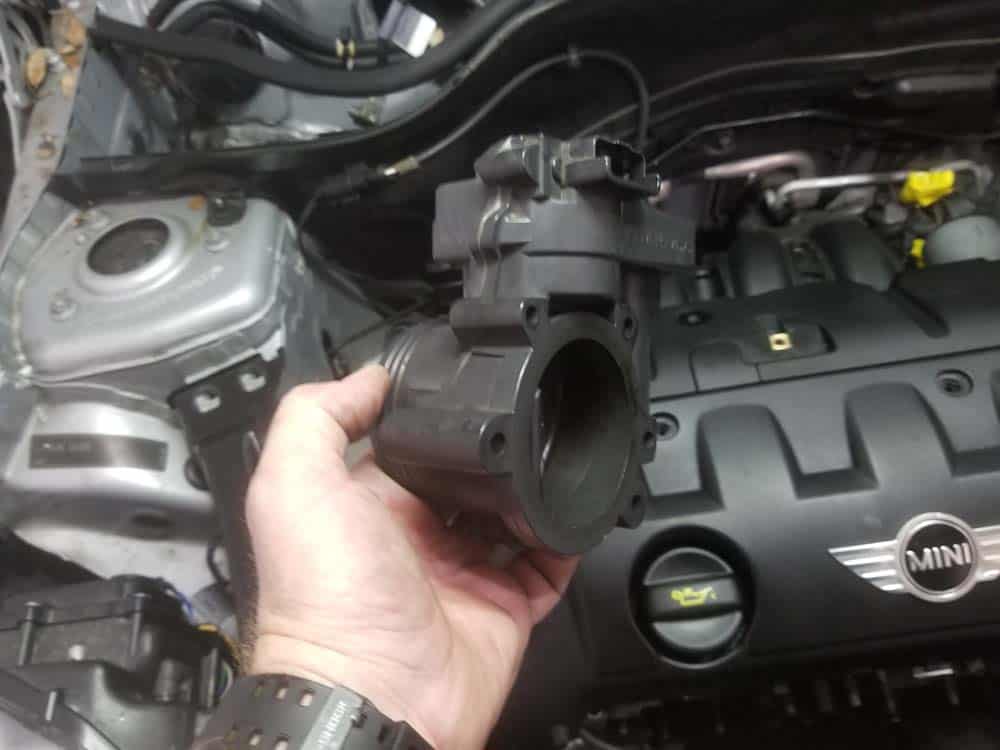
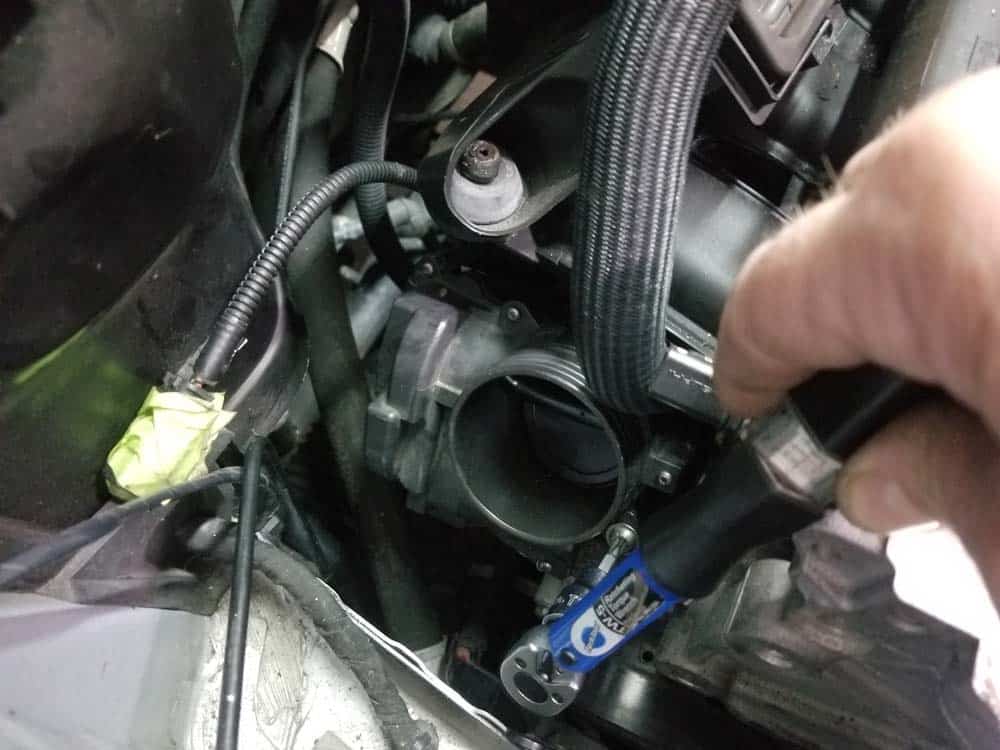
- Next, the throttle body must be removed from the intake manifold. There is unfortunately not enough clearance to remove and then properly reinstall and torque the far right manifold mounting nut with the throttle body attached. There are three torx screws anchoring the throttle body to the intake manifold. Note that one of the screws is hidden behind the throttle body opening and is difficult to find.
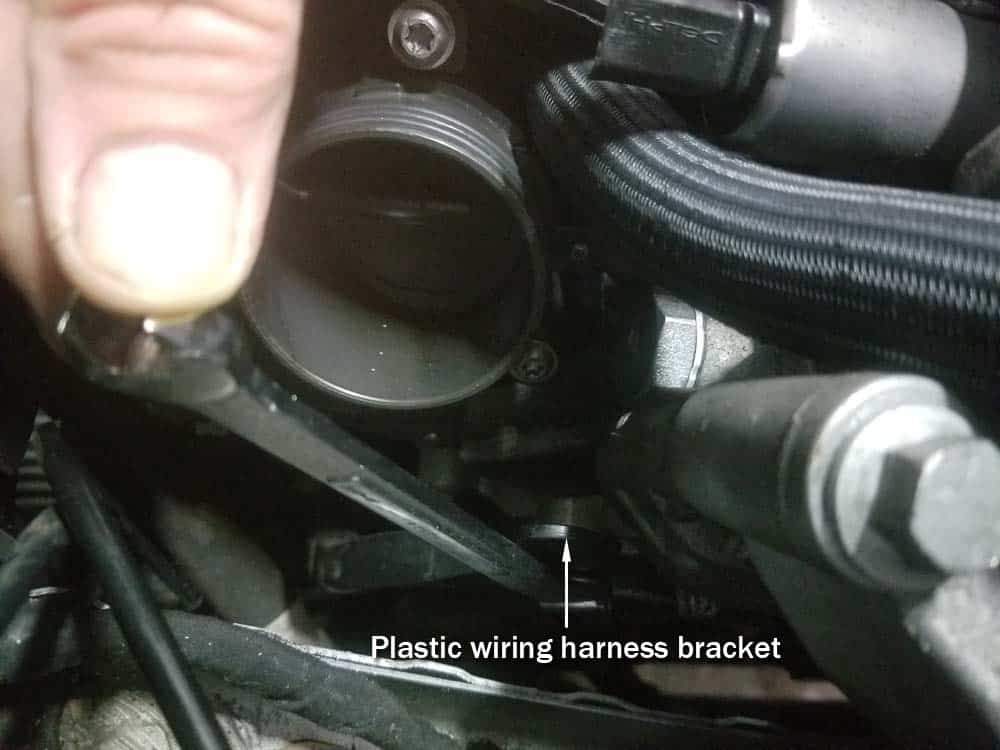
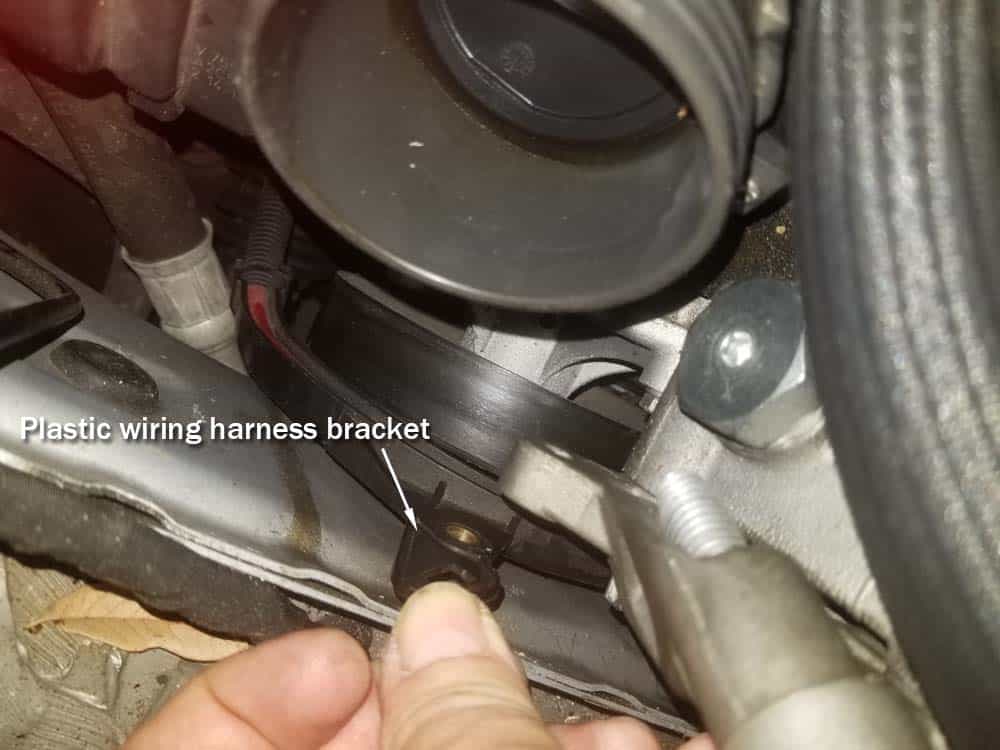
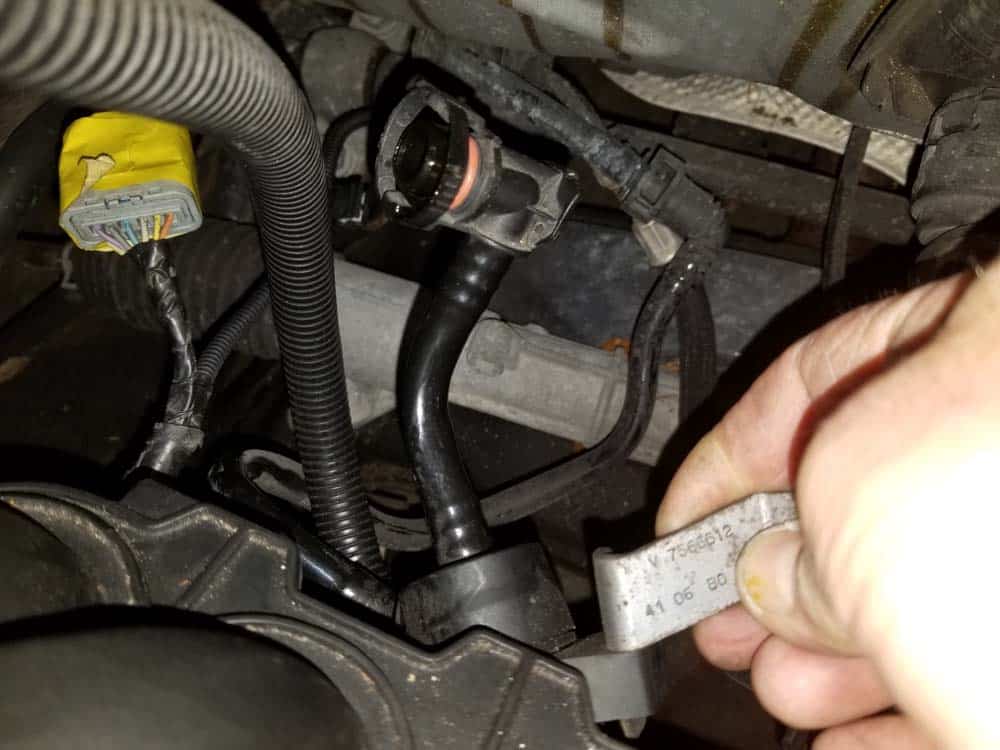
- Start by removing the 10mm bolt anchoring the plastic wiring harness bracket to the engine mount. This wiring harness bracket blocks access to the lower throttle body screw. Removing the 10mm bolt will loosen it enough so it can be pushed out of the way.
- Remove all three screws using a T30 torx bit.

- Grasp the throttle body, pull it loose and disconnect its electrical connection. Remove the throttle body from the vehicle. You now have clear access to the intake manifold and its mounting bolts.
Section 2 - Removing and Replacing the MINI R56 Intake Manifold Gaskets
There are six anchor points securing the intake manifold to the engine head; five upper mounting nuts and one lower mounting bolt (see diagram below). Many mechanics struggle, and hence get frustrated, trying to find and remove the lower bolt. To address this, we have created easy-to-follow instructions that will help you quickly find and remove the lower bolt with relative ease. 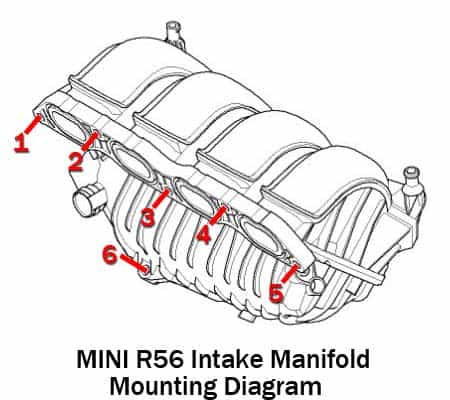
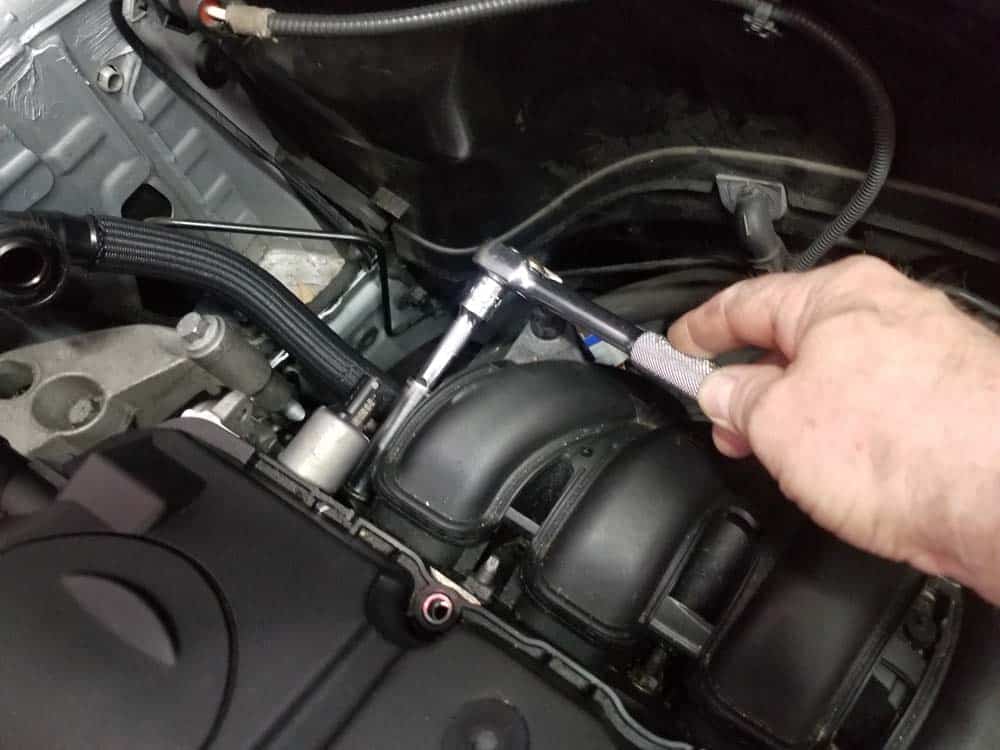
- Start with the five upper mounting nuts. Remove all them with a 13mm socket wrench.
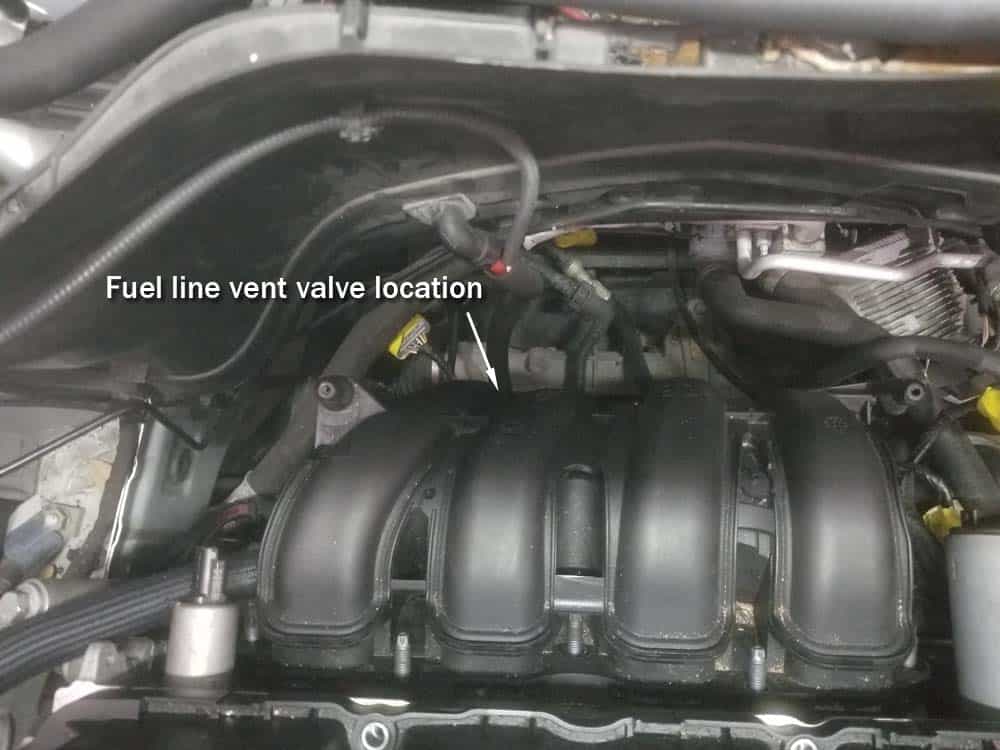
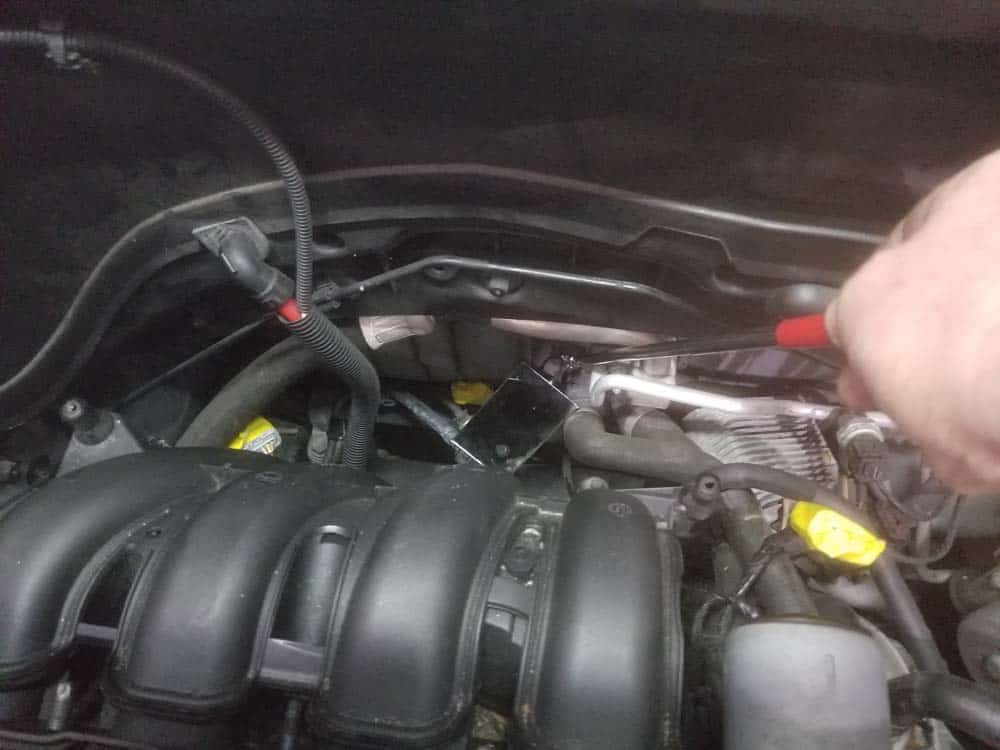
- Next, the sixth lower mounting bolt must be removed. This is unfortunately a slightly difficult process...the bolt is tucked away at the bottom of the intake manifold behind the fuel line vent valve and is often a challenge to locate. Compounding the issue is there are other bolts in the vicinity that can make it confusing as to which one needs to be removed. If you use patience and exactly follow our steps, you will be able to successfully remove the bolt.
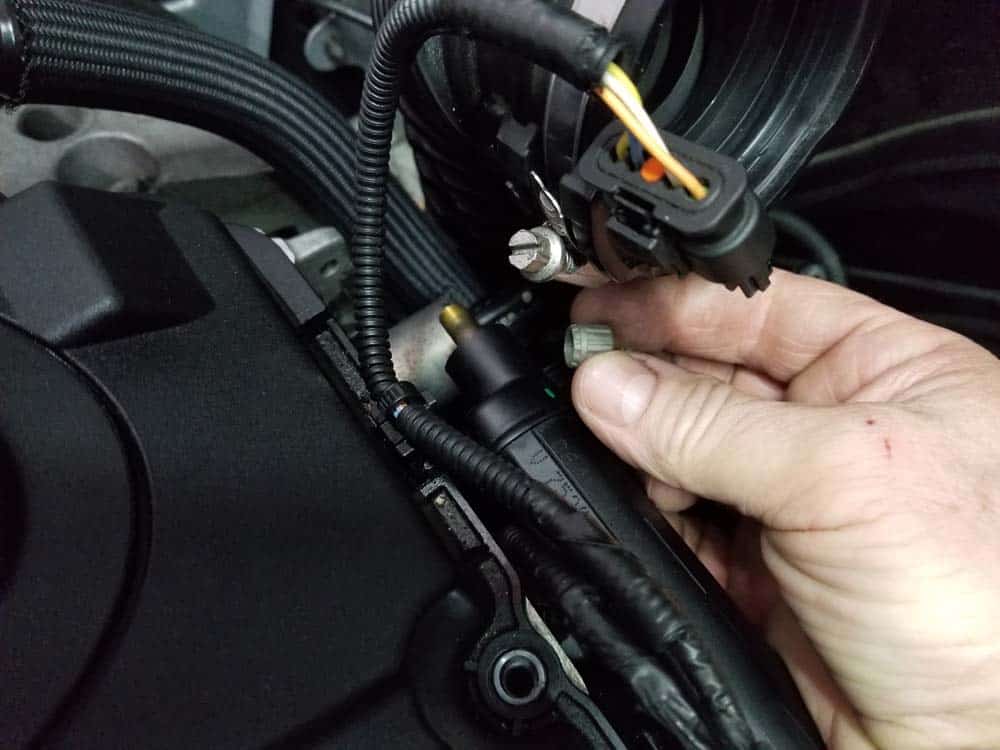
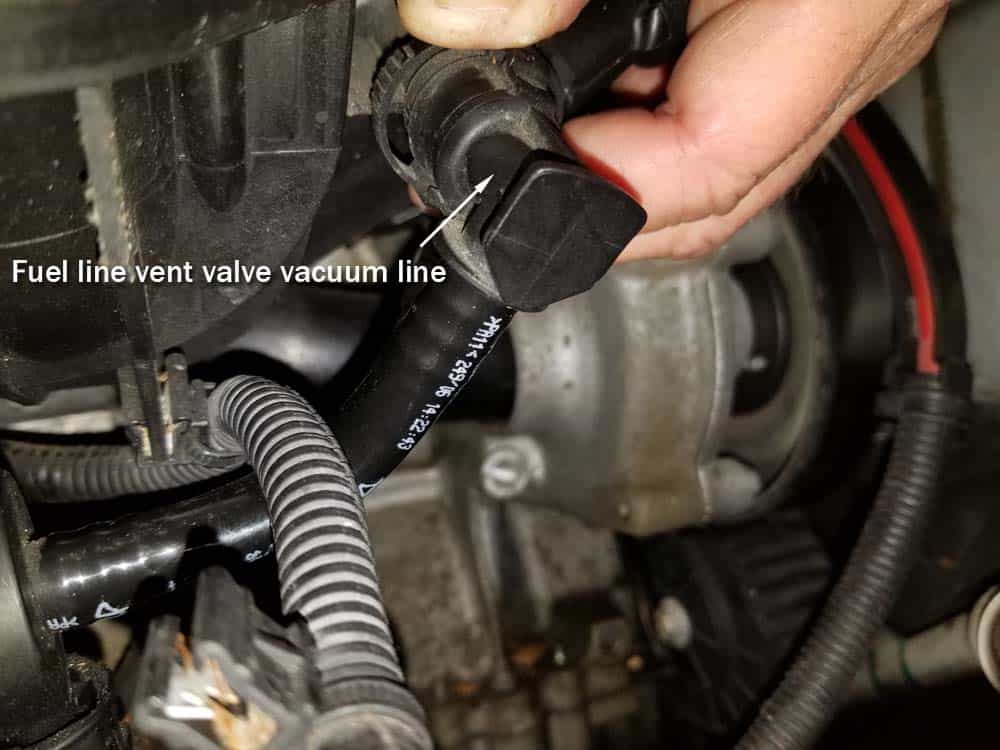
- First, the fuel line vent valve must be removed from the back of the intake manifold. The reason why the fuel line vent valve must be removed is because the lower intake manifold mounting bolt is hidden behind it. Use an inspection mirror and the following images to locate the fuel line vent valve mounting bracket and the bolt anchoring it to the back of the intake manifold.
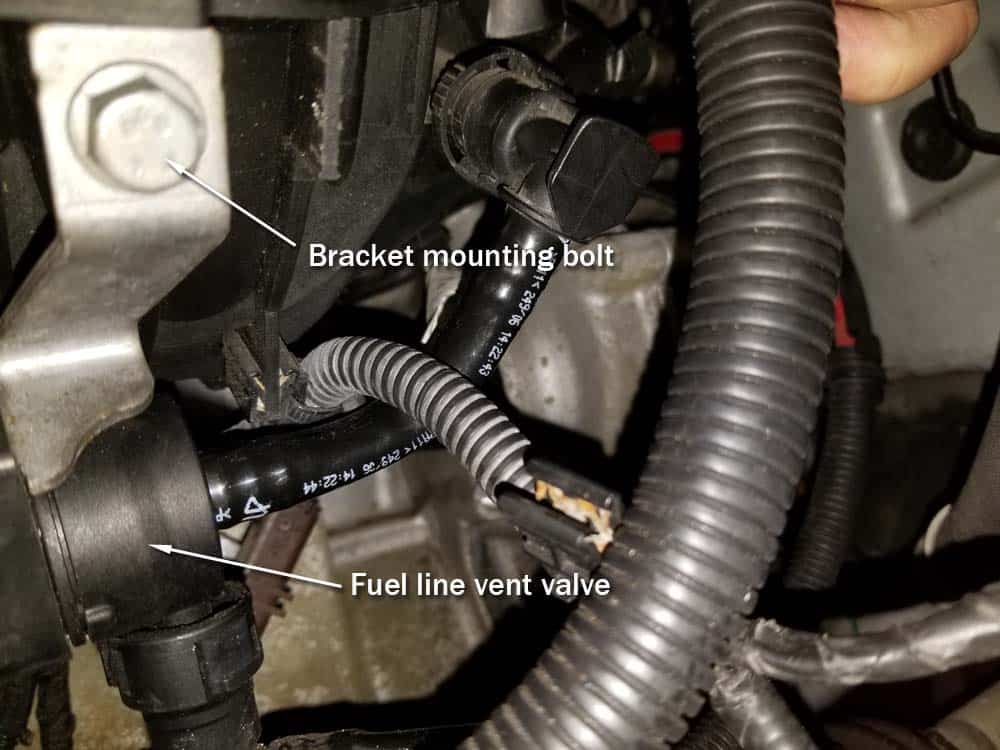
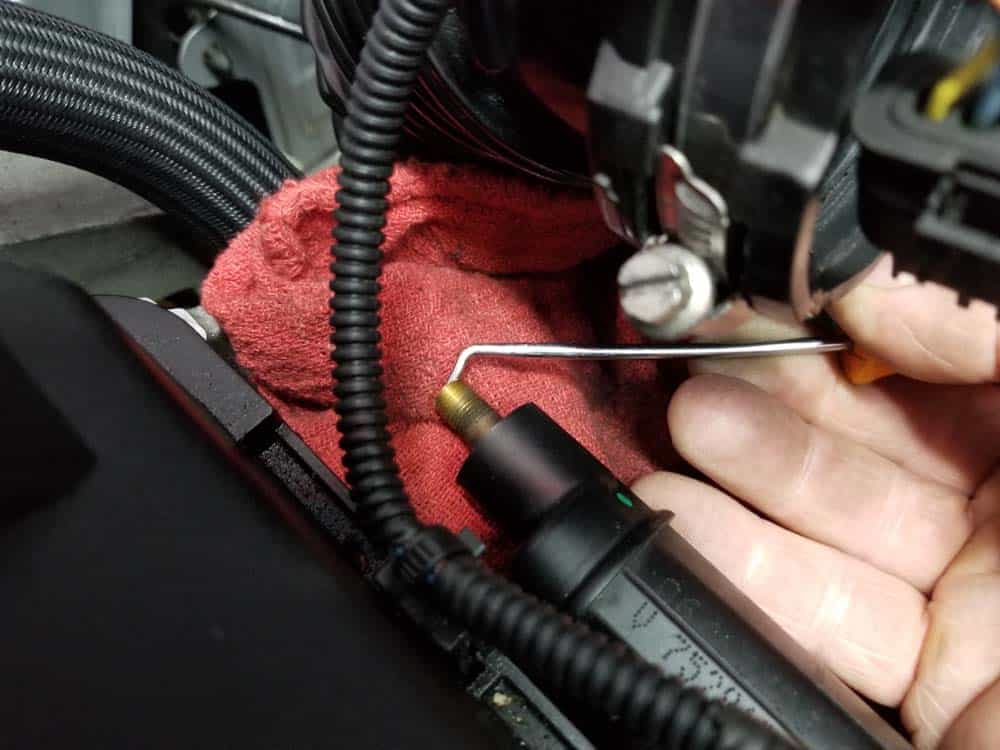
- Use a 10mm socket wrench to remove the fuel line vent valve bracket bolt.
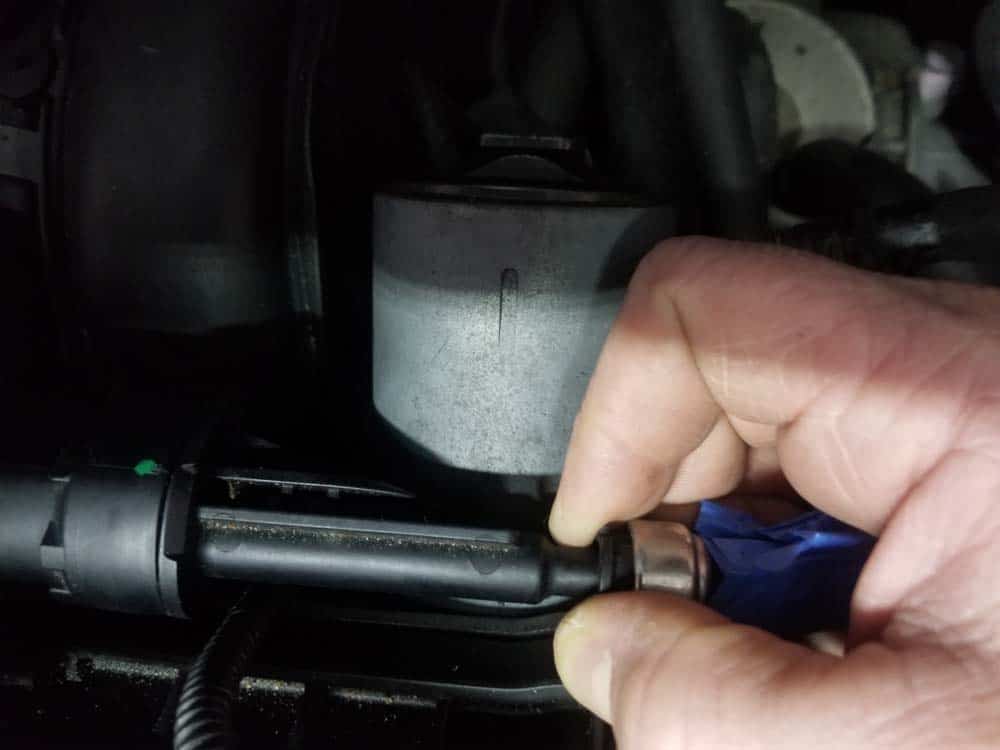
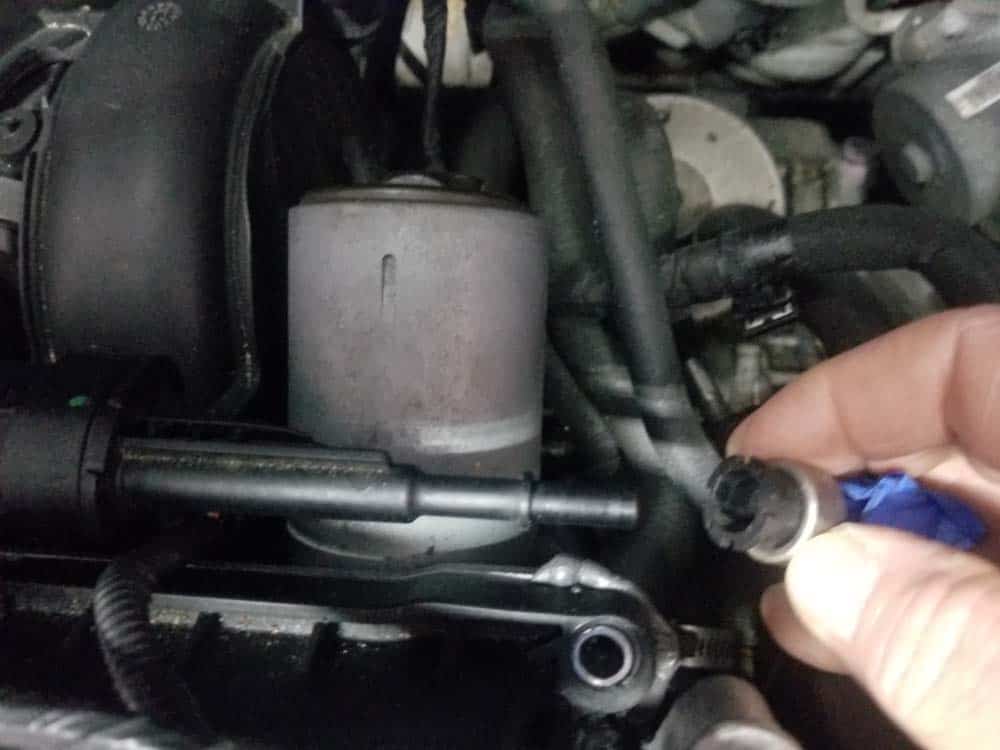
- Squeeze the plastic connector on the vent valve vacuum line where it connects to the intake manifold. Disconnect the vacuum line from the intake manifold and carefully stow out of the way.
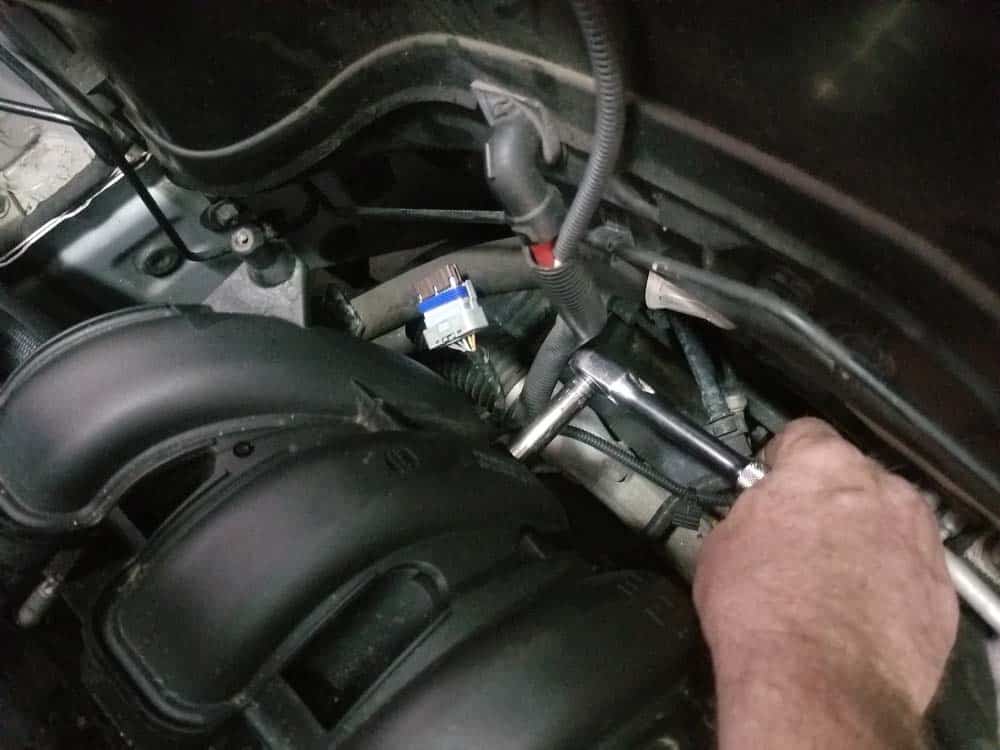
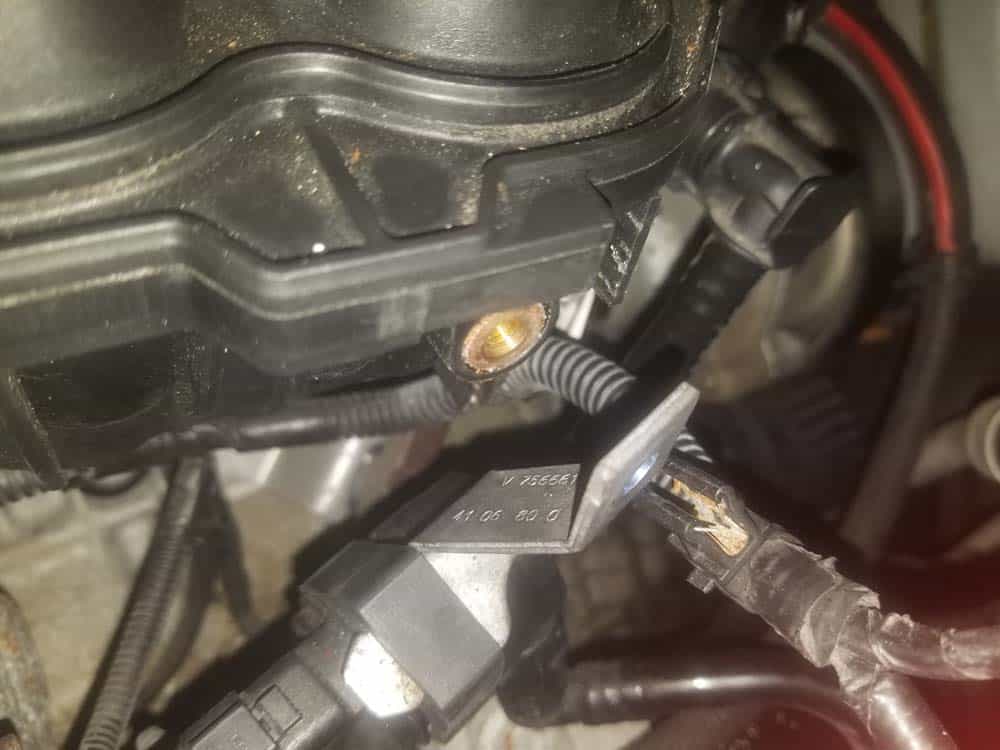
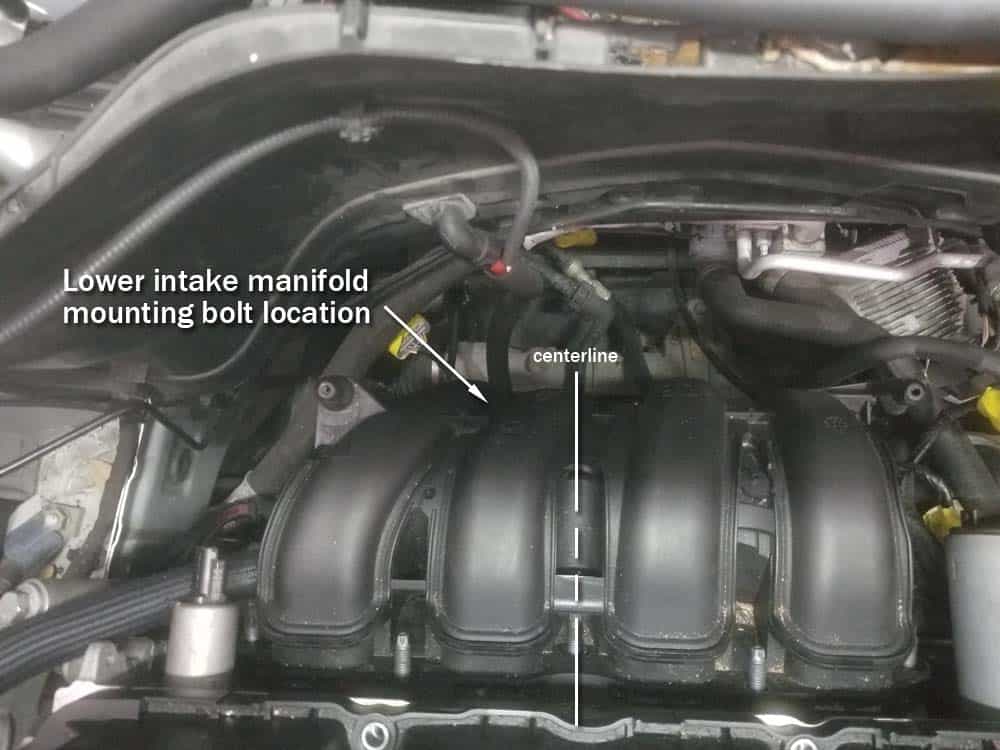
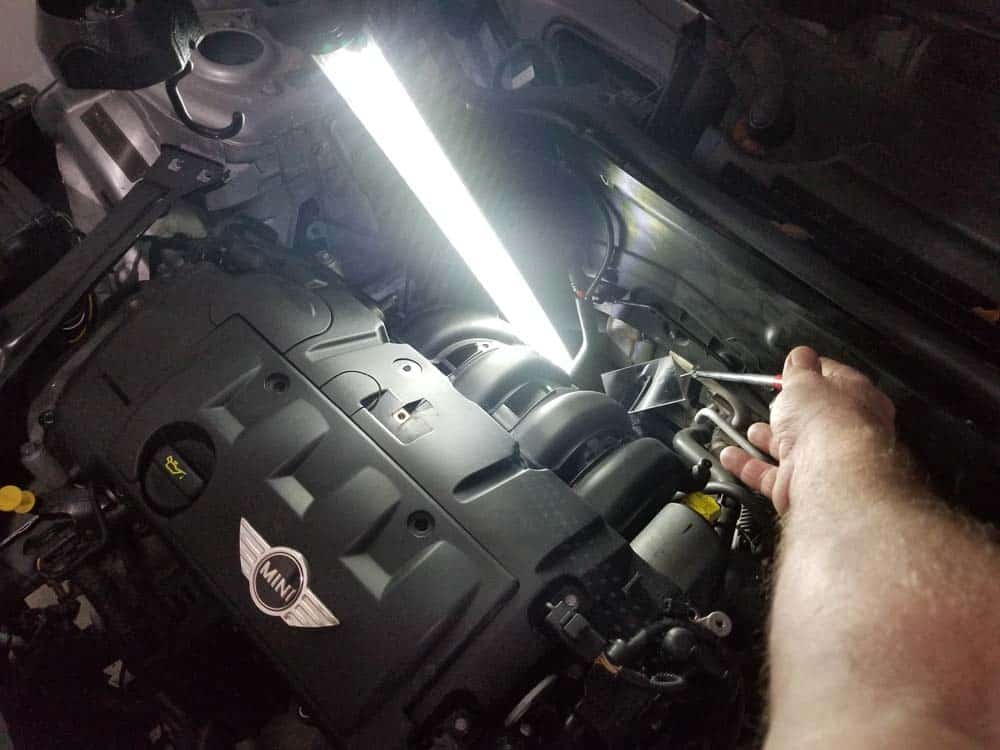
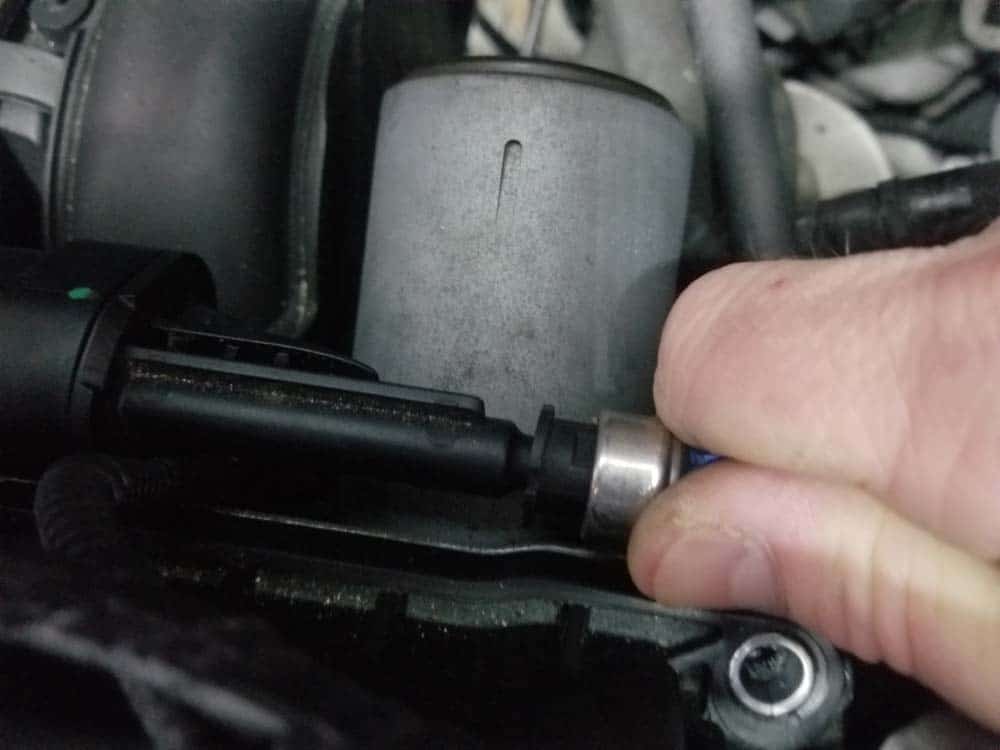
- You now have clear access to the lower intake manifold mounting bolt. Use an inspection mirror to locate it...it is located slightly to the right of the intake's centerline at the very bottom. We like to put an automotive work light behind the engine to help find it (see images below).
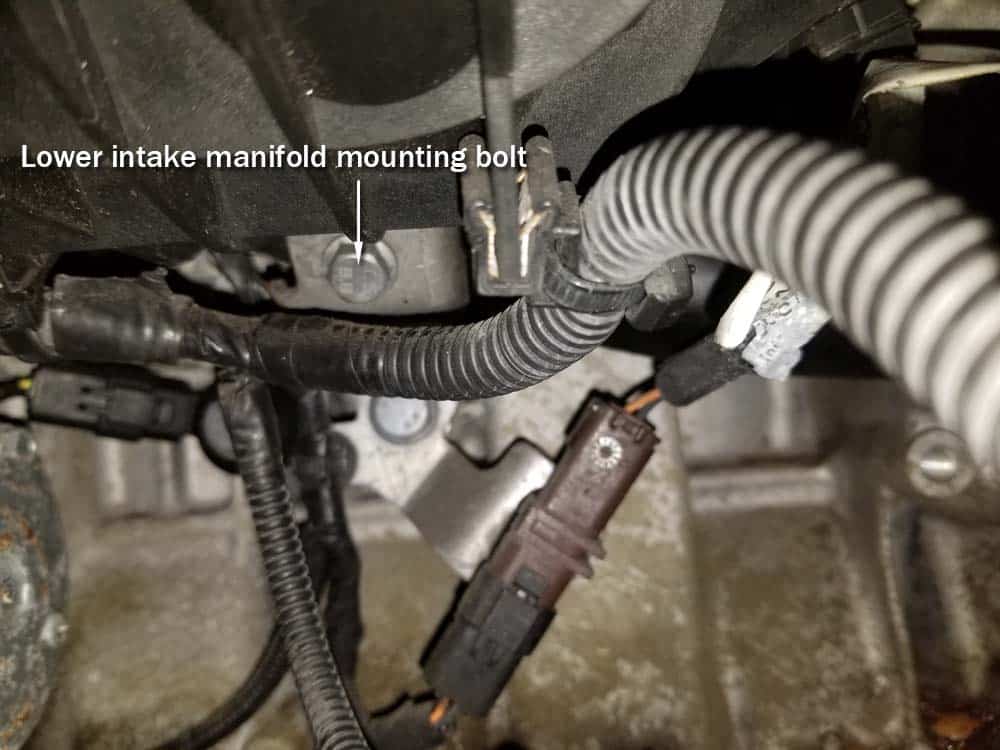
- Use a 9mm socket wrench to remove the lower intake manifold mounting bolt.
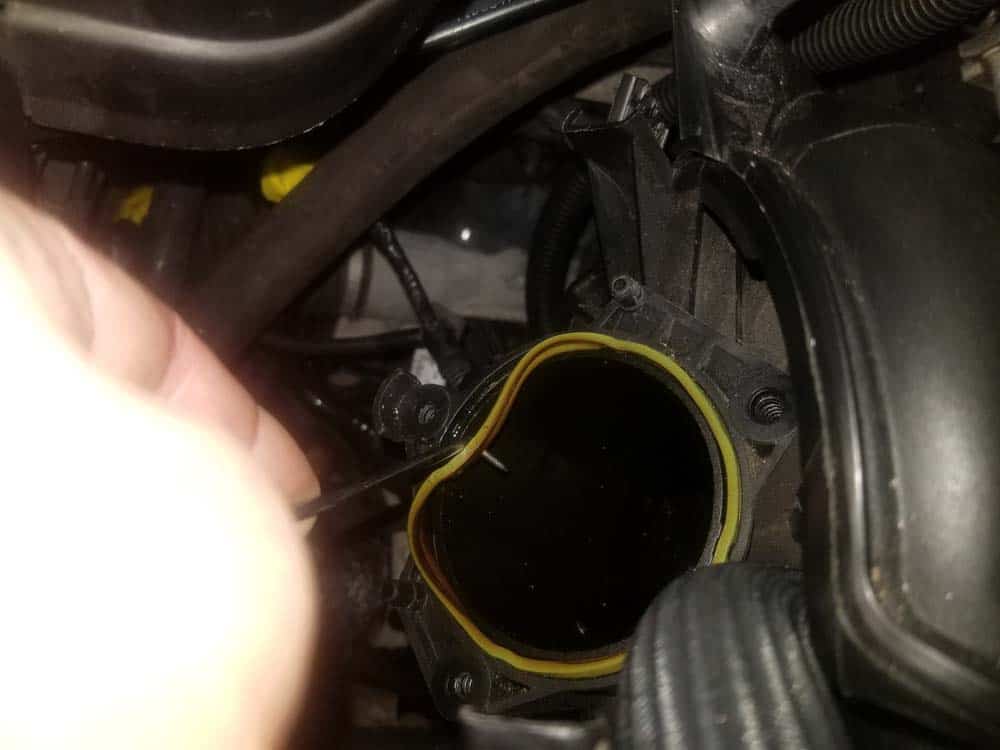
- The intake manifold is now free. Gently push it backwards off of the cylinder head exposing the gaskets.
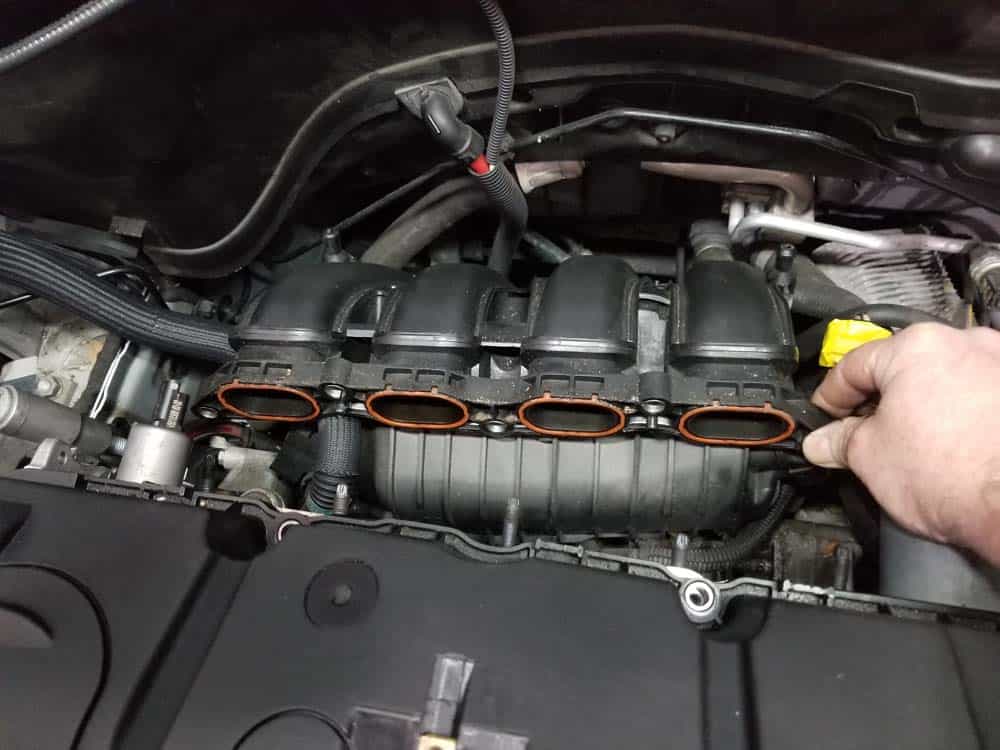
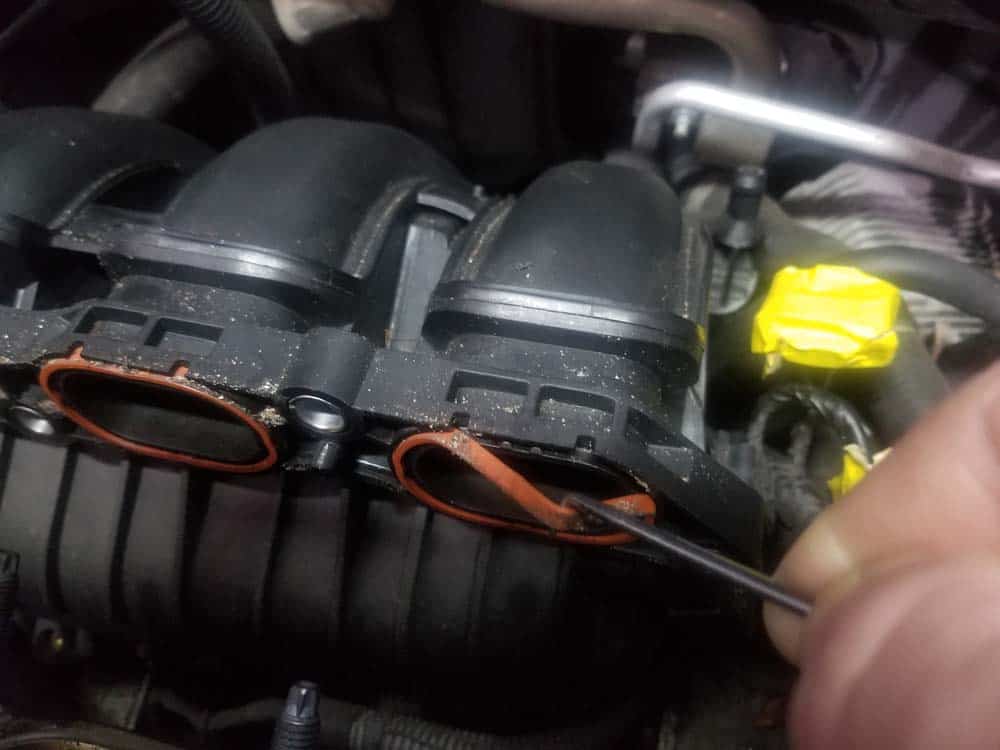
- Use a metal pick to remove the four intake manifold gaskets.
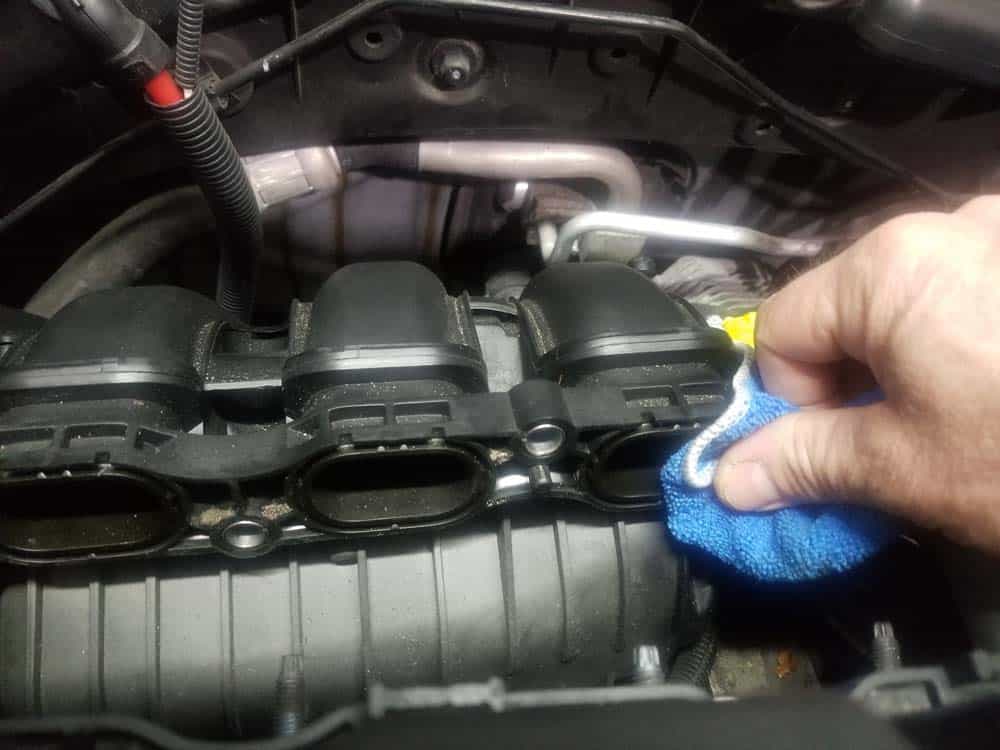
- Use compressed air to thoroughly blow out all of the dirt that has accumulated in the intake manifold around the gaskets. Use a clean rag to wipe out the intake manifold ports...they usually get a build up of oily residue.
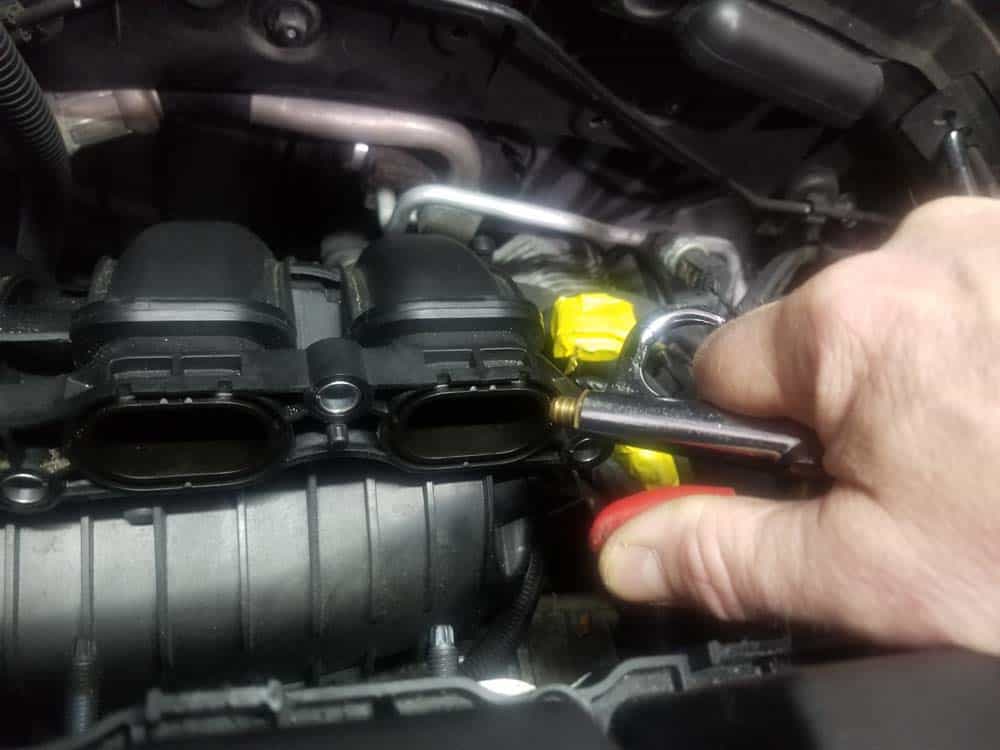
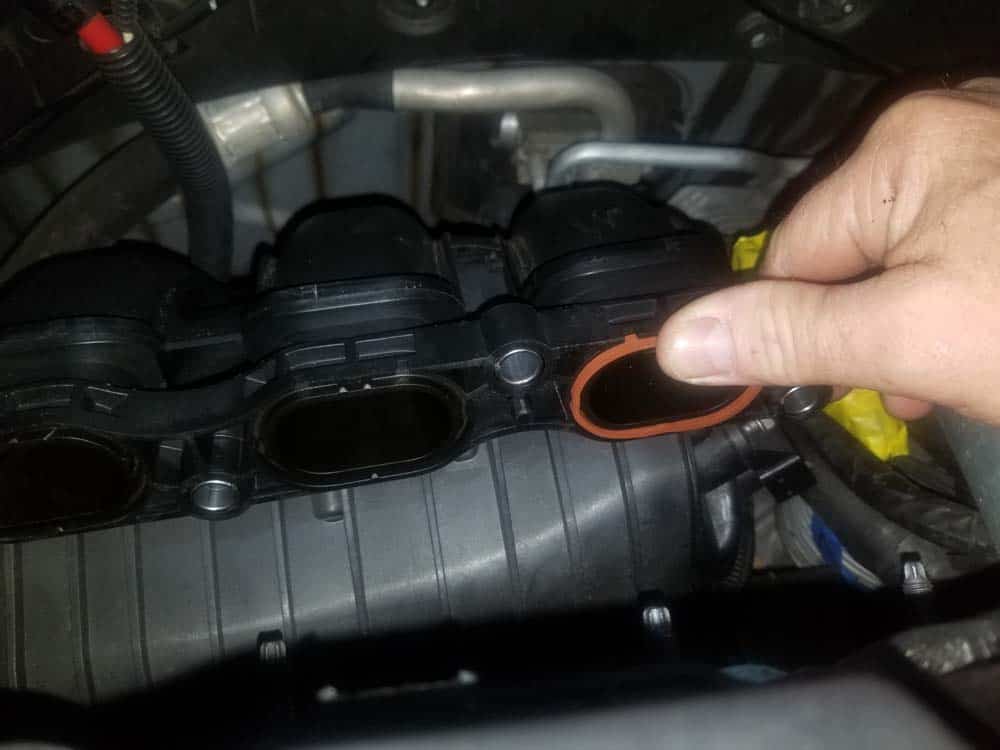
- Install fresh gaskets, making sure to press them in firmly with your fingers to ensure they are set correctly.
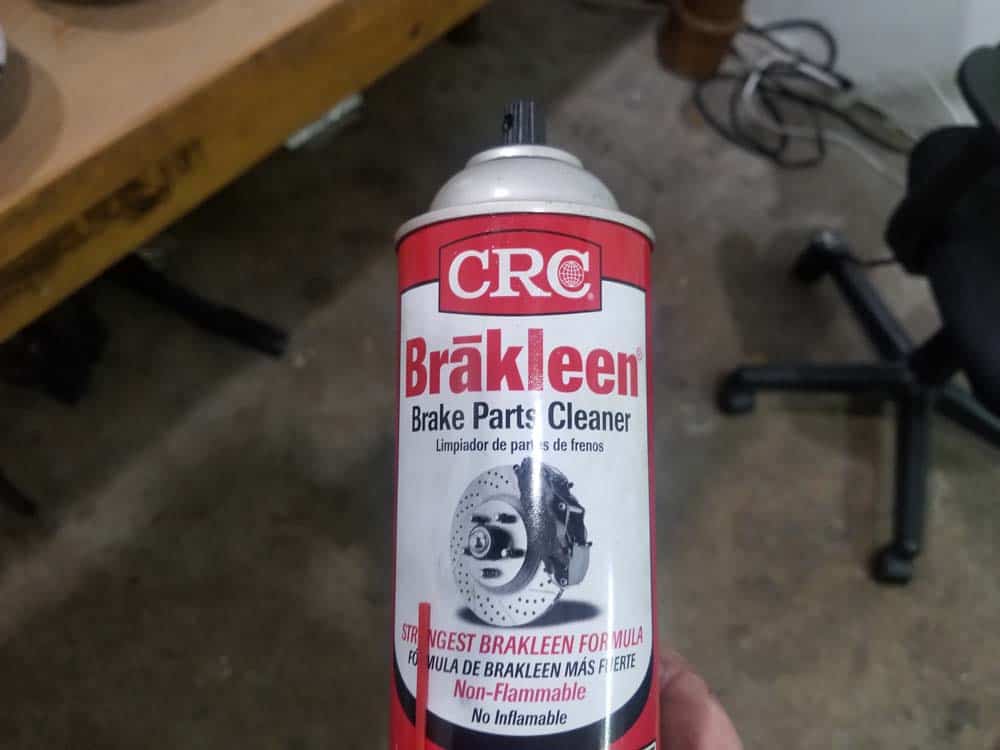
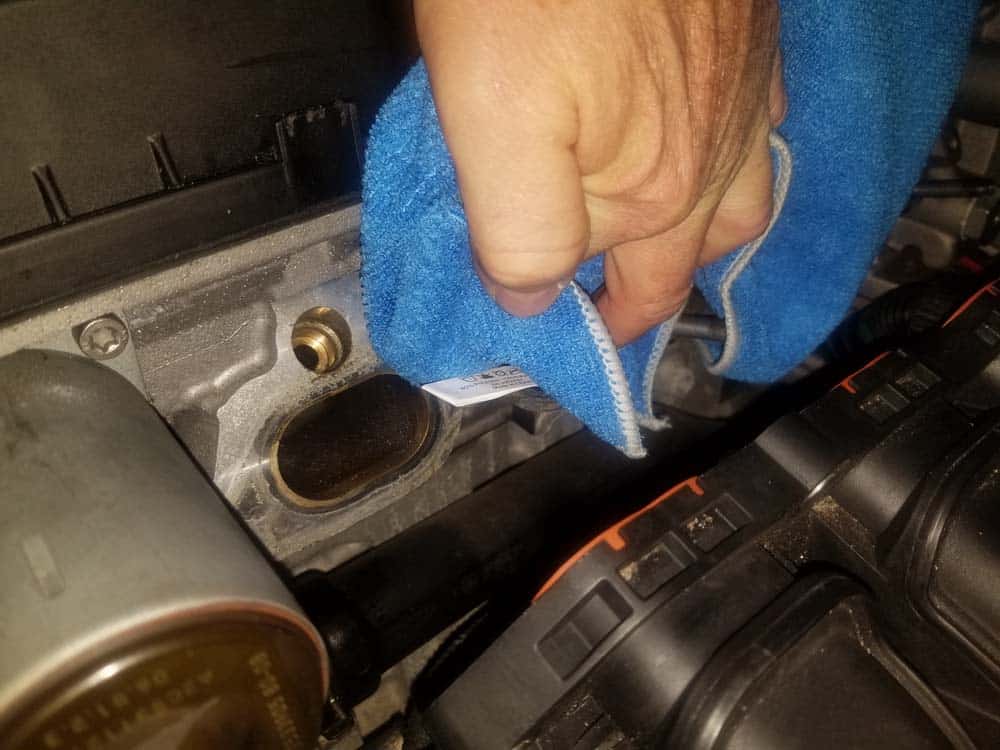
- Use CRC Brakleen to thoroughly clean the cylinder head surface where the gaskets mount.
- If you are going to replace the throttle body gasket, use a metal pick to remove the old one from the intake manifold. Wipe down the intake manifold with a clean rag and install a fresh gasket.
- Carefully reinstall the intake manifold taking extra care not to pinch the gaskets.
- Reinstall the lower mounting bolt and torque to 20 Nm (14.5 ft-lb).
- Reinstall the upper mounting nuts and torque to 20 Nm (14.5 ft-lb).
- Carefully reinstall the fuel line vent valve, making sure it snaps securely on the intake manifold. Reinstall the bracket bolt and tighten until snug.
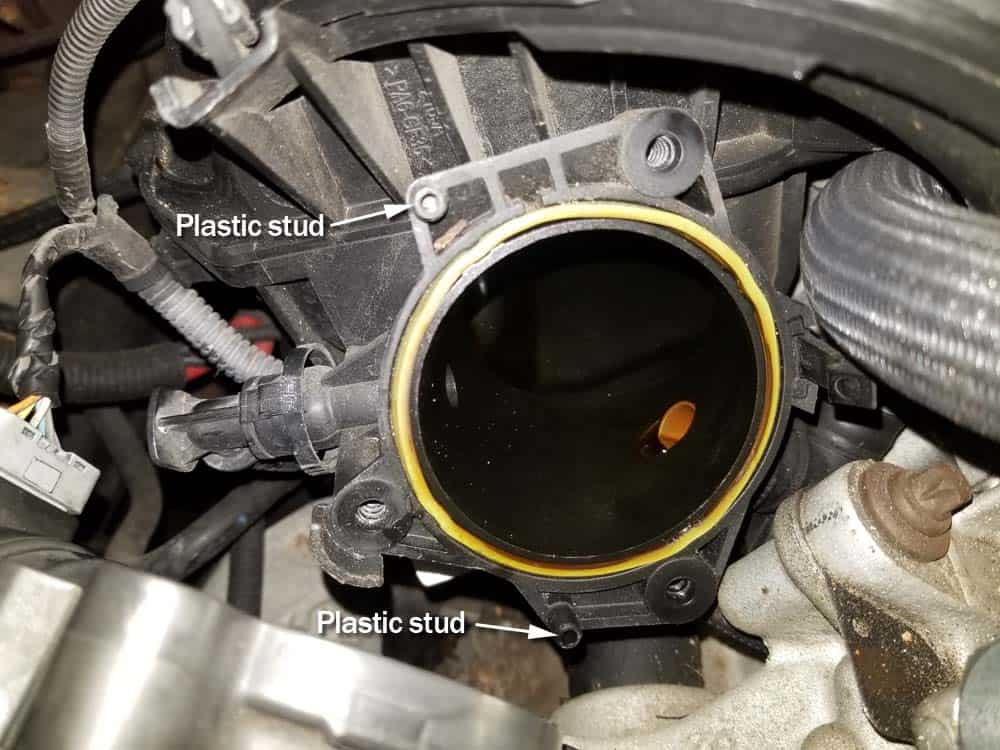
- Install the throttle body back into the car by first connecting the electrical plug then mounting it onto the intake manifold. Note there are two plastic studs on the intake manifold that line up with two holes on the back of the throttle. Torque the mounting screws to 7 Nm (5 ft-lb).
- Reattach the plastic wiring harness bracket with its 10mm bolt and plug the rear VANOS solenoid back in.
- Reinstall the rubber intake boot.
- Reinstall the crankcase breather line on the valve cover.
- Reconnect the differential pressure sensor and the Valvetronic motor.
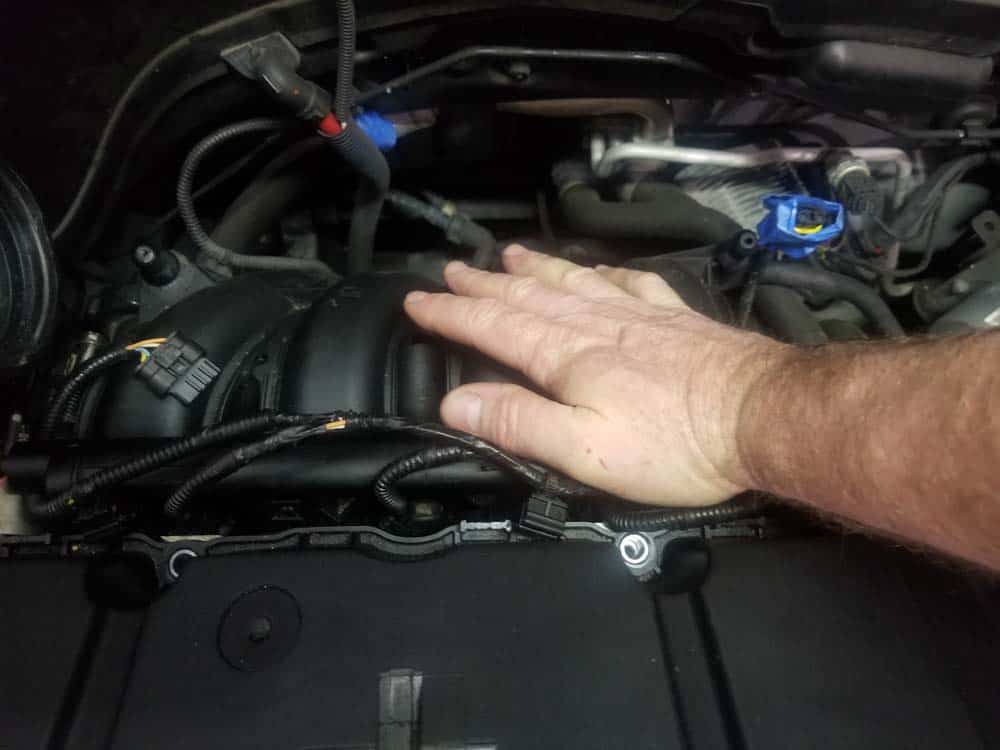
- Install the fuel injectors into the cylinders. It helps to tilt the fuel rail forward to get them in. If you are having a problem getting the injectors in, try wiggling the fuel rail back and forth. DO NOT put pressure on the fuel rail until you are certain the injectors are in the cylinders. DO NOT try and force the injectors into the cylinder...you will damage them.

- When all four injectors are properly in the cylinders, use the palm of your hand to firmly press down on the fuel rail. Continue to press firmly on each injector until their o-ring is properly seated inside the cylinder.
- Reinstall the two T30 fuel rail mounting bolts and torque to 8 Nm (6 ft-lb).
- Reinstall the fuel line on the end of the fuel rail. Make sure to press firmly on the fitting until you hear it snap into place.
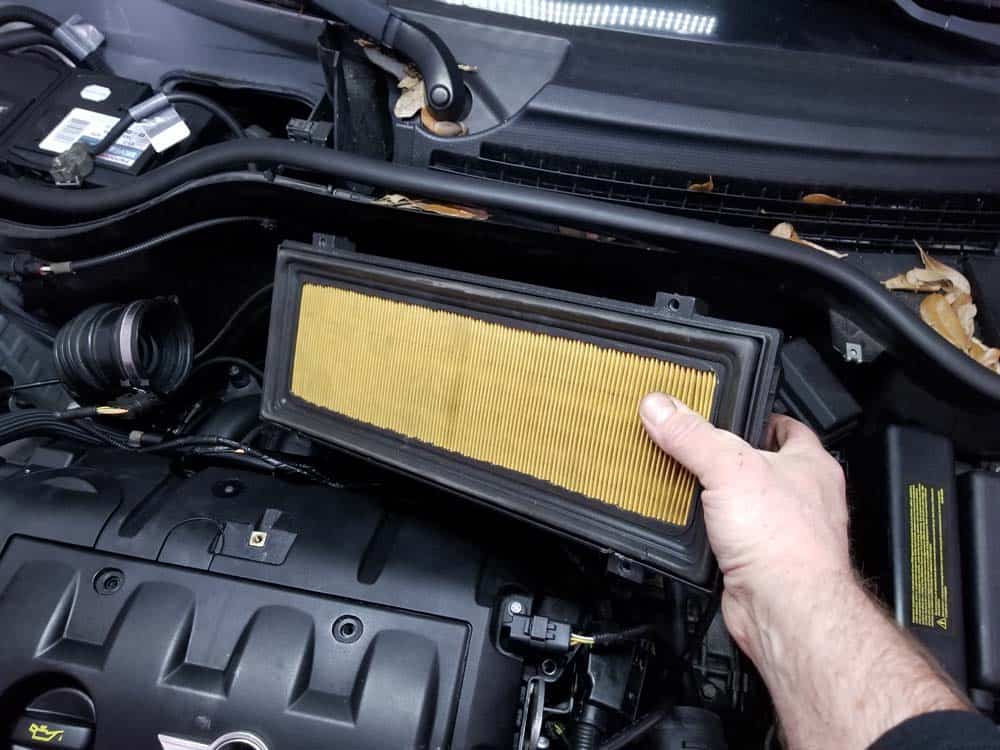
- Reinstall the intake muffler. Now is a great time to install a new air filter...you can order one from the parts list above. Don't forget to plug the MAF connection back in.
- Reinstall the pre-box and intake manifold tube.
- Reconnect the battery.
- Start the car and test for proper operation.
MINI R56 Intake Manifold Gasket Replacement Finished