
Affiliate link disclosure – The BMW Repair Guide uses affiliate links in their site. For more information on affiliate links, please click here.
Repair Summary
This article gives detailed instructions on replacing the friction wheel in a MINI R56/R57 MINI vehicle. Even though we used a 2007 MINI Cooper to perform this repair, this article can be applied to any 2006-2013 MINI Cooper/S vehicle with minor modifications to the repair steps.
A MINI R56 friction wheel replacement may be needed if your car is making a high pitched squeal or overheating.
The MINI R56/R57 Cooper and Cooper S were produced from 2006 -2013 with the Prince engine, a transverse four-cylinder motor manufactured via a joint venture between BMW and Peugeot. The R56 Cooper and its sibling, the turbocharged R57 Cooper S, have long been criticized for their reliability issues - some of them justifiable and some not.
The MINI R56 friction wheel is located on the right side of the engine and is in charge of spinning the water pump drive wheel (pulley). Due to its compact design and limited space in the engine compartment, the Prince engine was manufactured with a friction wheel to take the place of a traditional belt-driven water pump. It operates by placing a direct link between the crankshaft pulley and the water pump drive wheel.
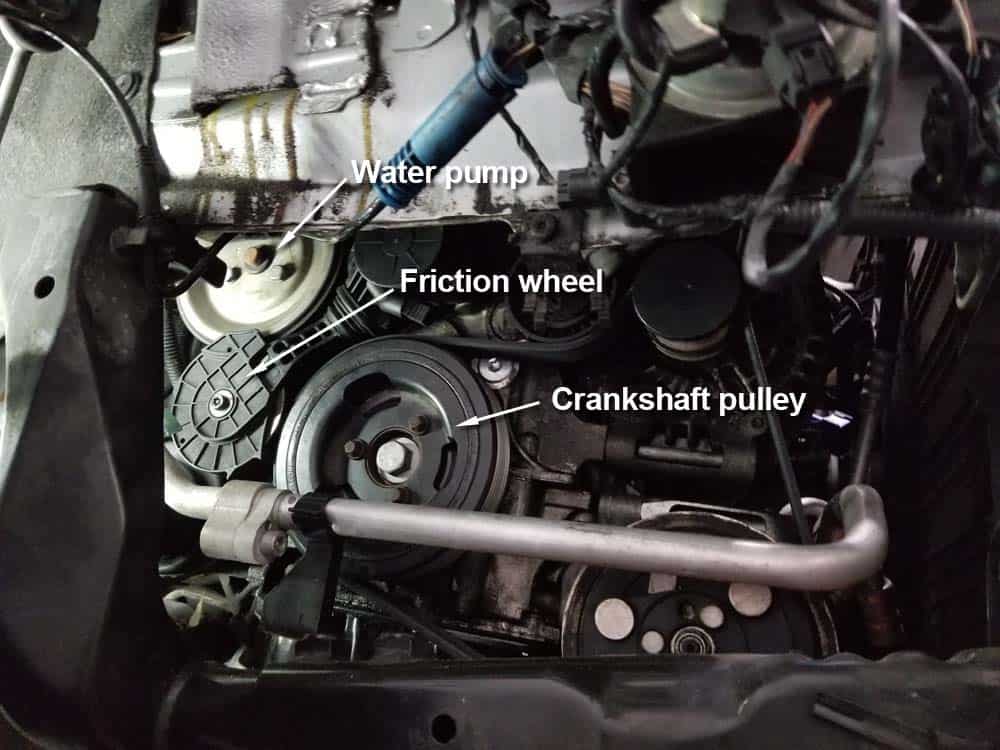
Like all mechanical engine parts, the MINI R56 friction wheel is under continual heat and stress. Over time the bearings inside the wheel can begin to fail, causing a high-pitched squealing sound from the right side of the vehicle. The rubber-coated wheel that transfers power from the crankshaft pulley to the water pump can also start to wear causing it to slip and lose its efficiency. In extreme cases the rubber can separate from the friction wheel leaving it completely inoperable. Any of these conditions can cause the water pump to stop working allowing the engine to overheat. The friction wheel should be replaced immediately upon the first signs of failure.
Like the accessory belt on your MINI, the friction wheel should be routinely checked and replaced when it shows any signs of wear. A MINI R56 friction wheel replacement is a relatively straightforward procedure that can be done by any home mechanic with average abilities. The good news is high-quality friction wheels are relatively inexpensive...the entire job can be completed for well under $100.


View the detailed parts diagram for this repair.
Includes detailed part diagrams, part numbers and links to purchase all of the required components needed to complete this repair.

Before starting this repair, you must have the following required parts.
All MINI R56/R57 vehicles
Designed to be a solid wheel link between two pulleys to drive the water pump, this unit can suffer from squeaking bearings that fail over time. This part should be replaced when you change the serpentine belt.
All MINI R56/R57 vehicles
This drive wheel / pulley mounts to the water pump and spins the pump front the drive belt.
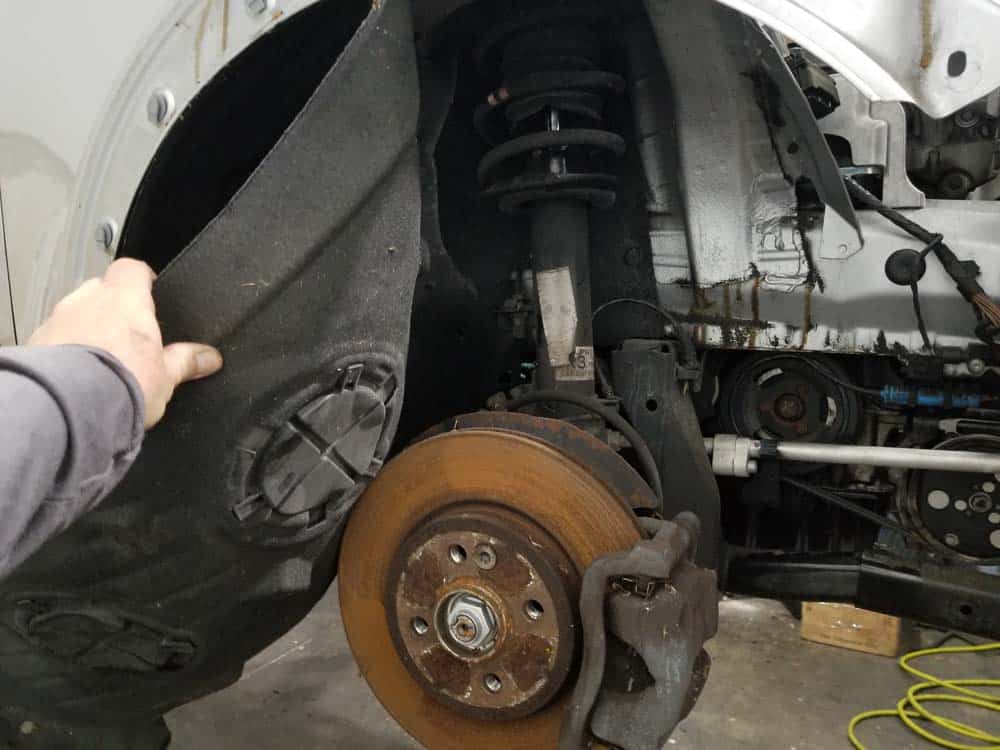
Section 1 - Removing the Right Fender Liner
The right fender liner on all MINI R56/R57 models must be removed to access and replace the friction wheel.- While the vehicle is on the ground, use a 17mm socket wrench to slightly loosen the four lug nuts on the right wheel. DO NOT remove the lug nuts…you are just loosening them so they can be removed after you raise the vehicle.
- Jack and support the front of your vehicle using the jack stand method as shown in our article BMW Jacking and Supporting for Repairs and Maintenance.
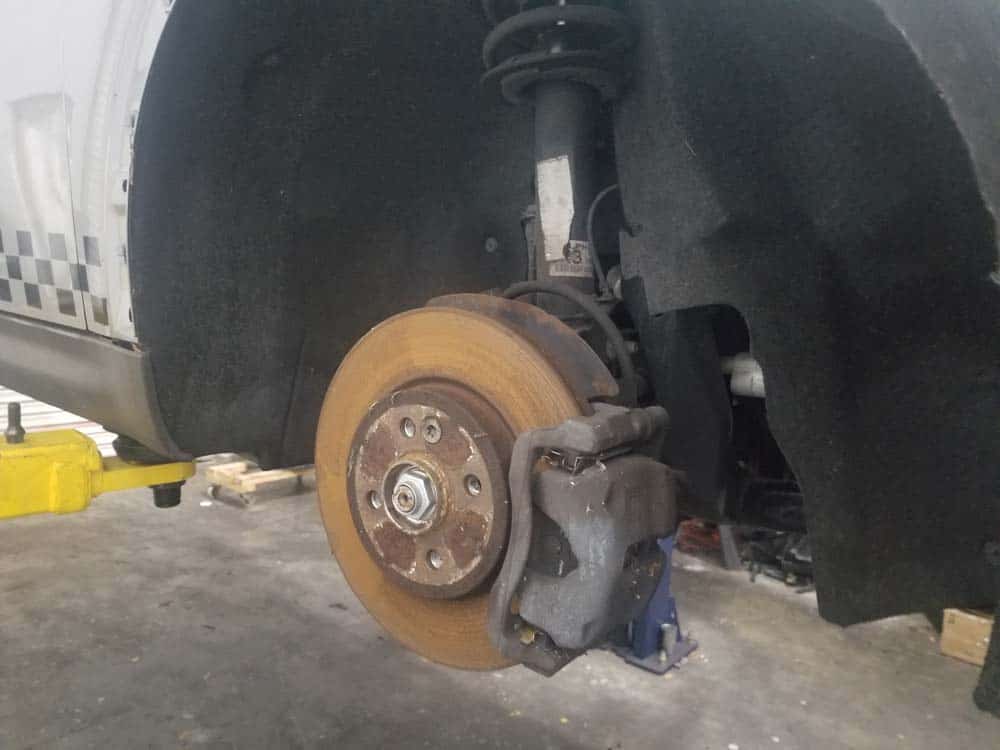
- Using a 17mm socket wrench, remove the front right wheel from the vehicle.
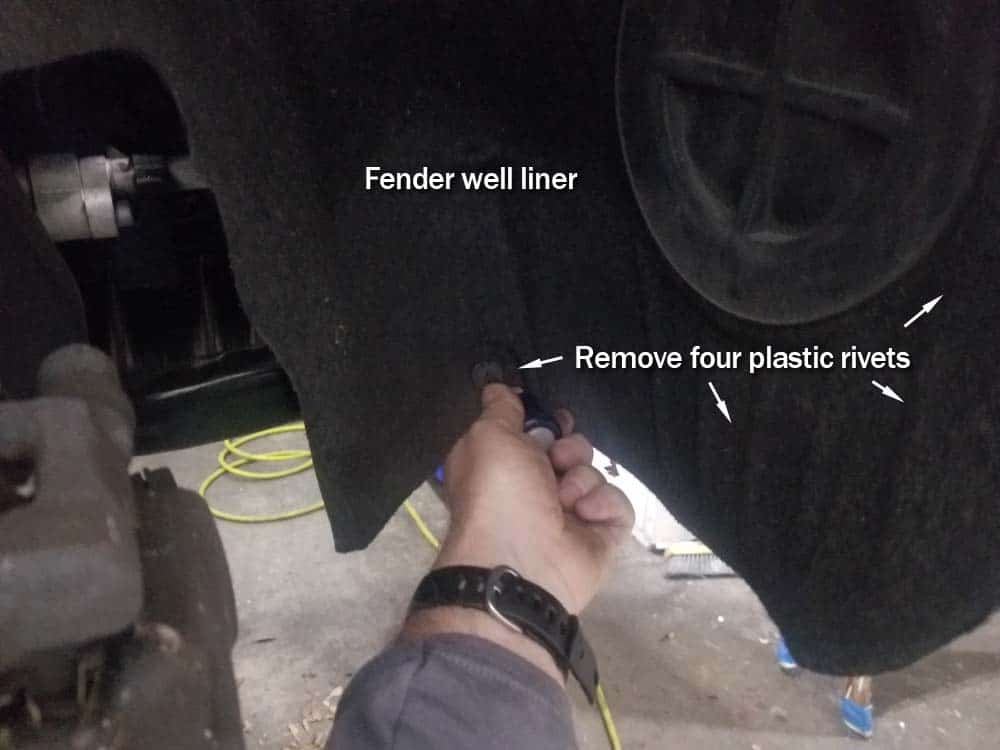
- Use a phillips head screwdriver to remove the four phillips head plastic rivets securing the front of the fender well liner to the body of the car. You do not need to remove the rear phillips head rivet.
- Next, use a T30 torx bit to remove the front torx screw anchoring the fender liner to the body of the car. You do not need to remove the rear torx screw.
- Grab the wheel well liner and fold back behind the brake rotor out of the way. You can now access the engine pulleys on the right side of the engine.
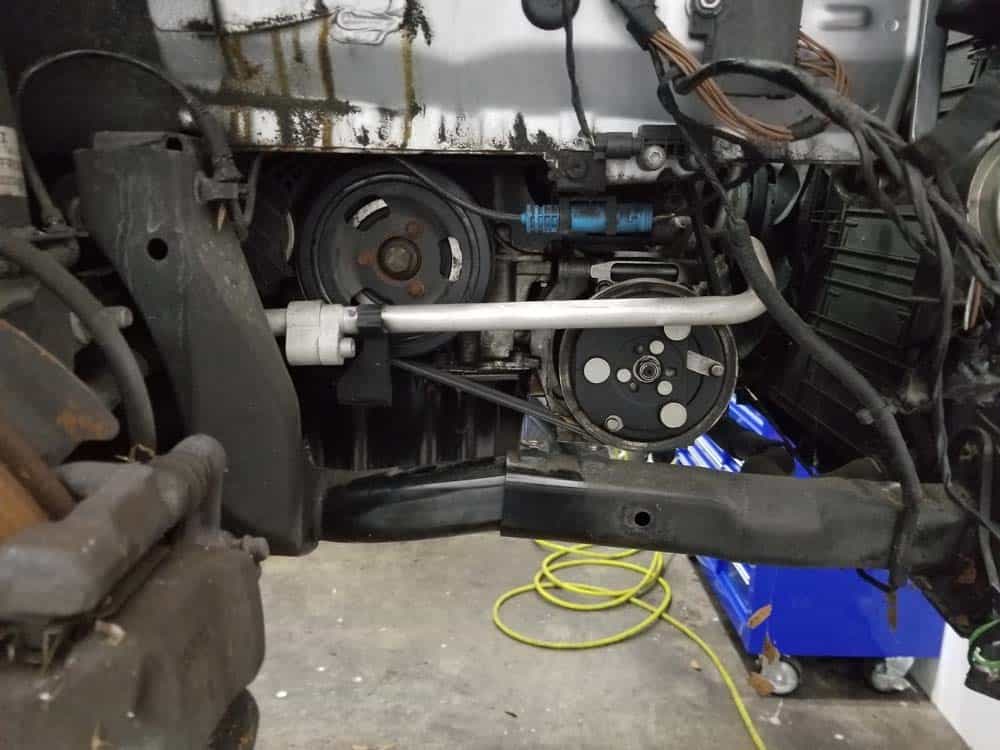
Section 2 - Accessing the MINI R56 Tension Wheel
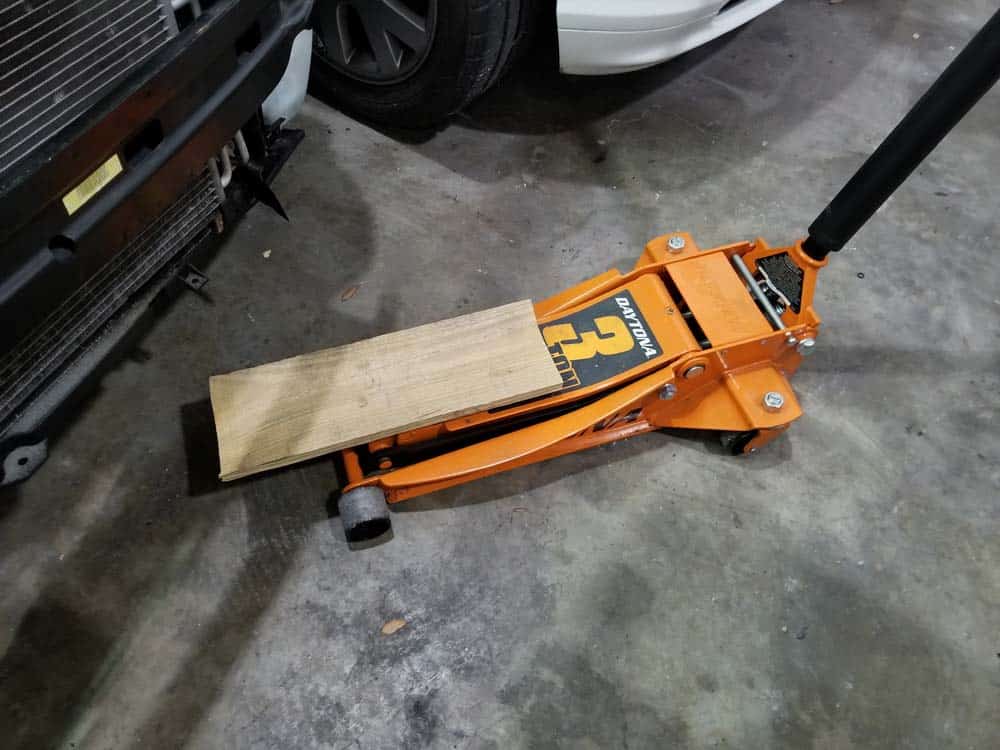
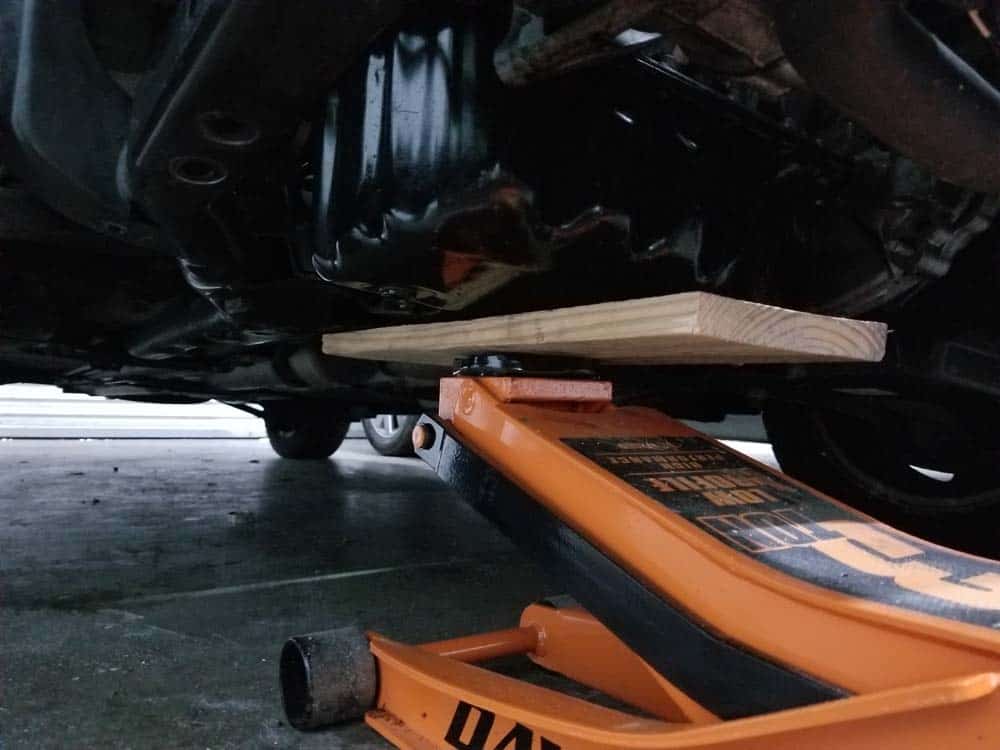
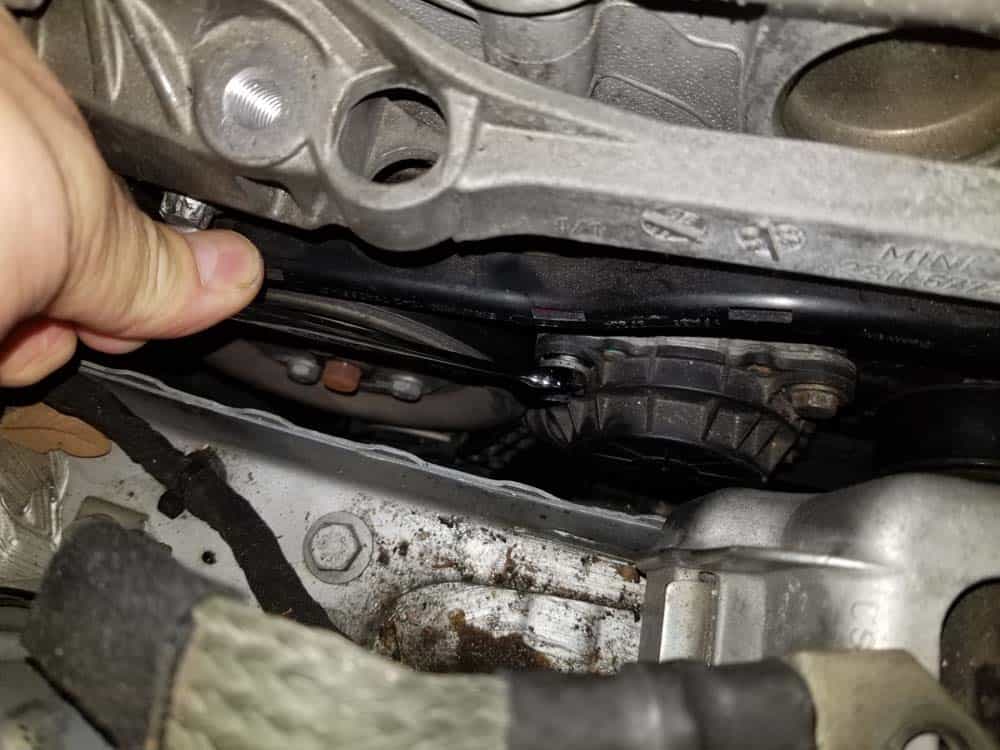
Due to the limited space inside the engine compartment, the motor will need to be raised and lowered to remove access the friction wheel mounting bolts. This should not be an intimidating procedure...in fact it is fairly easy after you learn how to do it. Take your time and use patience when removing the upper engine mount bracket. - Position a floor jack with a scrap piece of wood underneath the oil pan as shown below. Slowly raise the jack until it just barely lifts the engine. The goal here is to take pressure off of the upper engine mount so it can be safely removed.
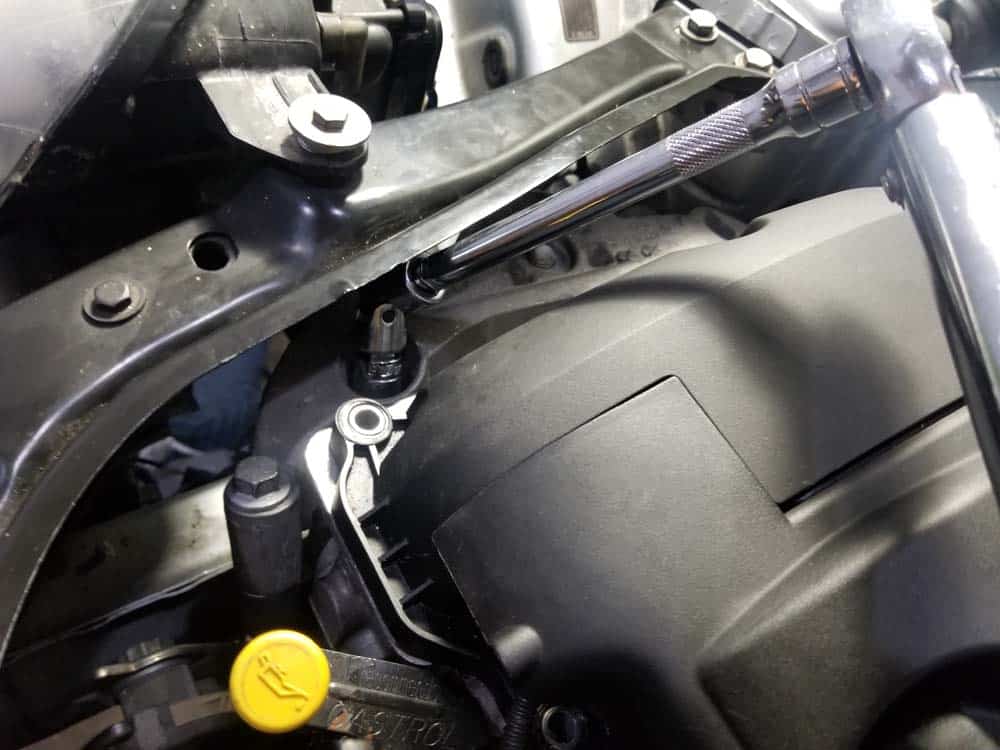
- Locate the upper engine mount bracket. It is held in place with four 13mm bolts and one 18mm nut.
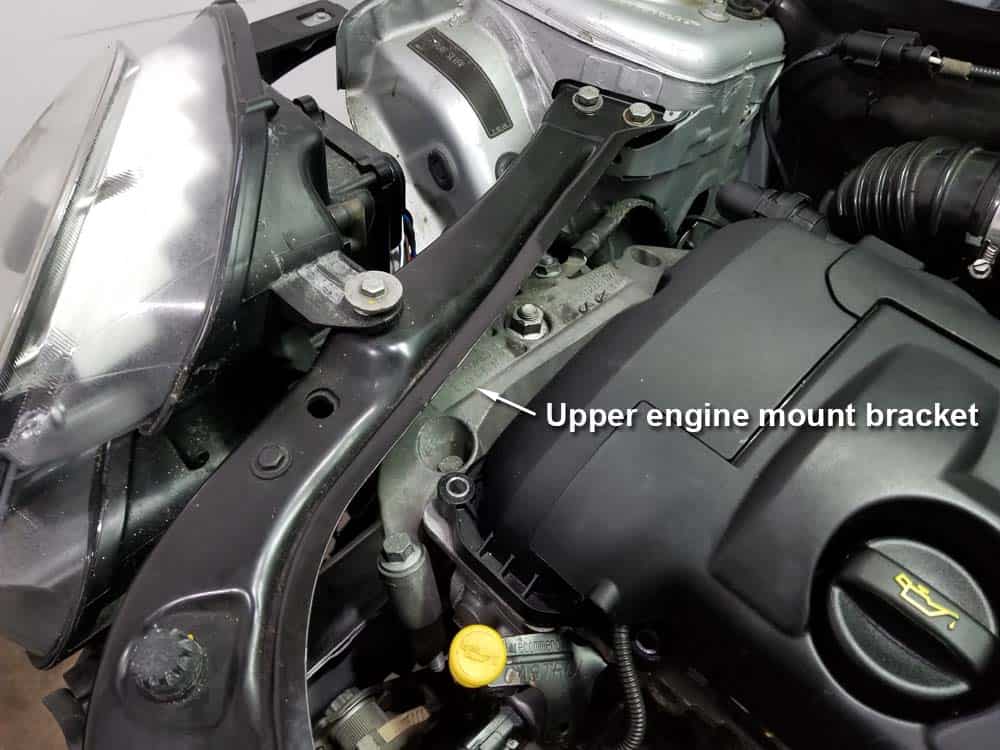
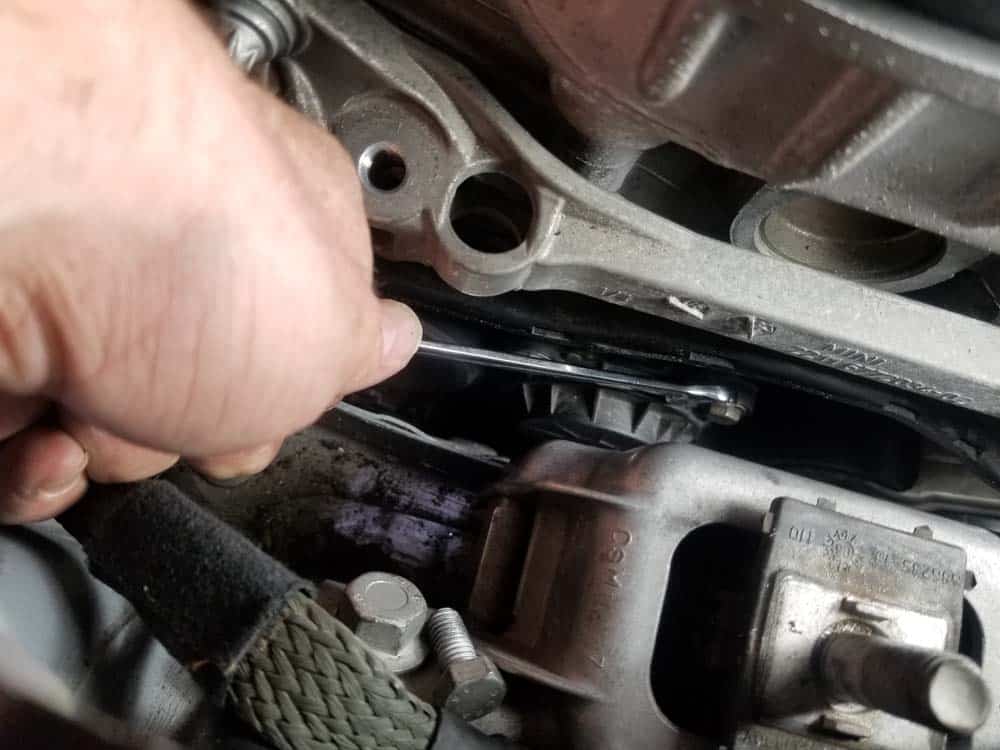
- Begin by removing the four 13mm bolts securing the bracket to the engine. Since several bolts are difficult to access with the radiator frame in the way you may have to get creative with socket extensions, open end wrenches, and even just your hands. The front two bolts are difficult to fully remove...you can remove them with the bracket.
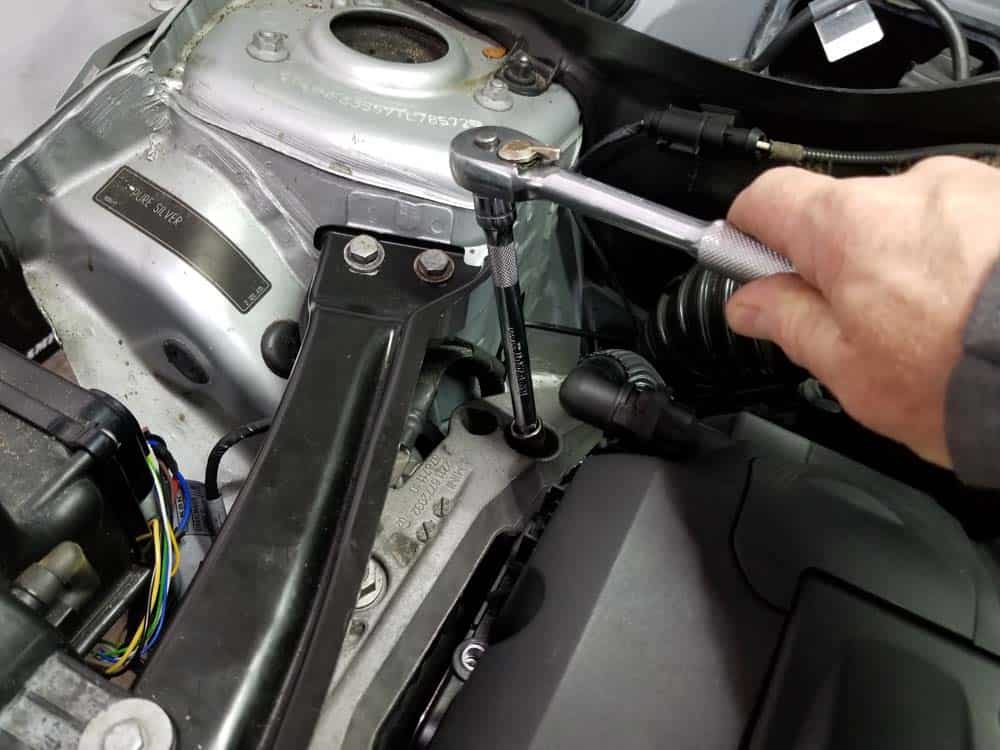
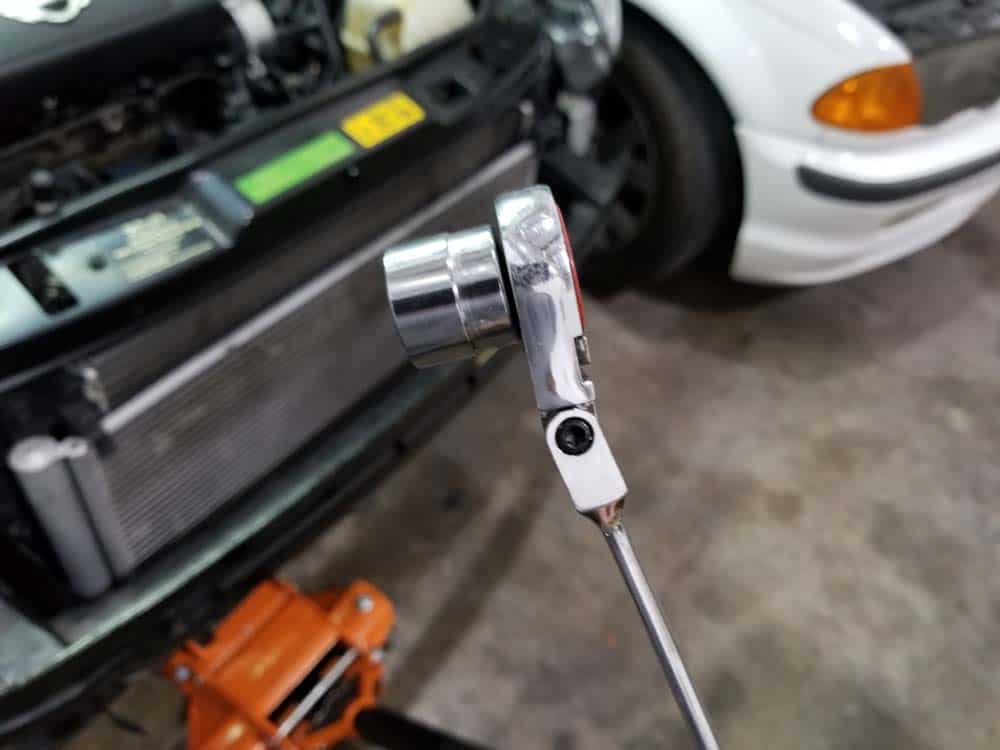
- Next, use an 18mm socket wrench to remove the nut securing the bracket to the engine mount. Once again clearance issues make this nut difficult to loosen...we used a low profile socket and wrench as shown below.
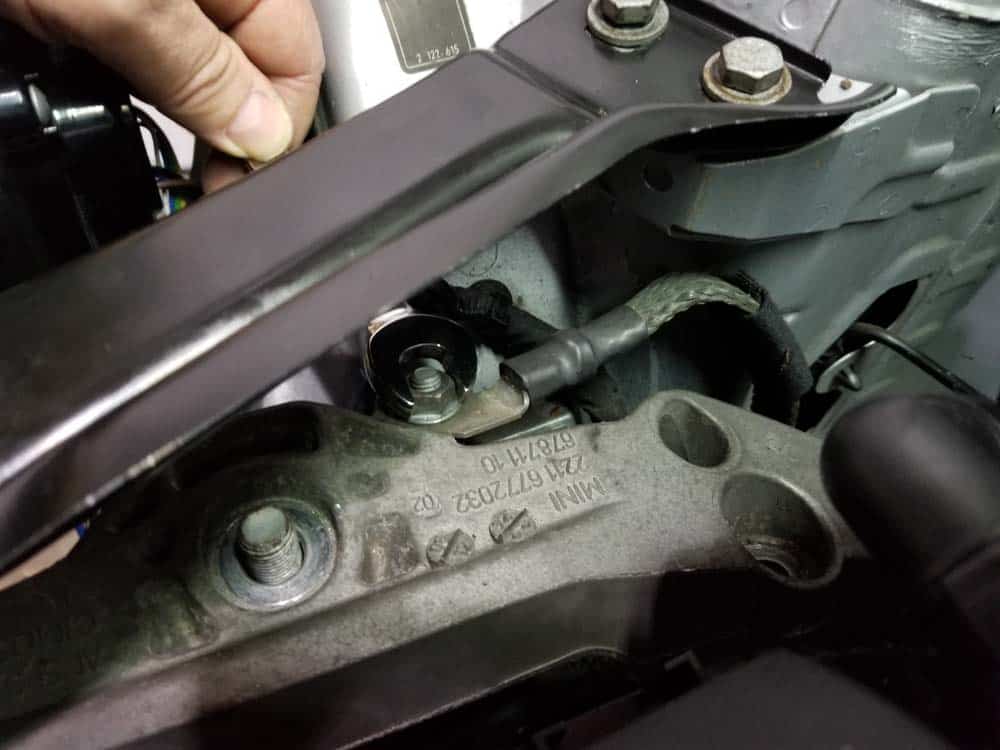
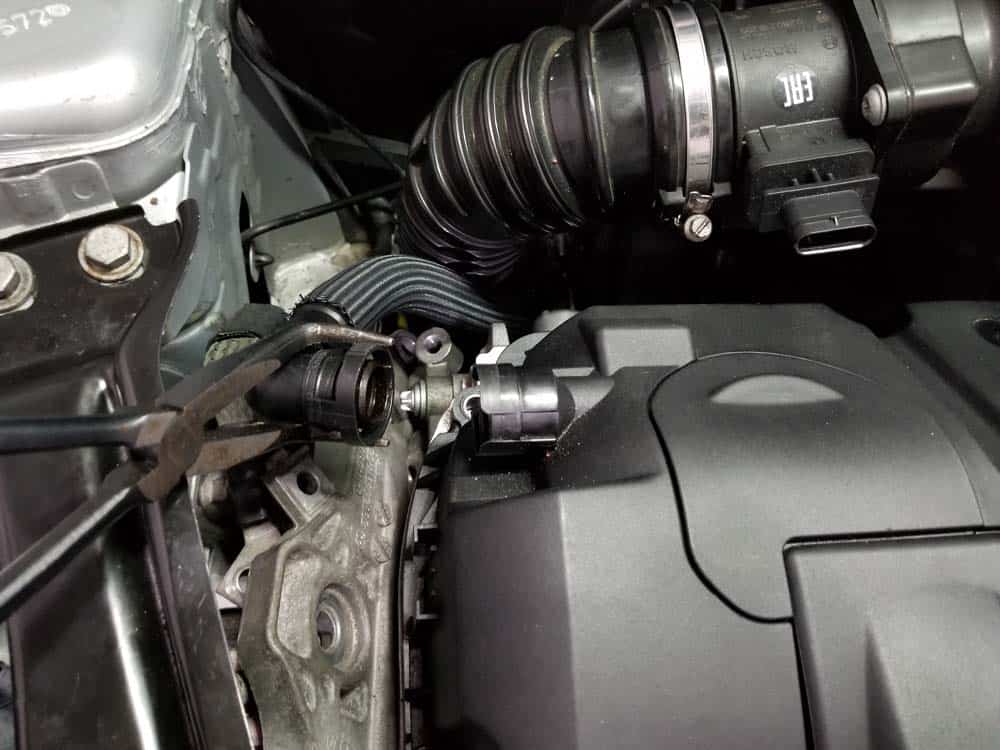
- Finally, remove the ground strap nut with a 13mm open end wrench.
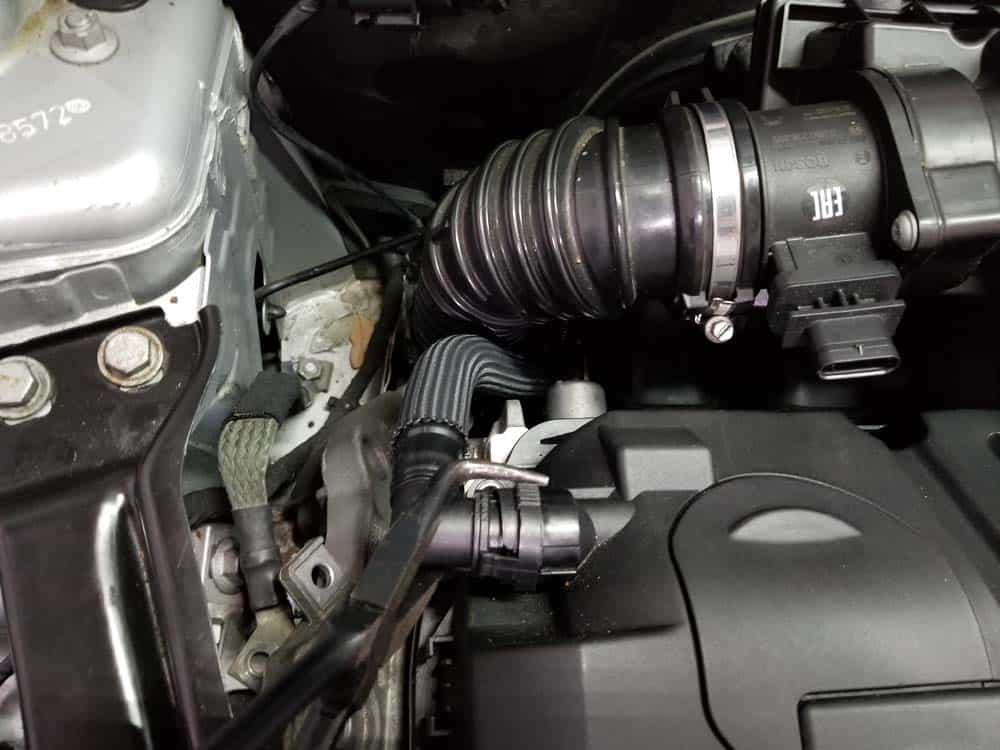
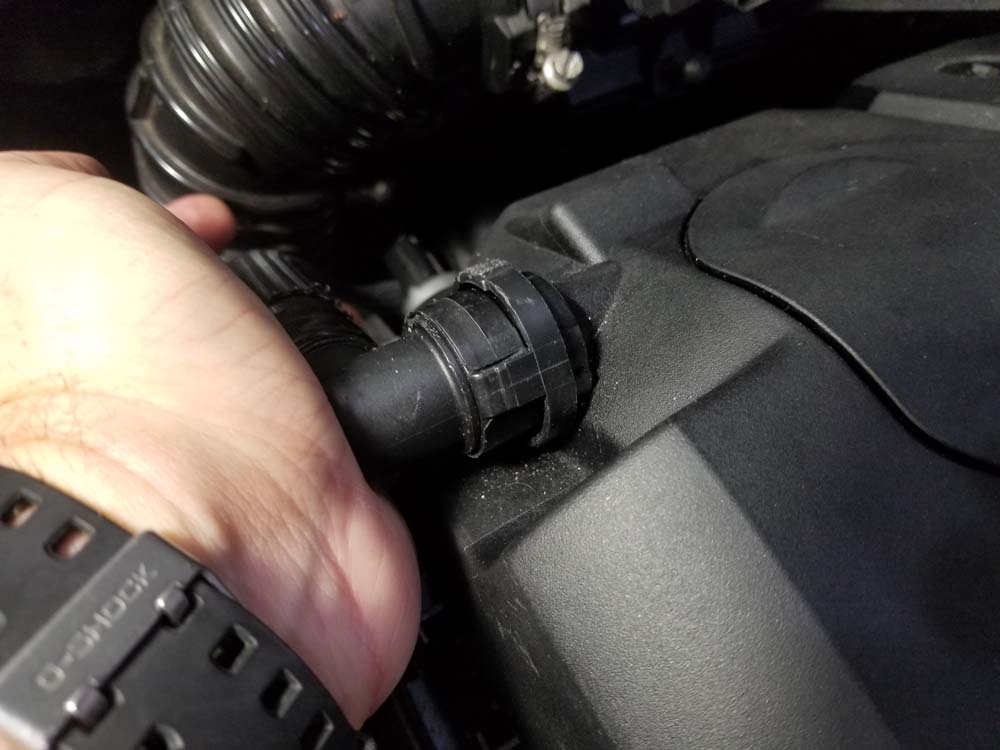
- Pinch the crankcase breather hose connection and remove it from the valve cover (a pair of thin nose pliers helps). This will give you enough clearance to remove the bracket.
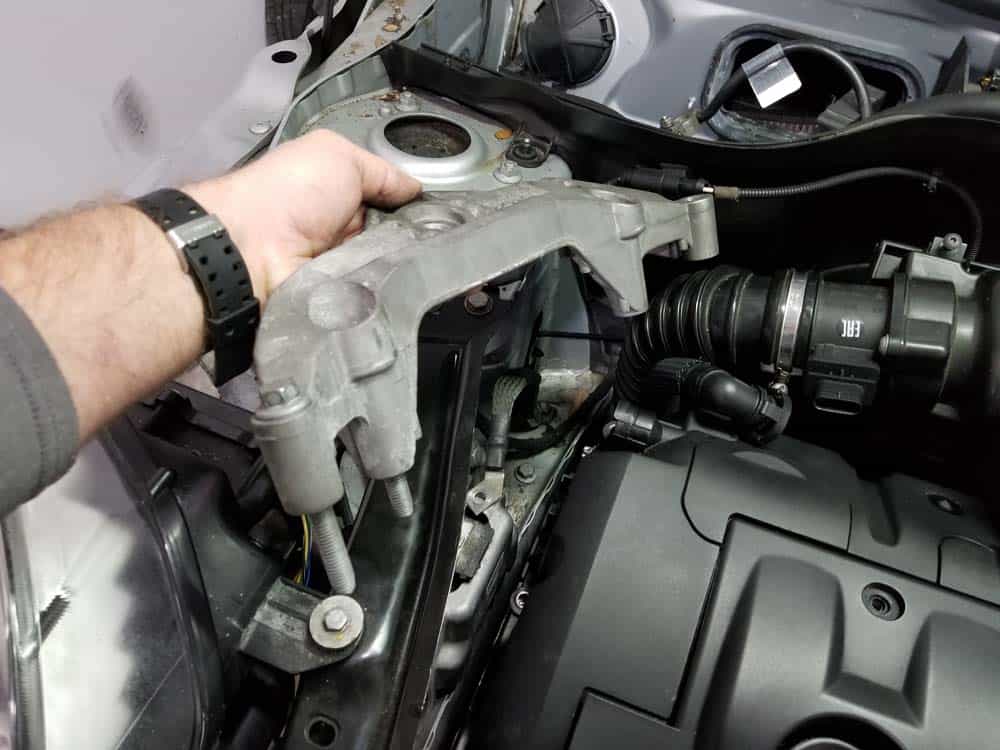
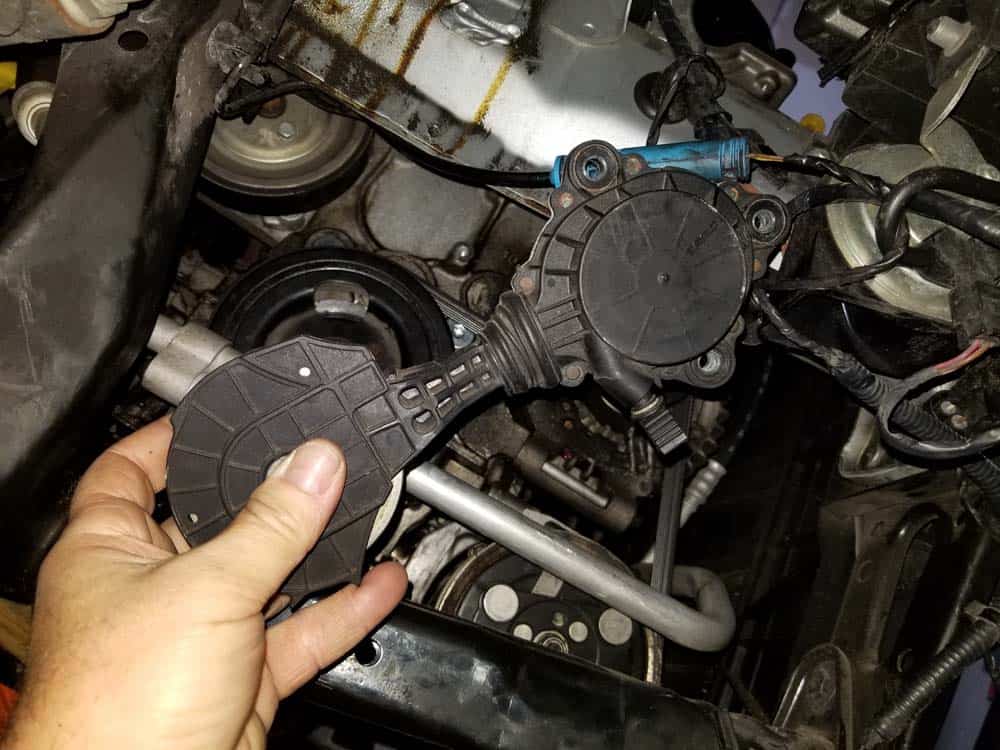
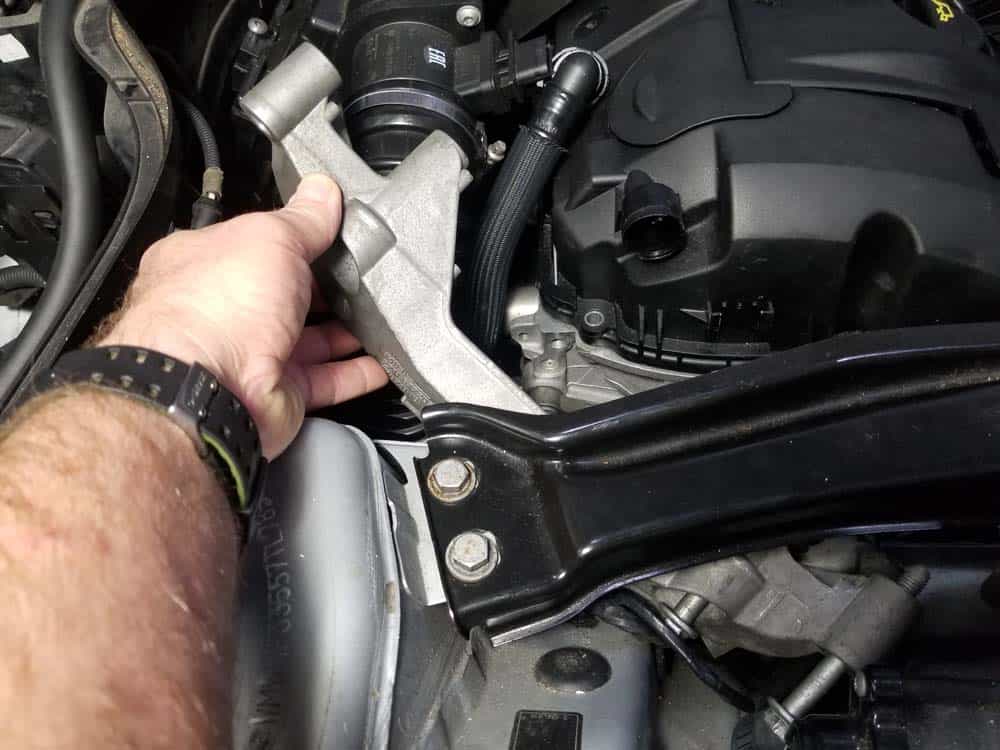
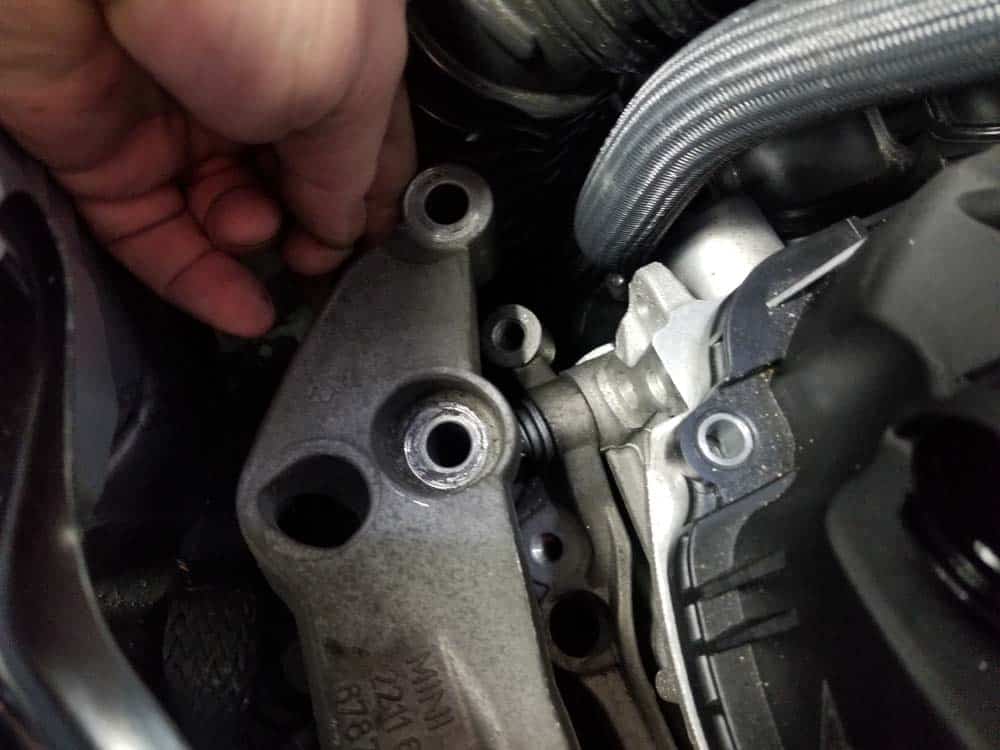
- Grasp the engine mount bracket and remove from the vehicle. Note that we left the front two mounting bolts in the bracket.
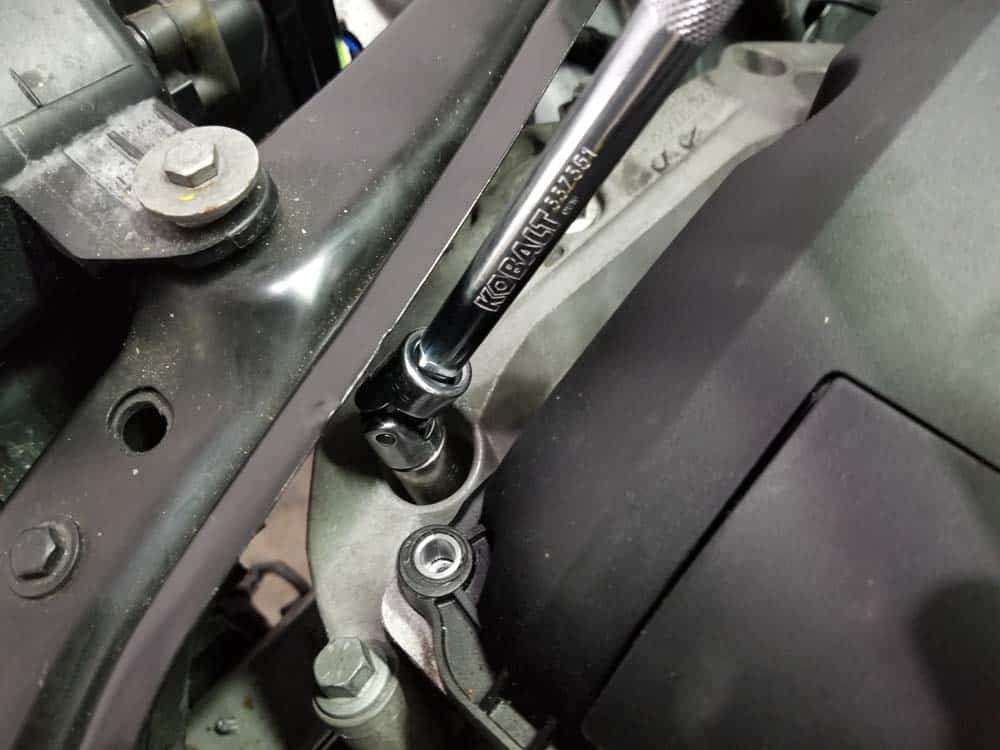
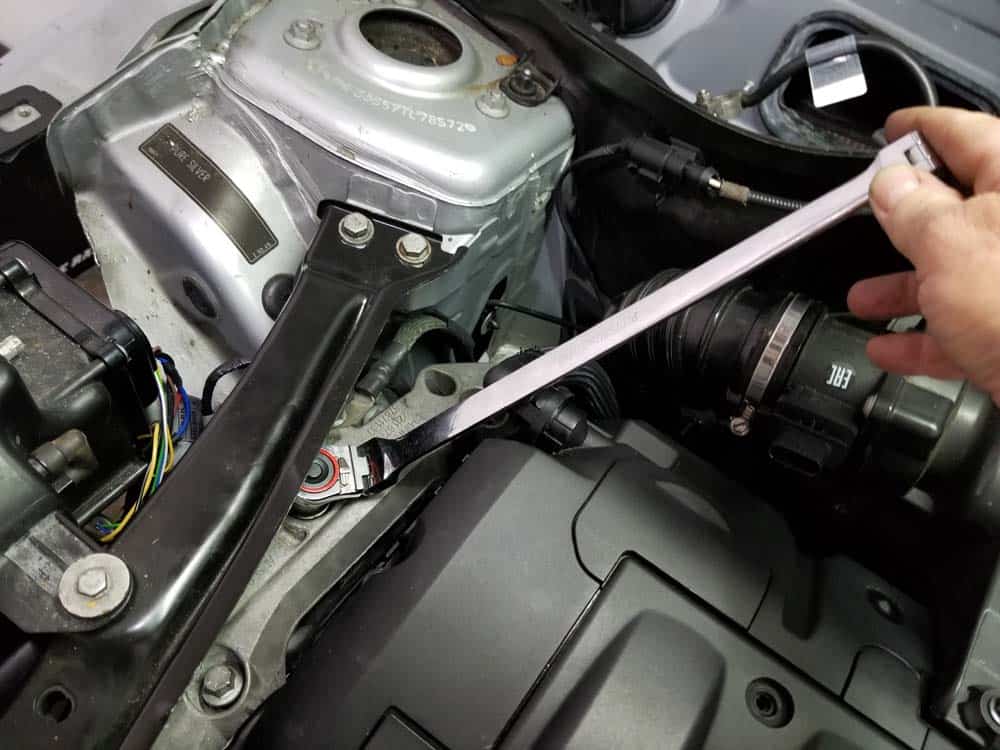
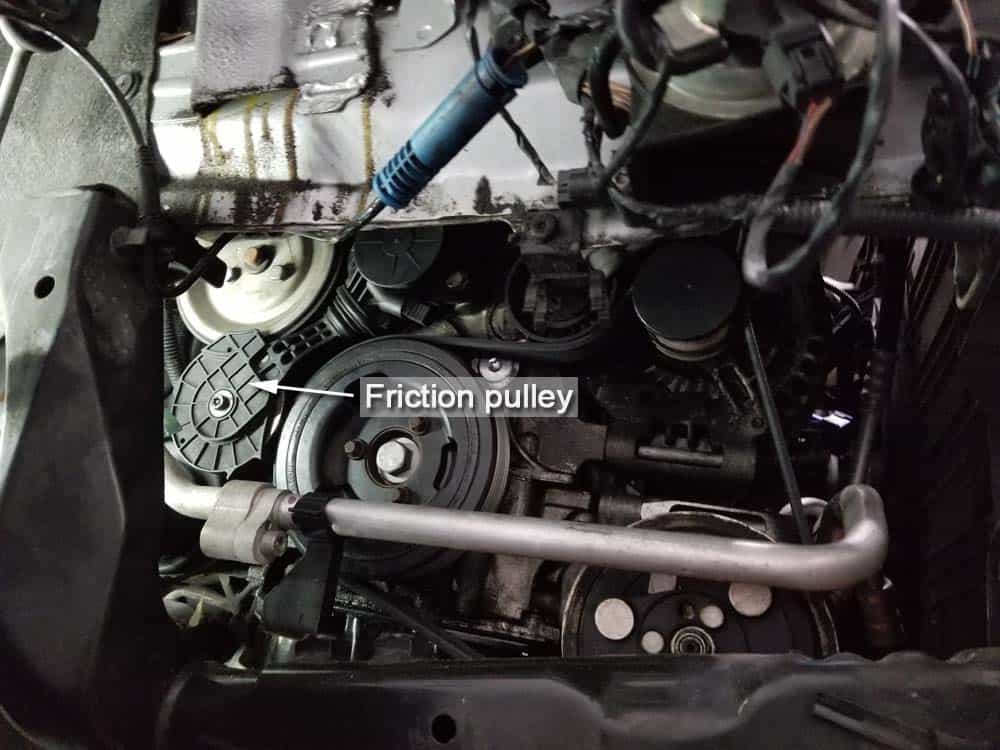
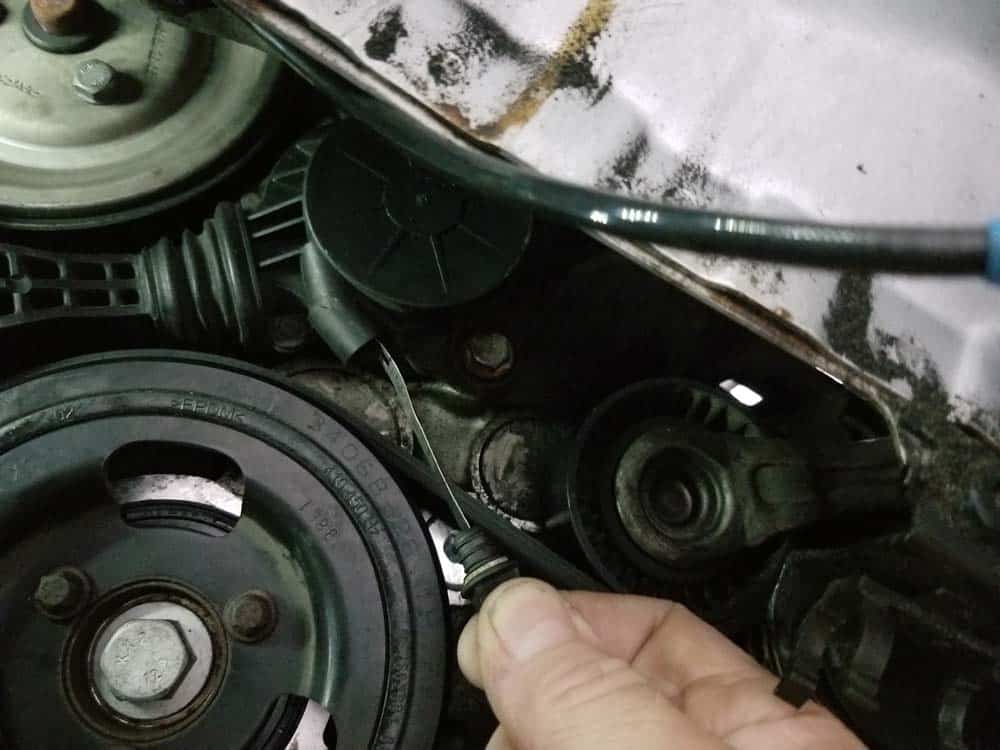
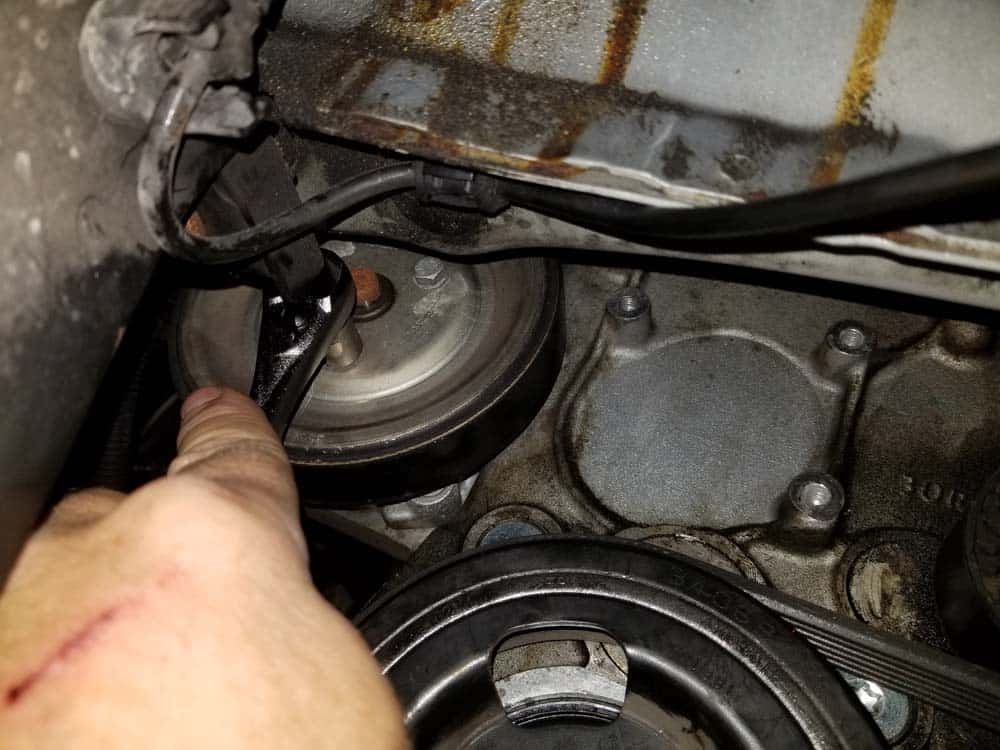
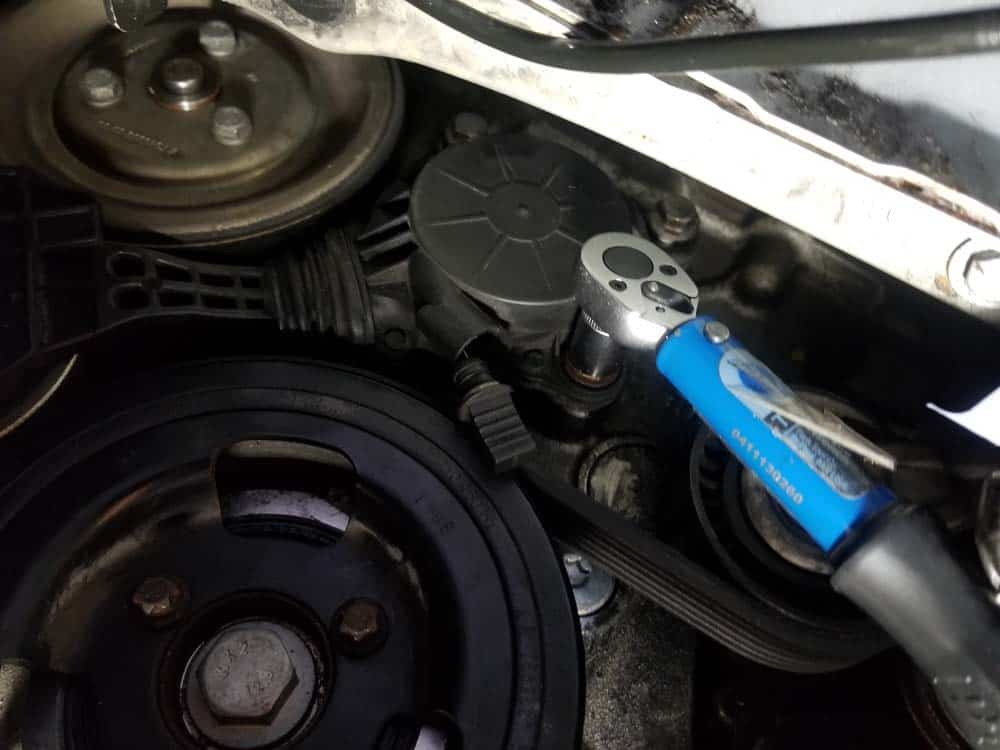
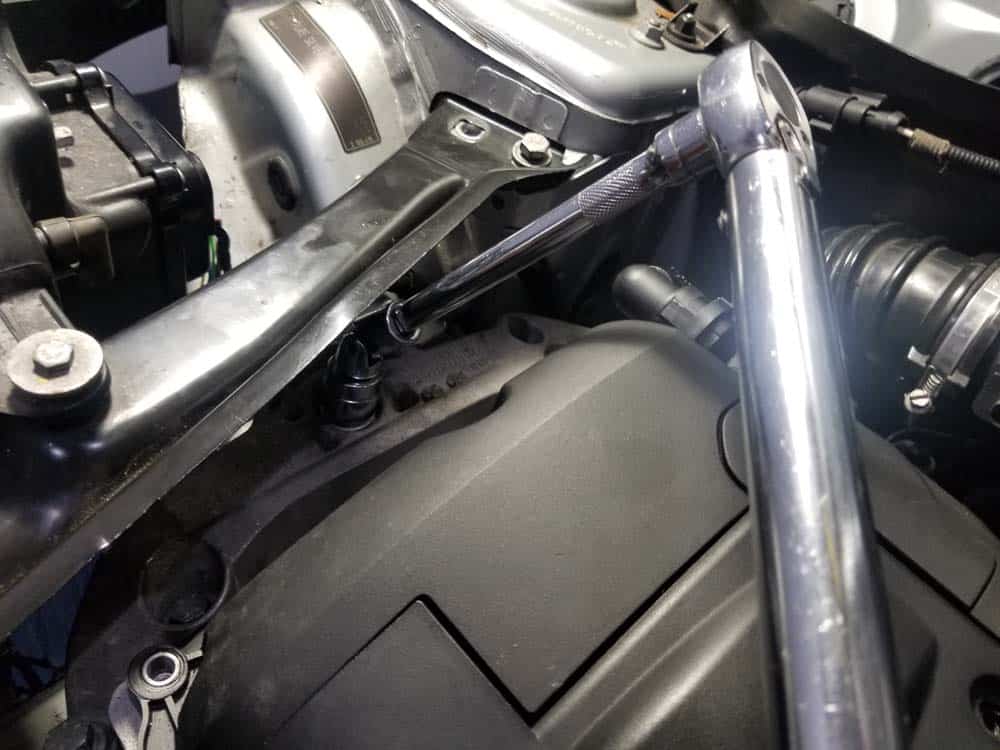
- The friction pulley can now be accessed. The friction pulley is held in place by three 10mm bolts - because of clearance issues with the frame of the car the upper two friction wheel bolts must be loosened from the top of the engine.
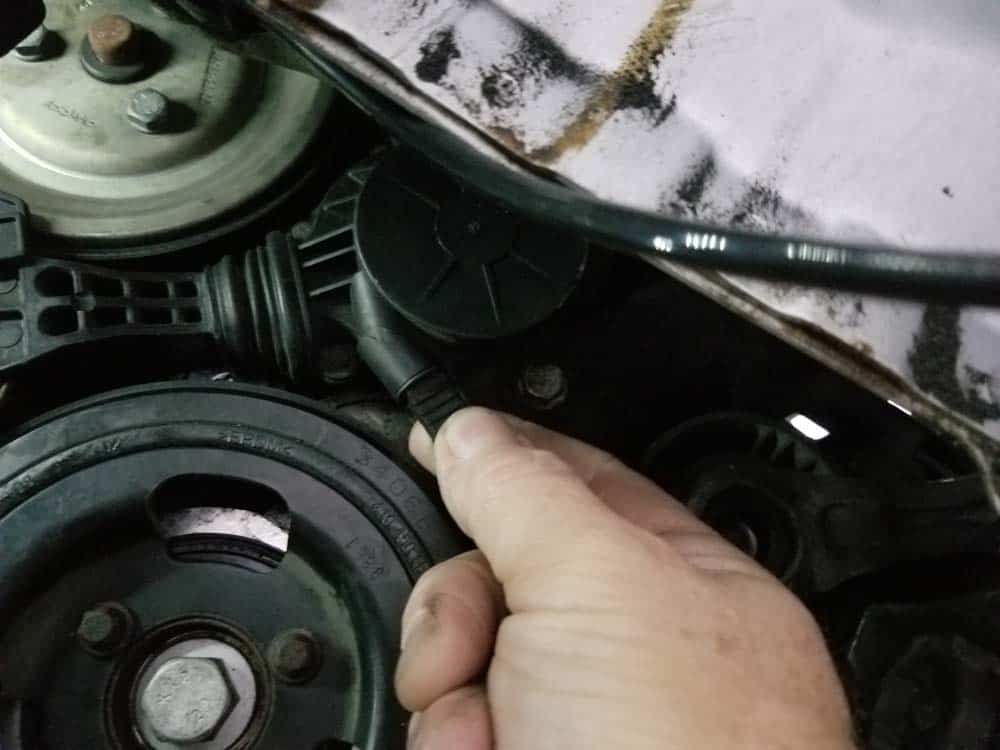
- Start by disengaging the friction pulley from the water pump by pulling on its release as shown below.
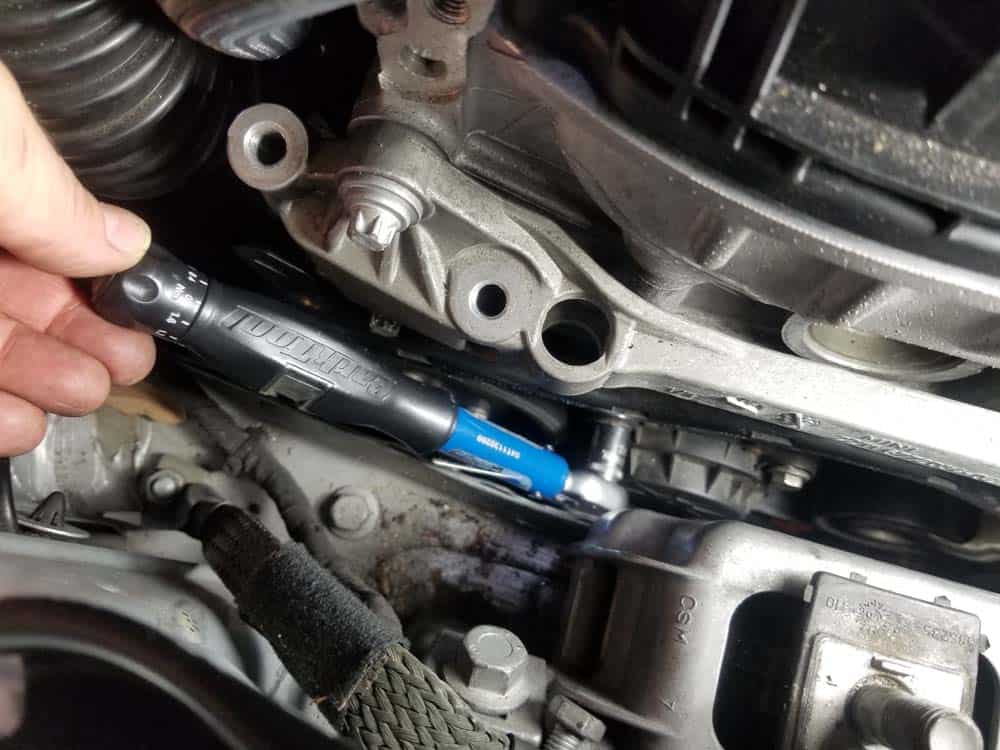
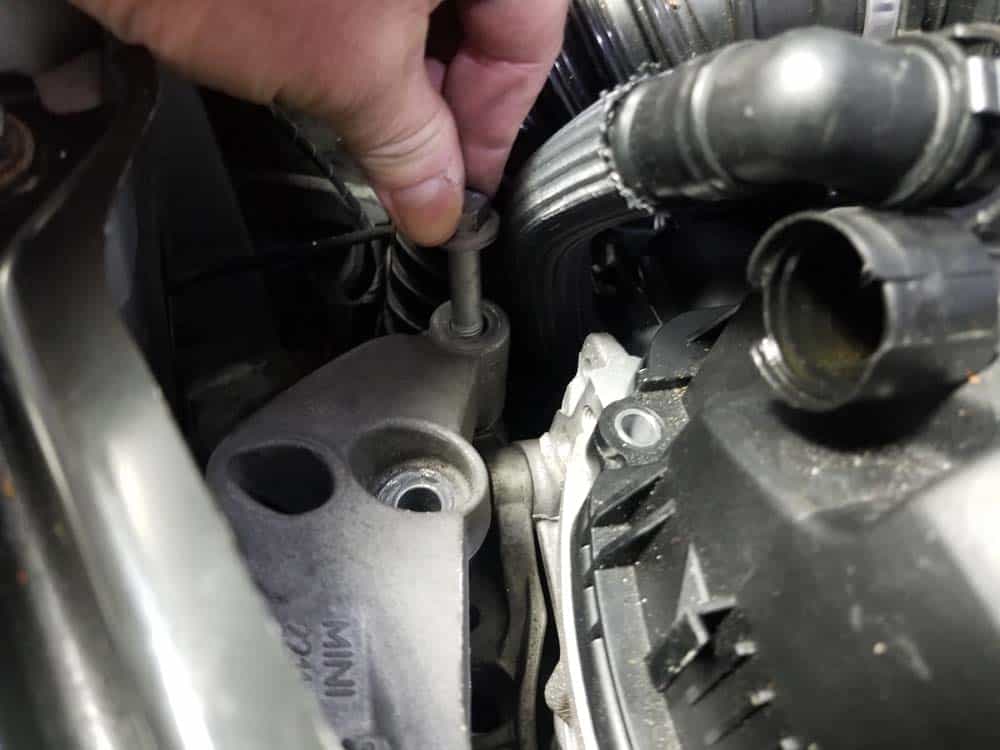
- Next, raise the engine until the top two friction wheel bolts can be accessed with a 10mm socket or open end wrench. Since you are simply loosening the bolts, an open end wrench is perfectly acceptable (and probably easier).
- Loosen the two upper friction pulley mounting bolts. You don’t have to remove them yet...it is easier to remove them after you lower the engine down in the step 13 below.
- Lower the engine as far as it will go.

- You can now easily remove the top two bolts from the friction wheel, as well as the third lower 10mm mounting bolt.

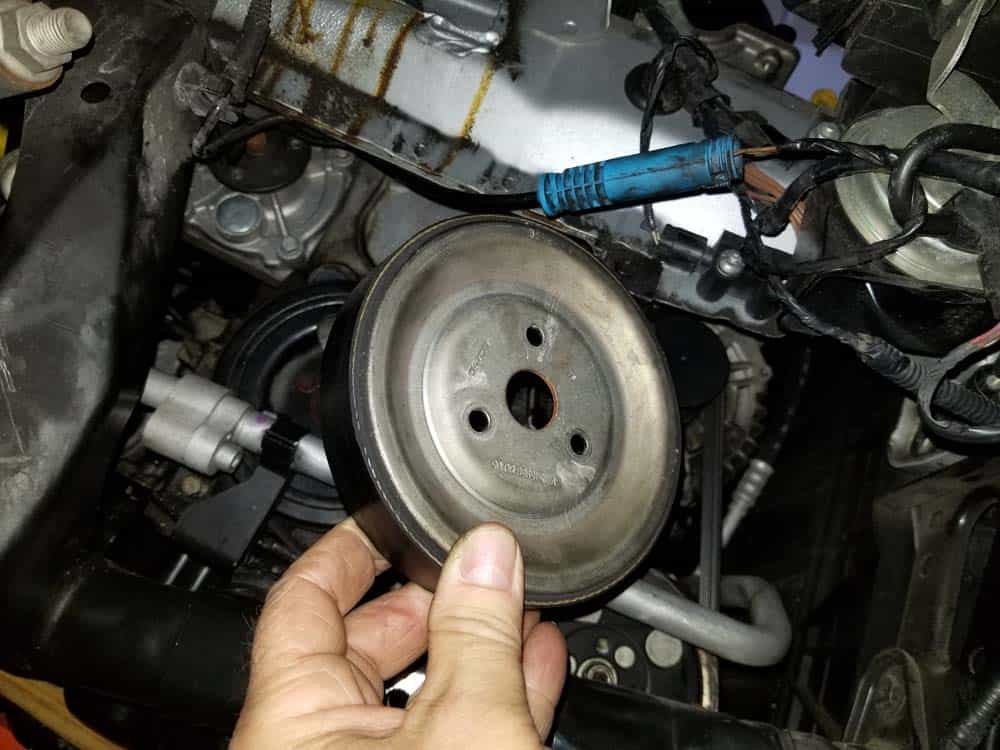
- Grasp the friction wheel and remove from the vehicle.
- Optional step - If you want to replace your water pump drive wheel (which we highly recommend doing), use a 10mm socket wrench to remove it three mounting bolts. They are at a very low torque...you can simply hold the drive wheel with one hand as you loosen the bolts with the other. Remove the water pump drive wheel from the engine.
Section 3 - Installing the New Friction Wheel and Reassembly of Vehicle
Installing the new friction wheel and reassembling the vehicle is basically the above steps in reverse. Reinstalling the engine mount bracket can be challenging...if you follow our instructions closely though it should go smoothly.- Optional step - If you are replacing the water pump drive wheel, install a new one and torque the bolts to 10 Nm (7 ft-lb). Remember….this is a low torque. You can easily hold the wheel with one hand to keep it from spinning.
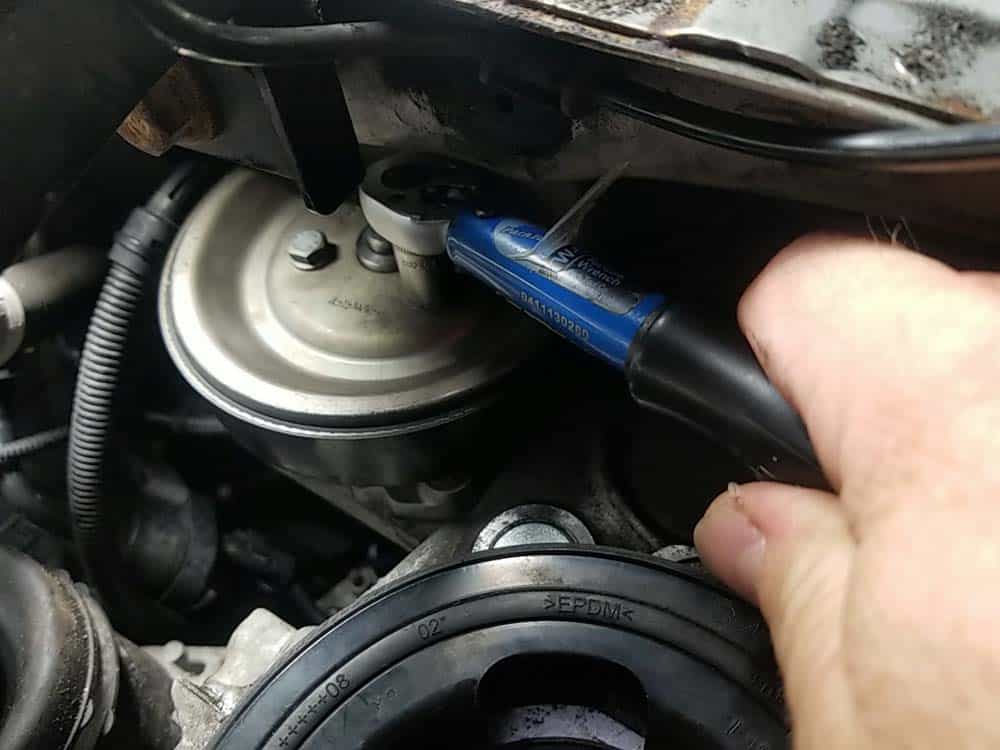
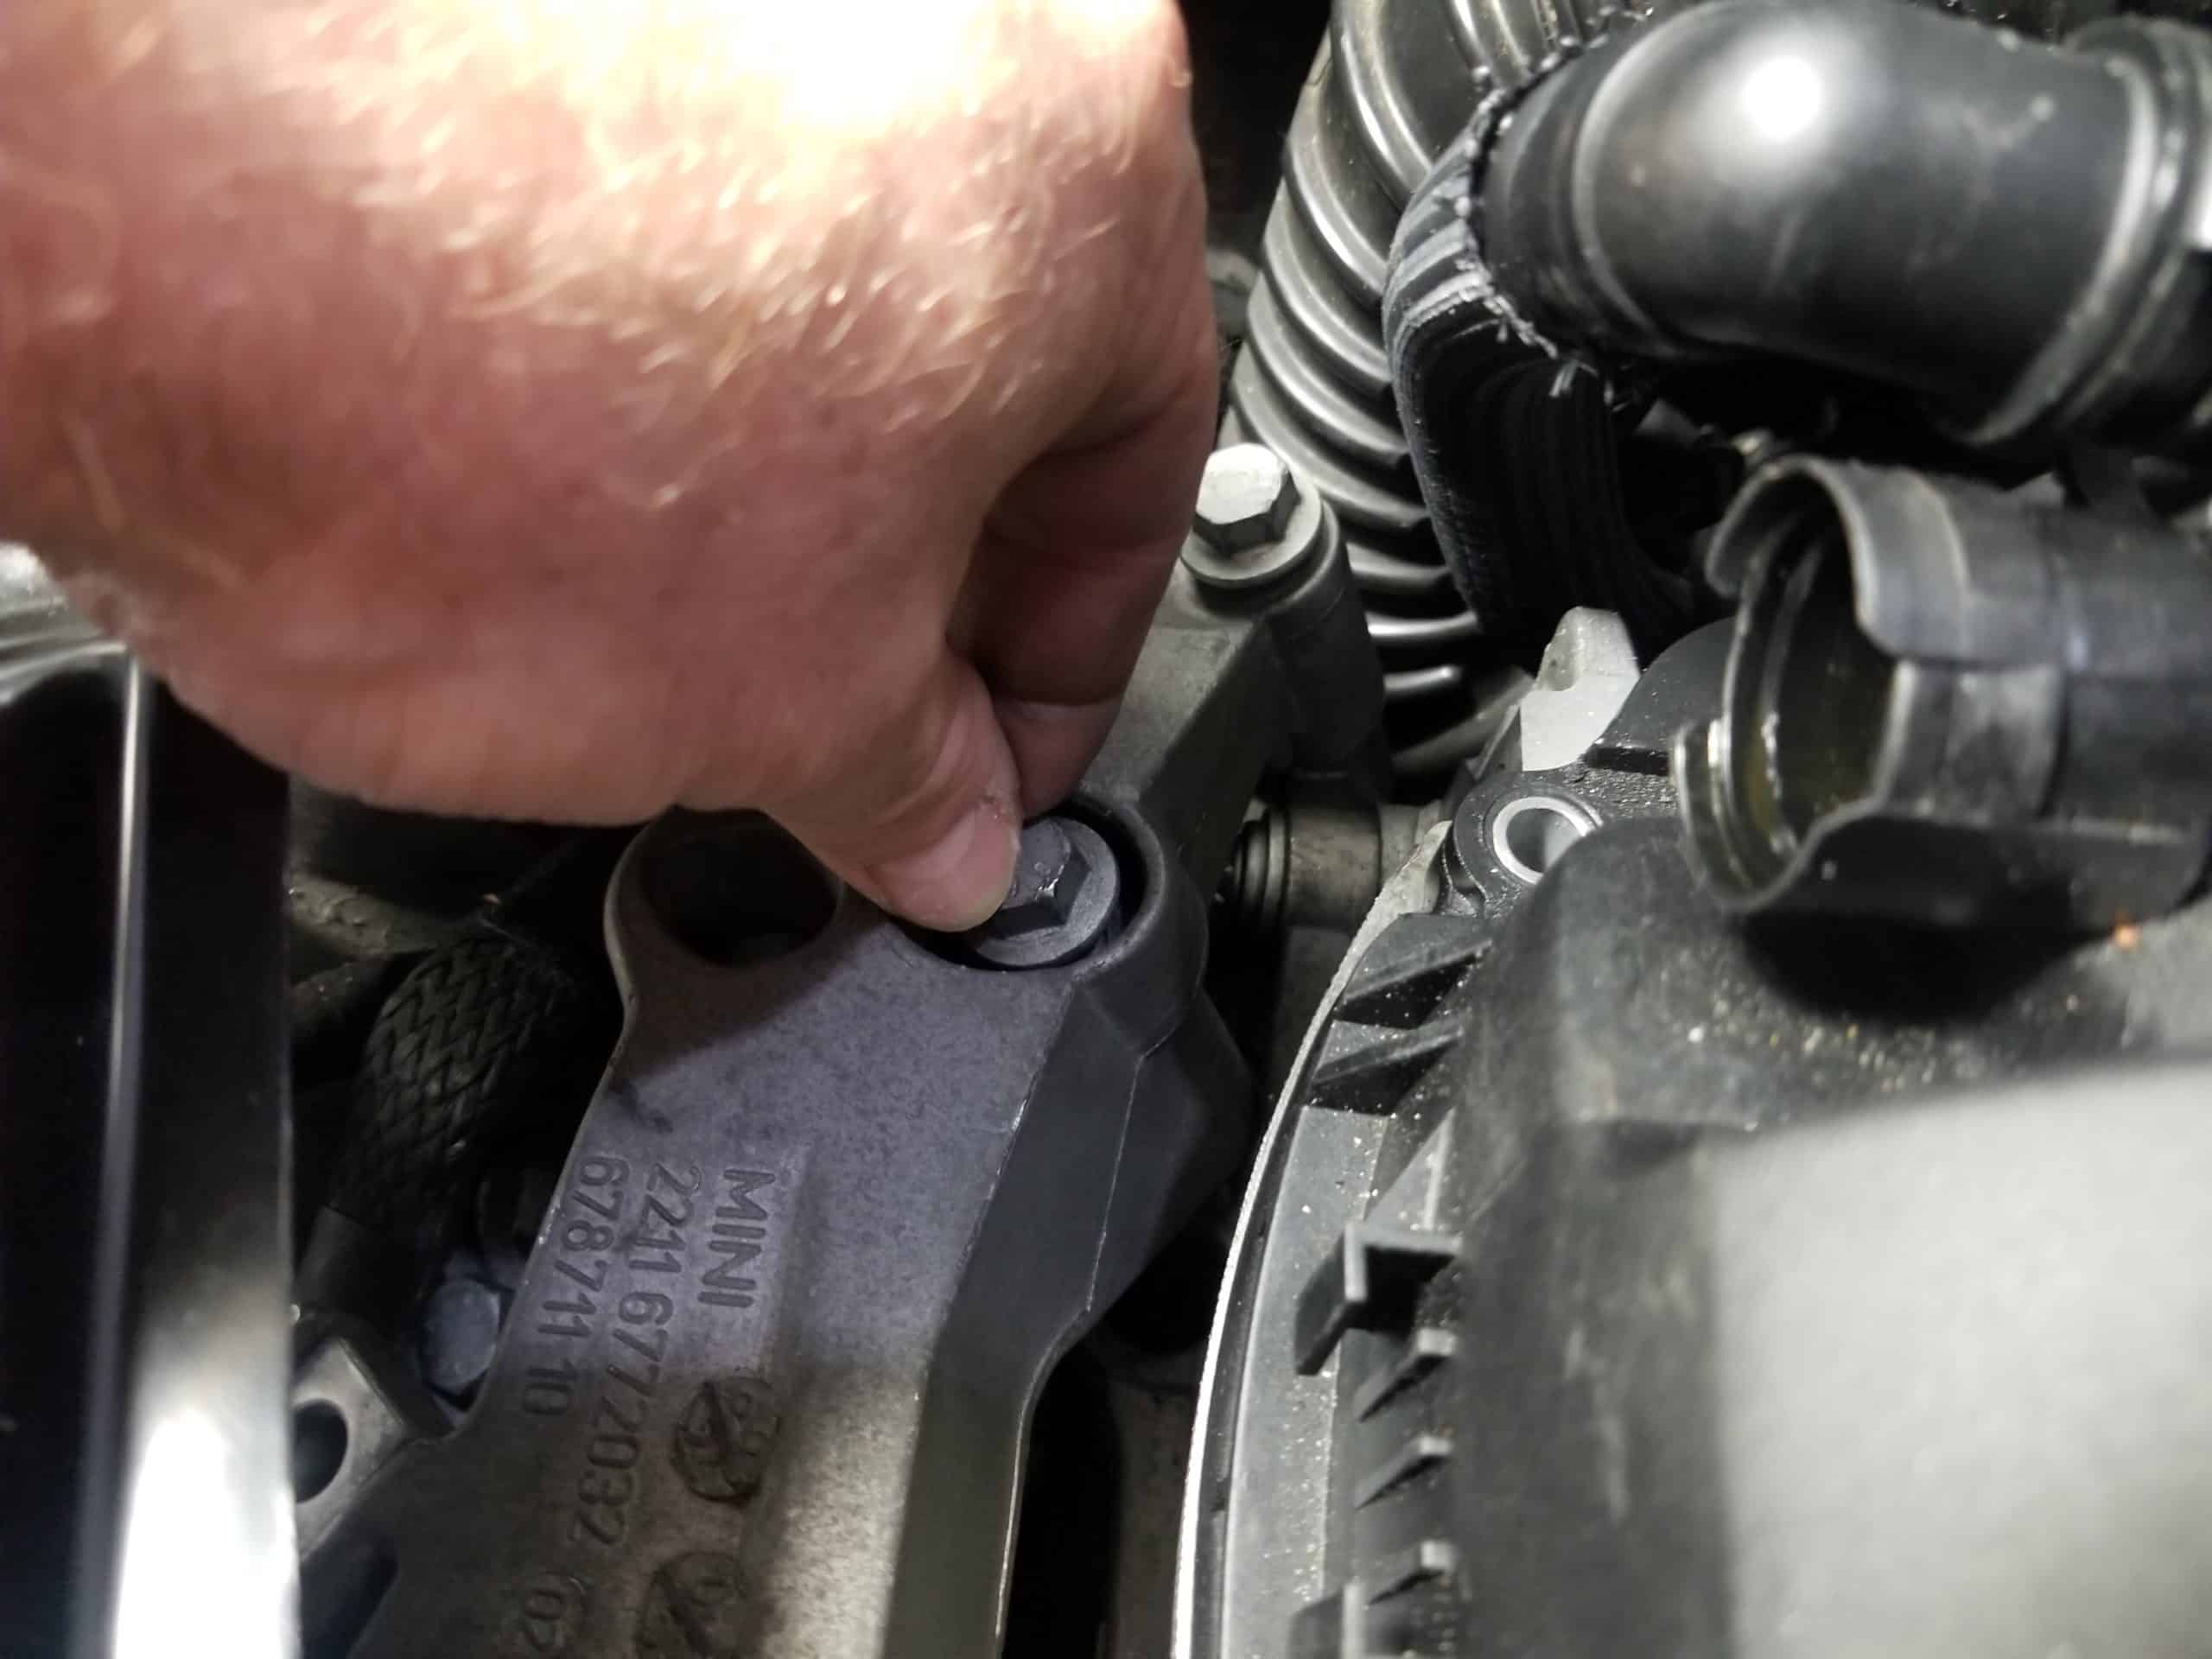
- Install the new friction wheel. Install all three bolts and hand tighten. It is easier to install the two upper bolts while the engine is down, even though you won’t torque them until below.
- Torque the lower friction wheel bolt to 10 Nm (7 ft-lb.). You will not be able to get a torque wrench on the top two bolts until you raise the engine in the next step.
- Raise the engine up until you can access the two upper friction wheel bolts. You will need to use a 10mm open end wrench (or pair of long nose pliers) to turn the bolts until they are snug. It is not feasible get a ¼” low torque wrench on the bolts until they are all the way into the friction wheel as far as they will go.
- Once the top two bolts are turned all the way in and snug, torque them to 10 Nm (7 ft-lb).
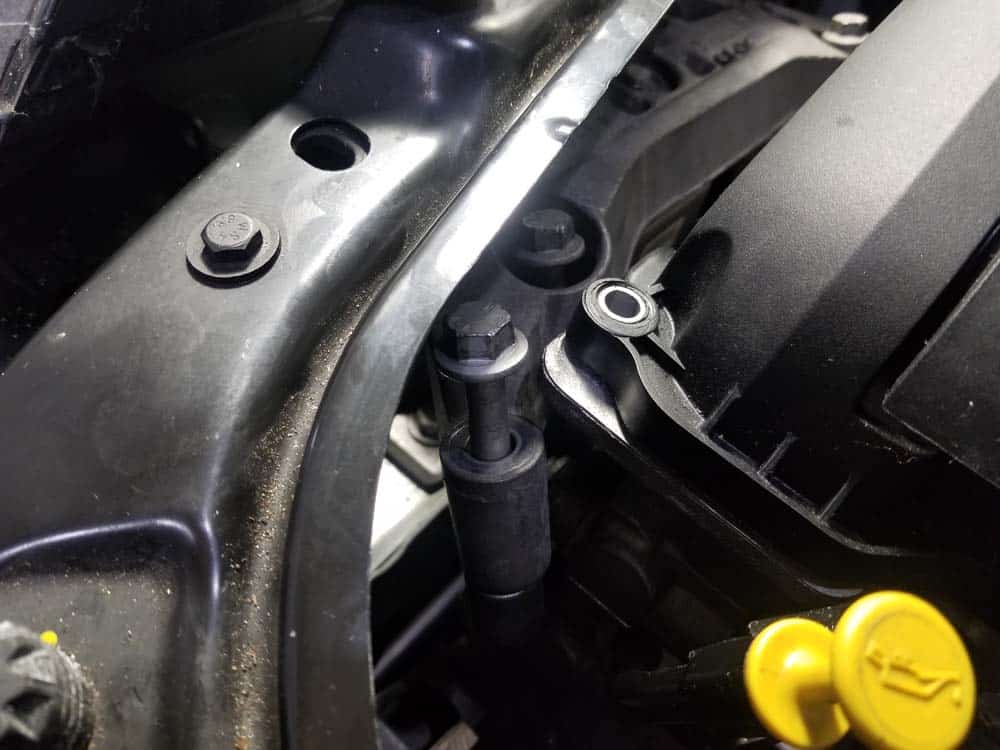
- Install the engine mount bracket. It is best to start at an angle as shown in the first image below, then flip it over into its proper position. If the MINI is not in its "service position", make sure the front two mounting bolts are installed in the bracket or you will not be able to get them in.
- Before tightening the mounting bolts, reinstall the grounding strap. It is very difficult to install after the bracket is tightened down.
- Next, install the front and rear mounting bolts into the engine. You may need to "manhandle" the engine a little by moving it back and forth, then up and down, until the holes line up with the bolts. Hand tighten the front and rear mounting bolts as far as you can.
- Install the two inner mounting bolts and hand tighten.
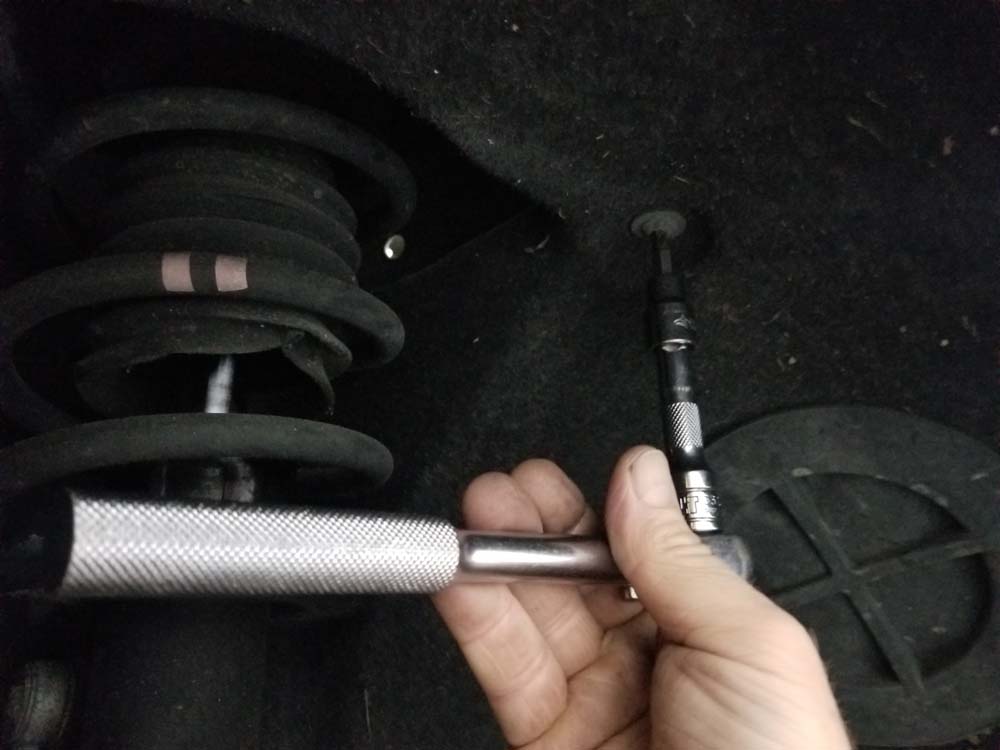
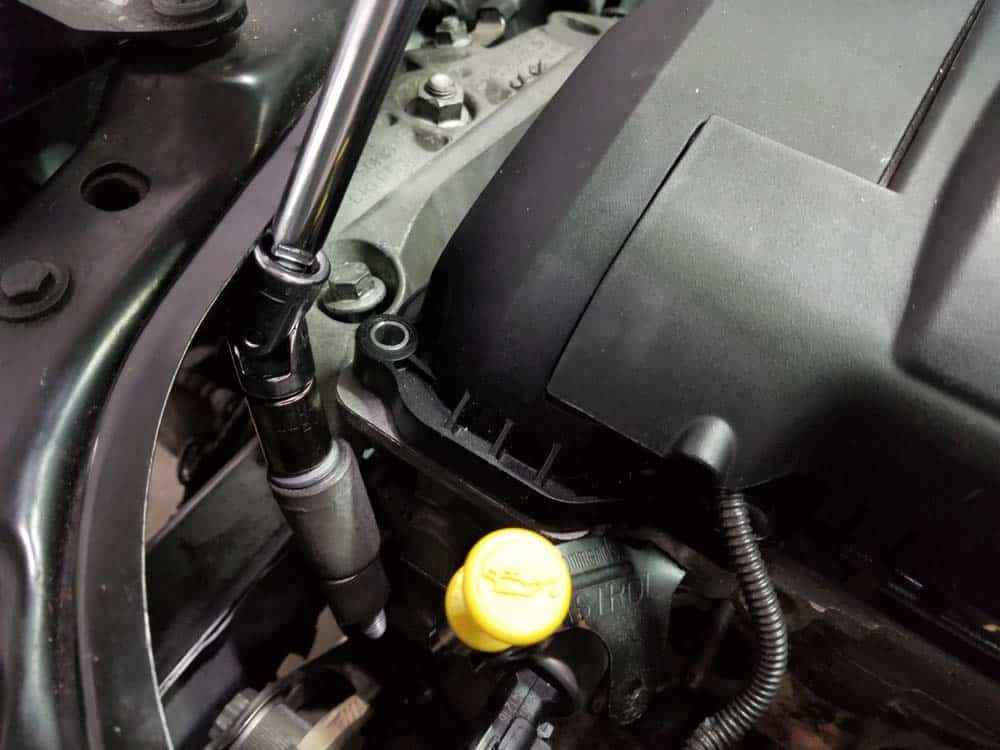
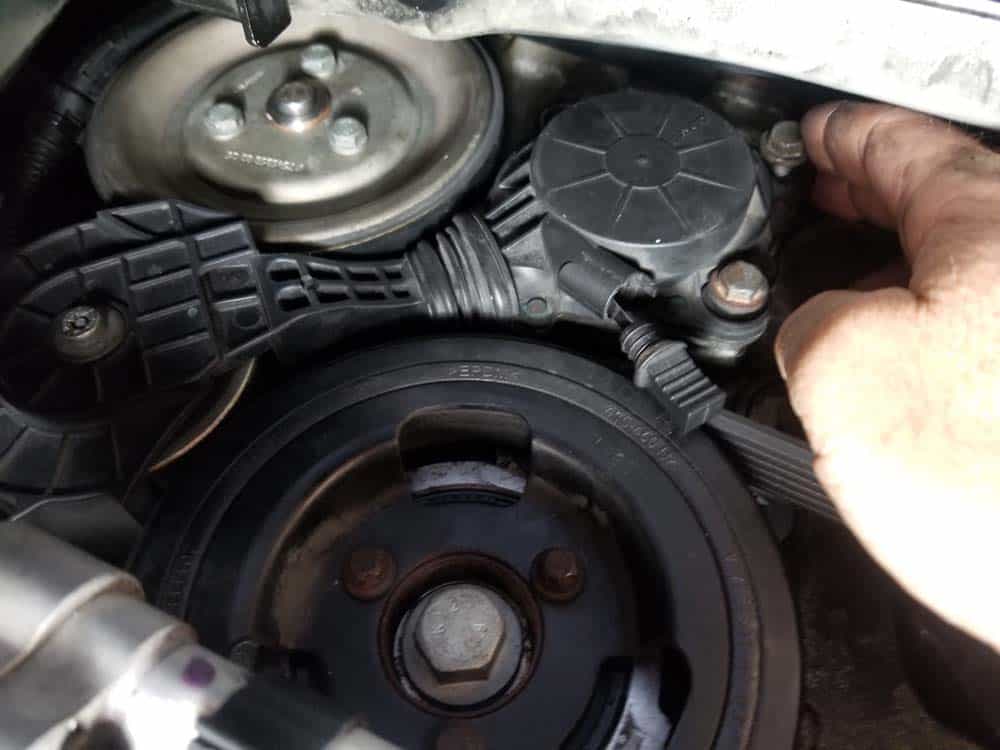
- Tighten all four mounting bolts and torque to 47 Nm (35.6 ft-lb). It is helpful to use a universal joint with a low profile 13mm socket to torque the front bolts (see image below).

- Reconnect the crankcase breather hose. Make sure that you hear it "click" when you press it onto the valve cover fitting.
- Lower the floor jack so all of the weight is now on the engine mount.
- Reinstall the engine mount nut and torque to 47 Nm (34.5 ft-lb).
- Reassemble the right fender well trim.
- Reinstall the right wheel and torque the lug nuts to 140 Nm (103 ft-lb).
MINI R56 Friction Wheel Replacement Finished