
Affiliate link disclosure – The BMW Repair Guide uses affiliate links in their site. For more information on affiliate links, please click here.
Repair Summary
The following article gives detailed instructions on replacing the fuel injectors in a Generation 2 MINI R56 car. Even though we have used a 2006 MINI Cooper to perform this installation, this article can be applied to any 2006-2013 Cooper (non-turbo) vehicle with minor modifications.
A MINI R56 fuel injector replacement is a very straightforward procedure for the home mechanic that can save an expensive trip to the local repair shop.
It is well known that the N12 engines found in the second generation MINI Cooper have issues. Fortunately, the majority of these problems can be avoided by following a strict maintenance schedule. Changing out the fuel injectors in your MINI Cooper is a good example of a repair that should be done long before you start encountering misfiring cylinders and "check engine" lights on the dashboard.
The fuel injectors in your MINI N12 four-cylinder engine are simple solenoid valves that pump a fine mist of pressurized fuel into the cylinder. Over time these valves can become clogged from fuel hydrocarbons and additives, restricting their flow and severely affecting engine performance. Signs of dirty fuel injectors are rough idling, difficult engine starting, failed emissions, misfiring cylinders, smoke emanating from the tailpipe, and overall poor engine performance.
Even though there isn't a suggested maintenance interval for fuel injectors in the MINI Cooper Service and Warranty Information guide, the BMW Repair Guide recommends that they are replaced every 100,000 miles to avoid any of the engine issues listed above.
A MINI R56 fuel injector replacement is actually a relatively simple procedure that can be easily done by any capable home mechanic. It does not require putting the MINI in its "service position"; the fuel rail and injectors can be easily accessed from the engine compartment.


View the detailed parts diagram for this repair.
Includes detailed part diagrams, part numbers and links to purchase all of the required components needed to complete this repair.
Section 1 - MINI R56 Fuel Injector Removal
Removing the fuel injectors from your MINI R56 Cooper is a simple procedure. It is very important to ALWAYS remove the negative terminal from the battery before starting this repair. Not disconnecting the battery can cause damage to sensitive engine electronics.- Locate the battery on the right side of the vehicle in the back of the engine compartment.

- Use a 10mm socket wrench to remove the negative terminal cable. If your negative terminal cable has an intelligent battery sensor attached to it, be very careful not to bump or drop it. For more information what the battery sensor looks like and how it functions, please see our article BMW E60 Battery Sensor Failure/Repair – 2004-2010 5 Series – All Models.

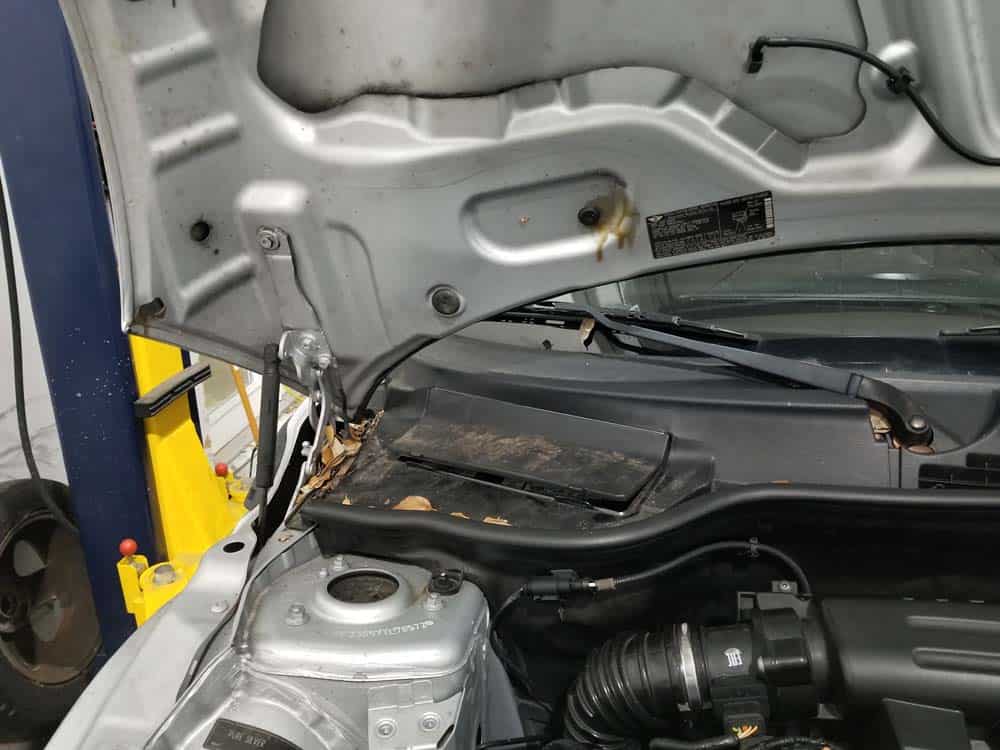
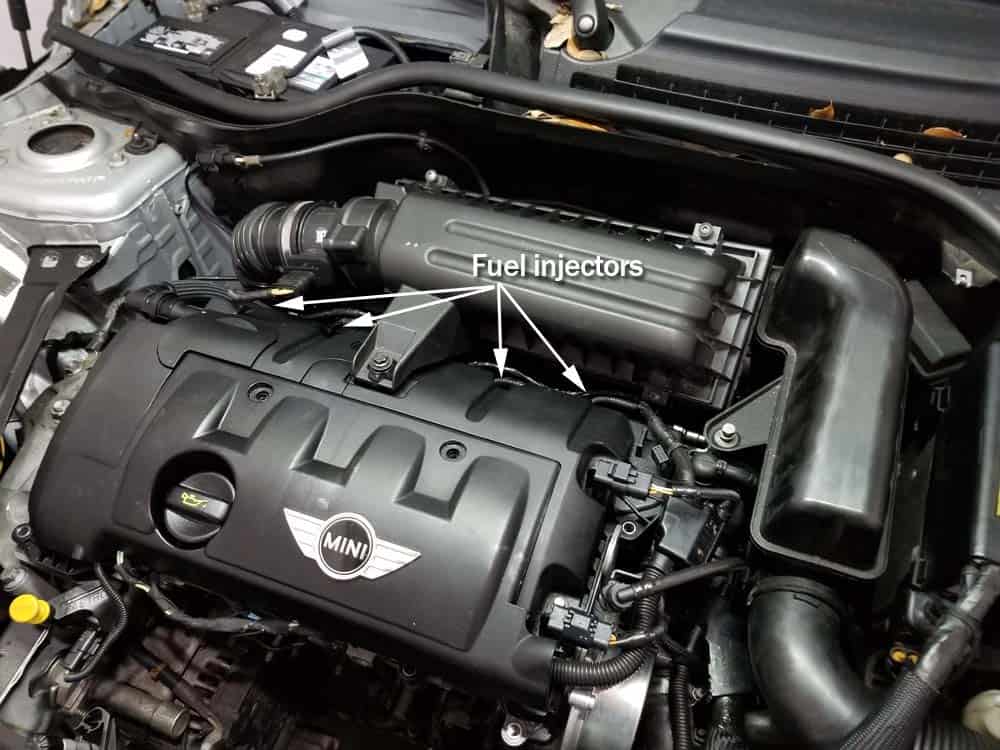
- Locate the fuel injectors...they are located at the back of the valve cover on the fuel rail, underneath the intake muffler that houses the air filter.
- In order to get to the injectors, some parts need to be cleared out of the way. Start by pinching in the plastic tabs and removing the intake manifold tube from the intake manifold pre-box.
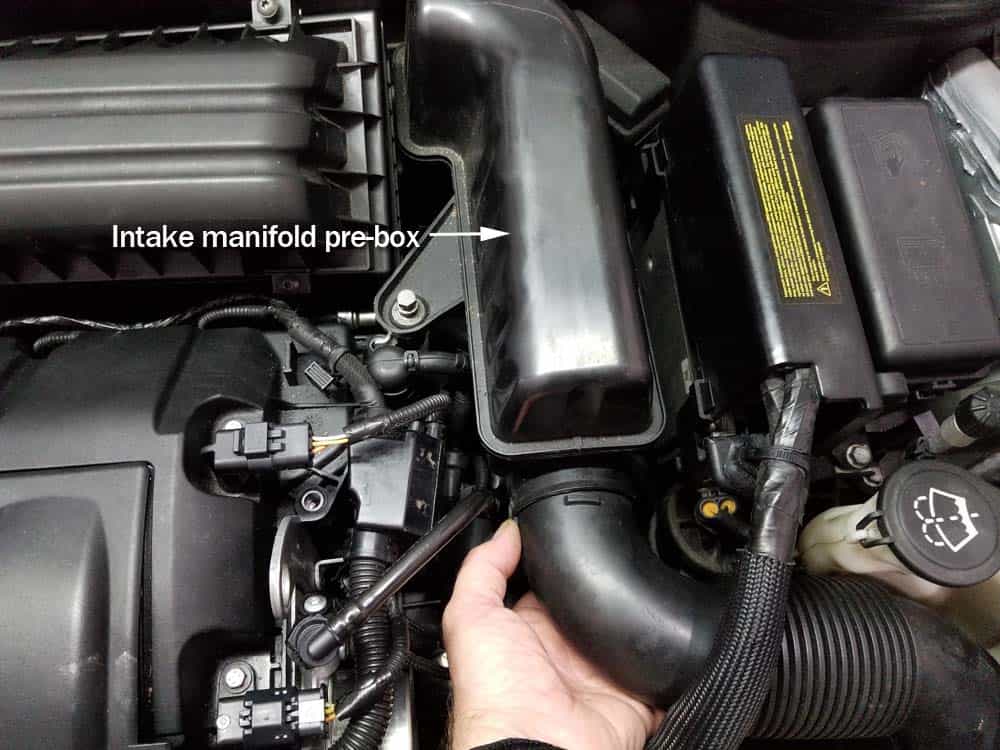
- Using a 10mm socket wrench, remove the bolt anchoring the intake manifold pre-box to the engine. Grasp the pre-box and pull free from the intake muffler.
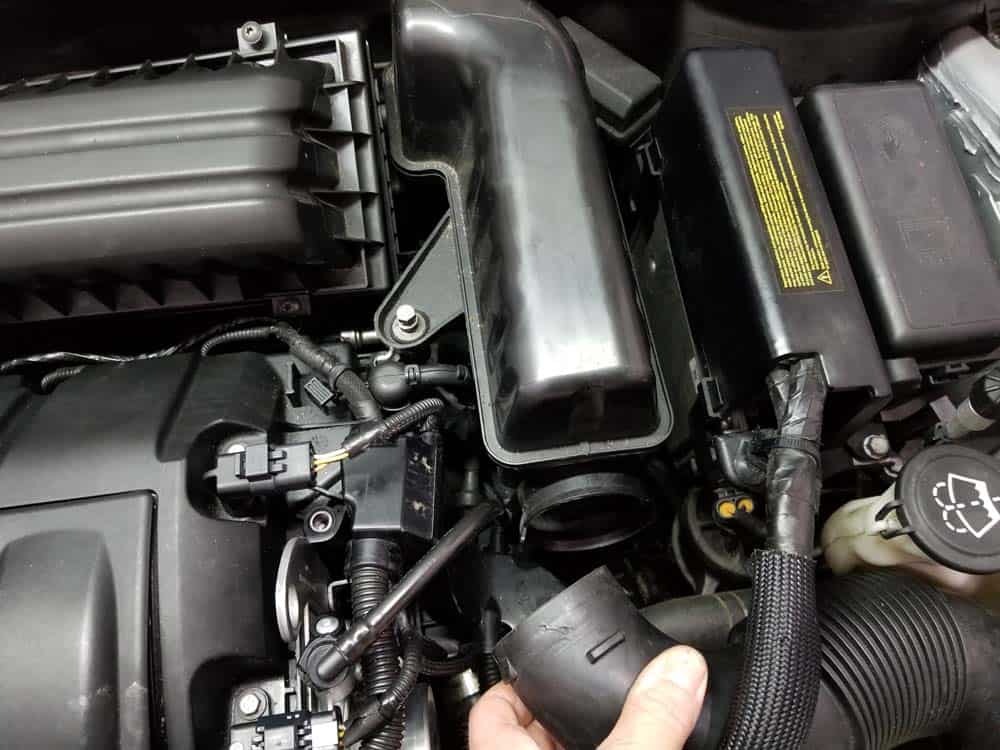
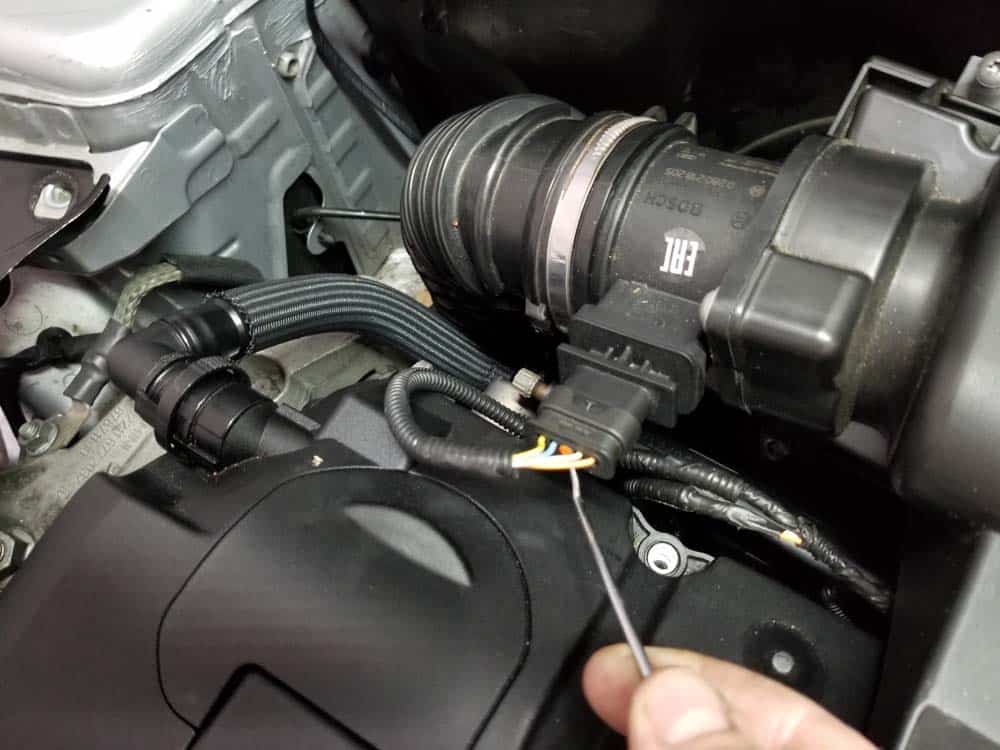
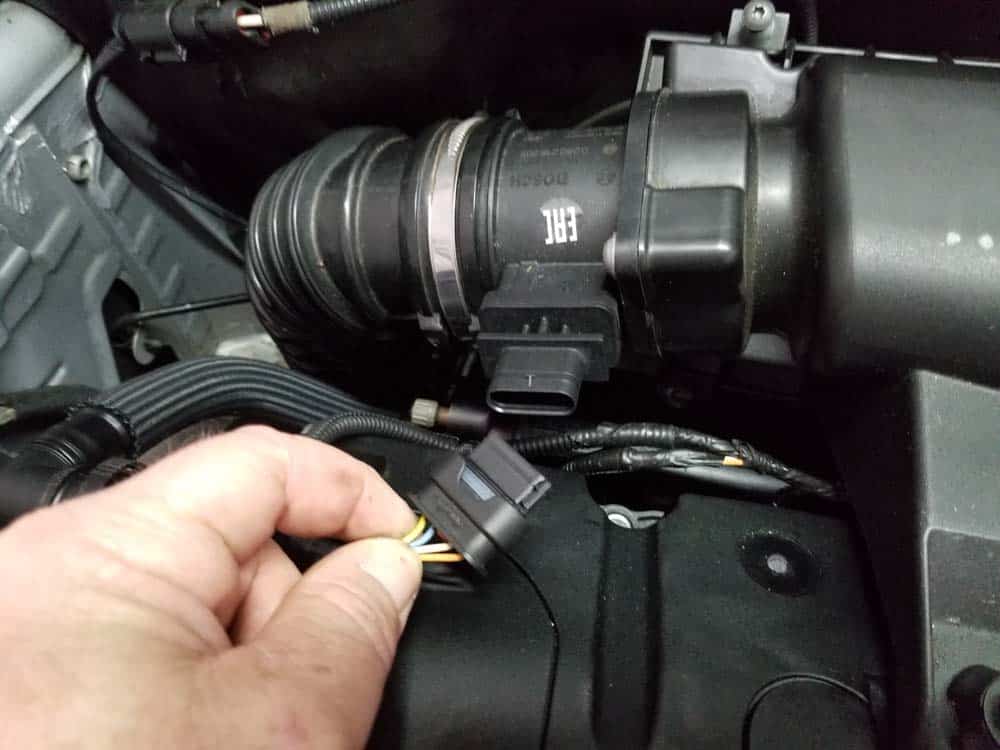
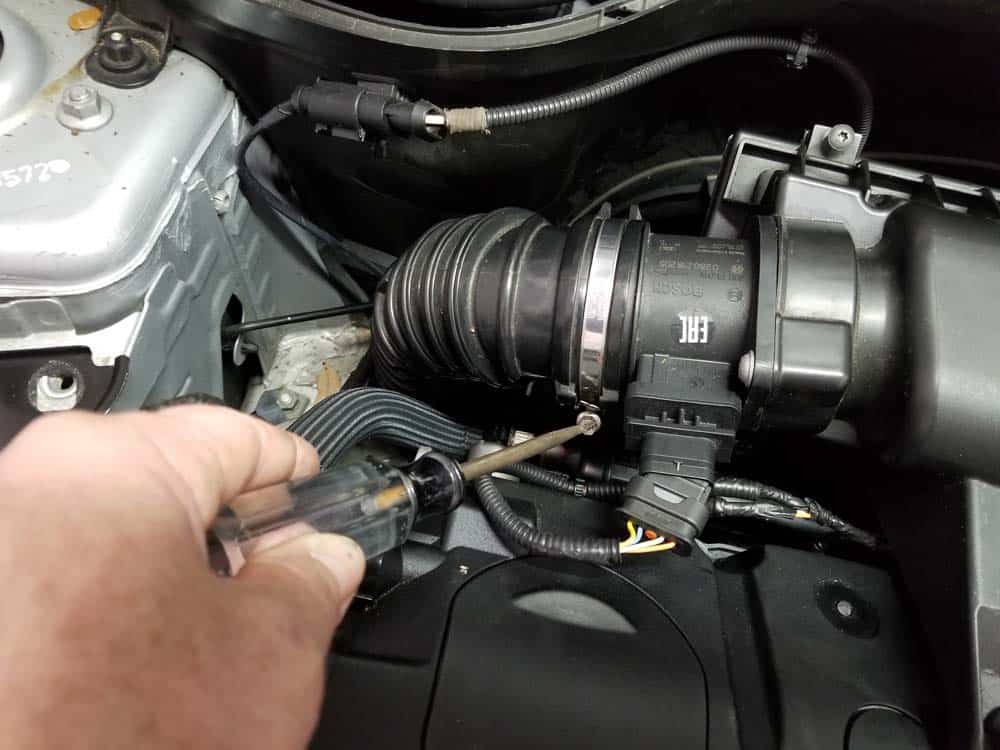
- Disconnect the mass air flow (MAF) sensor. This connection can be a little tricky...the release is under the plug. Try using a metal pick to depress the release then pull the plug free.
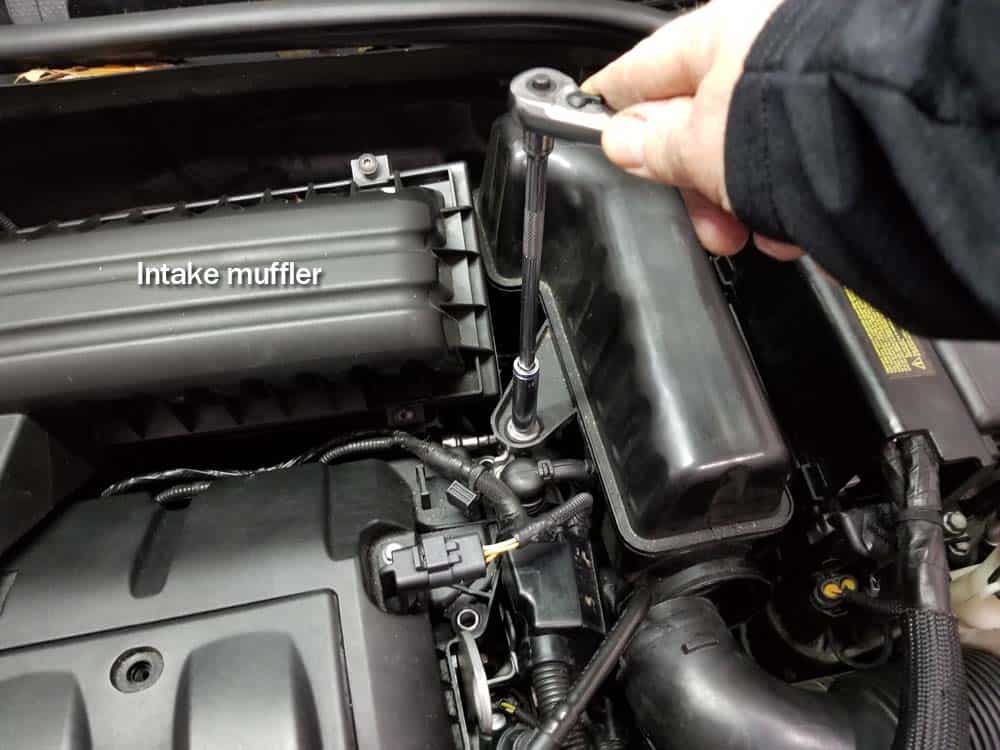
- Use a 10mm socket wrench to loosen the bolt anchoring the intake muffler to the engine.
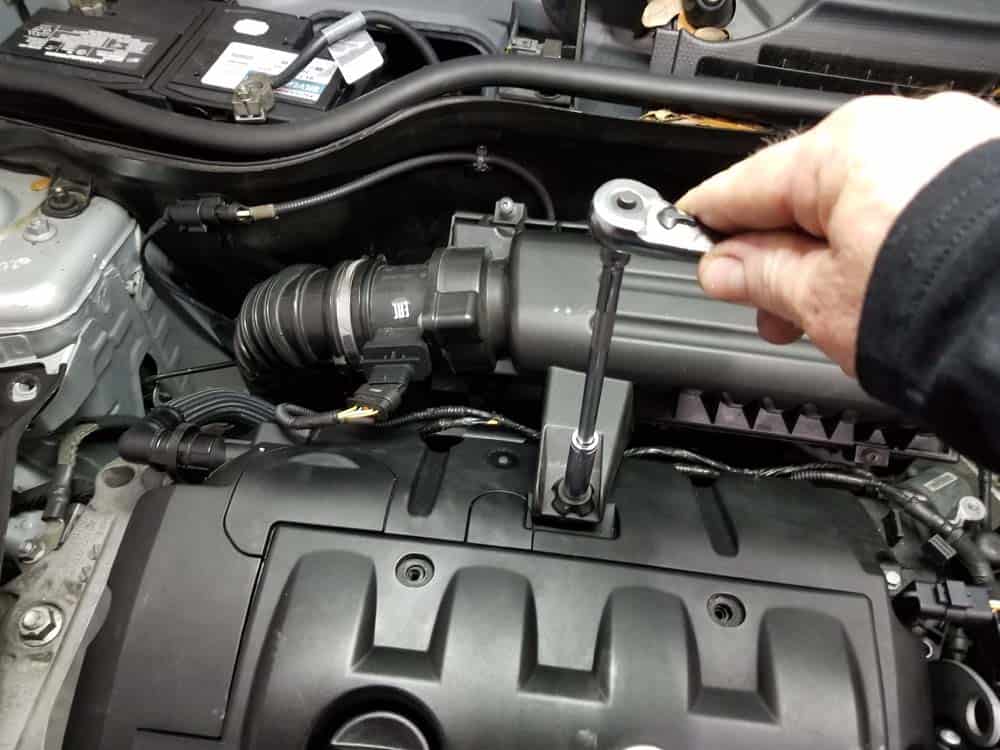
- Loosen the hose clamp connecting the intake muffler to the rubber boot.
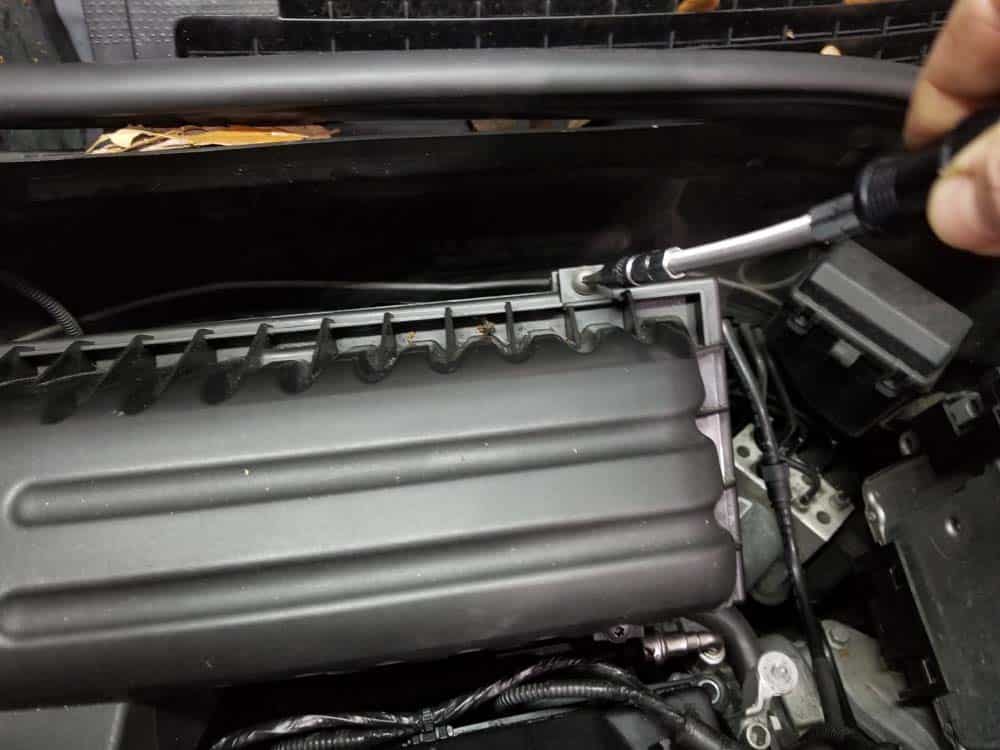
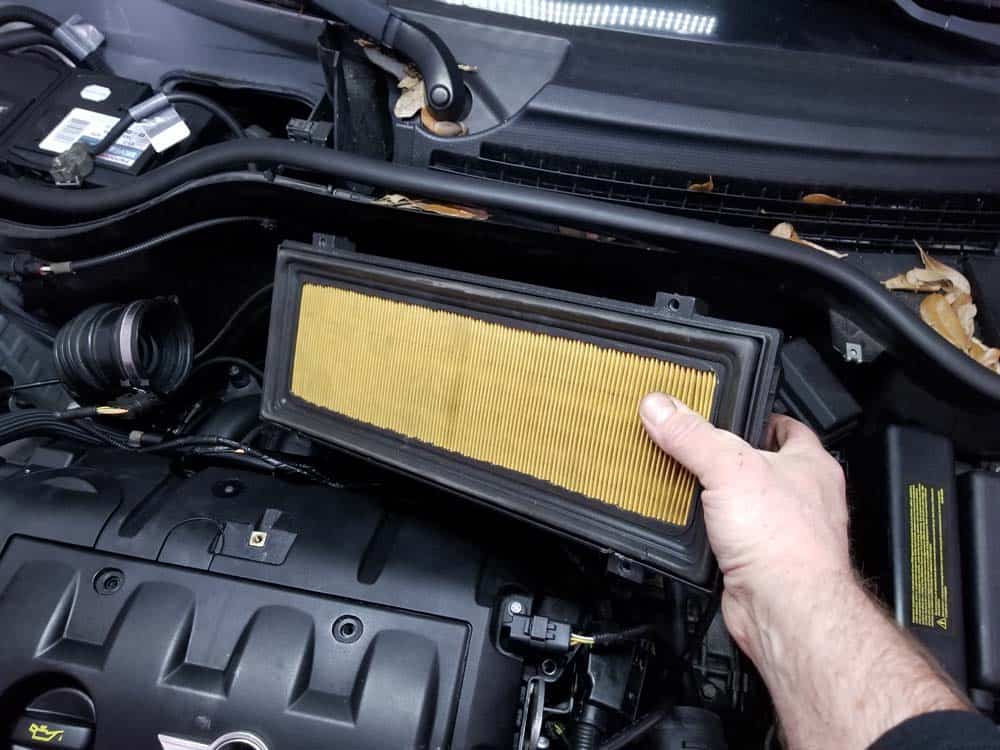
- Use a T25 torx bit to loosen the four intake muffler lid screws. Remove the lid off of the intake muffler.
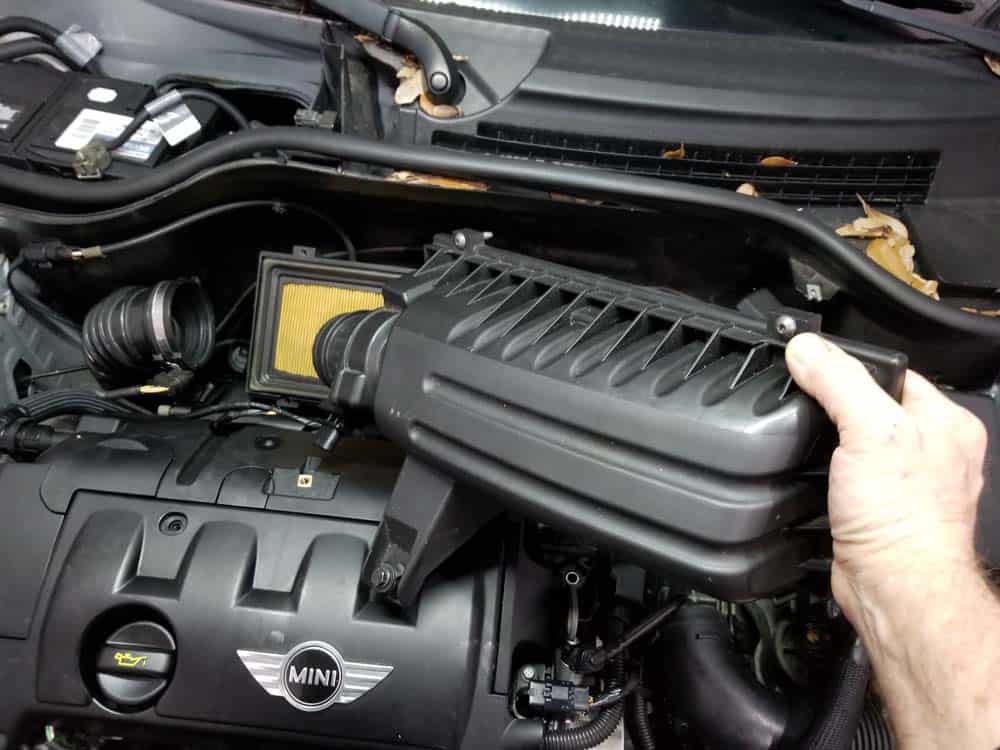
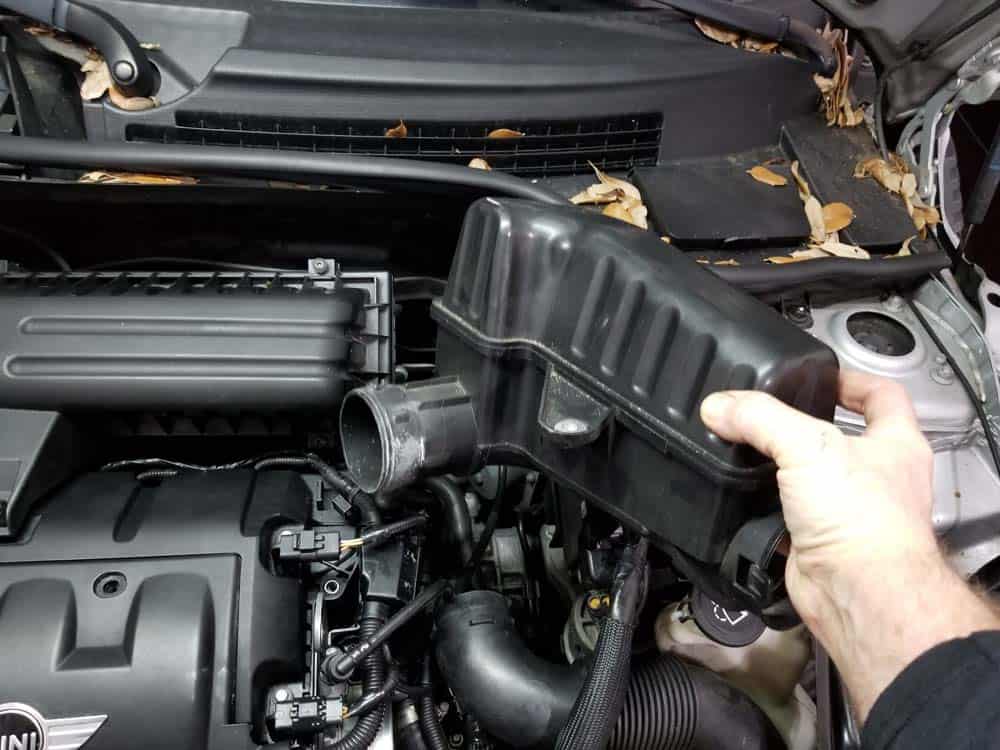
- Grasp the base of the intake muffler and pull it loose from the body of the car. It is held in place by two rubber grommets.
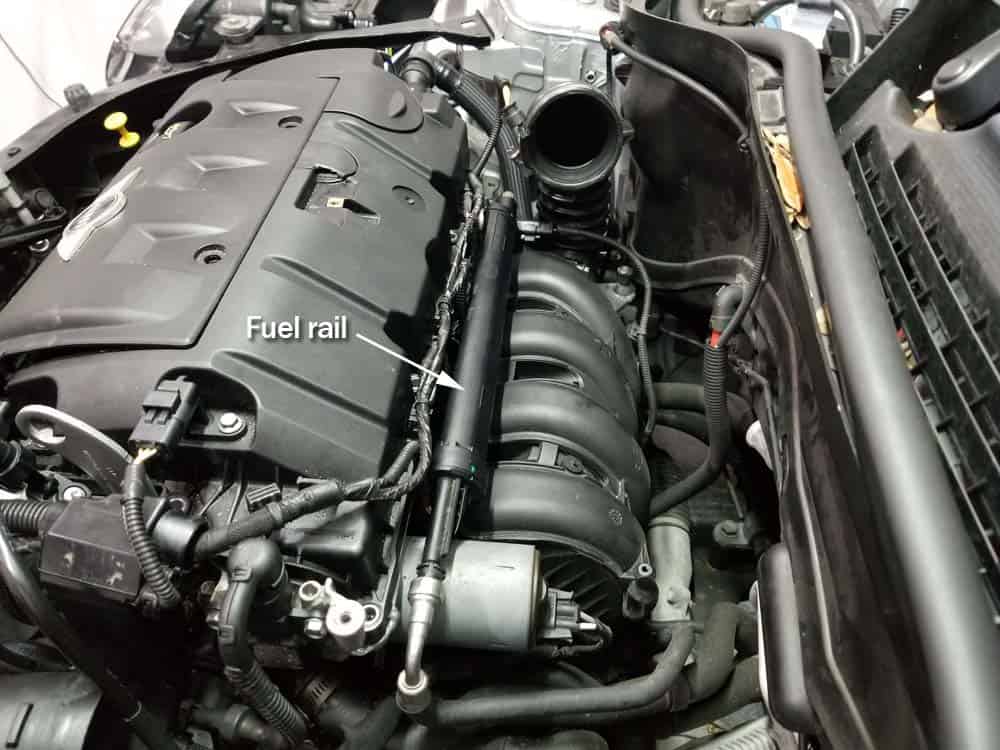
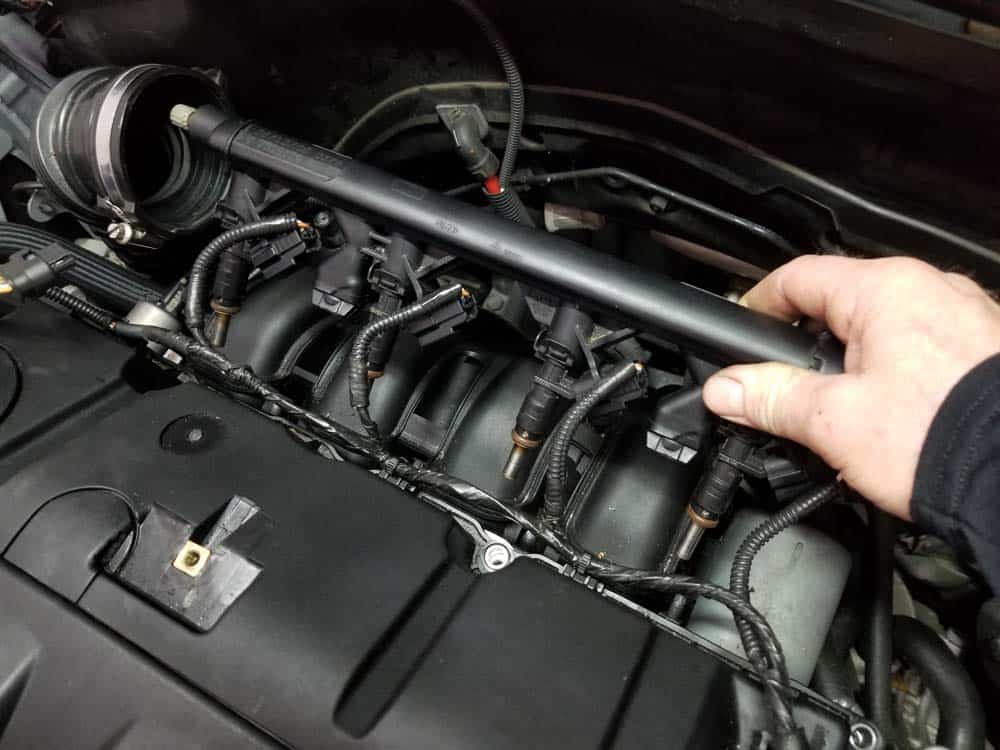
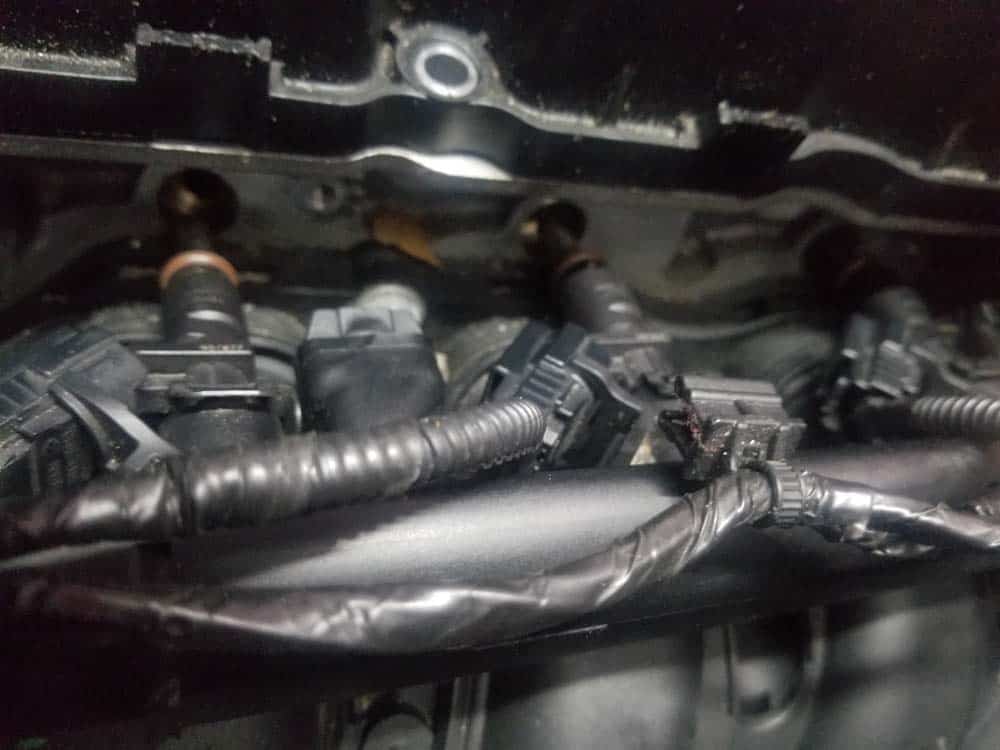
- You can now see the fuel rail on the back of the engine. The fuel injectors are attached to the bottom of the rail.
- Before disconnecting the fuel rail, it is good practice to release any fuel pressure that might be left in the system. This is done by simply depressing the Schrader valve located on the end of the rail. First, locate the Schrader valve and remove its protective cap.
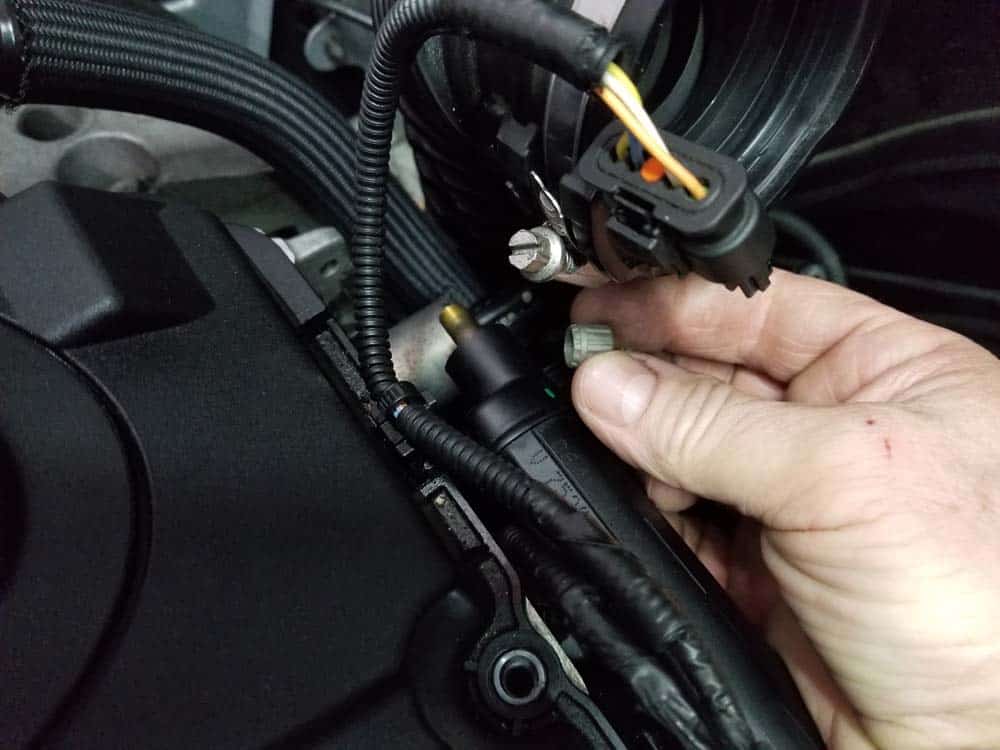
- Lay a rag under the Schrader valve to catch any fuel that may be ejected when releasing the pressure. Press the valve stem in with a small screwdriver or metal pick to release the pressure in the fuel rail (it's like releasing the pressure from a tire valve). Replace the cap when you are finished.
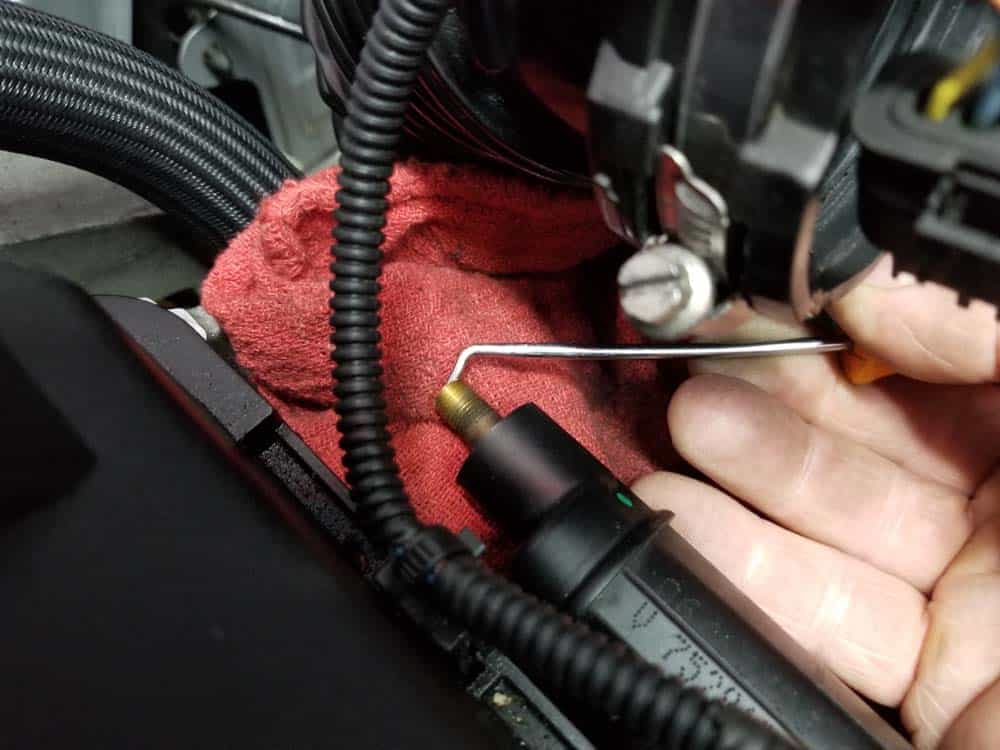
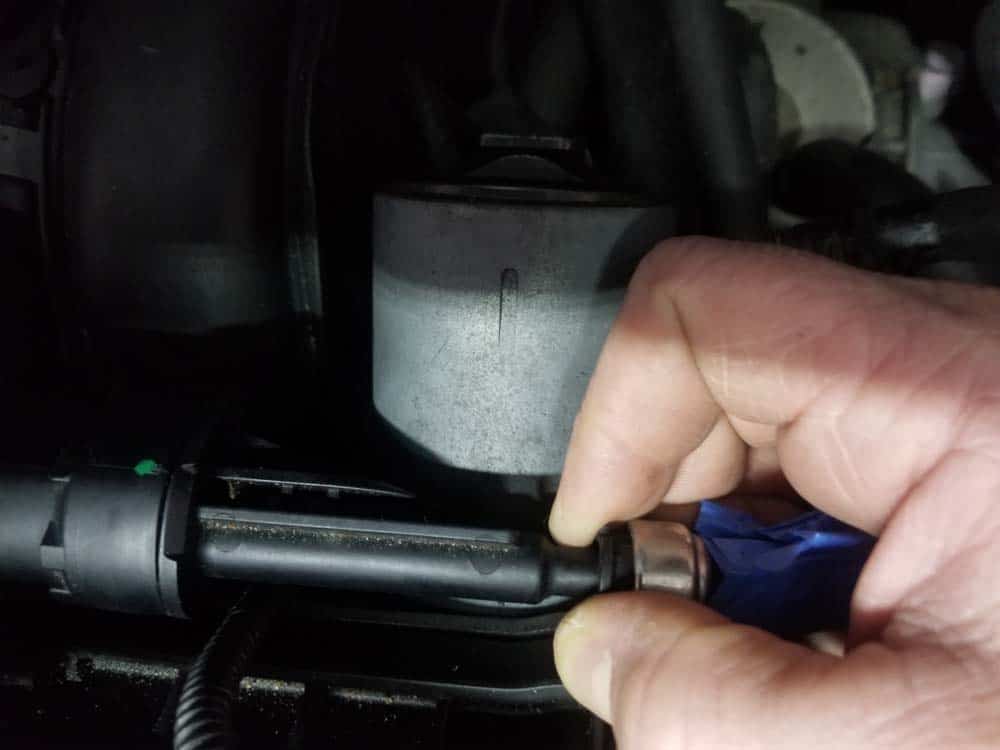
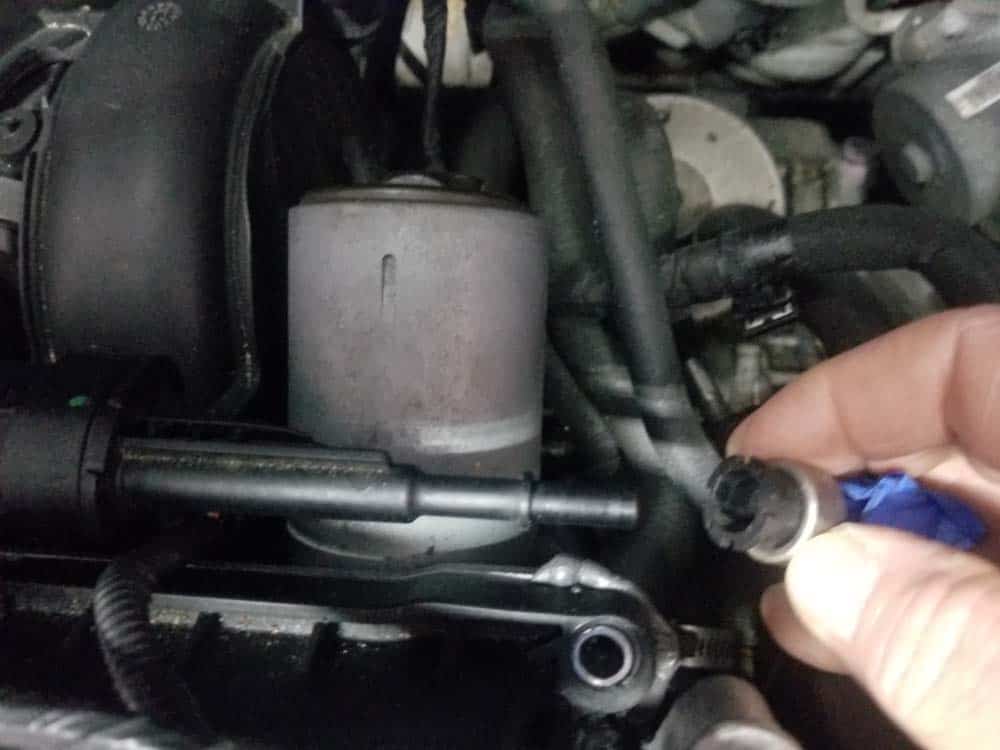
- Remove the fuel line from the end of the fuel rail by retracting the black lock ring and pulling it free as shown below. Have a rag ready to catch any fuel that may spill out.
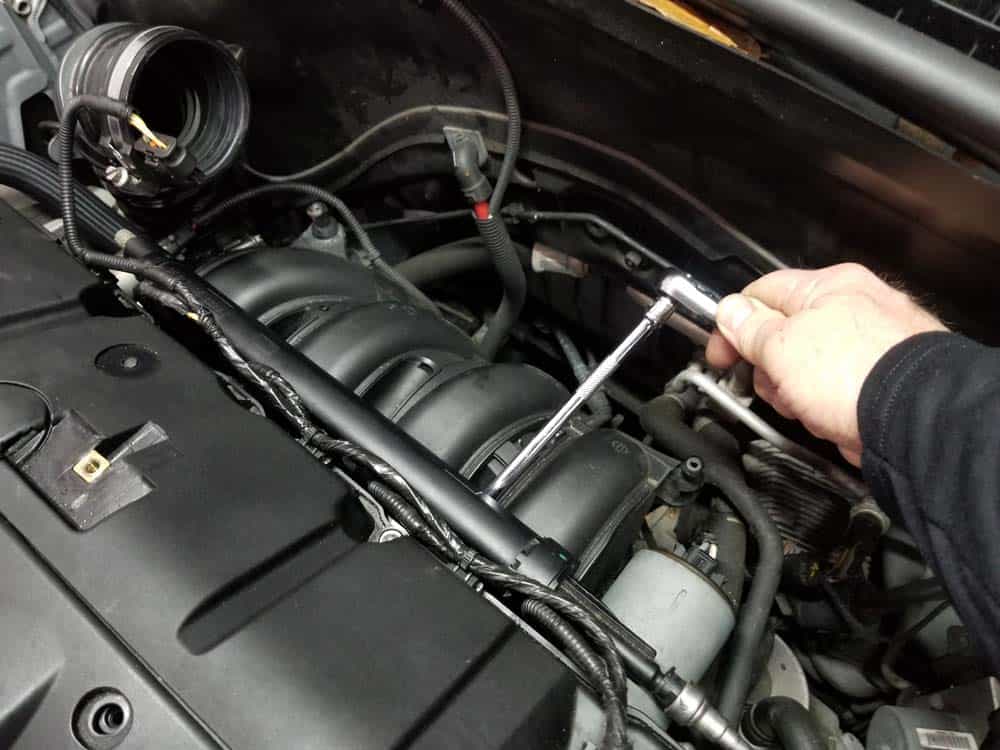
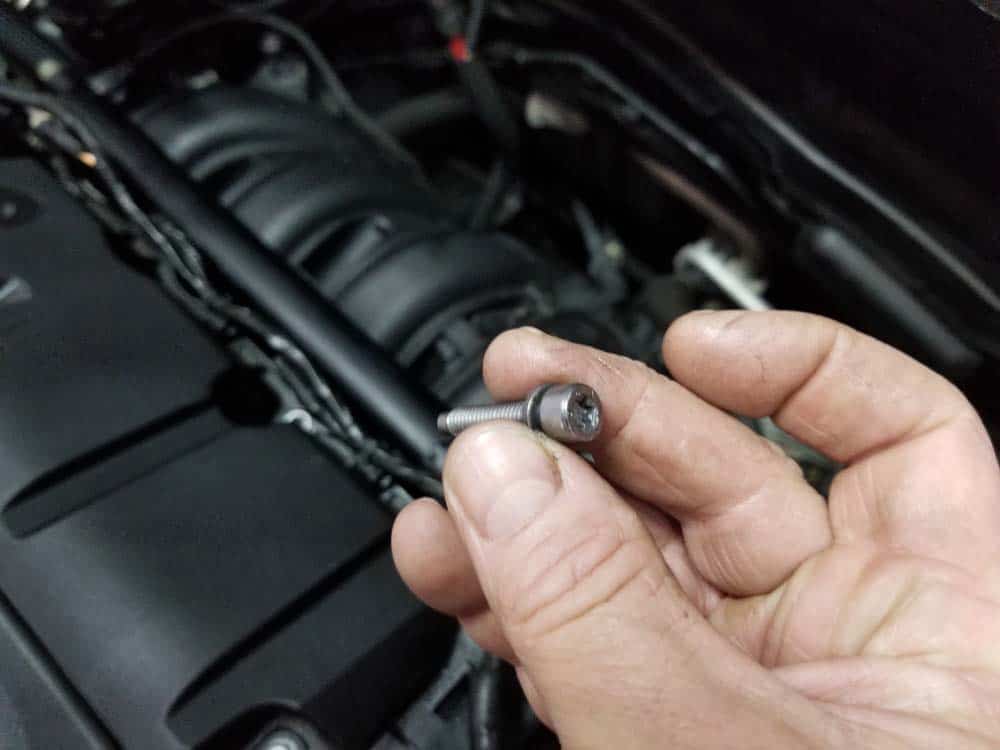
- The next step requires removing the two T30 bolts anchoring the fuel rail to the cylinder head. The two bolts are difficult to see since they are behind the engine...use an inspection mirror to locate them if necessary.
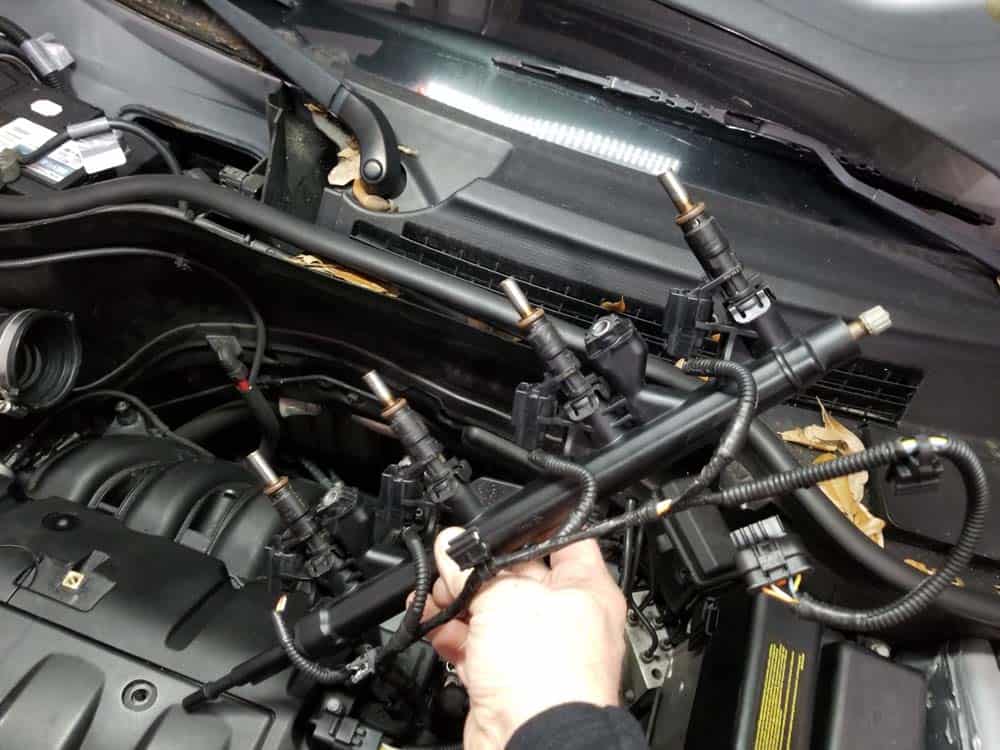
- When you have removed the two T30 mounting bolts, grasp the fuel rail with both hands and pull the injectors free from the cylinder head. You may have to gently rock it back and forth while pulling to get the injectors to release.
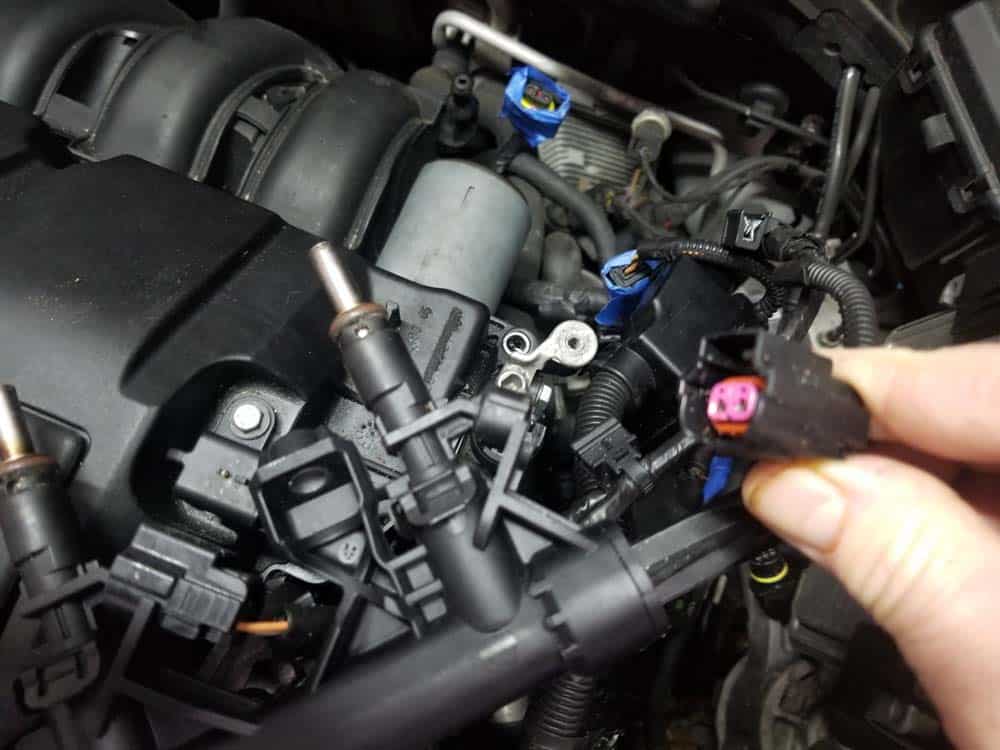
- Unclip the wiring harness from the back of the valve cover.
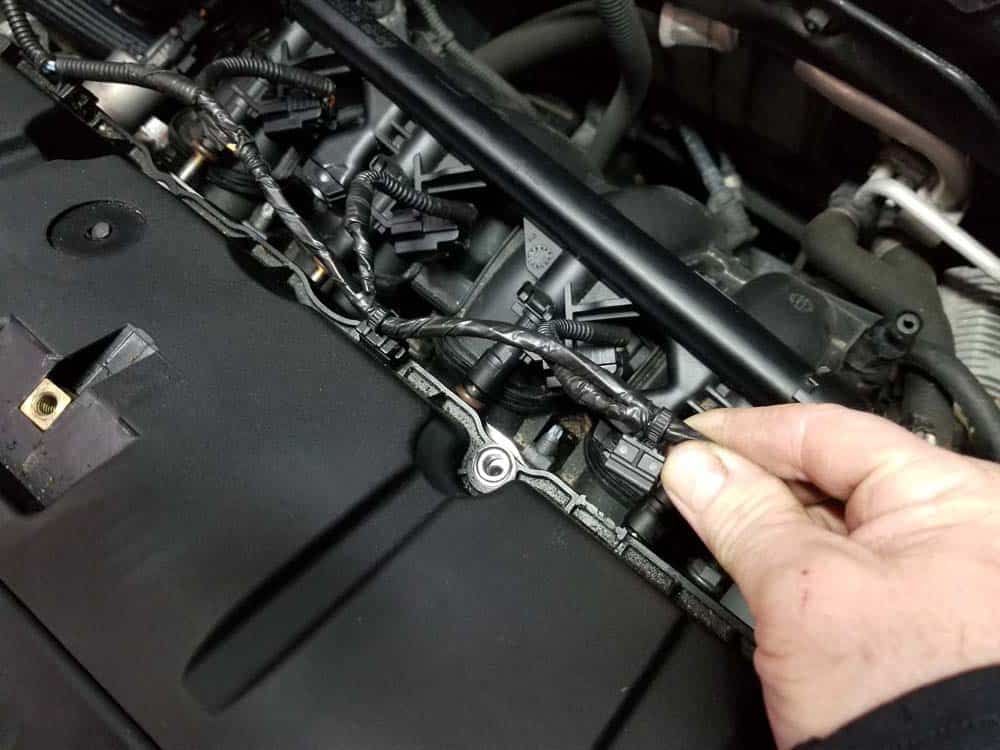
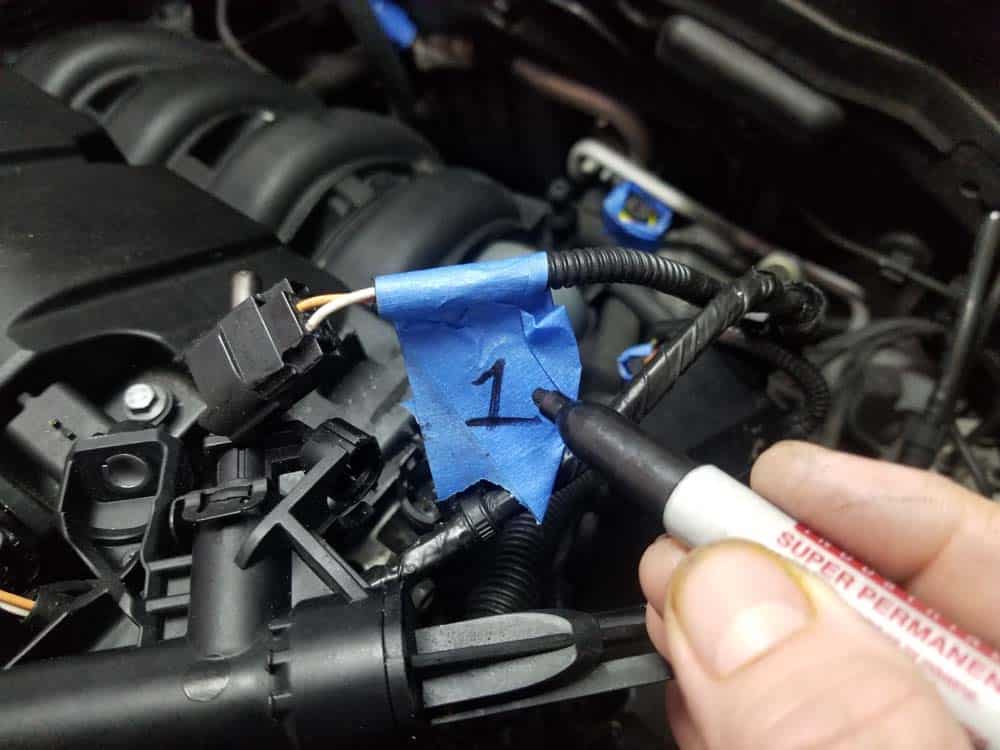
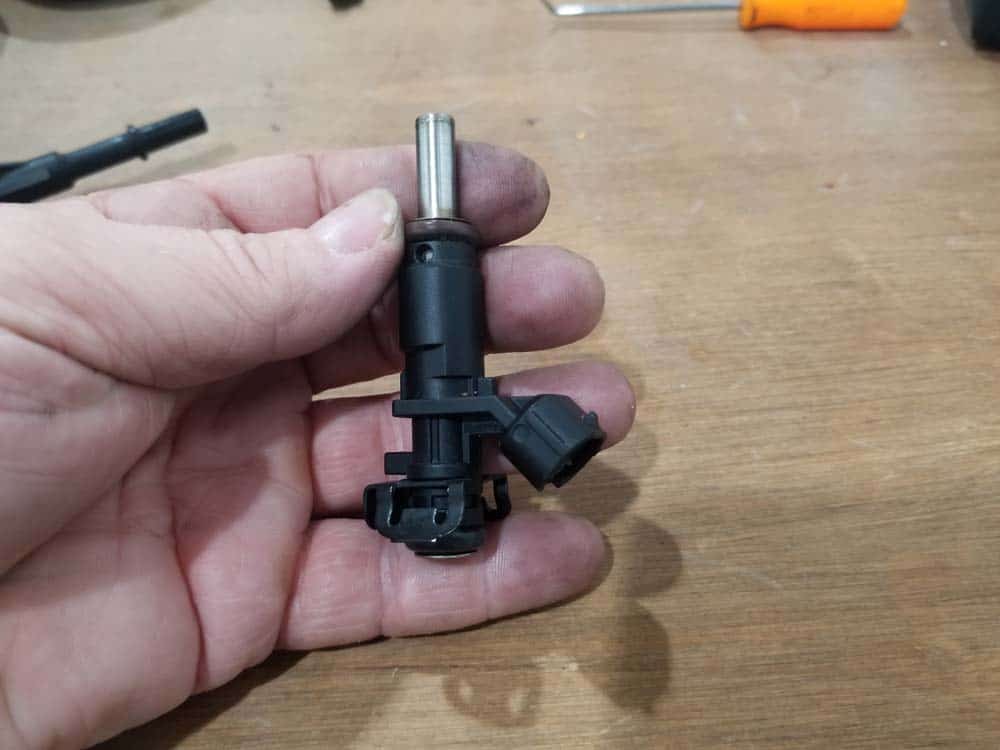
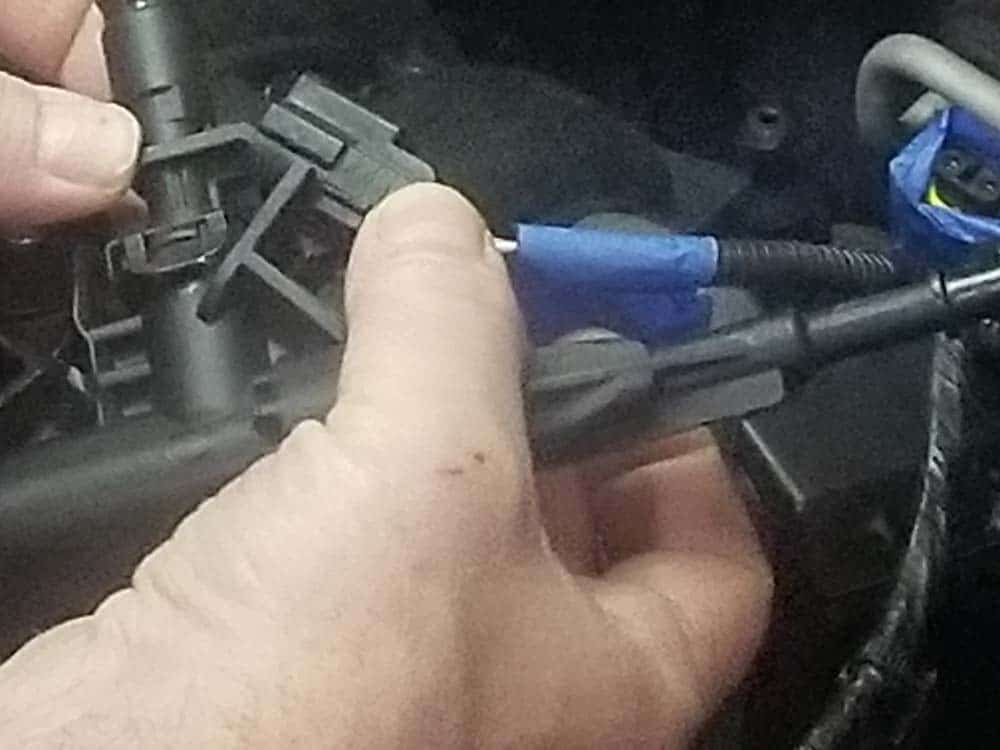
- Remove the injector electrical connector by pressing down on the upper tab and pulling it off. Be sure to use some tape to label the wires to avoid reinstalling them in the incorrect order.
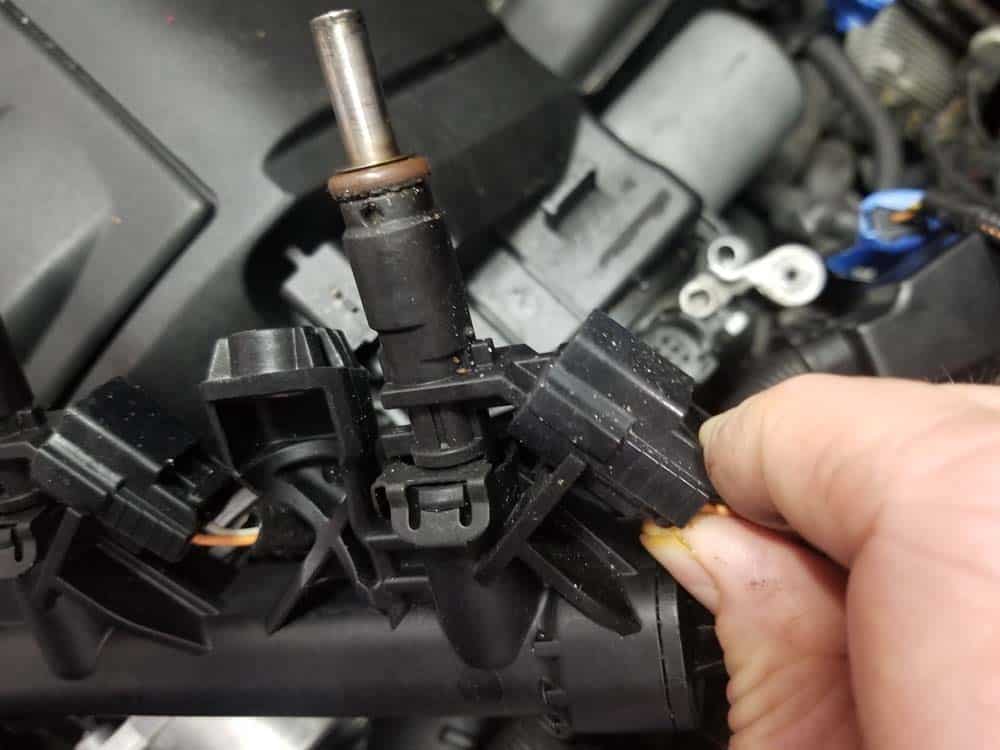
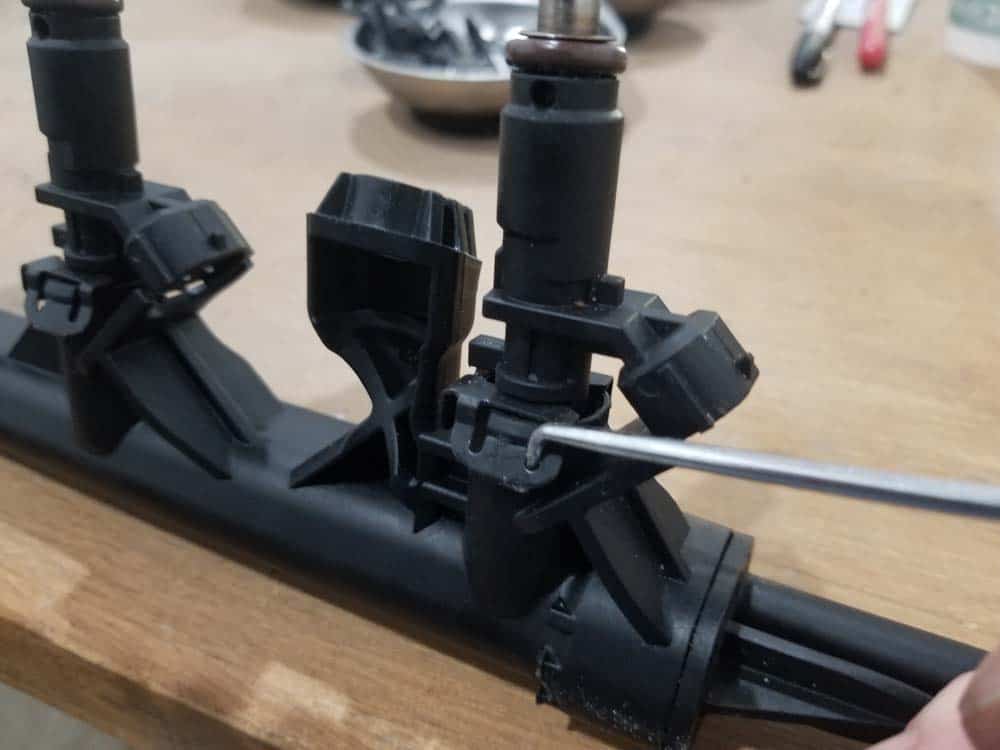
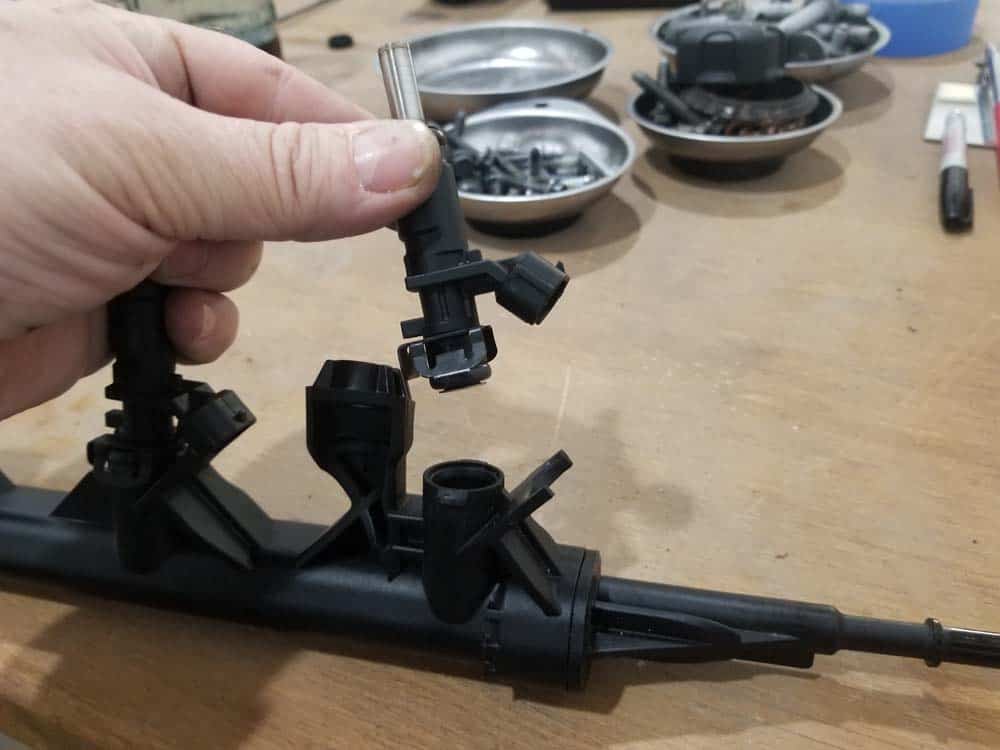
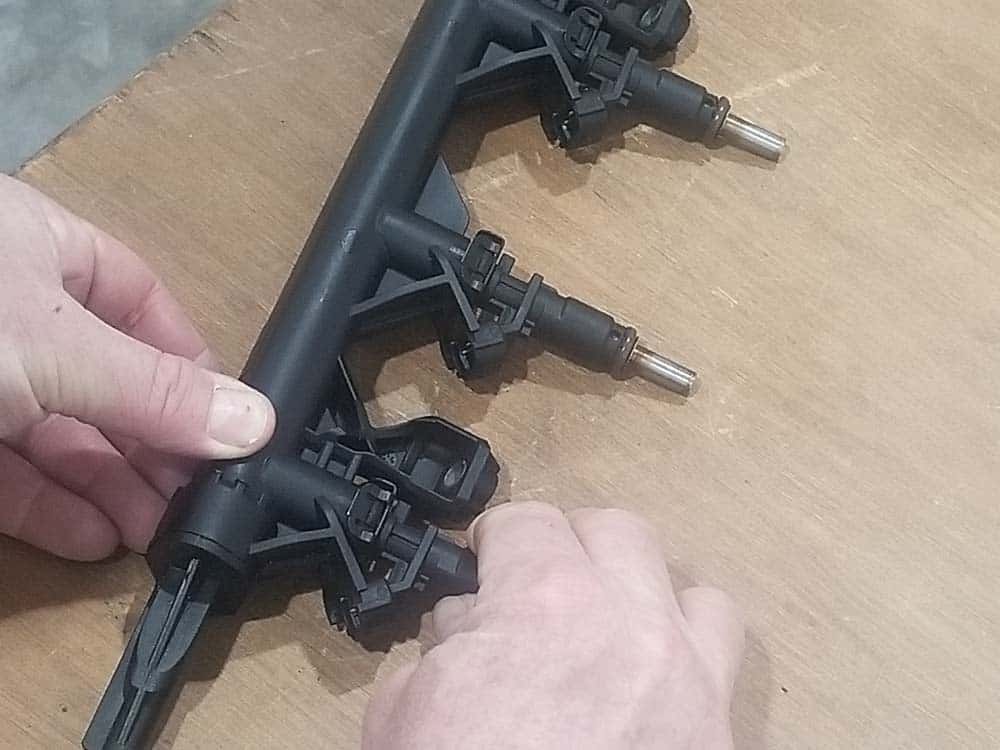
- Use a metal pick or small flat blade screwdriver to pry the injector clamp free from the fuel rail. Pull the injectors out of the rail.
- Using both hands, firmly press the new injectors into the fuel rail until they click into place.
- Reattach all of the electrical connectors to the fuel injectors paying close attention to the correct numbering order. Push them firmly on the injectors until you hear them click.
- If you used tape to label the connections, remove it now.
- The next step can be tricky, so use patience. Install the fuel injectors into the cylinders. It helps to tilt the fuel rail forward to get them in. If you are having a problem getting the injectors in, try wiggling the fuel rail back and forth. DO NOT put pressure on the fuel rail until you are certain the injectors are in the cylinders. DO NOT try and force the injectors into the cylinder...you will damage them.

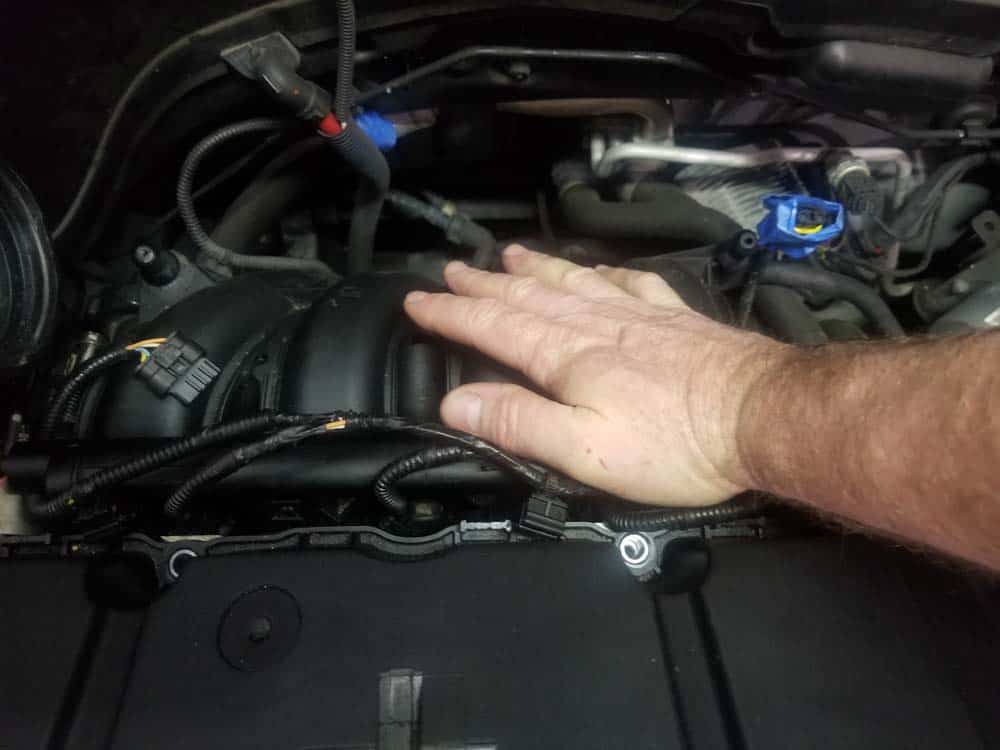
- When all four injectors are properly in the cylinders, use the palm of your hand to firmly press down on the fuel rail. Continue to press firmly on each injector until their o-ring is properly seated inside the cylinder.
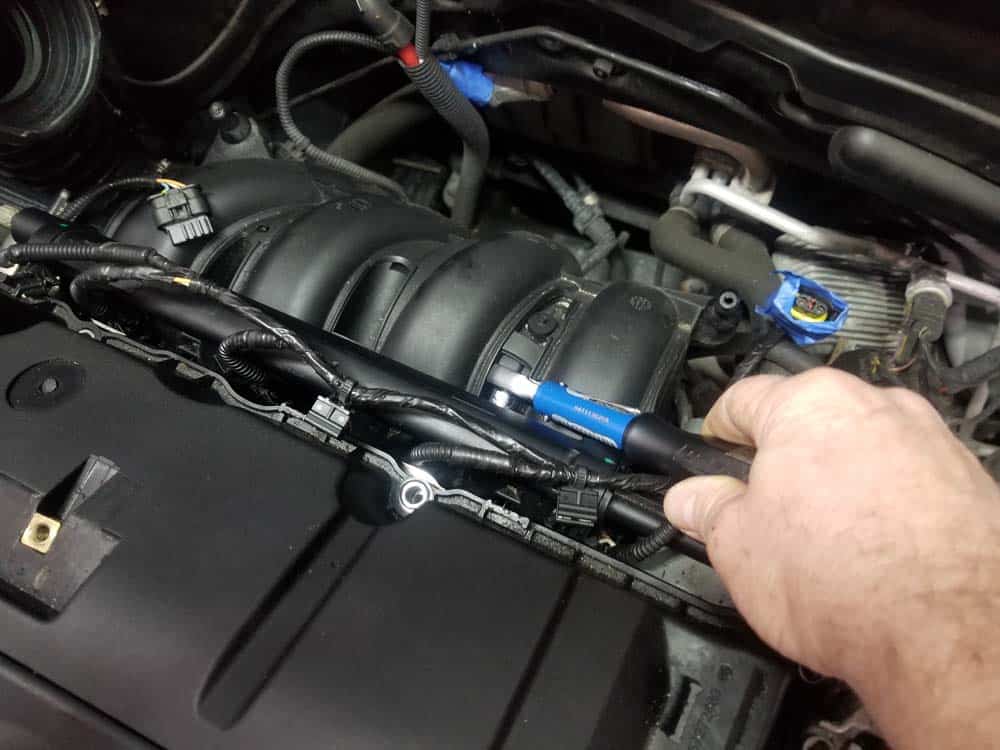
- Reinstall the two T30 fuel rail mounting bolts and torque to 8 Nm (6 ft-lb).
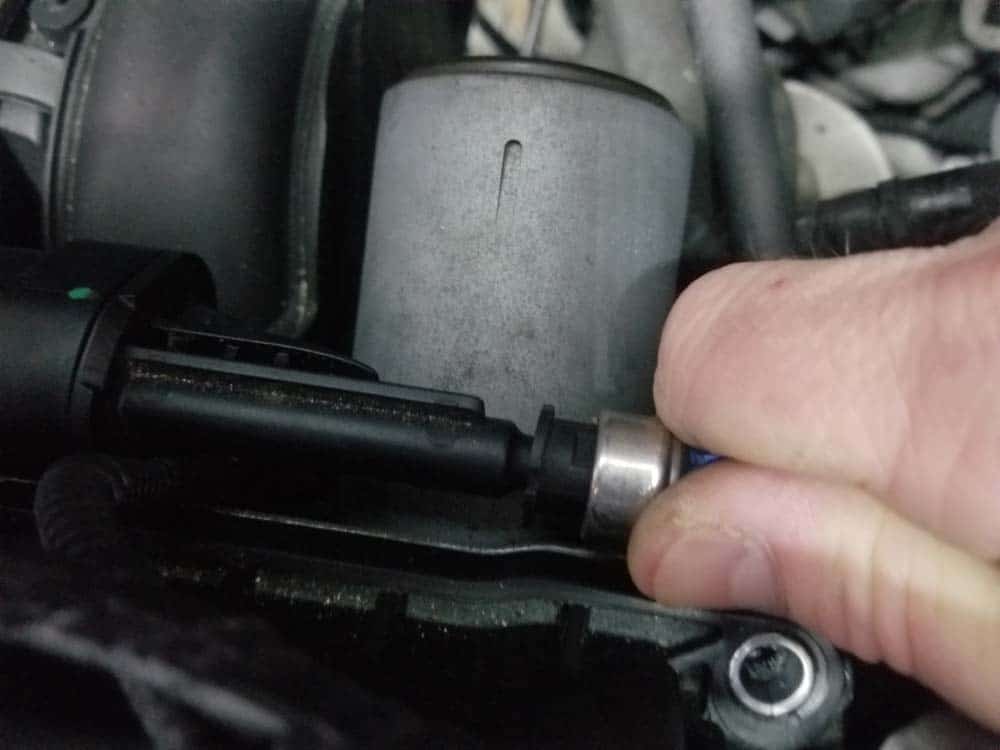
- Reinstall the fuel line on the end of the fuel rail. Make sure to press firmly on the fitting until you hear it snap into place.
- Reinstall the intake muffler. Now is a great time to install a new air filter...you can order one from the parts list above. Don't forget to plug the MAF connection back in.
- Reinstall the pre-box and intake manifold tube.
- Reconnect the battery.
- Start the car and test for proper operation.
MINI R56 Fuel Injector Replacement Finished