
Affiliate link disclosure – The BMW Repair Guide uses affiliate links in their site. For more information on affiliate links, please click here.
Repair Summary
This article gives detailed instructions on replacing the valve cover gasket in a MINI R56 Cooper vehicle. Even though we used a 2007 MINI Cooper to perform this repair, this article can be applied to any 2006-2013 MINI vehicle with minor modifications to the repair steps.
A MINI R56 valve cover gasket replacement is a very easy repair that can save the home mechanic a substantial amount of money doing it themselves.
Ok...we won't lie. We broke out the thesaurus for this article and researched every antonym for the word "mini". Let's see...substantial. Large. Huge. Where are we going with this?
Any word that you can think of that's the opposite for the term "mini" is what you will save in dollars doing this repair yourself. Yes. Very clever of us.
A MINI R56 valve cover gasket replacement is so simple, we struggled whether to give it a level 2 or 3 on the difficulty scale. If you can use a torque wrench and are proficient with a flat blade screwdriver, you can master this repair. It's that easy. And the best news is you can do it all for less than 50 bucks. Take that "Mr. Dealership" man.
The MINI R56 Cooper with the N12 4 cylinder engine is, unfortunately (among other things) notorious for a leaking valve cover gasket. Usually, your diagnosis of this issue will begin with a pungent oil-burning smell emanating from the engine compartment. Further inspection will usually reveal oil leaking from the edges of the cover or filling up the spark plug tubes. Oil can even drip from the cover onto the exhaust manifold or exhaust pipes causing a waft of blue smoke from the engine compartment. The cause of a MINI R56 valve cover gasket leak is usually heat and age; the gasket becomes dry and brittle and starts to deteriorate.
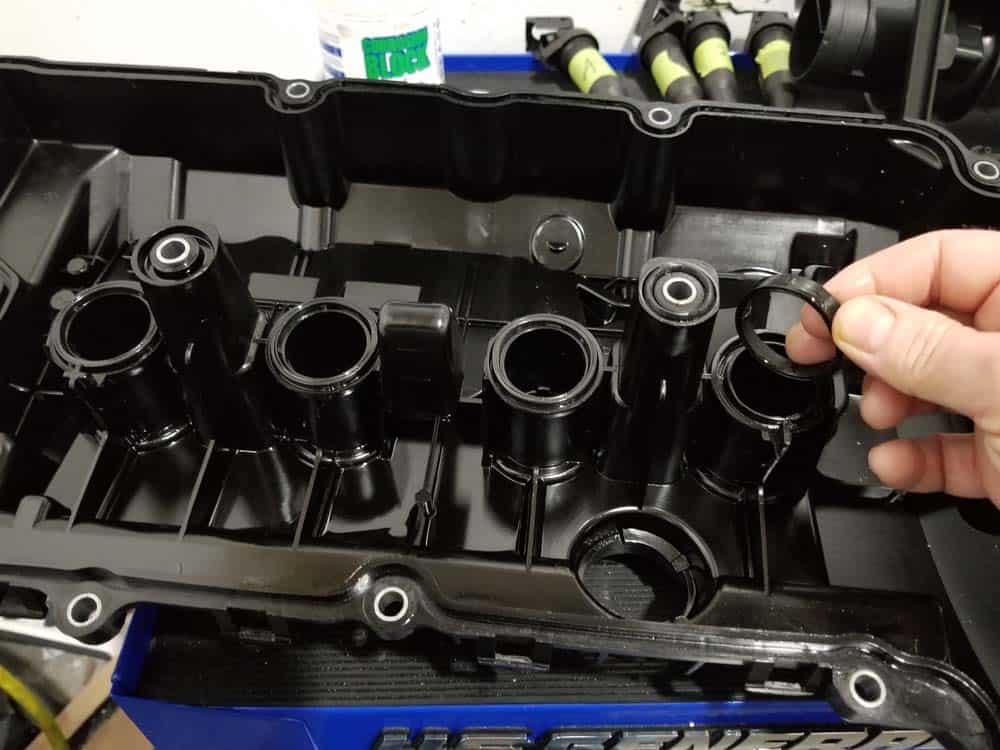
The valve cover gasket on your R56 MINI is a vital component that seals the top of the N12 four-cylinder engine. Its job is to keep the cylinder head and valves protected from the elements while also keeping the engine oil from seeping out. It is made of rubber and consists of seven pieces; four small rings that seal each spark plug tube, two rings that seal the interior mounting bolts, and one large piece that seals the perimeter of the cover.
The good news is a MINI R56 valve cover gasket replacement is an easy repair for the home mechanic and takes about an hour and a half. The only "specialty" tool you will need is a low-end torque wrench, available at just about any home improvement store (we also give you a link below to purchase on Amazon). The low-end torque wrench is important to make sure you don't overtighten the valve cover bolts during reassembly...a very common mistake made by Do It Yourselfers.


View the detailed parts diagram for this repair.
Includes detailed part diagrams, part numbers and links to purchase all of the required components needed to complete this repair.
Section 1 - Preparing the Engine Compartment for Replacing the Gasket
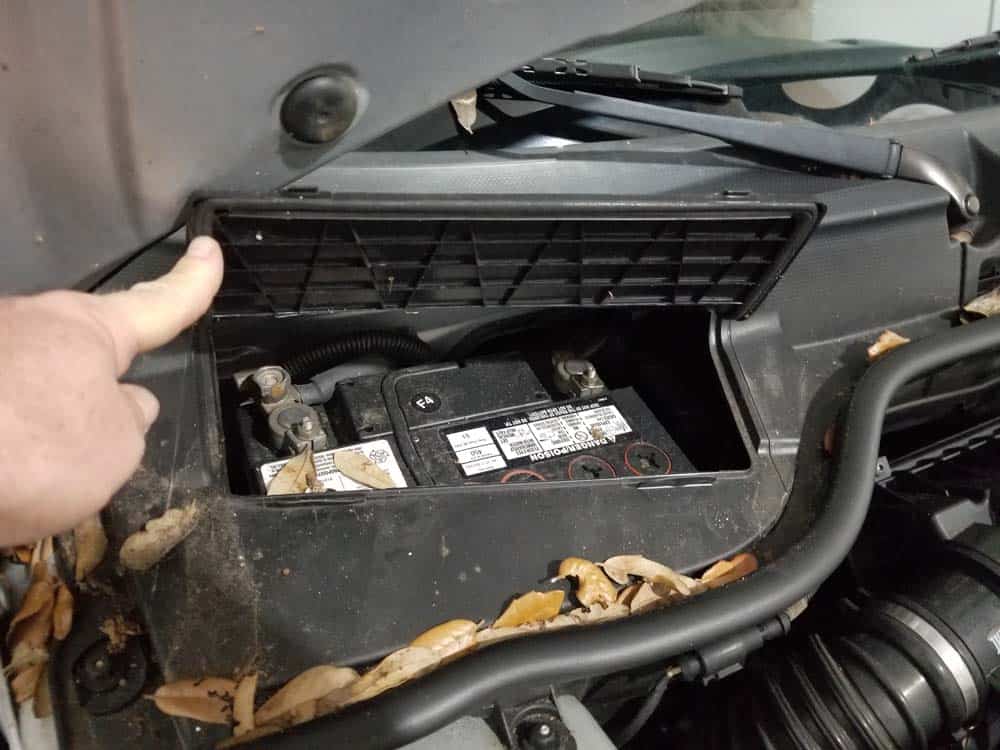
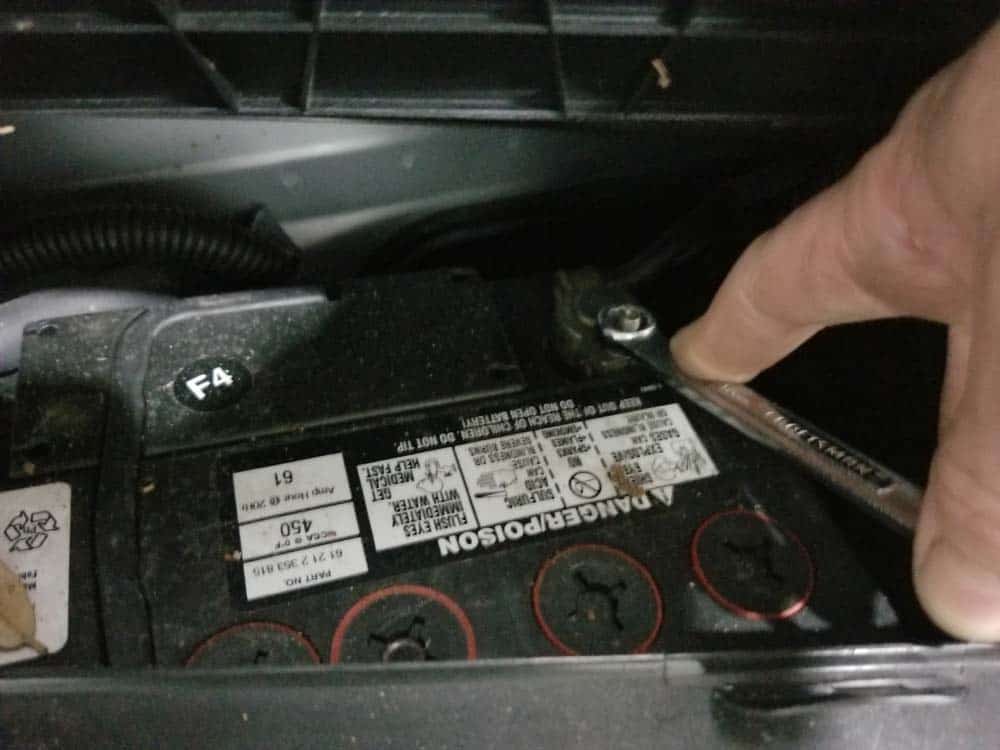
Before you can remove the valve cover and replace the gasket, there are some parts and electrical connections that need to be cleared out of the way. Always disconnect your battery before starting this repair to avoid damaging sensitive electronics.- Disconnect the negative terminal from the battery before starting this repair. To avoid catastrophic damage to your electronics, ALWAYS disconnect your MINI battery before working in the engine compartment.
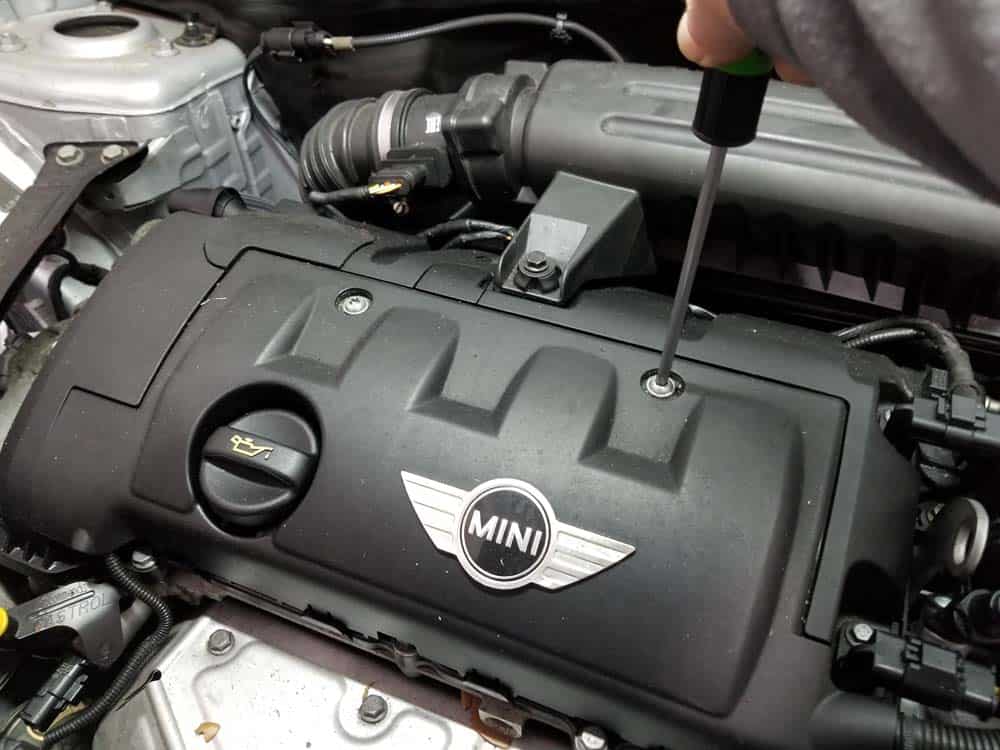
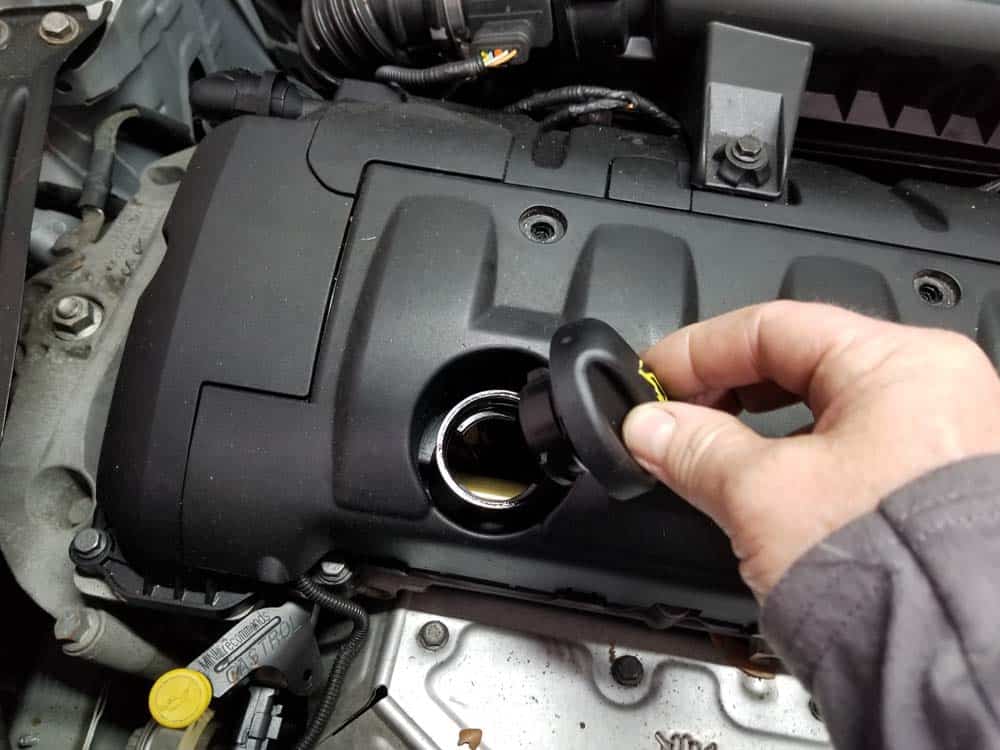
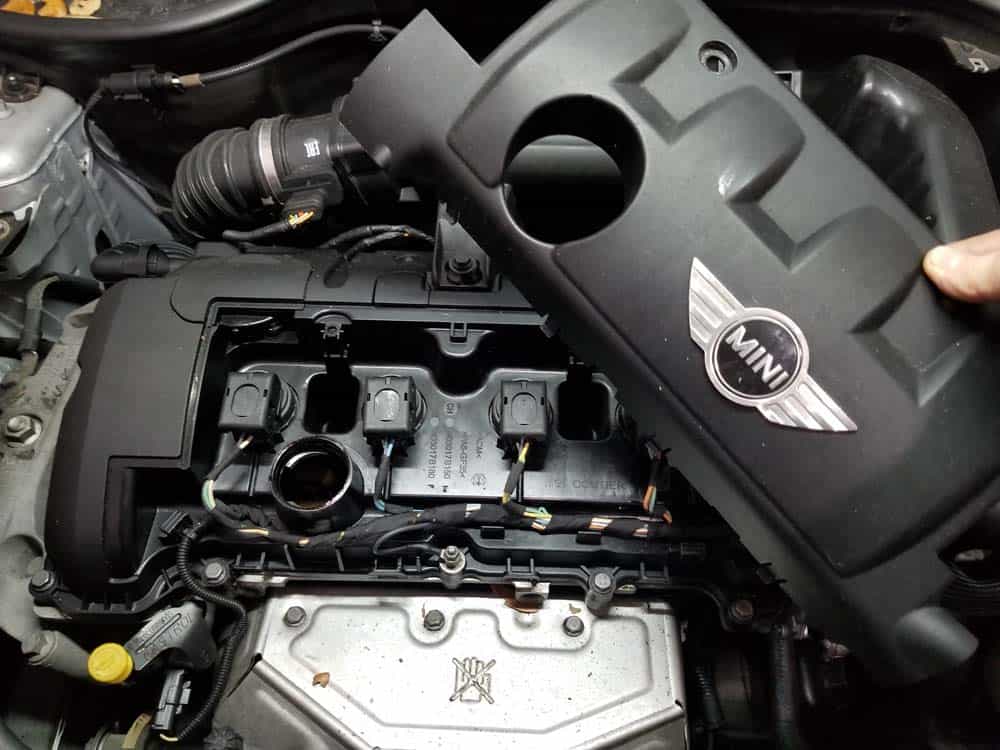
- Use a T40 torx bit to remove the two screws securing the engine cover. Remove the oil filler cap. Grasp engine cover and remove from vehicle.
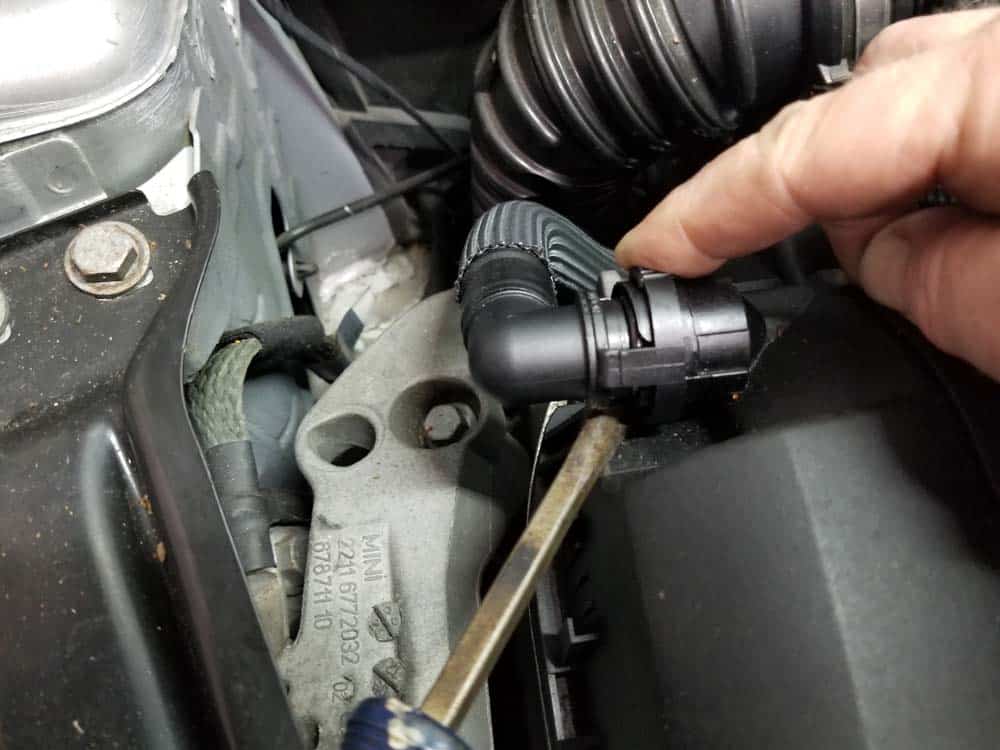
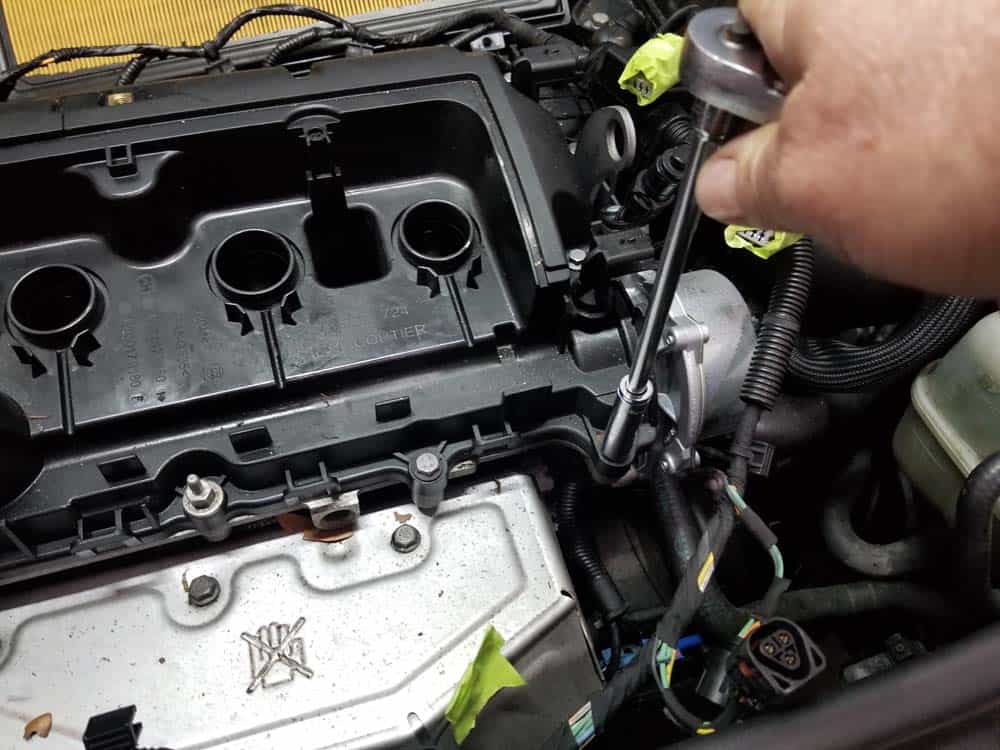
- Remove the crankcase breather line from the rear of the cylinder head cover. Use a flat blade screwdriver to assist with pinching the tabs in.
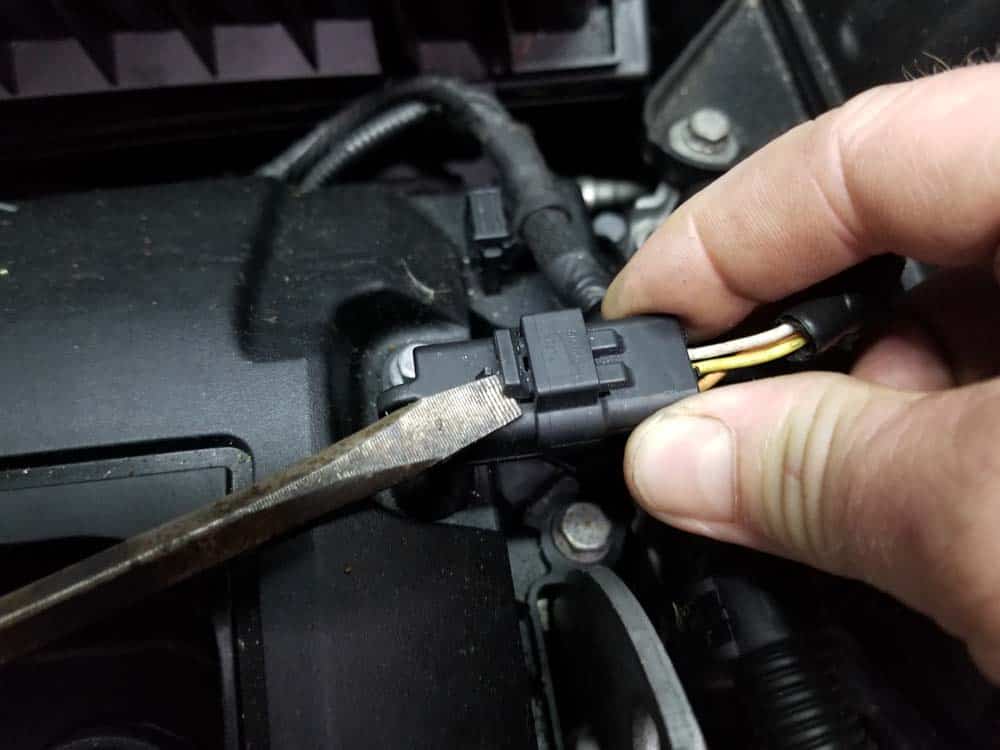
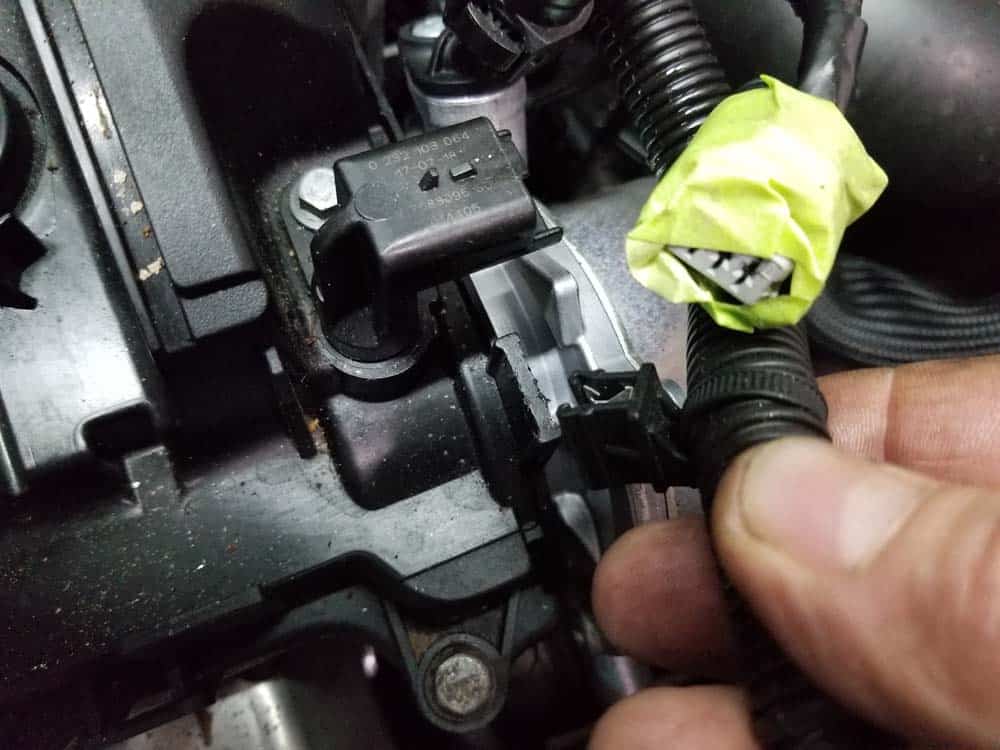
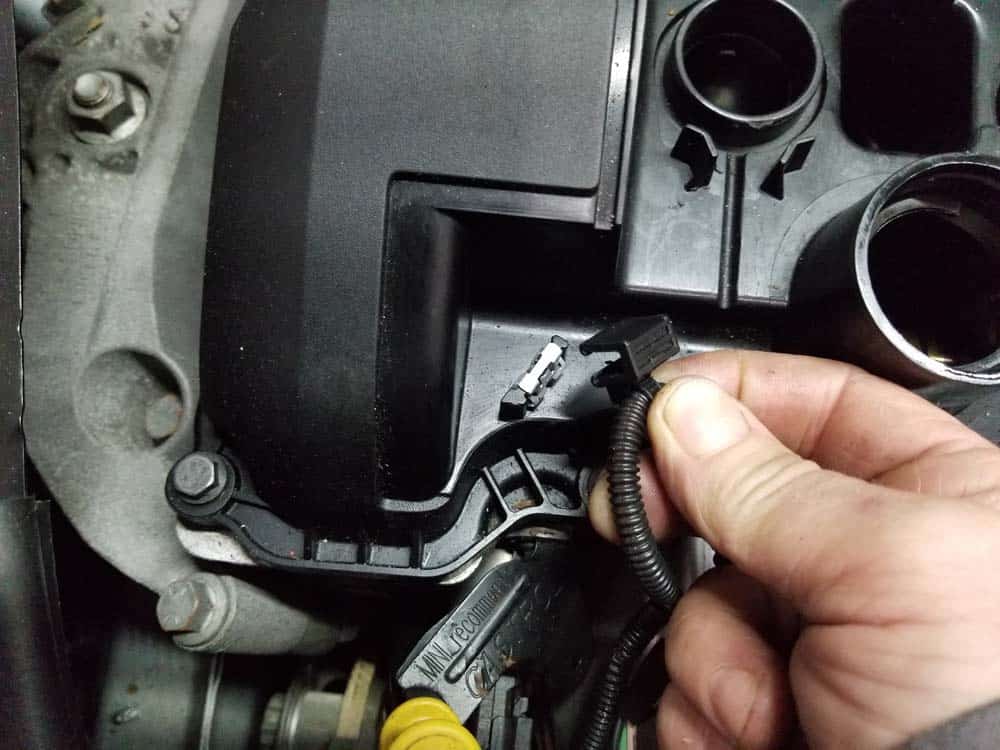
- Use a flat blade screwdriver to lift the plastic retainer on the rear exhaust camshaft sensor. Disconnect the sensor. Repeat on the front intake camshaft sensor.
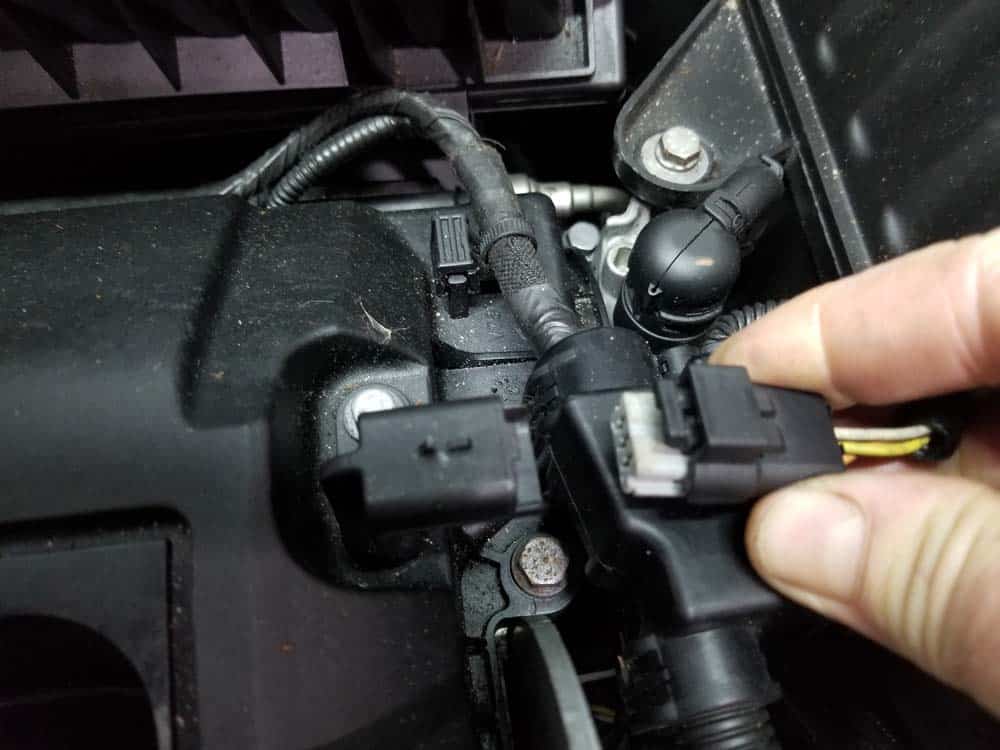
- It is always good practice to mark all of your electrical connectors with a high visibility tape so you don’t forget one during reassembly.
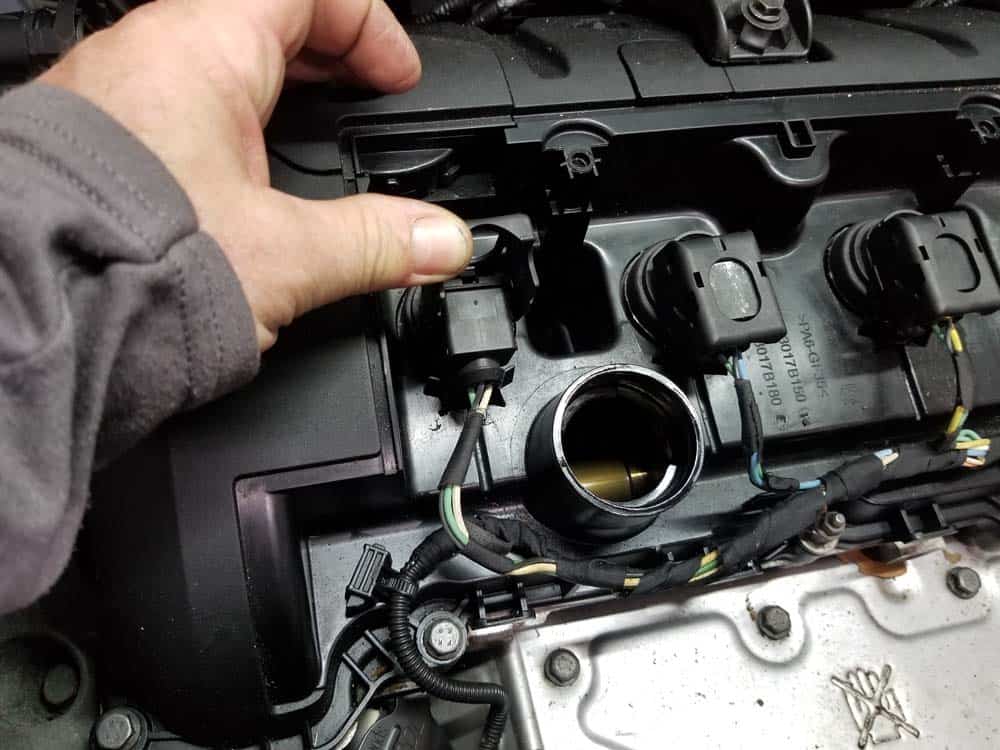
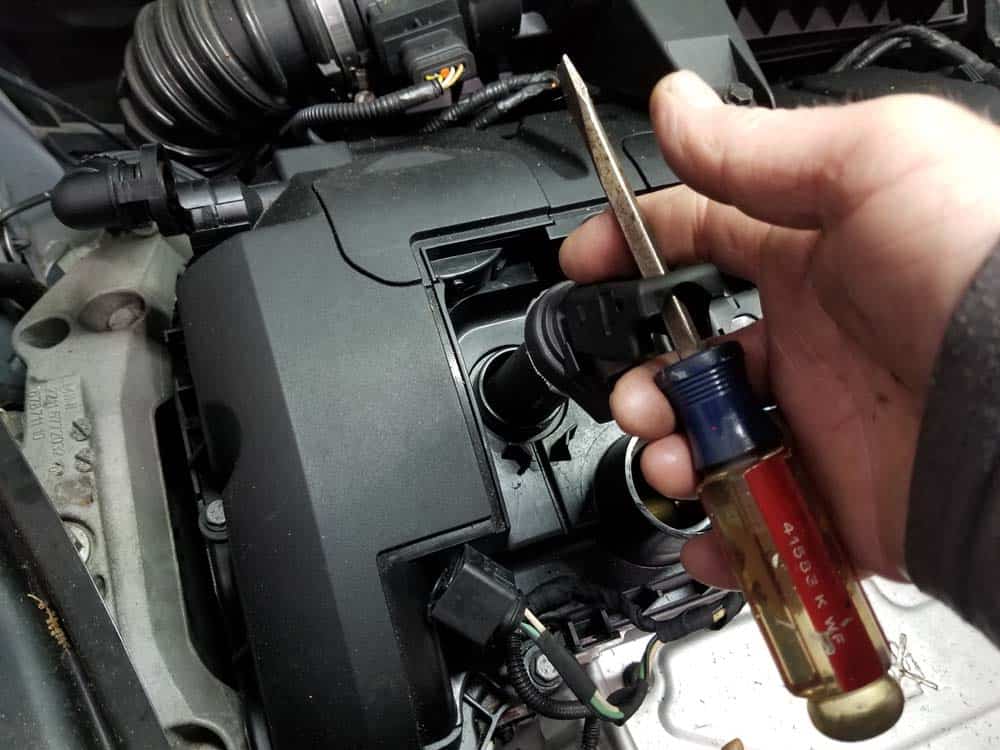
- Pull up the plastic retainer to release the electrical connection on the cylinder 1 coil pack. Pull the electrical connector out of the coil. With the aid of a flat blade screwdriver or socket extension, pull the coil pack out of the spark plug tube. Repeat on the other three cylinders.

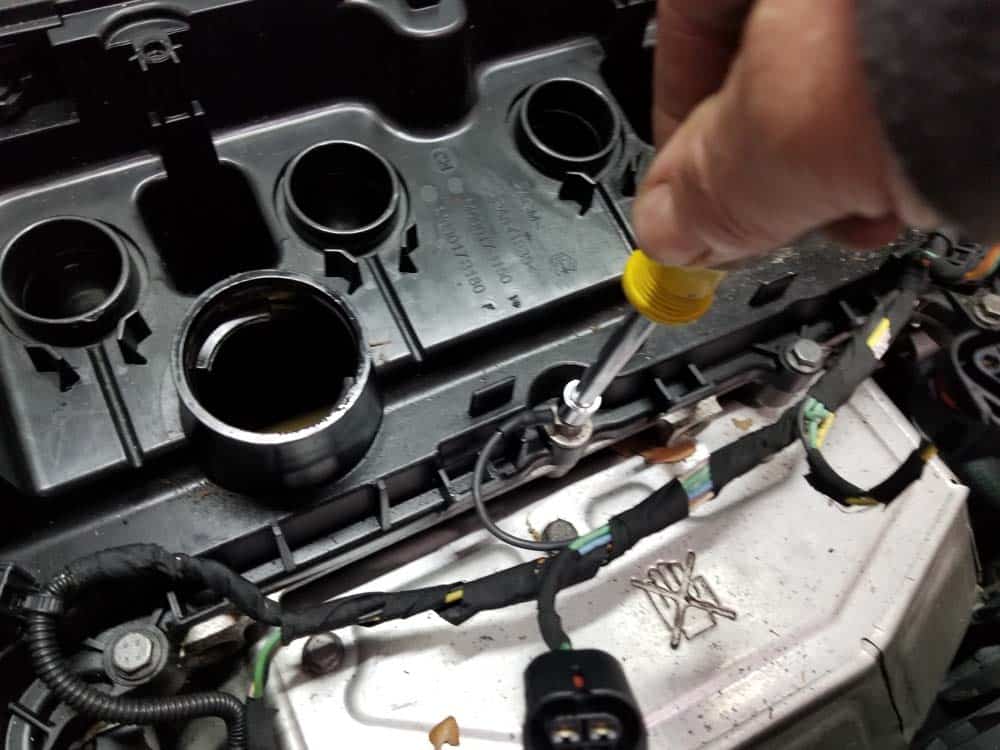
- Remove the grounding wire with an 8mm socket wrench.
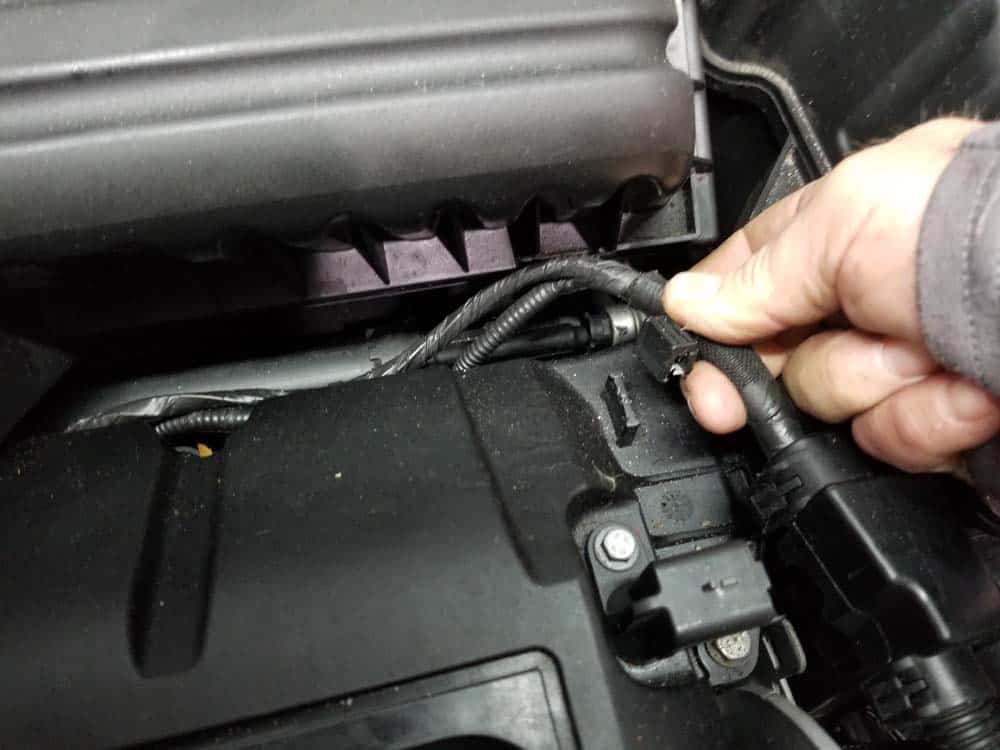
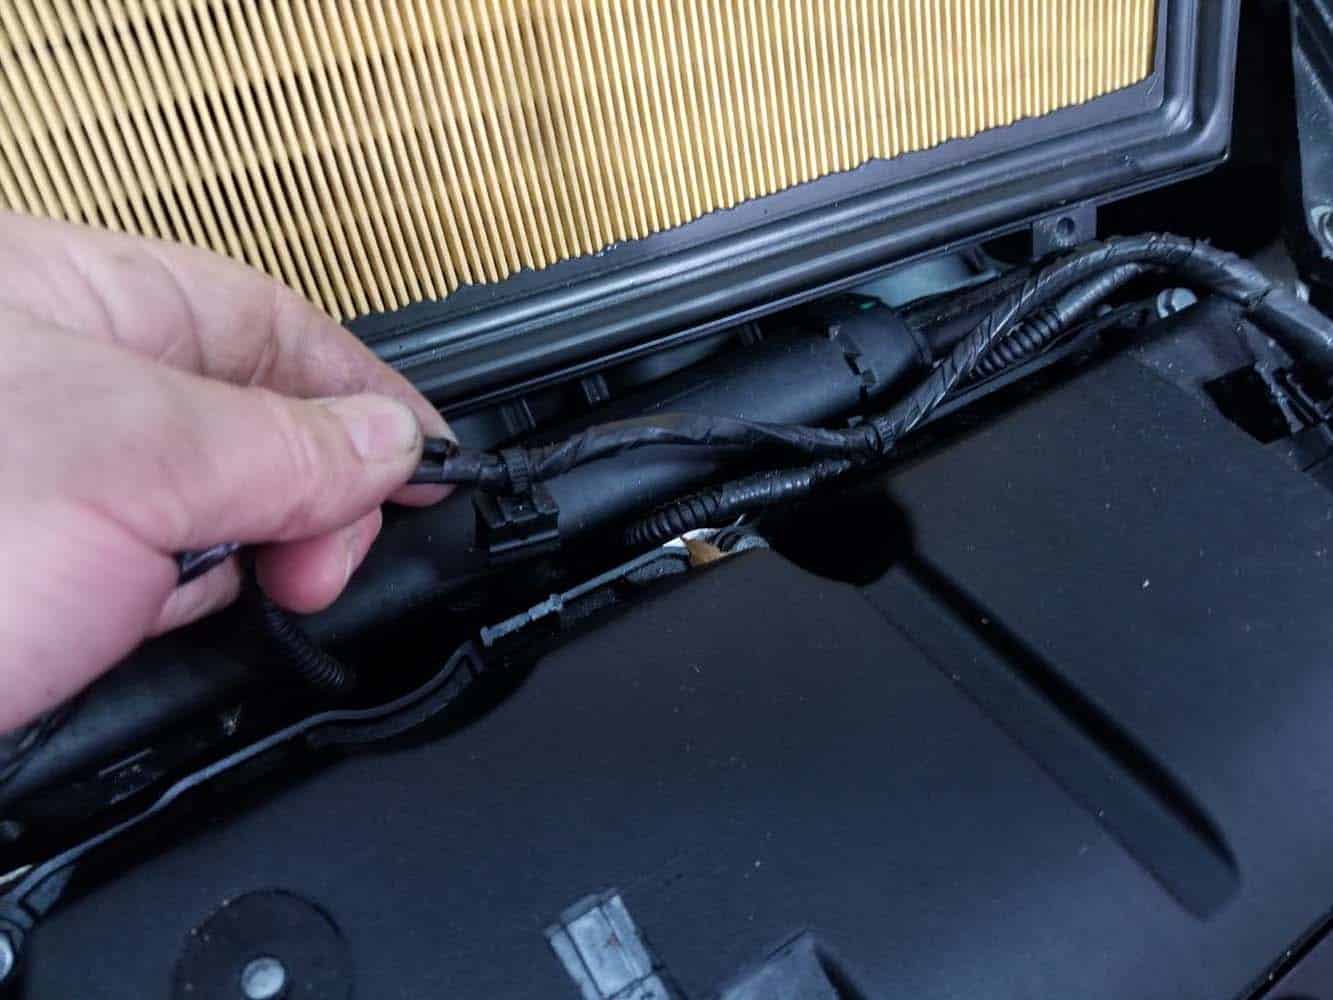
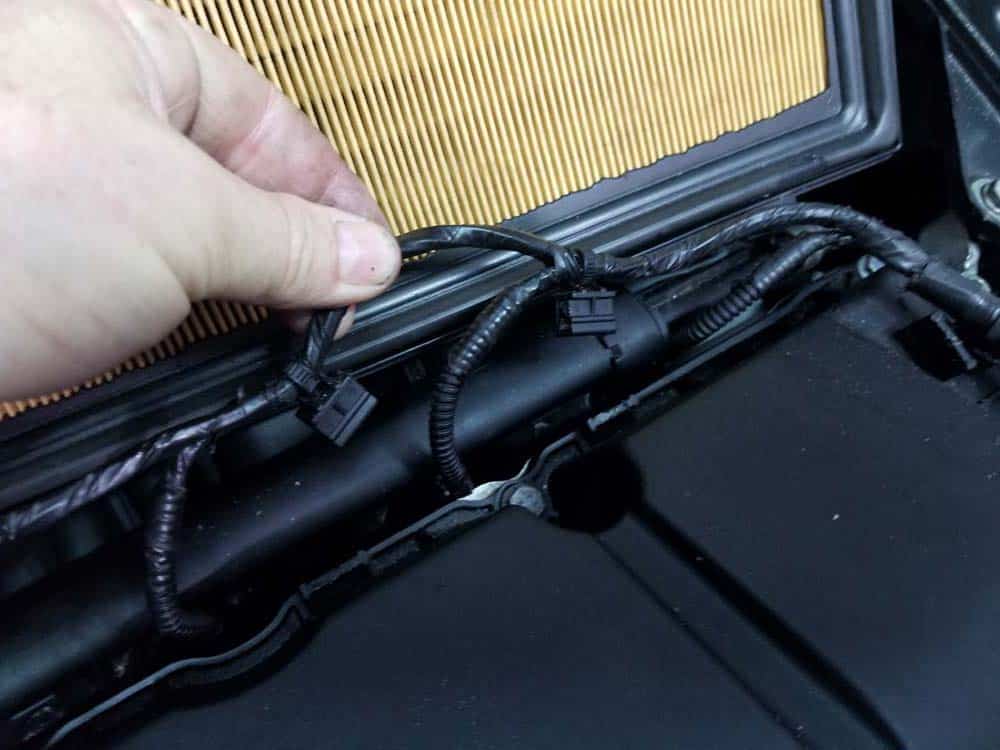
- Remove the four plastic snap anchors securing the wiring harness to the valve cover. There are two more under the air box cover that will be removed in step 13.

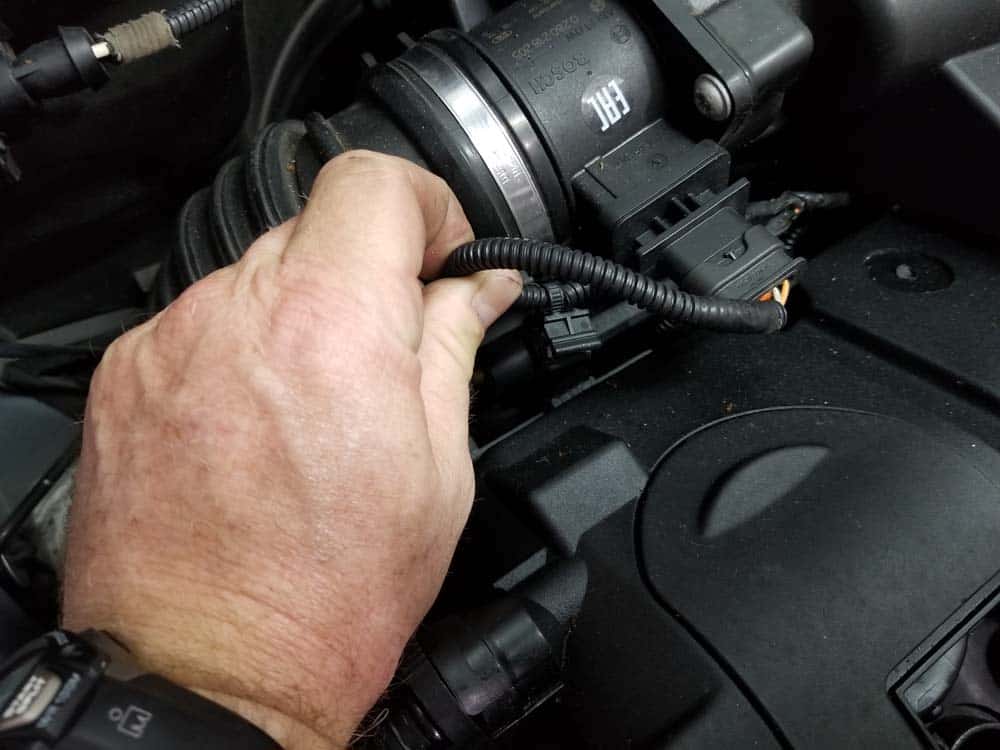
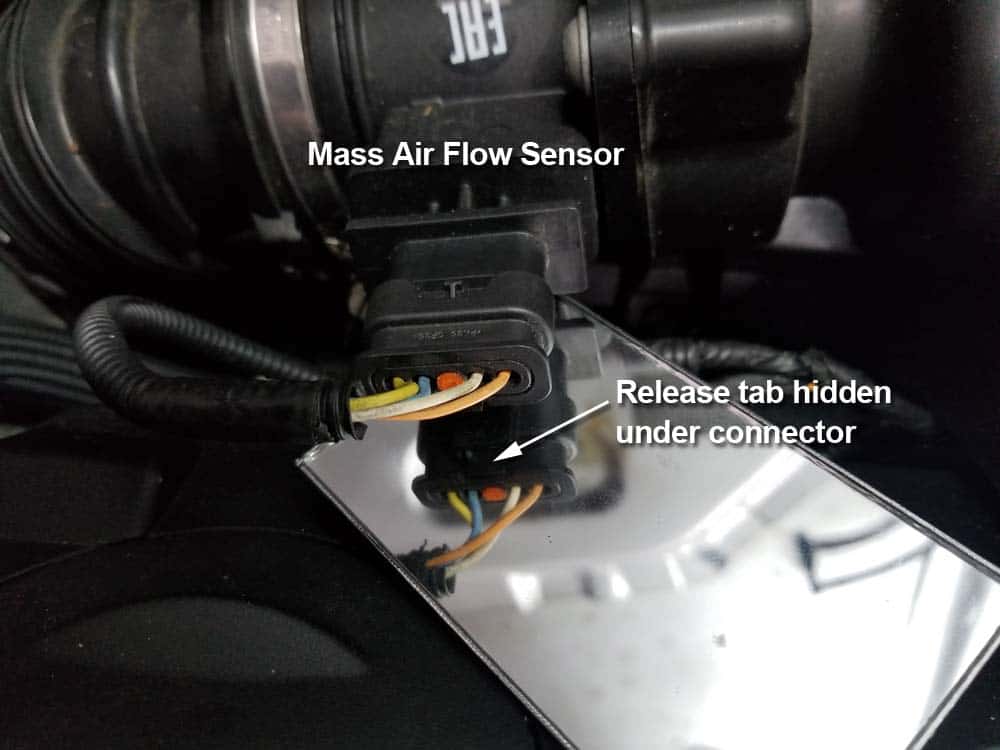
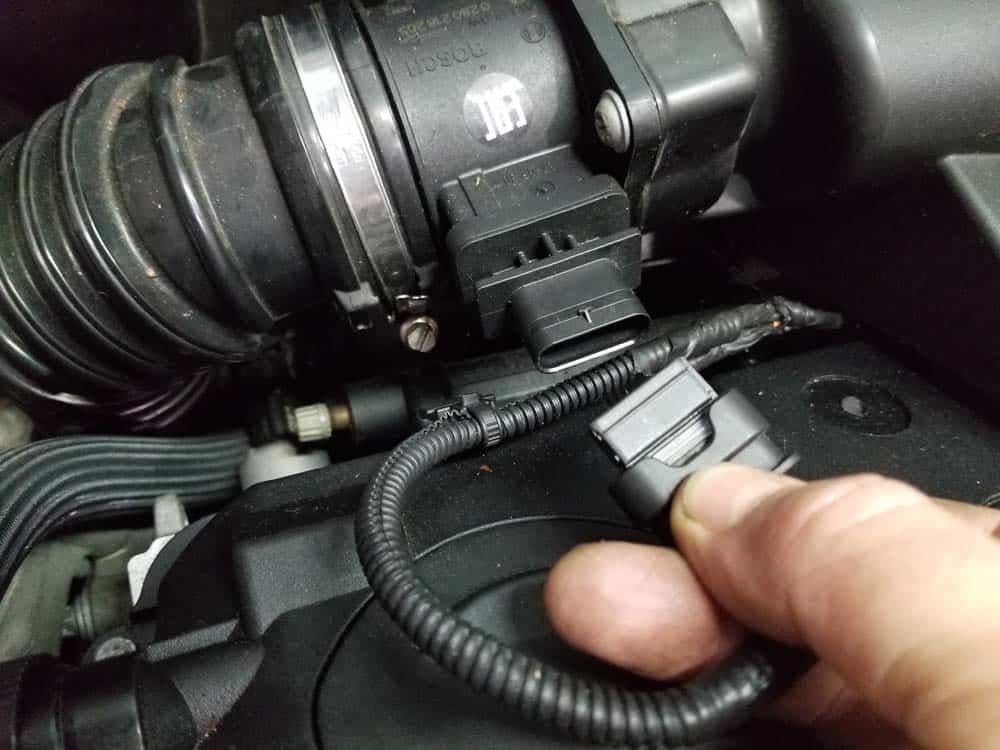
- Remove the connector wire from the mass air flow (MAF) sensor. DO NOT force it off...the plastic release is hidden under the connector as shown in the following images.
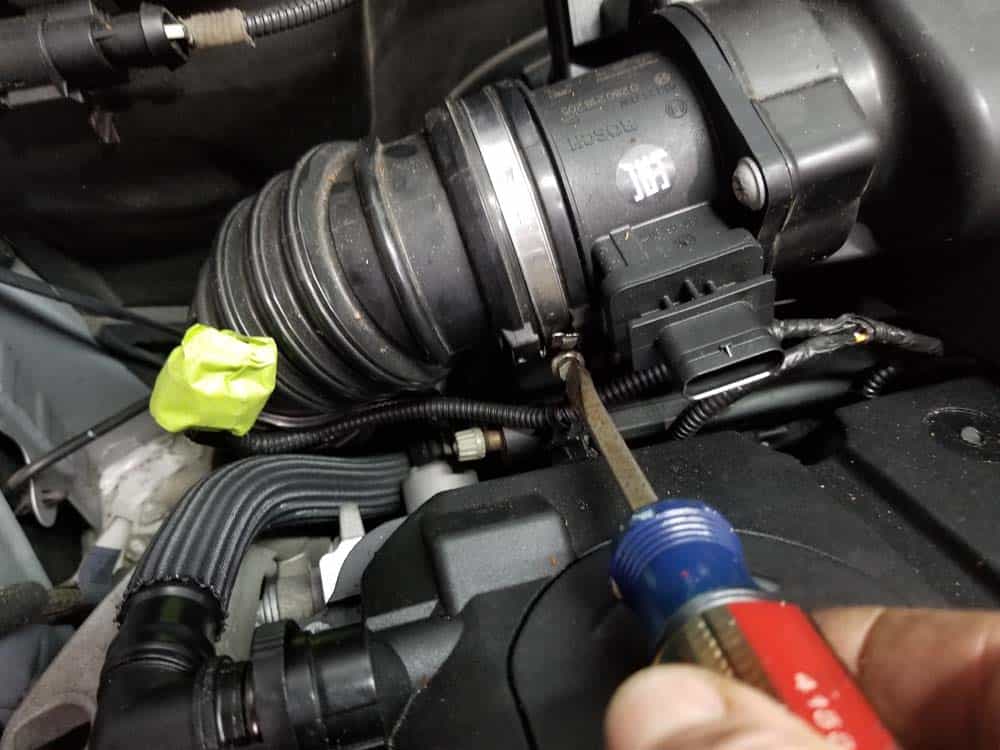
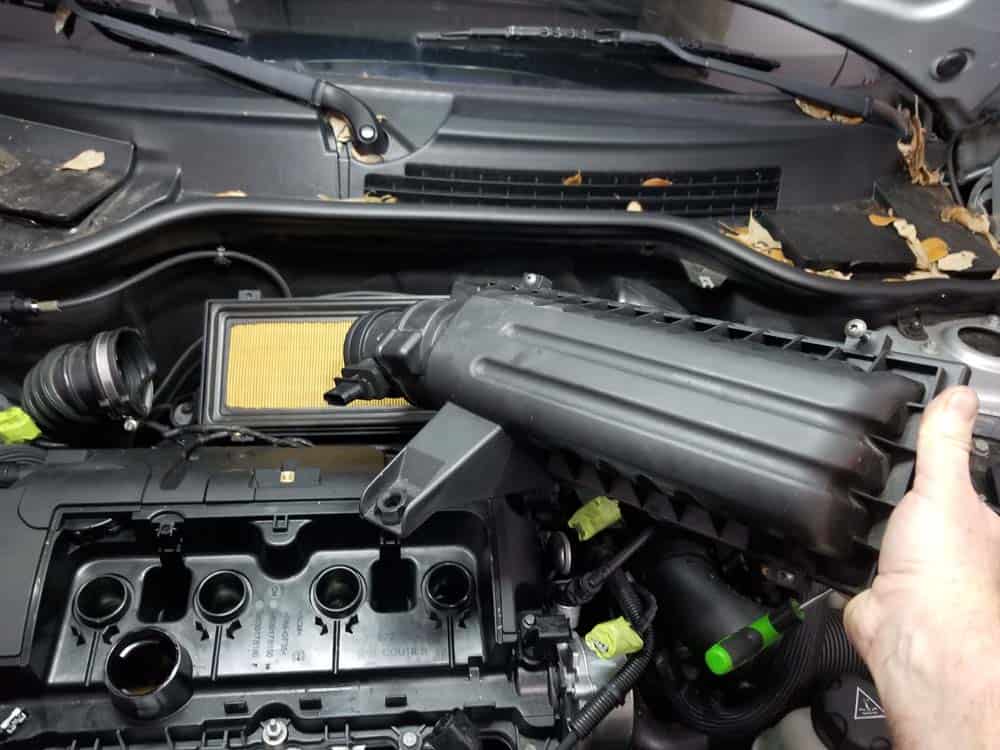
- Loosen the hose clamp securing the intake boot to the air box.
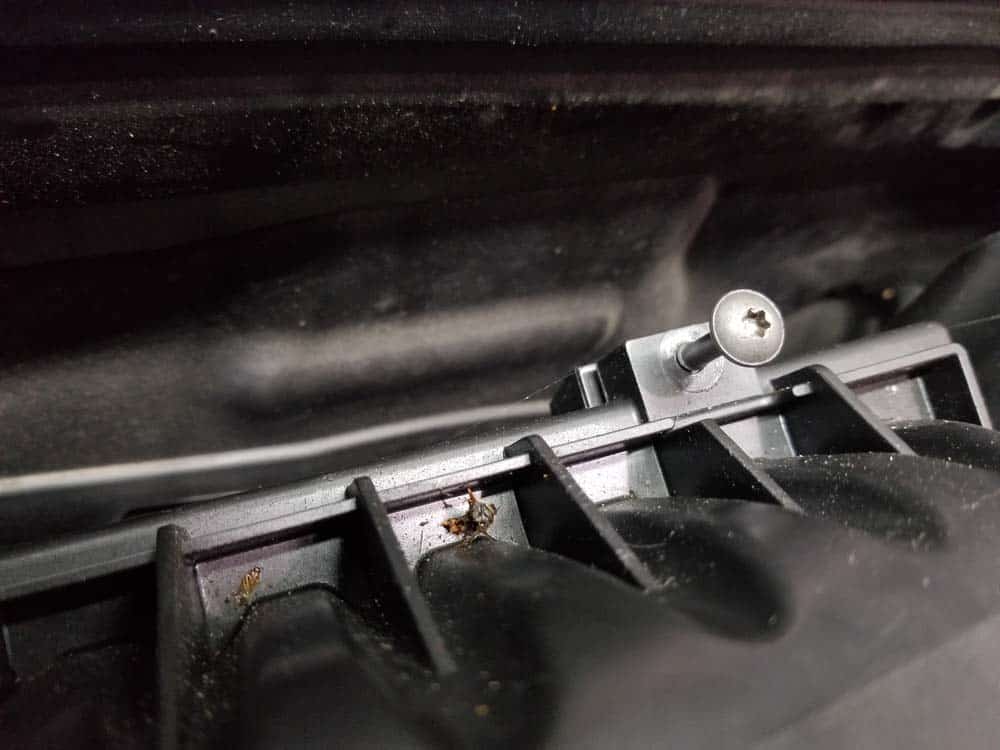
- Use a 10mm socket wrench to remove the bolt securing the air box cover to the valve cover.
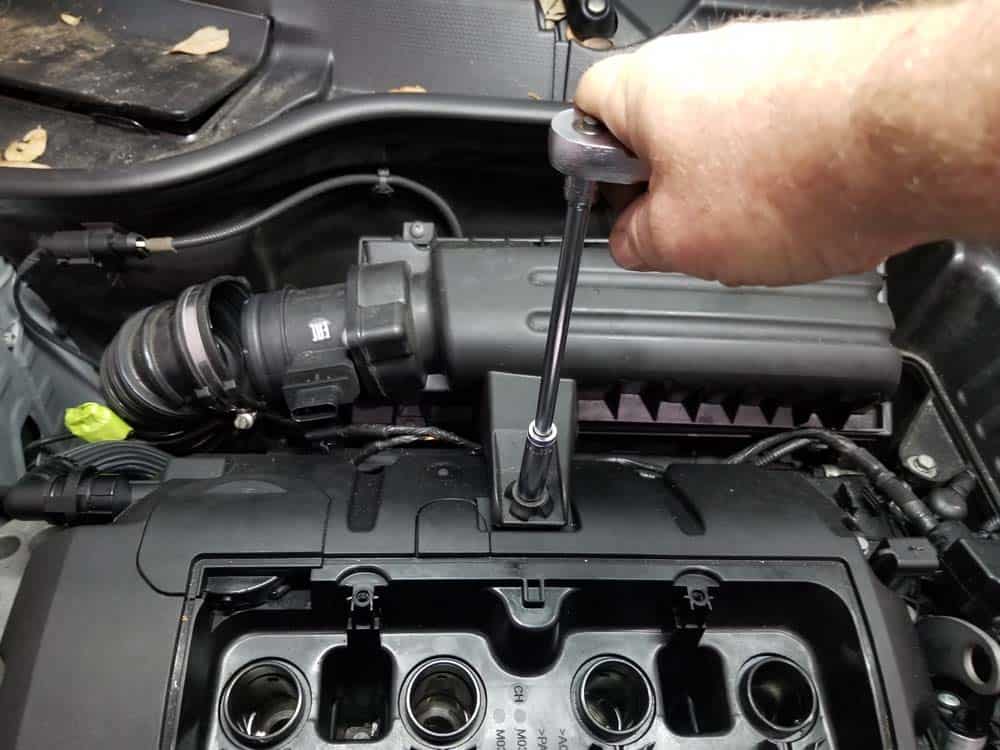
- Using a T20 torx bit, loosen the four screws securing the air box cover. Note the screws do not come out of the cover. Grab the cover and remove from the engine compartment.

- You can now access the final two snap anchors securing the wiring harness to the valve cover.
Section 2 - Removing the Valve Cover and Replacing the Gasket
- The valve cover is now clear and can be removed. Use a 10mm ratchet to remove the 11 outside bolts anchoring the valve cover to the cylinder head. Don’t forget the grounding stud...it is also a bolt anchoring the cover!
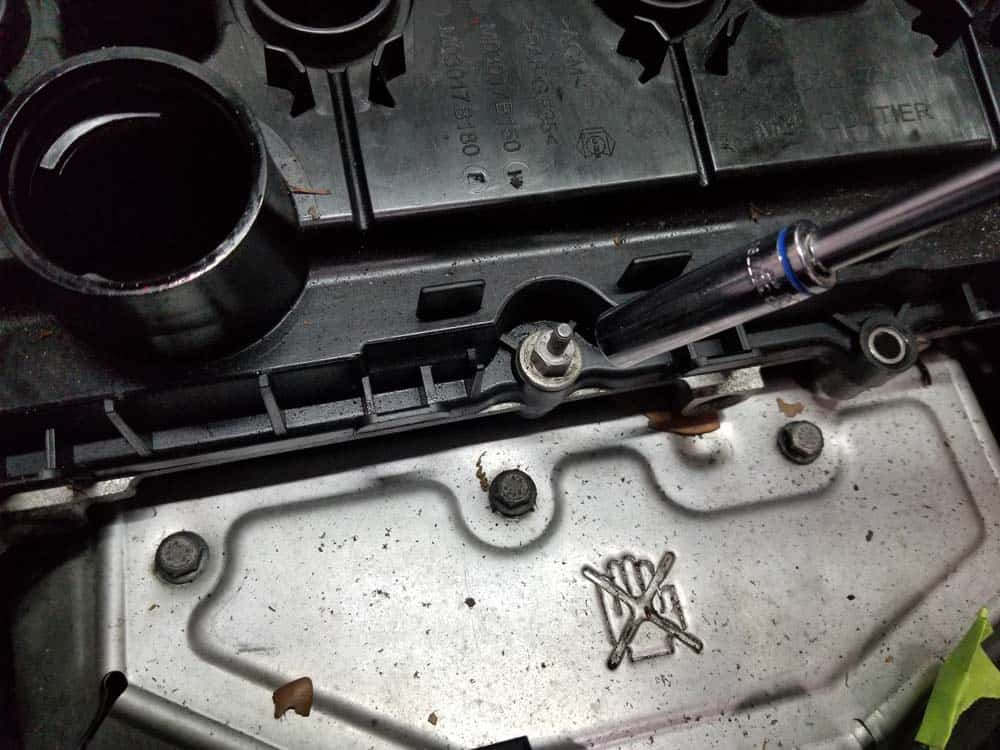
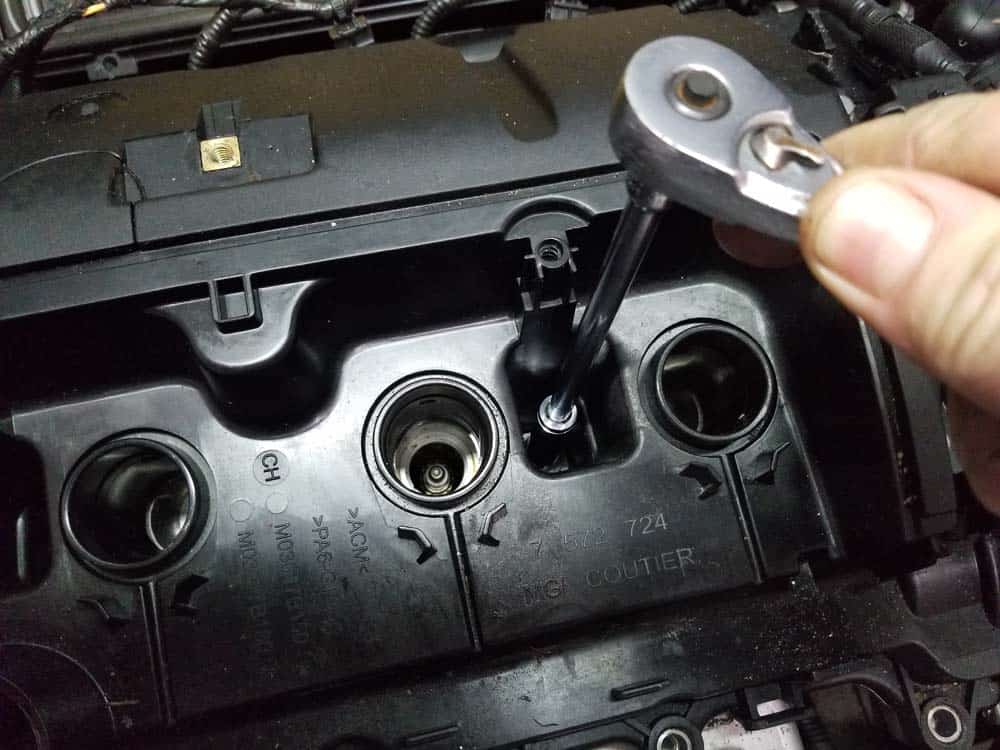
- Remove the two interior cover bolts.
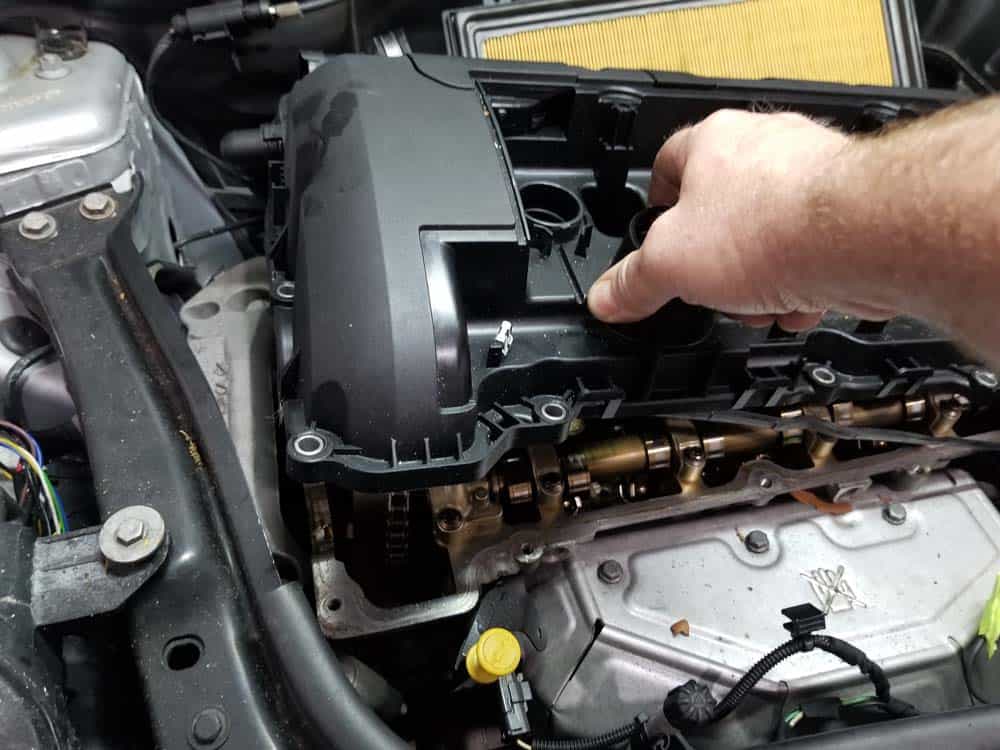
- Grasp the cover with both hands and remove from the vehicle. DO NOT force or attempt to pry the cover off...if it is not moving you most likely forgot a bolt.
- Remove the old rubber perimeter gasket from the valve cover. If it is stuck, use a plastic trim removal tool to gently pry it loose. NEVER use any type of metal tool to remove a stuck gasket. You can damage the plastic valve cover.
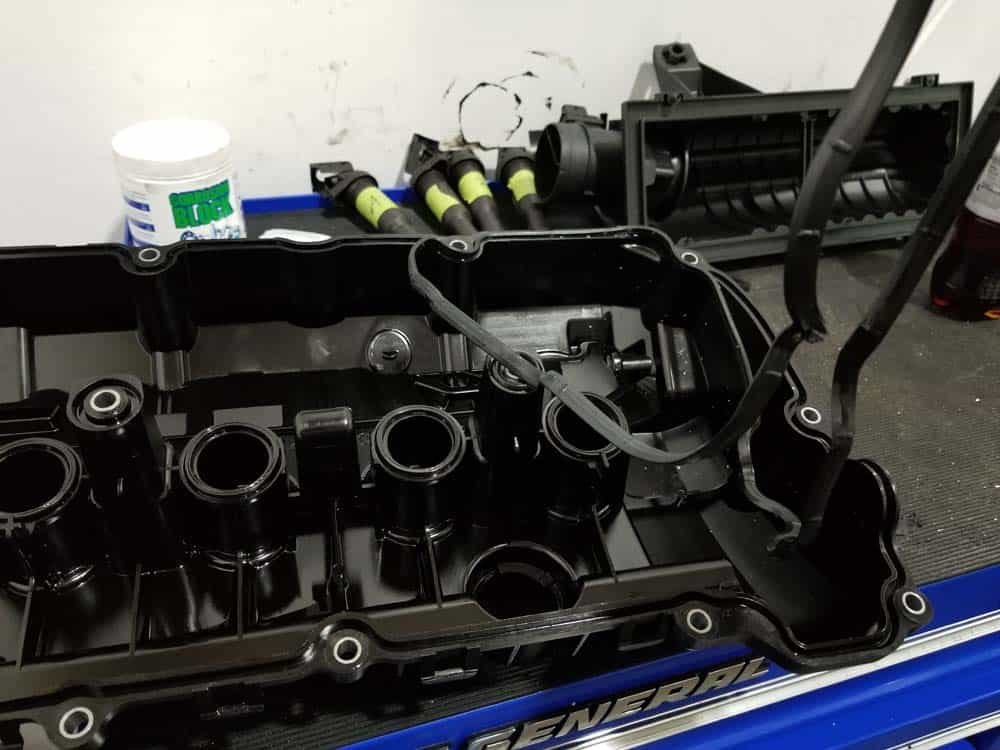
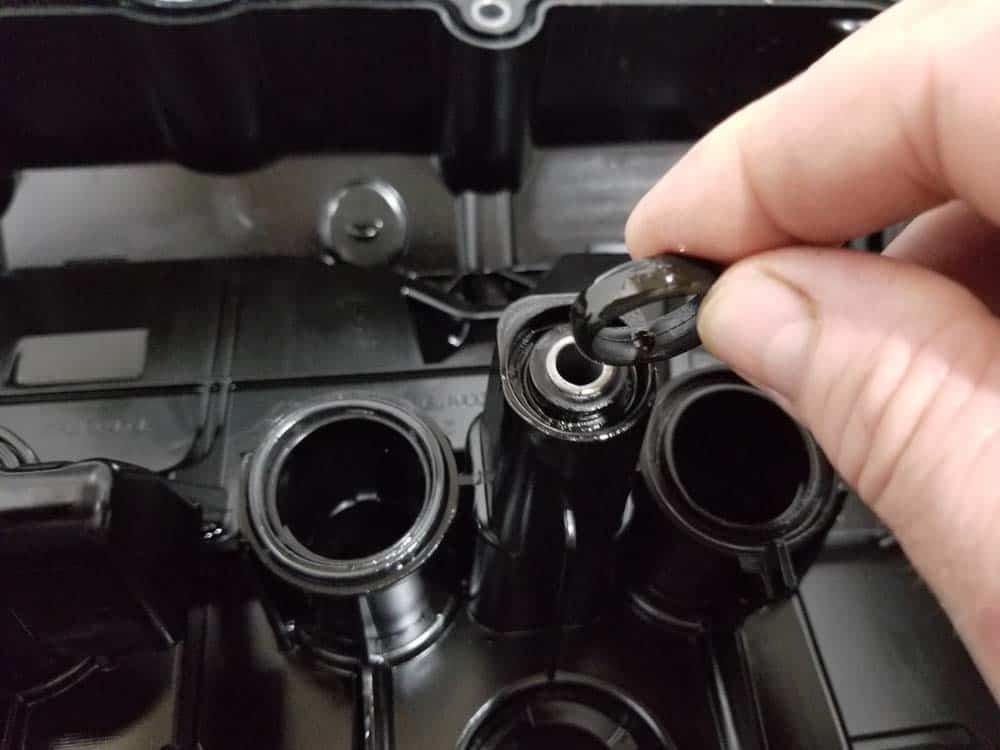
- Remove the four old spark plug tube gaskets and the two interior mounting bolt gaskets.
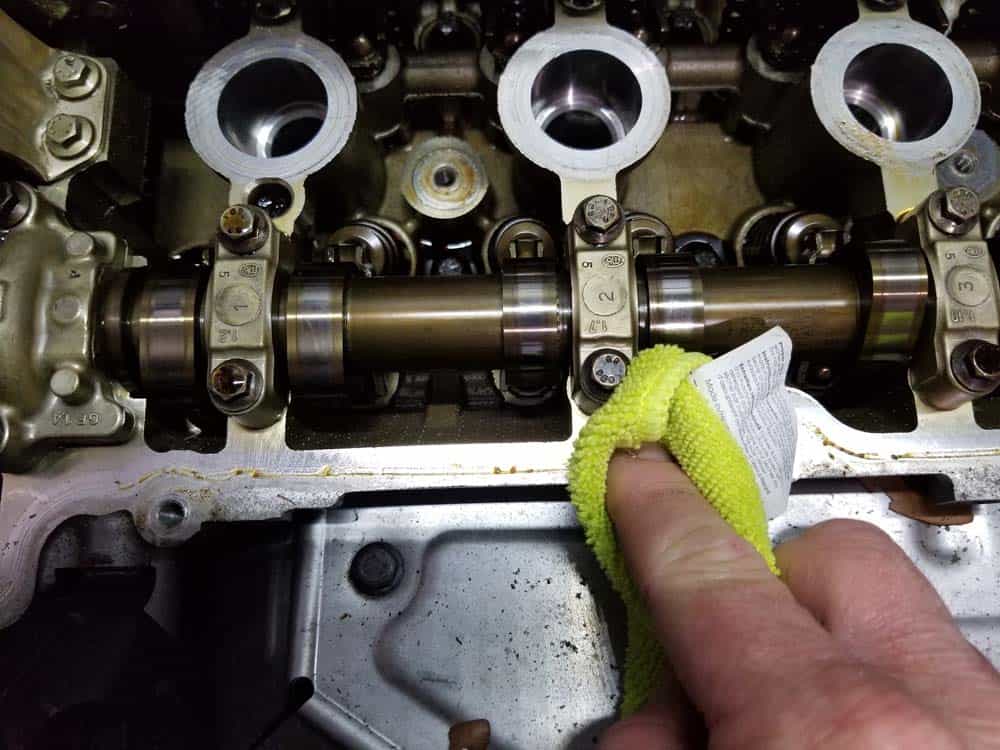
- Thoroughly clean the engine gasket surface with a soft cloth. Use a little brake caliper cleaner like CRC Brākleen to help remove any stubborn grime.
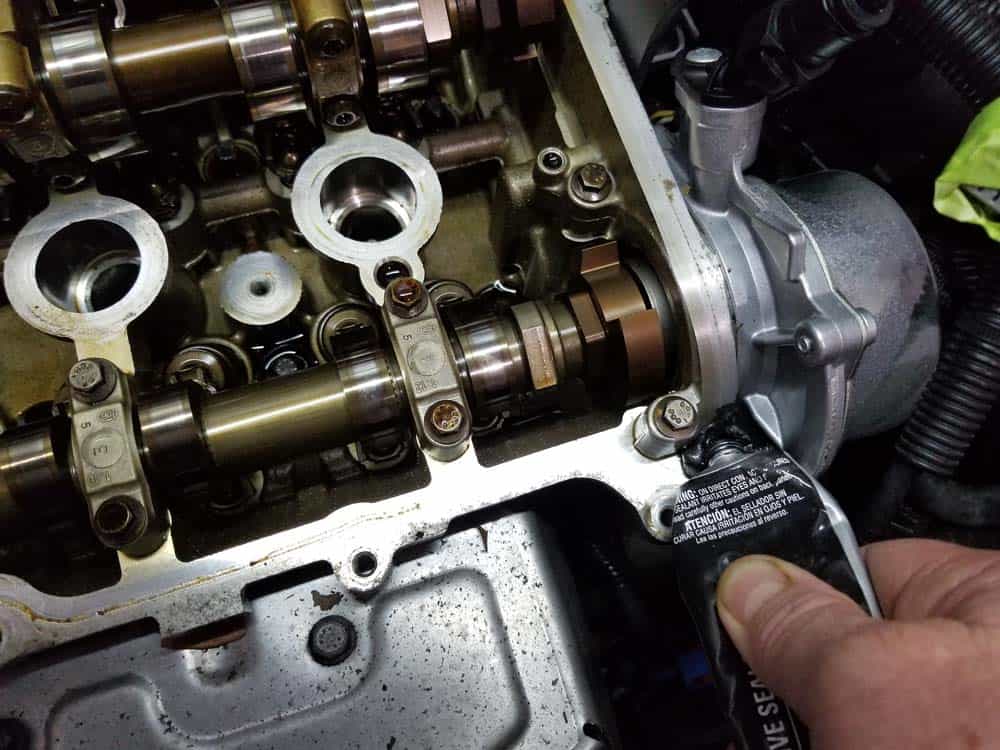
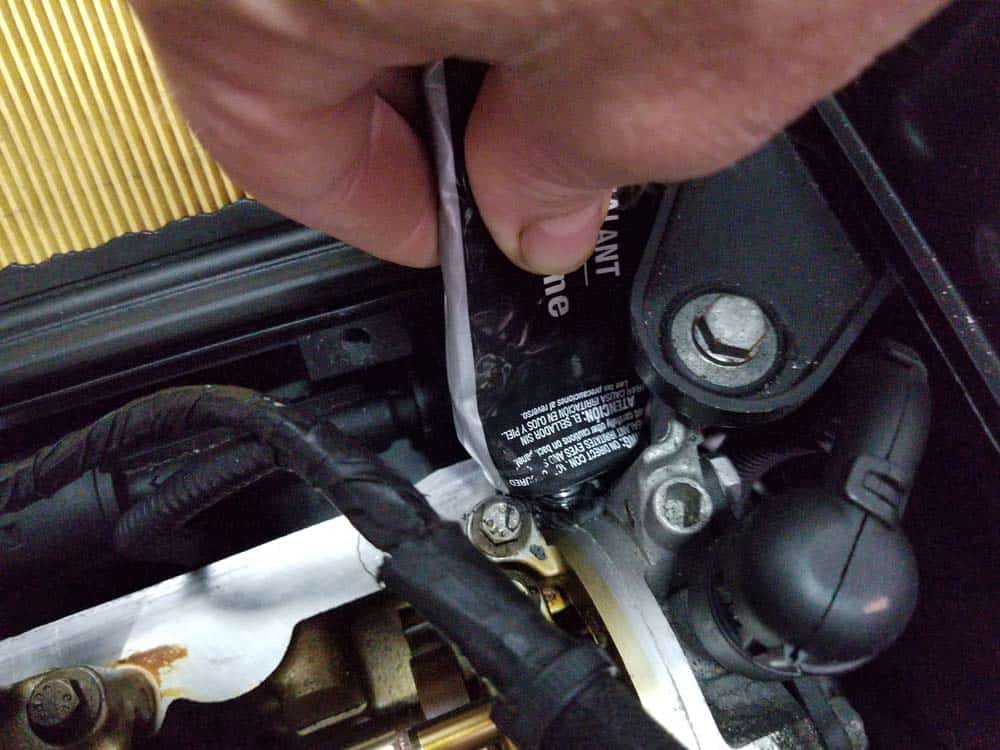
- Apply a good RTV silicone gasket maker like Permatex Ultra Black to the right front and rear corner of the engine head, as shown in the following images. These two corners are areas of concern for oil leakage...adding a good silicone gasket maker helps insure they stay dry.
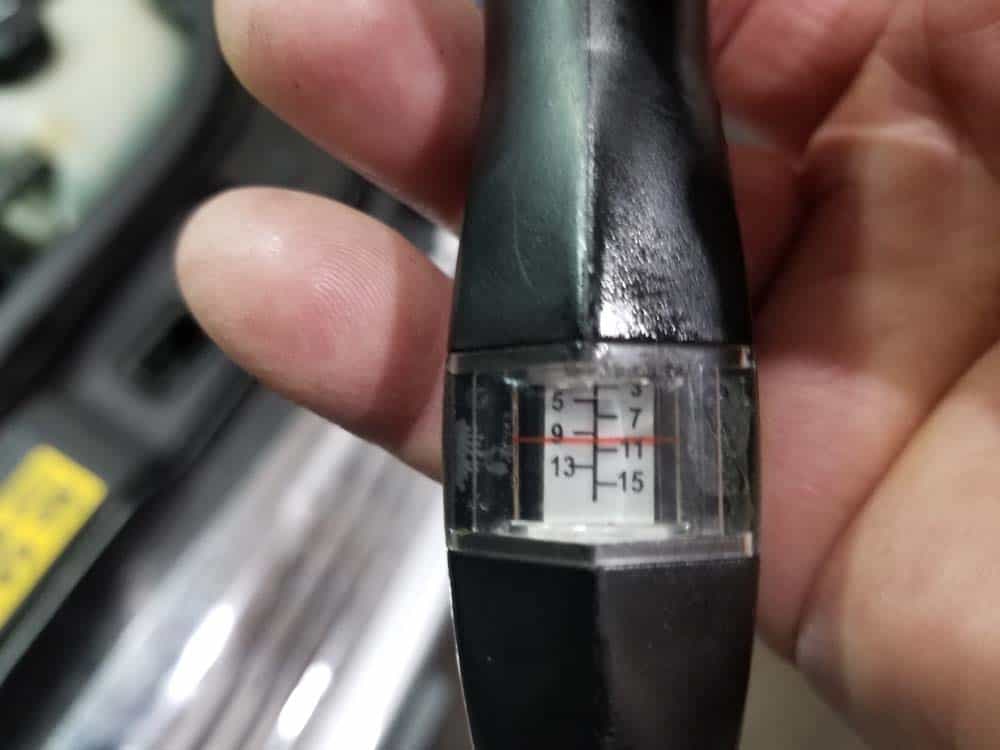
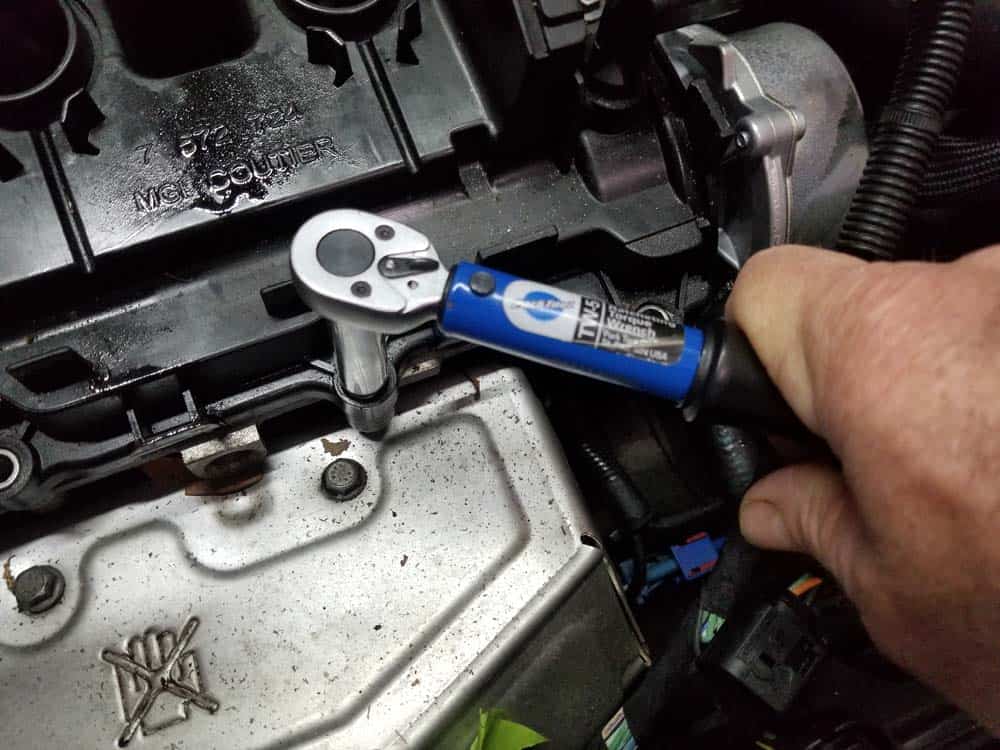
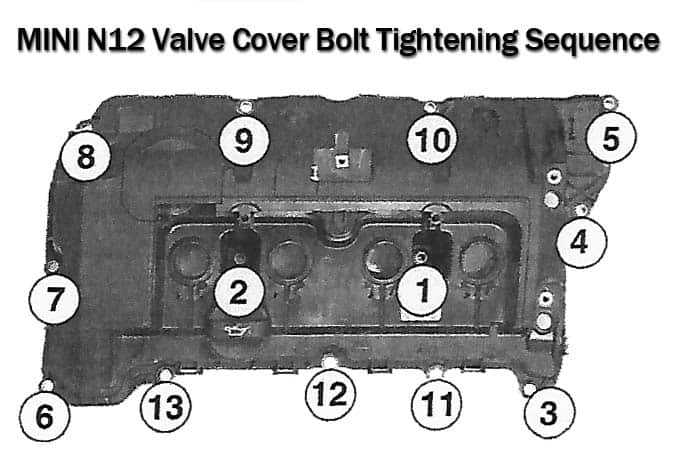
- Install all seven of the new rubber gaskets in the valve cover. Don't forget the two small interior mounting bolt gaskets...these are often overlooked! Carefully replace the valve cover on the engine head being sure not to pinch the gaskets while installing. Replace all of the valve cover bolts and finger tighten. Following the below bolt tightening sequence, use a low torque wrench to tighten all of the bolts to 10 Nm (7.5 ft-lb).
- Reassemble the engine following steps 1-13 in reverse. Start engine and confirm there are no leaks.
MINI R56 Valve Cover Gasket Replacement Finished