
Affiliate link disclosure – The BMW Repair Guide uses affiliate links in their site. For more information on affiliate links, please click here.
Repair Summary
This article gives detailed instructions on replacing the intake manifold gaskets in a BMW vehicle with the 8 cylinder N62 engine. Even though we used a 2005 645ci to perform this repair, this article can be applied to any vehicle with the BMW N62 8 cylinder engine including 5,6,7 and X5 models with minor modifications to the repair steps.
See all vehicles this article applies to
E65 7 Series 735i
E66 7 Series 735Li
E60 5 Series 540i
E60N 5 Series 540i
E65 7 Series 740i
E66 7 Series 740Li
E60 5 Series 545i
E63 6 Series 645Ci
E64 6 Series 645Ci
E53 X5 Series X5 4.4i
E61 5 Series 545i
E65 7 Series 745i
E66 7 Series 745Li
E67 7 Series 745LiS
E53 X5 Series X5 4.8is
E60 5 Series 550i
E60N 5 Series 550i
E61 5 Series 550i
E61N 5 Series 550i
E63 6 Series 650i
E63N 6 Series 650i
E64 6 Series 650i
E64N 6 Series 650i
E70 X5 Series X5 4.8i
E65 7 Series 750i
E66 7 Series 750Li
A BMW N62 intake manifold gasket replacement can help cure a rough idling engine and vacuum leak error codes.
Unlike its predecessors, the New Generation N62 V8 was equipped with an advanced Variable Intake Manifold creating a more efficient running engine and a broader torque curve, even at low RPMs. It is located on the top of the engine and is anchored to the cylinder head intake ports where it supplies the air/fuel mixture to the eight cylinders. In order to keep an air-tight seal on the cylinder heads, the intake manifold has two thin metal gaskets. Age and the brutal heat conditions inside the engine compartment take their toll on the intake manifold gaskets. Even though they are made of metal and not rubber, they are still susceptible to warping in extreme conditions. If not replaced, the gaskets will eventually fail to allow unmetered air to enter the cylinders.
The most common symptom of failing BMW N62 intake manifold gaskets is a rough idling engine. Since air is being introduced into the engine that has not been registered by the vehicle's mass airflow sensor (unmetered air), the engine control module miscalculates the amount of fuel needed and the engine runs rough. In extreme circumstances, intake manifold leaks may cause cylinder misfires and engine stalls.
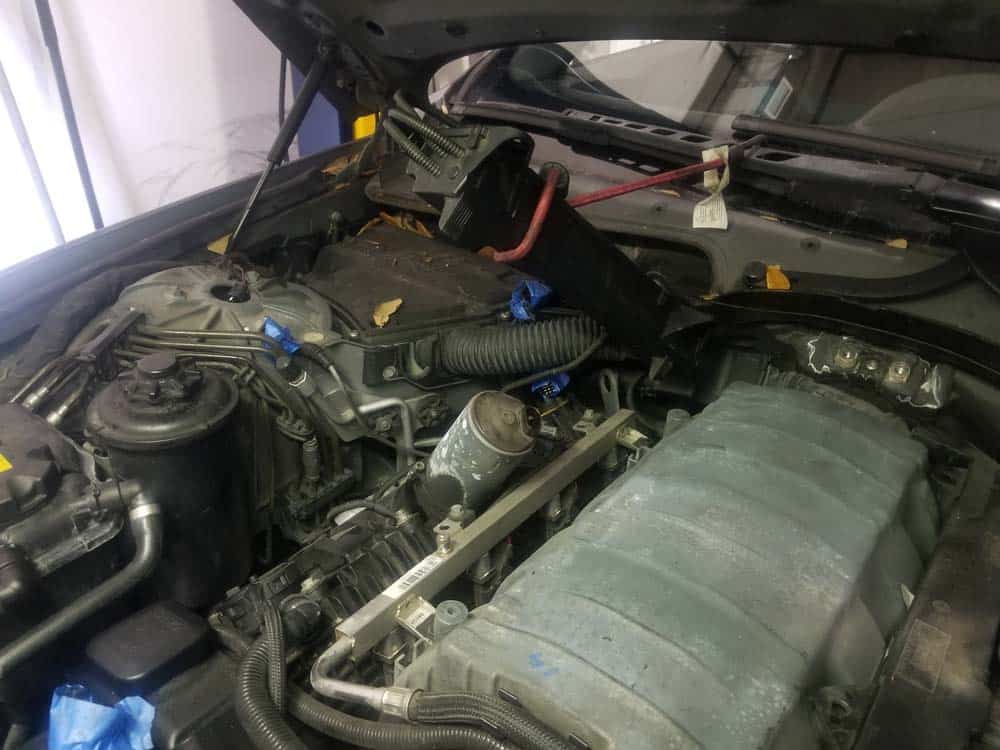
Replacing the intake manifold gaskets in the BMW N62 8 cylinder engine is a straightforward repair that doesn't require removing that many parts. Since the intake manifold is conveniently located on the top of the engine block, it is easy to access with very few parts that need to be cleared out of the way. Be aware that unlike the plastic intake manifold found on six-cylinder BMW models, the N62 8 cylinder manifold is made of metal and is heavy. We suggest using a helper when it comes time to remove it from the vehicle. Since you will need to remove the fuel injectors to access the intake manifold mounting bolts, now is a great time to consider replacing them. For more information on replacing the fuel injectors in your N62 V8 engine, please see our article BMW N62 Fuel Injector Replacement – 8 Cylinder 5,6,7 and X5 Series.


View the detailed parts diagram for this repair.
Includes detailed part diagrams, part numbers and links to purchase all of the required components needed to complete this repair.
Section 1 - Preparing for Intake Manifold Removal
Before the intake manifold can be safely removed from the top of the engine, you will need to clear the wiring harness and fuel rail out of the work area. Remember the intake manifold on the N62 V8 is very heavy and cumbersome...clearing all wires, hoses and fuel system parts out of the work area will make removing the intake manifold go much easier.- Before starting this repair, disconnect the negative terminal to the vehicle's battery. Since you will need to remove part of the engine's main wiring harness to gain access to the BMW N62 intake manifold, not disconnecting the battery could cause catastrophic damage to sensitive electronics.
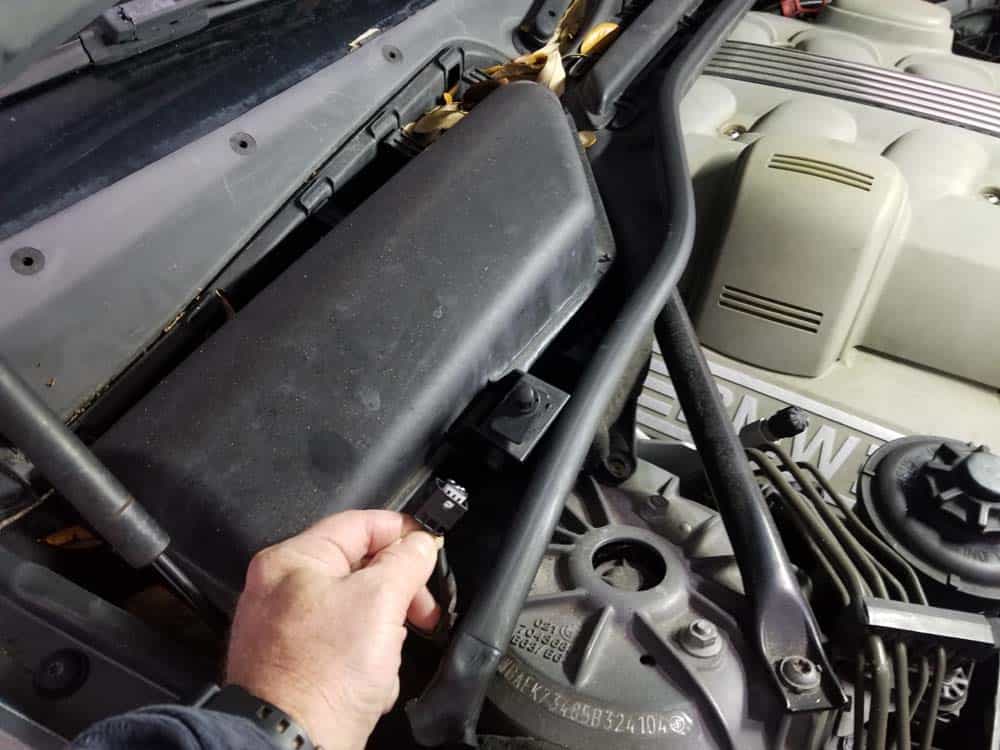
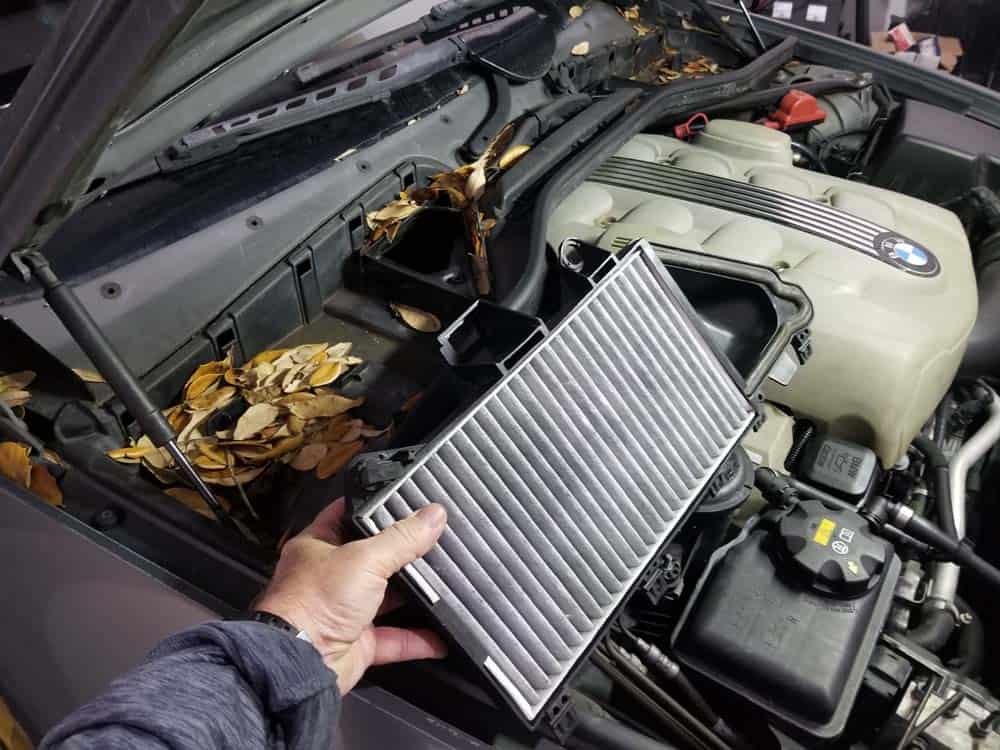
- Remove the microfilter housing covers by releasing their metal retaining clips. Use a 13mm socket to loosen the plastic mounting nuts. Remove the hood switch from the right microfilter housing cover. Remove the covers from the vehicle.
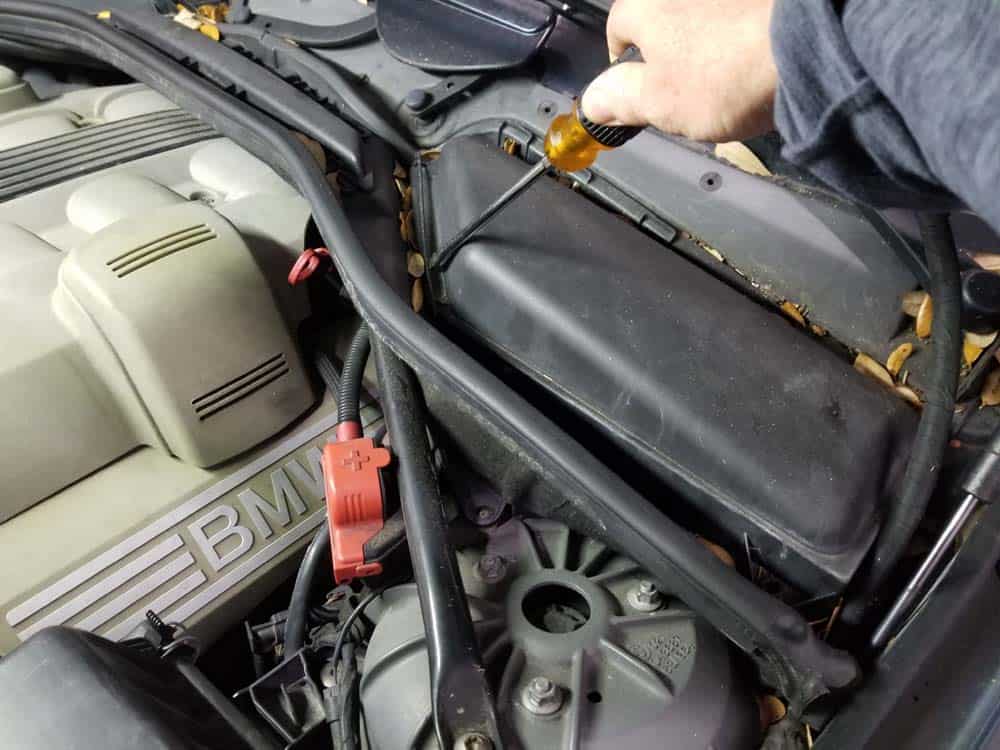
- Remove the microfilter housing locking cover by raising its plastic tab and sliding it free.
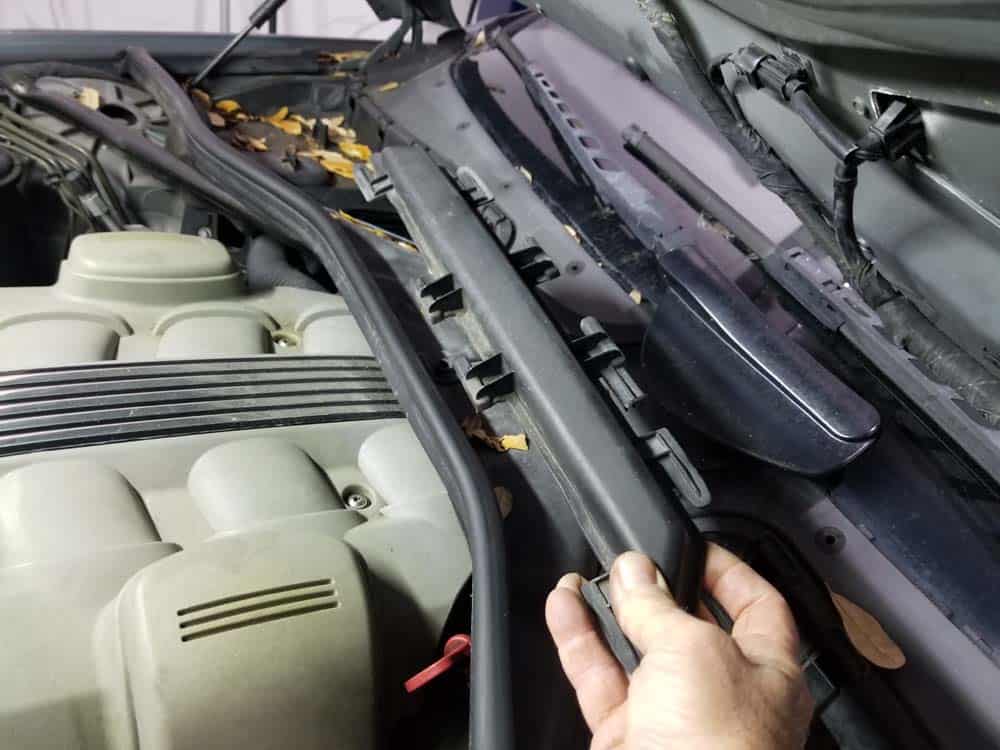
- Remove the rubber hood gasket from the microfilter housing.
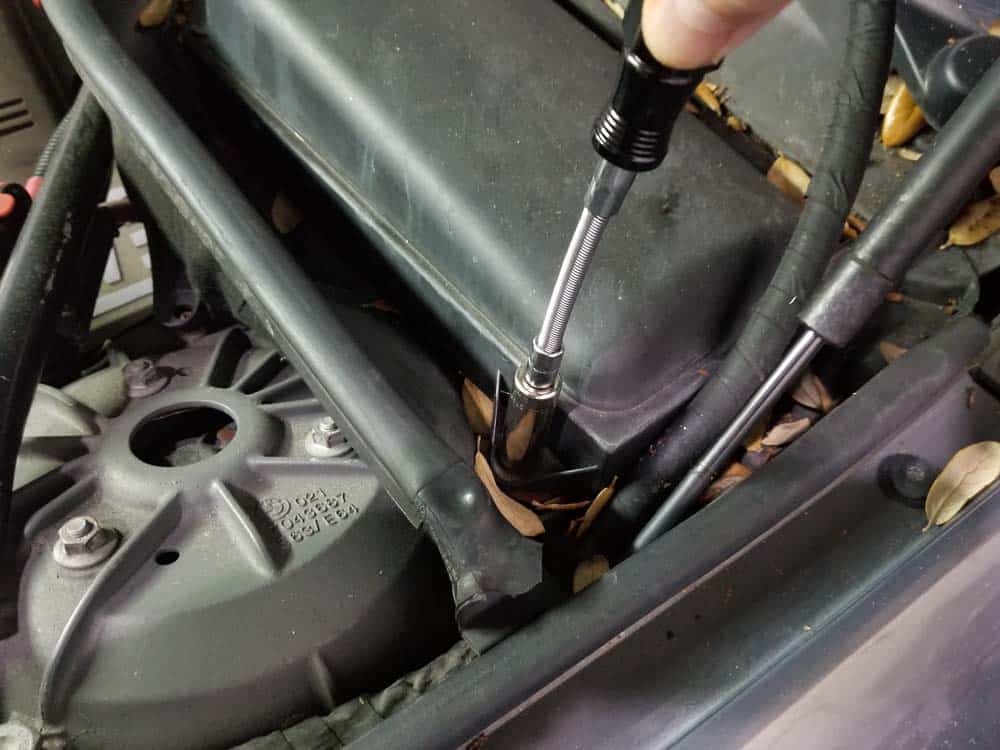
- Using a 13mm socket, loosen the rest of the plastic mounting nuts securing the microfilter housing to the body of the vehicle.
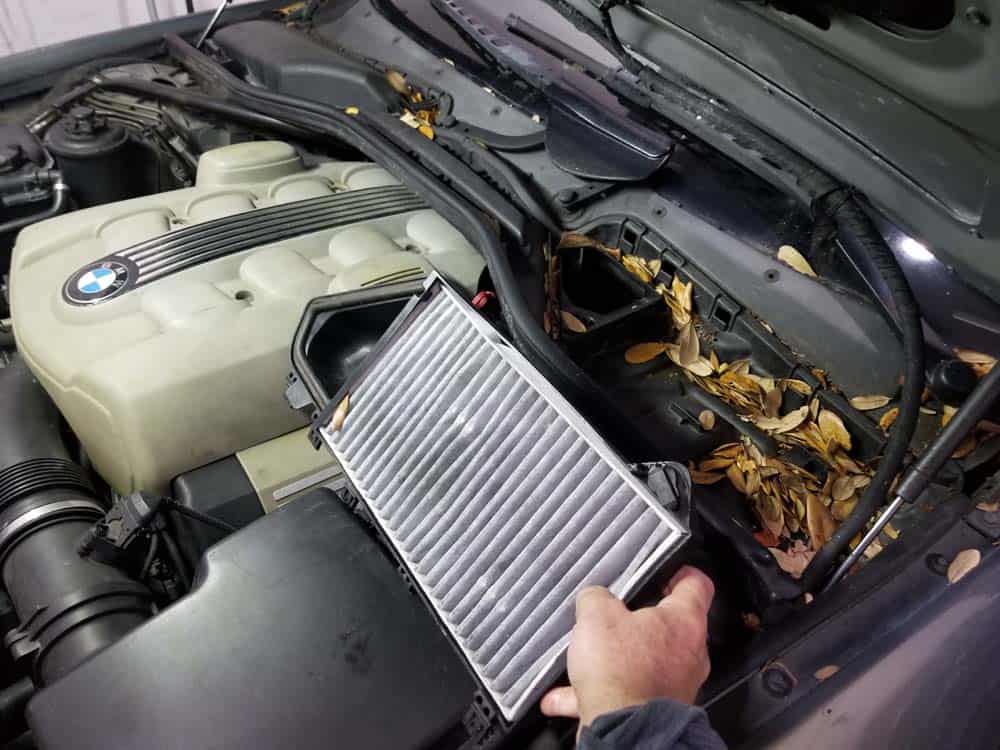
- Use a T20 torx bit to remove the two screws anchoring the lower microfilter housing to the body of the vehicle. Grasp the lower microfilter housings and remove from the vehicle.
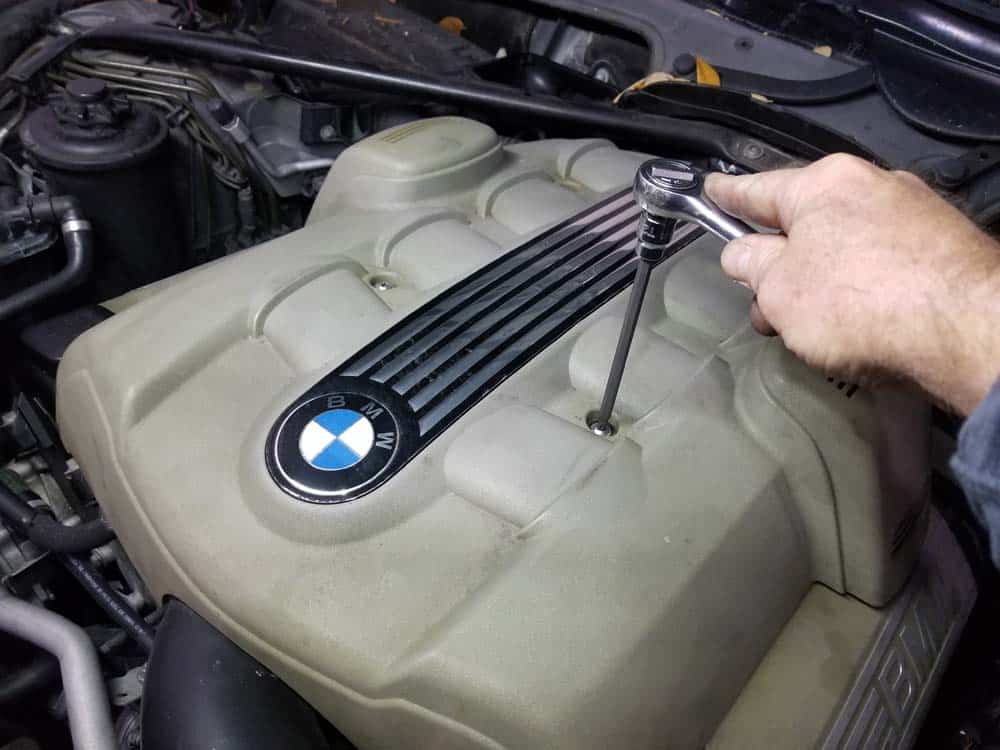
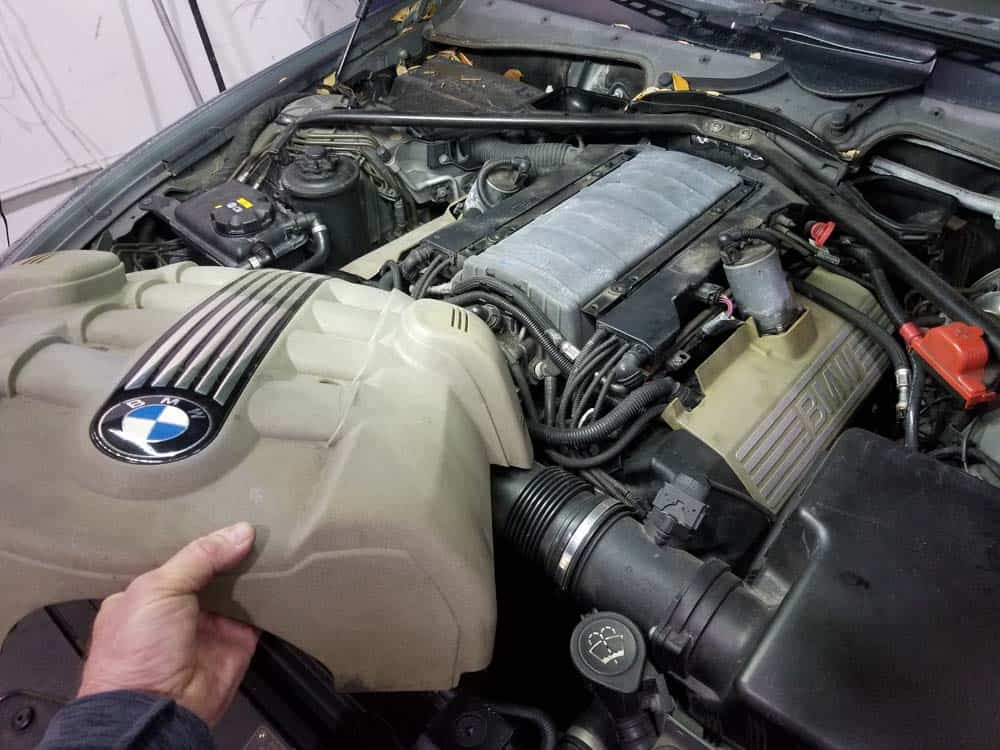
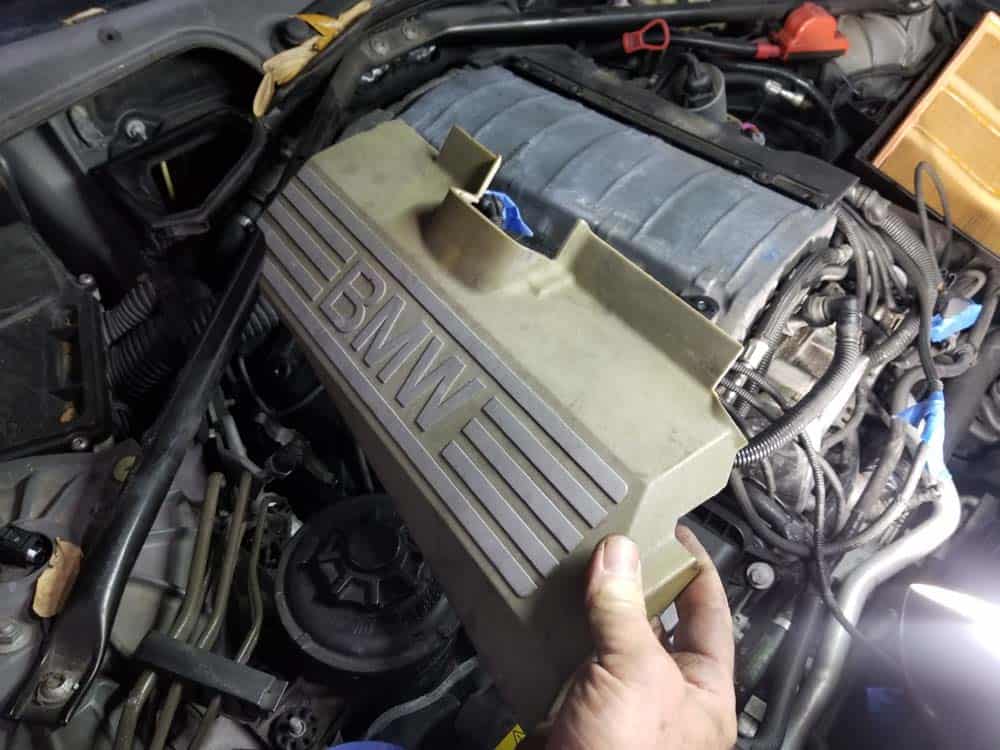
- Use a T27 torx bit to remove the upper engine cover.
- Unplug the mass air flow (MAF) sensor.
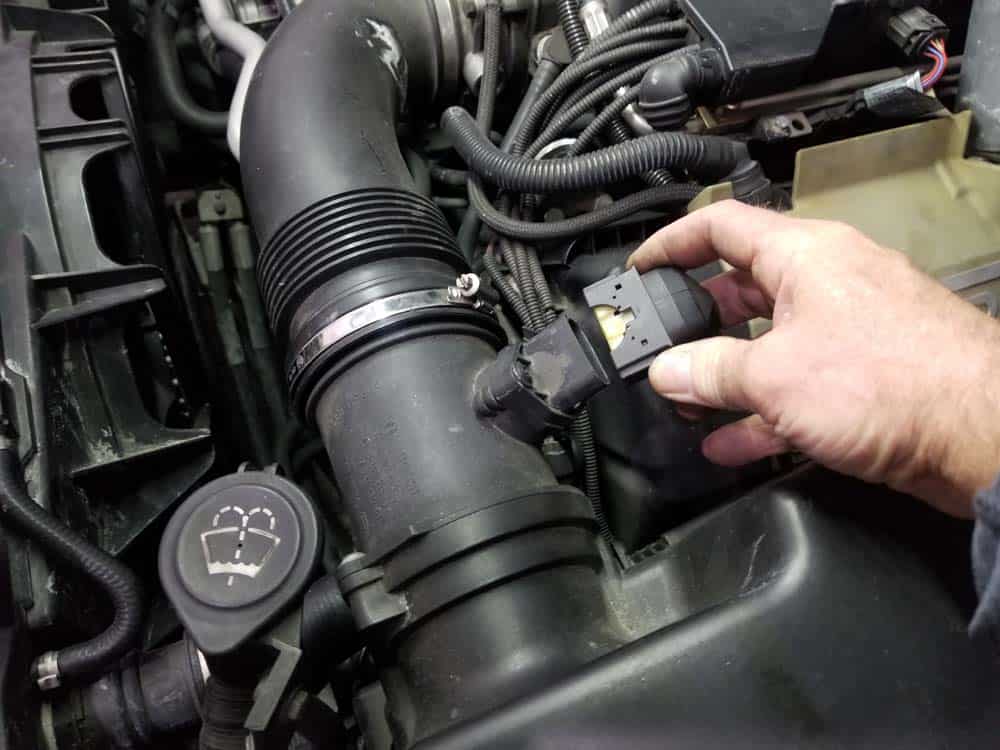
- Disconnect the vacuum line from the intake boot.
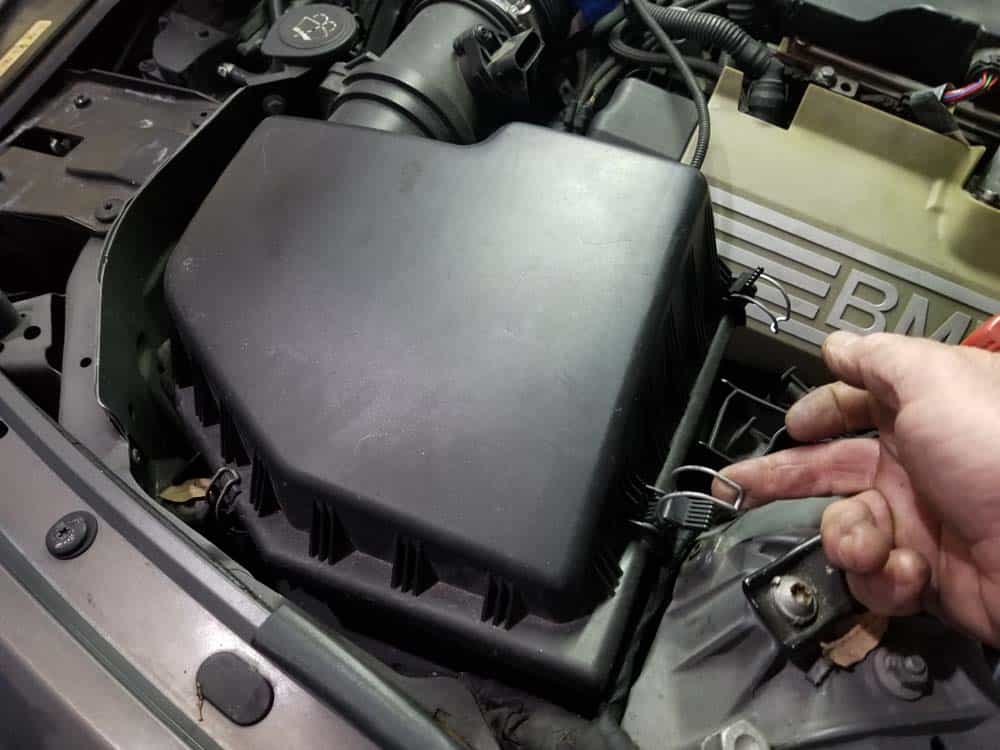
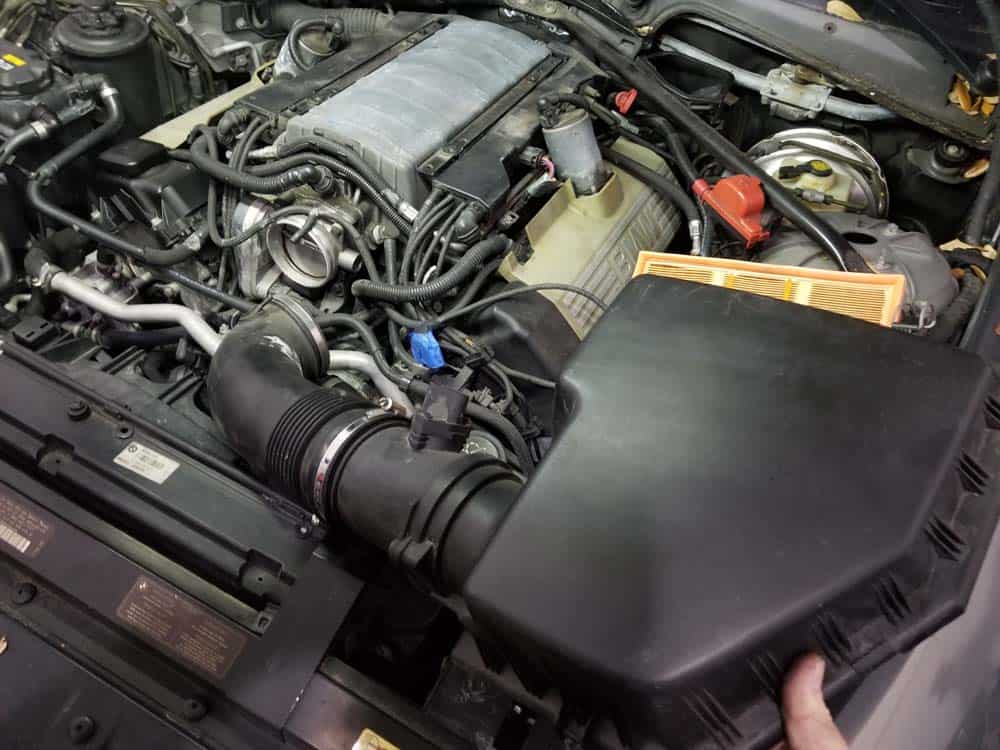
- Unsnap the intake muffler lid. Loosen the hose clamp on the intake boot where it attaches to the throttle body. Grasp the lid and the boot and remove them from the vehicle.

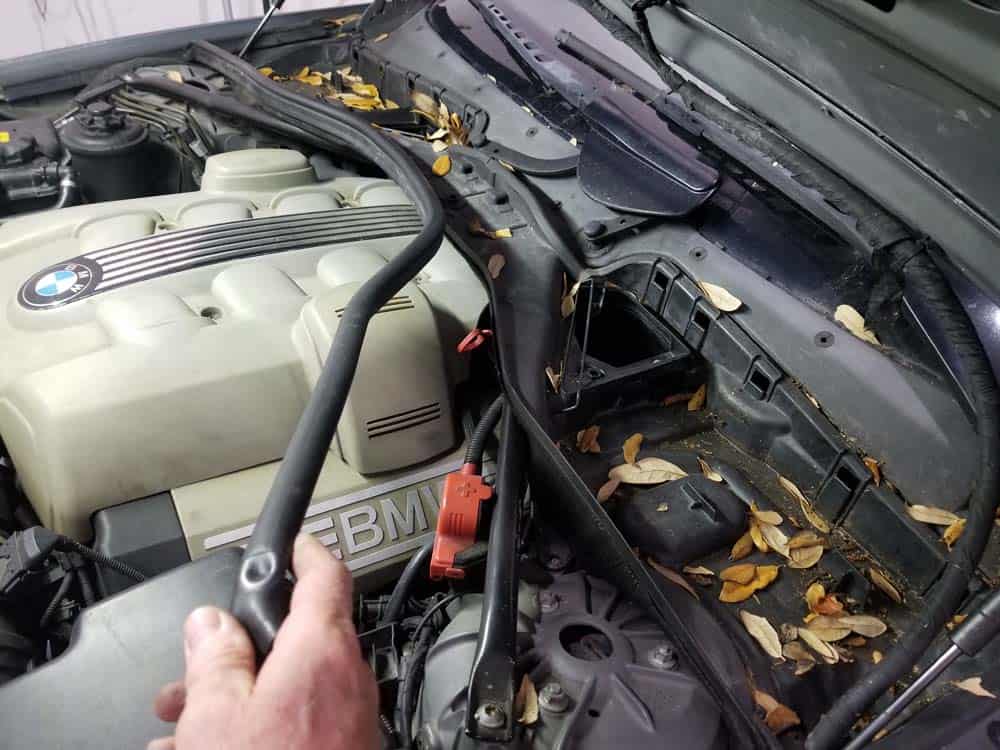
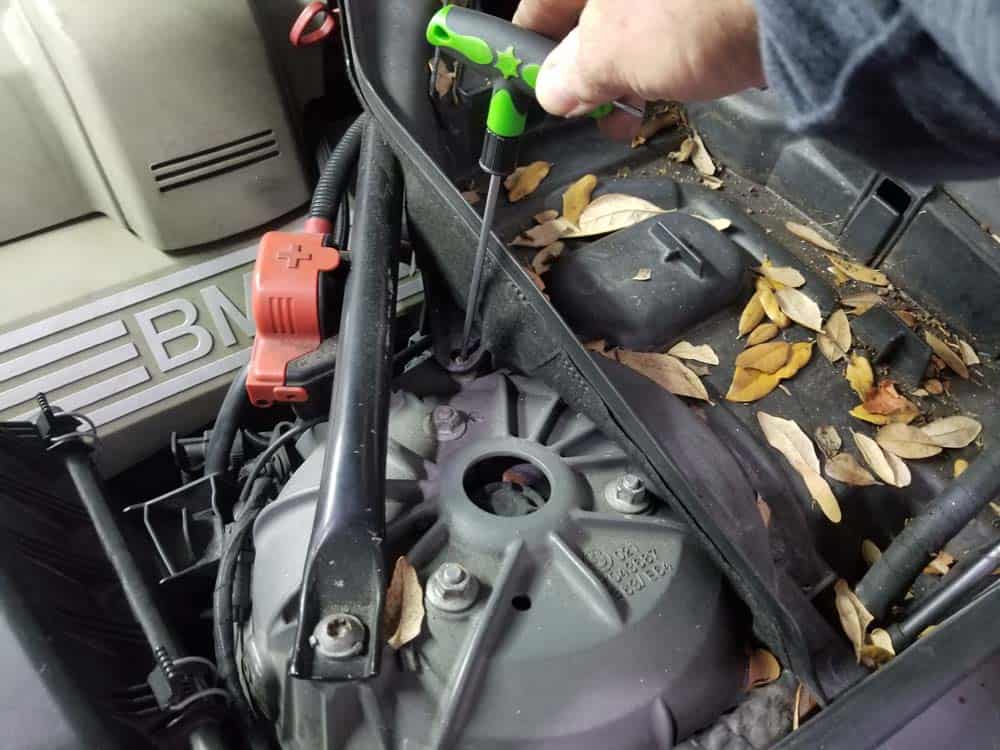
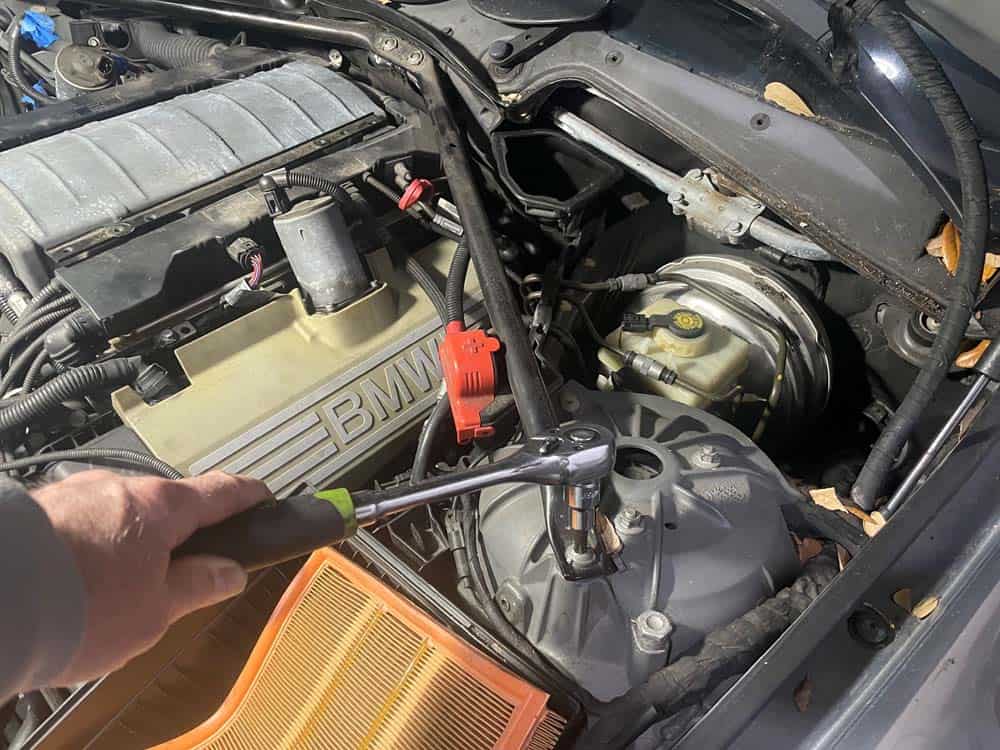
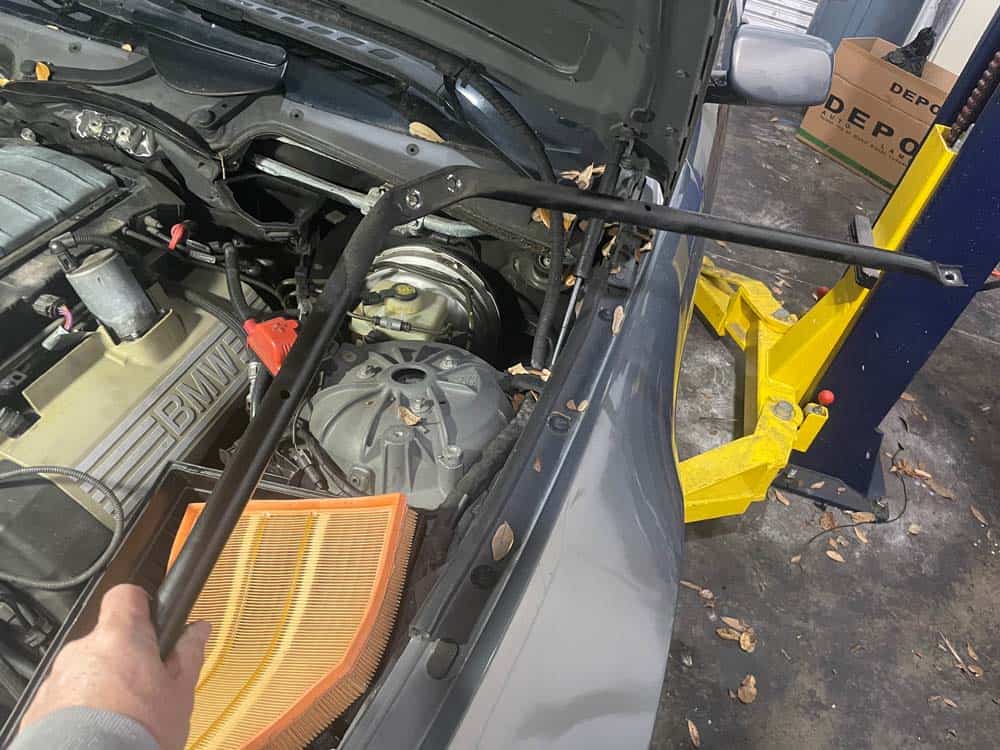
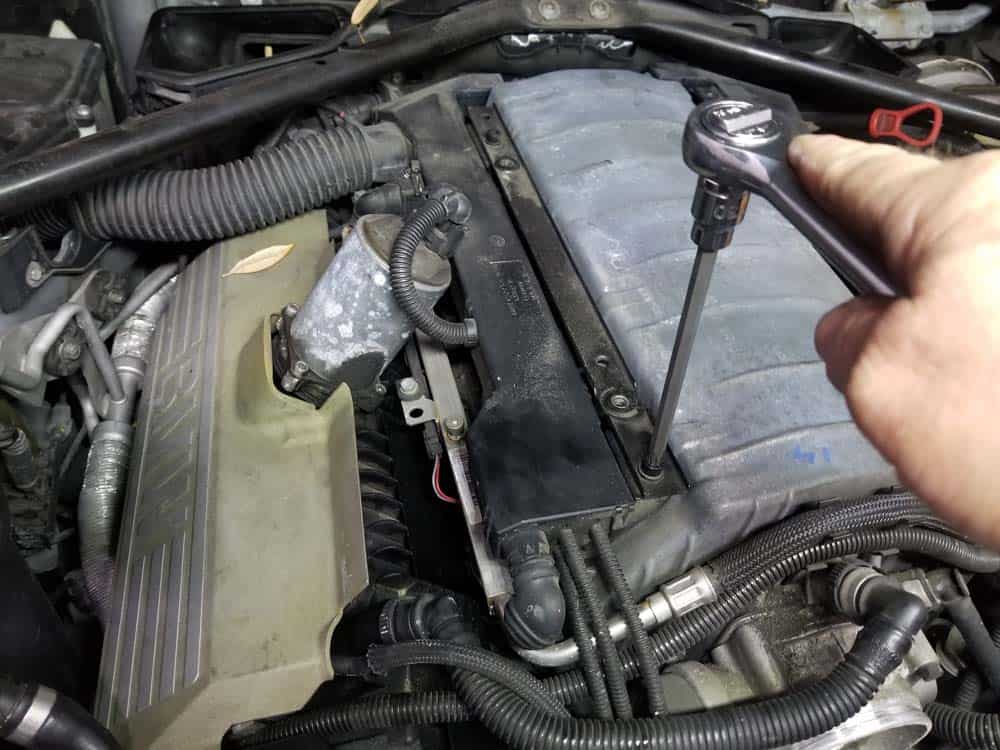
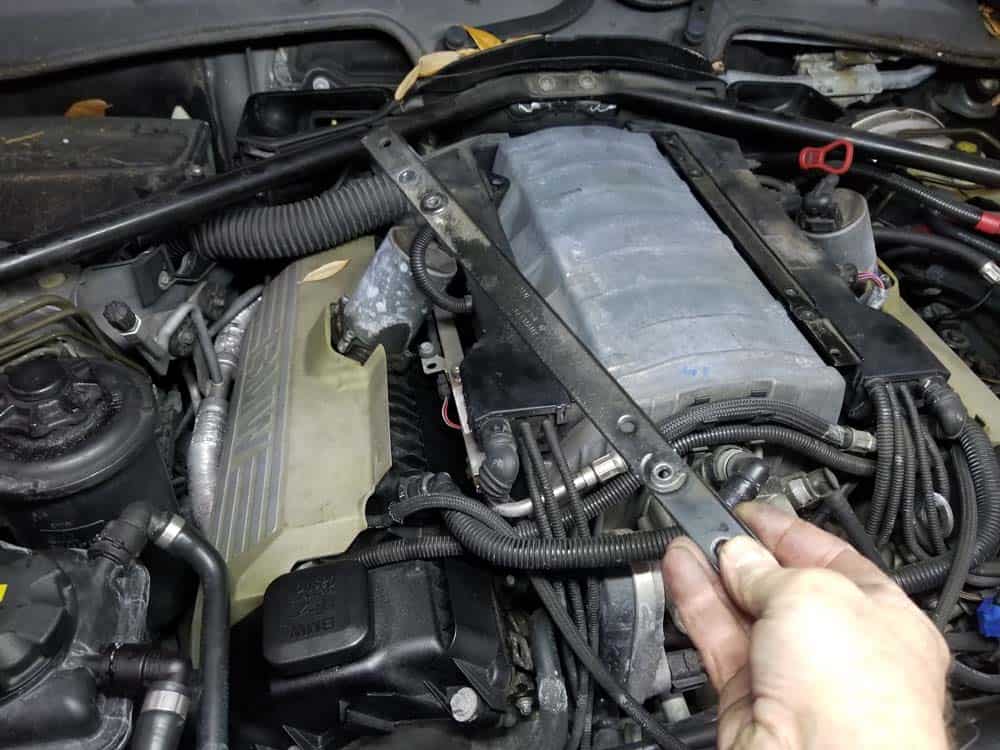
- Use a T45 torx bit to remove the four bolts anchoring the strut brace to the body of the vehicle. Removing the strut brace will give you the extra space needed to move the wiring harness out of the work area.
- Using a T30 torx bit, remove the bolts securing both the left and right wiring harness to the top of the engine. Remove the engine cover brackets from the vehicle.
- The following steps should be performed on both the left and right sides of the wiring harness....
- Unplug the Valvetronic motor on both sides of the engine.
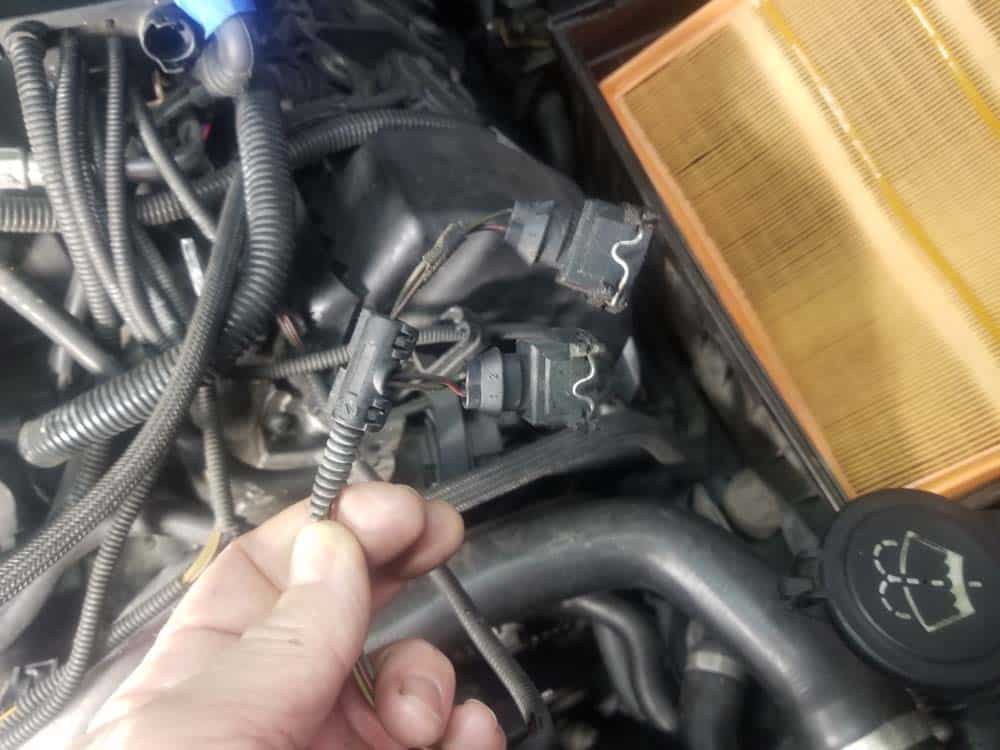
- Use a small flatblade screwdriver to release the plastic tab securing the ping sensor plug. Unplug the ping sensors on both sides of the engine.
- Unplug the fuel injector control wires on both sides of the engine.
- Unplug the intake camshaft position sensors on both sides of the engine.
- Remove the side engine covers.
- Unplug the eccentric shaft sensor on the rear of the valve covers on both sides of the engine.
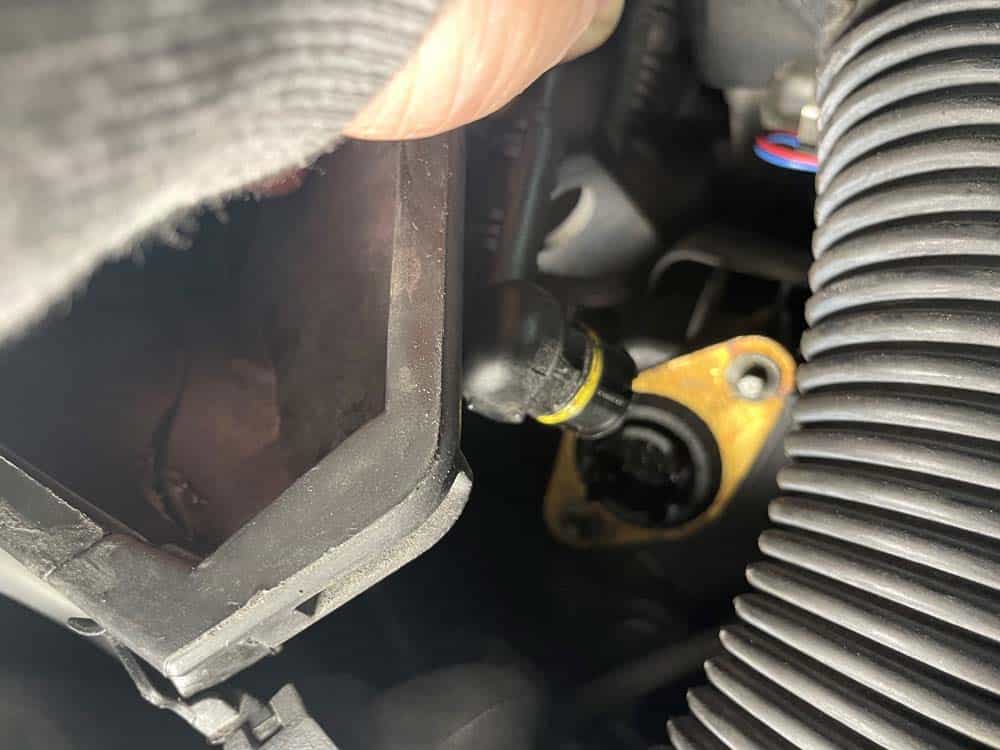
- Starting on the right side of the engine, disconnect the thermostat sensor.
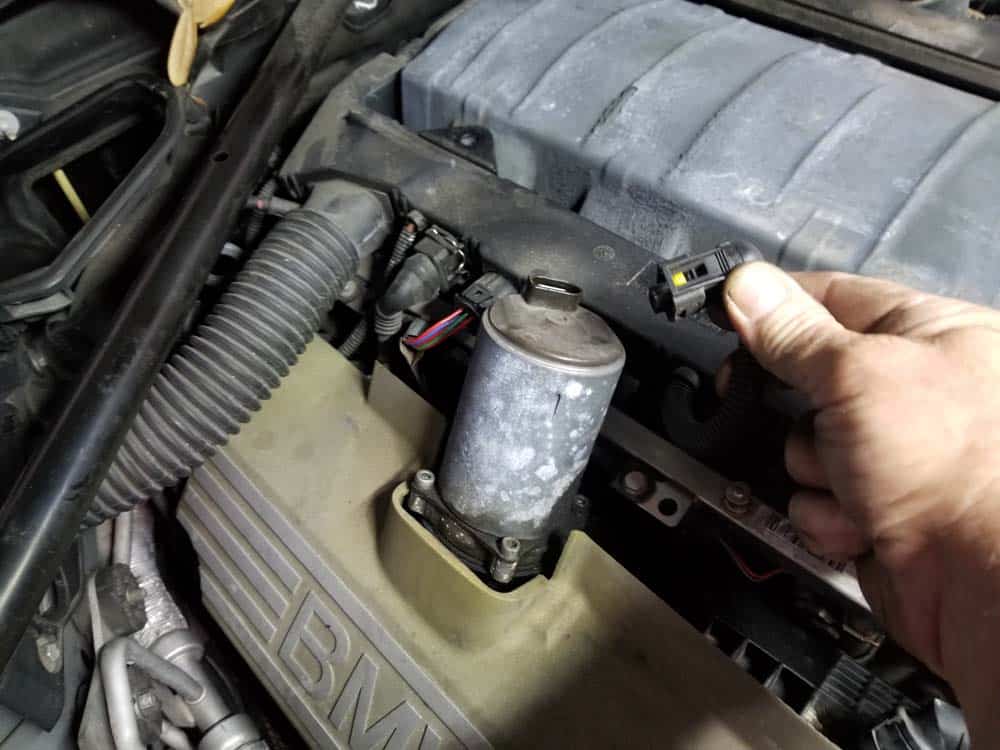
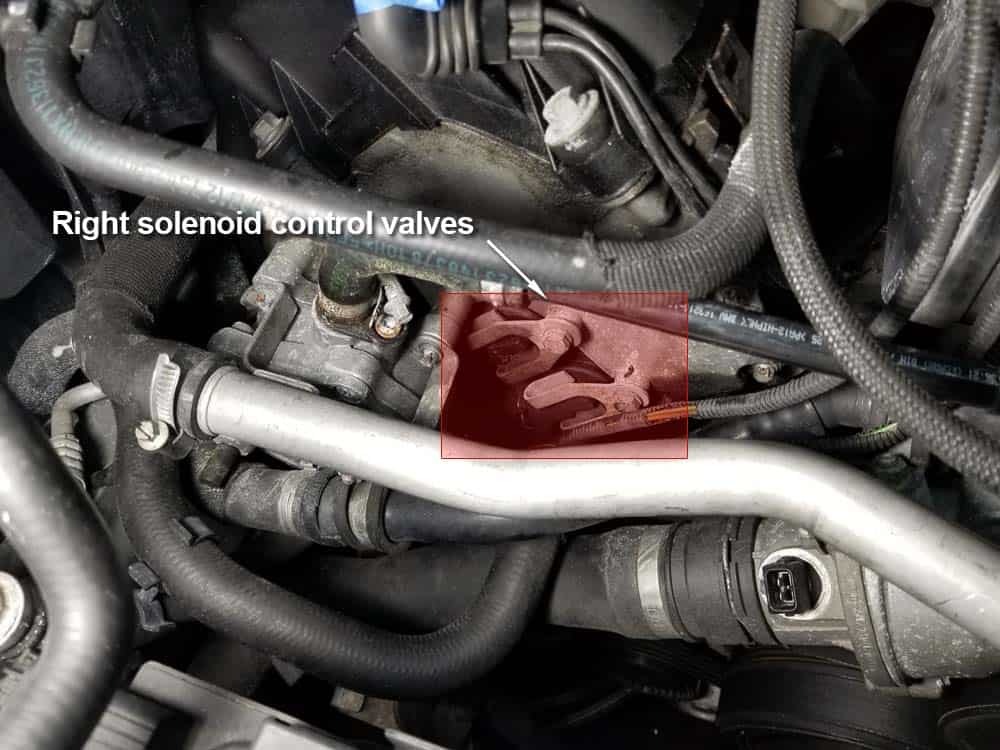
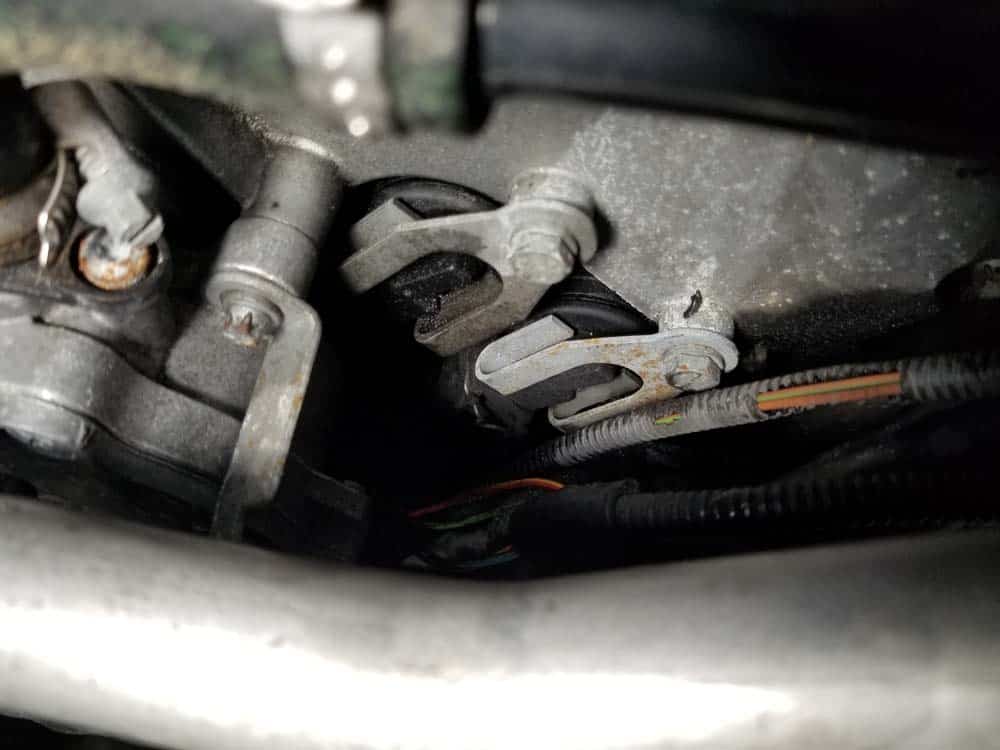
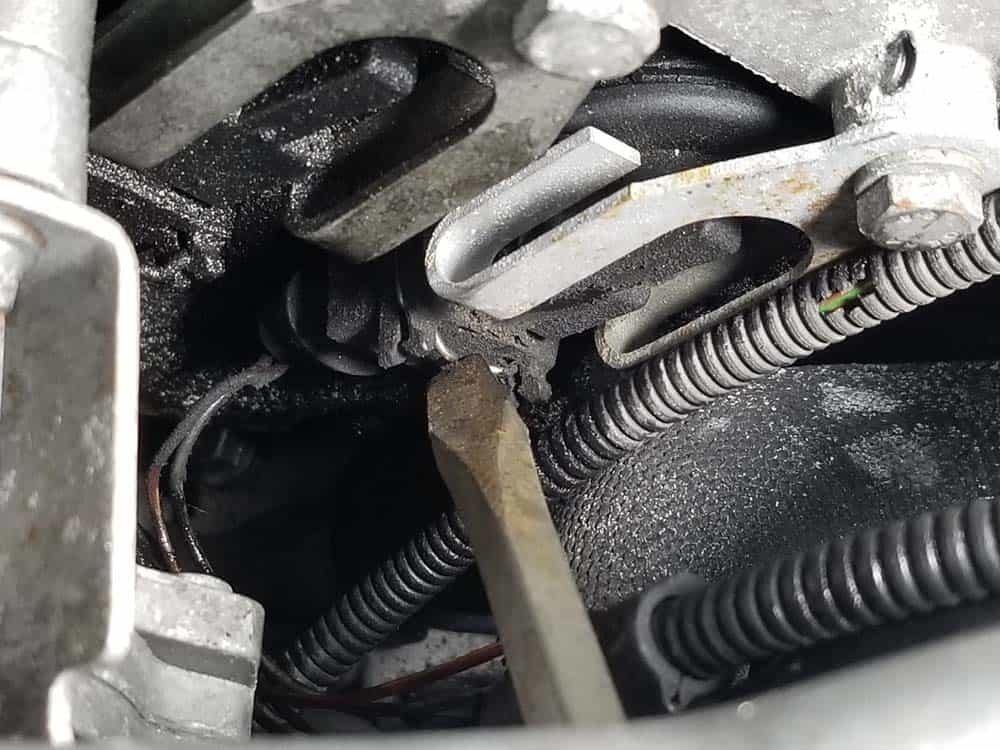
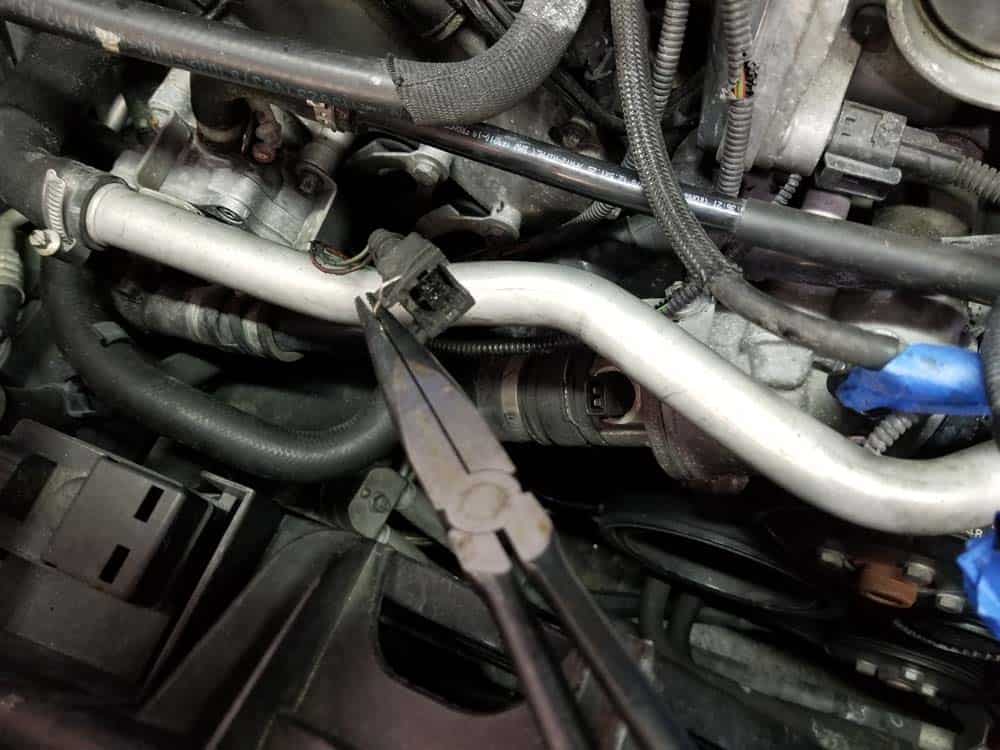
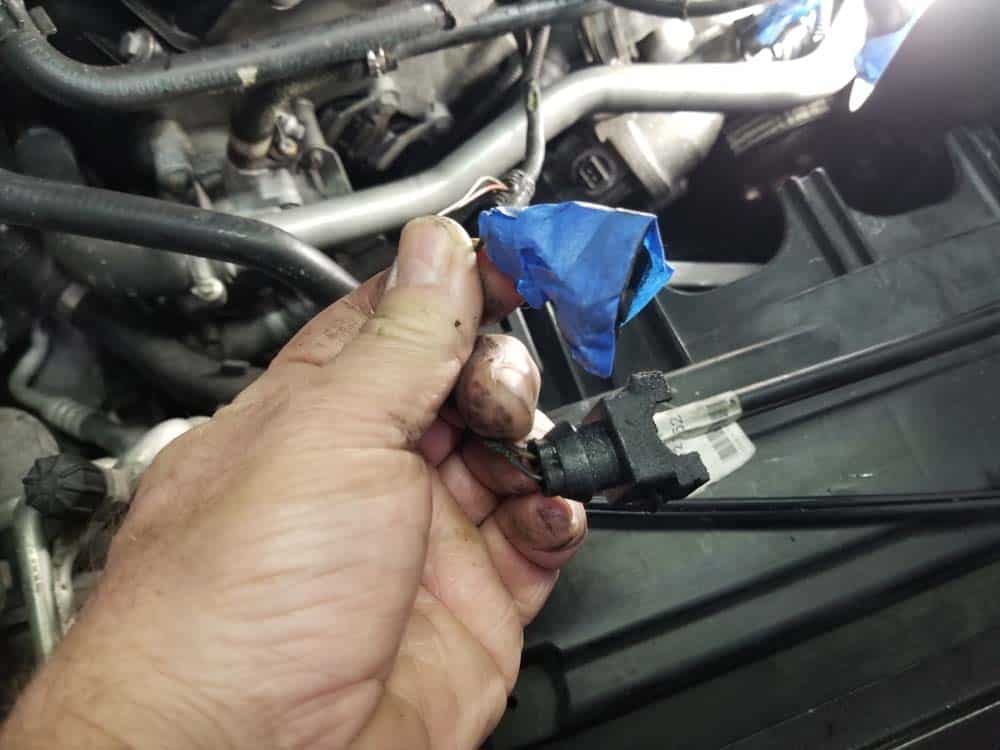
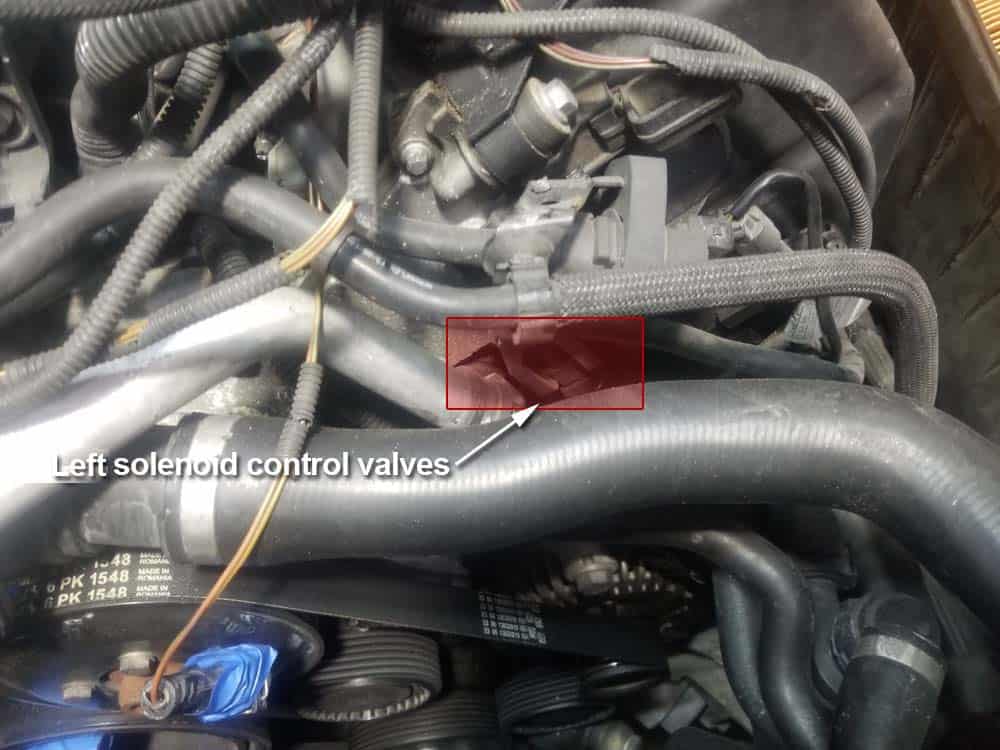
- Follow the right solenoid control wire down to where it connects to the two solenoid control valves on the front of the right timing case. We found the easiest way to unplug the valves is by depressing the metal locking clip with a long flatblade screwdriver and pulling them free with a pair of long nose pliers. Mark the plugs with tape so you don't get them mixed up during installation.
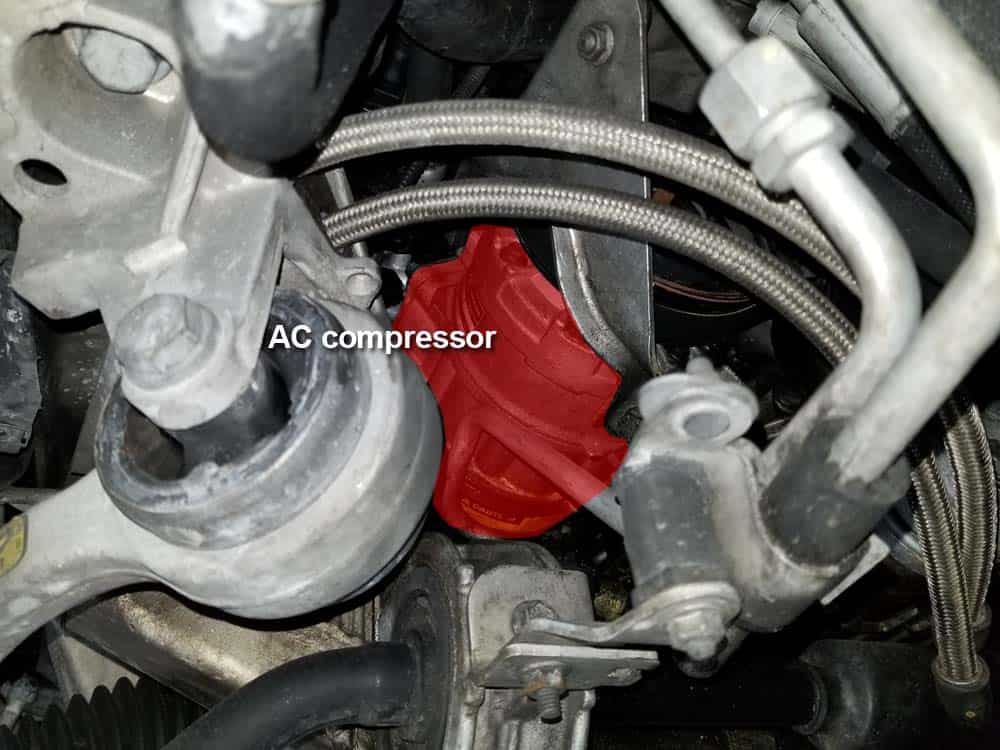
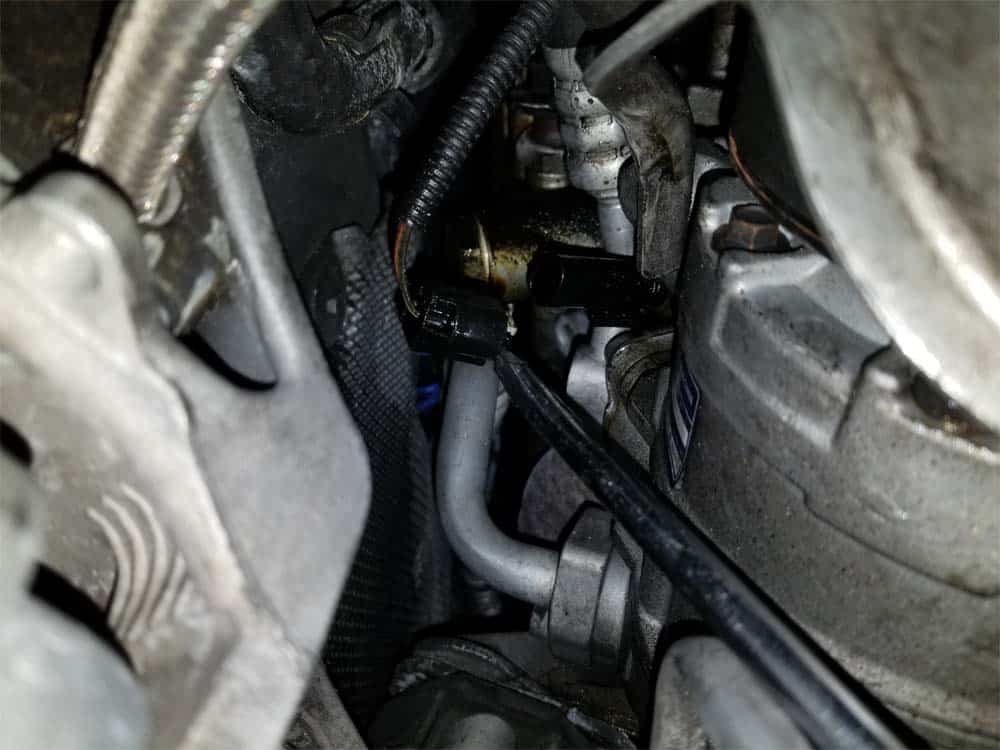
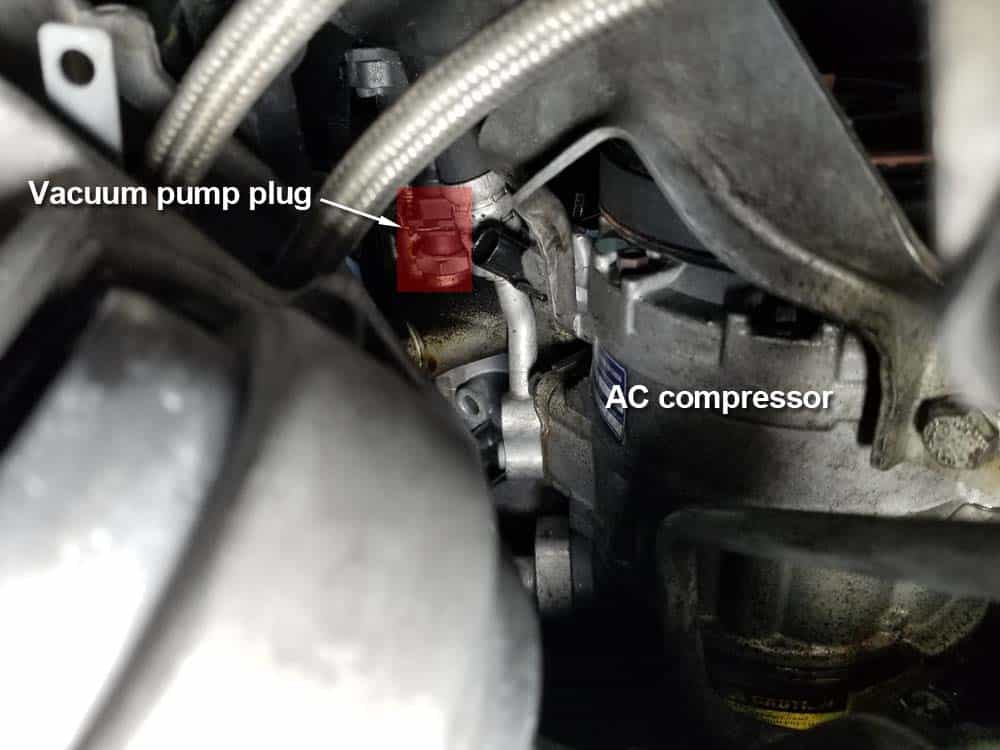
- The last two front connections on the right wiring harness are the vacuum pump and AC compressor. These two connections are notoriously difficult to access from the top of the engine...we find it much easier to disconnect them from the bottom of the vehicle.
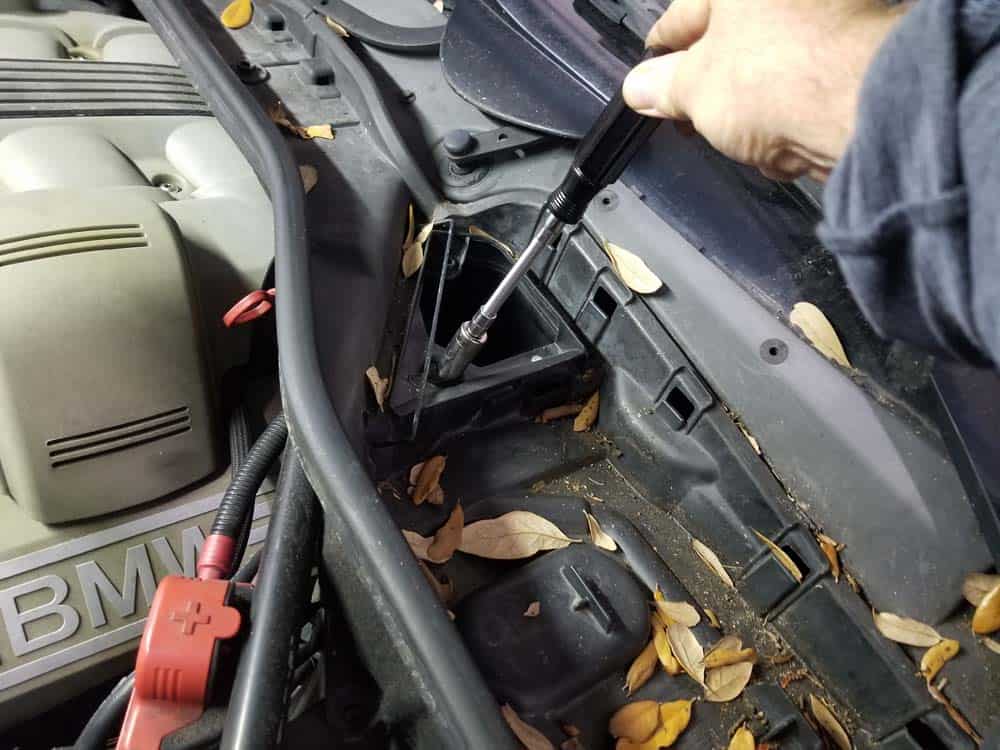
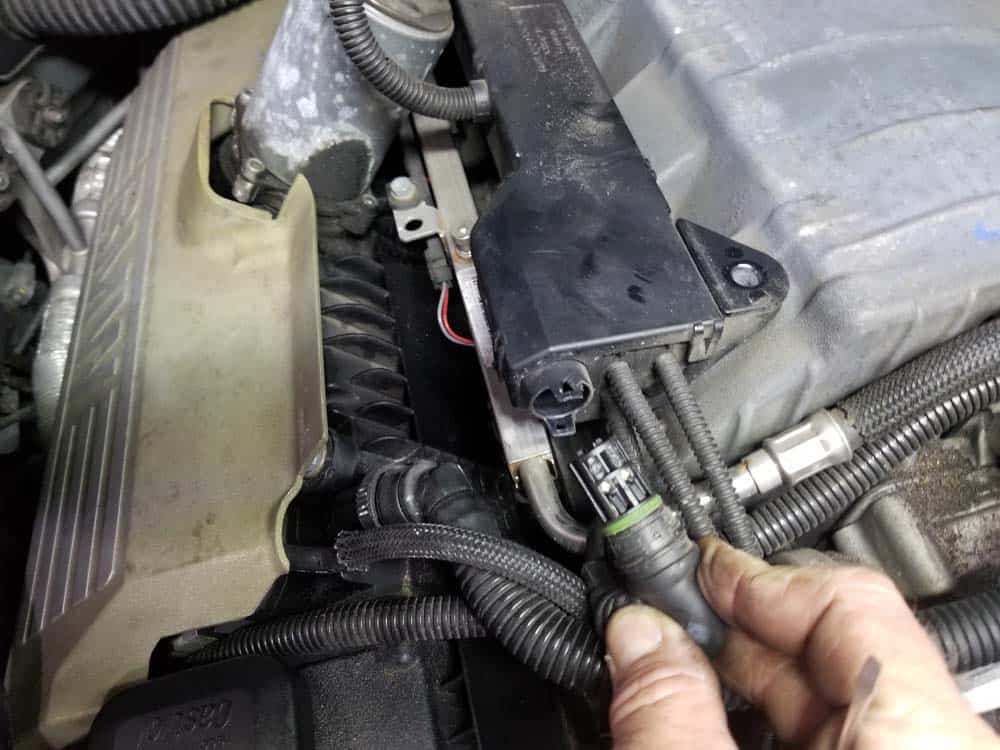
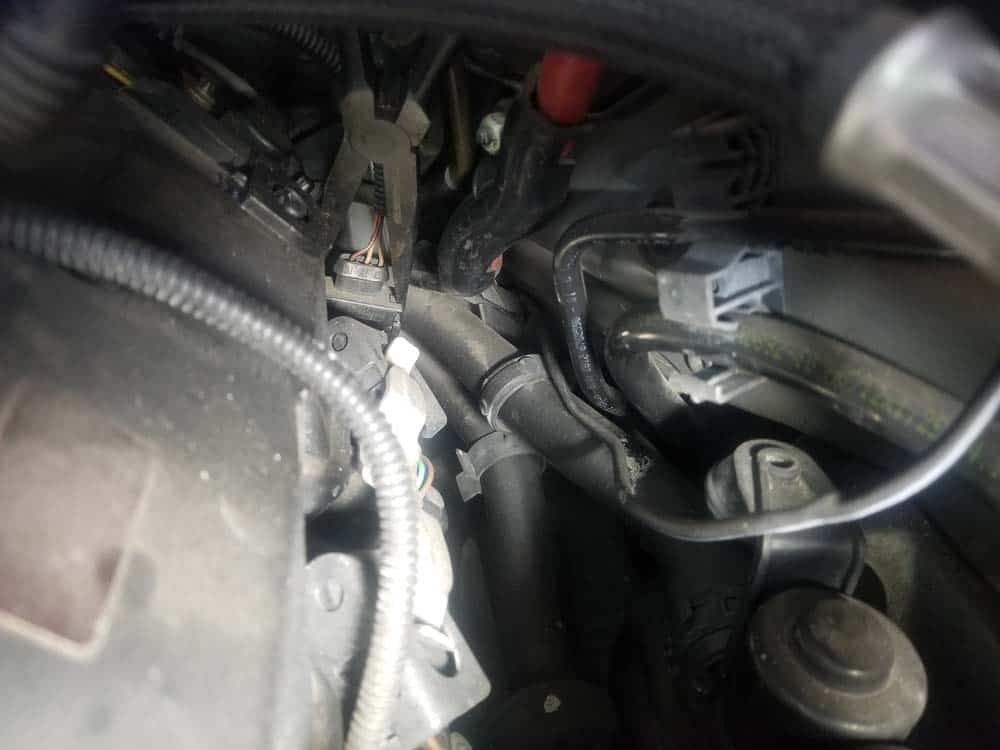
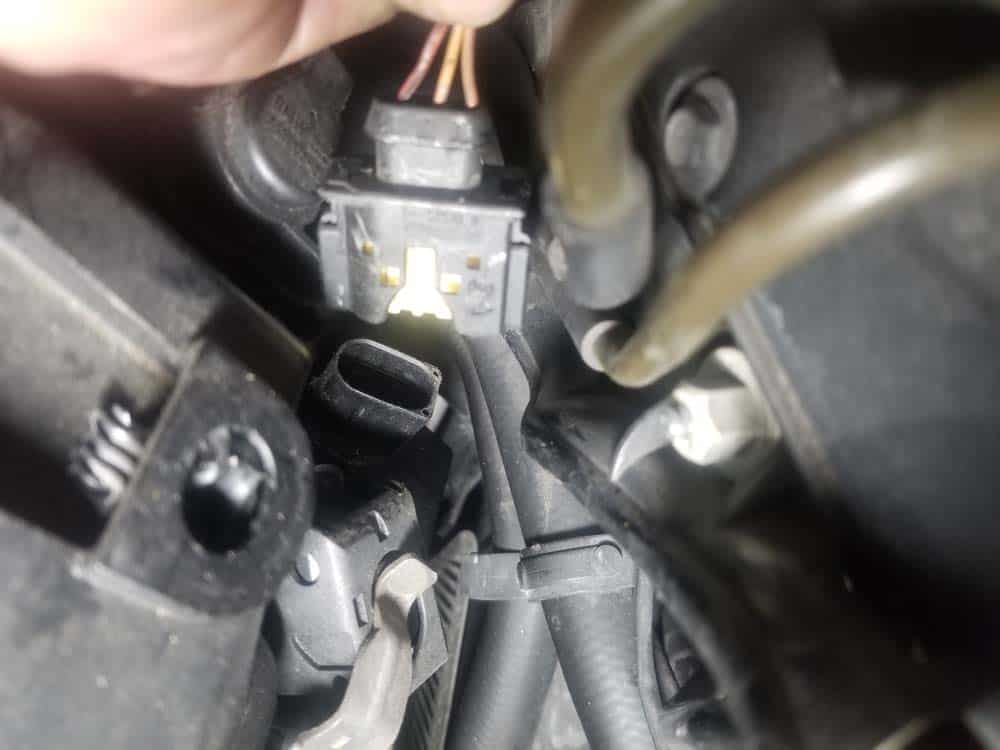
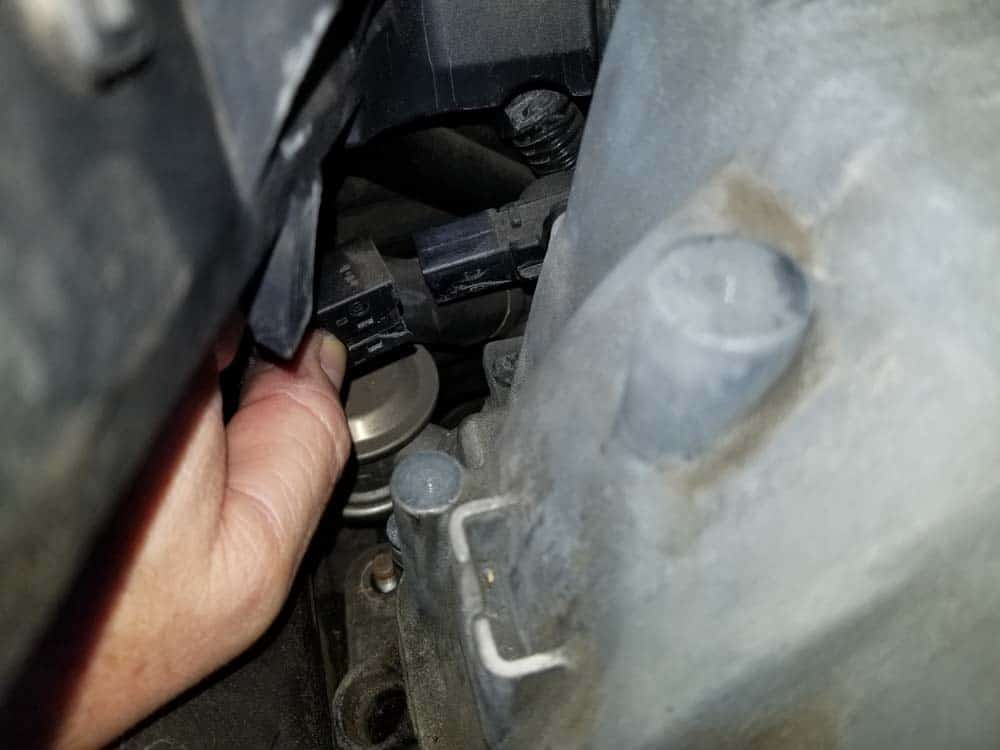
- Begin by locating the AC compressor plug. Reach up with your hand and disconnect. Sometimes using a long flatblade screwdriver helps like shown below.
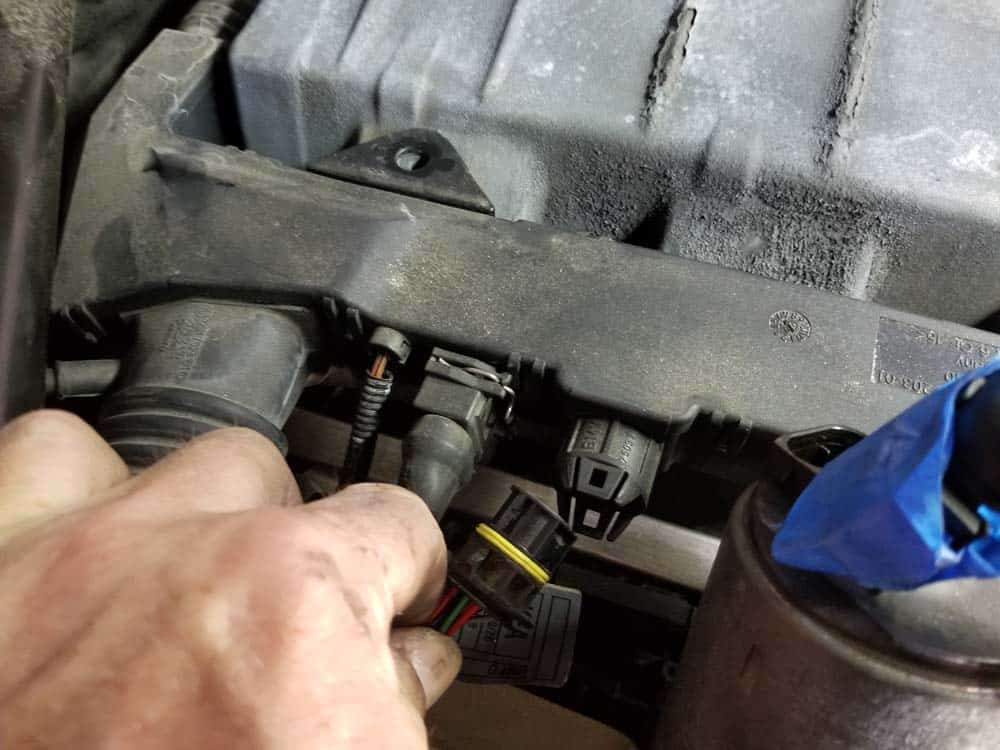
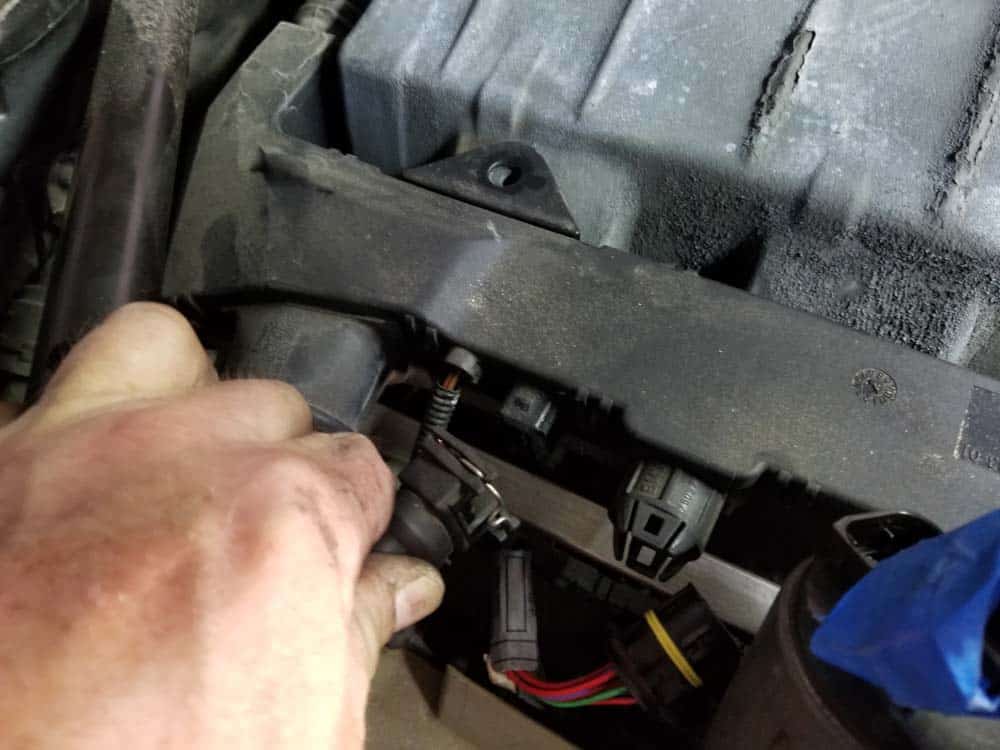
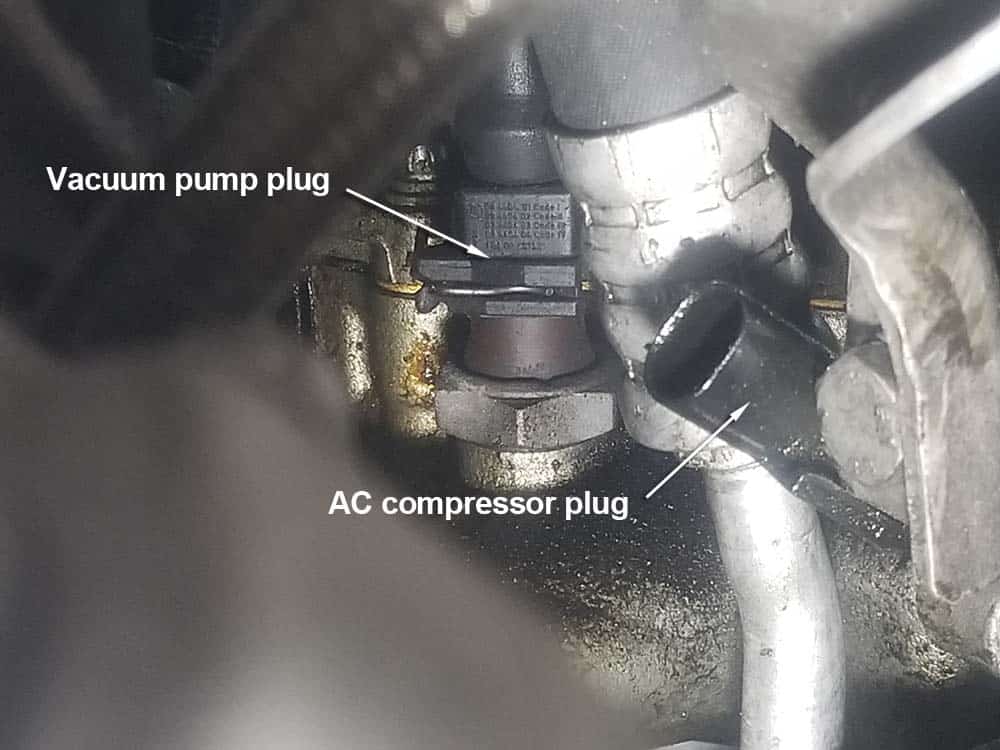
- Finally, locate the vacuum pump plug. Once again, reach up with you hand, depress the metal locking clip, and pull the plug free.
- Pull all the wires out of the engine and fold back gently out of the way. Lift the right wiring harness and bungee cord out of the work area.
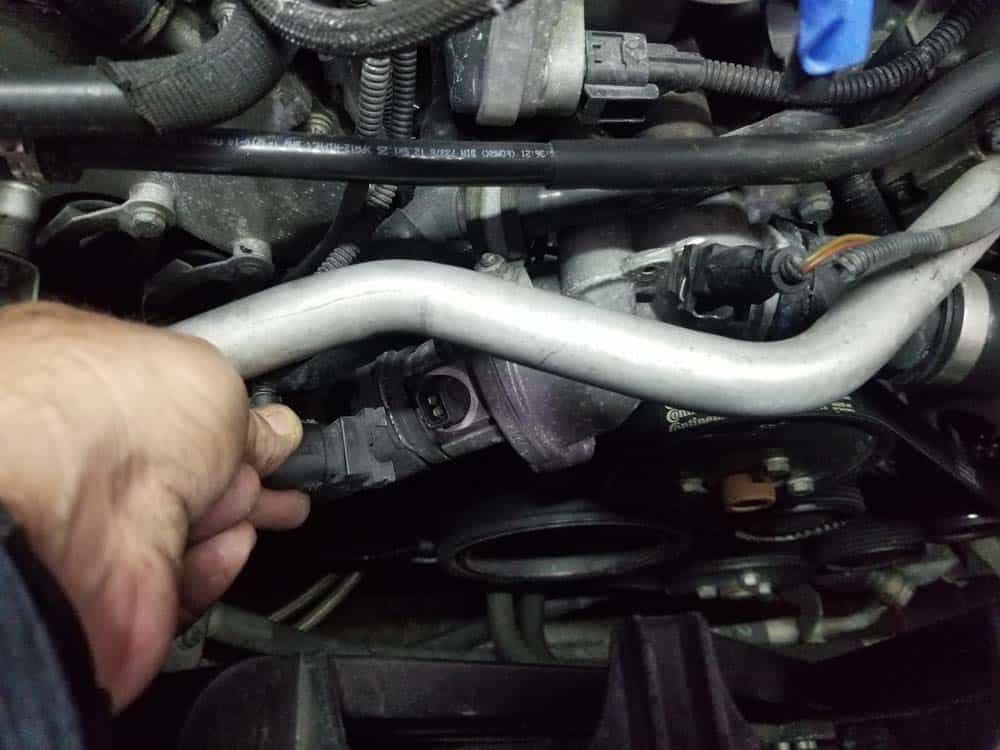
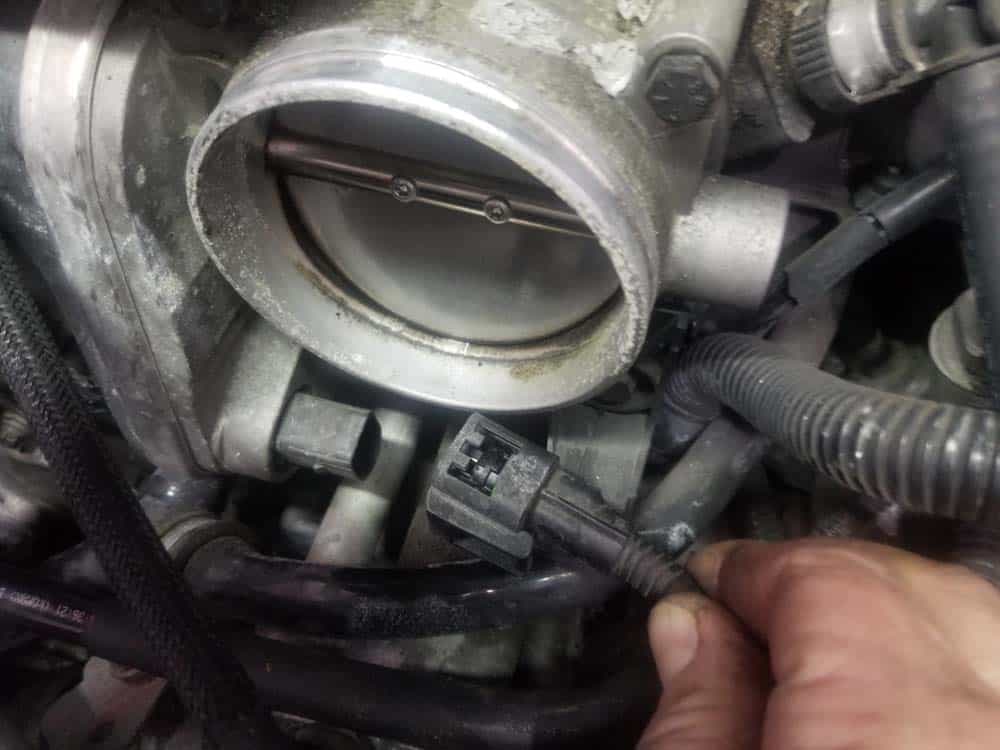
- Moving to the left side of the wiring harness, unplug the throttle body by depressing its locking tab and pulling it free.
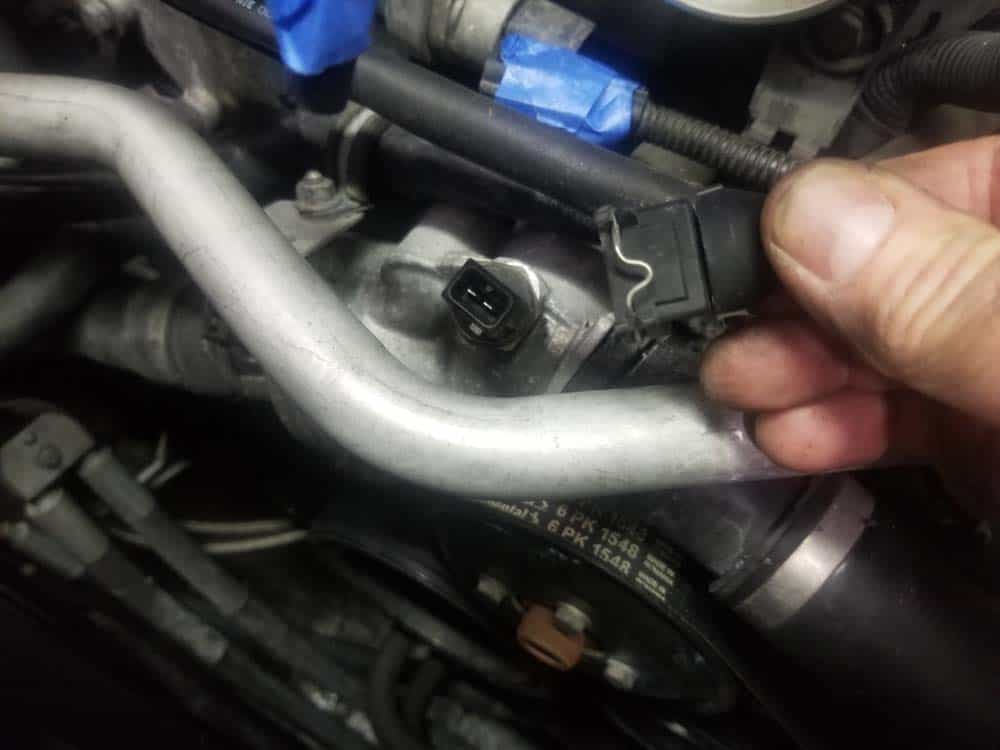
- Next, unplug the water pump sensor.
- Unplug the fuel vent valve sensor.
- Unplug the right solenoid control valves using the same technique used in step 2 above to remove the left ones.
- The final front wire is connected to the back of the alternator. This wire is extremely difficult to remove...we strongly recommend leaving it connected. Fortunately the left wiring harness can be cleared out of the work area if you disconnect the exhaust camshaft sensor in the next step instead.
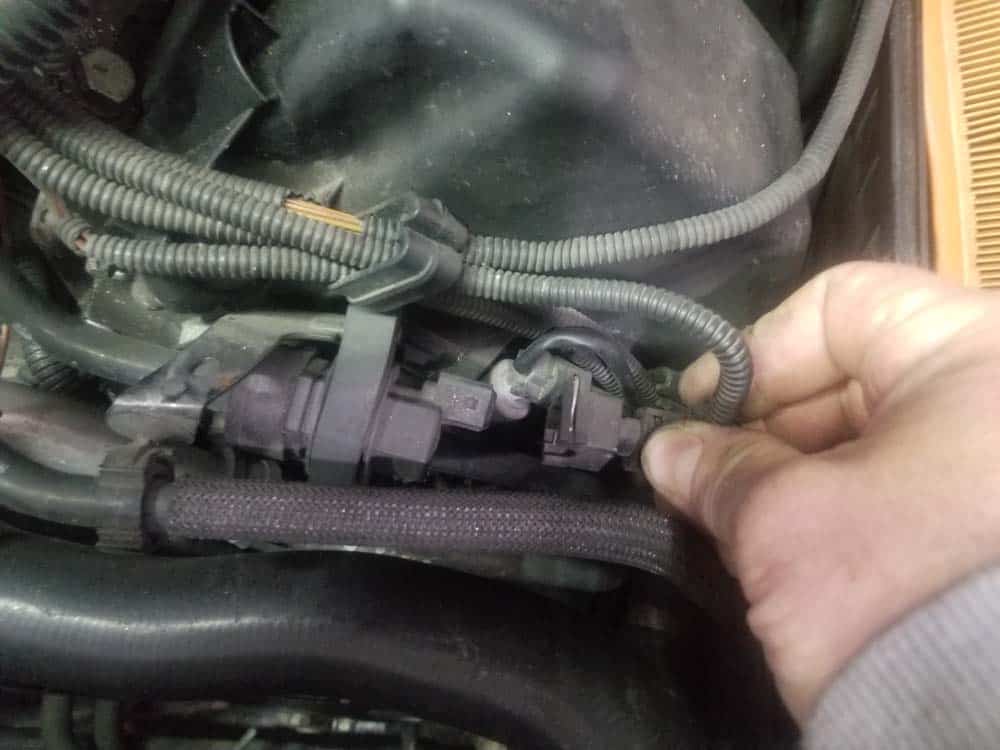
- Locate the left exhaust camshaft sensor. It is mounted on the rear of the valve cover on the left side of the engine.
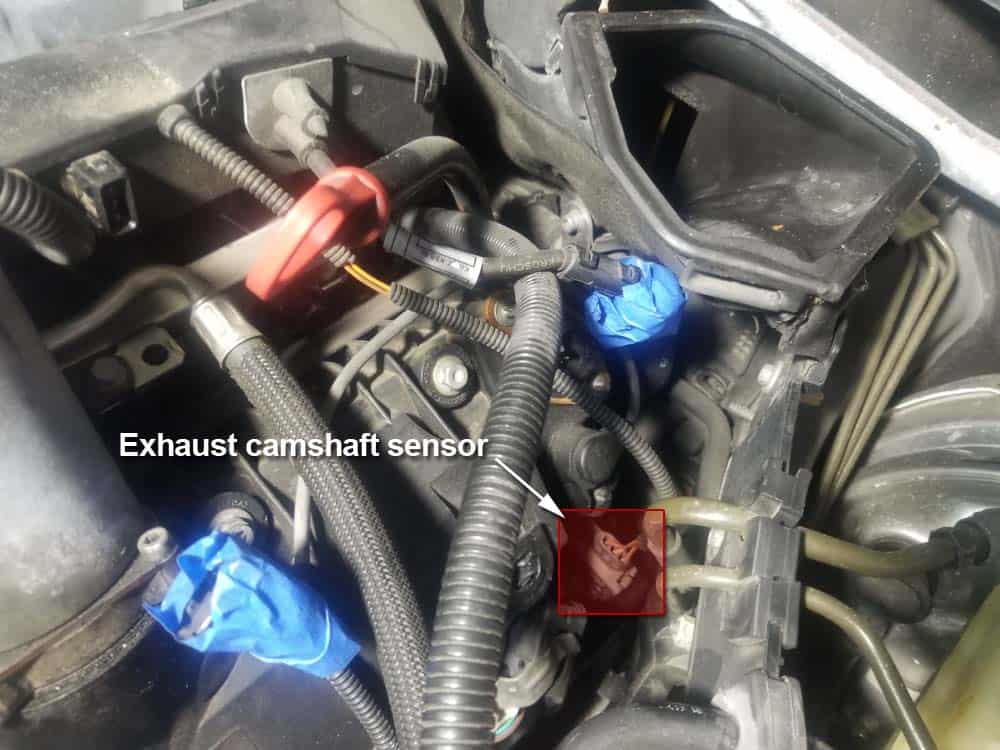
- Unplug the exhaust camshaft sensor. This can often be tricky...we found the easiest way is to squeeze the plug's locking tabs in GENTLY with a pair of long nose pliers with one hand while prying the plug off with a flatblade screwdriver with the other hand.
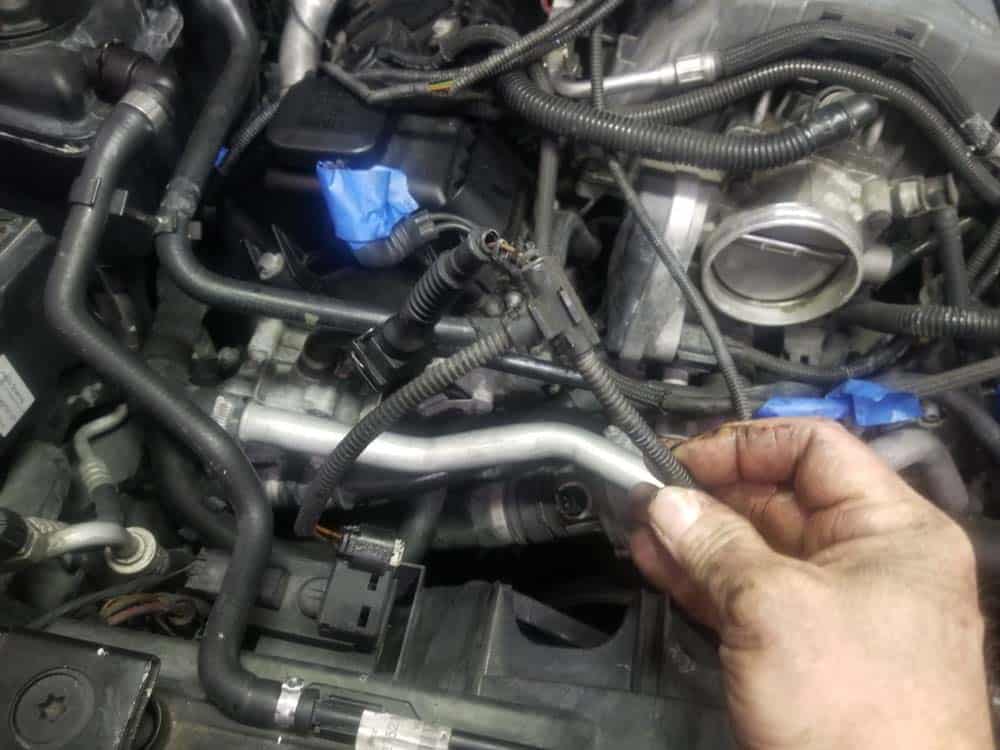
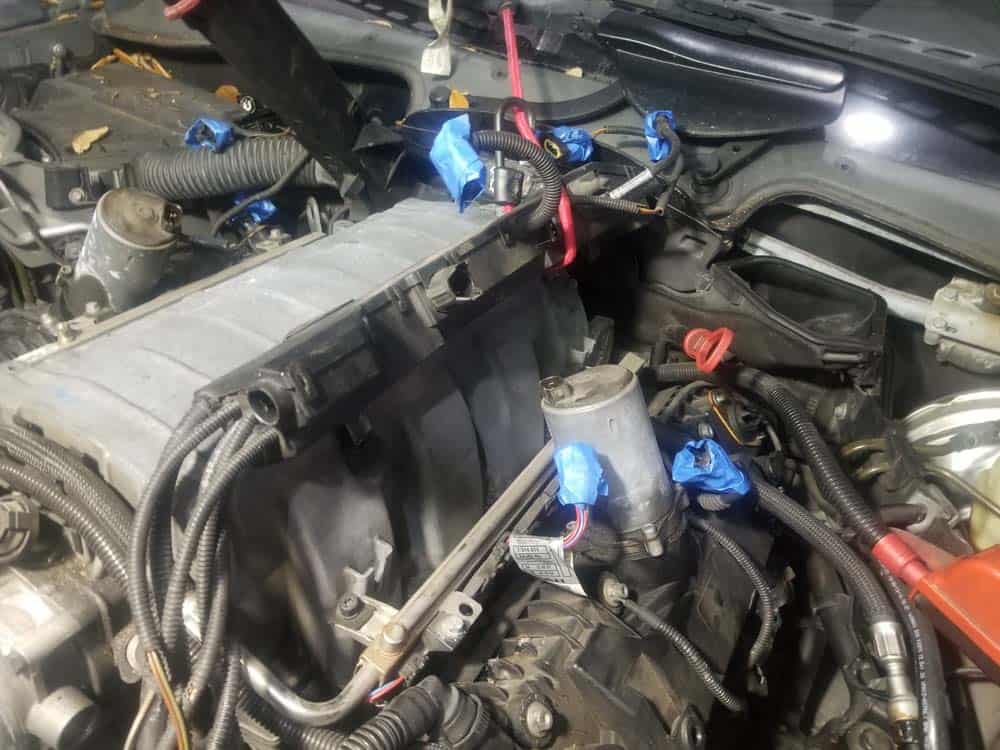
- The left wiring harness can now be cleared out of the work area. Carefully move it to the center of the engine as shown below and bungee cord so it doesn't move.
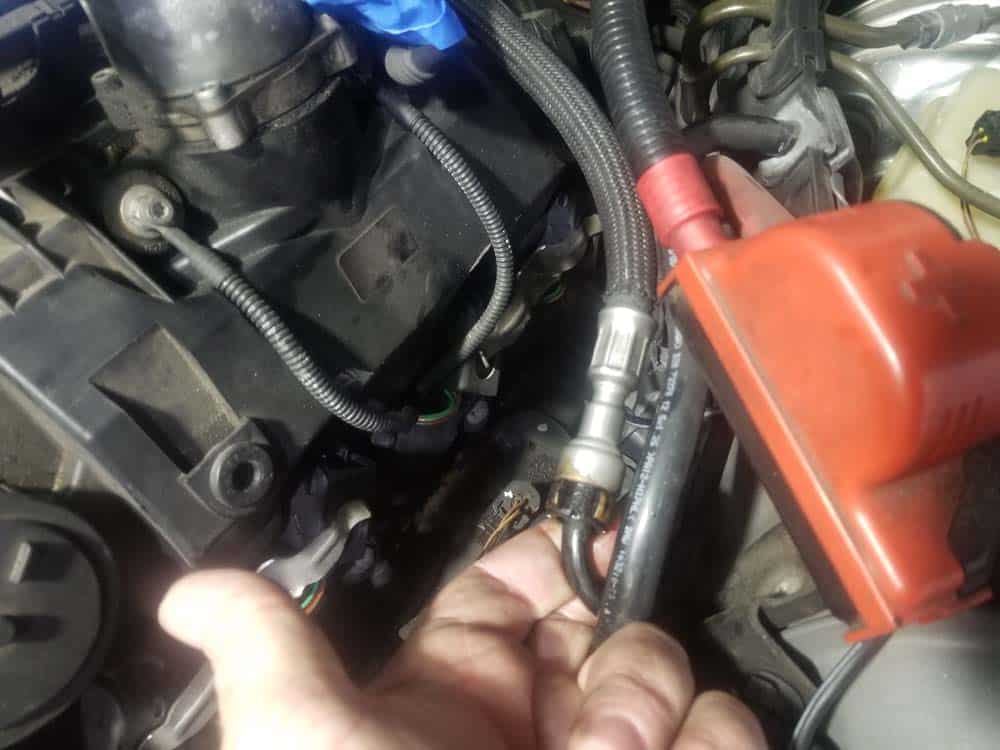
- Next, the fuel line needs to be disconnected from the fuel rails. Before removing the fuel line, the fuel pressure will need to be released. Locate the Shrader valve on the right side of the fuel rail and remove its cap. The Shrader valve is the same as the valve used to inflate your tires...simply press down on its stem with a small screwdriver to release the pressure. Have a rag ready to catch any fuel that may spill out.
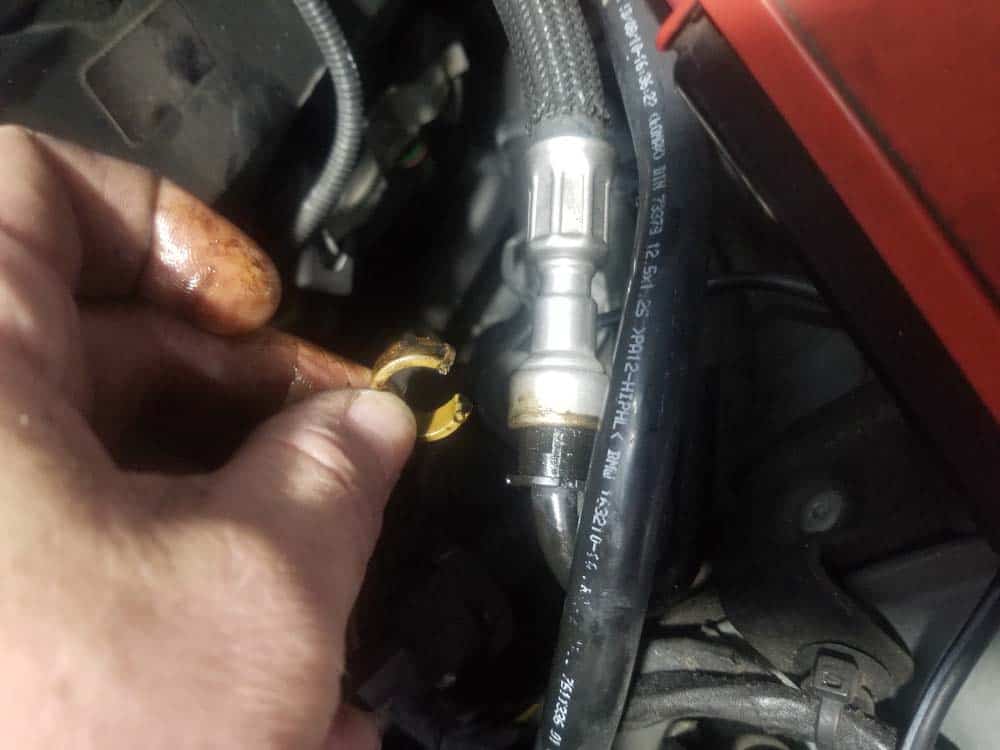
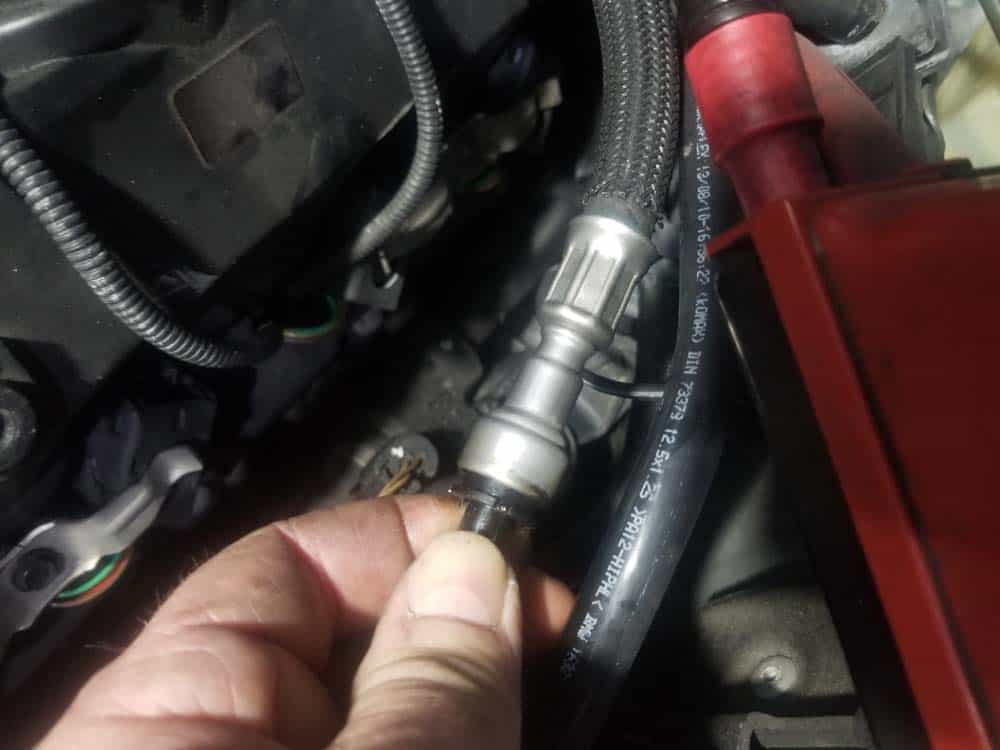
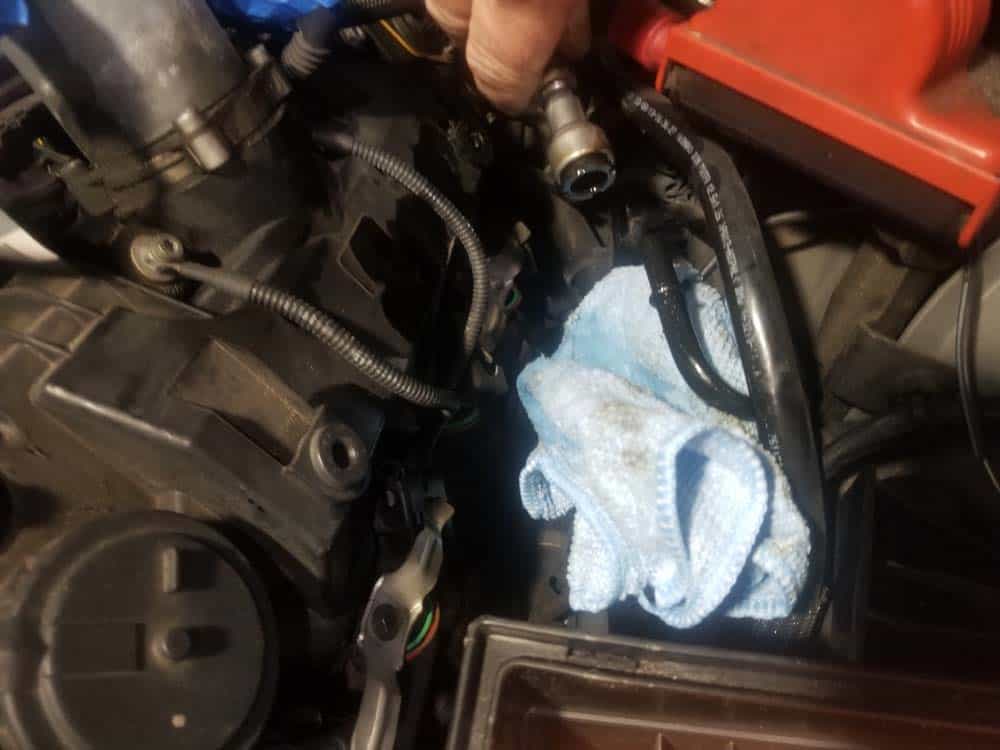
- Locate the fuel line on the left side of the engine. Remove its plastic locking collar, then retract its black plastic release. Pull the fuel line apart...have a rag ready to catch the small amount of fuel that will drain out.
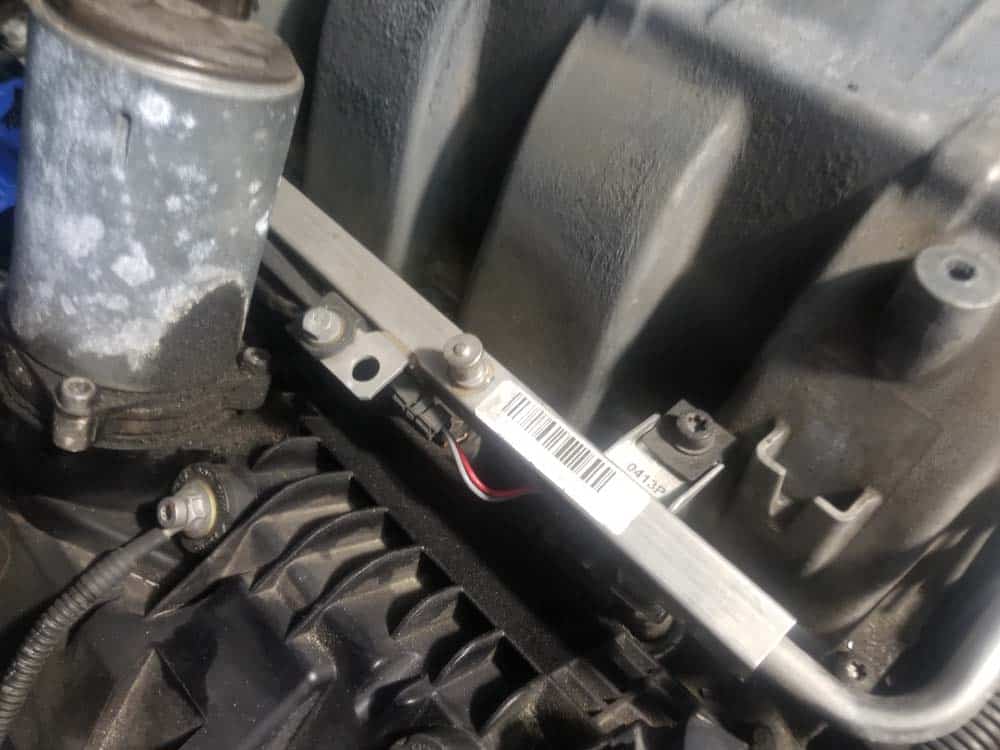
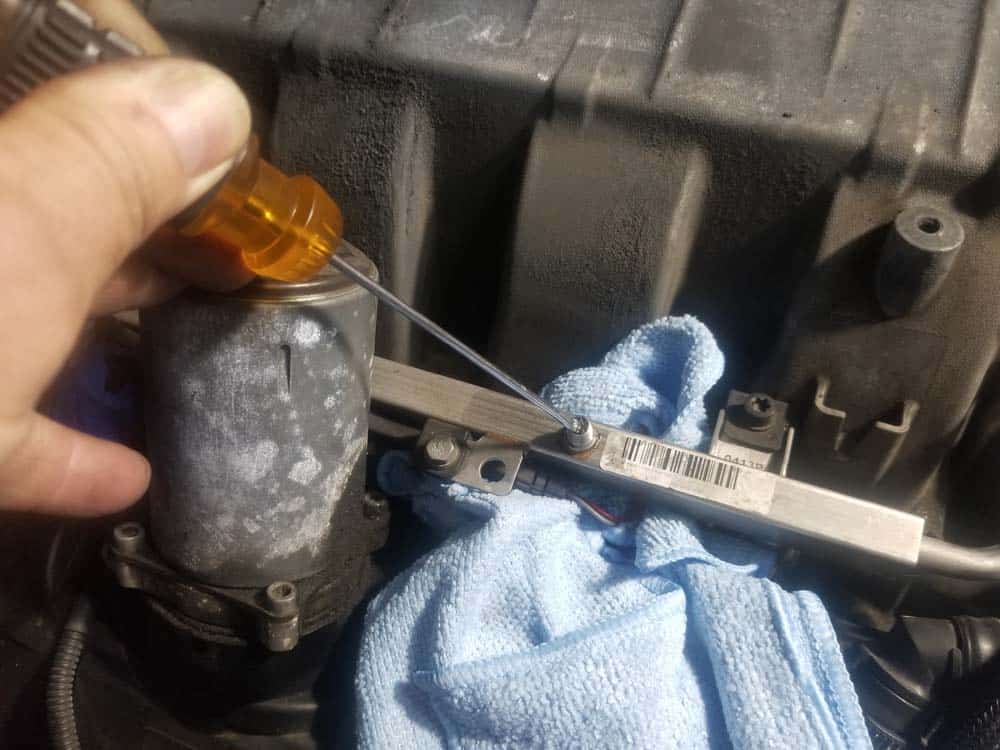
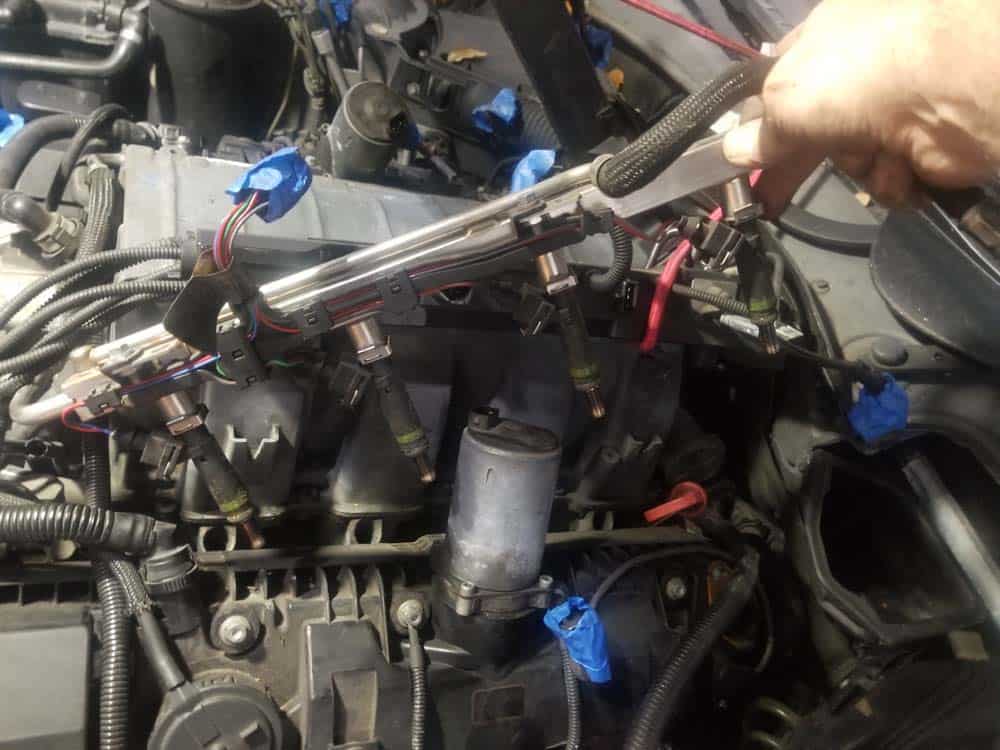
- Optional step - The fuel rail and injectors DO NOT have to be removed from the intake manifold to complete this repair. If you are not interested in removing your fuel injectors, please proceed to Section 2 below. If you are interested in removing the injectors so they can be inspected or cleaned, now is the time to do it. It only takes an extra few minutes to remove your injectors. For more information on cleaning your fuel injectors, please see our article BMW Fuel Injector Cleaning Kit – The Best Tool For The Home Mechanic. Start by using a T30 torx bit to remove the four bolts anchoring the fuel rail to the intake manifold.
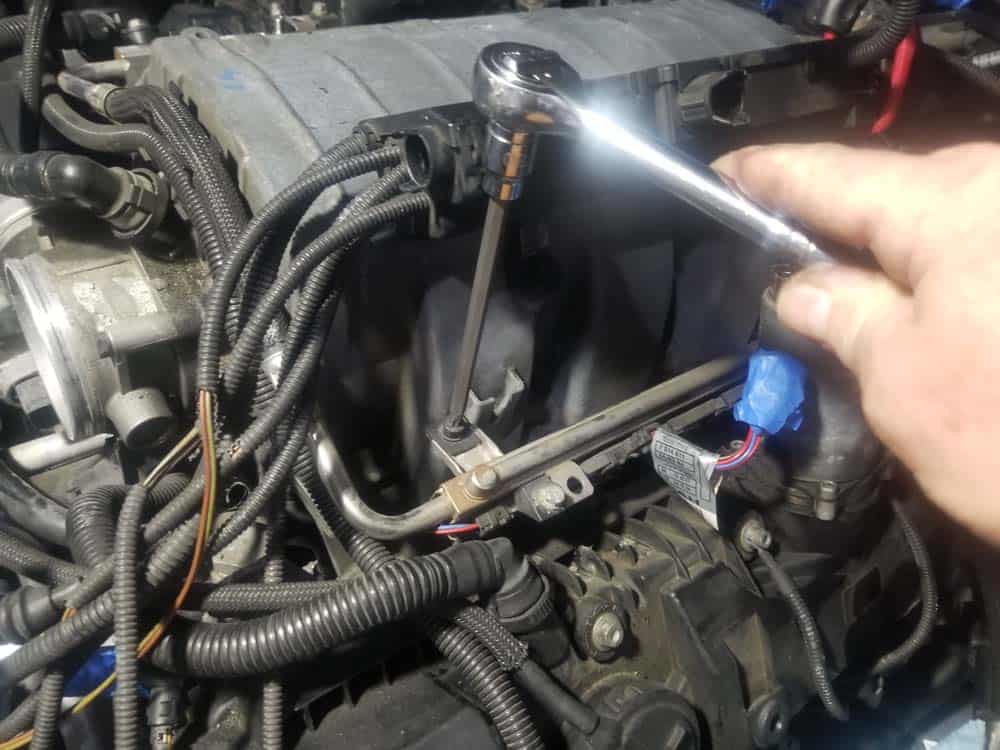
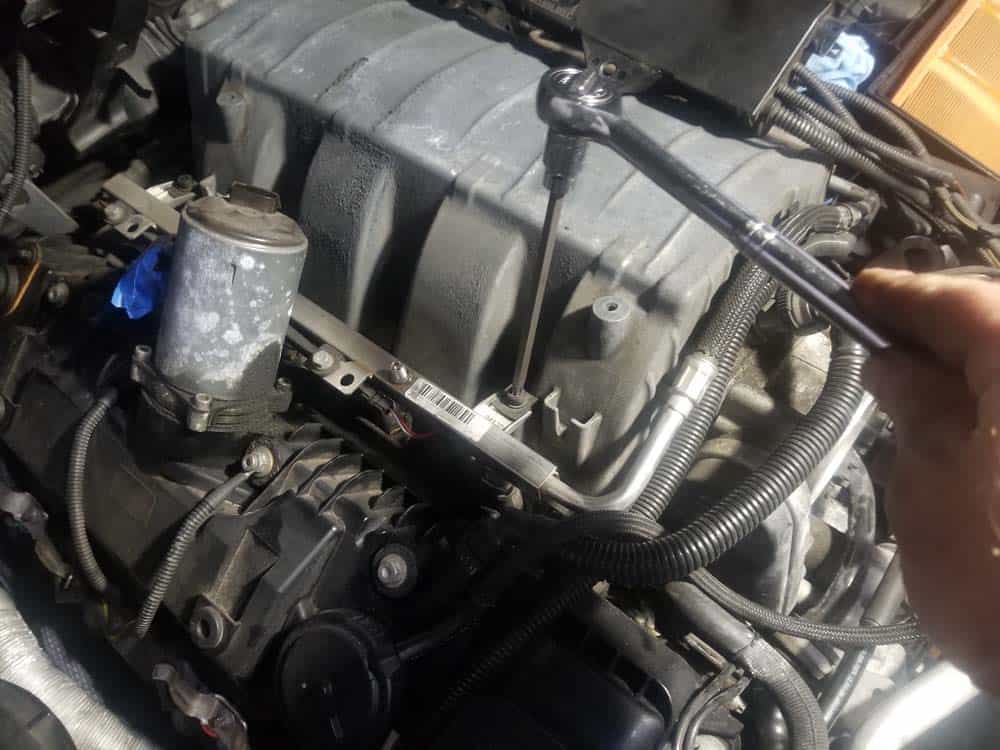
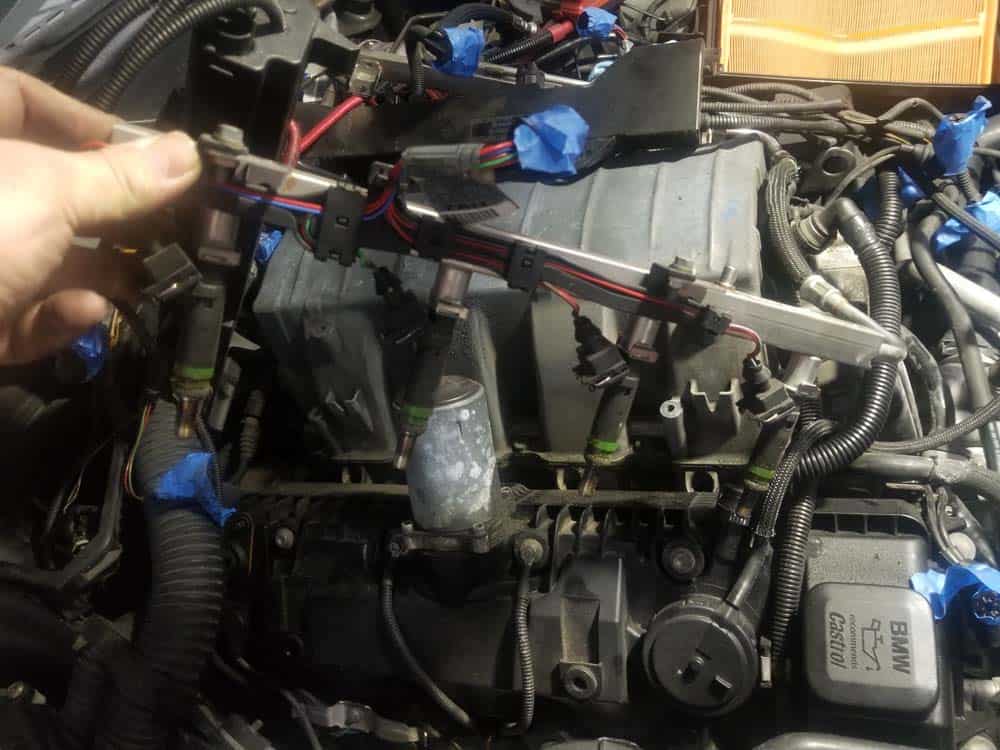
- Optional step - Starting on the left side of the engine, grasp the rear of the fuel rail and pull it free from the intake manifold. If the fuel rail is stuck, gently wiggle it back and forth while pulling until it releases as shown in the following images.
- Optional step - Remove the fuel rail from the right side of the intake manifold.
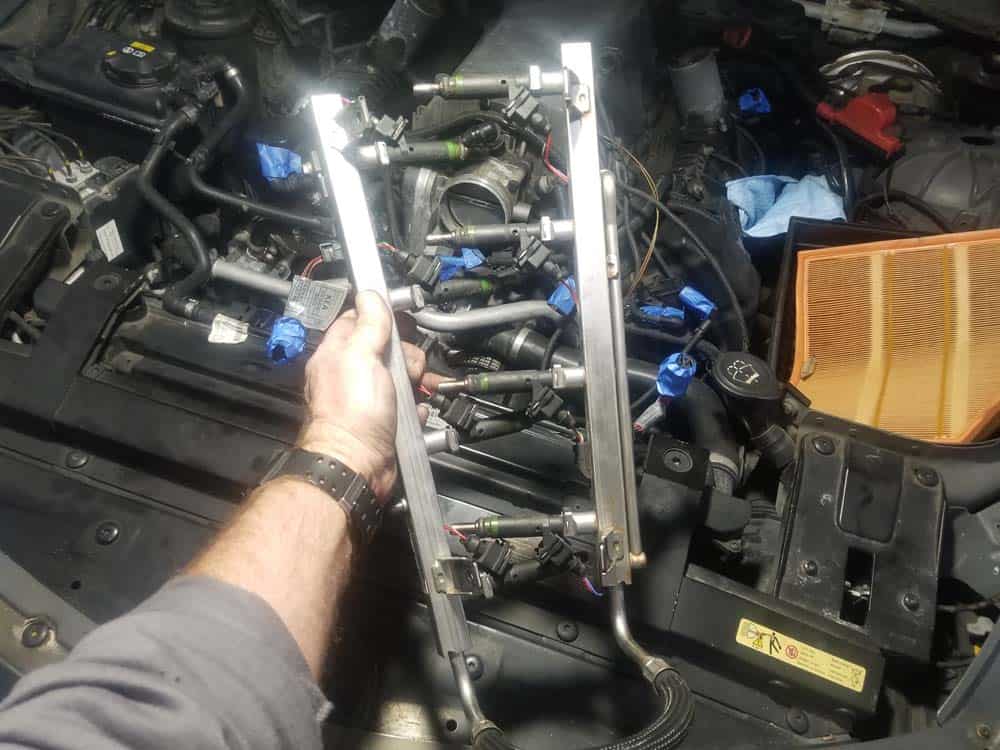
- Optional step - Remove the entire fuel rail/fuel injector assembly from the vehicle and place on a clean bench.
Section 2 - Removing the Intake Manifold
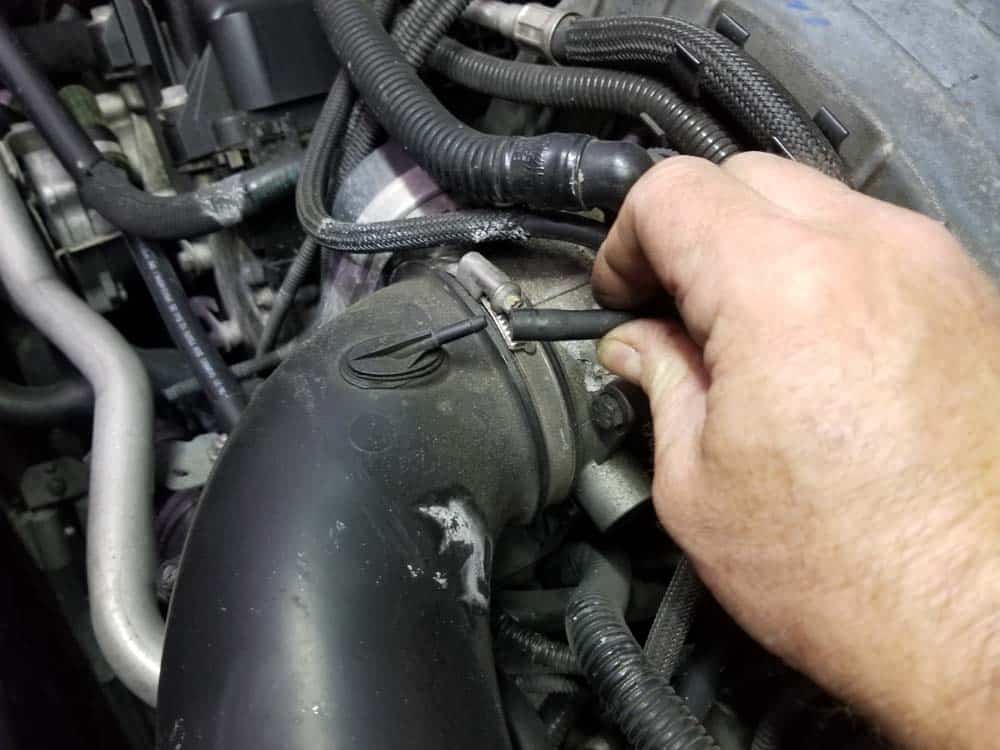
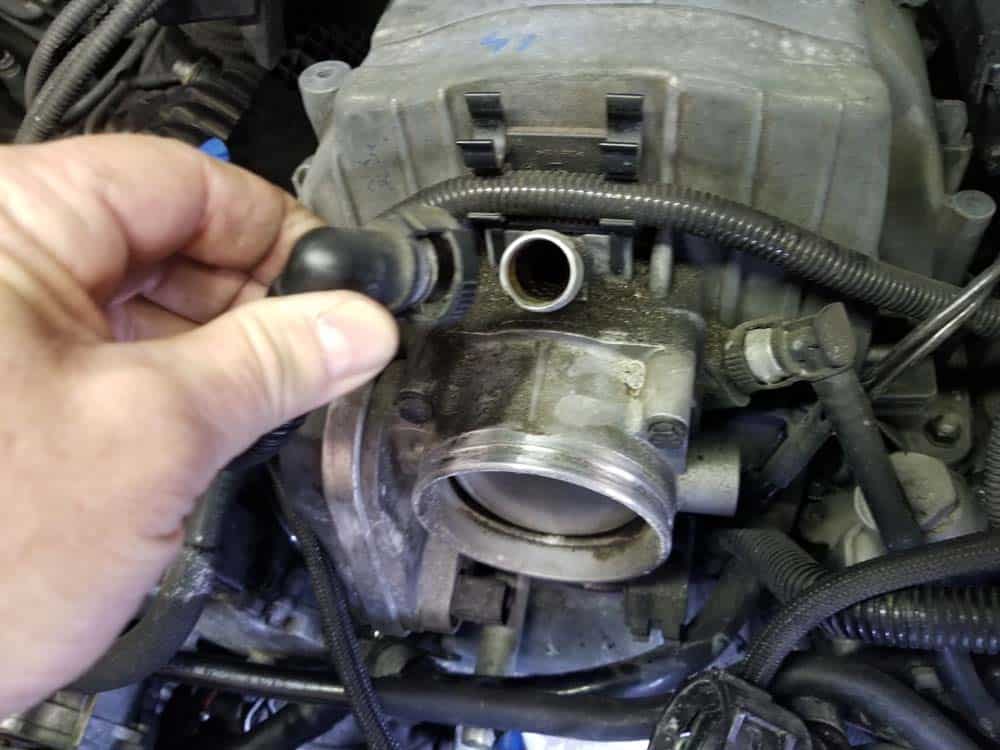
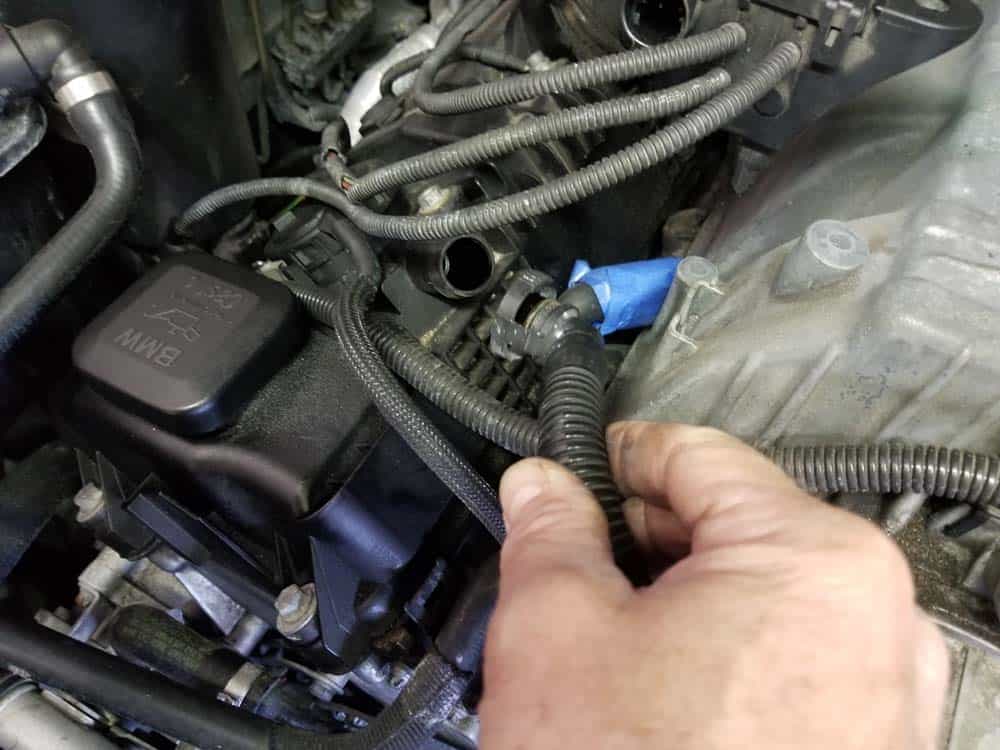
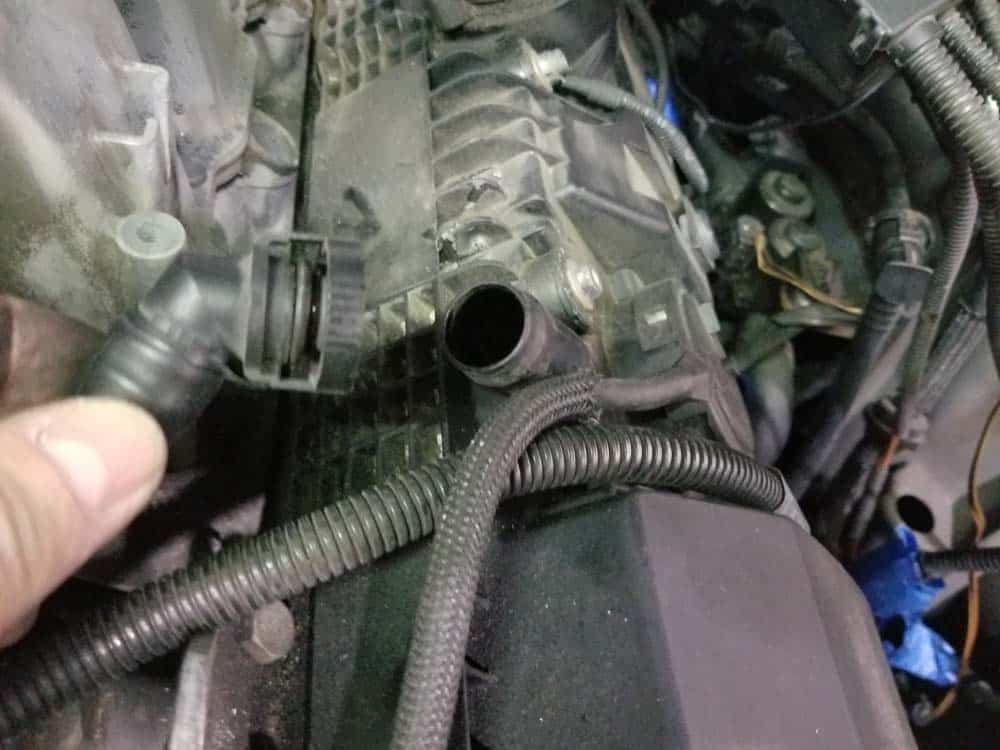
As previously discussed, removing the BMW N62 intake manifold from the cylinder heads is fairly simple once you have the wiring harness and fuel lines cleared out of the way. The intake manifold is anchored to the engine with ten nuts that are easily accessible. Please remember that the intake manifold is heavy. We suggest having a helper ready to assist in removing it from the engine compartment.- Remove the right crankcase vent hose from the throttle body by squeezing its connector and pulling it free. We suggest also removing it from the right valve cover to avoid breaking it during removal of the intake manifold.
- Remove the left crankcase vent hose from the left valve cover. Leave the other end attached to the intake manifold.
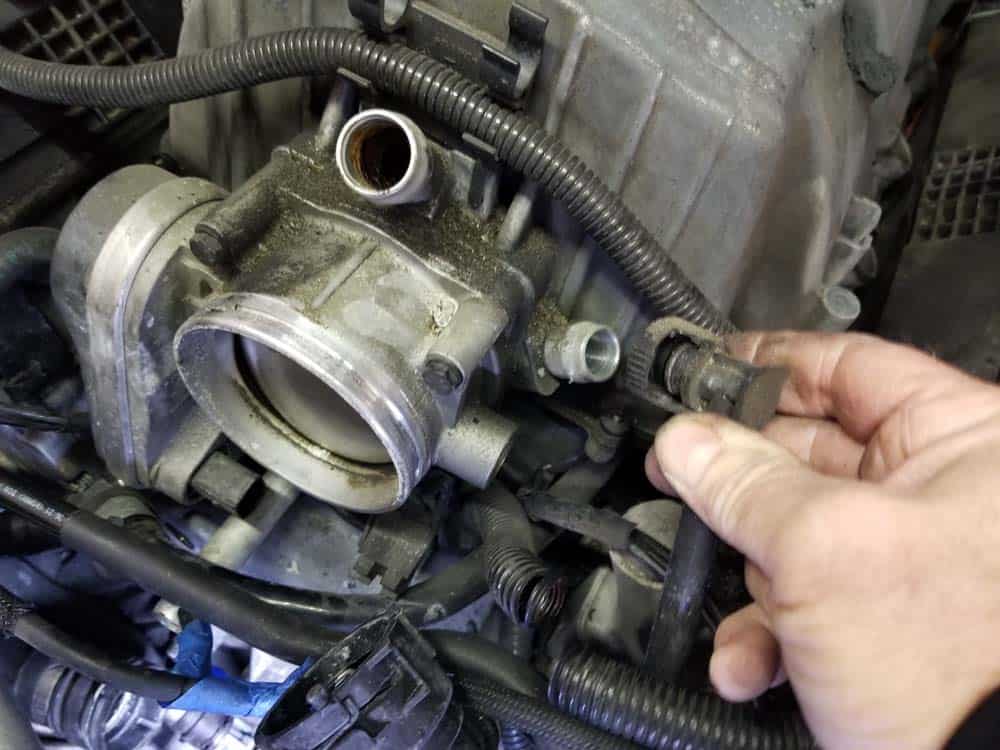
- Remove the fuel line vent valve from the front of the intake manifold.
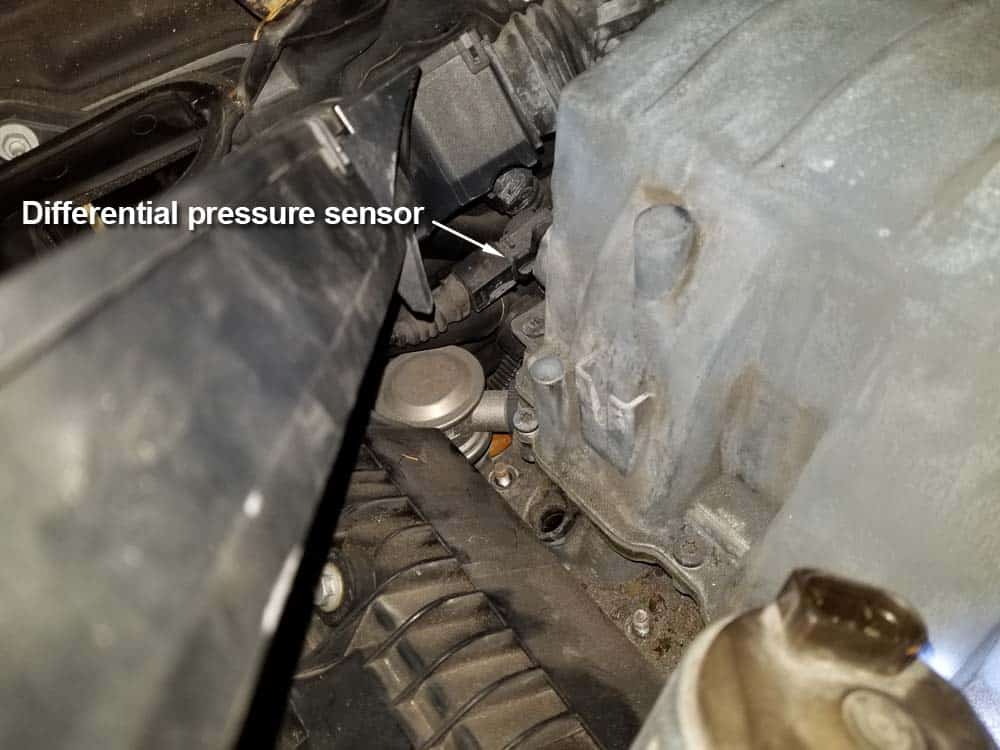
- Fold back the wiring harness on the right side of the engine and unplug the differential pressure sensor on the back of the intake manifold.
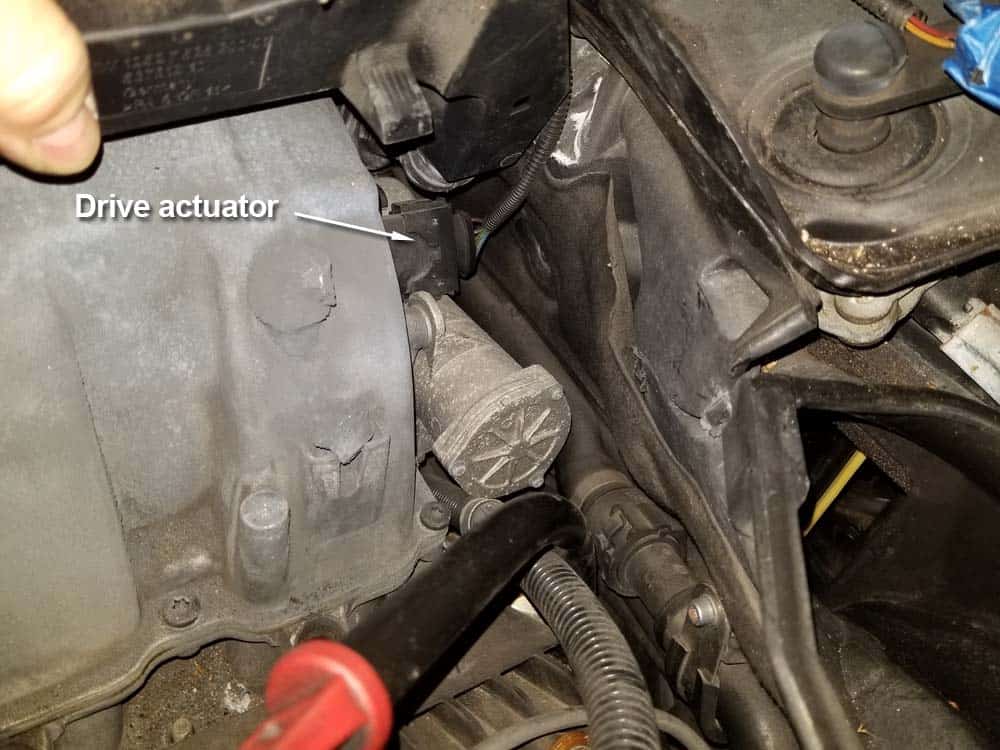
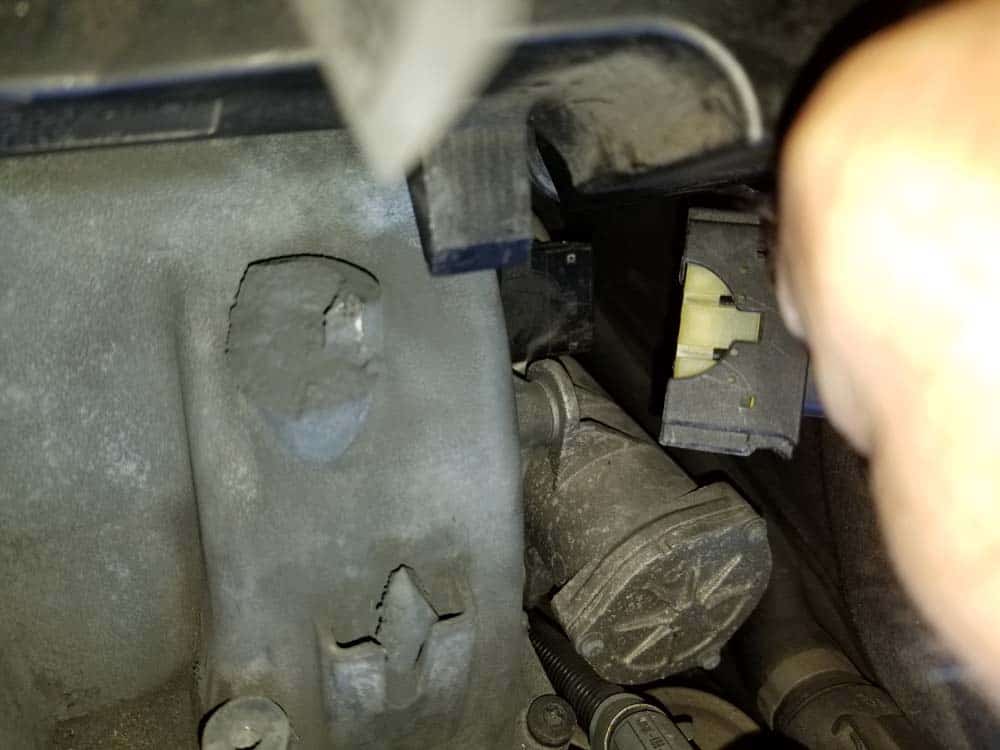
- Moving to the rear left side of the manifold, pull back the wiring harness and unplug the drive actuator.
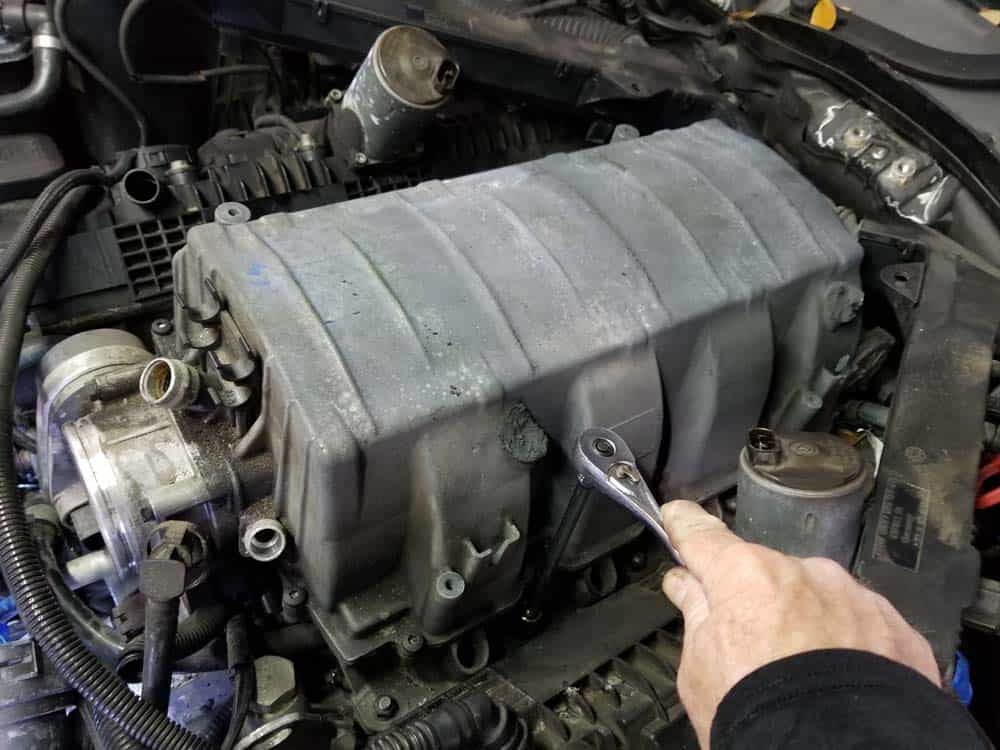
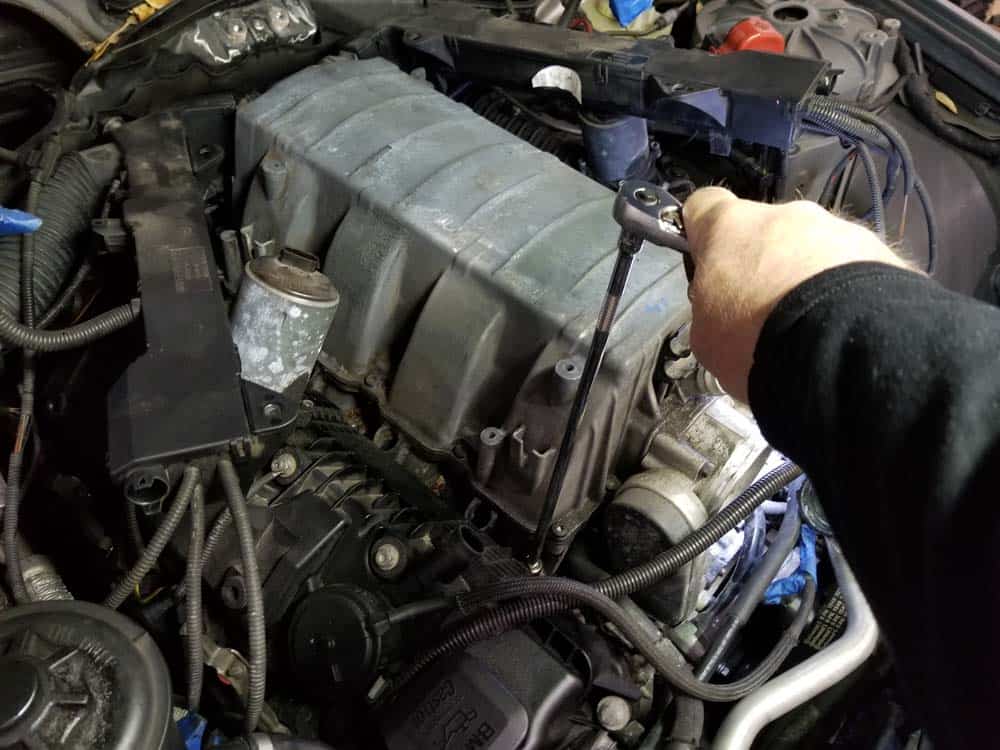
- The intake manifold is anchored to the cylinder heads by ten 11mm nuts. Remove the ten mounting nuts from the intake manifold being careful not to drop any into the engine.
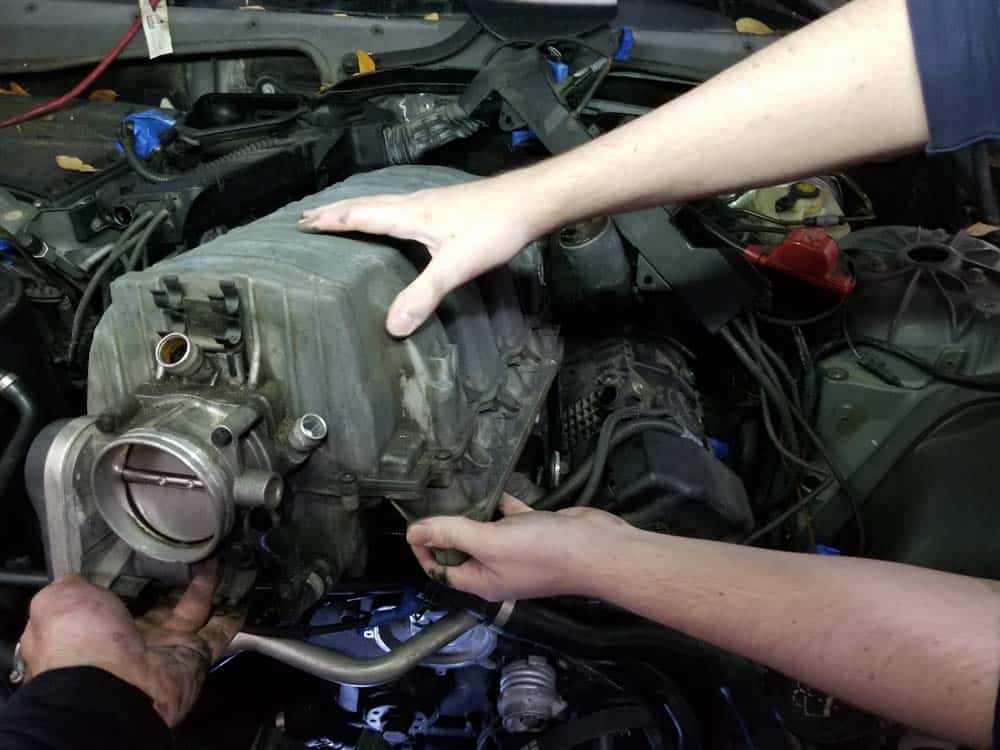
- The intake manifold is now free and can be removed from the cylinder heads. We suggest using a helper to lift it up and out of the engine compartment.

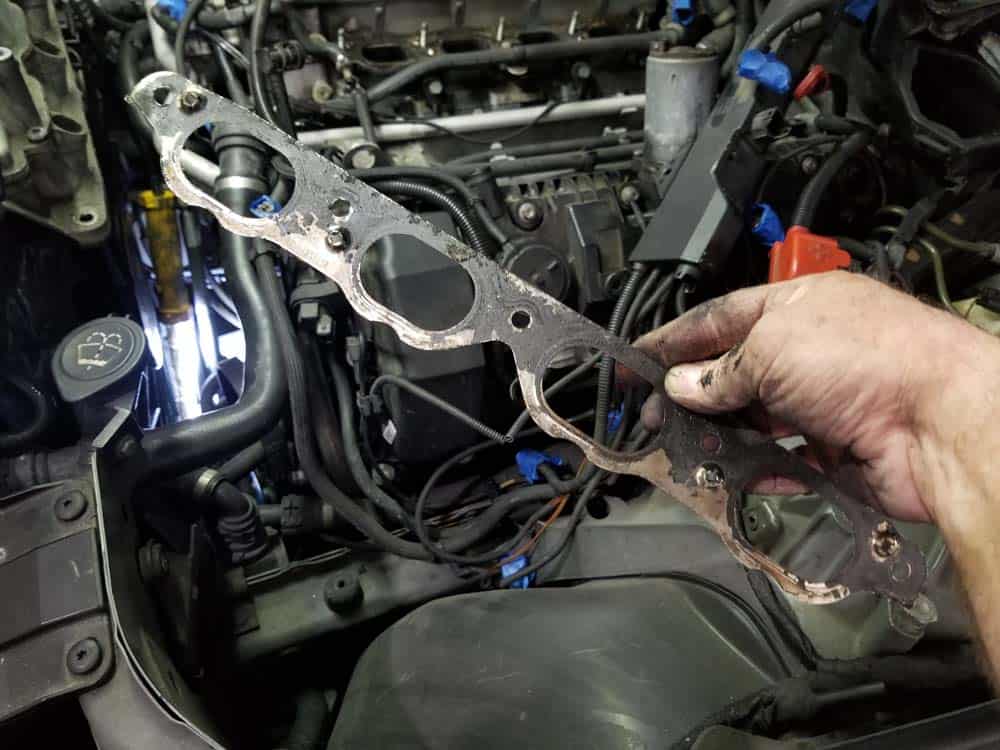
- Remove the two metal intake manifold gaskets from the cylinder heads. BE CAREFUL...the gaskets are extremely sharp on the edges!
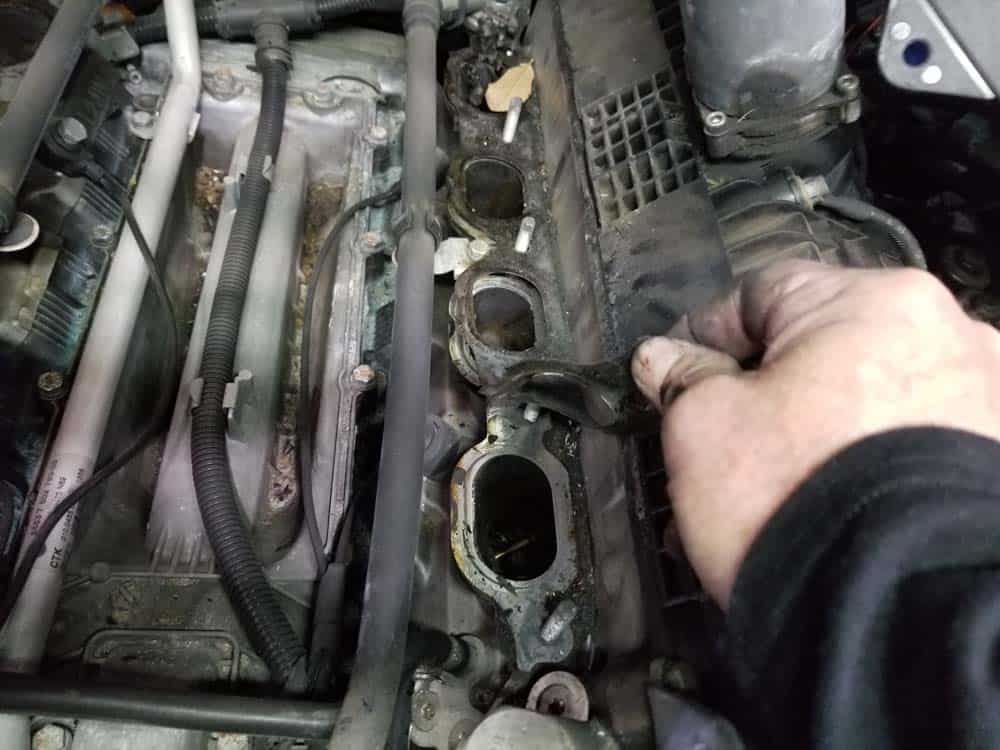
- Use some CRC Brakleen and a clean rag to thoroughly clean the cylinder head and intake manifold surfaces. Make sure to remove any dirt and oil that has built up on the surfaces.
Section 3 - Reassembling the BMW N62 Intake Manifold
Installing the intake manifold back into the N62 engine is very straightforward with no special steps or procedures. We cannot stress enough using a helper to install the manifold back into the engine...it is very heavy and can be frustrating to try and install by yourself. We have supplied a handy reassembly checklist below with important torque values for your convenience. BMW N62 Intake Manifold Reassembly Checklist
***The following steps were performed on a 2005 645ci...other models may vary.- Install the new metal intake manifold gaskets on the cylinder heads.
- Using a helper, carefully reinstall the intake manifold back onto the cylinder heads.
- Install the ten mounting nuts and torque to 17.5 Nm (13 ft-lb).
- Plug the drive actuator back in on the left rear of the manifold.
- Plug the differential pressure sensor back in on the right rear of the manifold.
- Plug the fuel line vent valve back into the front of the manifold.
- Reinstall the left and crankcase vent hoses.
- Optional - If you removed the fuel injectors, install them back into the intake manifold. Use the palm of your hand to make sure they are firmly seated in the manifold.
- Optional -Reinstall the four fuel rail mounting bolts and torque to 10.5 Nm (8 ft-lb).
- Reattach the fuel line. Install its plastic locking collar.
- Reinstall the cap on the Shrader valve.
- Starting with the left side of the wiring harness, plug the exhaust camshaft position sensor back in.
- Plug the left solenoid control valves back in.
- Plug the fuel vent valve back in.
- Plug the water pump sensor back in.
- Plug the throttle body sensor back in.
- Move to the left side of the wiring harness, plug the vacuum pump back in.
- Plug the AC compressor back in.
- Plug the right solenoid control valves back in.
- Plug the thermostat sensor back in.
- Moving back to the top of the engine, plug both the right and left eccentric shaft sensors back in.
- Replace both of the side engine covers.
- Plug both the right and left intake camshaft sensors back in.
- Plug the left and right fuel injector control wires back in.
- Plug the left and right ping sensors back in.
- Plug the left and right Valvetronic motors in.
- Replace the top engine cover brackets. Install the wiring harness mounting bolts and torque to 10.5 Nm (8 ft-lb).
- Replace the strut brace and torque its four bolts to 25 Nm (18 ft-lb).
- Reinstall the intake muffler lid. Make sure the hose clamp is secure.
- Install the vacuum line back on the intake boot.
- Plug the mass air flow sensor back into the intake boot.
- Install the upper engine cover.
- Install the microfilter housing.
Replacement Finished