Affiliate link disclosure – The BMW Repair Guide uses affiliate links in their site. For more information on affiliate links, please click here.
- Repair Summary
- Repair Difficulty and Cost
- Repair Video
- Parts Diagram
- Required Parts List
- Repair Steps
Repair Summary
This article gives detailed instructions on replacing the fuel injectors in a BMW N55 twin turbo engine. Even though we used a 2011 335i to perform this repair, this article can be applied to any BMW vehicle with the N55 twin turbo including the 1,3,5,7,X3,X6 and Z4 models minor modifications to the repair steps.
See all vehicles this article applies to
E88 1 Series 135i
E82 1 Series 135i
F20 1 Series M135iX
F20 1 Series M135i
F20N 1 Series M135iX
F20N 1 Series M135i
F21 1 Series M135iX
F21 1 Series M135i
F21N 1 Series M135iX
F21N 1 Series M135i
F22 2 Series M235iX
F22 2 Series M235i
F87 2 Series M2
F87N 2 Series M2
F23 2 Series M235iX
F23 2 Series M235i
E90N 3 Series 335xi
E90N 3 Series 335i
E91N 3 Series 335xi
E91N 3 Series 335i
E92N 3 Series 335xi
E92N 3 Series 335i
E93N 3 Series 335i
F30 3 Series Hybrid 3
F30 3 Series 335iX
F30 3 Series 335i
F31 3 Series 335iX
F31 3 Series 335i
F34 3 Series 335iX
F34 3 Series 335i
F35 3 Series 335Li
F35N 3 Series 335Li
F32 4 Series 435iX
F32 4 Series 435i
F33 4 Series 435i
F33 4 Series 435iX
F36 4 Series 435i
F36 4 Series 435iX
F07 5 Series 535i
F07 5 Series 535iX
F07N 5 Series 535i
F07N 5 Series 535iX
F10 5 Series Hybrid 5
F10 5 Series 535iX
F10 5 Series 535i
F10N 5 Series Hybrid 5
F10N 5 Series 535iX
F10N 5 Series 535i
F11 5 Series 535iX
F11 5 Series 535i
F11N 5 Series 535iX
F11N 5 Series 535i
F18 5 Series 535Li
F18N 5 Series 535Li
F06 6 Series 640iX
F06 6 Series 640i
F06N 6 Series 640iX
F06N 6 Series 640i
F12 6 Series 640i
F12 6 Series 640iX
F12N 6 Series 640iX
F12N 6 Series 640i
F13 6 Series 640iX
F13 6 Series 640i
F13N 6 Series 640iX
F13N 6 Series 640i
F01N 7 Series Hybrid 7
F01N 7 Series 740i
F02N 7 Series Hybrid 7L
F02N 7 Series 740LiX
F02N 7 Series 740Li
E84 X1 Series X1 35iX
F25 X3 Series X3 35iX
F26 X4 Series X4 M40iX
F26 X4 Series X4 35iX
E70N X5 Series X5 40iX
E70N X5 Series X5 35iX
F15 X5 Series X5 35iX
F15 X5 Series X5 35i
E71 X6 Series X6 40iX
E71 X6 Series X6 35iX
F16 X6 Series X6 35iX
F16 X6 Series X6 35i
Please read the following before beginning this repair.
- Before starting this advanced repair, please we aware that you will need a diagnostic tool that has the ability to calibrate the flow rates of your new injectors. The BMW Repair Guide uses ISTA+ (Rheingold) software to program their injectors, but most other popular BMW diagnostic tools have this ability including the Schwaben/Foxwell nt510. YOU MUST calibrate your new injectors after installation in order for them to operate correctly. Please see our video on injector calibration at the end of this article.
- You will also need a special fuel injector extraction/installation tool to do this repair. We have prepared a detailed video on how to use this tool - please see section 4 below to view video. Please see our links below in "Tools and Supplies" on where to purchase this tool prior to starting the repair.
- This repair is for the BMW N55 direct injection engine only. Please click on the following box to verify this repair applies to your vehicle before starting:
A BMW fuel injector replacement on the N55 twin turbo six cylinder engine is a lengthy repair, but will save you thousands of dollars on parts and labor by "Doing It Yourself" and not going to your local repair shop.
One of the unfortunate evils of owning a BMW with the N55 twin-turbo engine is increased maintenance. As wonderful as these engines are, they are notorious for their mechanical issues. Add the sad fact that many of the original owners of these cars didn't properly maintain them, and you have a recipe for impending disaster...especially on N55 engines with over 100,000 miles.
When you get north of 100,000 miles, you can pretty much expect to perform a BMW fuel injector replacement on these engines. Injectors get fouled over the years from poor fuel choices and not regularly using a good fuel additive like Techron. Driving a vehicle on fouled or clogged injectors can cause further damage and may ultimately lead to injector failure.
The BMW N55 engine uses direct injection which further complicates the matter. A direct injection is a form of fuel injection, where the gasoline is atomized directly into the cylinder under extremely high pressure. Direct injectors are prone to carbon buildup and are subjected to a continuously brutal environment inside the combustion chamber of the engine.
Fuel injectors in the BMW N55 engine are also prone to sticking open. This is a very serious condition where the injector continues to spray fuel into the cylinder. As the fuel builds up in the combustion chamber(s) it will cause multiple cylinder misfires and plumes of noxious white smoke to be ejected from the tailpipes. Driving the car in this condition will cause catastrophic damage to the engine and a tow truck ride to the scrap yard.
Using the correct fuel injector removal tool
There seems to be some confusion as to what tool and method are best for extracting a fuel injector from the cylinder head of an N55 engine. The first rule of thumb is this; if your vehicle is close to/over 100,000 miles, most likely your fuel injectors will be stuck and require a removal tool to get them out.

Secondly, only use a BMW OEM extraction/installation tool and a good low torque wrench to remove and reinstall the injectors in your N55 engine. There are a lot of BMW owners out there that have come up with creative ways to pull out a stuck injector...from using coat hangers to dental picks and pliers. We urge our readers to use the proper tool and follow our instructions below on how to use it. The money saved by doing this repair yourself will exponentially outweigh the cost of buying the tool. And most importantly you will avoid any damage to the new injector or your engine.
Be aware that are two different tool mounting configurations in the BMW N55 engine; a horizontal configuration and a vertical configuration. Always check your mounting bolt layout before ordering your tool.



If the video does not appear below, please click here to view
View the video version of this repair.
View the detailed parts diagram for this repair.
Includes detailed part diagrams, part numbers and links to purchase all of the required components needed to complete this repair.

Before starting this repair, you must have the following required parts.
For most N20 4-cyliner and N55 6-cylinder engines
Direct injection fuel injectors are notoriously expensive. Many home mechanics try and save money by installing "imported" aftermarket injectors often found on sites like Amazon and Ebay. Big mistake. Please take our word on this...you get what you pay for with fuel injectors. Cheap aftermarket versions will fail and can even possibly cause major damage to your engine. Don't cut corners - even if you have to take out a loan, only install Genuine BMW fuel injectors like this one in your vehicle.
For N55 engine vehicles only with production date up to 01/2011
If you are experience a rough idle, misfire, or check engine light, this could be the problem. Fuel injectors for turbocharged BMWs have been a common failure item. It is highly recommended to replace older injectors also if your car is modified or you plan to modify it.
Fits all BMW vehicles
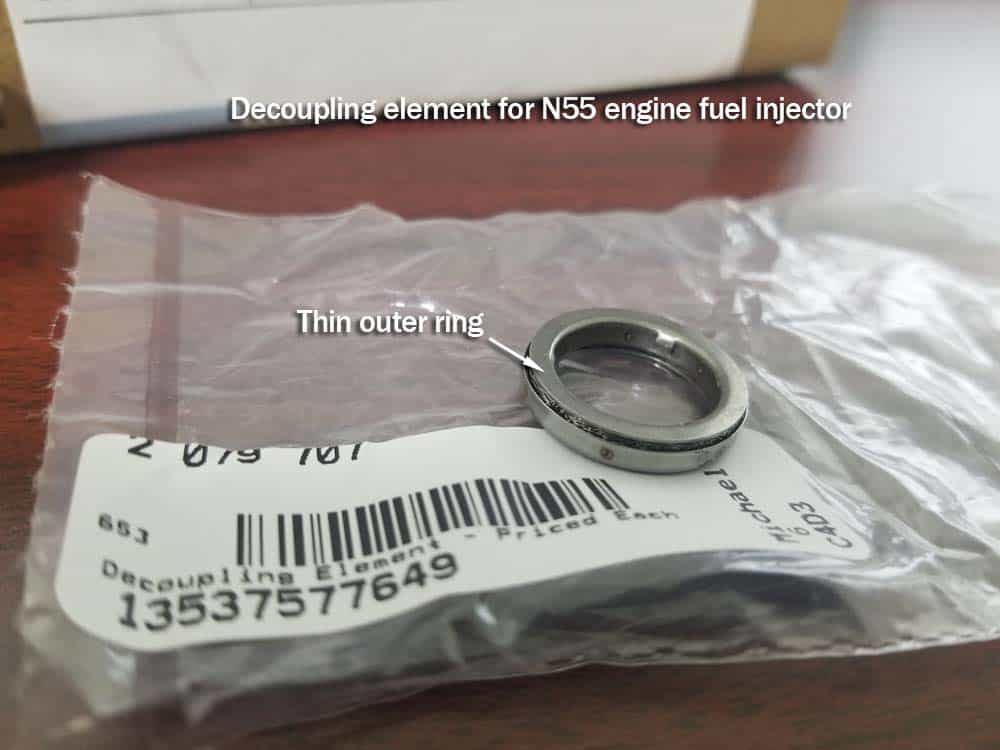
The decoupling ring is essential for proper fuel injector installation. Never use the old rings from the injectors you are replacing.
Section 1 - Removing The Cabin Filter Assembly
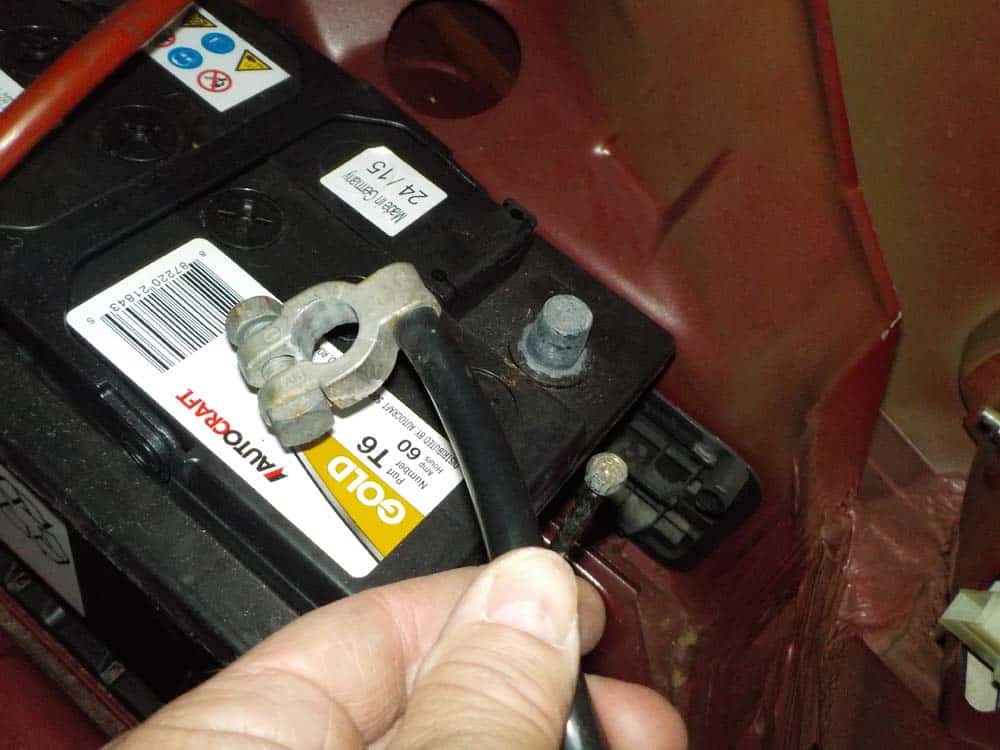
The cabin filter assembly must be removed in order to access the rear fuel injectors in cylinders 5 and 6.- Use a socket wrench to disconnect the negative terminal from the battery before starting this repair. Always cover the terminal with a clean rag to avoid accidental contact during the repair. If working on a vehicle with 2 batteries (8 series), disconnect the negative terminal from both batteries. ALWAYS disconnect the battery(s) before performing any type of mechanical repair, especially in the engine compartment.
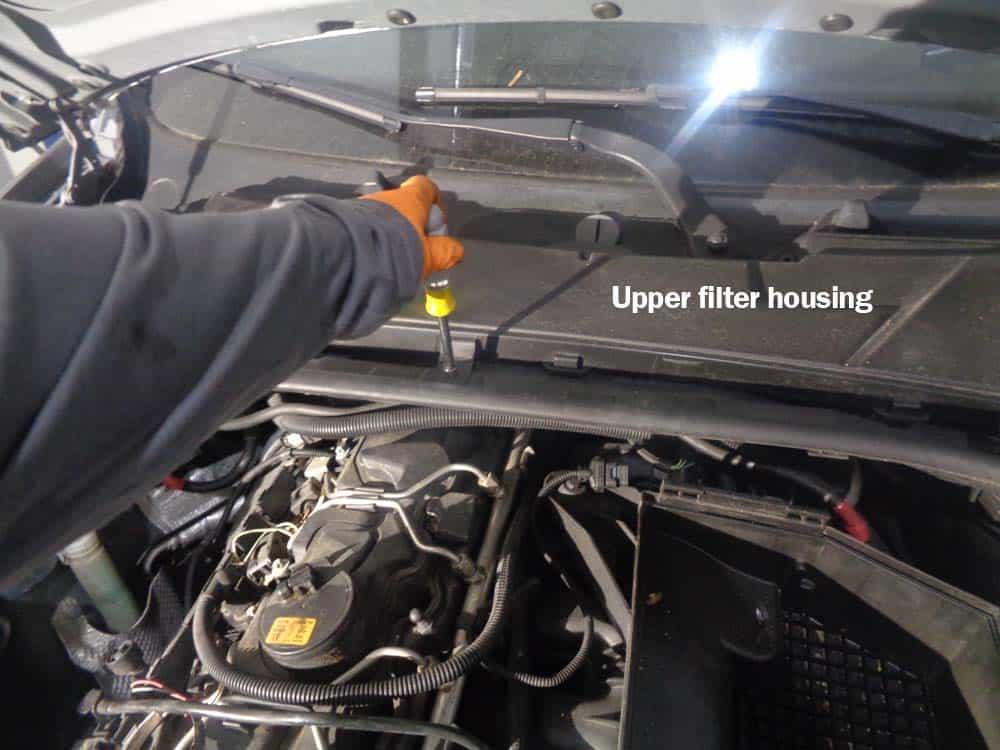
- Remove the five 8mm screws anchoring the upper filter housing. Remove upper filter housing from the vehicle.
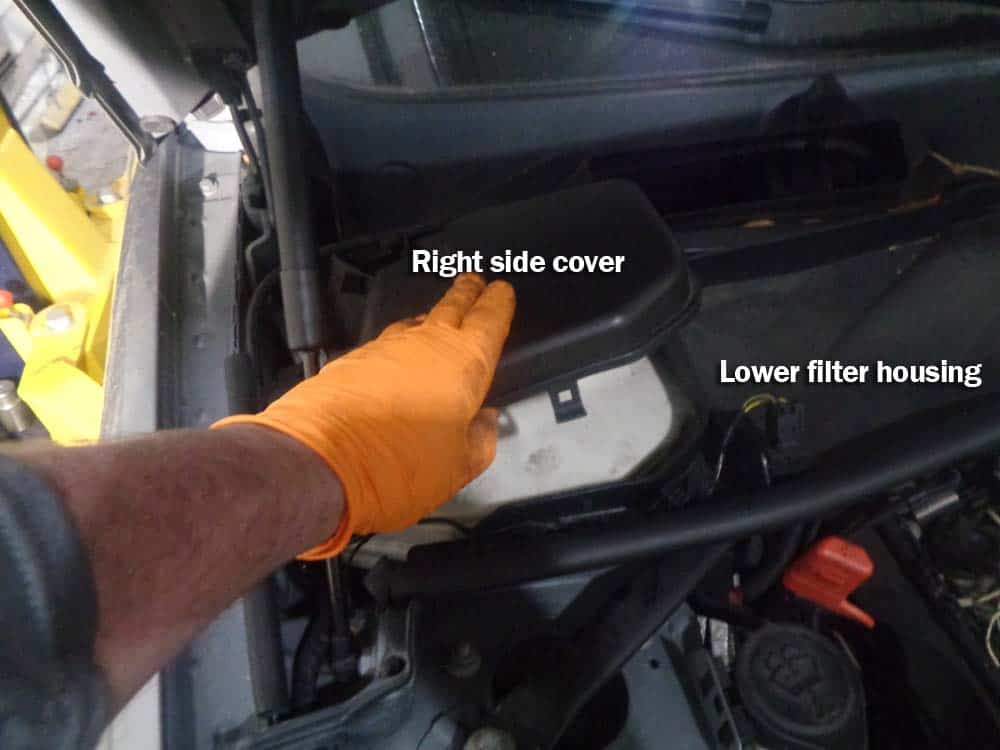
- Unsnap and remove the two side covers (both left and right) from the lower filter housing and remove them from the vehicle.
- Remove the right and left electrical connections from the lower filter housing.
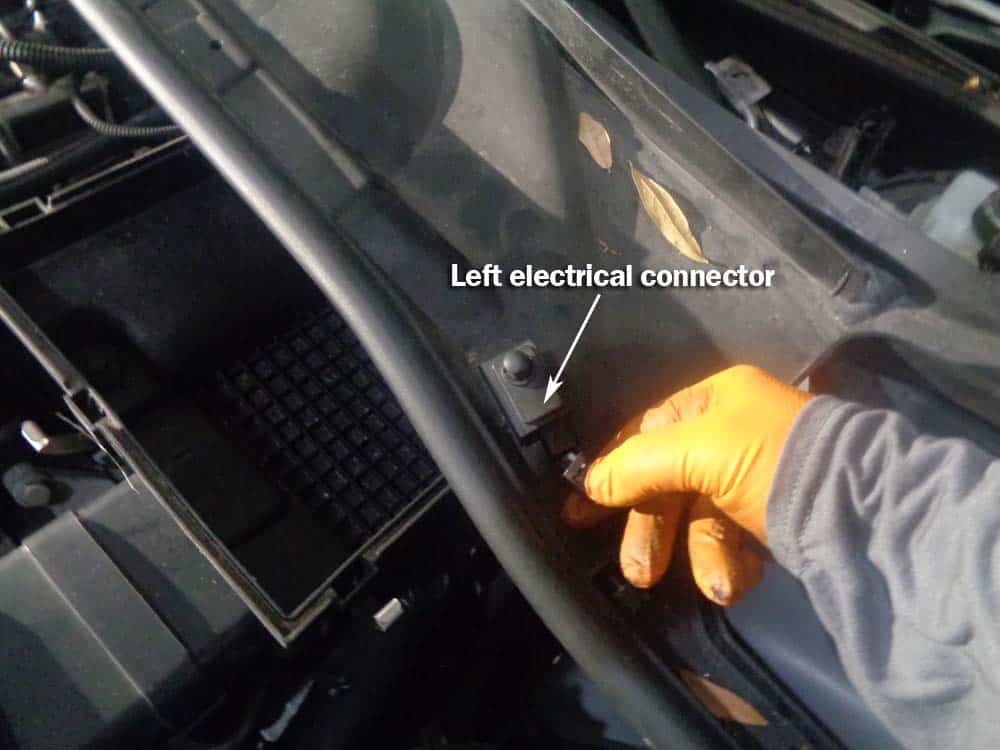
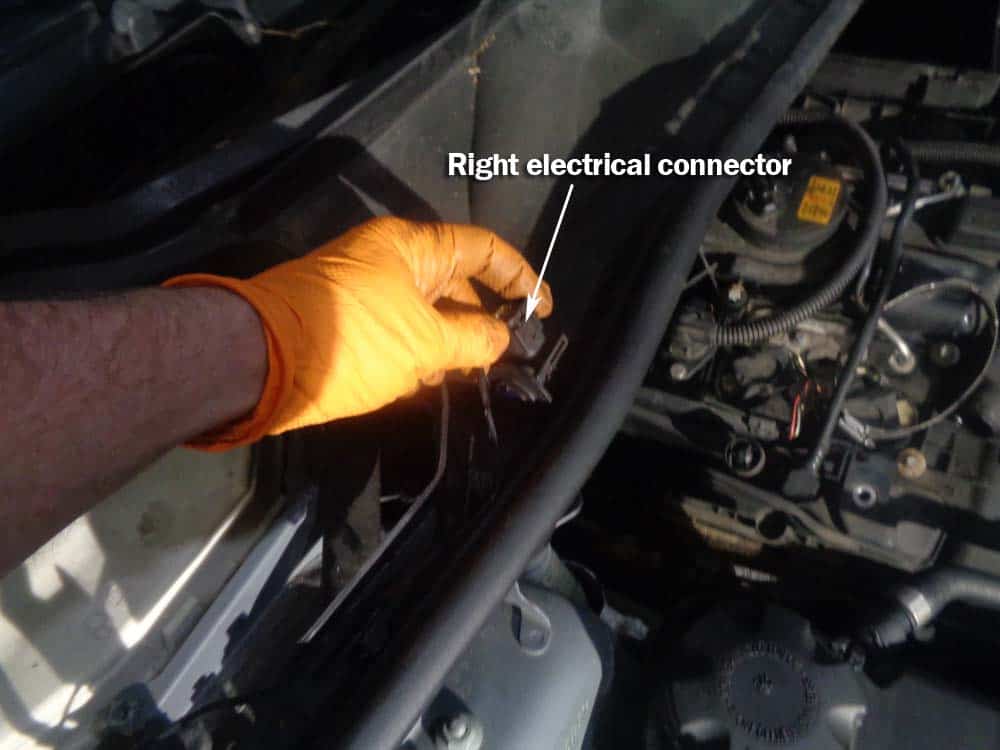
- Use an 8mm nut driver to remove the two screws anchoring the lower filter housing to the vehicle. There is a screw-on both the right (passenger) and left (drivers) side of the lower filter housing.
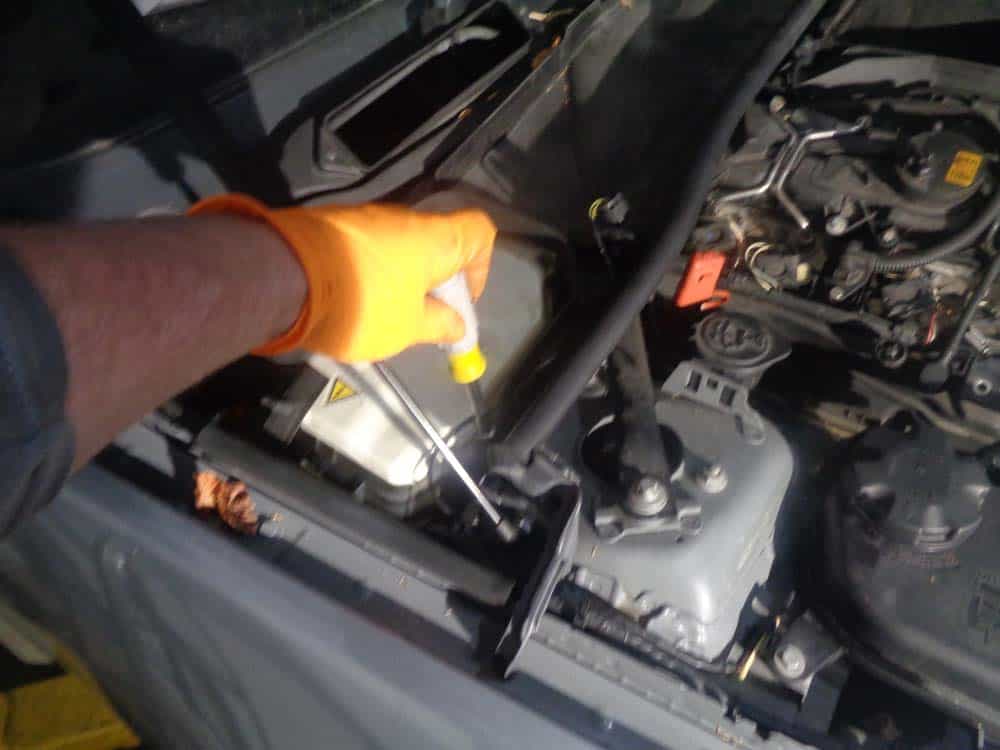
- Remove the lower filter housing from the vehicle.
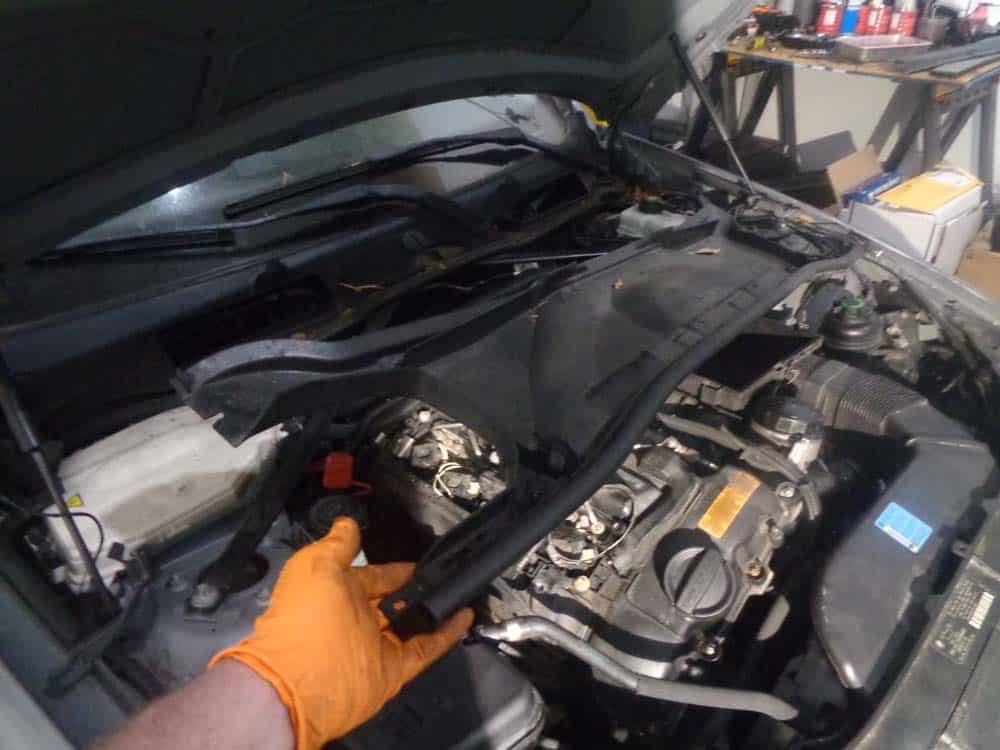
Section 2 - Intake Air Duct Removal
- Use a flat blade screwdriver to remove the Mass Air Flow (MAF) electrical connector from the front duct.
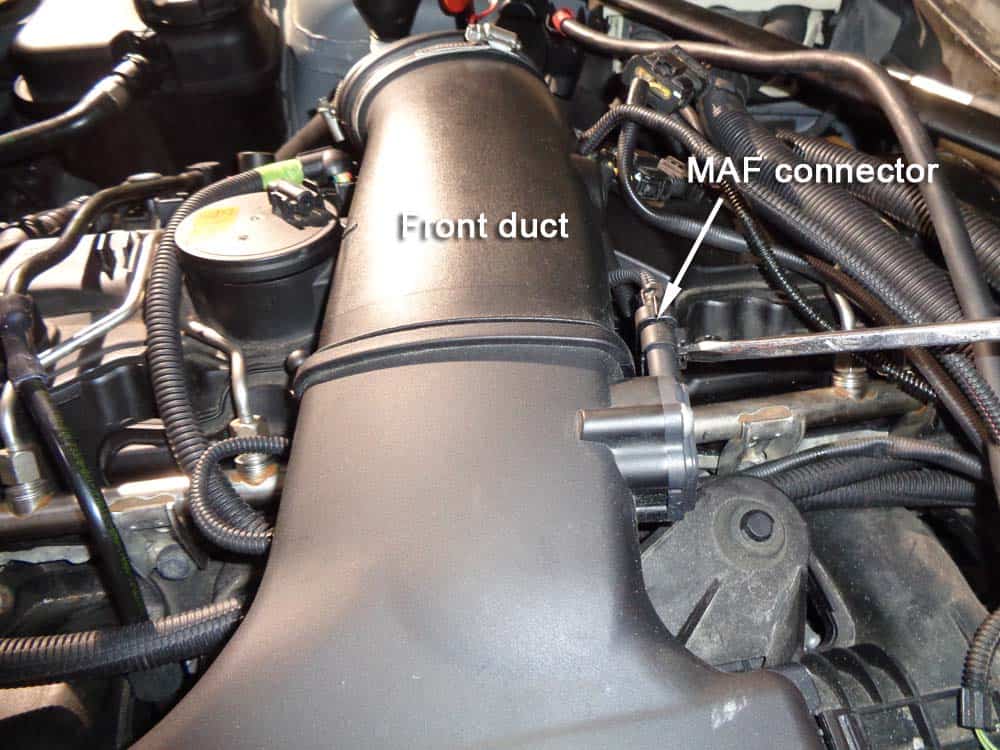
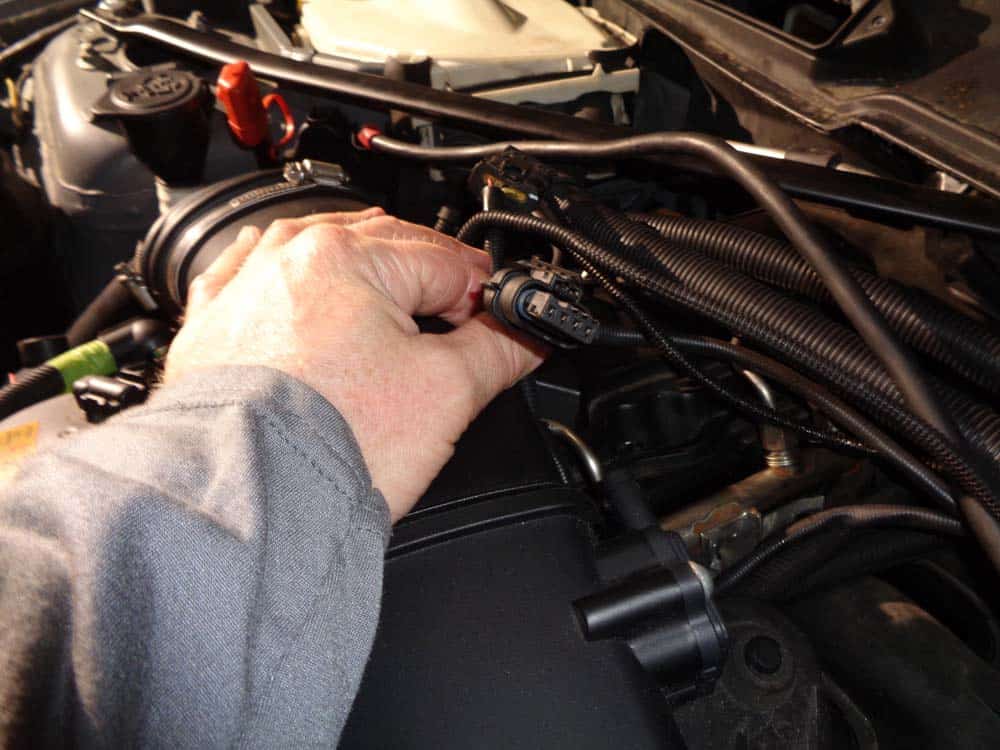
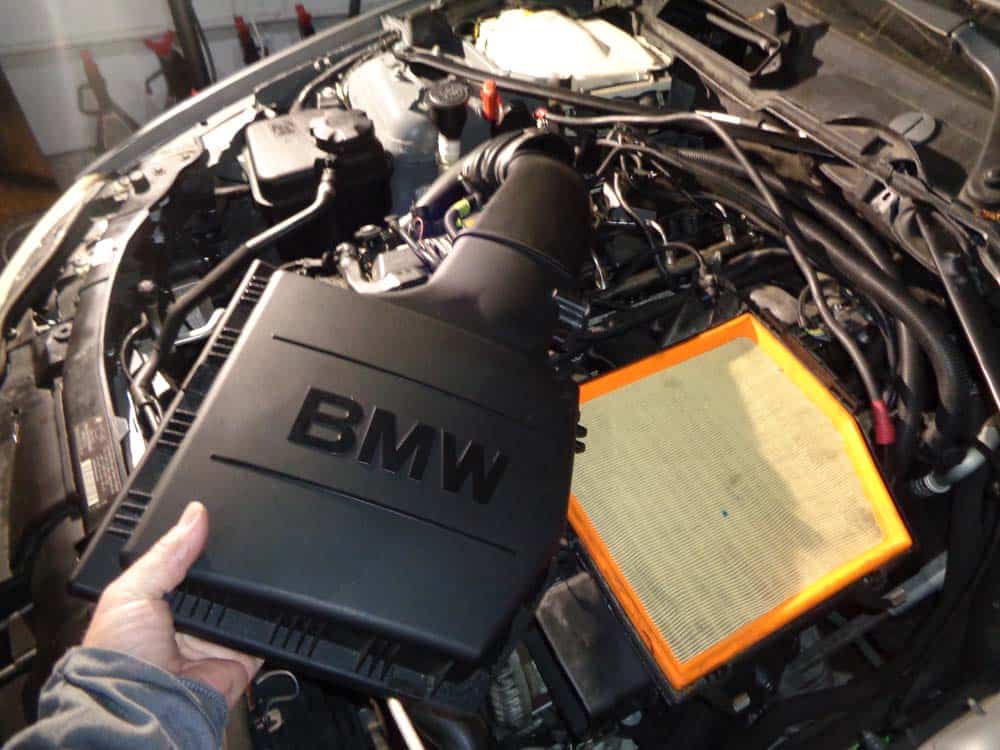
- Loosen hose clamp connecting air cleaner assembly to the front duct. Unclip the lid of the air cleaner assembly and remove it.
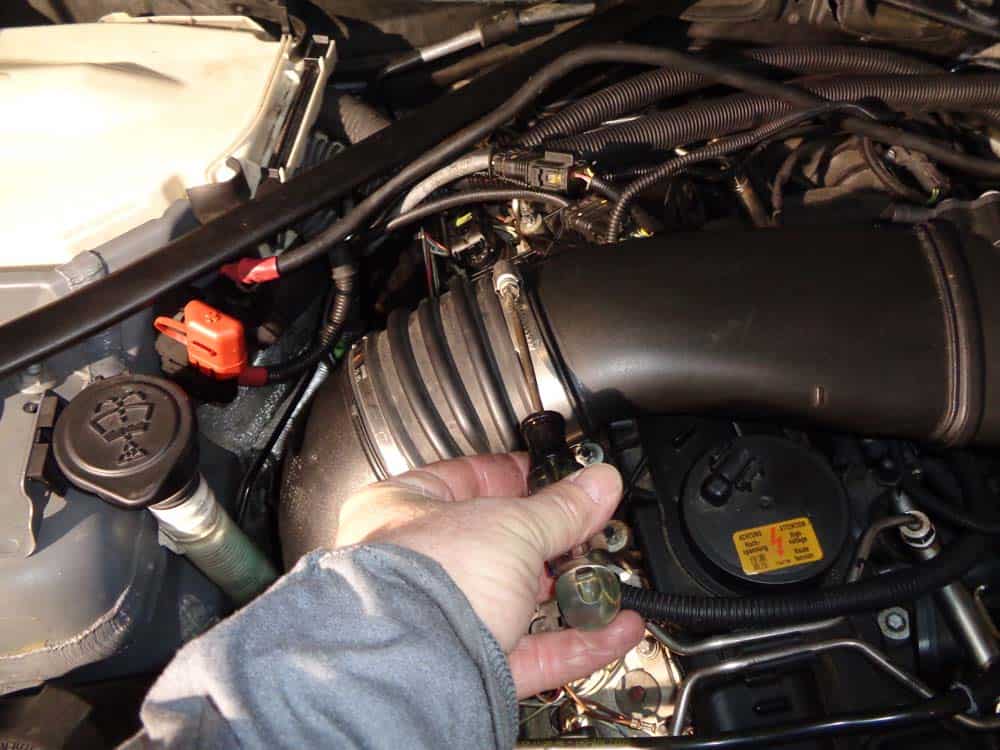
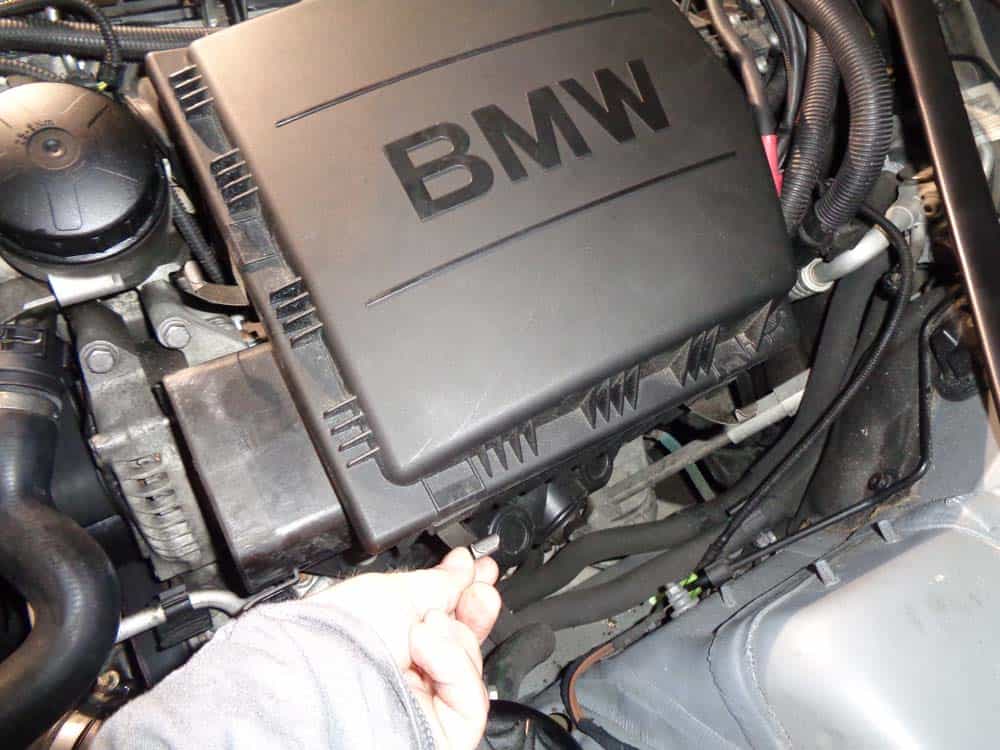
- Remove the 10mm bolt anchoring the top air duct assembly to the cylinder head.
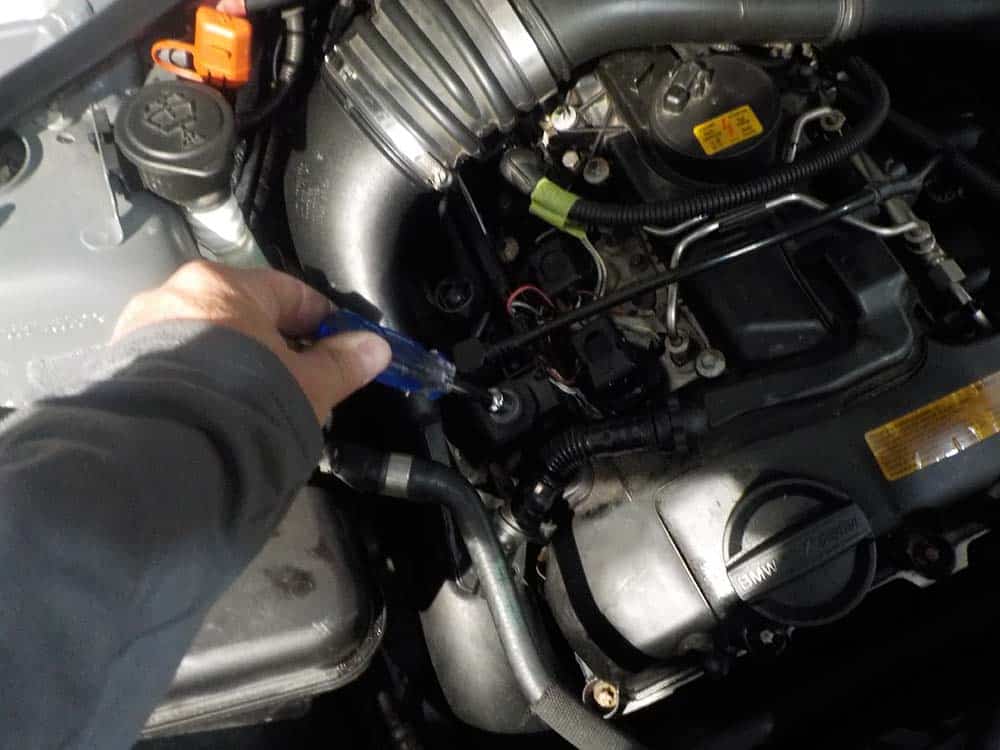
- Remove the electrical connector from the crankcase vent hose.
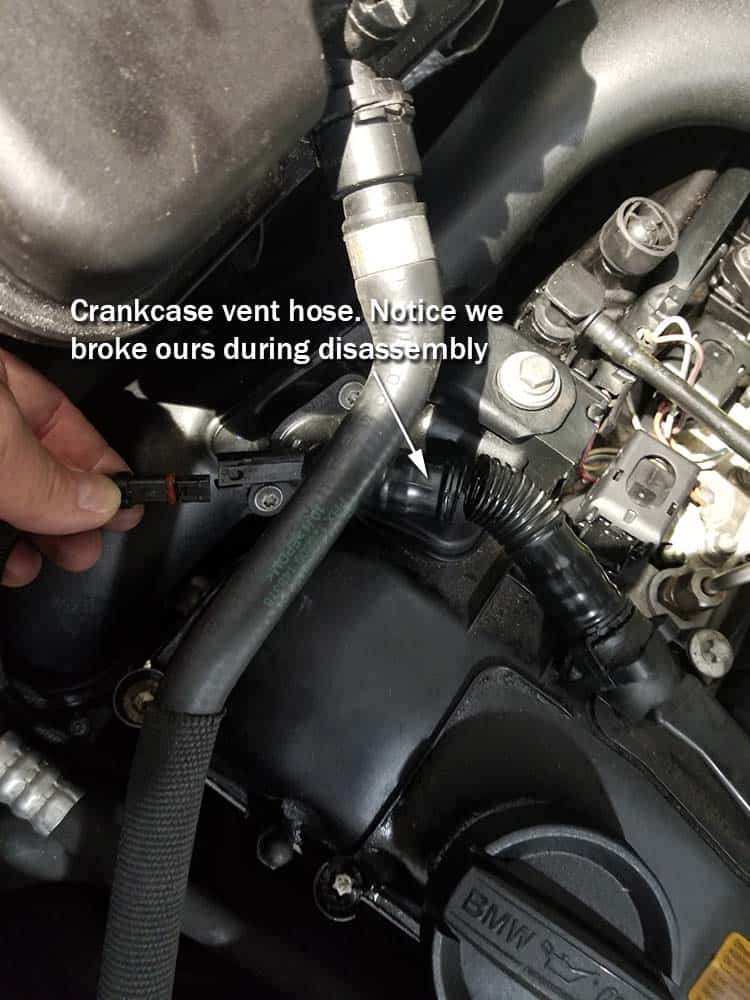
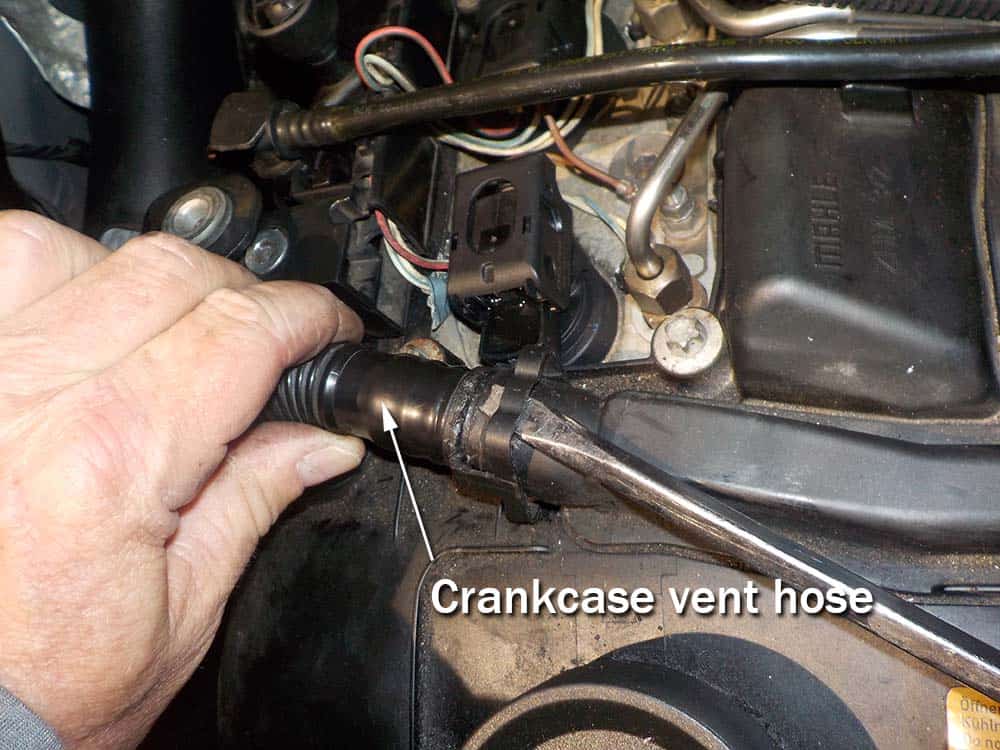
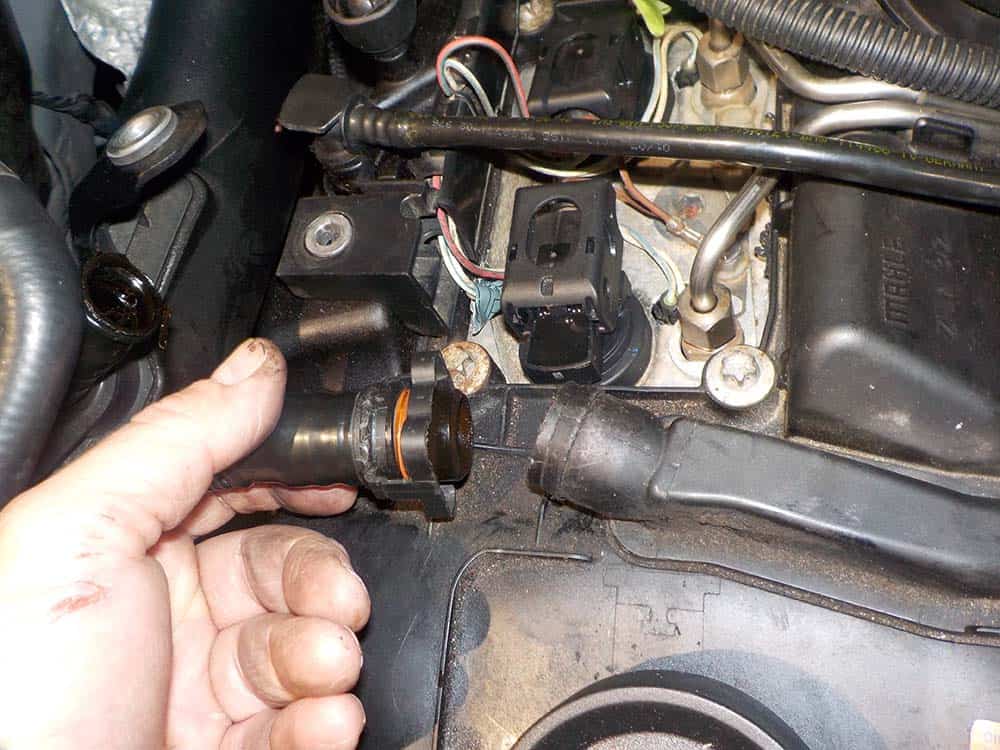
- Use a flat blade screwdriver to pry the crankcase vent hose off of it’s cylinder head connector. This part is made of stiff plastic that becomes very brittle with age, and is prone to breaking during removal. In fact you can see in the step 4 photo above we broke ours by accident. If you break your vent hose, click to reorder here (BMW part # 11127584128).
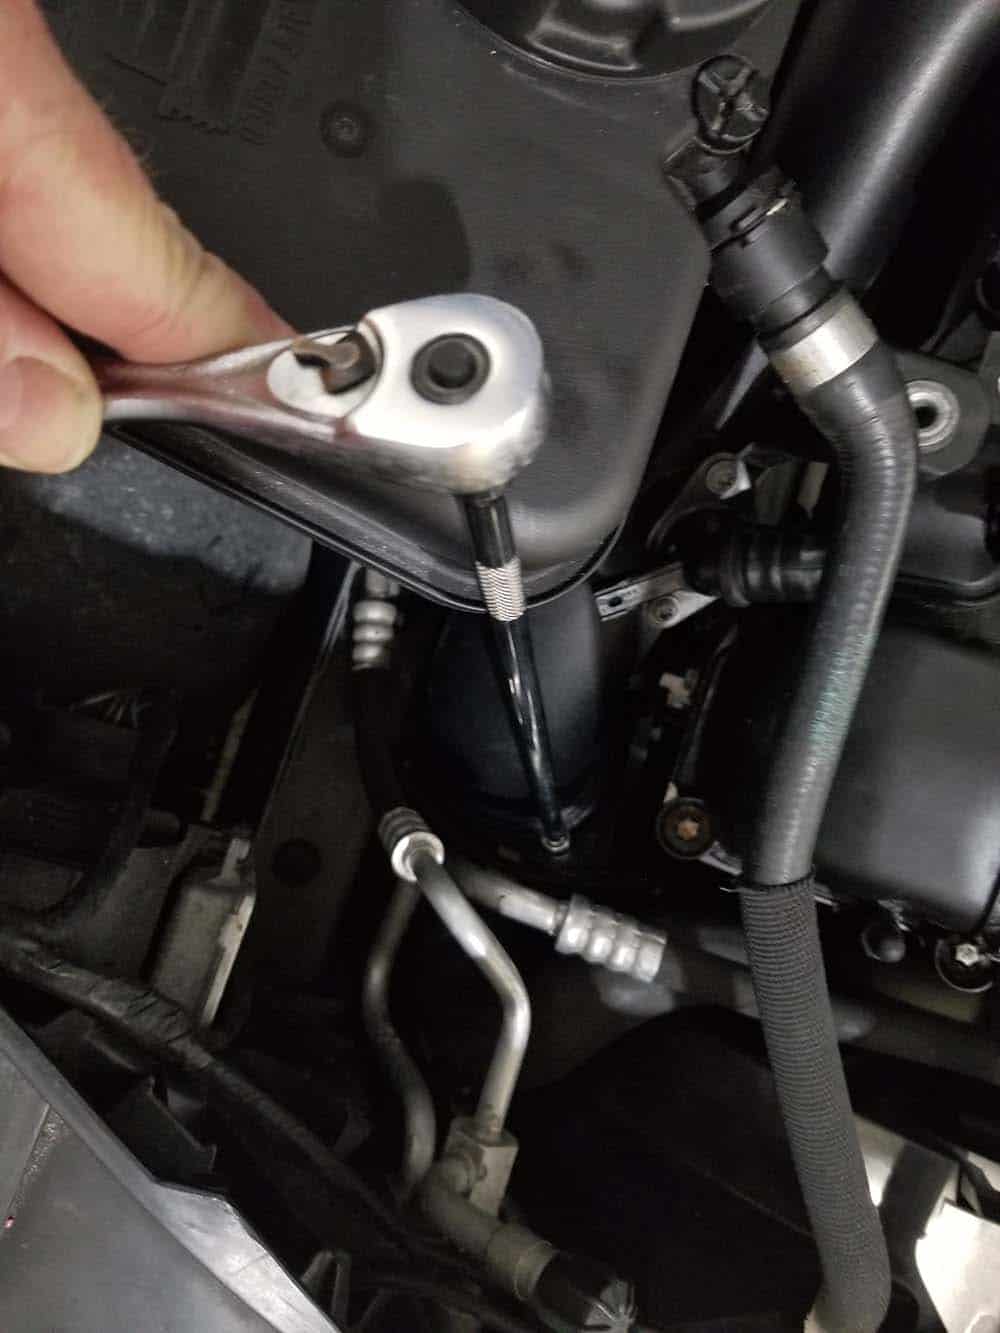
- Use a T25 torx bit on a long extension to remove the screw securing the air duct assembly to the bottom air duct. BE CAREFUL...don’t drop screw into engine.
- Remove the air duct assembly from engine.
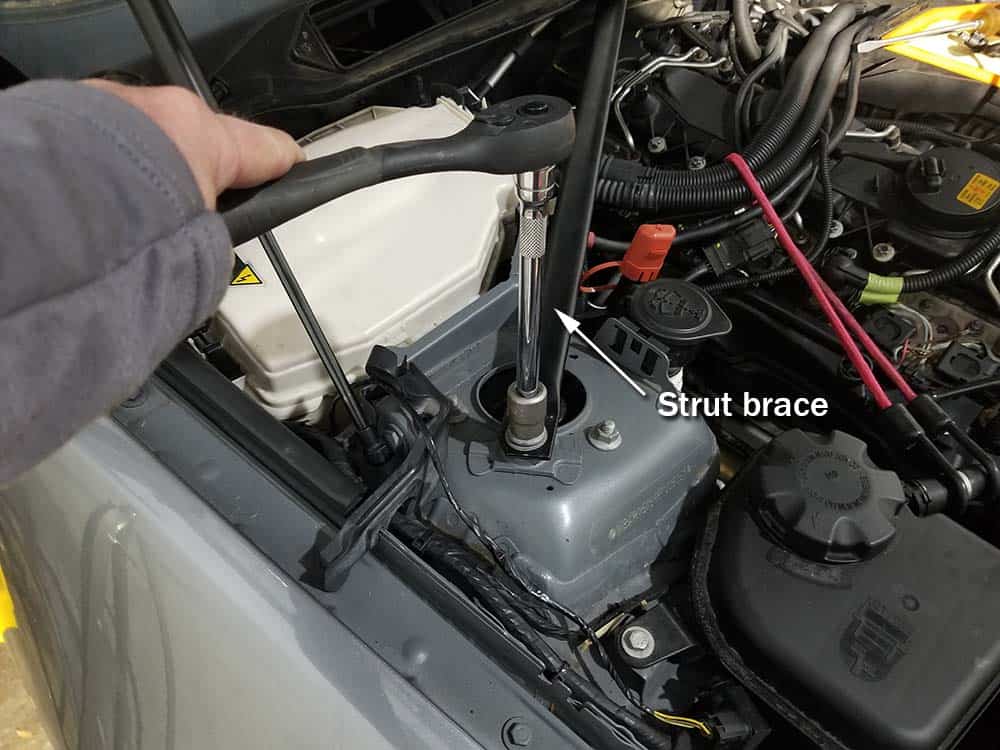
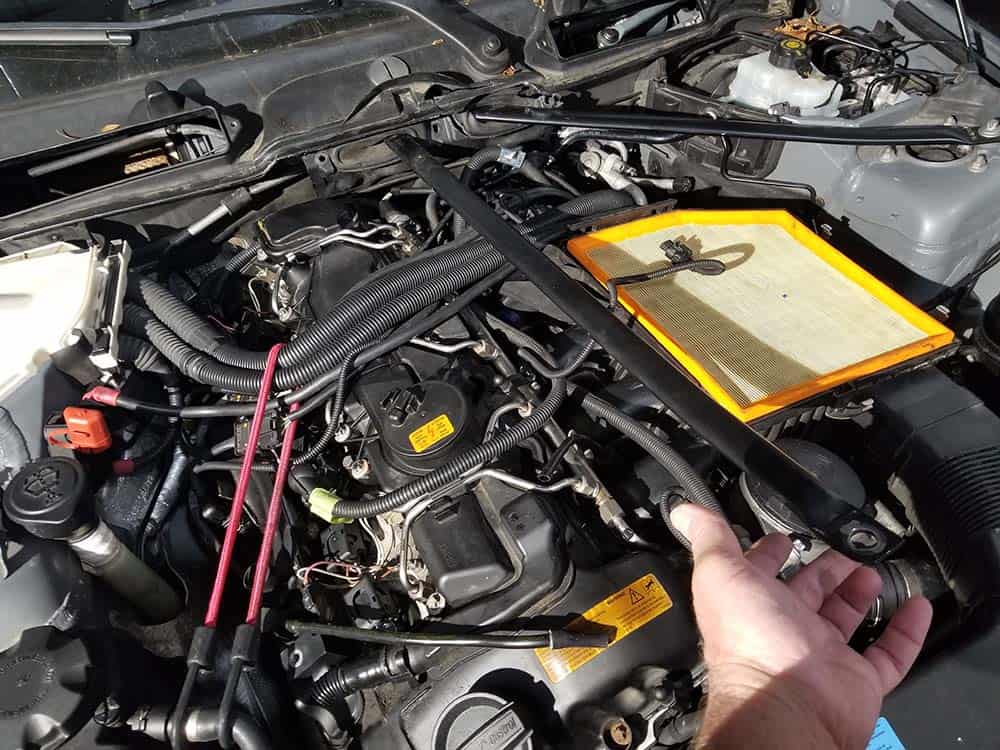
- Use an E16 external torx socket to remove the bolt securing the right strut brace to the vehicles body and pivot out of the way. This needs to be done to gain access to cylinder 5 and 6 fuel injectors.
Section 3 - Preparing for Fuel Injector Removal
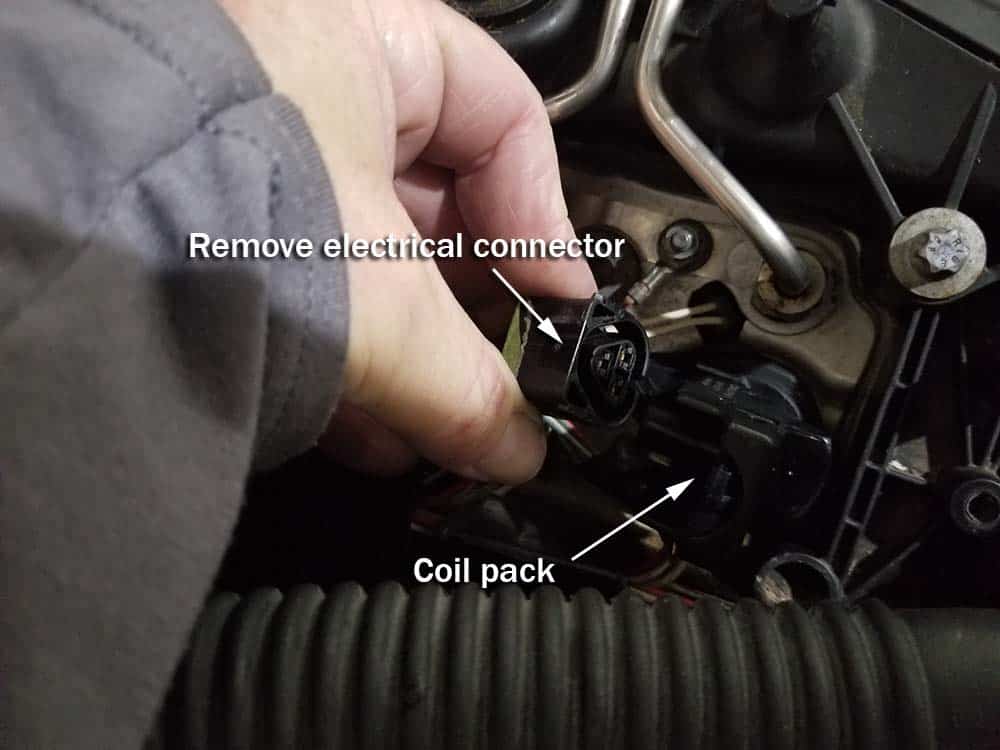
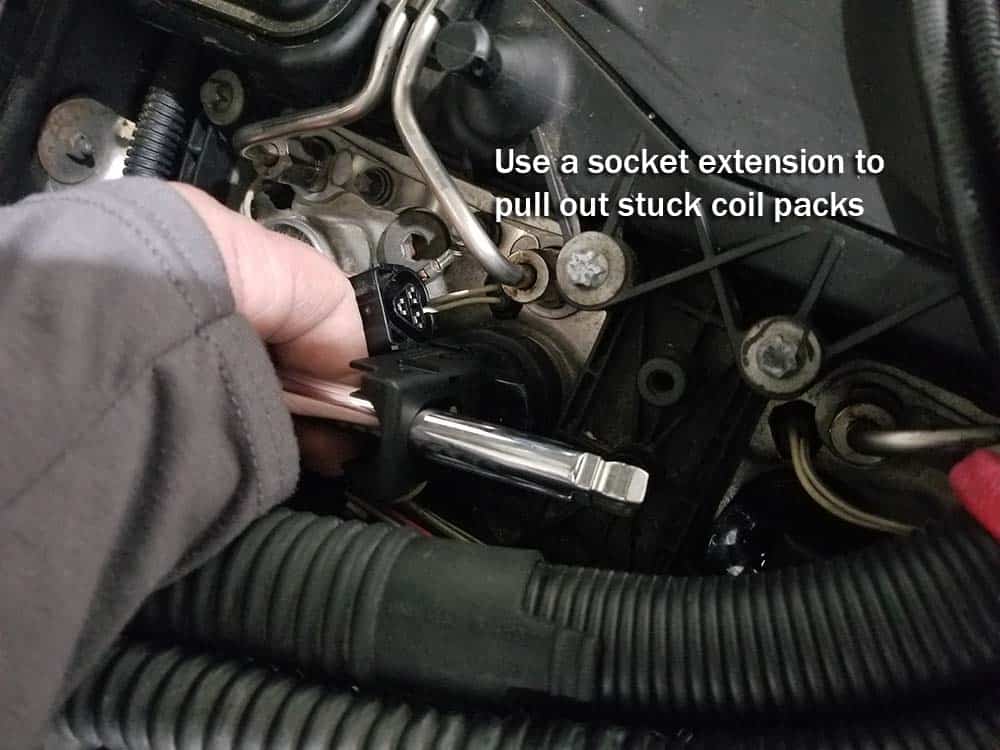
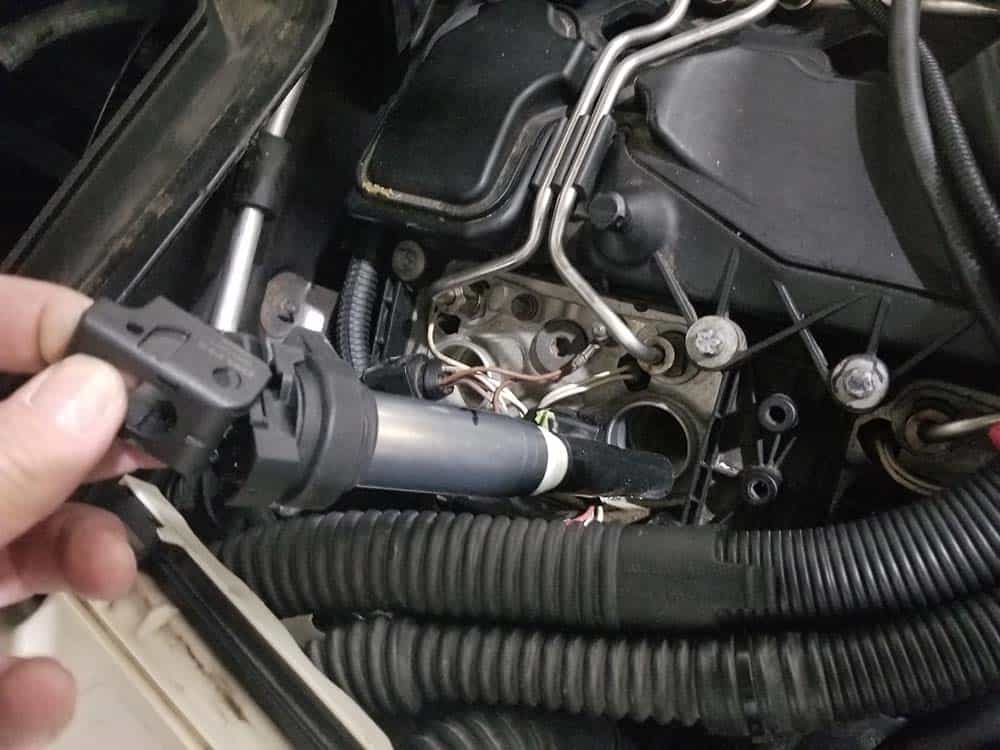
- Remove the ignition coil from the cylinder in which you are performing the fuel injector service by releasing the electrical connector and pulling it straight out of spark plug tube. Use a socket extension to help pull the coil out if it is stuck. Remove the ignition coil from the adjacent cylinder as well.
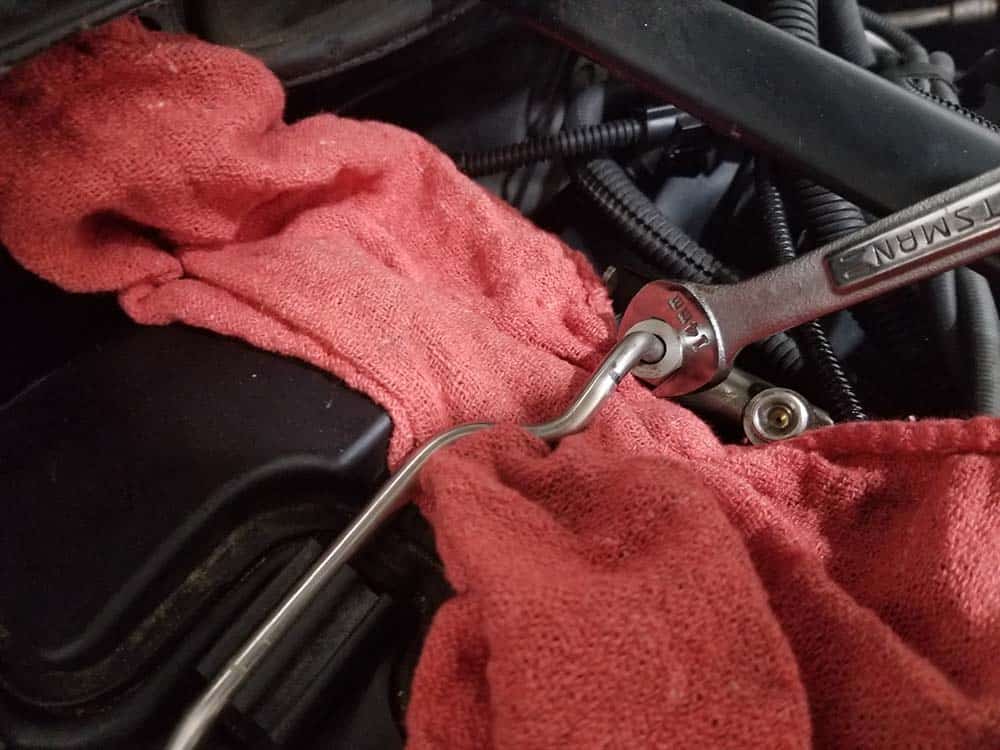
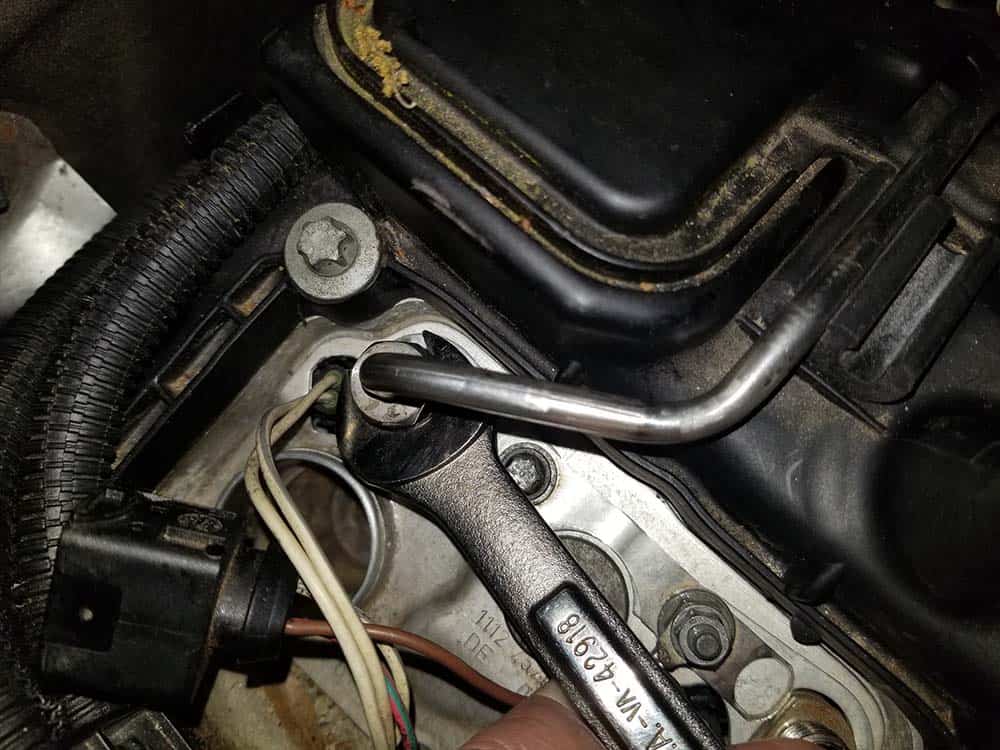
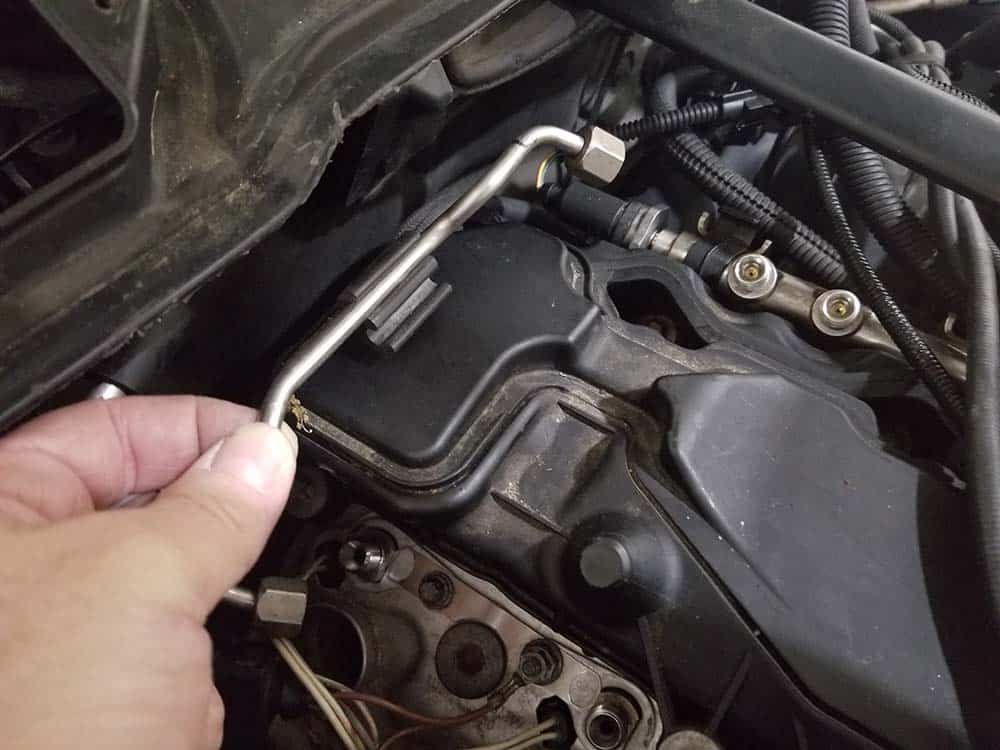
- Use a 14mm open end wrench to loosen the fuel line nuts on both cylinders. ***Fuel line may be under pressure. Have a rag ready to catch any fuel that may be ejected from fuel line. Remove fuel lines from engine.
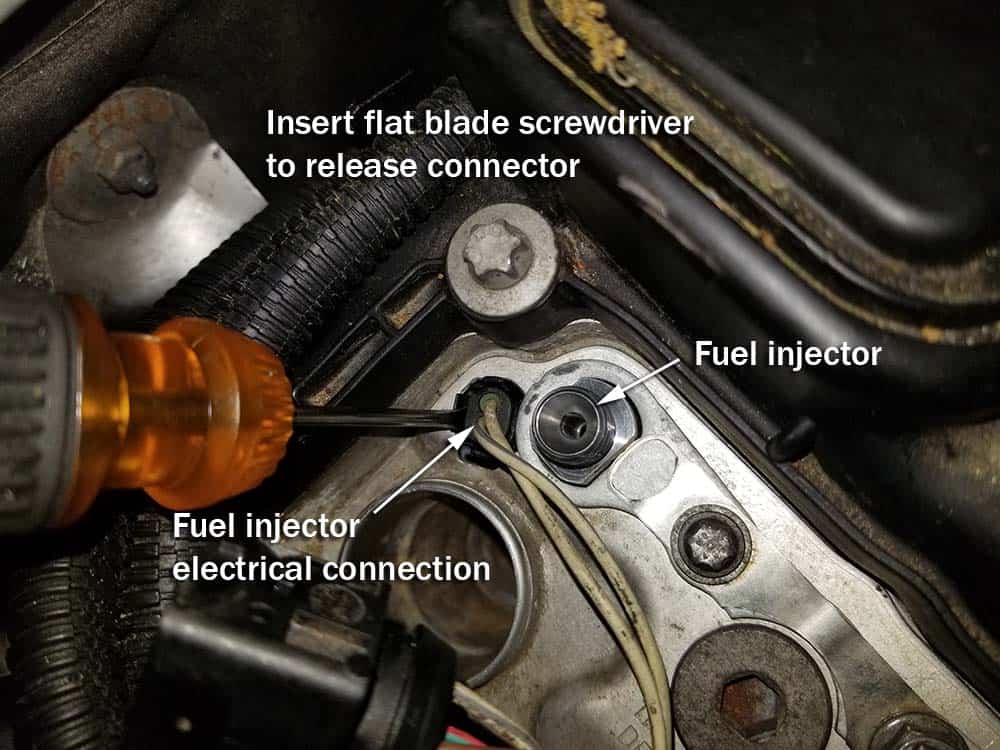
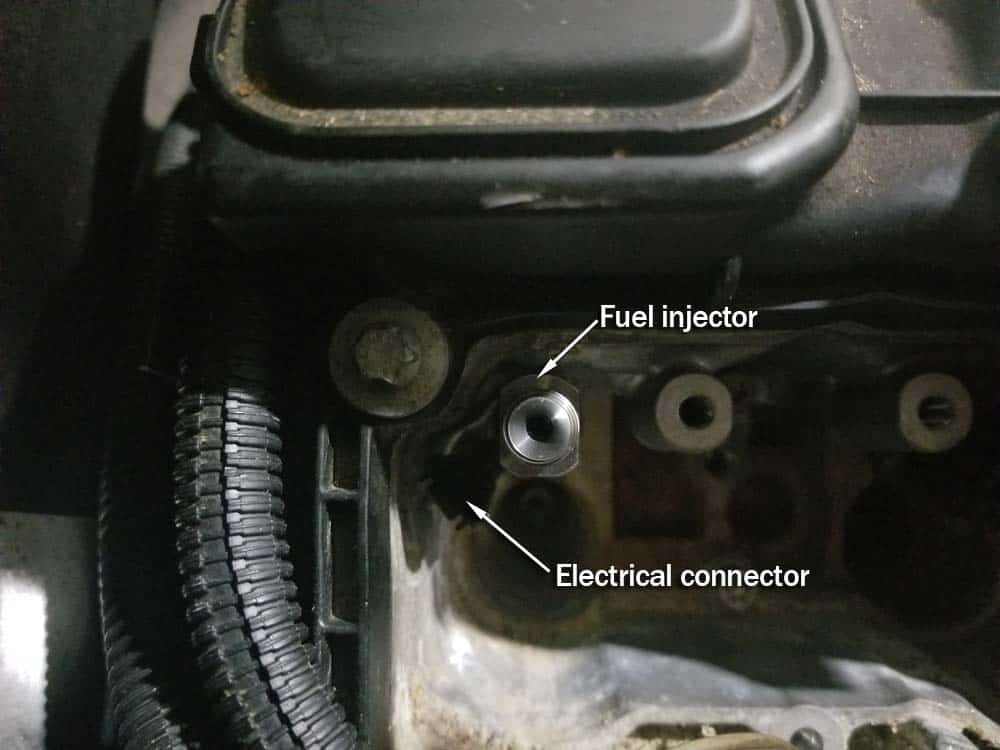
- Remove both fuel injector electrical connectors. These connectors can be tricky to remove. Insert a small flat blade screw driver down the left side of the connector and it will release and pull straight out (see image below). DO NOT try and pull out with force...you will break the connector and hence be in a world of sh!t.
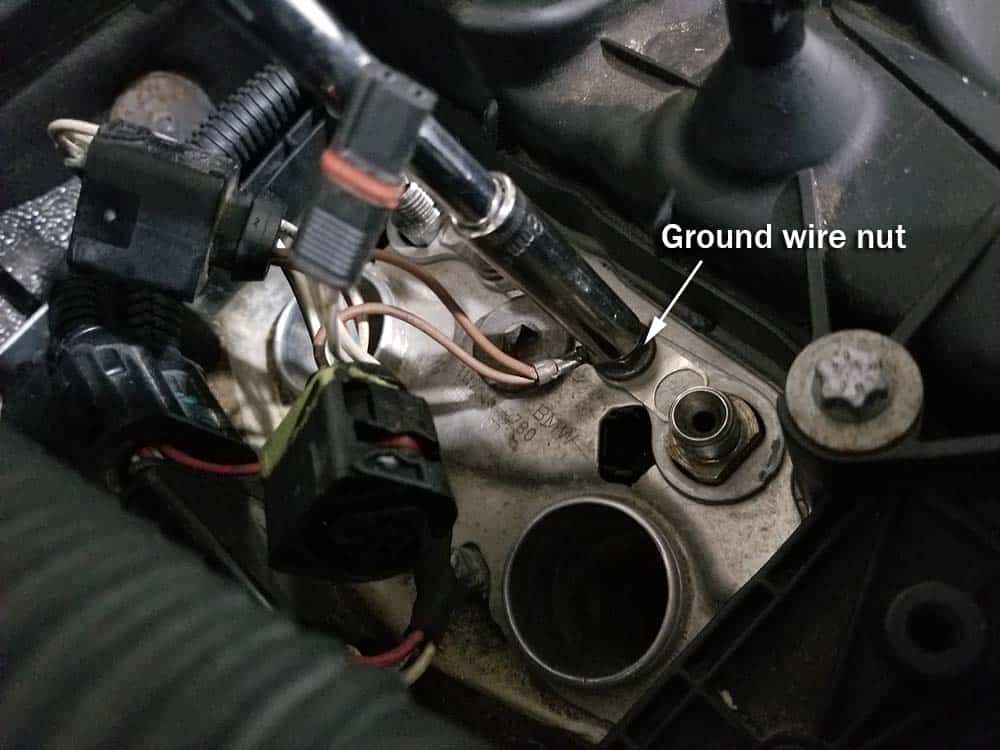
- Use an 8mm socket to remove the ground wire nut. Remove ground wire from cylinder head.
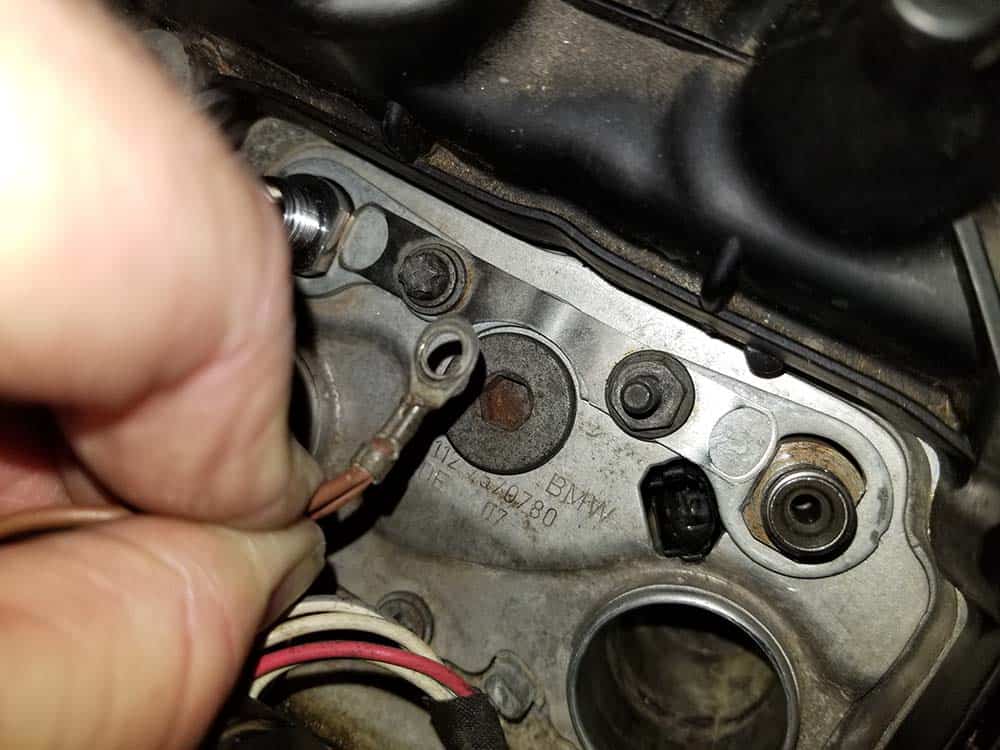
- Optional step - Remove the inspection screw plug using an 8mm hex socket. This is a completely optional step, and has no bearing on completing this repair. It is simply an inspection hole that is used to view the injector slot during routine maintenance. We like to remove it so we can lubricate the threads in the event it needs to be used at a later date to inspect the injectors.
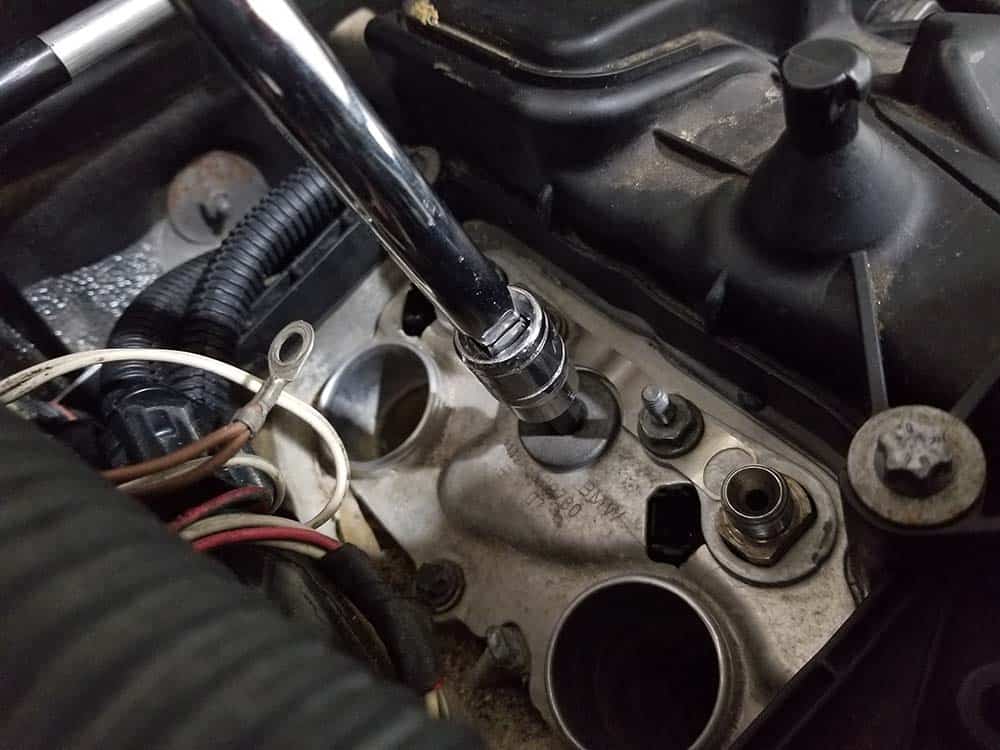
- Use a deep 8mm socket to remove the front bolt securing the support bridge to the engine.
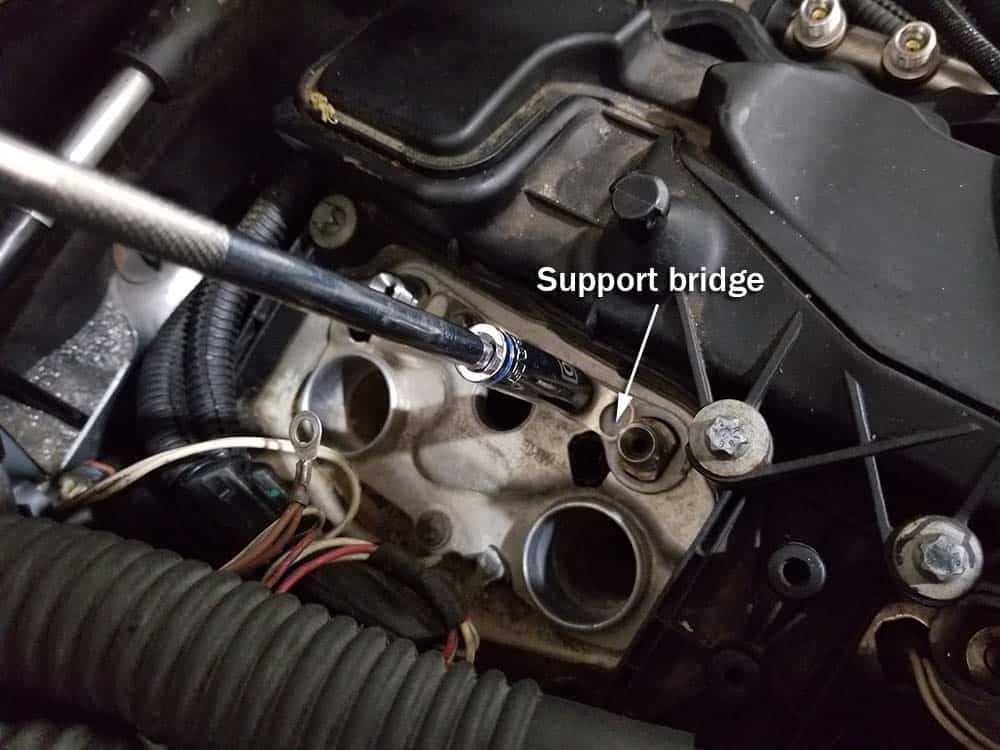
- Use an E8 external torx socket to remove the rear bolt securing the support bridge to the engine.
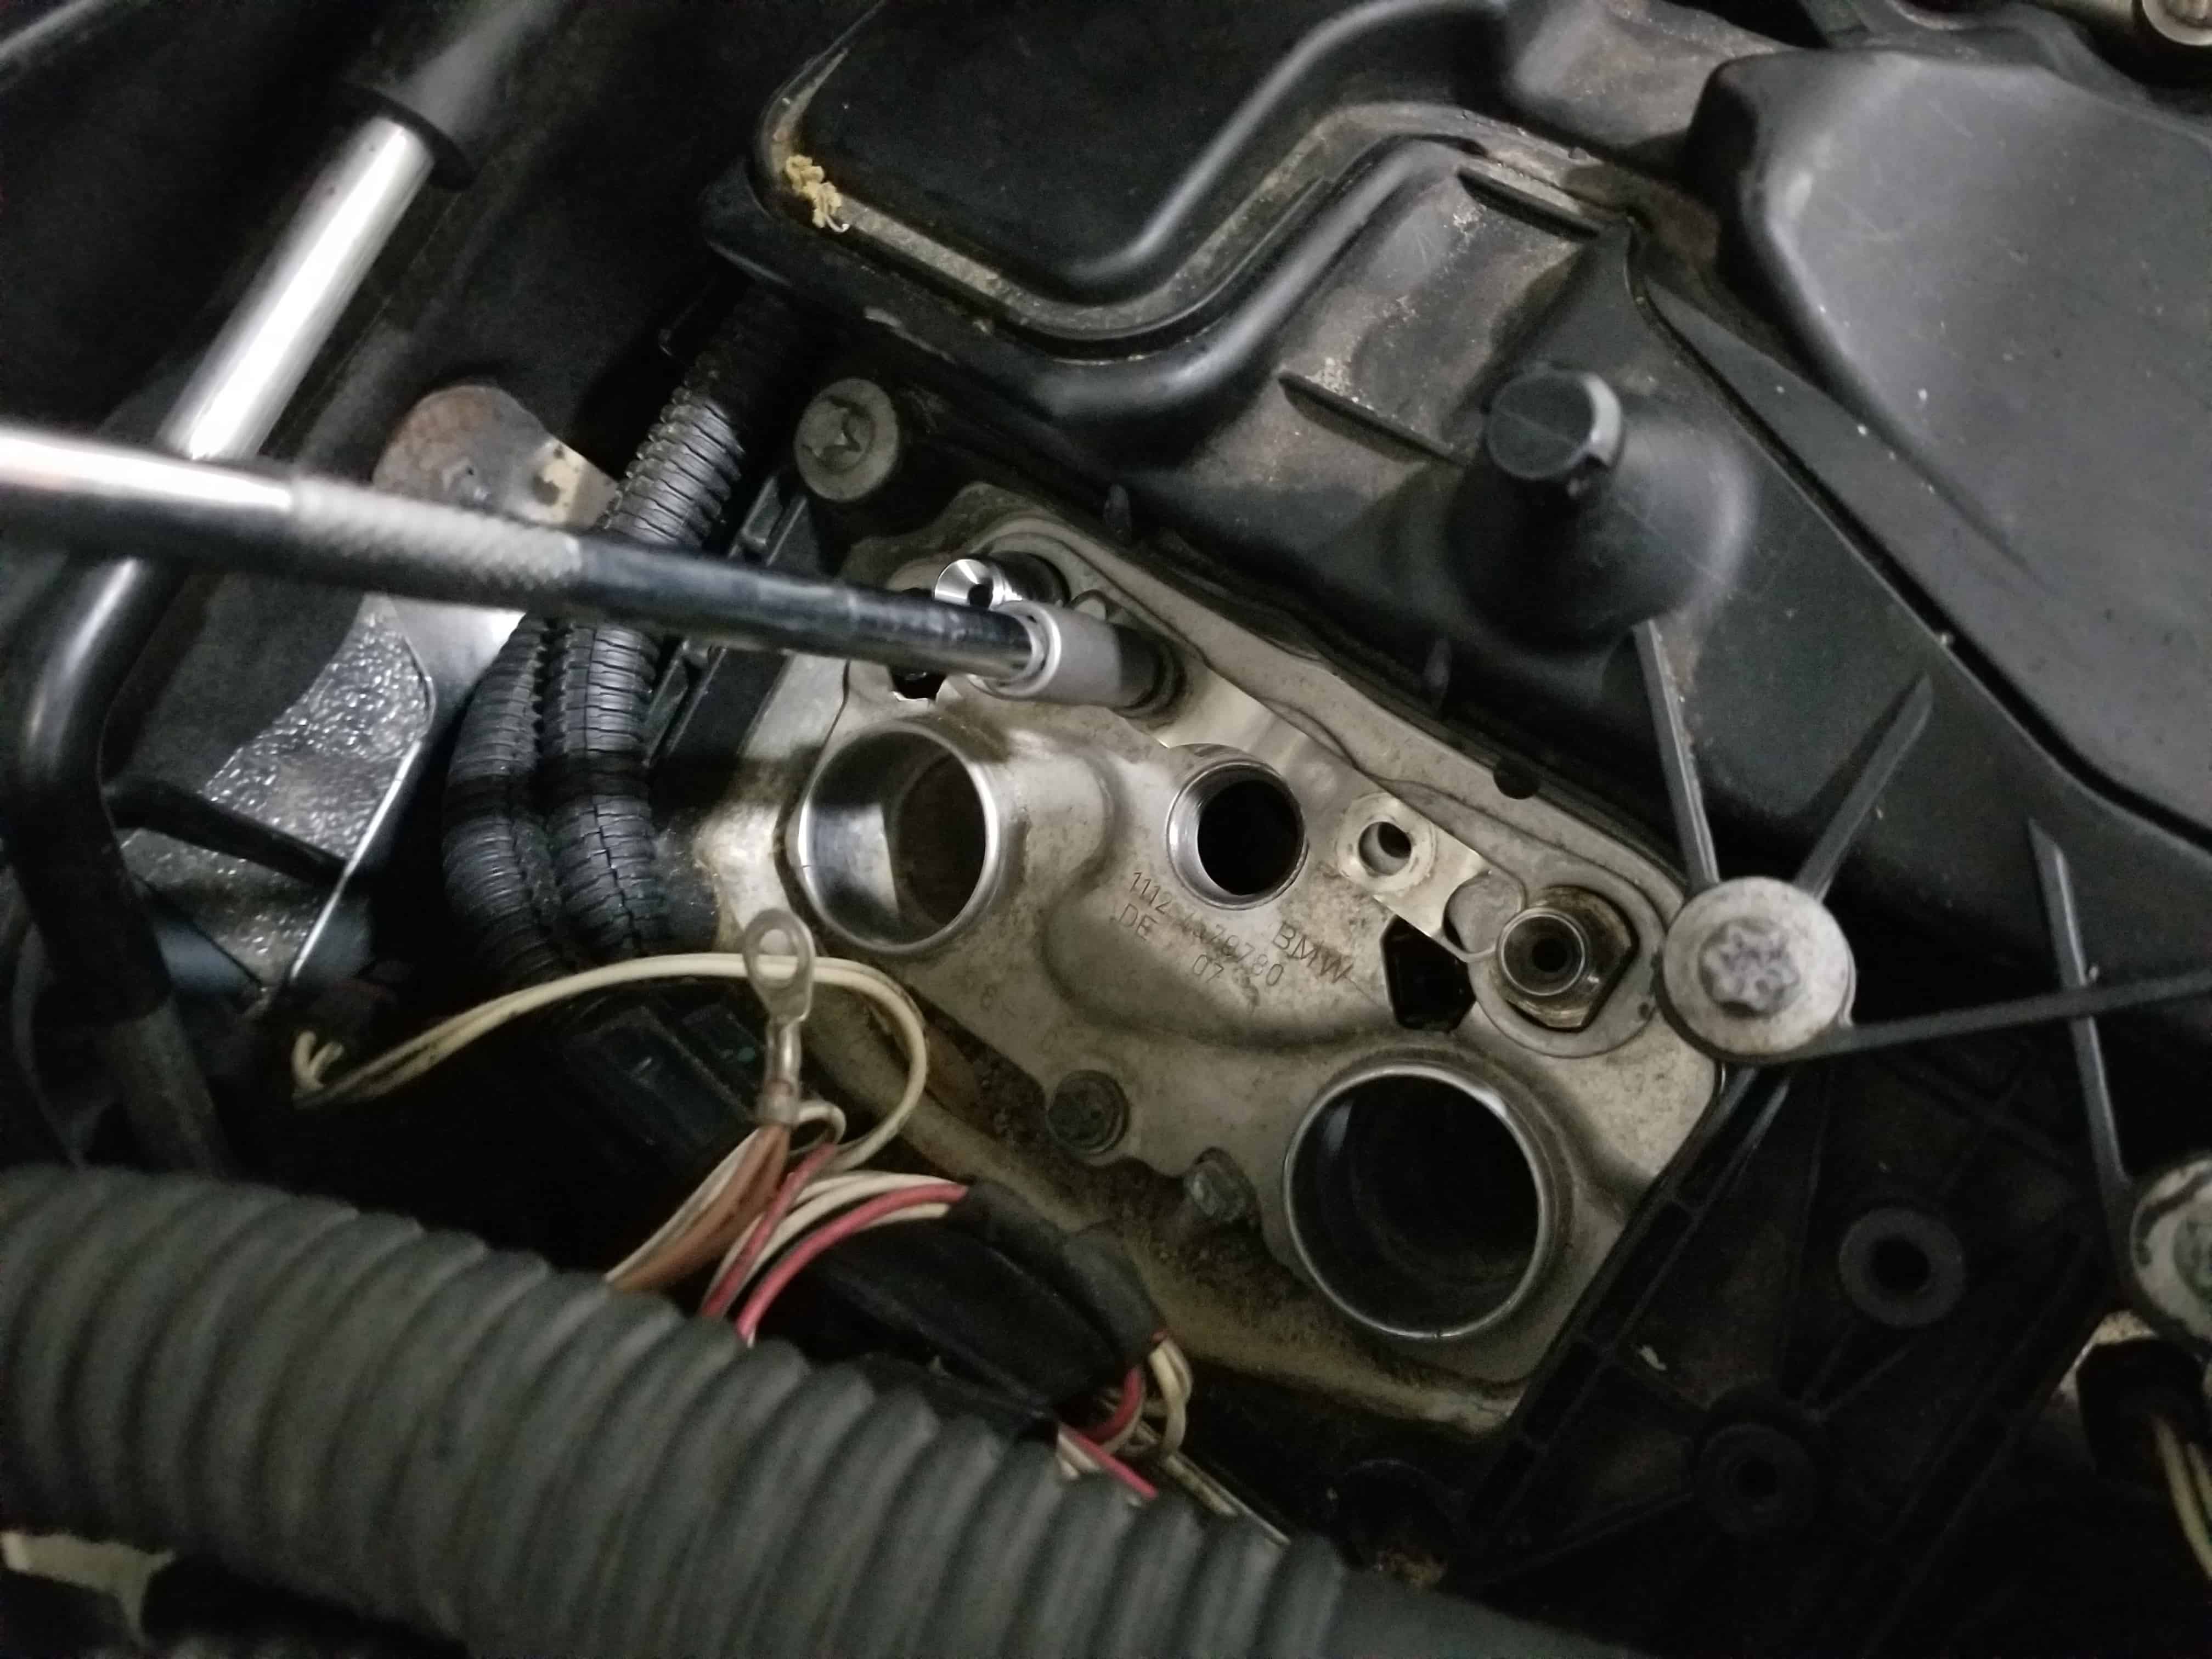
- Use the E8 external socket to also remove the lower bolt securing the injector cover plate to the engine.

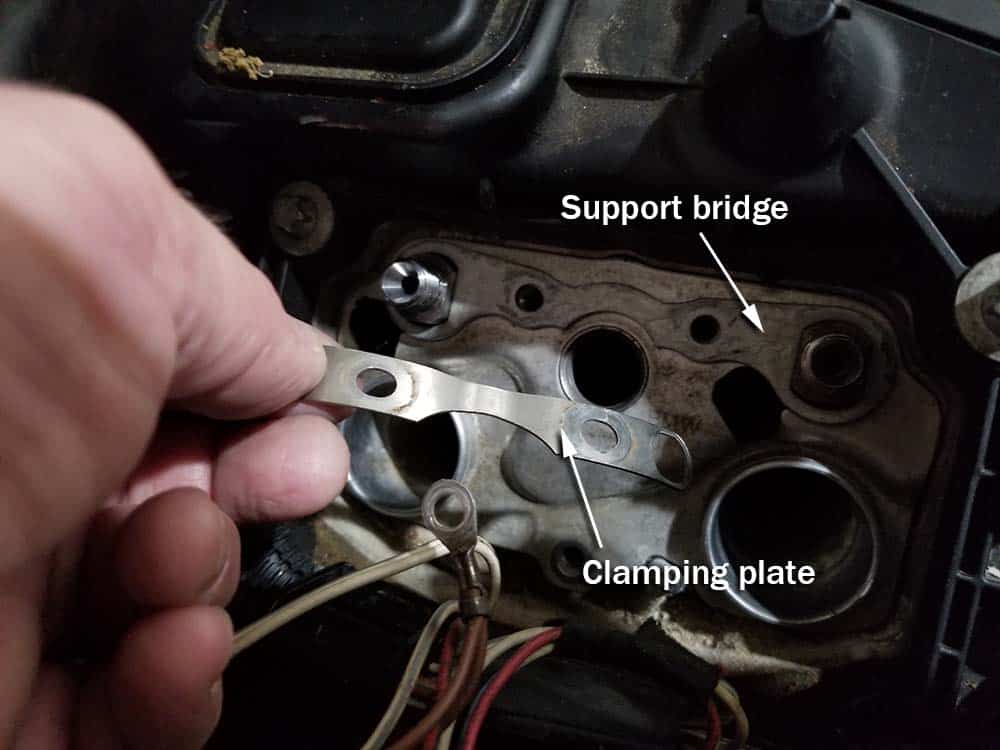
- Remove the clamping plate and the support bridge from the engine.
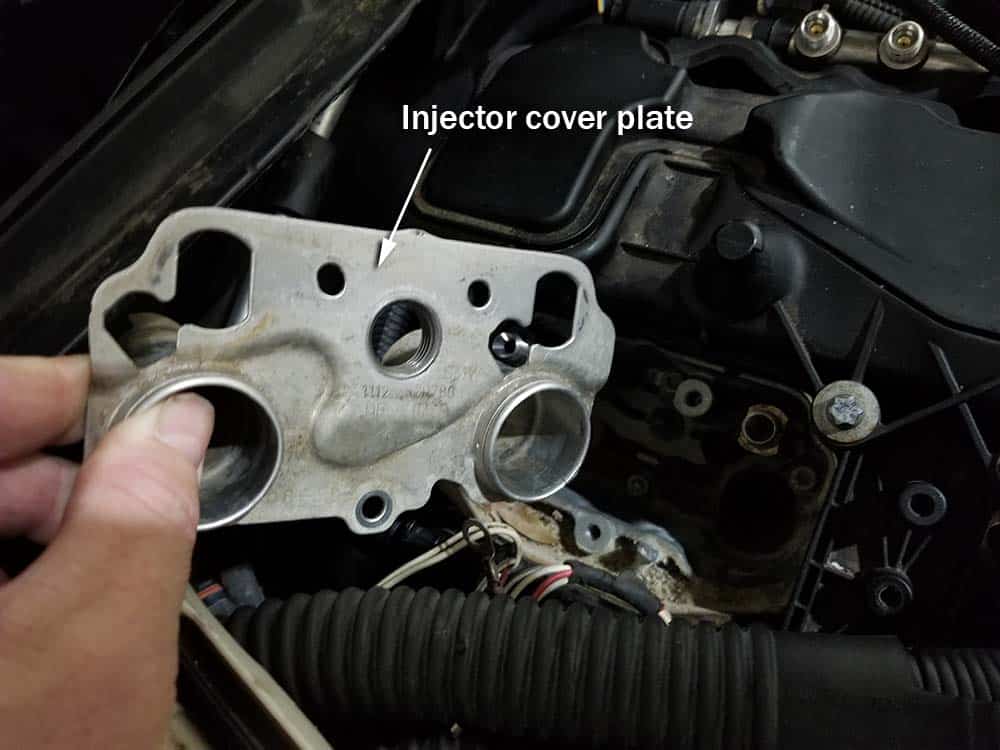
- Remove the injector cover plate from the engine.
- Using an E10 external torx socket, remove the bolt securing the bottom hold down bracket to the cylinder head.
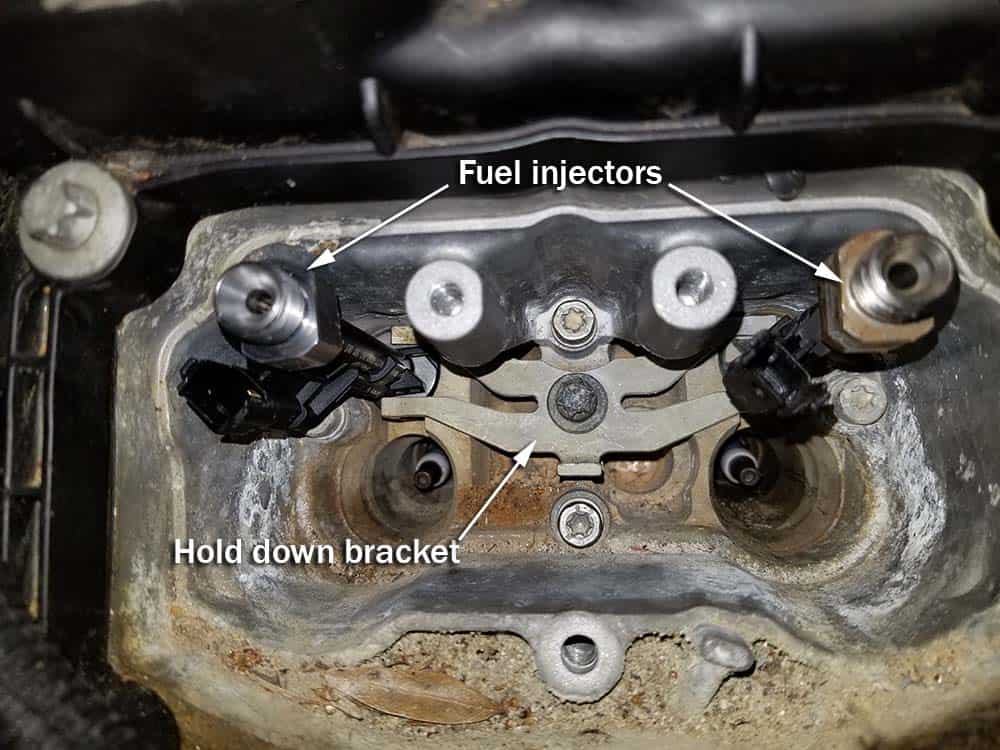
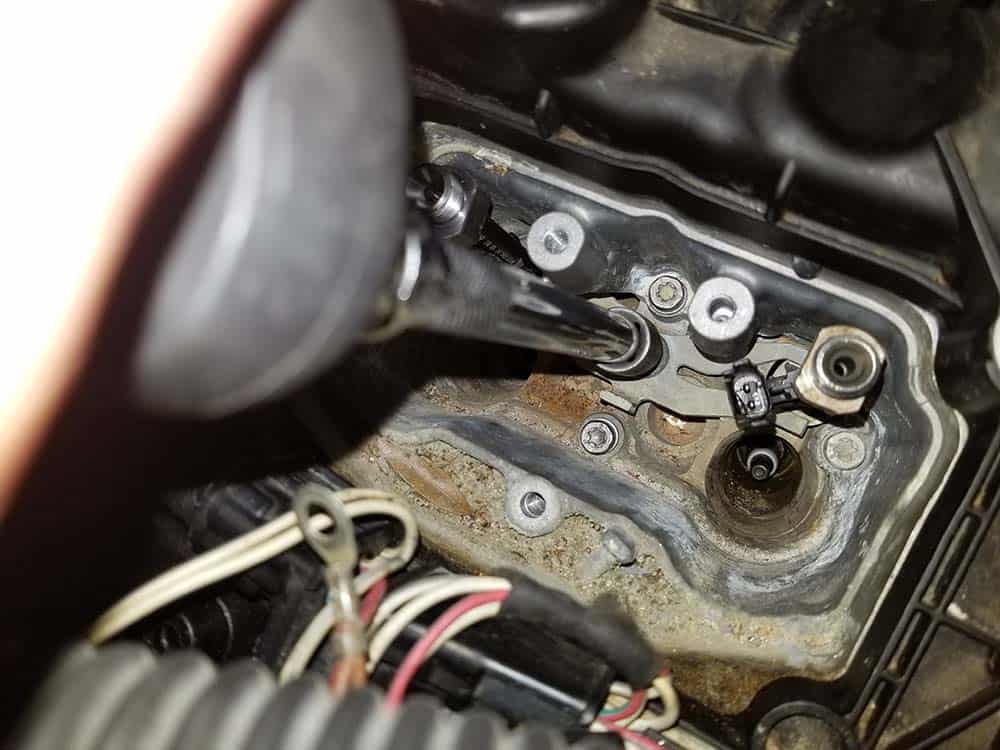
- Use a pair of long nose pliers to extract the bottom hold down bracket from engine. It’s a bit tricky so use patience...you have to tilt the bracket to coax it out from around the fuel injectors.
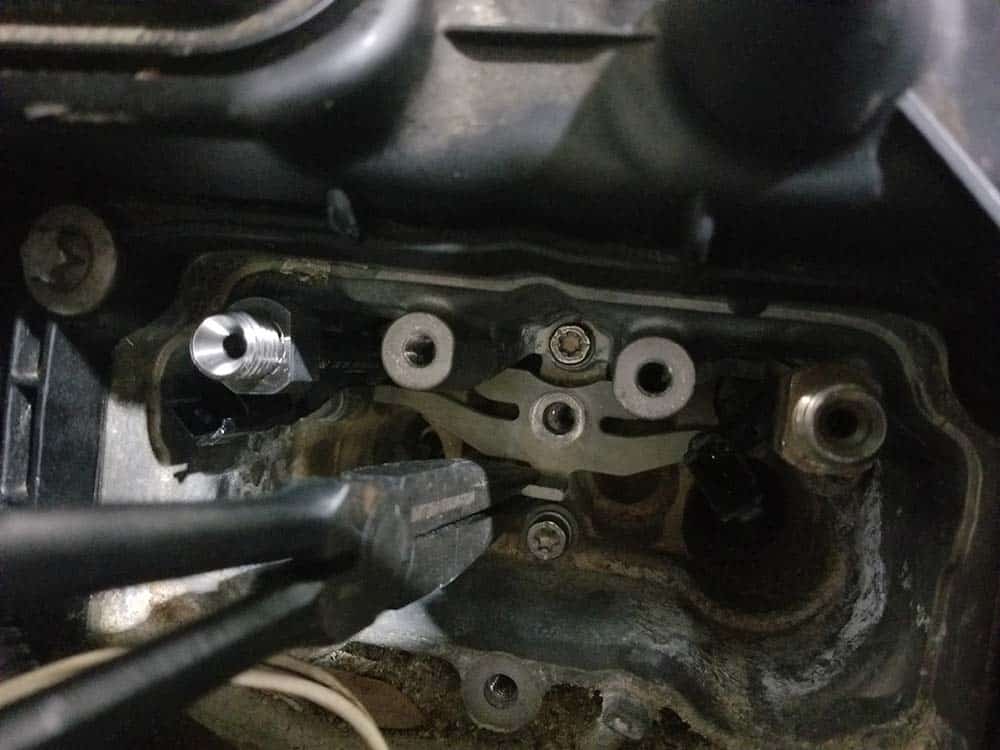
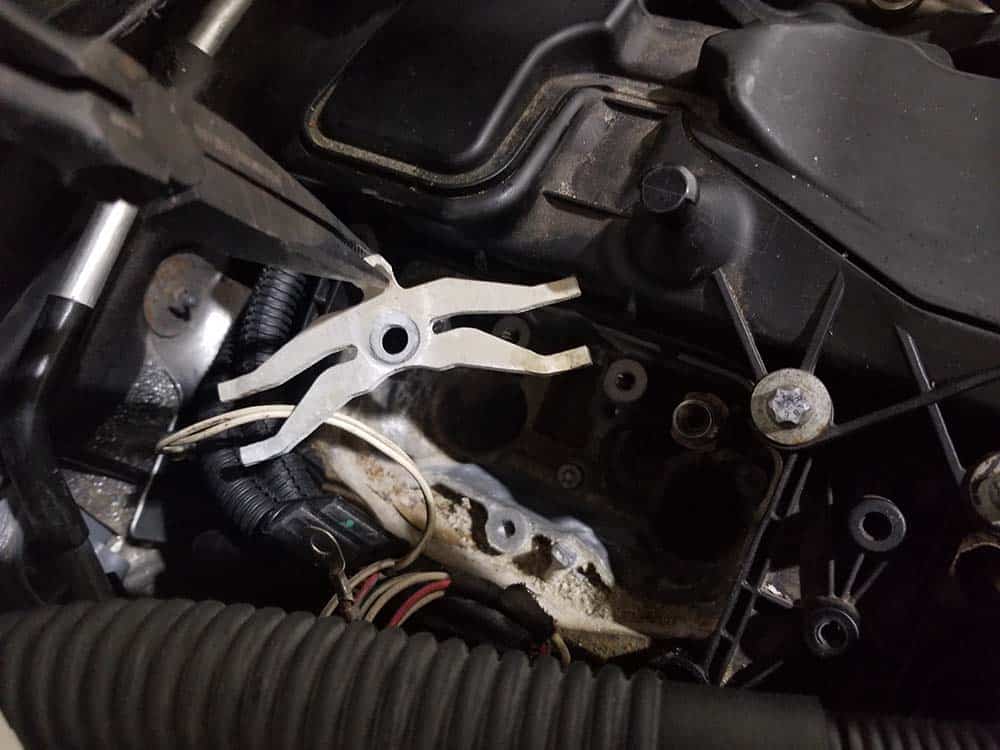
Section 4 - Removing and Installing Fuel Injectors
Please watch the following video on how to remove and install your fuel injectors using the N55 fuel injector tool. We have also included written instructions with photos after the video. 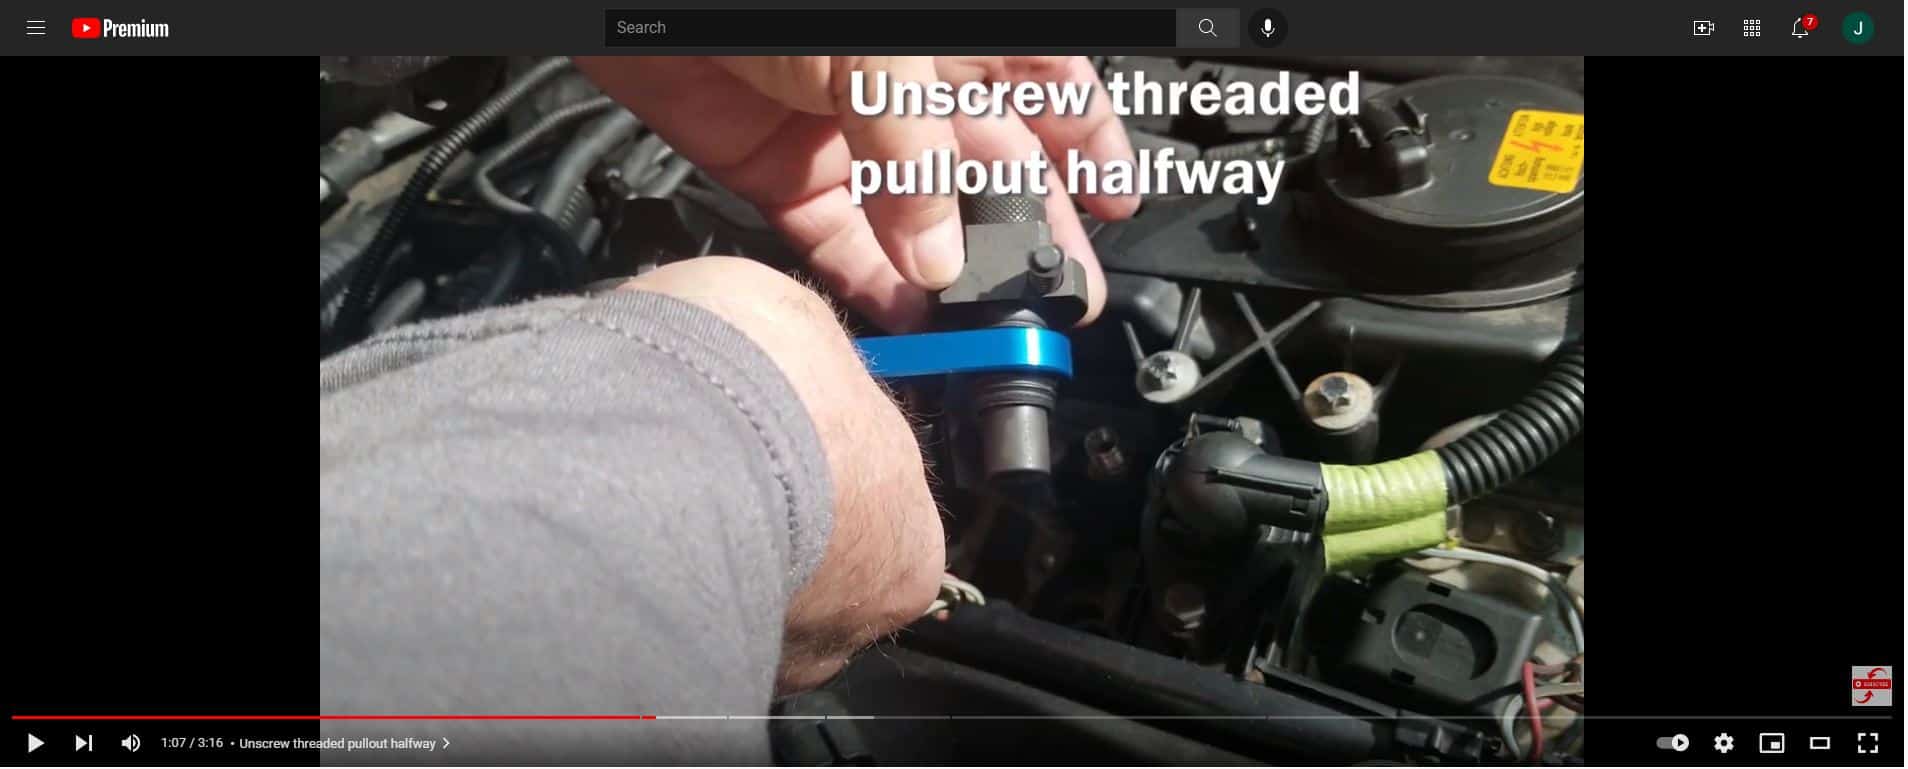
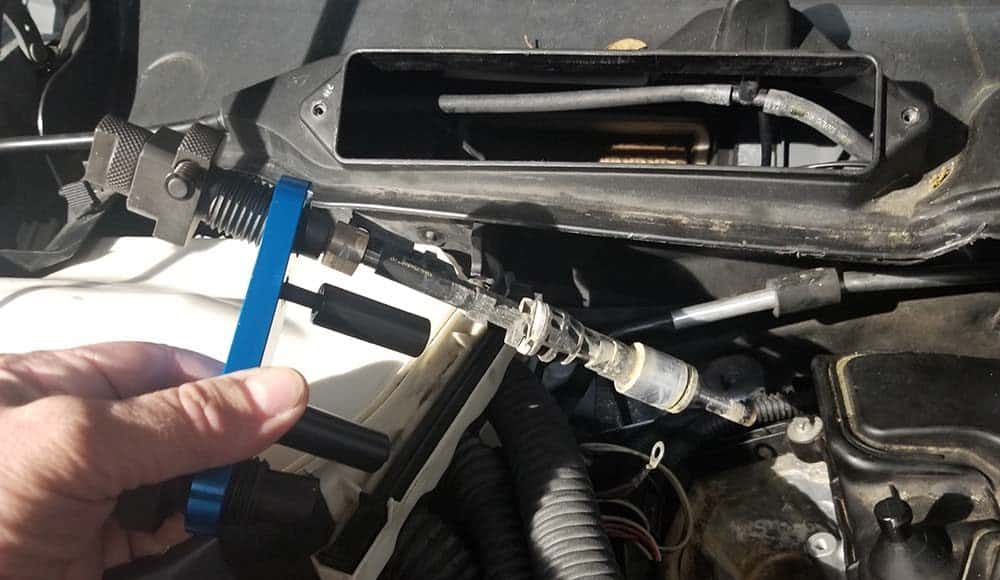
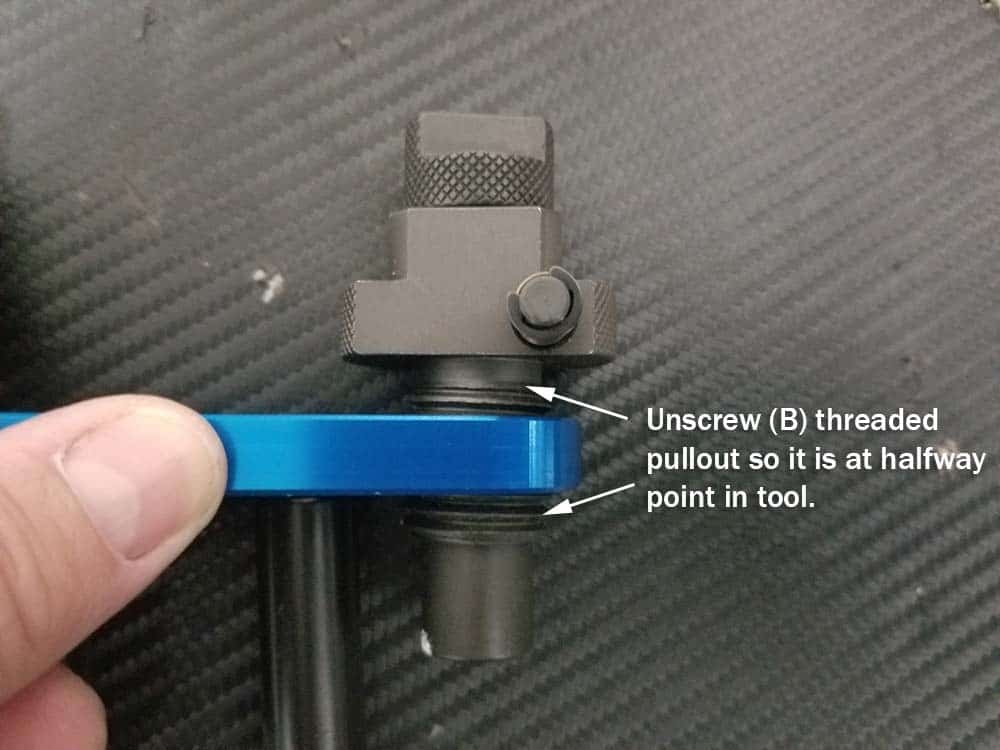
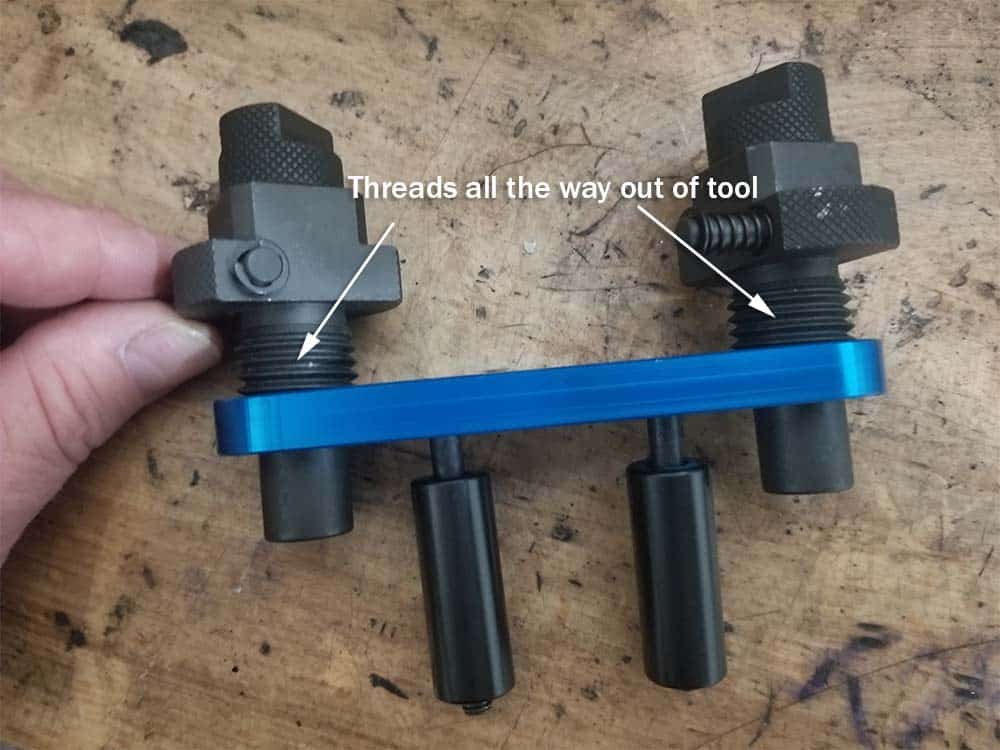
- ***Before proceeding, please be sure you are using BMW tool #130270 to extract the fuel injectors on the N55 engine (see our discussion above). Before placing the extraction tool in the engine, unscrew the two threaded pullouts (A) so they are at the halfway mark in the tool.
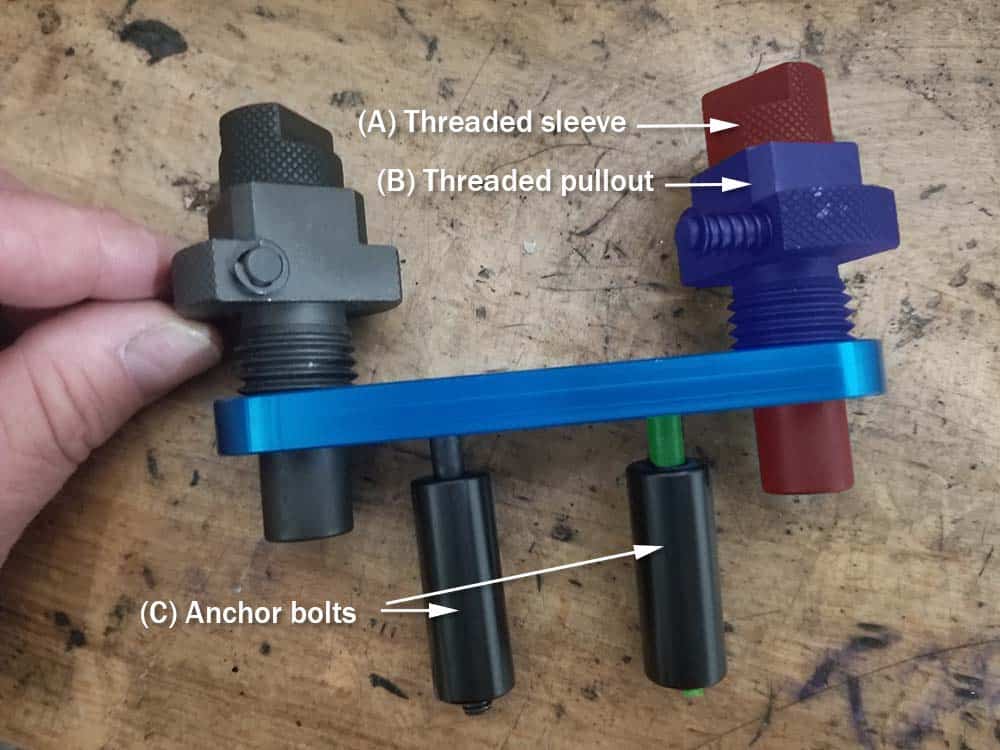
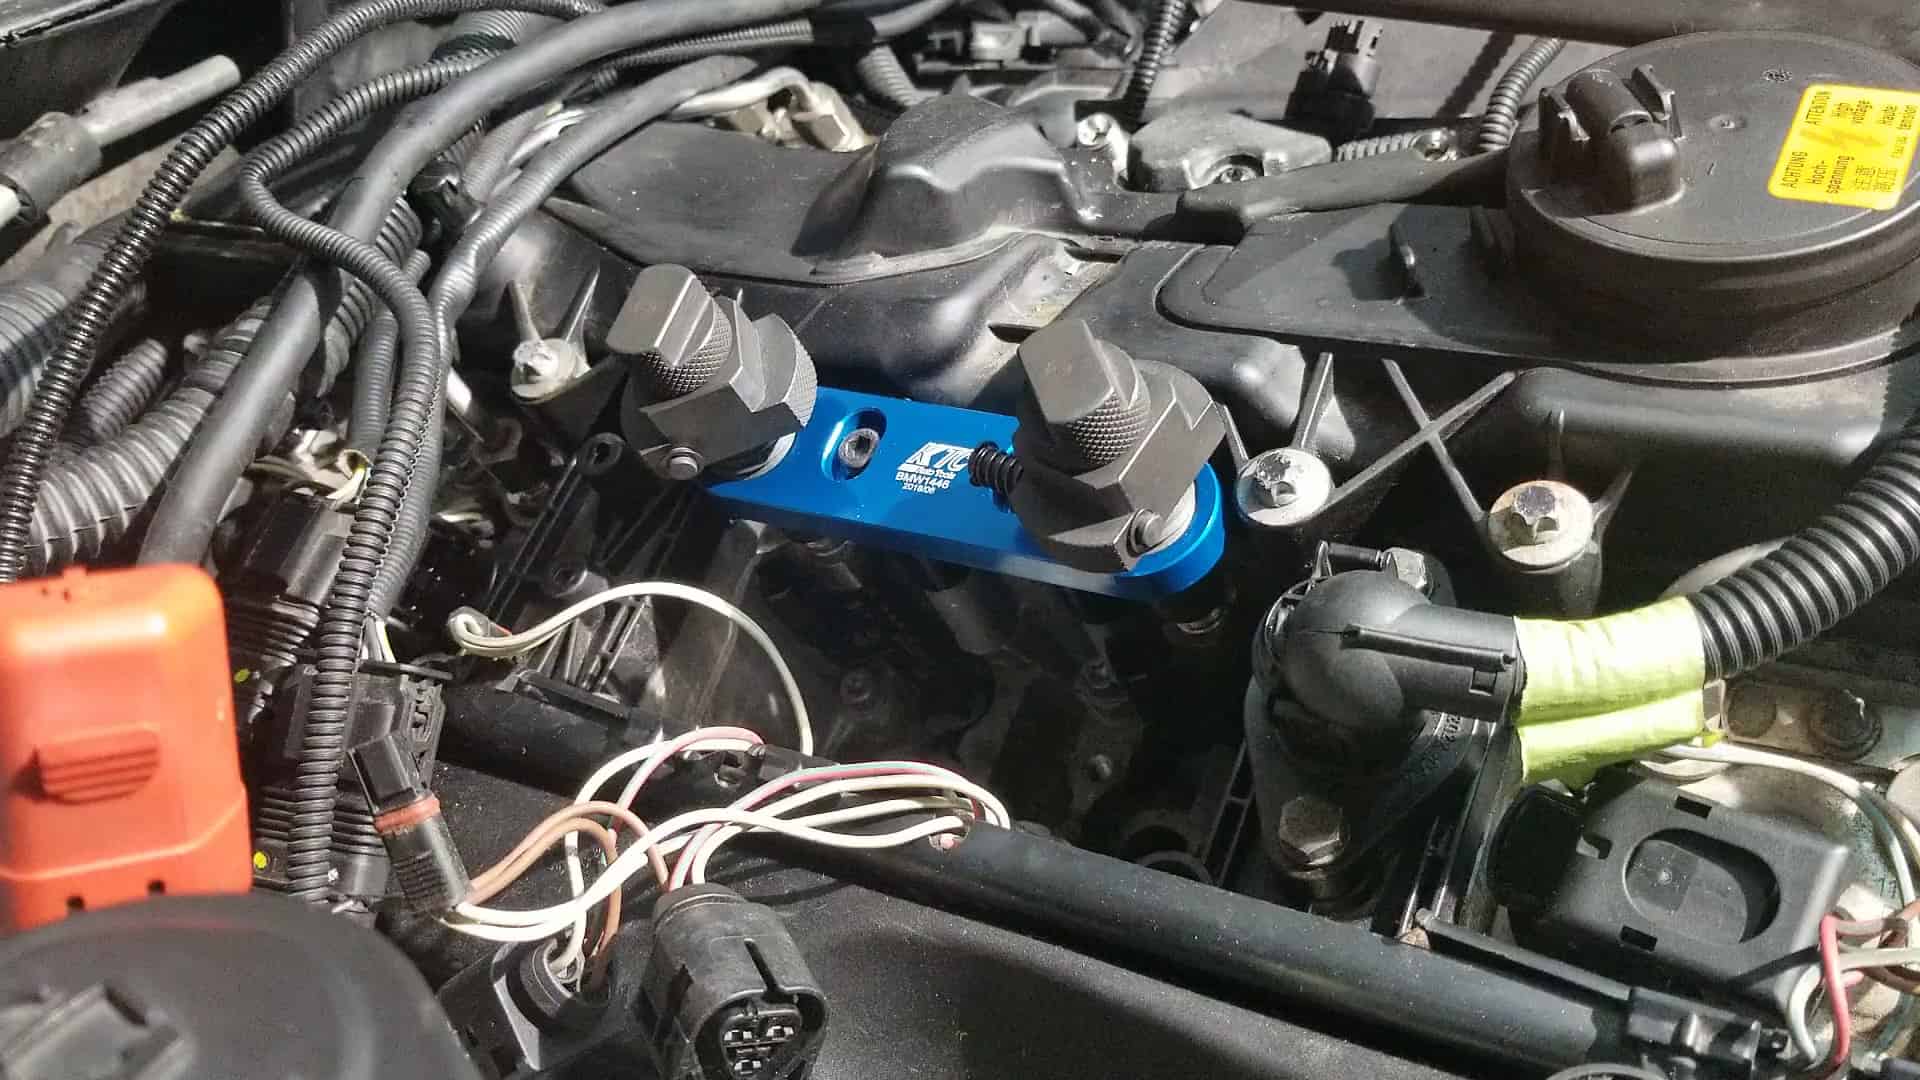
- Place the tool in the injector slot. Make sure the threaded sleeves and pullouts (A and B) are lined up over the fuel injectors. Hand tighten the two anchor bolts (C) into the cylinder head. Double check to make sure tool is square and everything is lined up correctly.
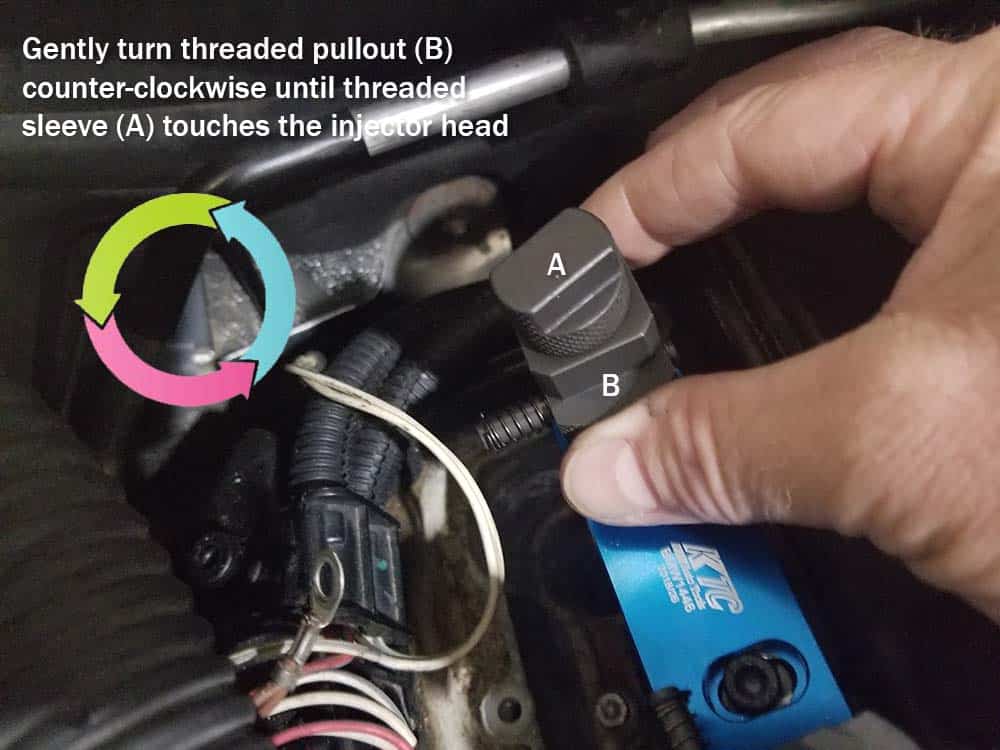
- Gently turn the threaded pullouts (B) counterclockwise until they stop turning. DO NOT hand tighten. You are simply lowering the threaded sleeve (A) onto the injector head in preparation for the next step (see above video).
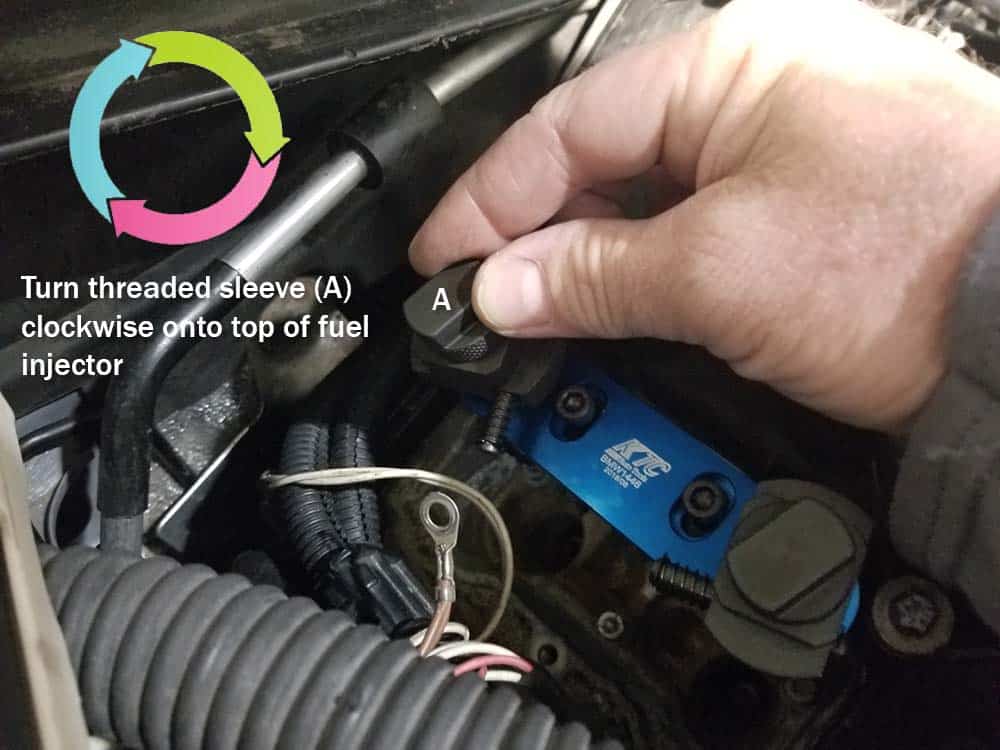
- Hand tighten the threaded sleeves (A) clockwise onto the injectors until they are snug. ***If you are only removing one injector, only tighten the threaded sleeve (A) on the injector being removed (leave the other one loose) (see video).
- Tighten the two anchor bolts (C) and torque to 9 Nm (7 ft-lb) (80 in-lb).
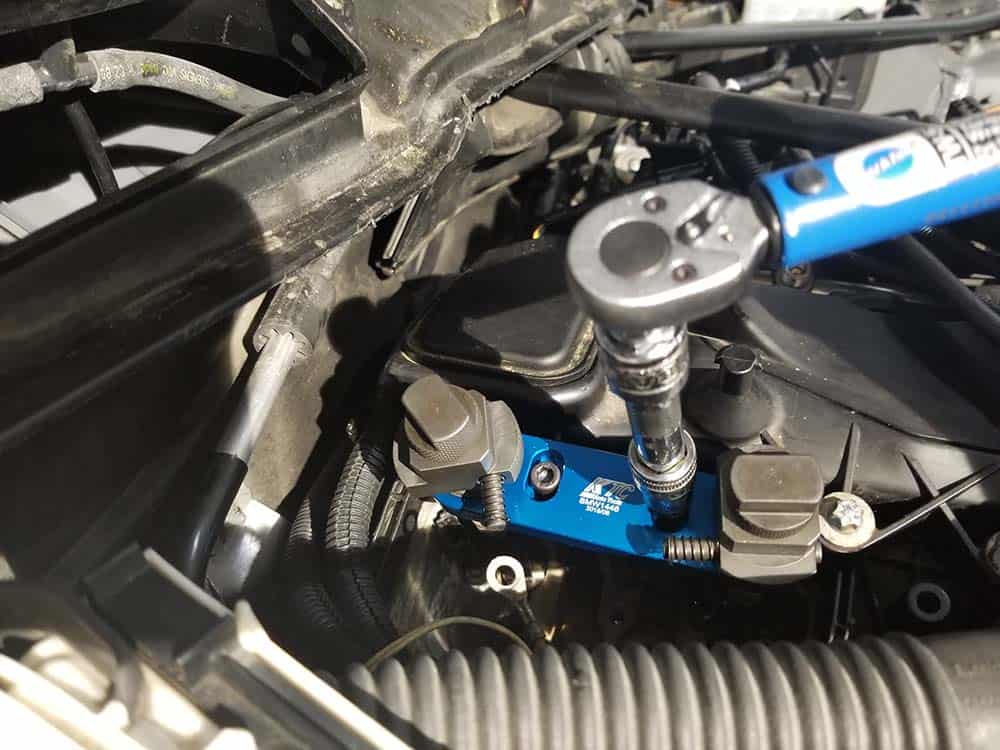
- Attach a 24mm crow’s foot socket to a low torque wrench. This will require the use of socket reducers since the 24mm crow’s foot will be ½” drive, and most low torque socket wrenches are ¼” drive. Please see the following photo to see how we handle it.
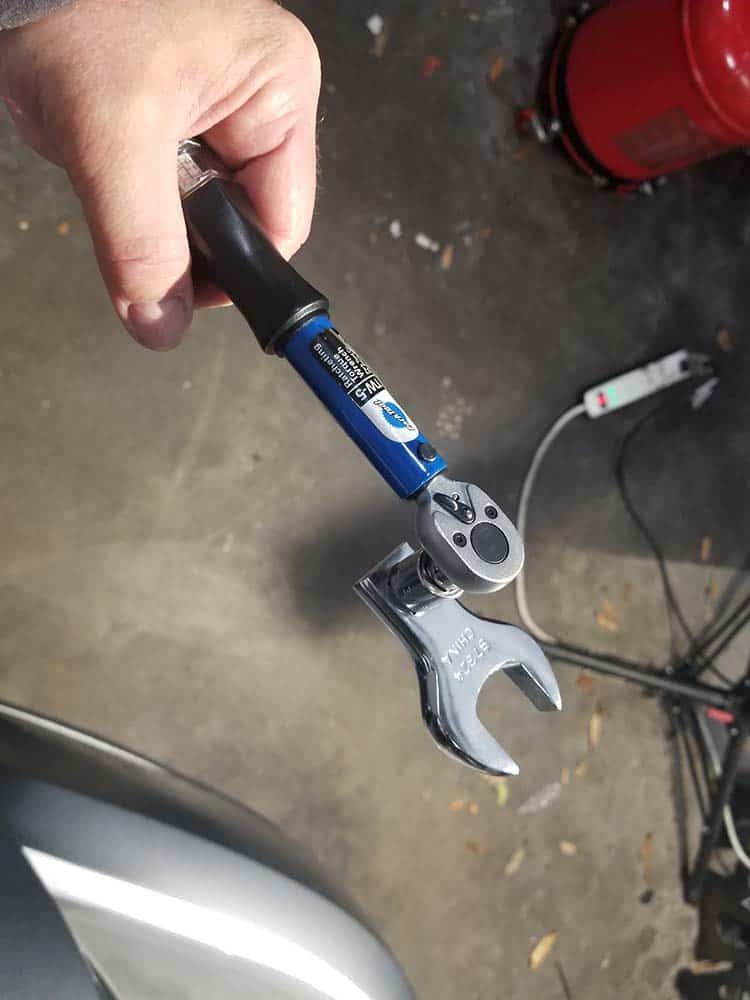
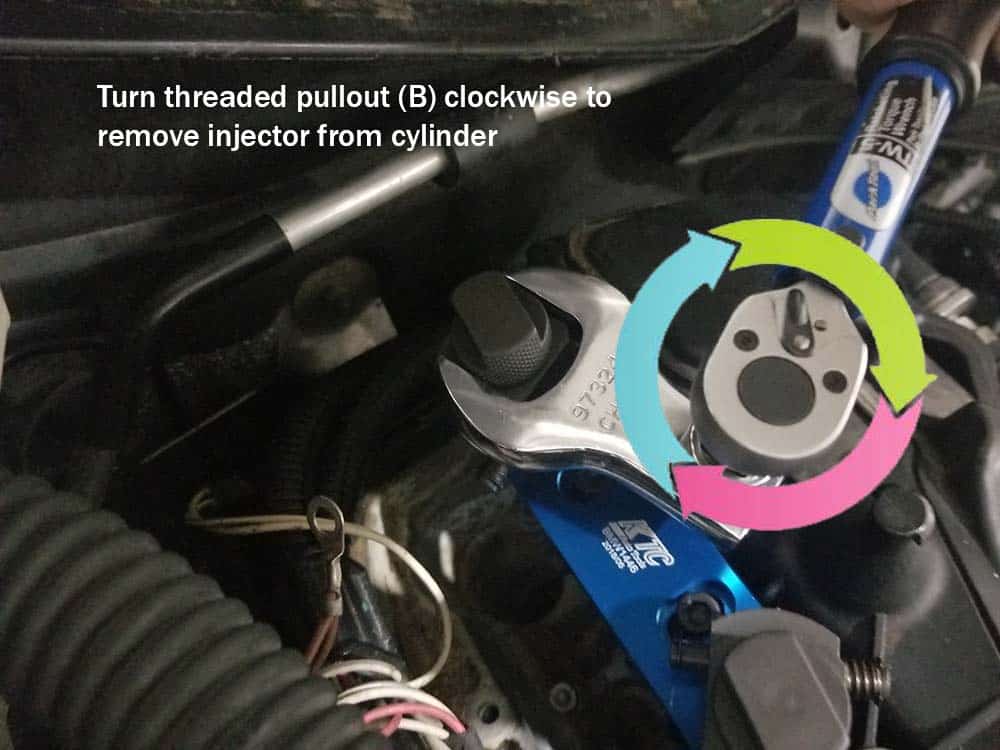
- Set the torque wrench to 5 Nm (3.5 ft-lb). Attach the crow’s foot to the threaded pullout (B) (NOT the threaded sleeve (A)) and turn CLOCKWISE. Remember, the threaded pullout has a reverse thread so turning clockwise will pull the injector out. Try not to exceed the 5 Nm on the torque wrench. There should not be any reason why you should exceed 5 Nm when extracting the injector, unless you are turning the wrong way!
- When the injector(s) are extracted, loosen the anchor bolts and remove the tool with the injectors attached.
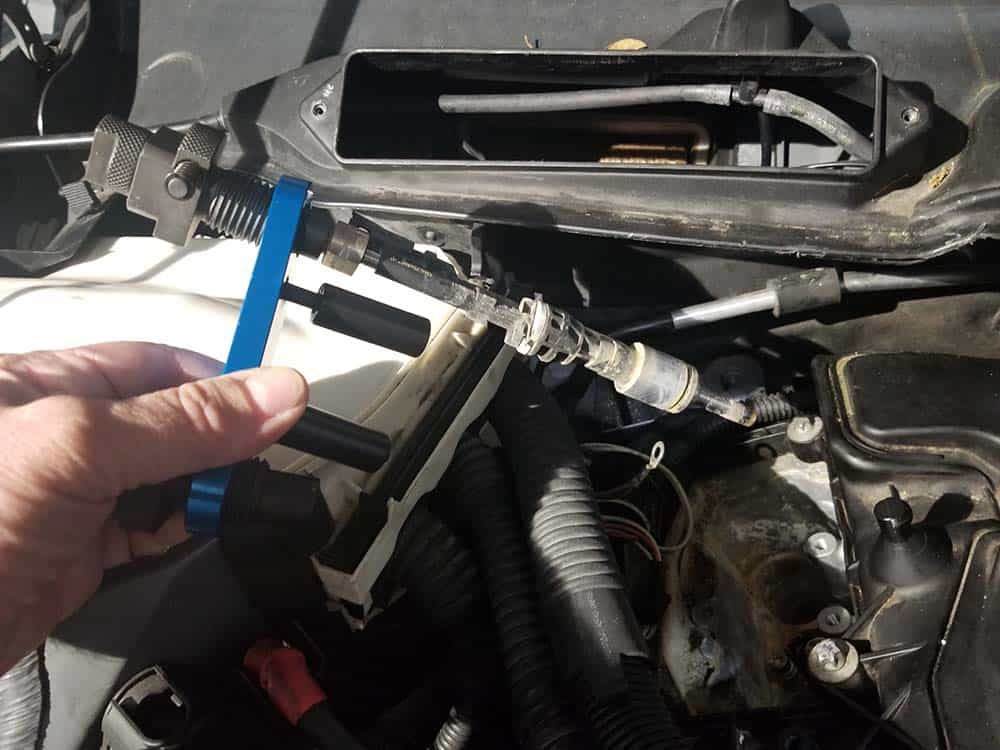
- Place the tool on a bench and remove the old injector.
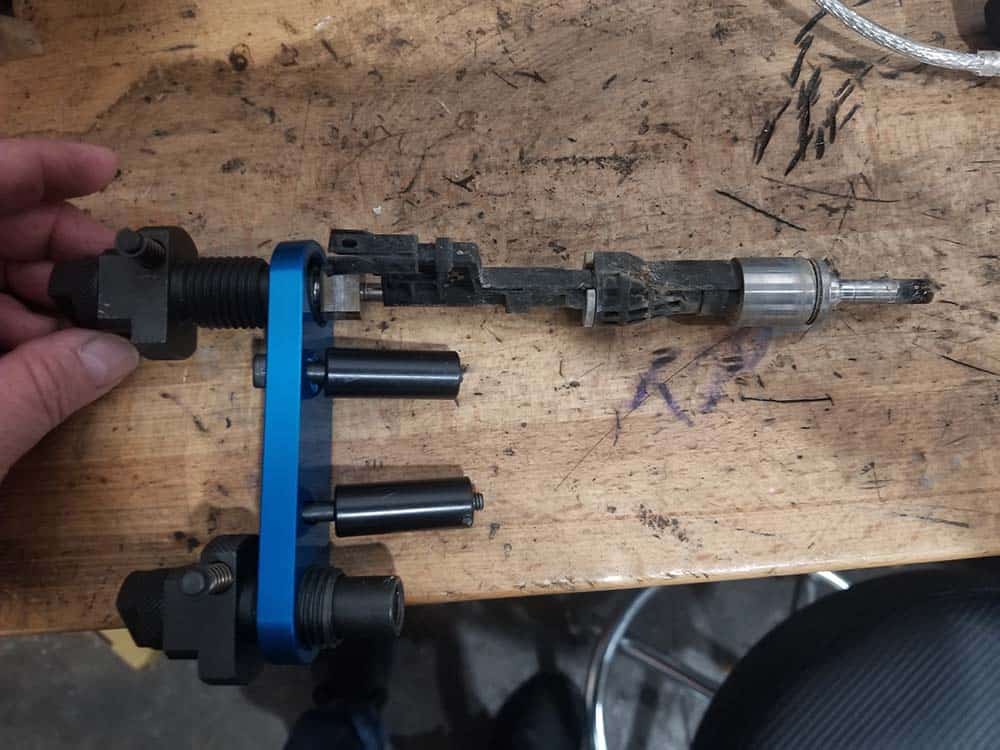
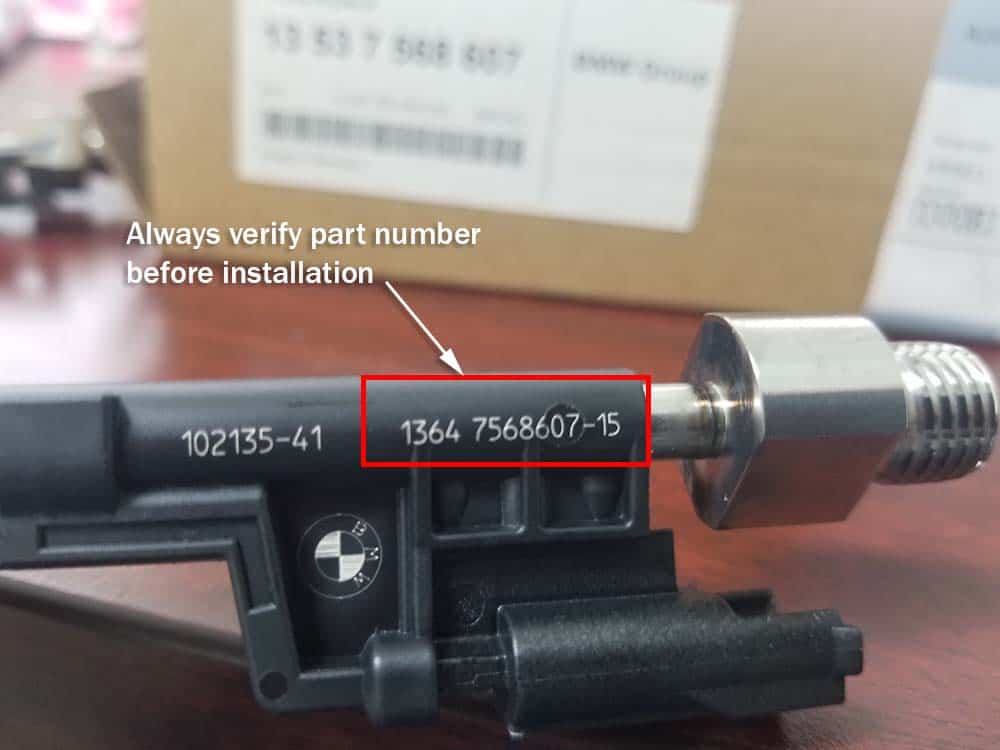
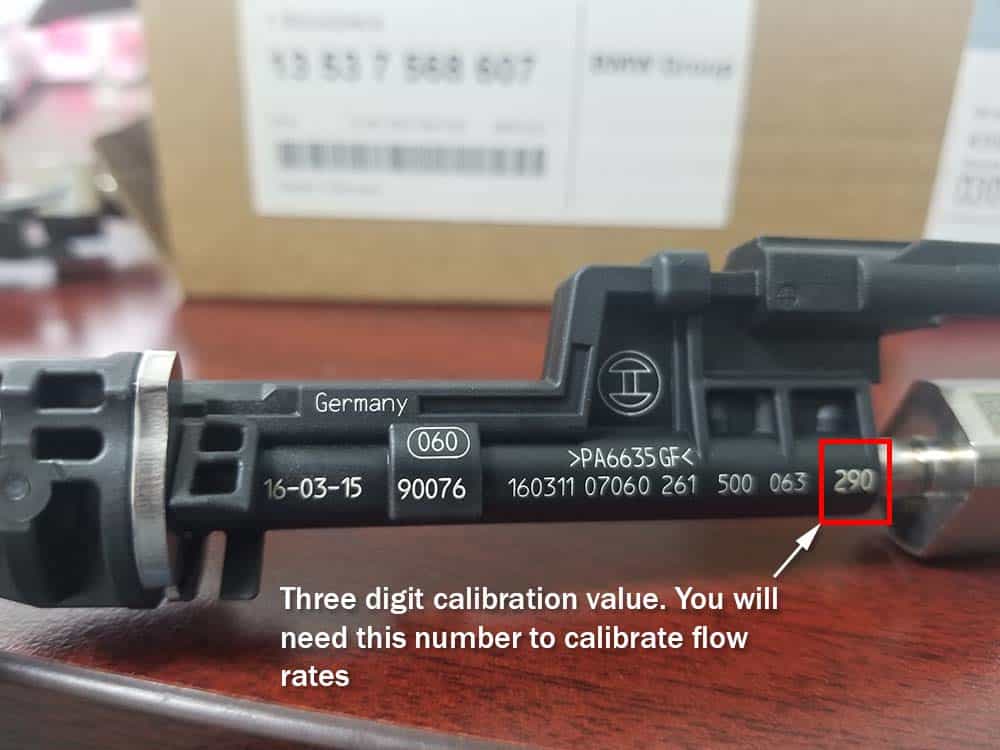
- Unpack the new injector. Look at the part number side to verify it is correct (we suggest taking a photo). Flip the injector over and take another photo of the numbers on that side. ***You will need the three digit calibration number to program the flow rate in the new injector. DO NOT install the new injector without writing down this number. We highly recommend taking a photo of both sides of the injector before installing so there are no issues during the calibration phase.
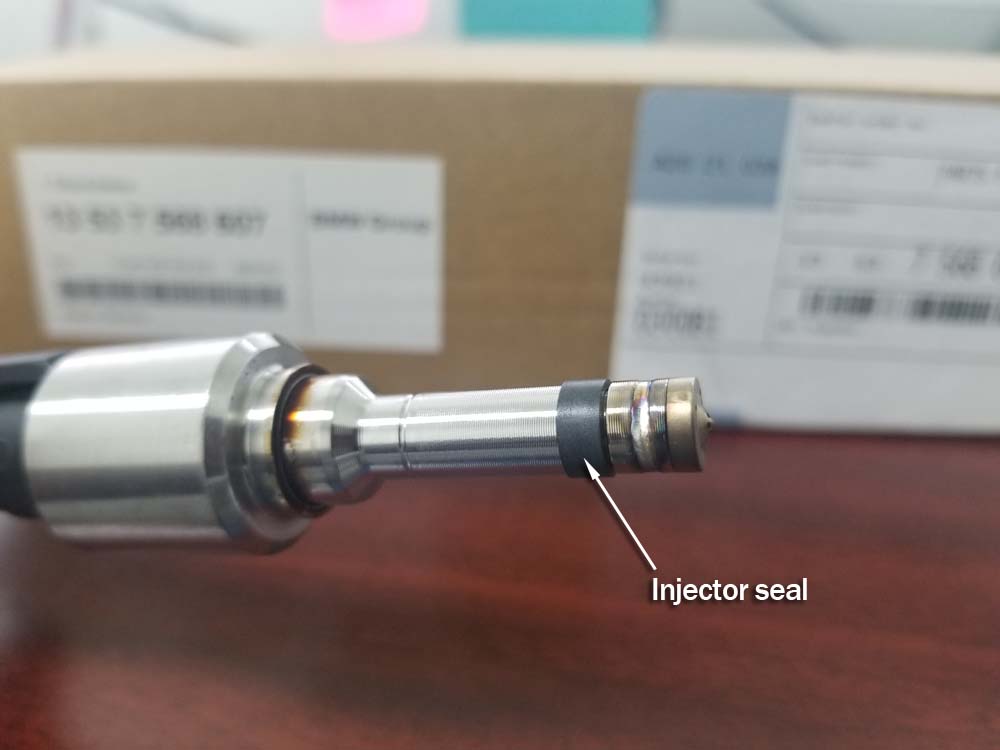
- Verify that the injector seal is installed on the new injector. All new BMW injectors ship with the injector seal already installed.
- Unpack the new decoupling element. Notice that the sides are different. One side has a thin ring.
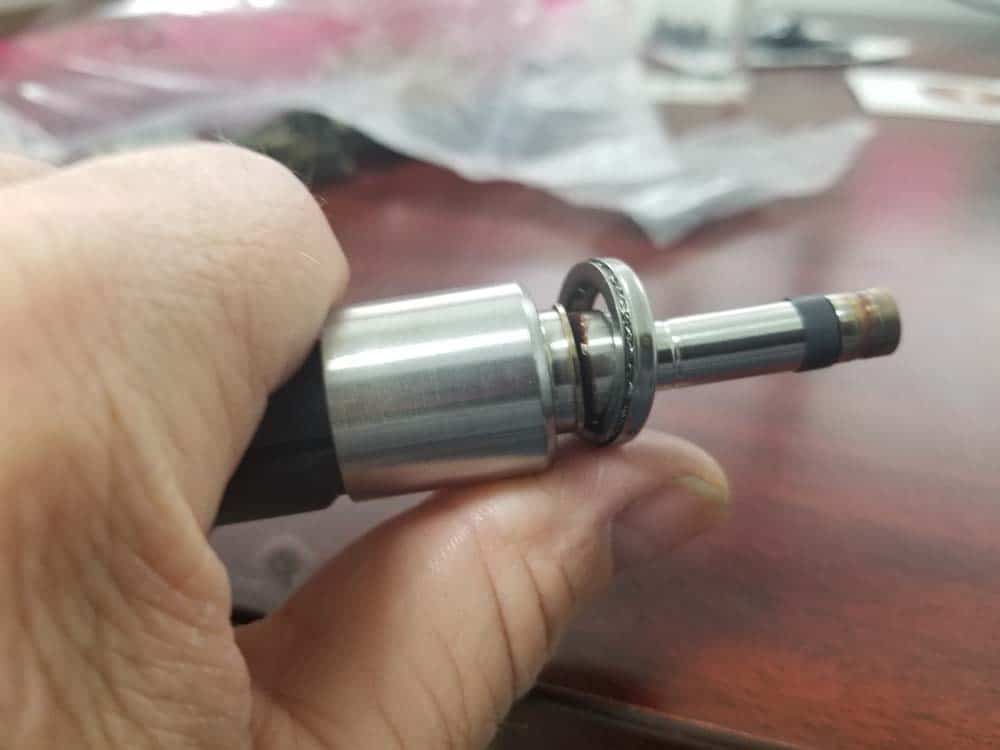
- Slide the decoupling element on the new injector with the thin ring facing the inside as shown in the following image. Press on the decoupling element until it snaps into place.
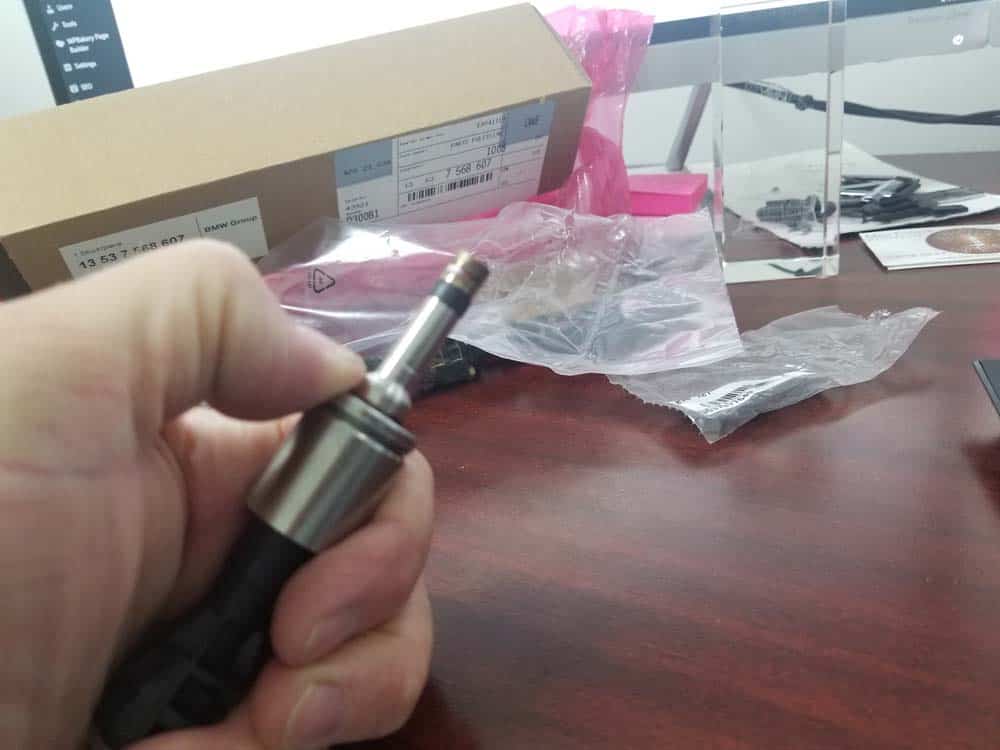
- The new injector can now be installed. Start by placing the injector LOOSELY back into the engine. Do not apply force.
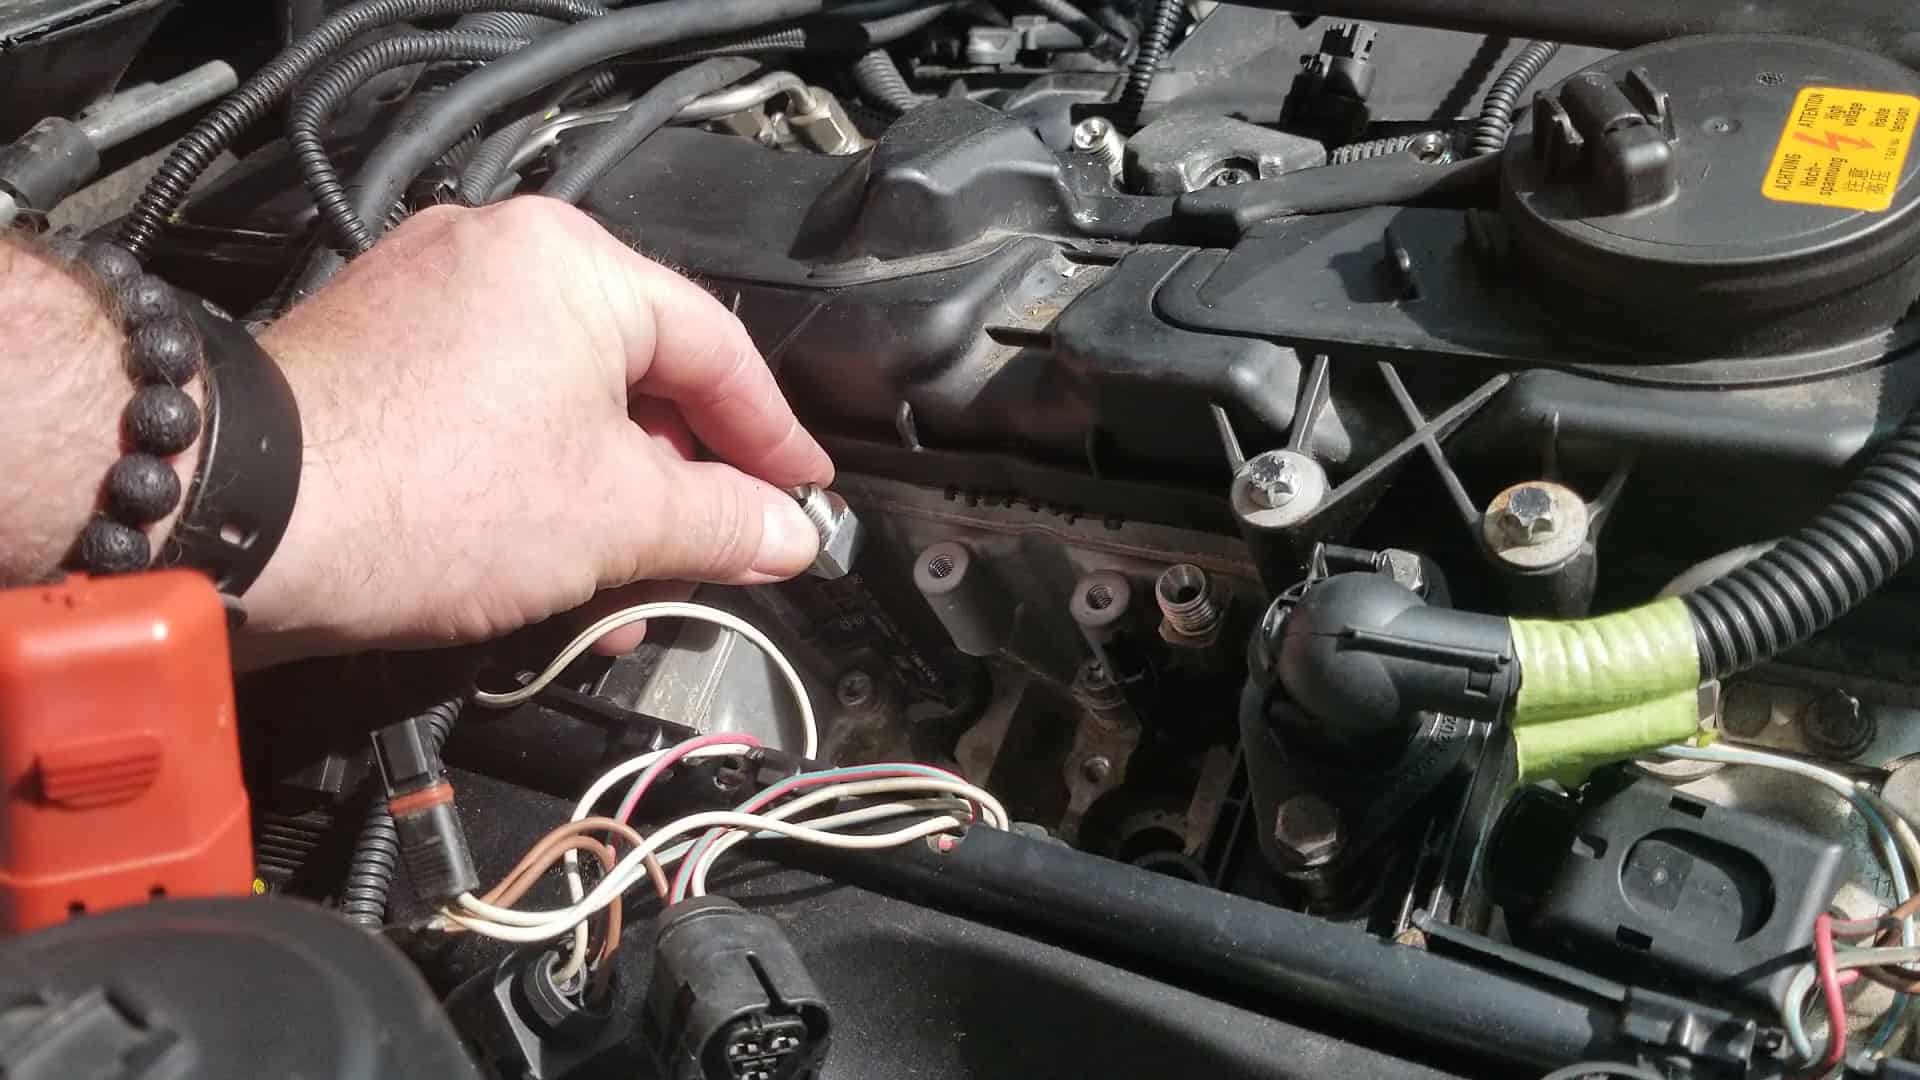
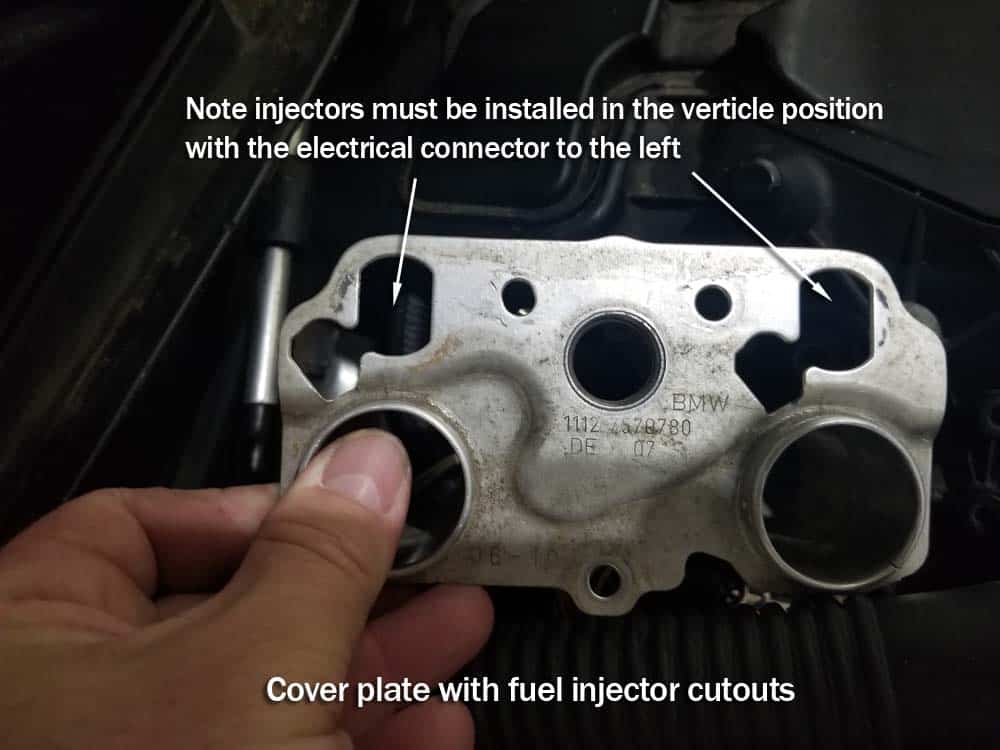
- This is a very important step, so please follow carefully. Note the location of the electrical connector and the threaded head of the injector. These MUST line up with the cutouts in the cover plate, or you will not be able to complete the installation. Make sure the injector is installed with the electrical connector on the left side and the injector threads are vertical so they match the cover plate cutouts (see image below).
- Unscrew (turn clockwise) the threaded pullouts (B) so they all the way out of the tool.
- Install tool into the injector slot and attach to fuel injectors as outlined in steps 2-6 above.
- Set the torque wrench to 4 Nm (3 ft-lb).
- Turn the threaded pullout (B) COUNTER-CLOCKWISE, pushing the fuel injector into the cylinder head until torque is reached.
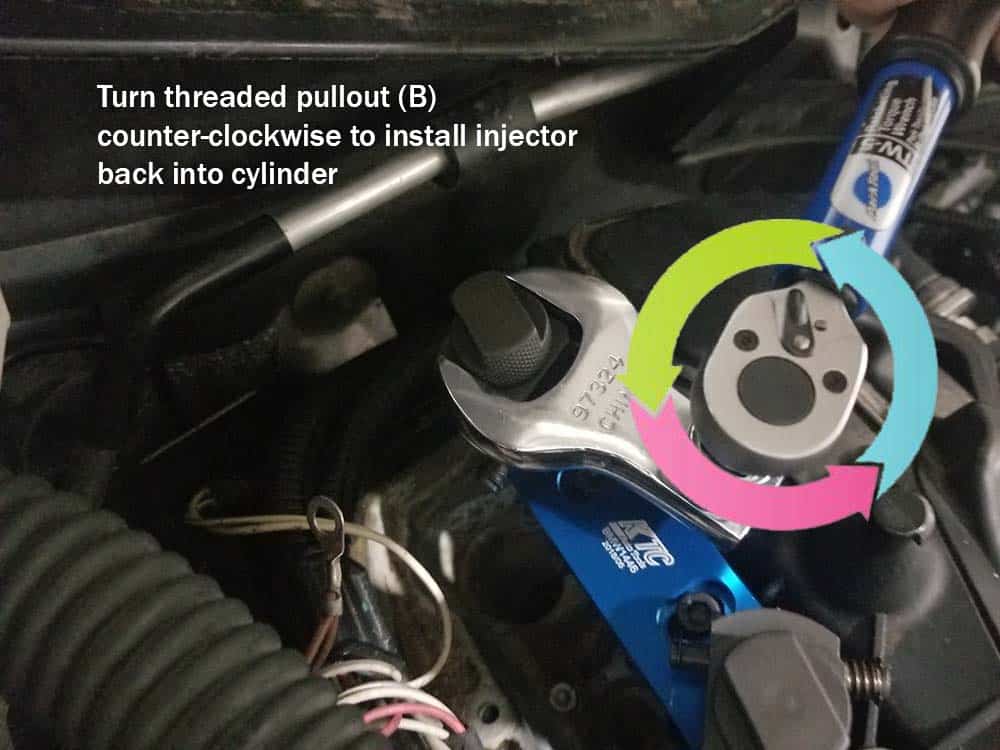
- Release retaining pin by pushing in (use a pair of pliers if necessary). Releasing the retaining pin allows the threaded sleeve (A) to be removed.
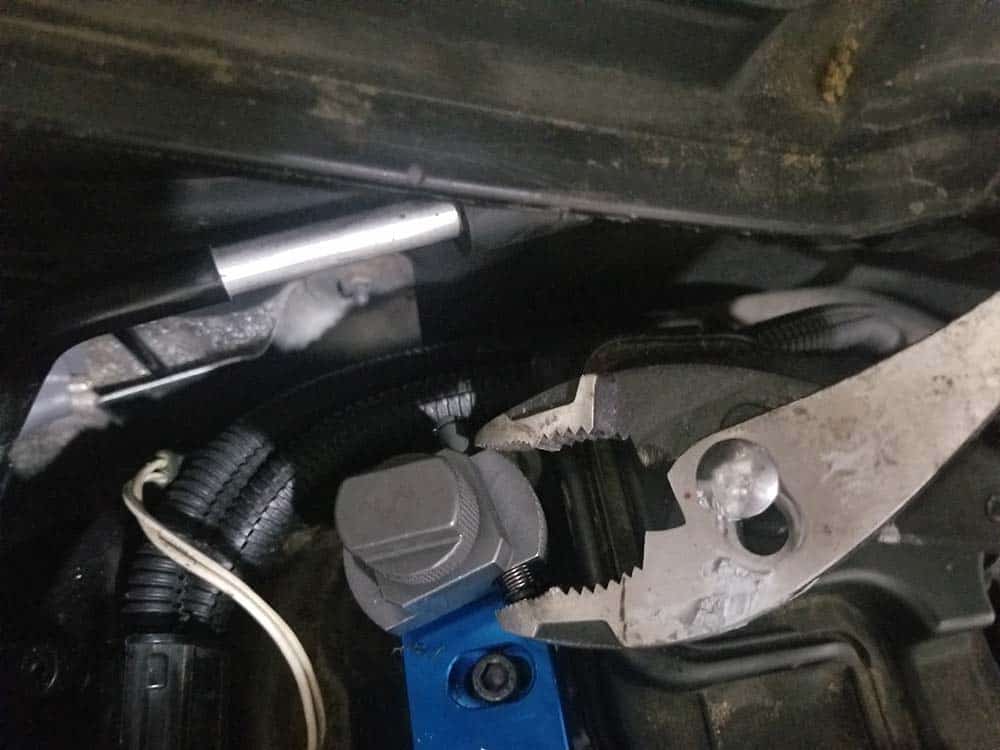
- Remove threaded sleeve (A) by turning counterclockwise, using a 14mm open end wrench to first loosen it and then finishing with your fingers.
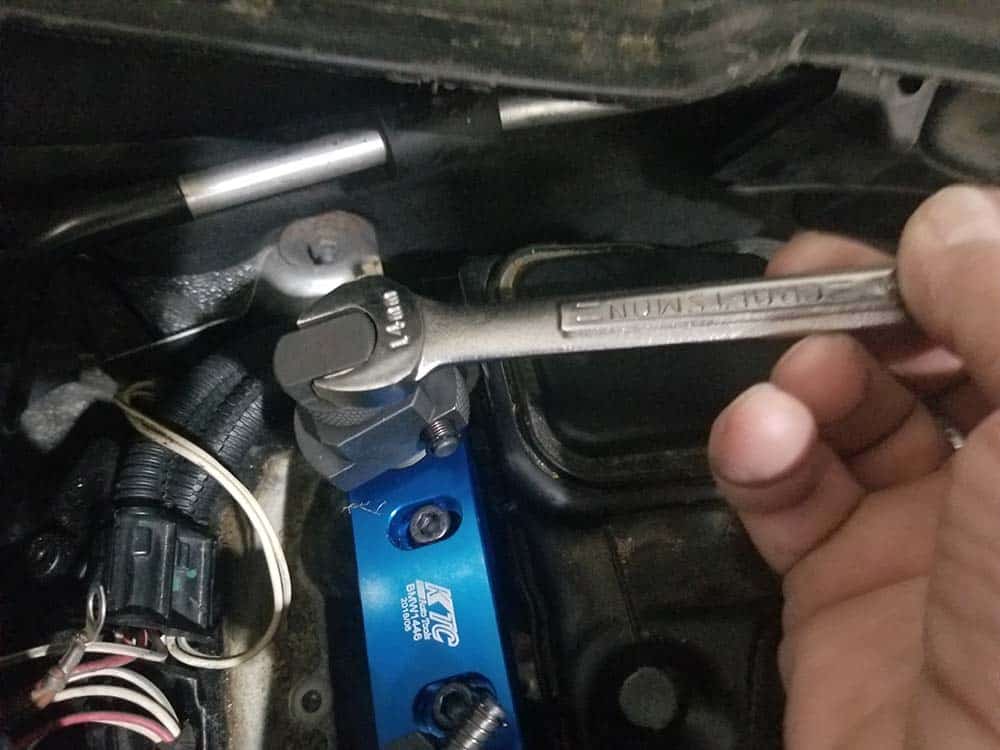
- Temporarily install cover plate to insure injectors line up with openings. If they do not, use a 14mm open end wrench and VERY GENTLY turn the injector in the direction needed so it lines up with cover plate. Once again, we stress VERY GENTLE micro turns until it lines up correctly.
- Injector is now properly installed. Repeat with other injectors being replaced.
- When finished installing injector(s), reassemble engine following steps in Section 1, Section 2 and Section 3 above in reverse order.
Section 5 - BMW N55 Fuel Injector Calibration - Injector Quantity Compensation
You will need to calibrate your BMW N55 fuel injector flow rates before you can run the engine. The reason the injectors must be calibrated is that the vehicle's DME (Engine Control Unit) does not know what the true flow rate of the injectors is...just what they are supposed to be for the engine to operate efficiently. Therefore, we must tell the DME what the true flow rates are. With the true rates stored in its memory, the DME will calibrate the injectors so they all spray fuel into the cylinder at the same rate. In order to calibrate the injectors you will need a diagnostic tool that supports this function. The BMW Repair Guide uses ISTA+ (Rheingold) to calibrate their direct fuel injectors, although many BMW handheld diagnostic tools on the market support this function, including the popular Schwaben/Foxwell nt510 and the Autel MX808. The following video show you how to calibrate the injectors using ISTA+: 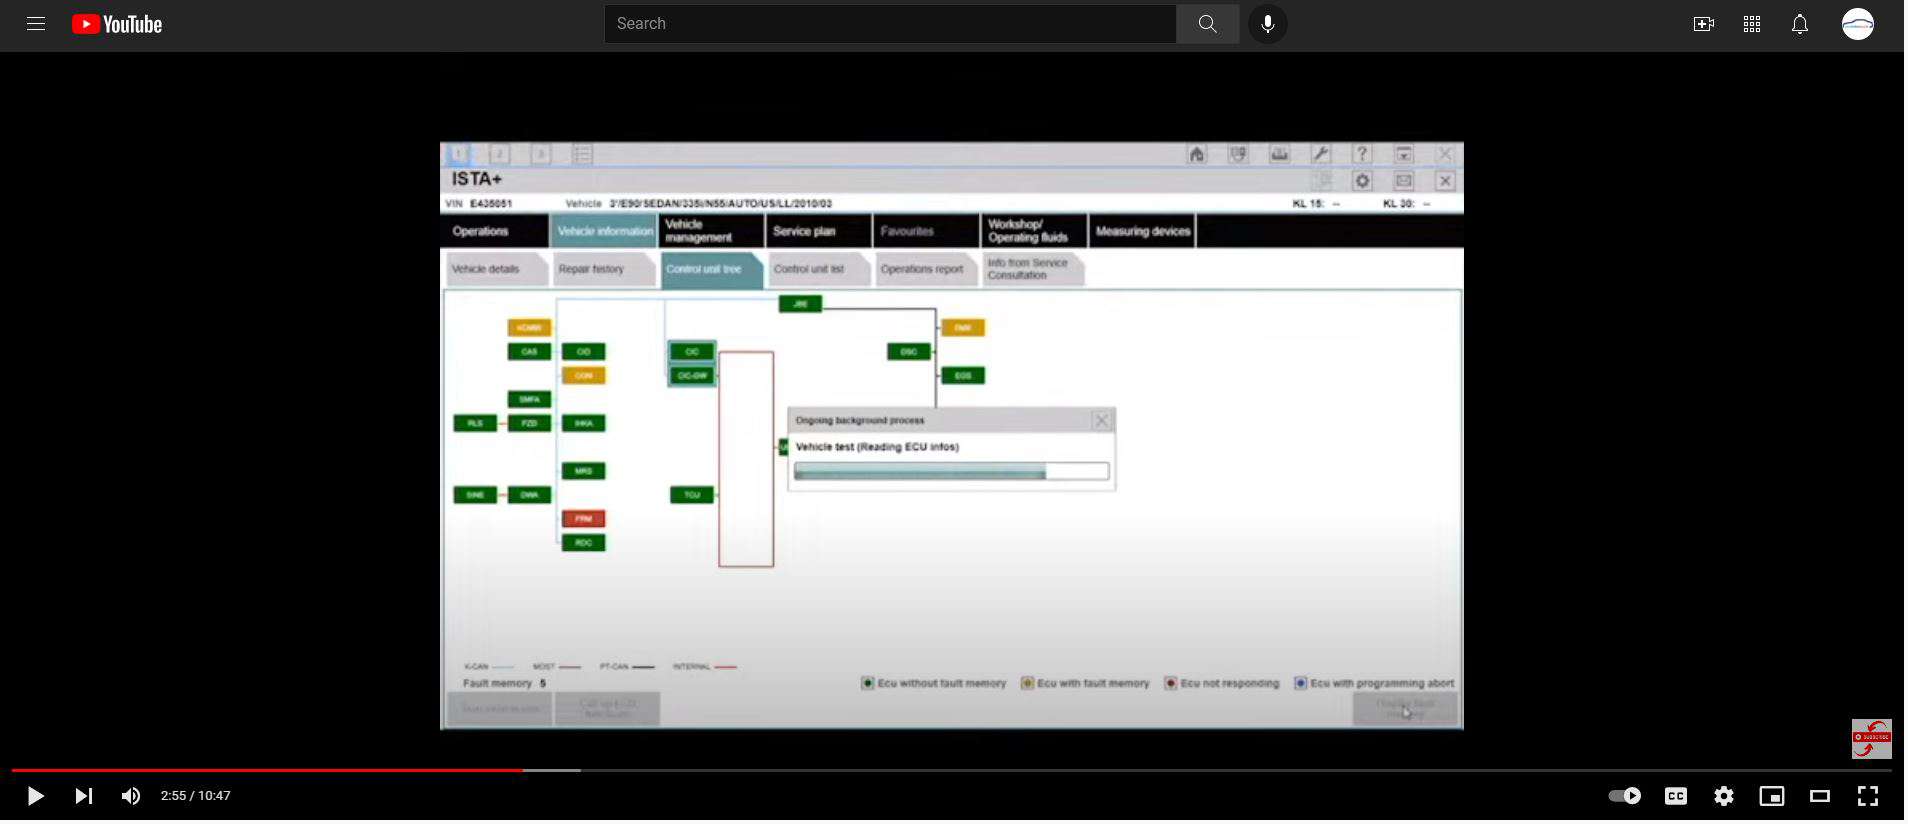
BMW N55 Fuel Injector Replacement Finished

