
Affiliate link disclosure – The BMW Repair Guide uses affiliate links in their site. For more information on affiliate links, please click here.
Repair Summary
The following article gives detailed instructions on performing an ignition coil and spark plug replacement on a BMW E9x M3 series car. Even though we have used a 2013 BMW E92 M3 to perform this installation, this article can be applied to any BMW E9x M3 series vehicle with the S65 eight cylinder engine, including the E90 sedan and E93 convertible.
A BMW E90 M3 tune up only takes a couple hours, and can save a resourceful home mechanic a substantial amount of money by avoiding the repair shop.
As many of our readers already know, we are very fond of our 2013 E92 M3 here at the Repair Guide. We feel that its eight cylinder S65 engine could be one of the greatest power plants BMW has ever manufactured.
The BMW S65 V8 is a high-performance, naturally aspirated four-liter engine that was used in every E9x M3 produced from 2007-2013. It is the only V8 ever used by BMW in an M3 (and probably the last), and has consequently become very sought after by hardcore BMW enthusiasts. But while these high performance vehicles are being snatched up on the used car market by savvy M3 aficionados, one issue is often overlooked...maintenance.
Maintenance on the M3's S65 V8 is expensive...plain and simple. M3 ignition parts can cost up to twice as much as those on the regular E9x 3 series vehicles, and repair shops usually charge substantially more for labor. Any maintenance items that can be done by the home mechanic can translate into huge savings by avoiding the dealership.
A BMW E90 M3 tune-up consists of replacing your spark plugs and possibly your ignition coils. Per the BMW M3 Service and Warranty Book, the spark plugs on a BMW E9x M3 should be replaced every 37,000 miles. The coil packs on the S65 engine can be very expensive - the good news is they do not have to be replaced with every spark plug service. Most M3 owners report getting 75,000-100,000 miles out of their coils before they need replacement. This of course is dependent on driving habits and styles - vehicles used on the track or driven aggressively will experience shorter life spans than those discussed above.
Replacing the spark plugs and coils on your M3 is relatively straightforward...the actual time-consuming part is clearing out the engine compartment so you can access them. Unlike the BMW inline sixes, there is very little room in the V8 engine compartment to negotiate around. The good news is this is a very "doable" repair for the home mechanic that can be completed in about three hours. There are aftermarket coils and plugs available for your M3, but we strongly recommend only using Genuine BMW parts for this repair. There have been reports of high failure rates in aftermarket coils (especially the ones from China) so we have declined to offer them in our parts section below.


View the detailed parts diagram for this repair.
Includes detailed part diagrams, part numbers and links to purchase all of the required components needed to complete this repair.

Before starting this repair, you must have the following required parts.
BMW E9x M3, 8 plugs
Poor idle, bad fuel efficiency, and engine misfire codes are all symptoms of worn spark plugs. Replace yours with quality stock replacements to get your engine running as well as possible.
All BMW E9x M3. Kit includes 8 plugs.
These are the same factory spark plugs that would be installed at the BMW dealership.
All BMW E9x M3 vehicles
These are the same factory ignition coils that would be installed at the BMW dealership.
All BMW E9x M3 models
Your ignition system will start to fail with age, which will ruin your fuel economy as well as your performance. ECS Tuning has created a kit that includes new coils, plugs, and hardware. This particular kit utilizes all genuine BMW components and AGS Brand Dielectric Grease.
All BMW E9x M3 models with production date from 09/2009
The air filter must clean 8000-9000 gallons of air for each gallon of gasoline burned inside the engine, without restricting the air intake. Air filter replacement at recommended intervals lets an engine breathe properly while protecting it from costly damage. Air filters should be inspected and replaced as needed at least once a year, more often if the vehicle is driven in heavily polluted or dusty conditions.
All BMW E9x M3 models with production date to 09/2009
The air filter must clean 8000-9000 gallons of air for each gallon of gasoline burned inside the engine, without restricting the air intake. Air filter replacement at recommended intervals lets an engine breathe properly while protecting it from costly damage. Air filters should be inspected and replaced as needed at least once a year, more often if the vehicle is driven in heavily polluted or dusty conditions.
BMW E90, E92, E93 M3 only
Cabin filters are something that is often overlooked in vehicle maintenance, but these filters are actually very important to both your comfort and health. Traditional cabin filters prevent pollen, dust, and other allergens from entering your vehicle's cabin, keeping your air as clean as possible. Cabin filters that feature an activated charcoal filter layer take it a step further to help eliminate unpleasant smells, especially useful in large cities or when passing smelly areas such as farms.
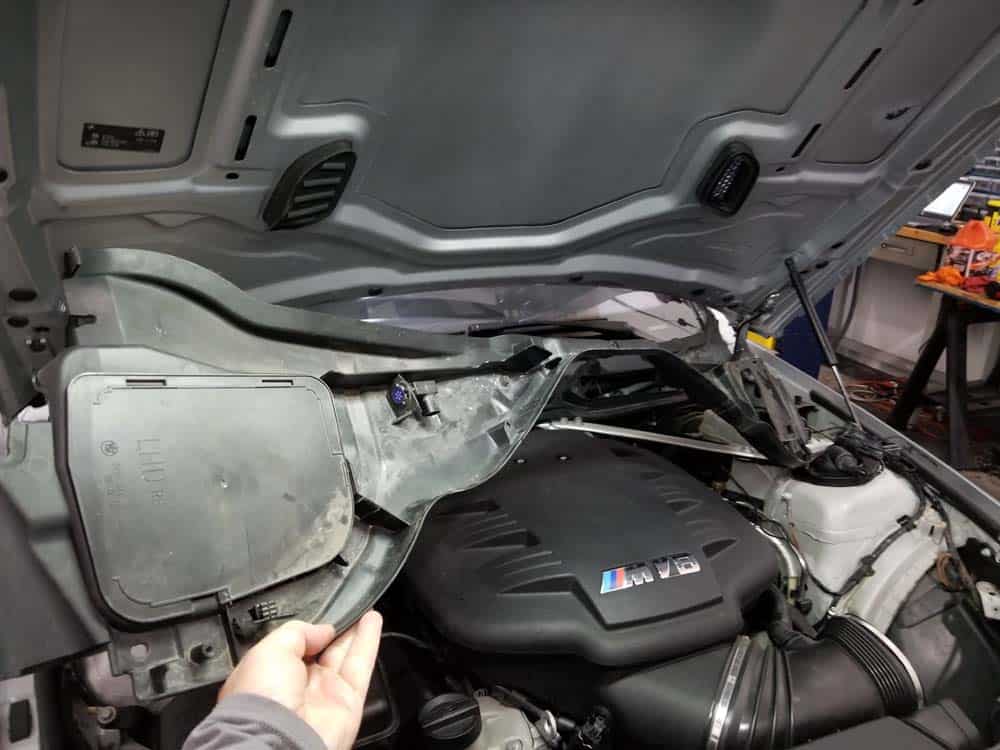
Section 1 - Removing the Air Box and Cabin Filter Assembly
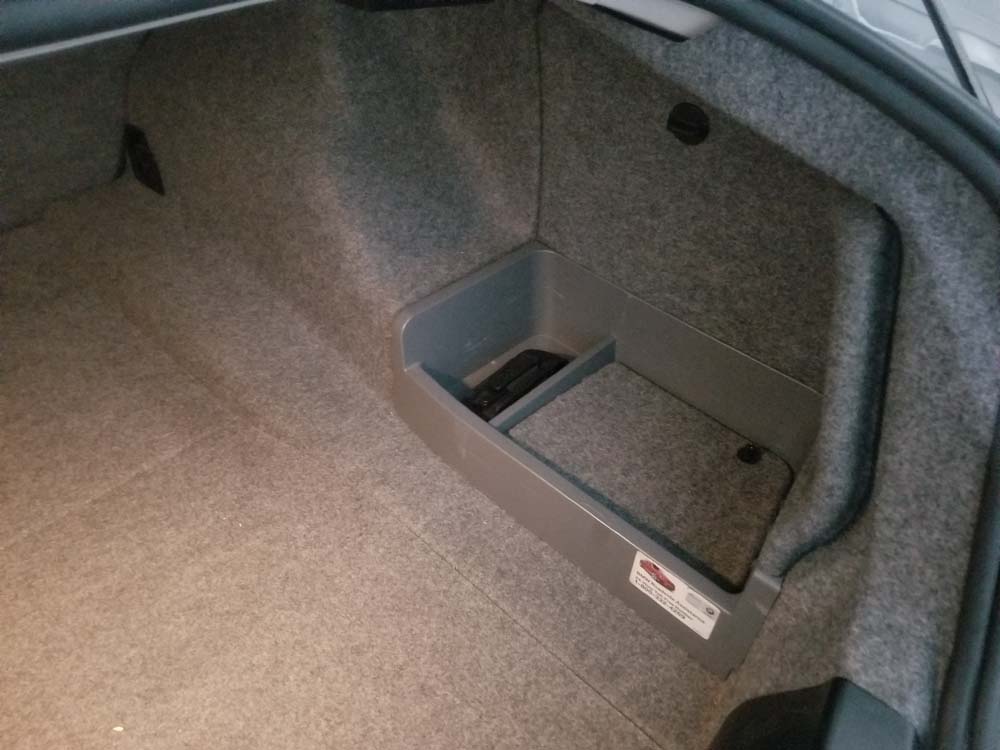
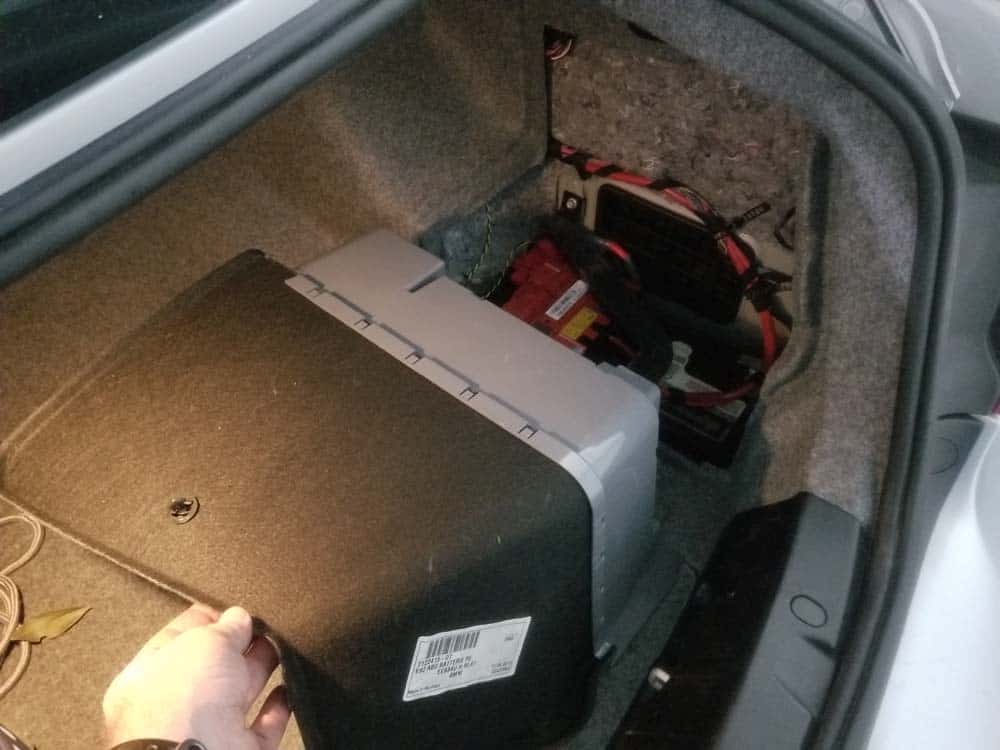
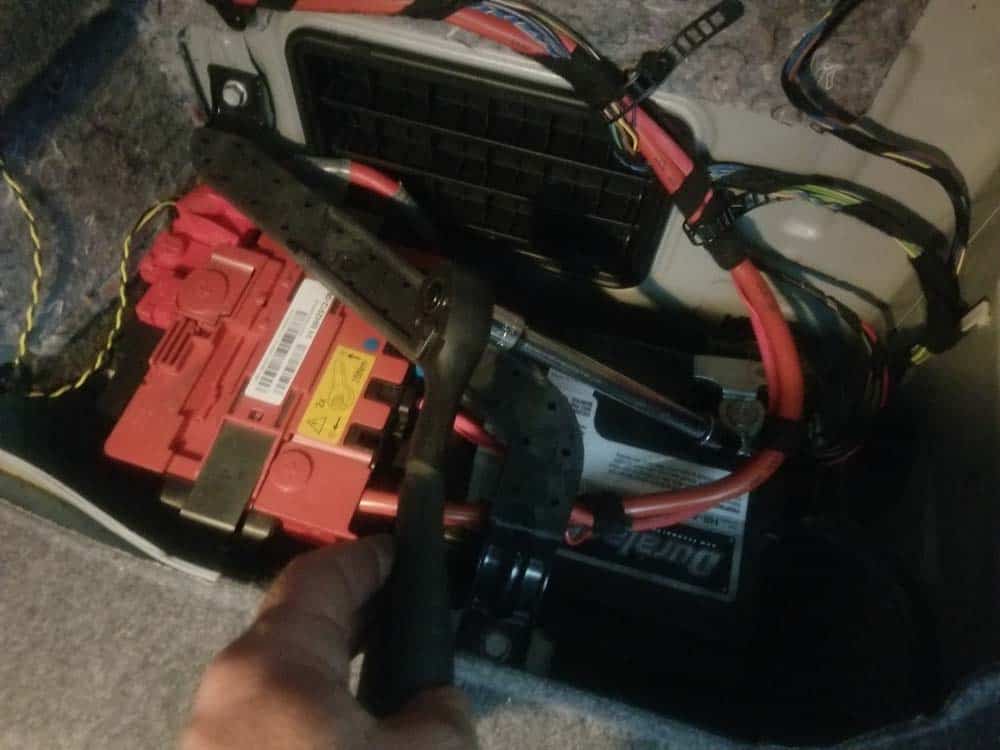
Before performing a tune up on your E90 M3, the right and left cabin filter housings and the intake muffler must be removed to gain access to the coil packs and spark plugs. You will not be able to get to the rear coils and plugs (cylinder 4 and 8) if you do not remove the cabin filter housings.- Before starting this repair ALWAYS remove the negative terminal from your M3’s battery. Since you will be working on the vehicle’s ignition, it is very important that the battery is disconnected to prevent catastrophic short circuits that can destroy electronics. The M3 battery is located in the right side of the trunk behind the trim panel. Use a 10mm socket wrench to remove the negative terminal. Always exercise care when handling the negative terminal on your M3...it has a very sensitive Intelligent Battery Sensor attached to it that can be damaged if handled incorrectly.
- Use a 10mm socket wrench to remove the two intake muffler mounting bolts.
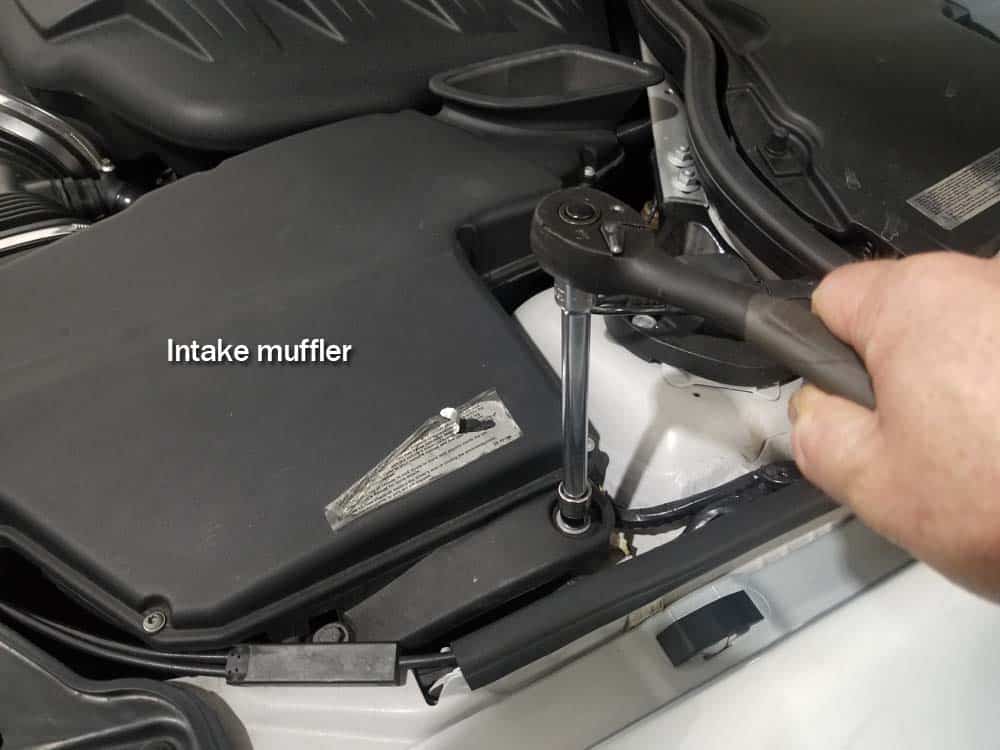
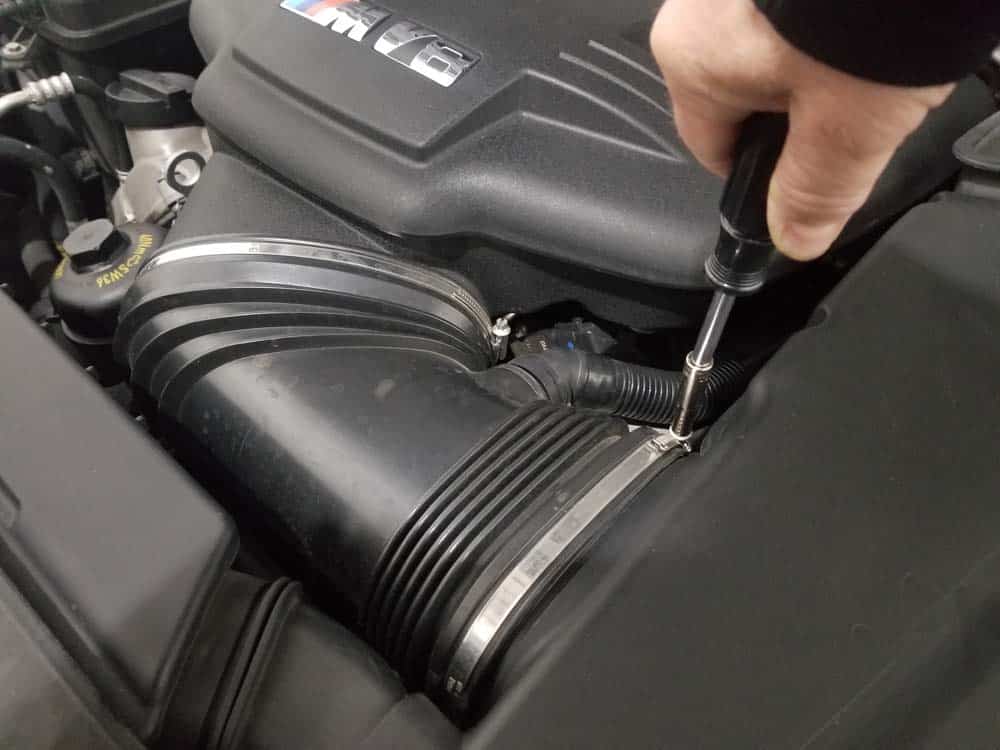
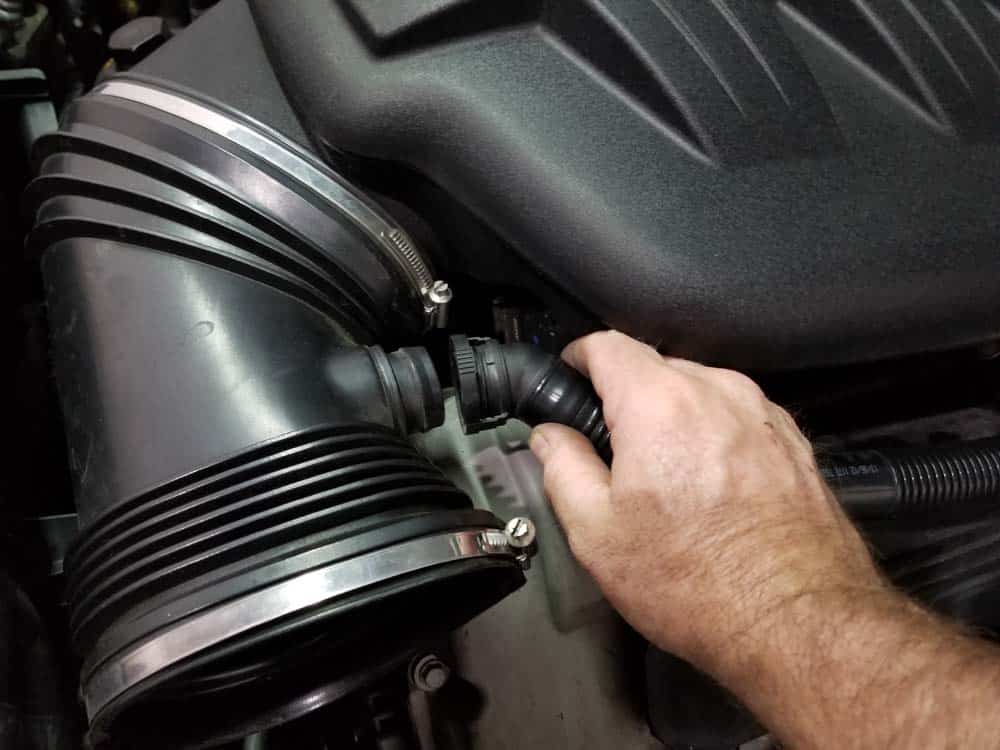
- Use a 6mm socket wrench to loosen the hose clamp attaching the intake muffler to the rubber boot.
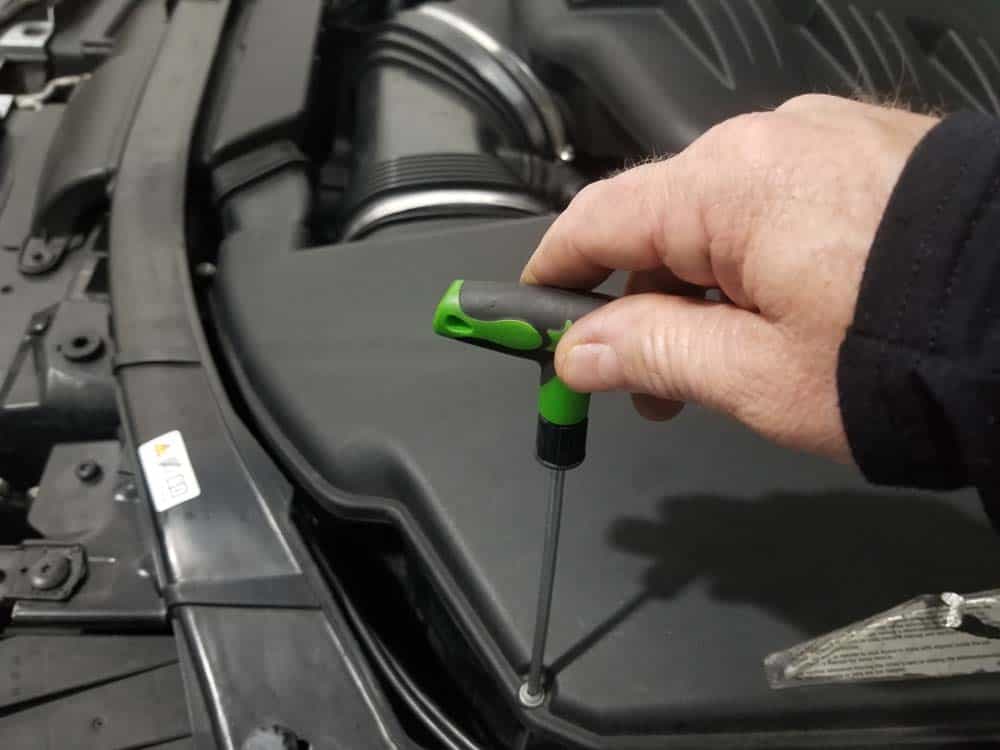
- Using a T20 torx bit or T-handle, remove the eight torx screws securing the lid on the intake muffler. Remove the lid from the vehicle.
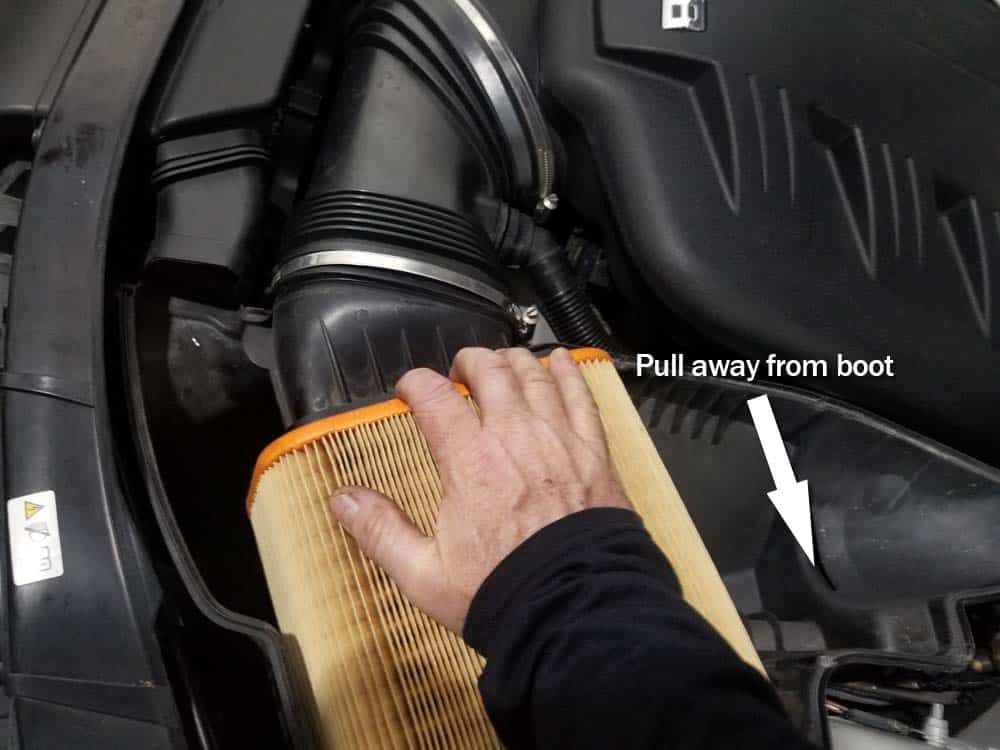
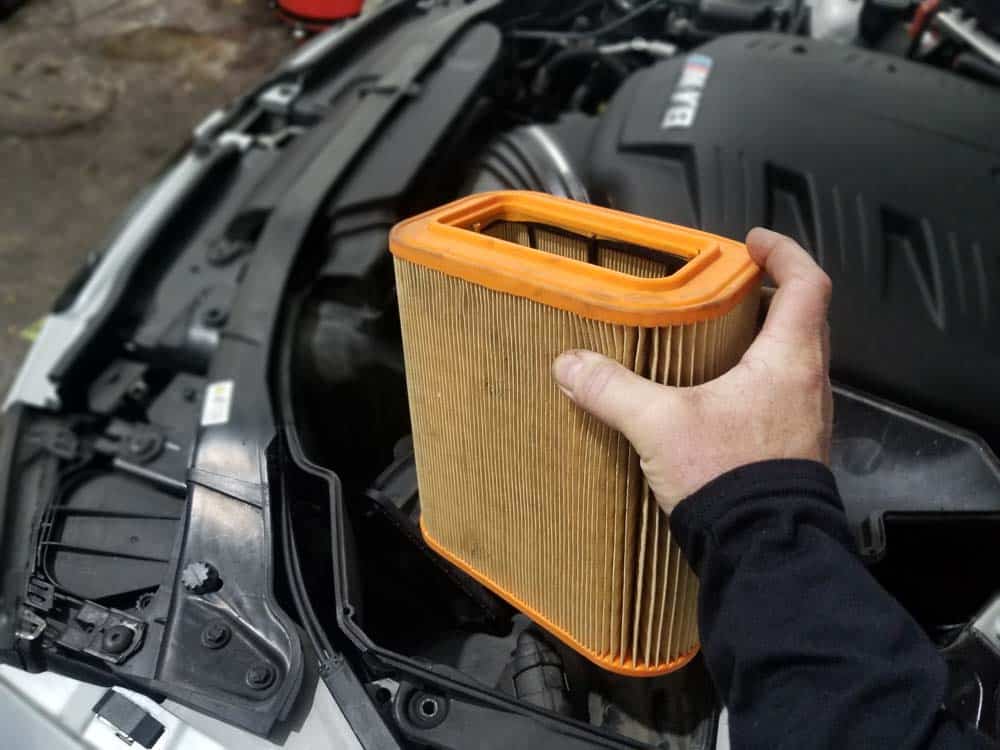
- To remove the air filter, grasp it on the rubber boot side and pull straight back. The filter is on a spring mechanism that compresses when you pull back allowing you to remove the filter (see image below).
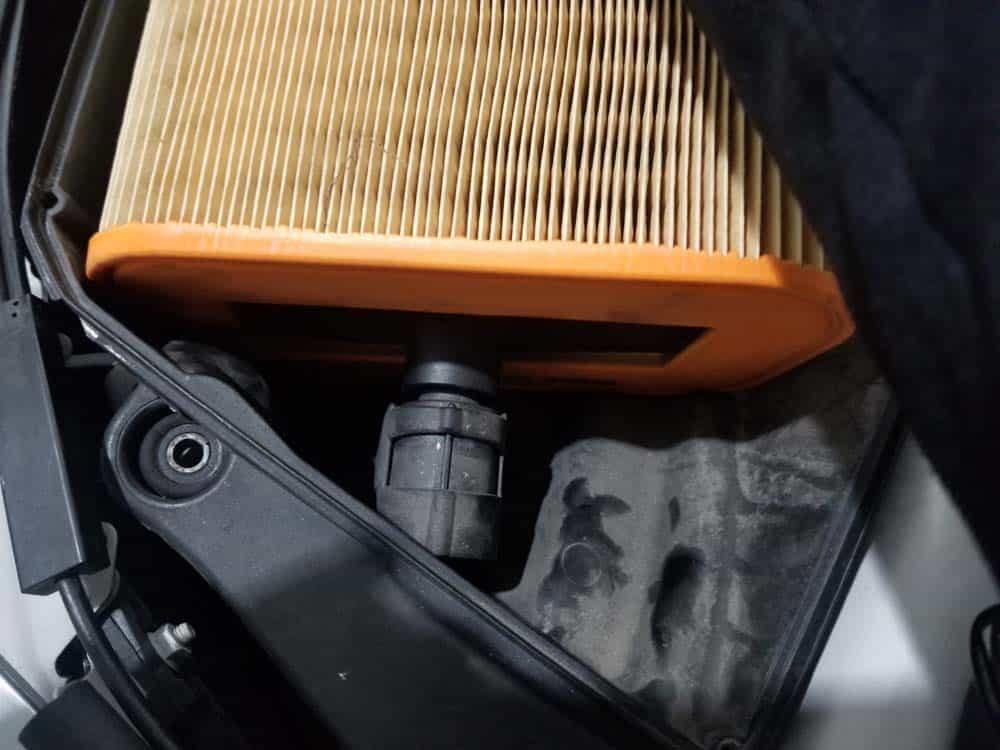
- Remove the air filter and the rubber boot adapter from the vehicle.
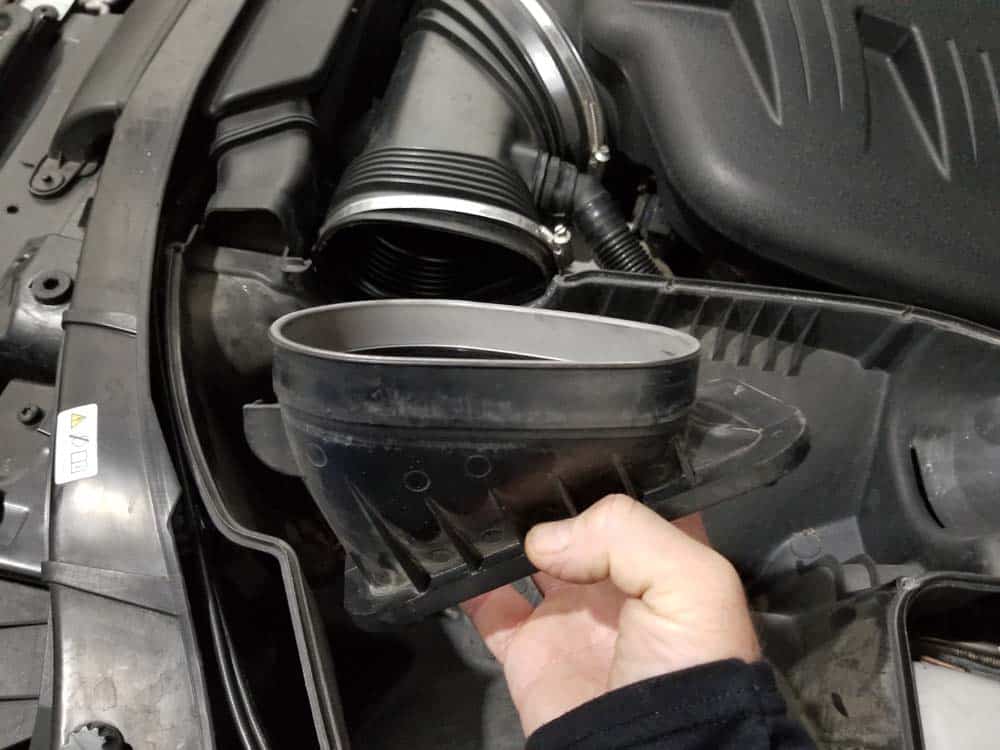
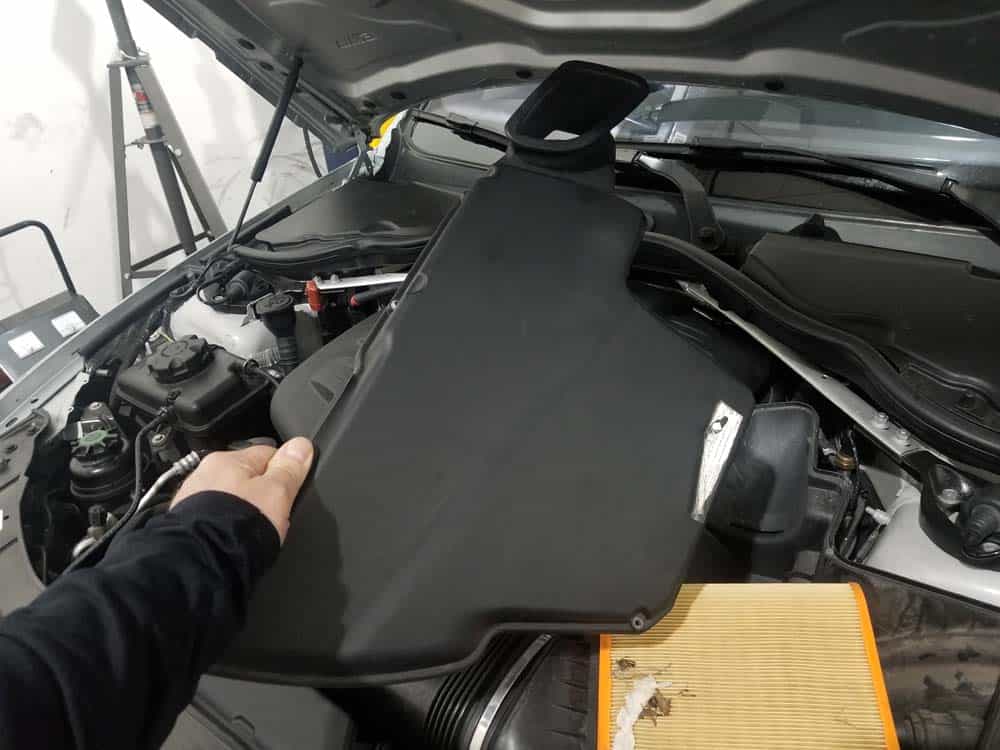
- You can now grasp the intake muffler and easily remove it from the engine compartment.
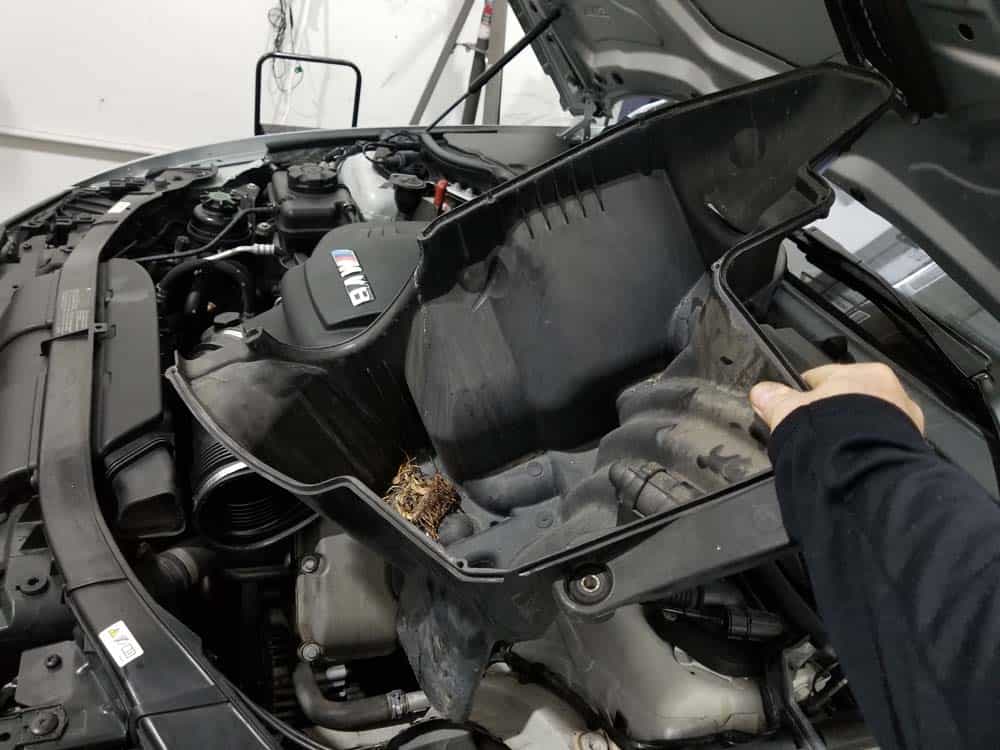
- Remove the hood gasket from the cabin filter housing.
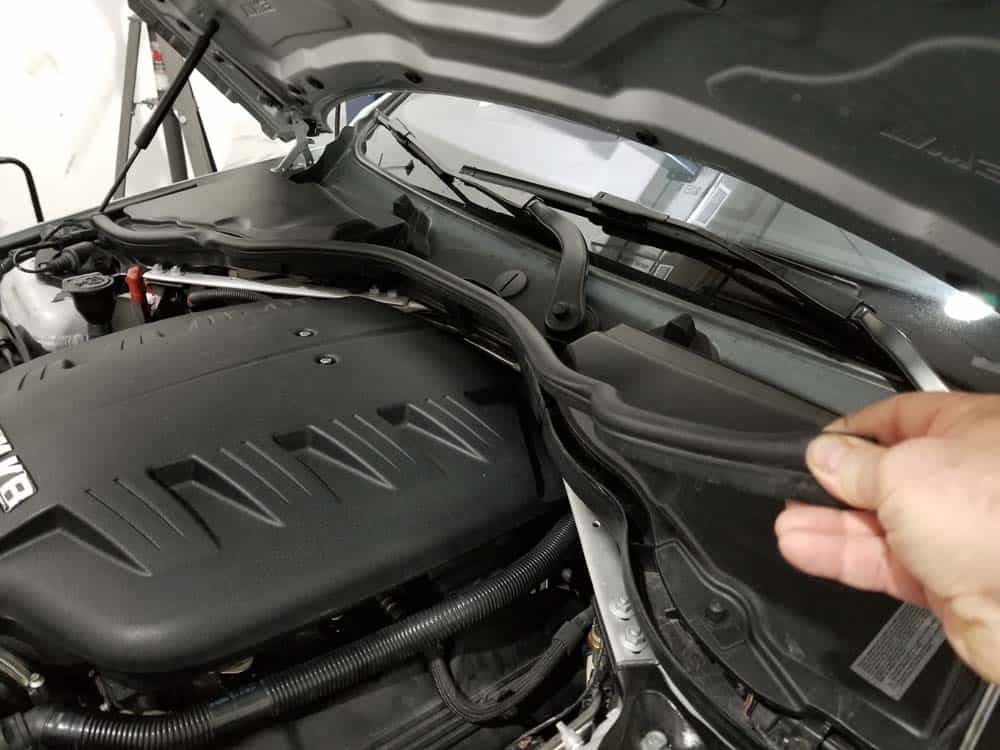
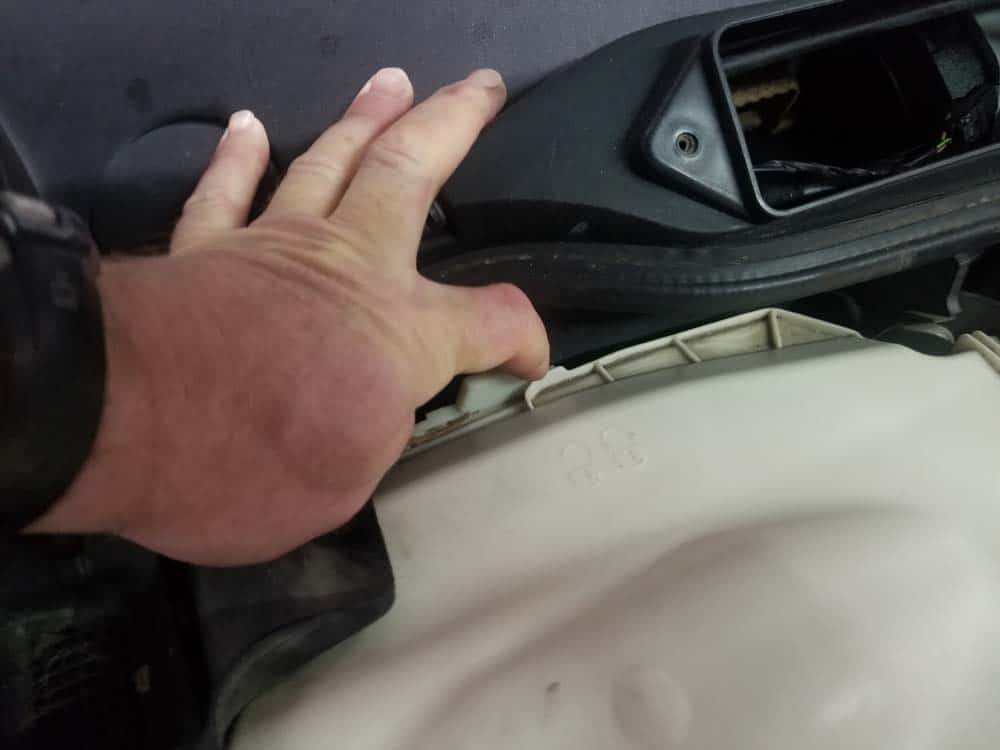
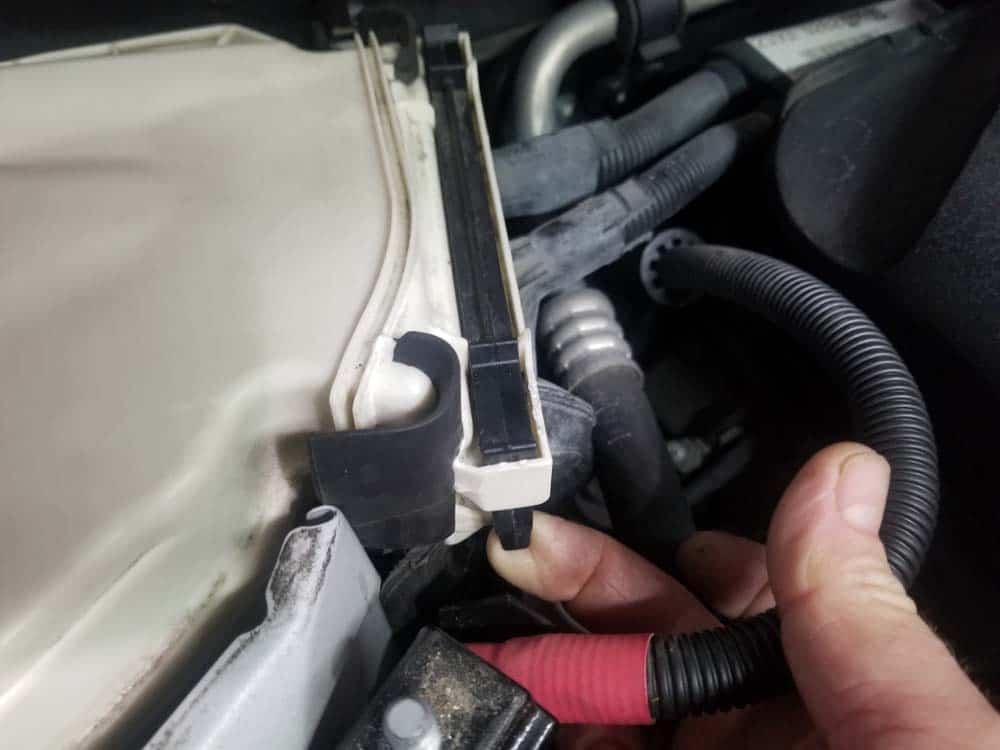
- Use an 8mm socket wrench to remove the three screws anchoring the top section of the left cabin filter housing to its lower section. Unplug the hood switch by pressing in the tab with a small flat blade screwdriver. Remove the top section from the vehicle.

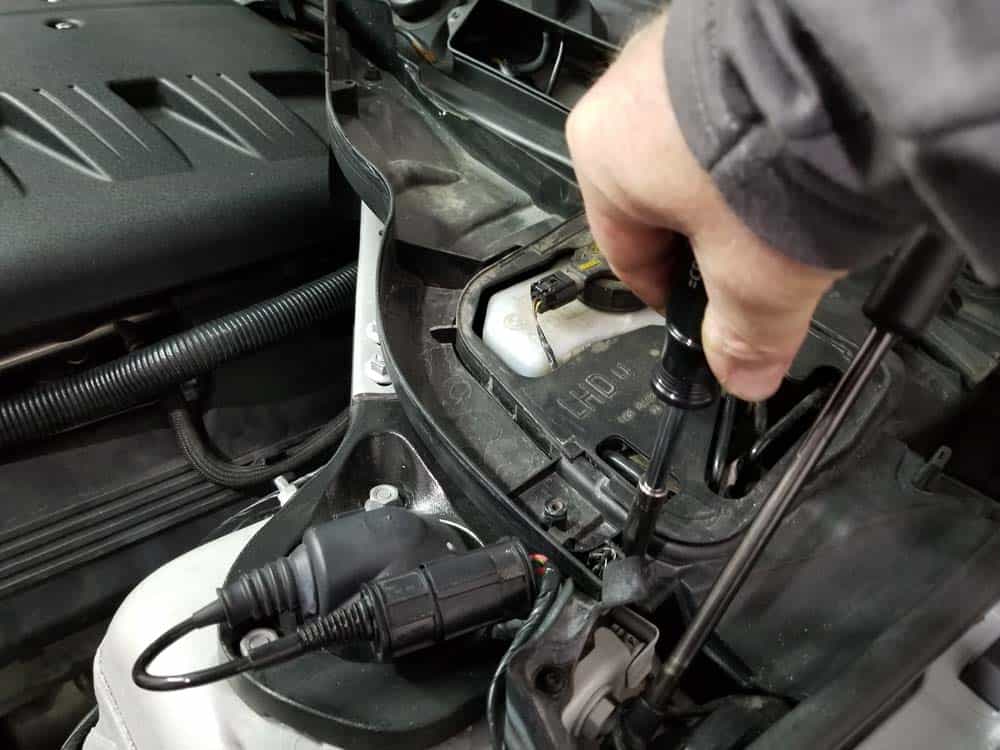
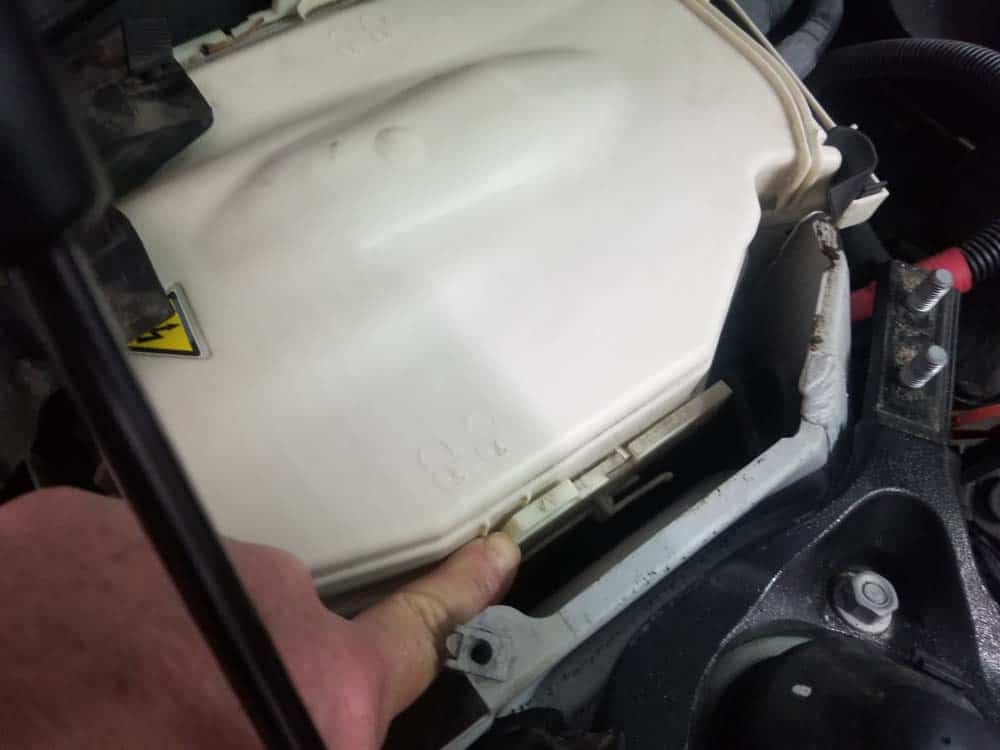
- Remove the 8mm nut anchoring the lower cabin filter housing to the frame of the car. Pull the lower housing loose.
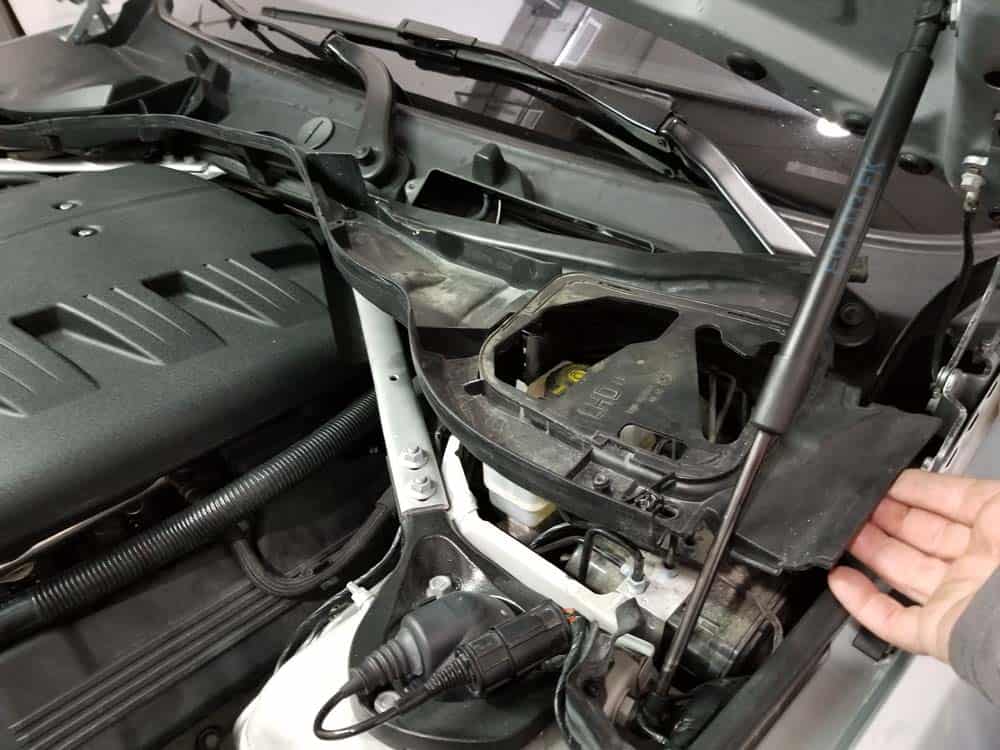
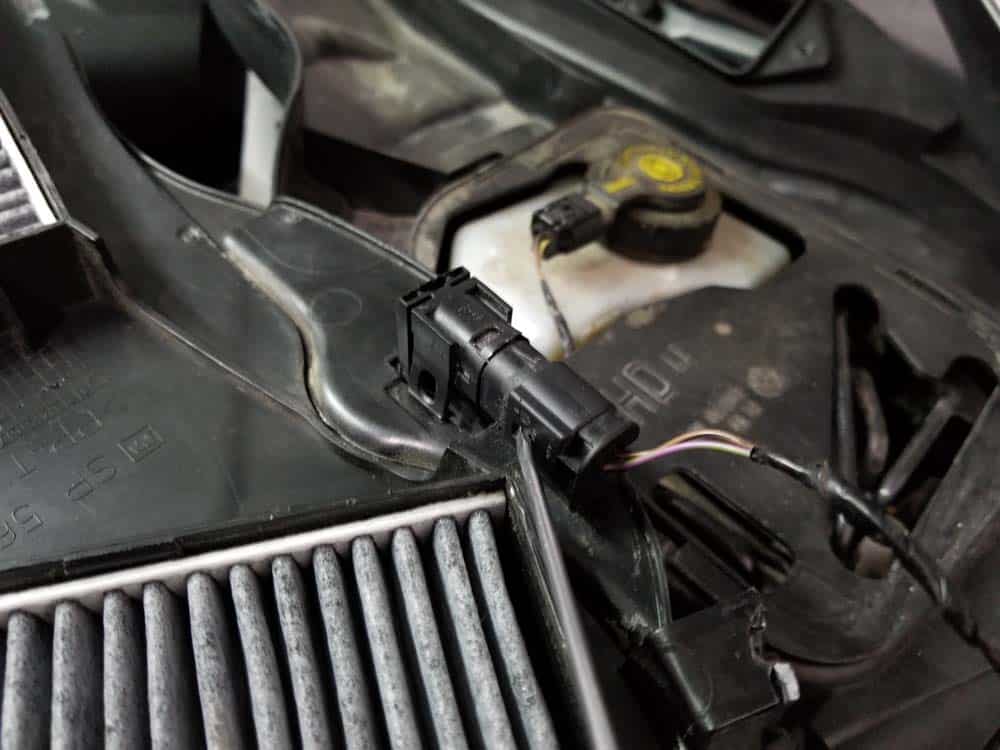
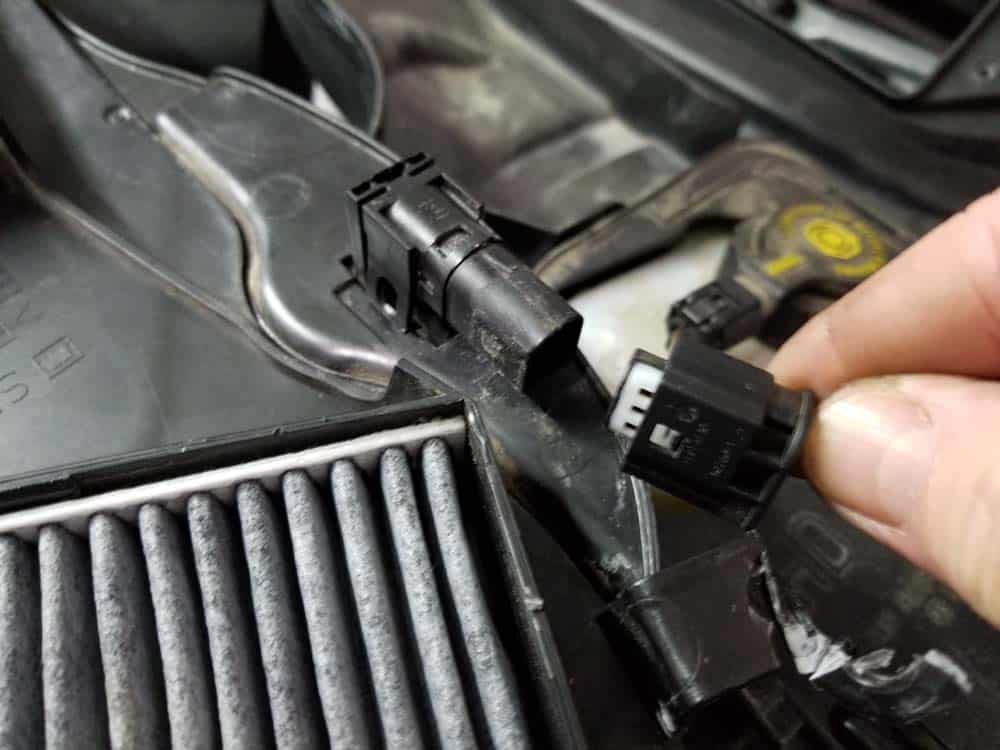
- Repeat the above two steps on the right cabin filter assembly. Unplug the AUC sensor located in the lower housing. Grasp the entire lower housing and remove from the vehicle.

Section 2 - Preparing the Engine Compartment for Ignition Coil and Spark Plug Removal
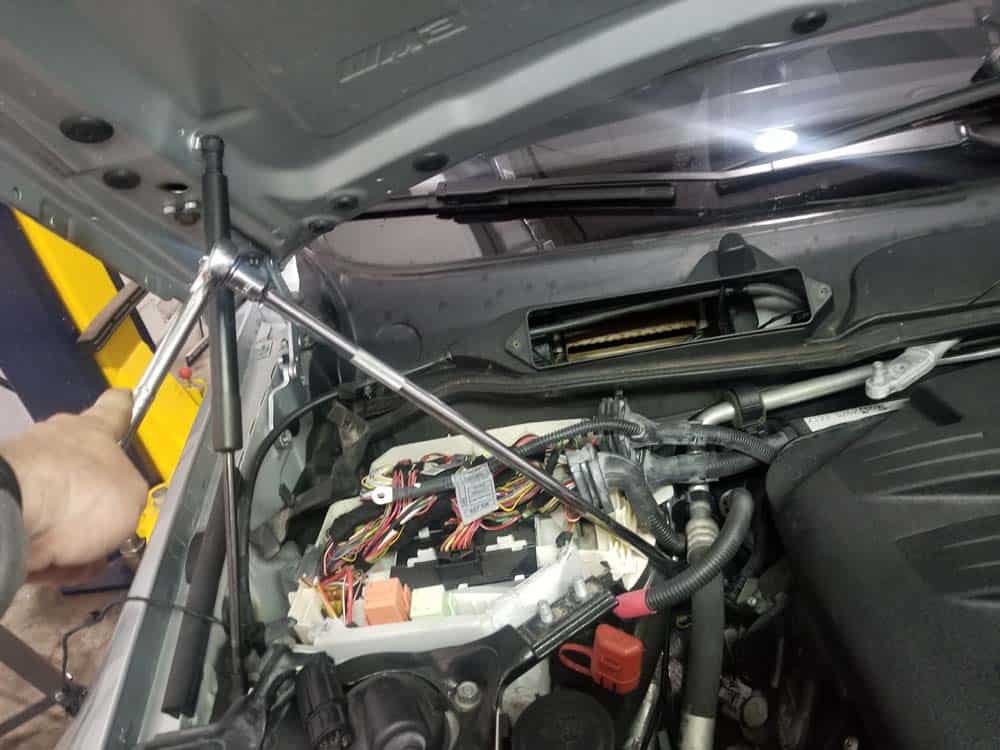
In order to gain clear access to the ignition coils and spark plug tubes, you will need to clear out some parts that reside in the work area.- Start by removing the two strut braces. Use a 13mm socket wrench to remove the three nuts and one bolt securing the left strut brace. Remove the strut brace from the engine compartment. Repeat on the right strut brace.


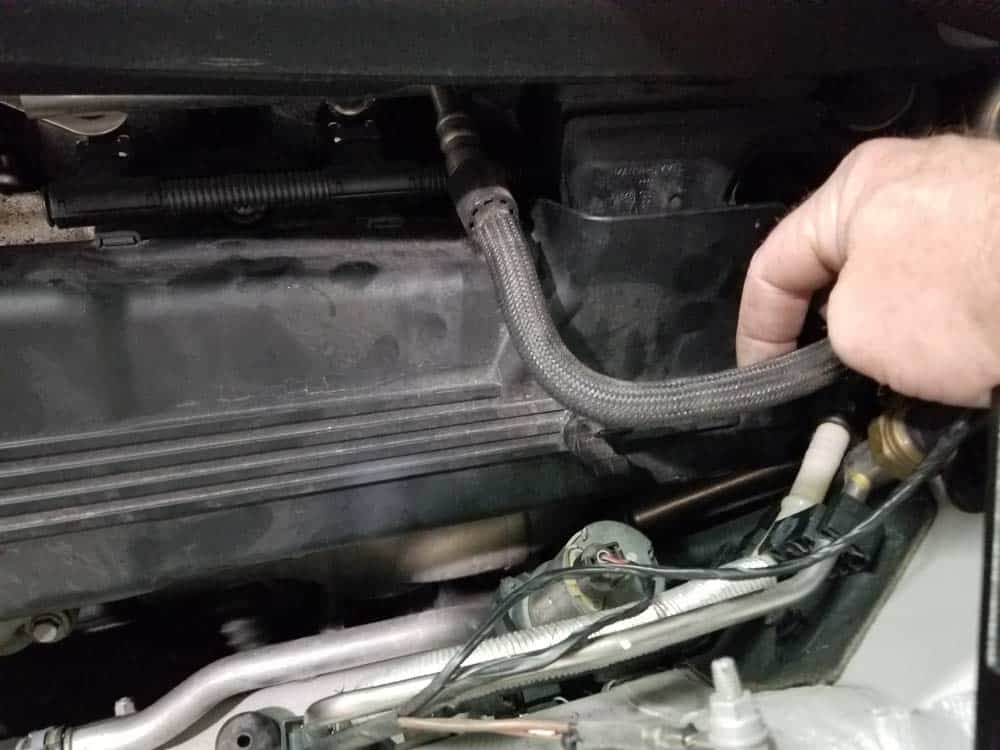
- Disconnect the vent hose from the rubber boot and gently tuck out of the way.
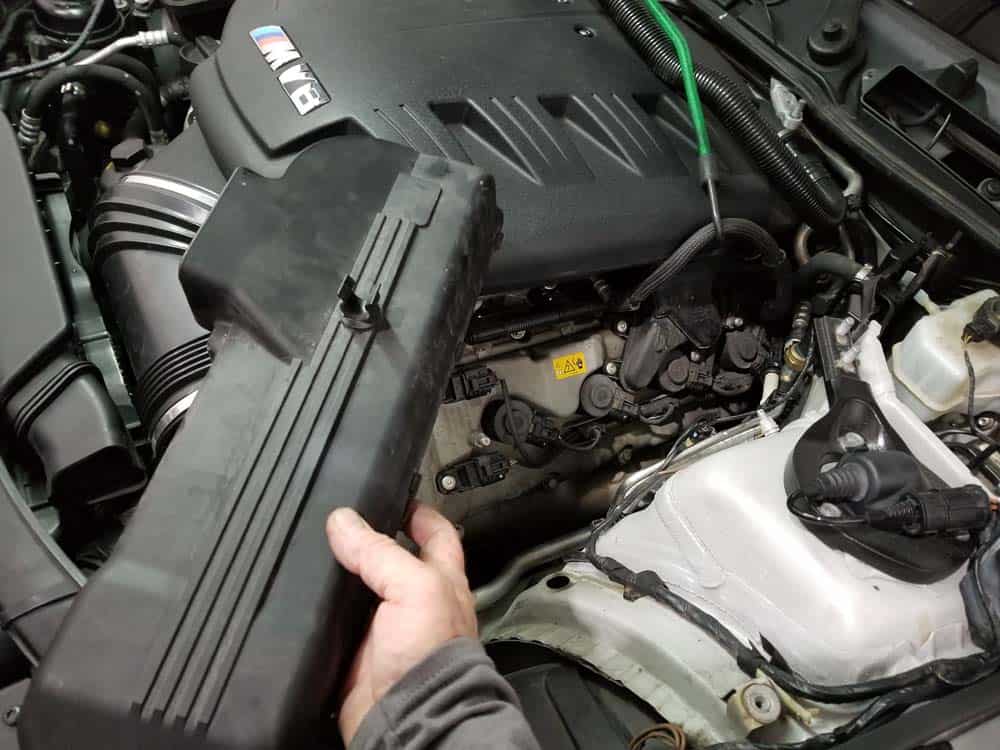
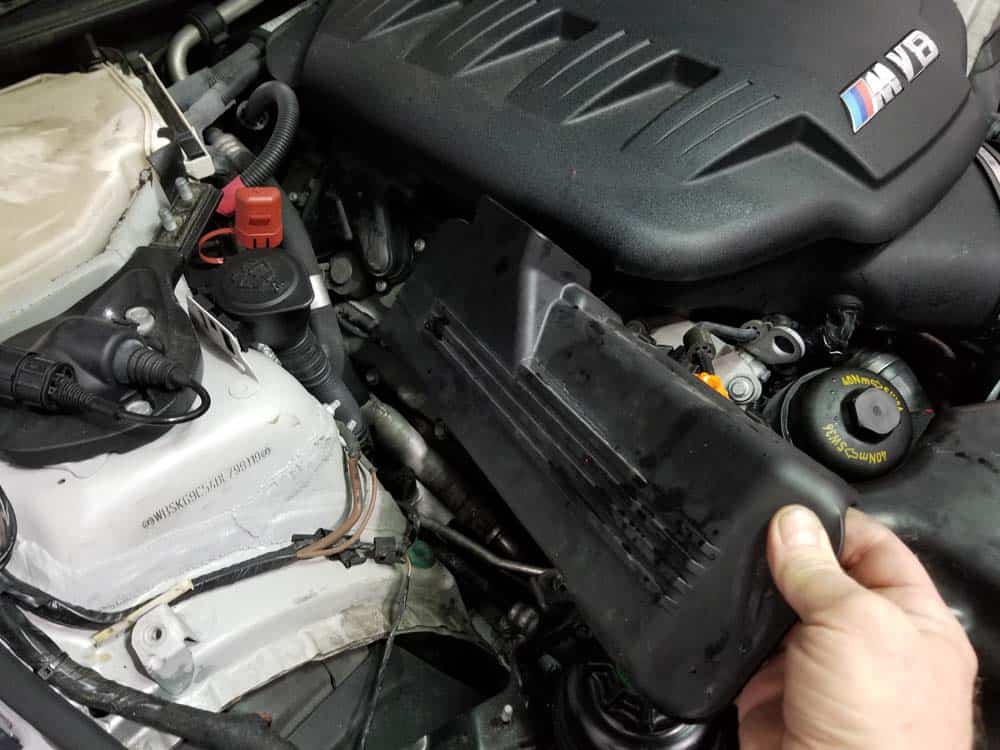
- Unclip the fuel line from the left engine cover. Grasp the left engine cover and pull it loose. It is held in place by two steel dowels that snap into rubber grommets in the back of the cover. Use patience...the rear one can sometimes be tough to pull loose.
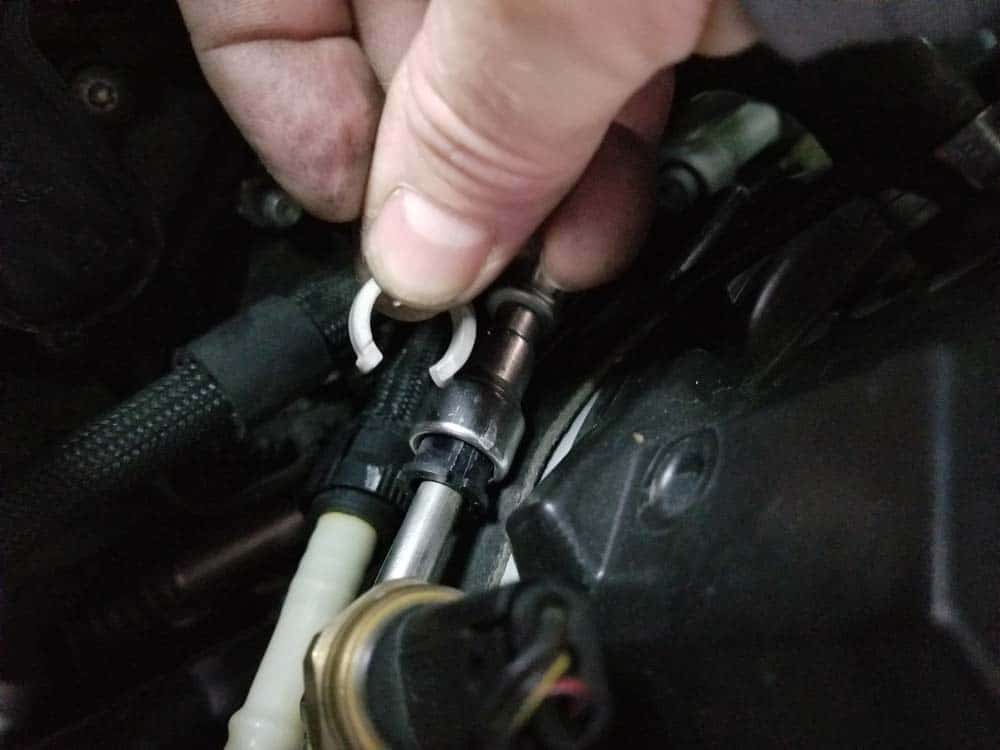
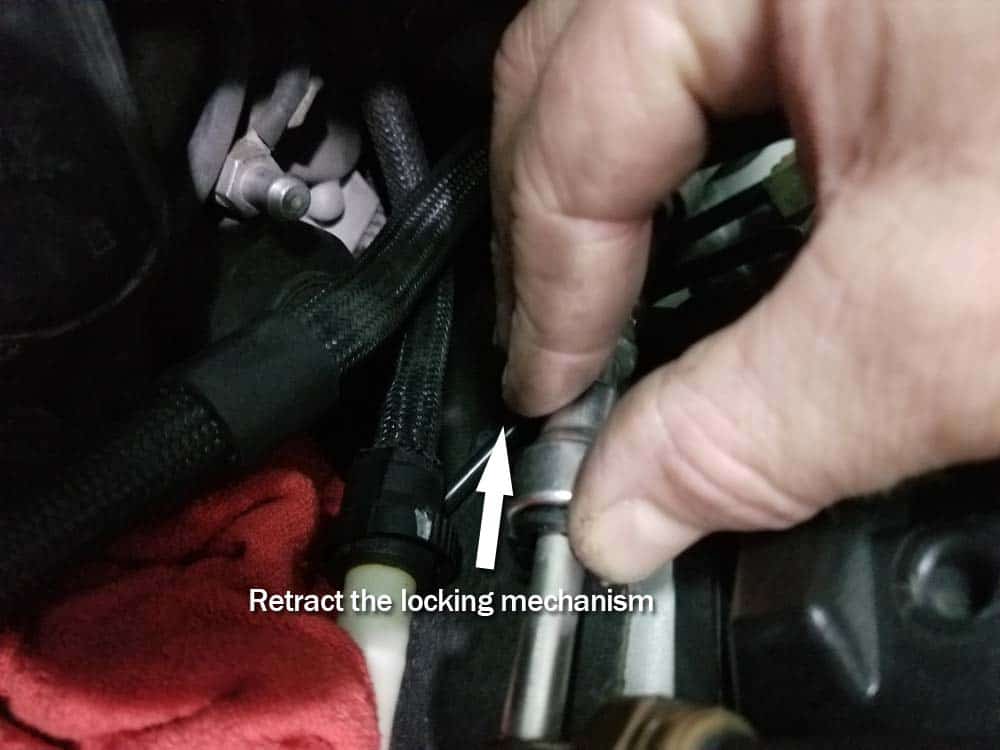
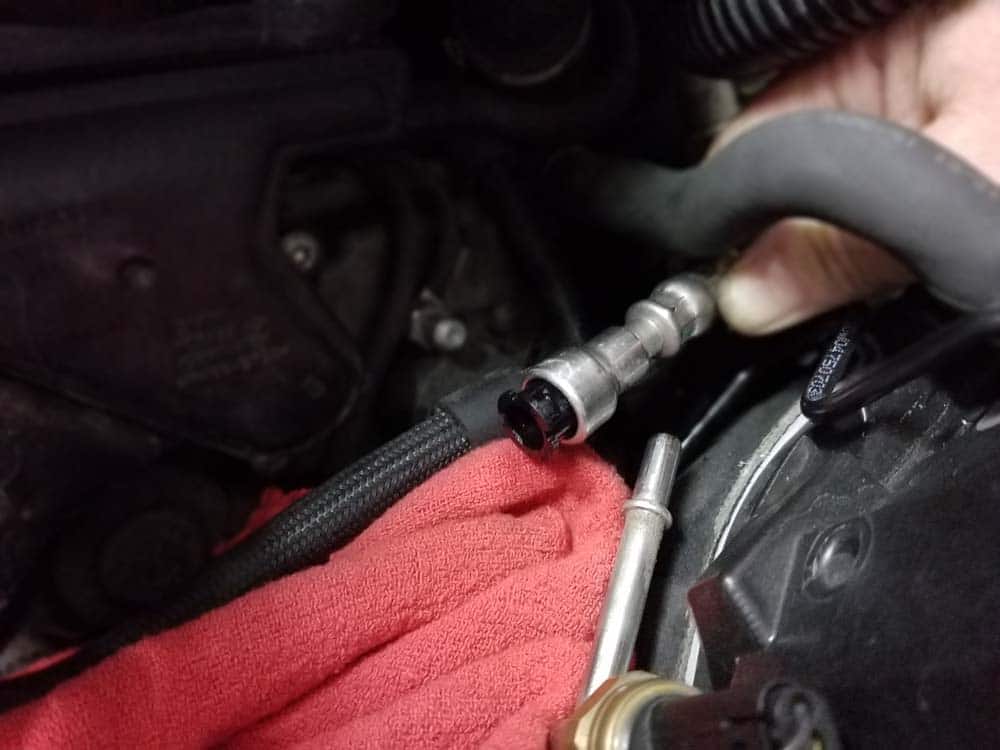
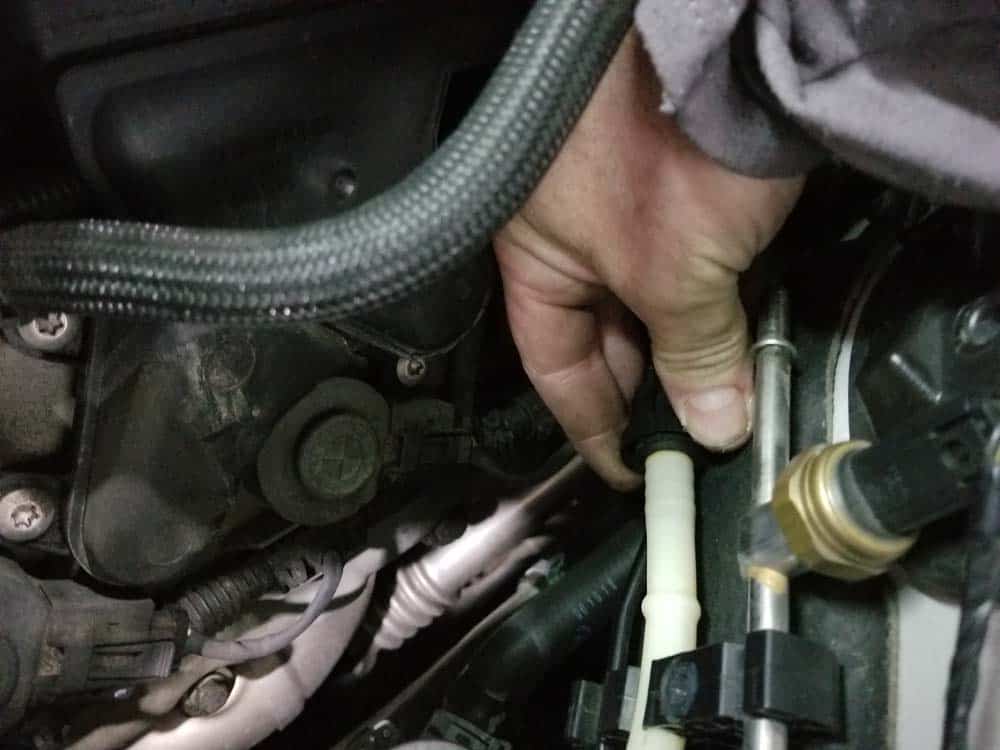
- Next you will need to disconnect the fuel line and clear it out of the way. This is a very simple process. First, remove the gray plastic safety clip. Next, with two hands, retract the black locking mechanism. Once the black locking mechanism is retracted, you can easily pull the fuel line quick disconnect apart. Have rags ready to catch the few small drops of fuel that may spill out.
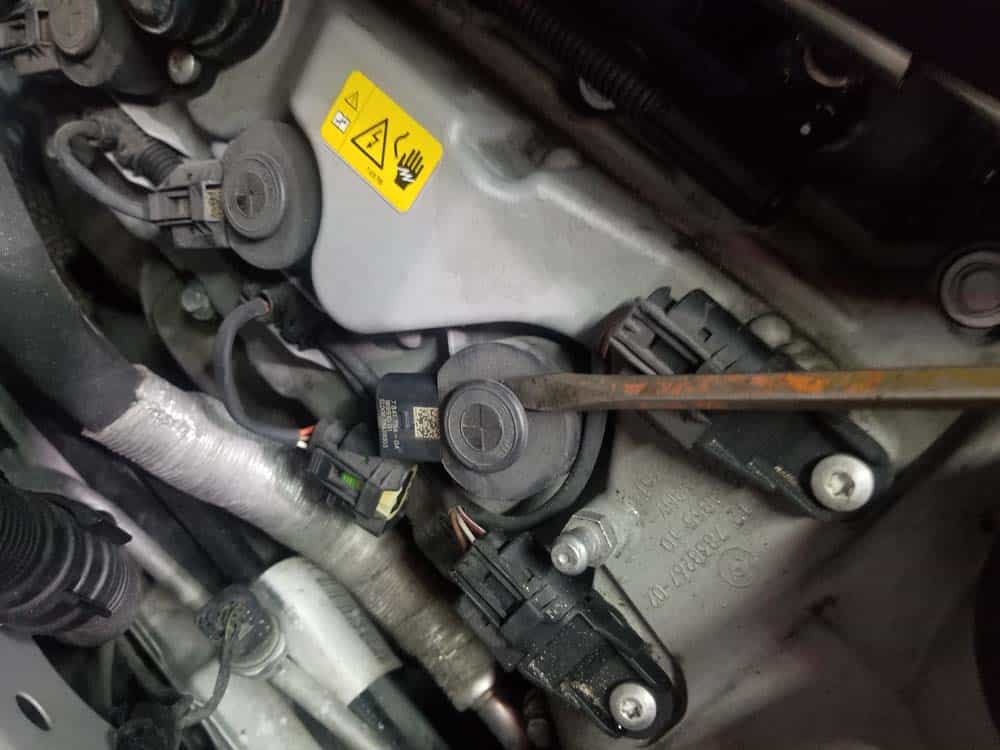
- Squeeze the plastic connector and disconnect the vent line located under the fuel line. Pull it loose from its mount on the side of the engine compartment. Tuck all of the lines cleanly out of the way so you have clear access to the rear ignition coil.
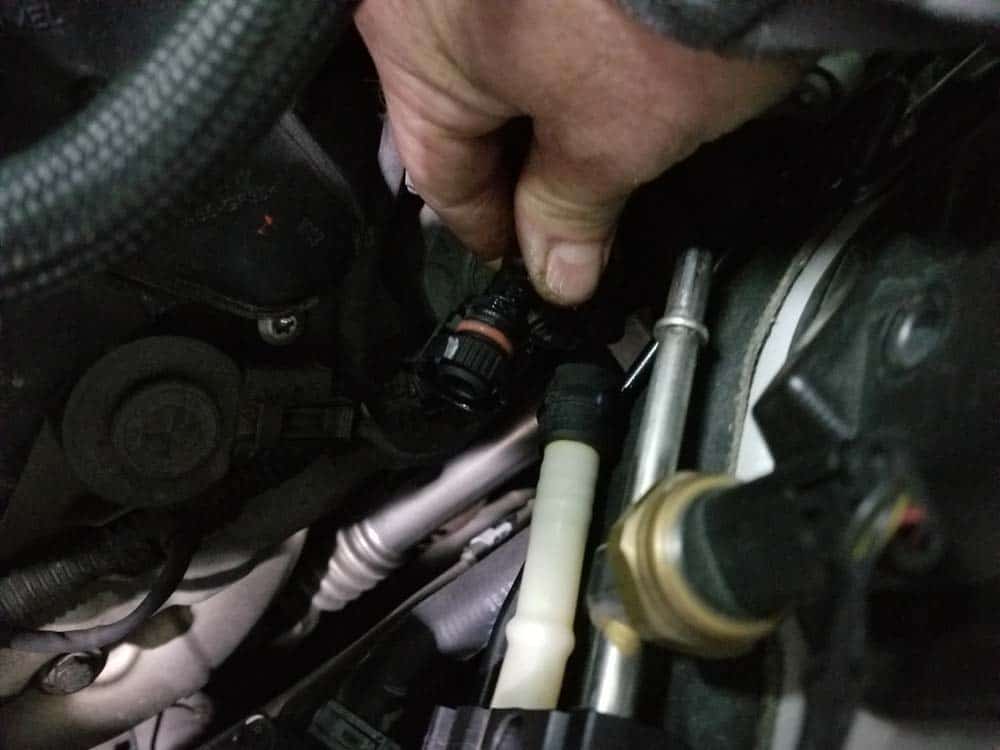
- You now have clear access to the coil packs on the left side of the car.
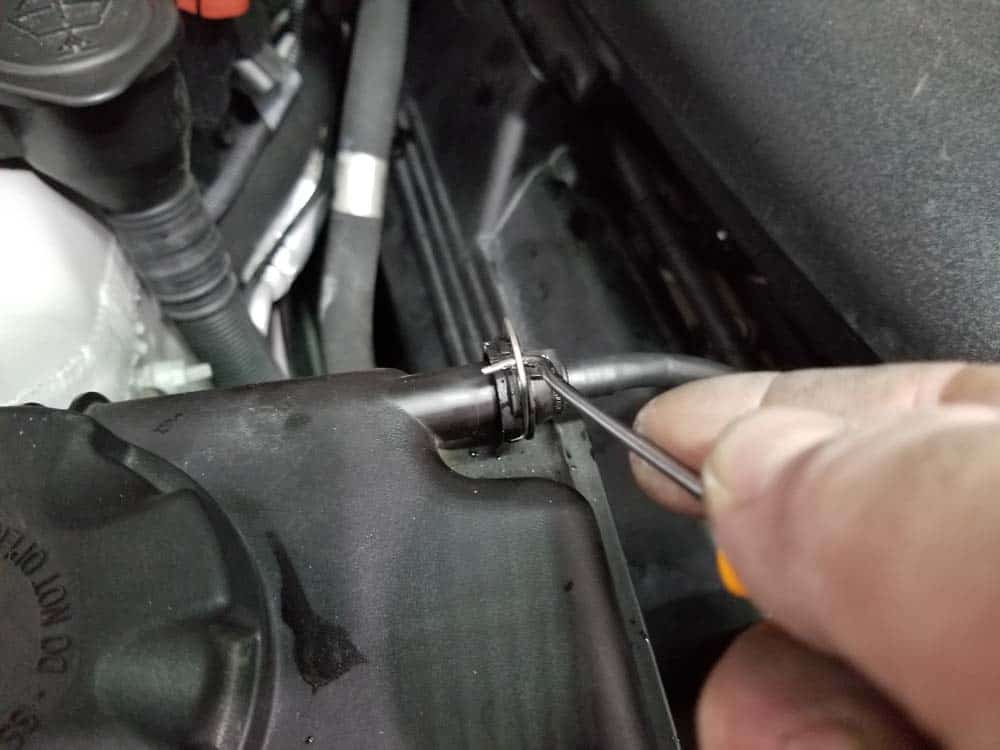
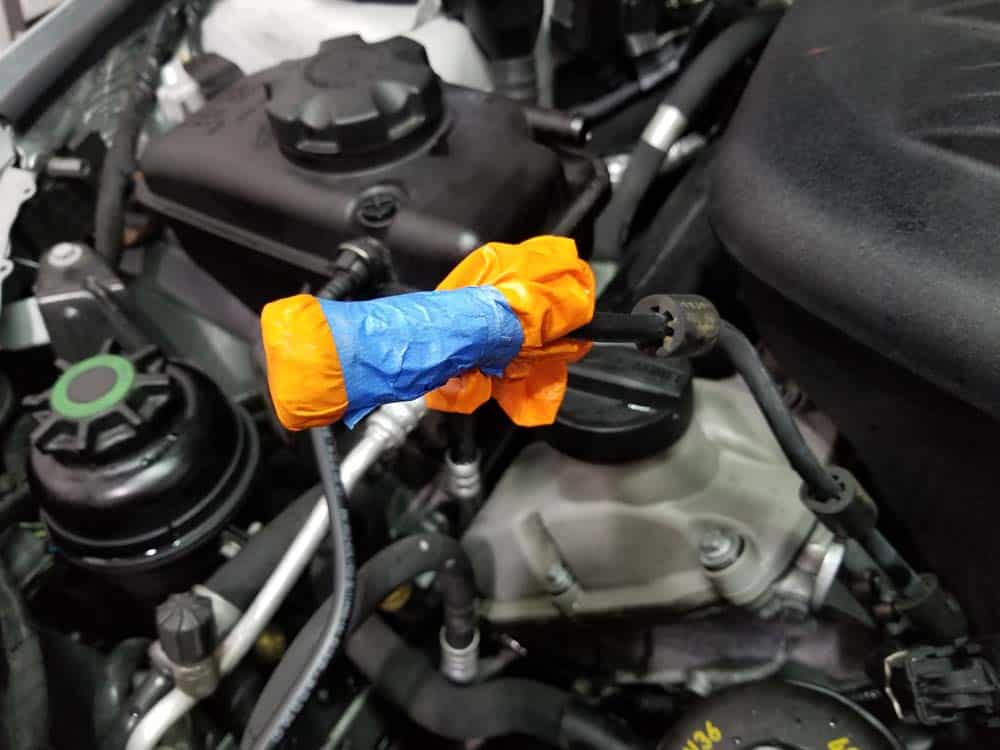
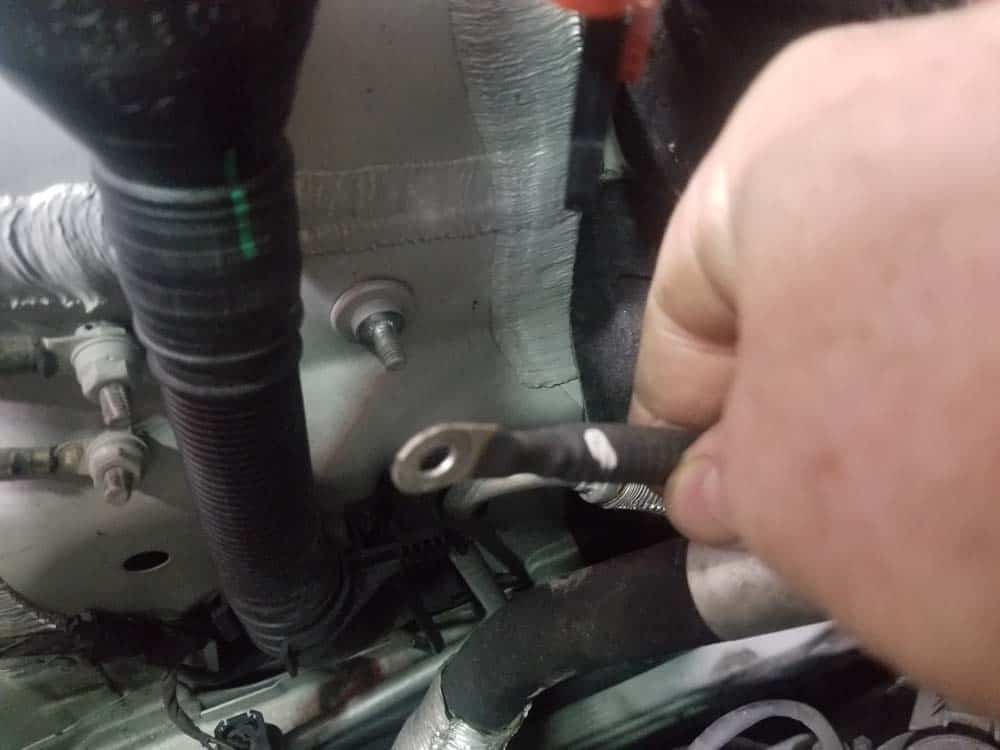
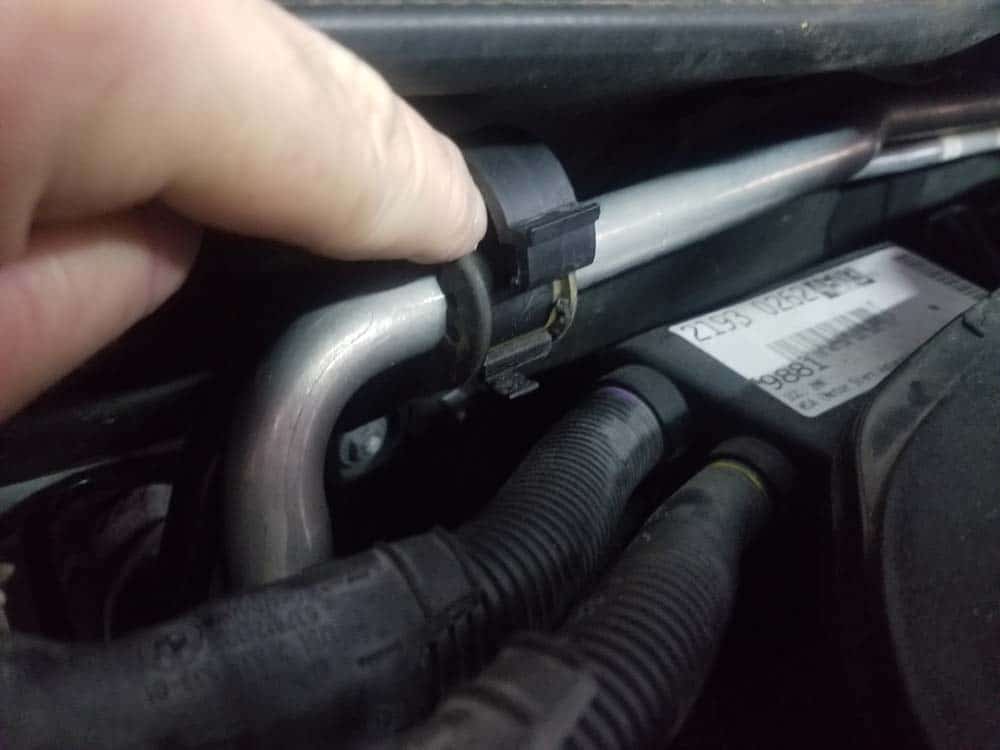
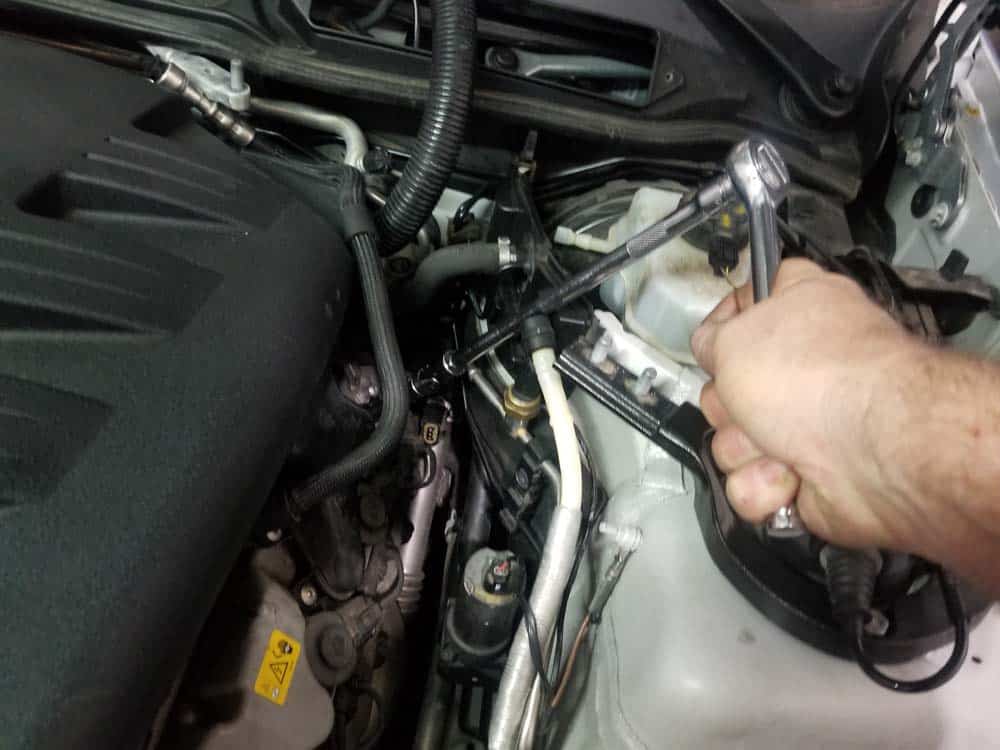
- Moving to the right side of the M3, use a metal pick to release the clip securing the overflow hose to the coolant reservoir. Pull the pipe loose from the reservoir.
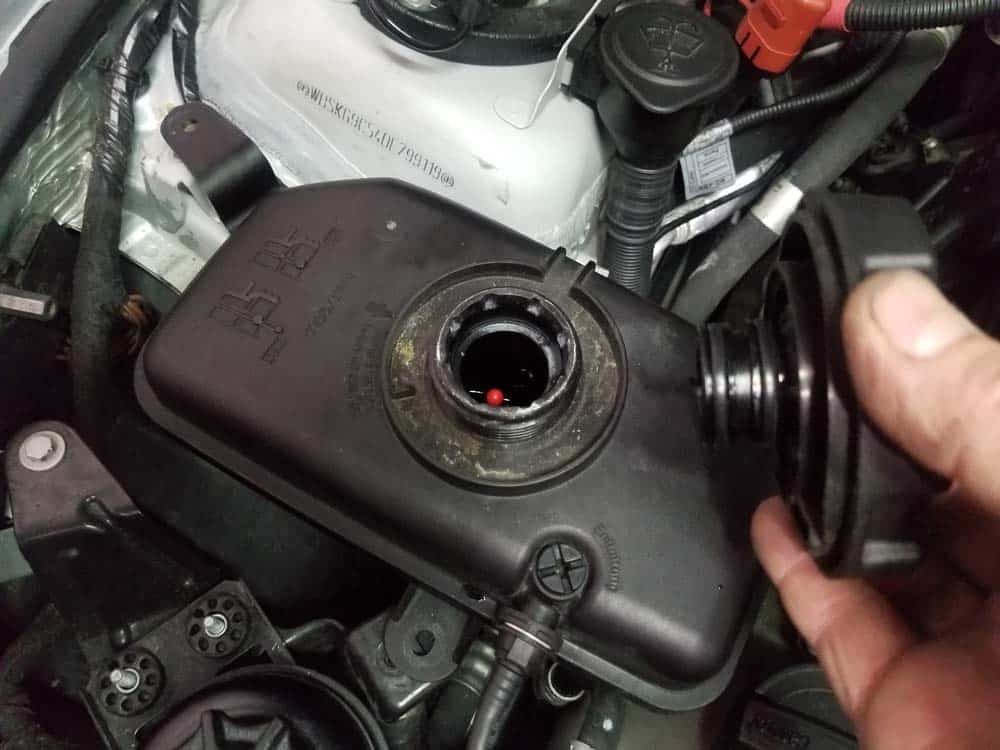
- Tape or zip tie a rubber glove around the end of the reservoir pipe to keep it from leaking. Believe it or not, this irritating little tube will continue to dump coolant on your floor even if secured in an upright position.
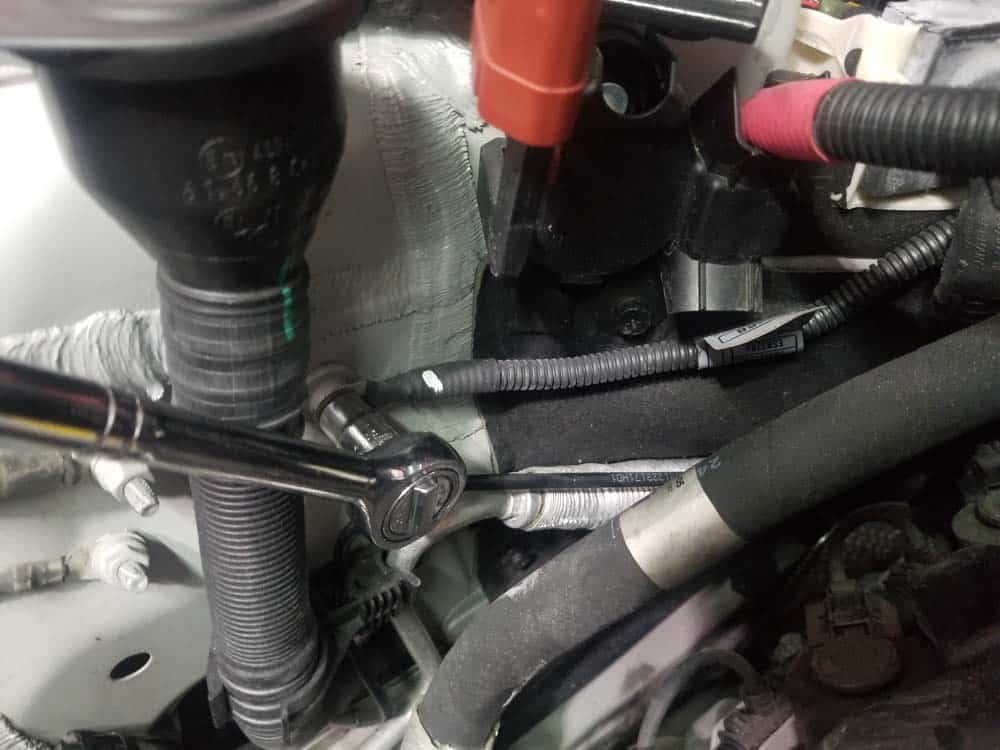
- Use a 10mm socket wrench to remove the two bolts securing the coolant reservoir to the car.
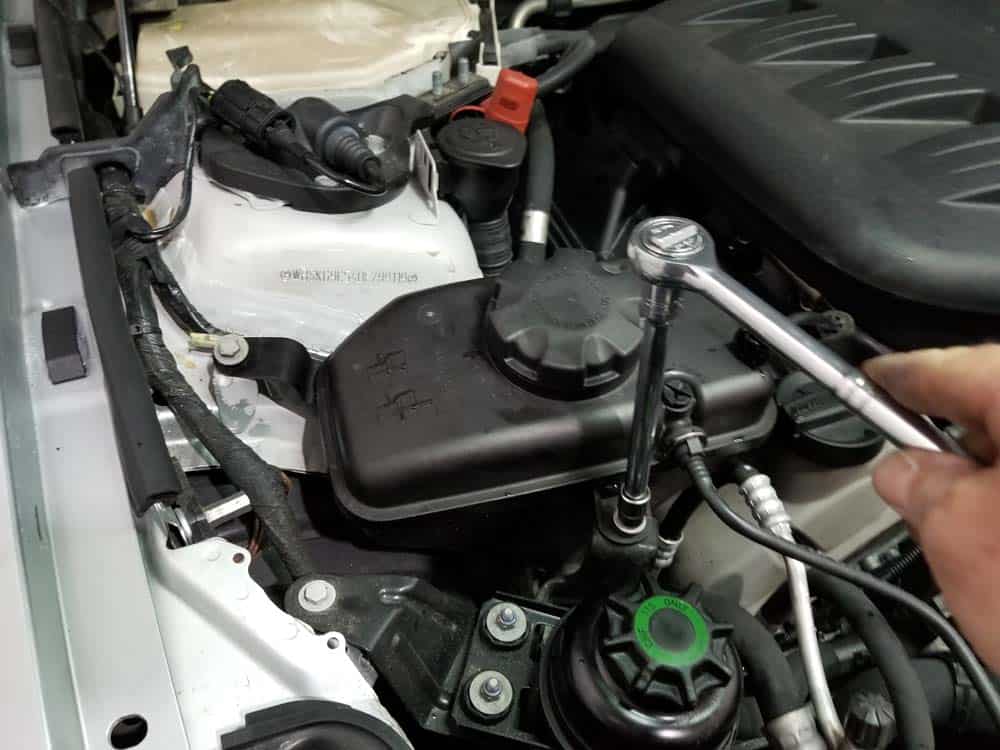
- Use a 10mm socket wrench to remove the two nuts securing the power steering fluid reservoir.
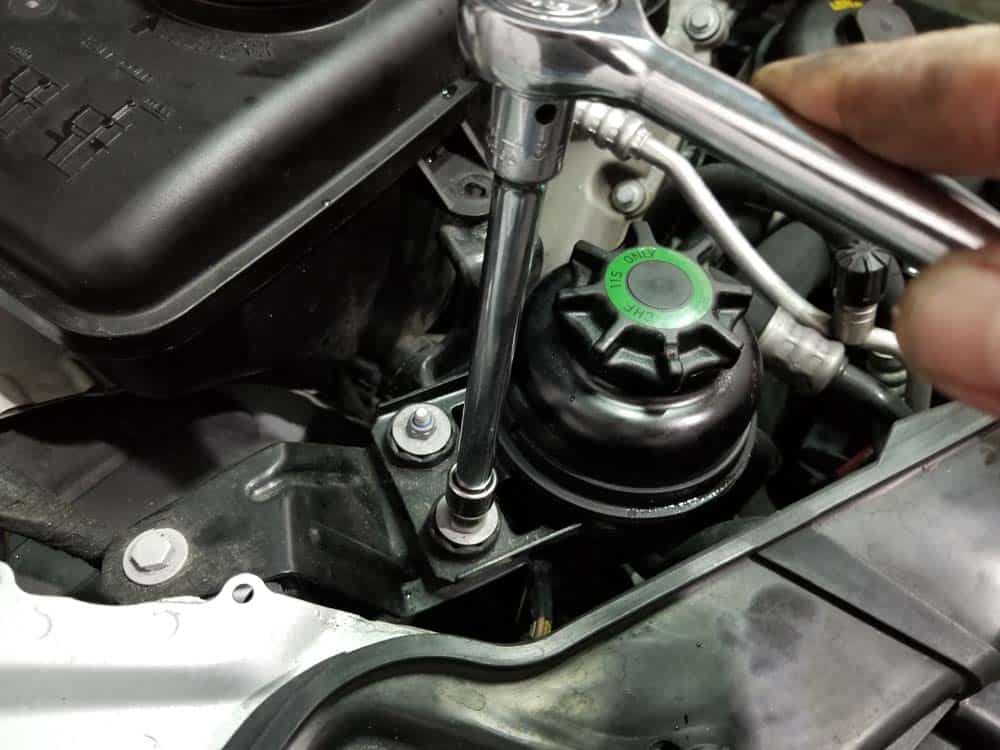
- Using extreme care, pull the power steering and coolant reservoirs loose and maneuver out of the way of the work space. Make sure not to pinch any of the coolant lines during the process.
- Grasp the right engine cover and remove from car.
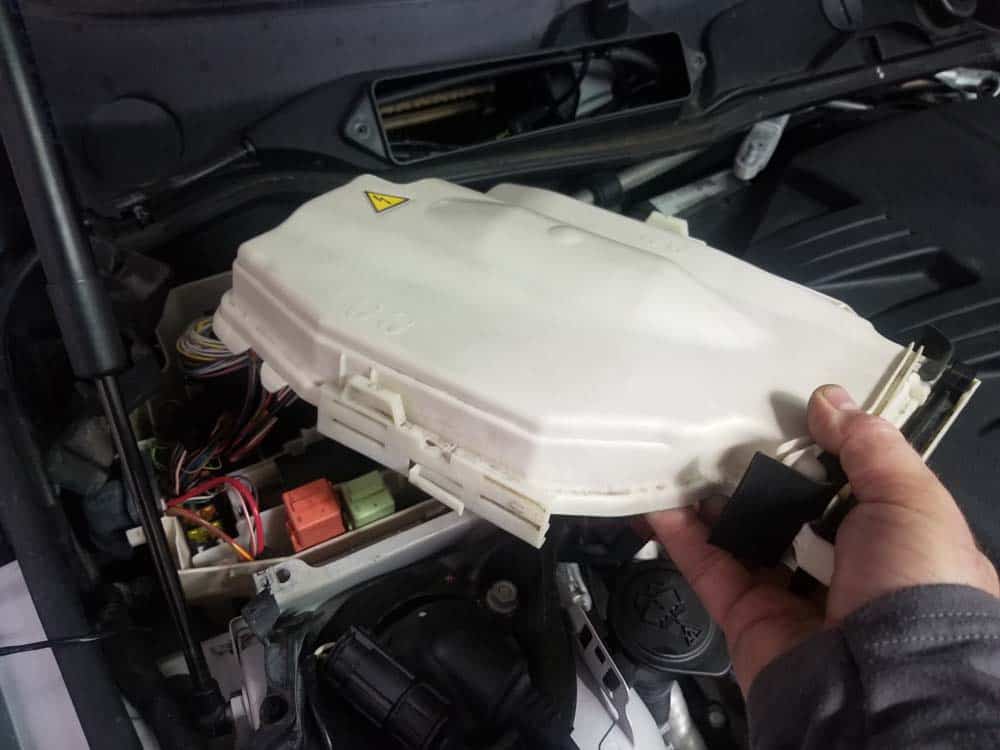
- Next, you will need to clear out the rear wiring harnesses so you can access the right rear ignition coil (cylinder 4). Start by removing the top from the E-box. First, slide the front and rear latches to the “unlock” position on the box (the unlock positions are embossed on the lid). Next, unsnap the sides of the E-box lid by pulling out on the black plastic retainers. Remove the E-box top from the vehicle.
- Use a 10mm socket wrench to remove the ground cable from the side of the engine compartment.
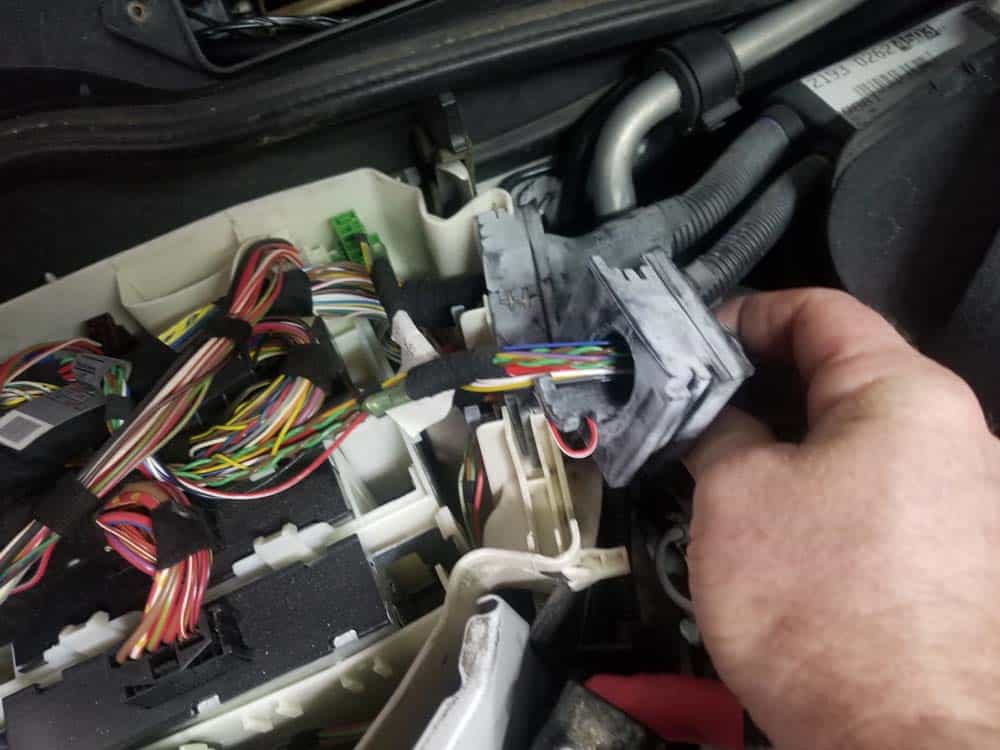
- Pull the wiring harnesses from the E-box and carefully stow out of the way.
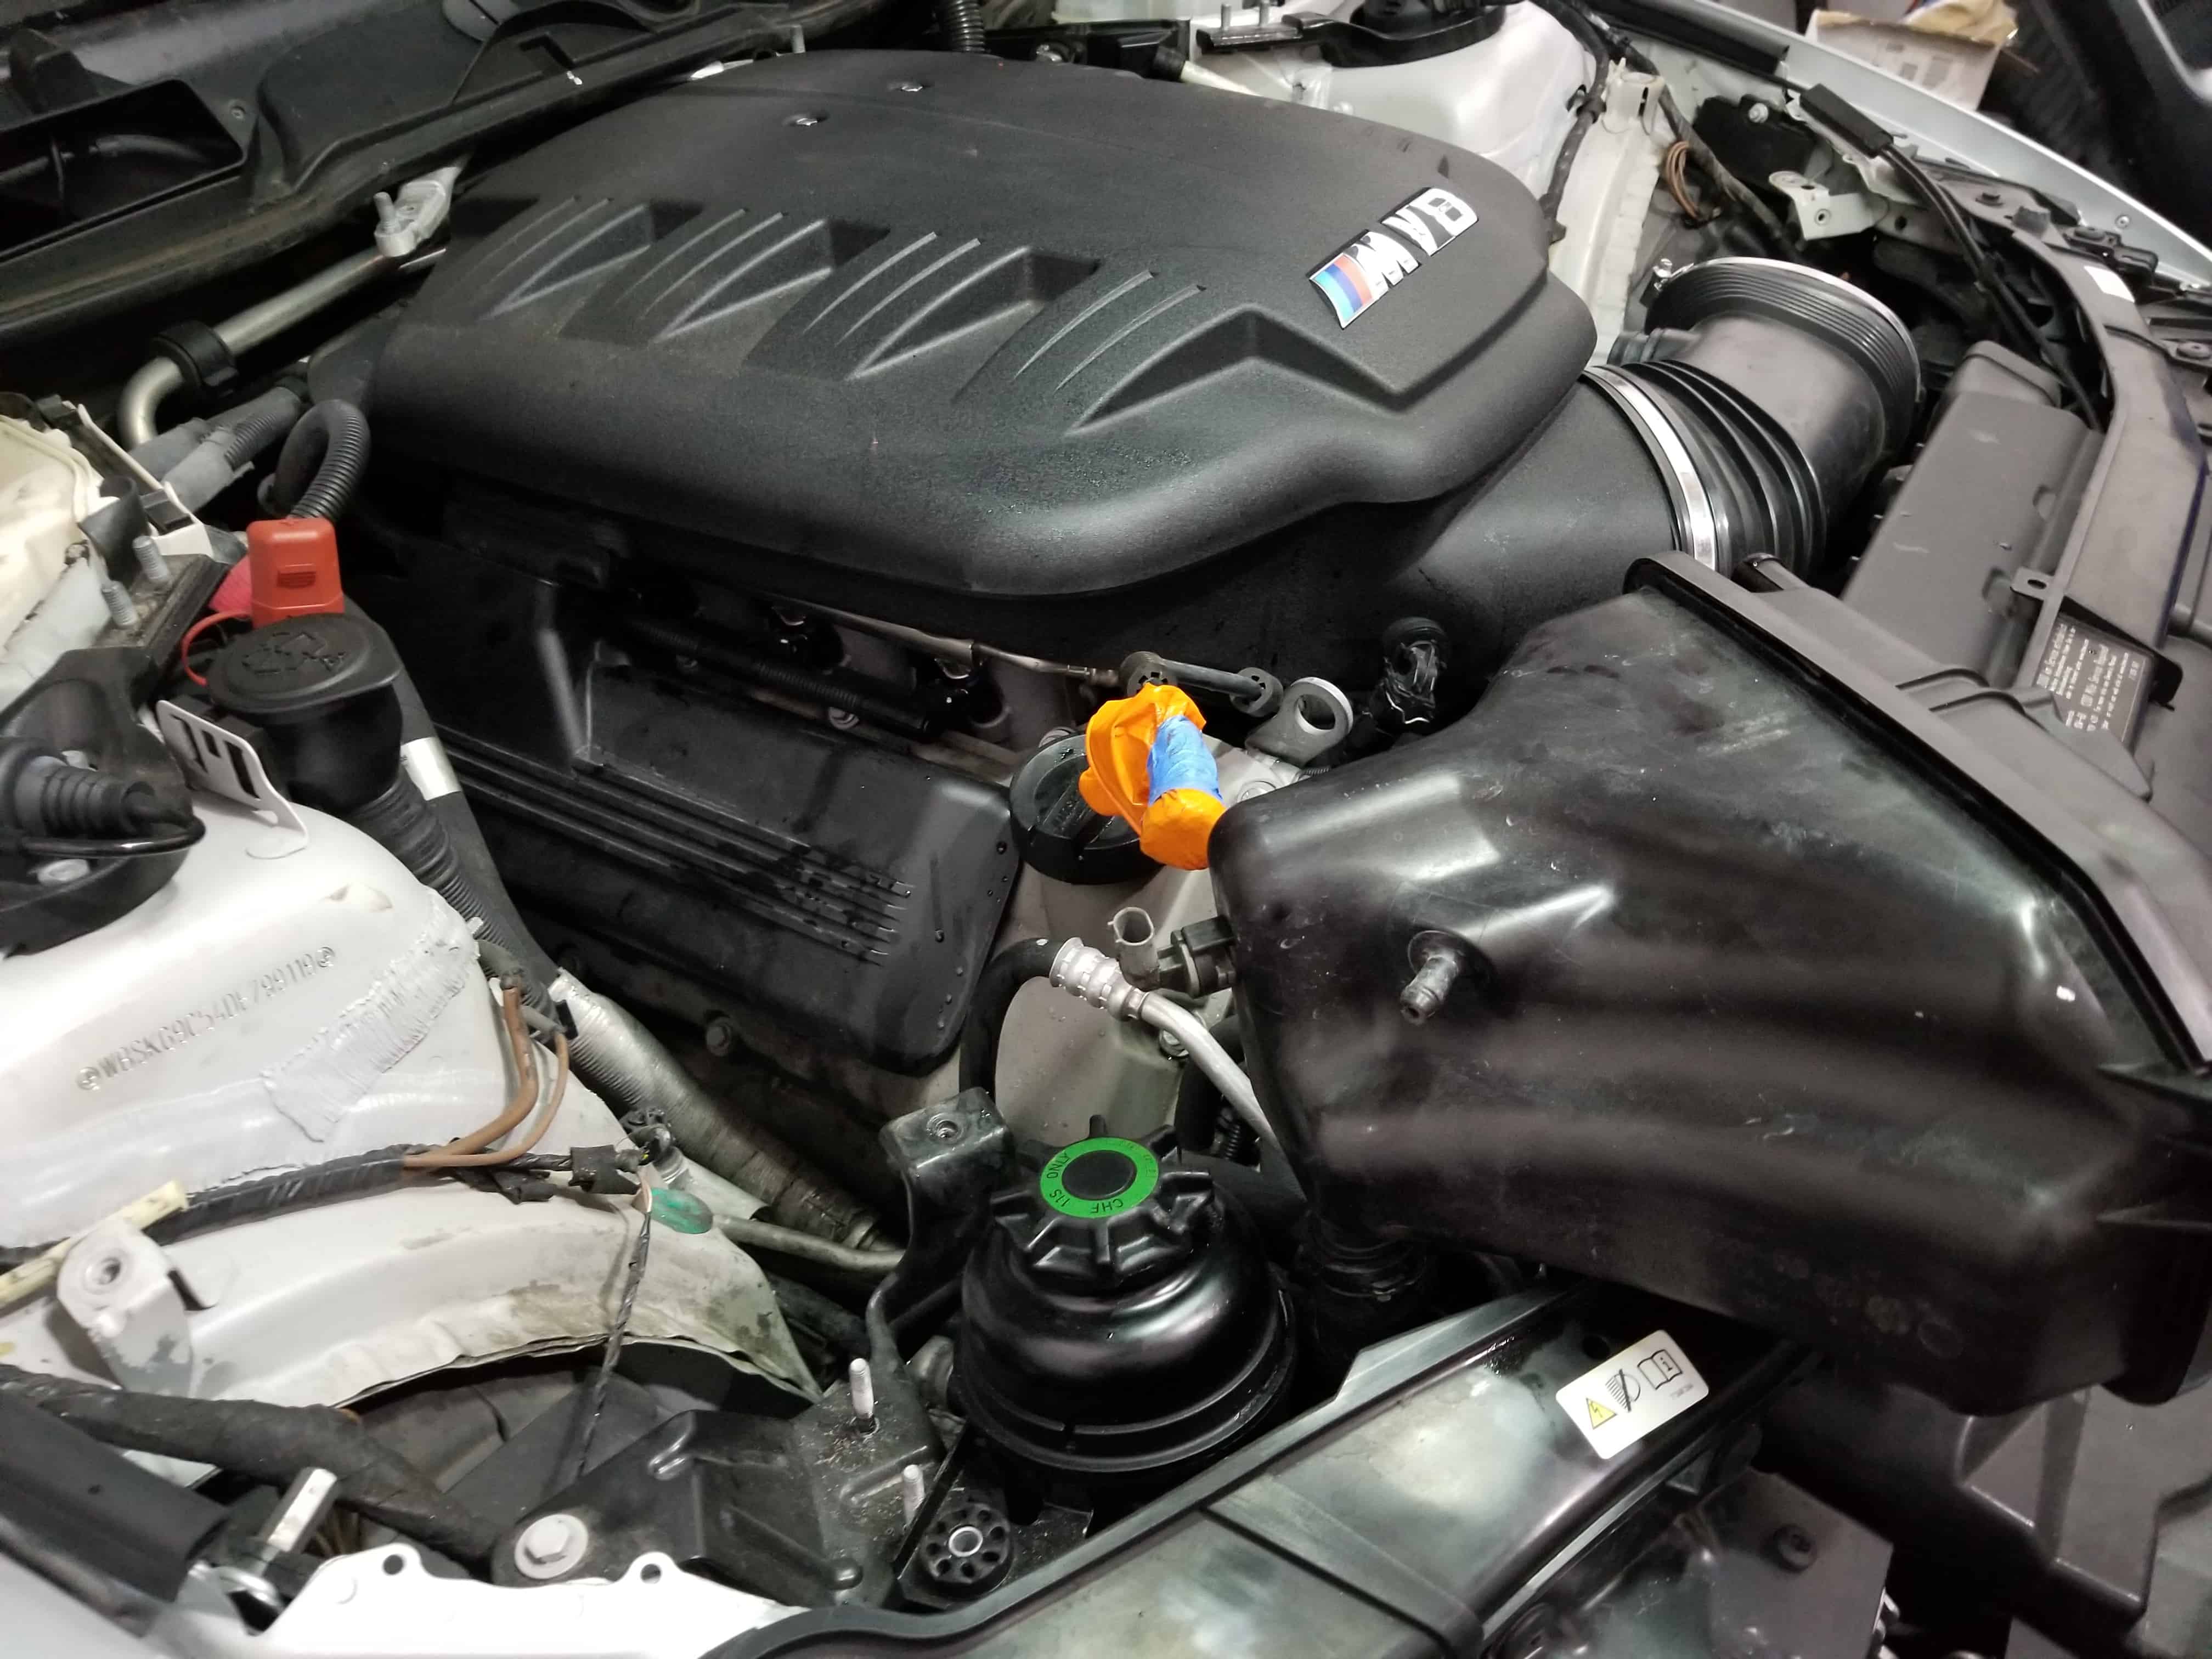
- We like to loosen the ac vacuum line where it mounts to the firewall. It's an optional step, but it only takes a few seconds to release it and we find having that extra little bit of flexibility in the metal line helps during coil removal. Use a flat blade screwdriver to open the plastic clip as shown below.
- You can now easily remove all of the ignition coils and spark plugs.
Section 3 - Replacing the Coil Packs and Spark Plugs
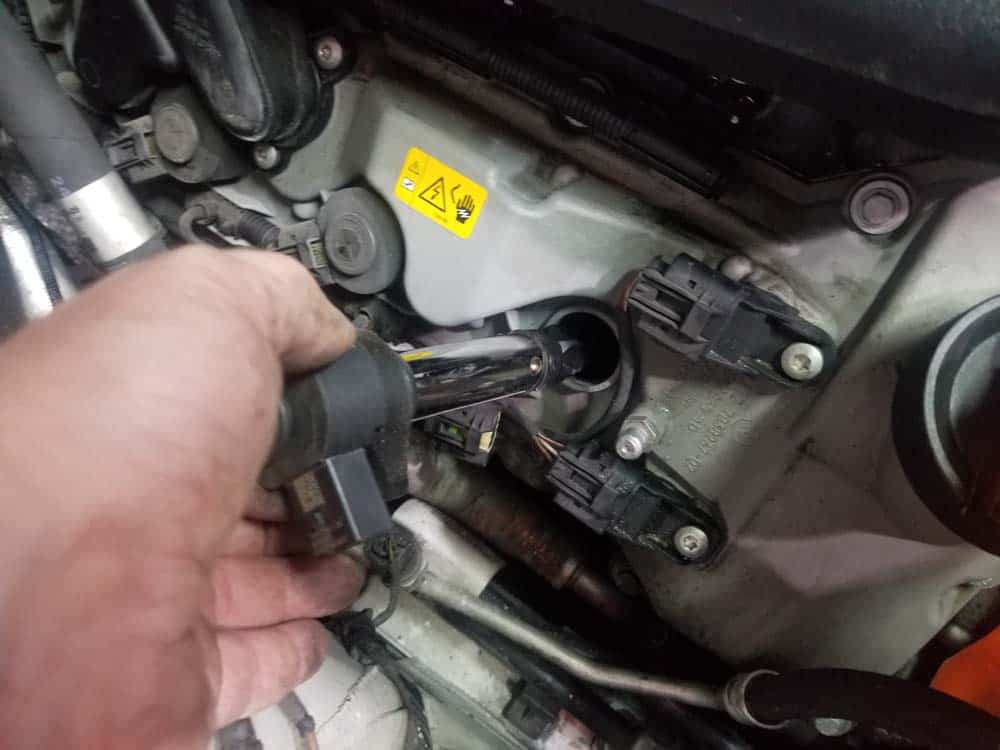
There is a lot of chatter online as to what the best method is to remove BMW E90 M3 ignition coils. There are special tools you can purchase that grasp the top of the coil so you can pull it out of the spark plug tube but we have found these to be completely unnecessary. The easiest and least expensive way to remove the high performance ignition coils from your M3 are with a large screwdriver. Don’t get caught up in all of the controversy; there is absolutely no need for special tools to remove your coils. You don’t even have to wrap the screwdriver in tape to protect your coils...that’s another “old wives tale” that someone came up with that is a complete waste of time. Just remember to never force them out with the screwdriver...if they are stuck then you are most likely trying to pry them out crooked. Re-position your screwdriver and try again.- Starting with cylinder #1, release the wiring harness from the ignition coil and pull it free.
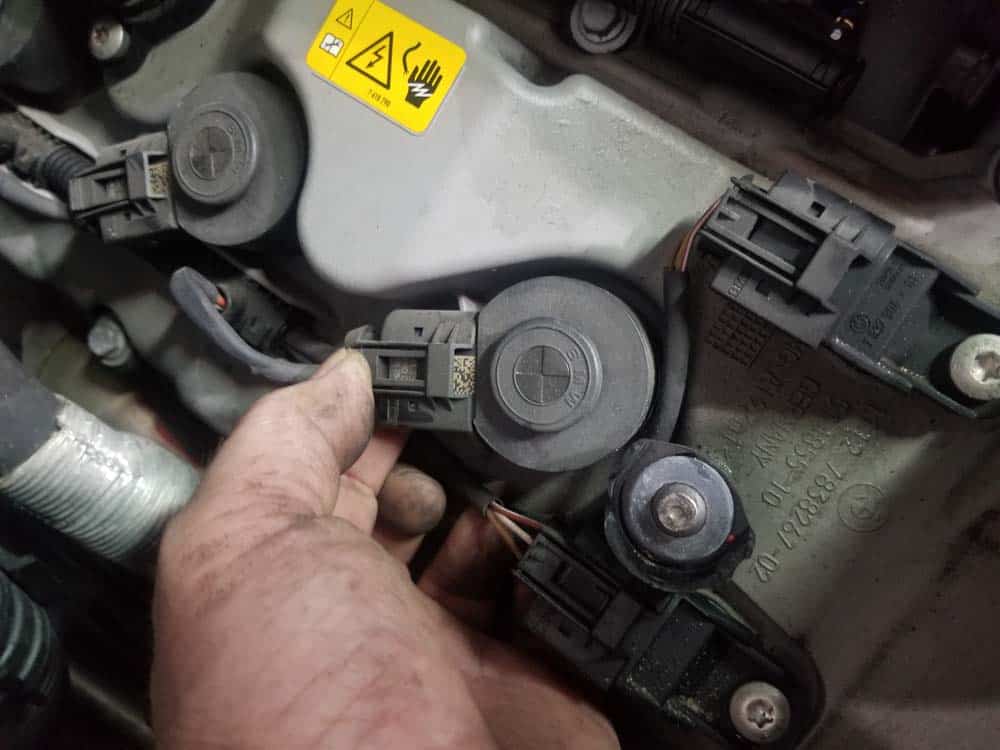

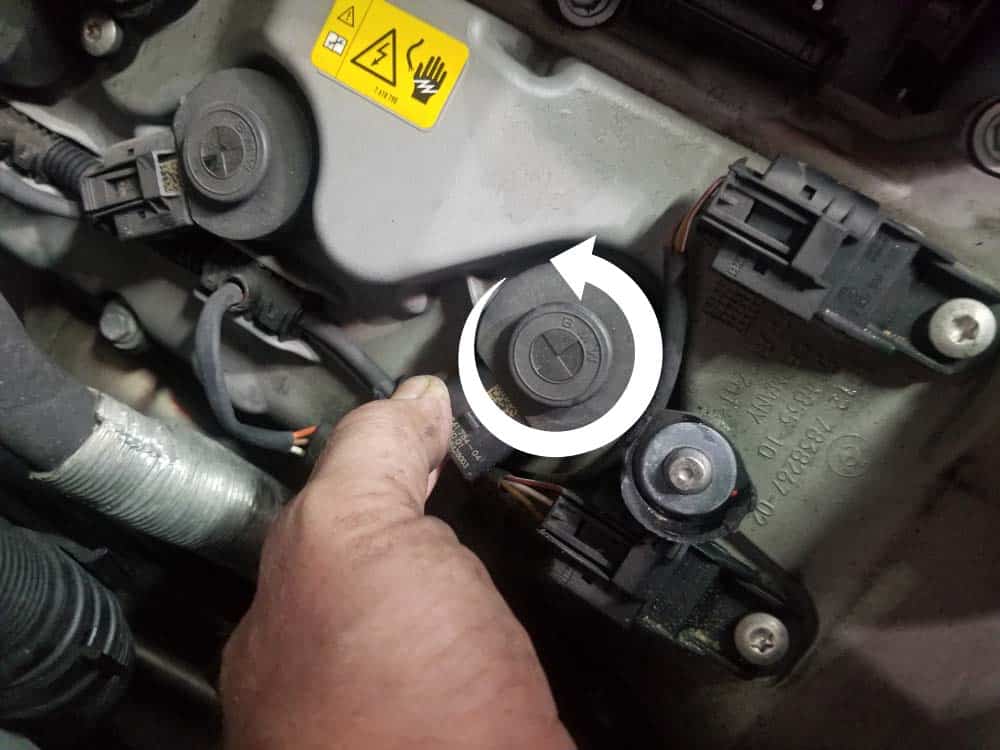
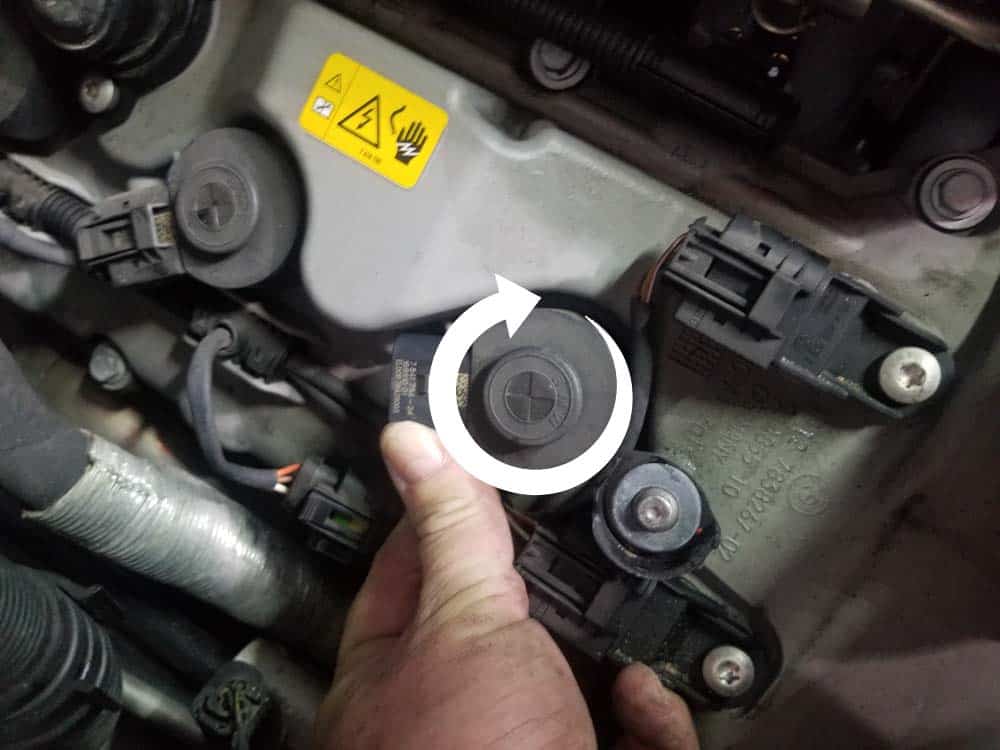
- Grasp the top of the coil and turn it back and forth several times to release its grip on the top of the spark plug.
- Using a large flat blade screwdriver, GENTLY pry the ignition coil off of the spark plug. Remove the coil from the vehicle.
- Using a 16mm spark plug socket, remove the spark plug from the spark plug tube.
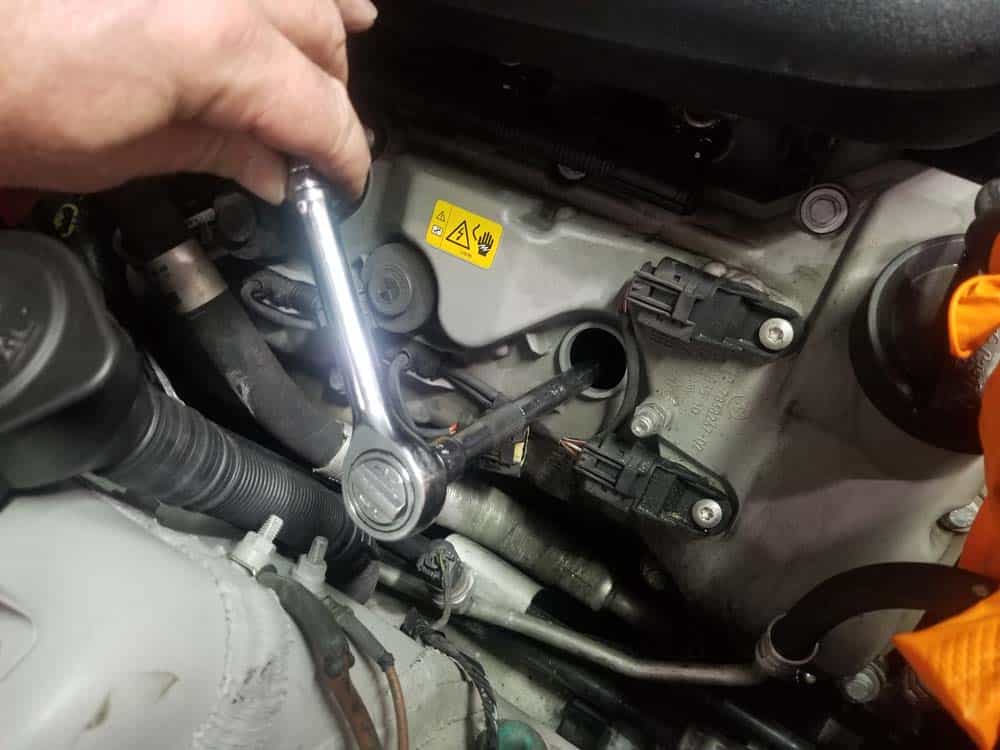
- Install a new spark plug. Torque the plug to 25 Nm (18 ft-lb).
- Install old (or new if replacing) ignition coil. The BMW Repair Guide does not recommend using dilithium grease on your ignition coils...it has been known to create misfires by causing the ignition coil to slip off of the spark plug. Use the palm of your hand to apply pressure to the top of the coil until in snaps onto the head of the spark plug.
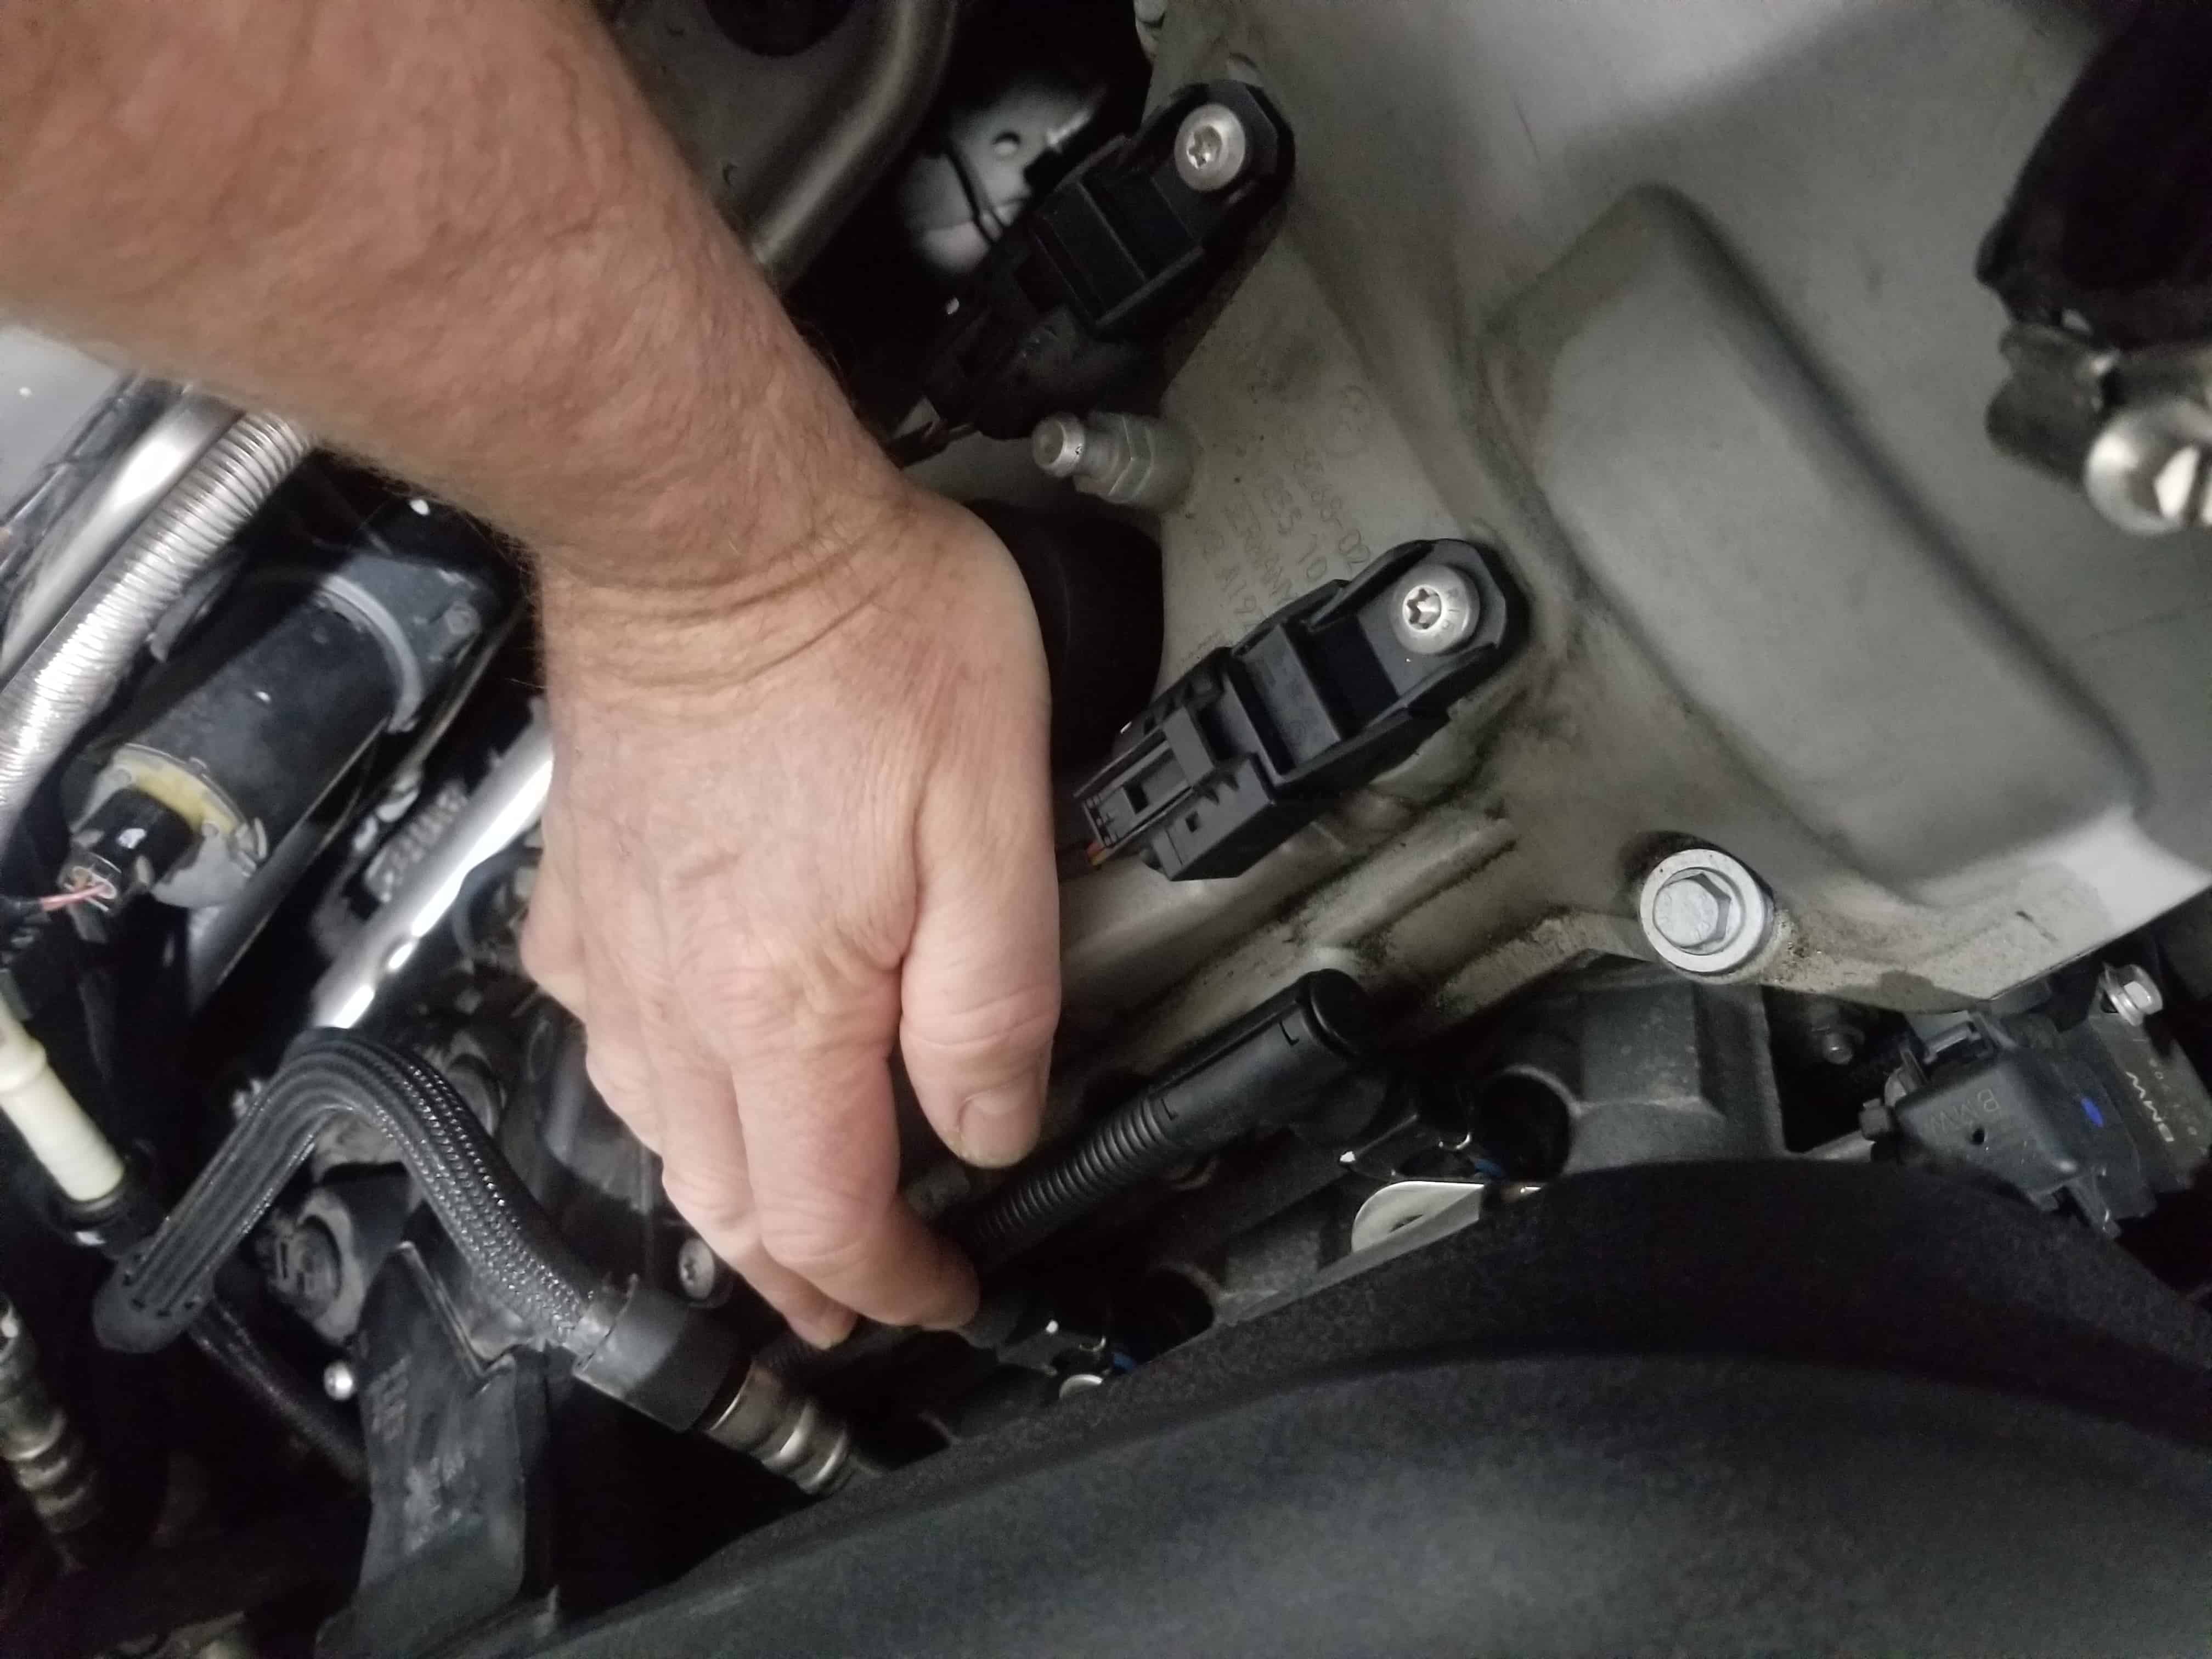
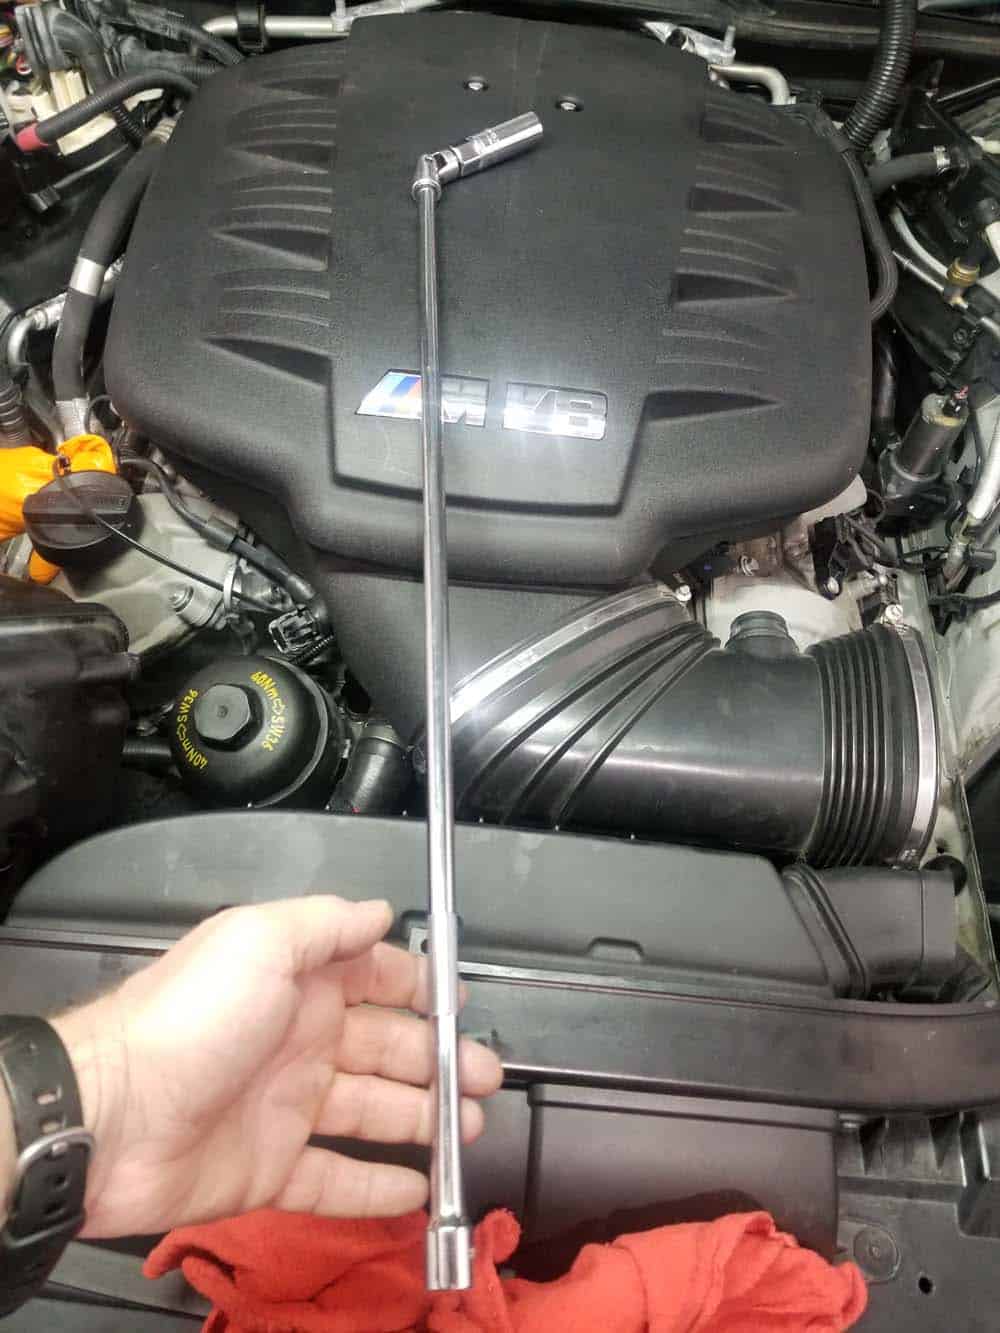
- Replace the other seven spark plugs and coils following the instructions above. You may want to use different socket extensions to access some of the other plugs...there really is no science to it. Just use what works best for you. We love using a 24” socket extension with a universal joint to remove the spark plugs on our E90 M3...it really works great (see images below).
- We made up this contraption with two extensions and two universal adapters to remove the spark plug in cylinder 8...it worked like a charm.

Section 4 - Stage 1 Reassembly and Testing
We have split the reassembly of your M3 into two stages. We strongly suggest that you start the vehicle and test it before completely reassembling the engine compartment. The reason for this is in case there is a misfire in one of the cylinders. If one of your cylinders is misfiring after completing a BMW E90 M3 tune-up, then most likely you have a coil that is not seated correctly on the spark plug.- Starting with the E-box, reinstall the wiring harnesses into their respective positions. Don't forget to reattach the grounding cable to the side of the vehicle. This is a commonly overlooked step that can cause major issues when you go to hook up the battery. Do not install the lid on the E-box yet until you test your repair job.
- If you loosened the ac vacuum line in section 1, go ahead and secure it back to the firewall.
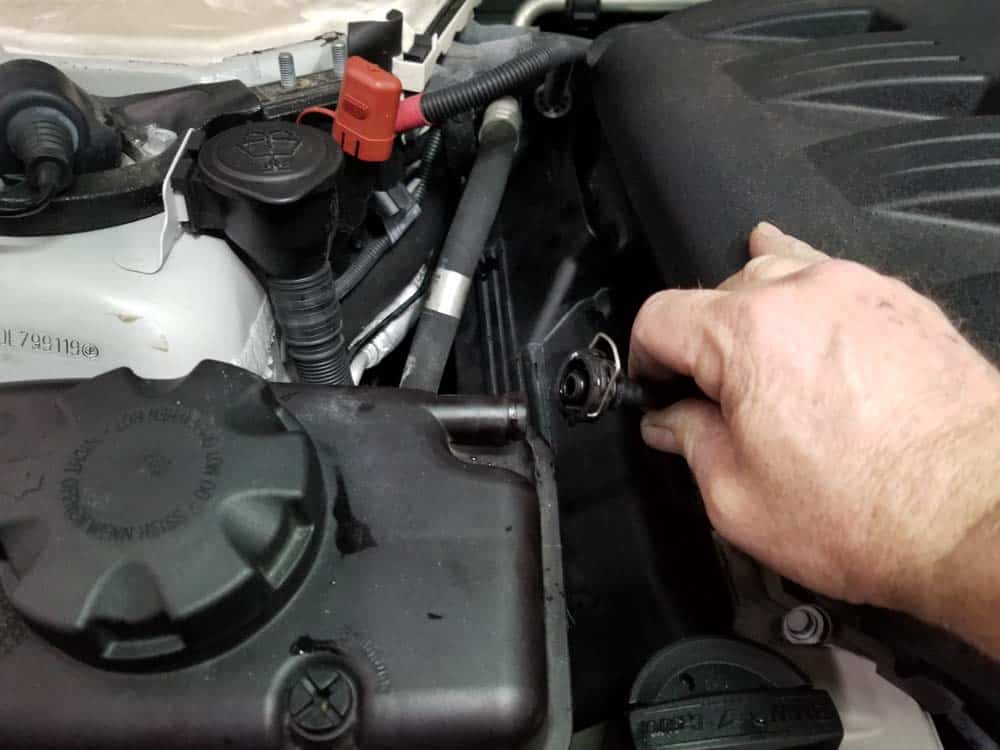
- Reconnect the coolant reservoir level sensor.
- Reattach the reservoir overflow pipe and set the coolant reservoir and the power steering reservoirs into their proper positions. DO NOT install the mounting bolts yet. DO NOT install the engine covers yet either.
- Moving to the left side of the vehicle, reattach the fuel and vacuum lines. Don’t forget the plastic locking collar on the fuel line.
- Reattach the vent hose to the rubber boot. This is important...if it is not connected the car will not idle properly when you start it up to test it.
- It is now safe to hook the battery back up to the car. Reattach the negative battery cable using a 10mm socket wrench.
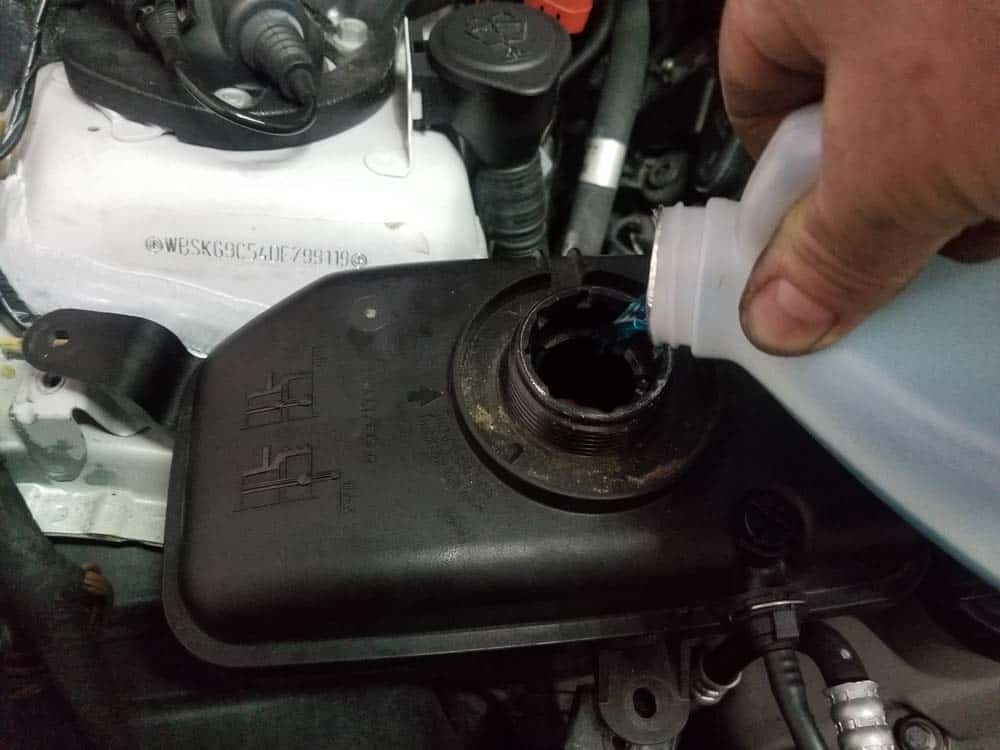
- Open the coolant reservoir and check the coolant level - it may be low if you lost coolant out of the overflow tube. Only use BMW engine coolant mixed 50/50 with distilled water (see our parts section if you need to order).
- Do not install any engine covers, the intake muffler or the cabin filter housings yet. That will be done in the next section.
- The car is now clear to be started. Start the M3 and allow to run for a minute or so. Check for any coolant leaks around the reservoir. Make sure the engine runs smoothly without any misfires. If the engine is running rough do to misfire, continue to the next step. If everything is ok, proceed to section 4.
- If the engine is running rough due to an obvious misfire, immediately turn the car off. First, check all of the coils to make sure they are firmly seated on the plugs. This is the number one reason why engines misfire after a BMW E90 M3 tune up - it is especially prevalent on the rear cylinders where it's difficult to get the palm of your hand on the top of the coil to press it down. Use a long socket extension and press down on the rear coils to make sure they are seated correctly. Next, check all of the coil electrical connections to make sure they are snapped in tight. Once you have gone through everything, start the vehicle and see if the misfire is still present.
- If the misfire is still present you will need to hook up a diagnostic scanner to the vehicle to determine which cylinder is causing the issue. It is possible that you have a bad coil or plug...follow standard procedures to diagnose (switch out the coil and plug with another cylinder and see if the problem persists). For more information on diagnosing misfires please refer to other articles on our site dealing with this issue.
Section 5 - Final Vehicle Reassembly
You can now finish reassembling the vehicle. Now is a great time to replace your air and cabin filters if you haven’t in a while - we have them listed in the parts section above for your convenience.- Install the right and left engine covers. Make sure they snap firmly in place to prevent any rattling from the engine. Reattach the fuel line to the left engine cover.
- Install the E-box cover. It is very important that the cover is installed correctly to keep moisture and debris from entering the box.
- Reinstall the power steering and coolant reservoir bolts.
- Reinstall the strut braces. Torque the strut brace nuts and bolts to 24 Nm (18 ft-lb).
- Reinstall the cabin filter housings. Don’t forget to plug in the hood switch and the AUC sensor.
- Install the hood gasket.
- Reinstall the intake muffler.
BMW E90 M3 Tune Up Finished