
Affiliate link disclosure – The BMW Repair Guide uses affiliate links in their site. For more information on affiliate links, please click here.
Repair Summary
This article gives detailed instructions on replacing the thermostat in a BMW E9x 3 series vehicle. Even though we used a 2011 335i to perform this repair, this article can be applied to any 2006-2013 3 series vehicle (except M3) with minor modifications to the repair steps.
See all vehicles this article applies to
E90 3 Series M3
E90 3 Series 318d
E90 3 Series 335i
E90 3 Series 335xi
E90 3 Series 335d
E90 3 Series 330xd
E90 3 Series 330xi
E90 3 Series 330i
E90 3 Series 330d
E90 3 Series 328xi
E90 3 Series 328i
E90 3 Series 325xi
E90 3 Series 325i
E90 3 Series 323i
E90 3 Series 325d
E90 3 Series 320i
E90 3 Series 320si
E90 3 Series 320d
E90 3 Series 318i
E90 3 Series 316i
E90N 3 Series M3 CRT
E90N 3 Series 318i
E90N 3 Series M3
E90N 3 Series 335xi
E90N 3 Series 335i
E90N 3 Series 335d
E90N 3 Series 330xd
E90N 3 Series 330xi
E90N 3 Series 330i
E90N 3 Series 328xi
E90N 3 Series 330d
E90N 3 Series 328i
E90N 3 Series 325d
E90N 3 Series 325i
E90N 3 Series 325xi
E90N 3 Series 323i
E90N 3 Series 320xd
E90N 3 Series 320i
E90N 3 Series 320d ed
E90N 3 Series 320d
E90N 3 Series 318d
E90N 3 Series 316i
E90N 3 Series 316d
E91 3 Series 335xi
E91 3 Series 325d
E91 3 Series 335i
E91 3 Series 335d
E91 3 Series 330xi
E91 3 Series 330xd
E91 3 Series 330d
E91 3 Series 330i
E91 3 Series 328xi
E91 3 Series 325i
E91 3 Series 328i
E91 3 Series 325xi
E91 3 Series 323i
E91 3 Series 320i
E91 3 Series 320d
E91 3 Series 318i
E91 3 Series 318d
E91N 3 Series 316d
E91N 3 Series 335xi
E91N 3 Series 335i
E91N 3 Series 330xi
E91N 3 Series 335d
E91N 3 Series 330xd
E91N 3 Series 330i
E91N 3 Series 330d
E91N 3 Series 328xi
E91N 3 Series 328i
E91N 3 Series 325xi
E91N 3 Series 325i
E91N 3 Series 325d
E91N 3 Series 320xd
E91N 3 Series 323i
E91N 3 Series 320i
E91N 3 Series 320d ed
E91N 3 Series 320d
E91N 3 Series 318i
E91N 3 Series 318d
E91N 3 Series 316i
E92 3 Series M3
E92 3 Series 325d
E92 3 Series 335xi
E92 3 Series 335i
E92 3 Series 335d
E92 3 Series 330xi
E92 3 Series 330xd
E92 3 Series 330i
E92 3 Series 330d
E92 3 Series 328xi
E92 3 Series 328i
E92 3 Series 325xi
E92 3 Series 325i
E92 3 Series 323i
E92 3 Series 320xd
E92 3 Series 320i
E92 3 Series 320d
E92 3 Series 316i
E92N 3 Series M3
E92N 3 Series 323i
E92N 3 Series 335xi
E92N 3 Series 335is
E92N 3 Series 335i
E92N 3 Series 335d
E92N 3 Series 330xi
E92N 3 Series 330xd
E92N 3 Series 330i
E92N 3 Series 330d
E92N 3 Series 328xi
E92N 3 Series 328i
E92N 3 Series 325xi
E92N 3 Series 325i
E92N 3 Series 320xd
E92N 3 Series 325d
E92N 3 Series 320d
E92N 3 Series 320i
E92N 3 Series 318i
E92N 3 Series 316i
E93 3 Series M3
E93 3 Series 320d
E93 3 Series 335i
E93 3 Series 330i
E93 3 Series 330d
E93 3 Series 328i
E93 3 Series 325i
E93 3 Series 323i
E93 3 Series 325d
E93 3 Series 320i
E93N 3 Series M3
E93N 3 Series 323i
E93N 3 Series 335is
E93N 3 Series 330i
E93N 3 Series 335i
E93N 3 Series 330d
E93N 3 Series 328i
E93N 3 Series 325i
E93N 3 Series 325d
E93N 3 Series 320i
E93N 3 Series 320d
E93N 3 Series 318i
A BMW E90 thermostat replacement may be necessary if your 2007-2013 3 series is overheating or displaying erratic temperature changes.
When the 5th generation BMW E9x 3 series was launched in 2006, it contained a "new and improved" engine coolant system including an electric water pump and thermostat. Unlike the mechanically controlled thermostats from prior year 3 series models, the new electric thermostat is operated by the engine's control module (DME). This was actually a welcomed advancement in technology since the thermostat can now be monitored and more accurately diagnosed via a diagnostic scanner.
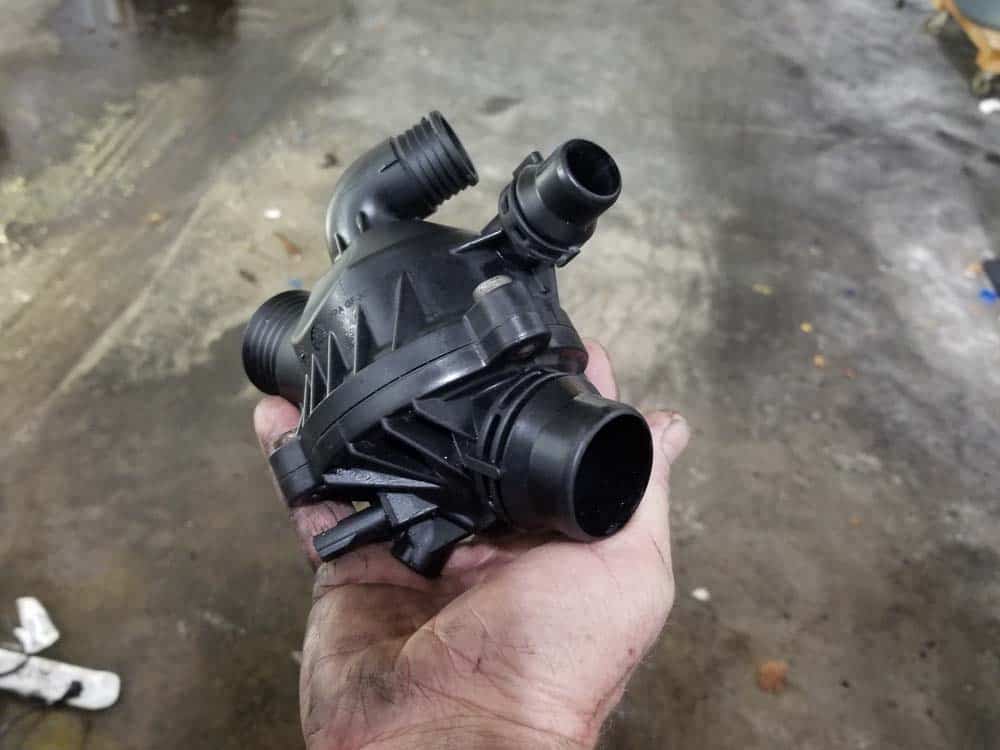
The BMW E90 thermostat is actually a complete self contained system that consists of an outer plastic housing with the thermostat sealed inside of it. Although complex in design, its job is very simple; when the engine heats up, it redirects hot coolant to the radiator so the motor doesn't overheat. The thermostat is basically a thermal valve. When the temperature of the engine coolant rises beyond a critical level it opens, redirecting the coolant to the radiator.
Like all engine parts on a BMW, the thermostat has a definitive lifespan...it doesn't last forever. Signs that your vehicle may require a BMW E90 thermostat replacement are; engine overheating, erratic changes in the engine temperature gauge, and a check engine light with fault codes (usually 2EF4 or 2EF5). Since the thermostat is sealed inside the housing, the entire thermostat assembly must be replaced (you cannot purchase the pieces separately).
A BMW E90 thermostat replacement can be challenging due to the tight confines around the front and lower engine. The thermostat mounting bolts can only be accessed from the bottom of the engine, so the vehicle will have to be lifted in order to complete this repair. You will also need to remove the electric cooling fan from the rear of the radiator to complete this repair; There simply is not enough room to get the thermostat out with the cooling fan in place. The good news is removing the fan is easy - it only takes a few minutes and it creates ample space to reach the thermostat's front cooling hoses without a struggle.
Now is also an excellent time to flush your engine's cooling system...especially if you find any signs of mineral deposits or scaling while replacing the thermostat. Flushing your coolant system during this repair is easy since it will need to be completely drained prior to removing the thermostat. For more information on flushing your system, please see our article BMW E90 Coolant System Flush.


Before starting this repair, you must have the following required parts.
BMW E60 and E90
If your vehicle is experiencing cooling issues, chances are the thermostat is the cause. Common symptoms include prolonged warm-up at highway speeds from the thermostat being stuck open, or consistent overheating issues from the thermostat being stuck in the closed position. Either condition can result in poor performance, and potential damage to vital components in your vehicle.
All BMW/MINI Vehicles
This is the same factory coolant that would be installed at the dealership. Aftermarket coolants actually cost more than Genuine BMW...so why would you use them? Mixed 50/50 with distilled water, this container makes 2 gallons of factory coolant.
All BMW vehicles
Deposits in the cooling/heating system create blockages for heat exchange and they also block thermostat valves and control mechanisms. When engine temperatures are too high, the engine runs uneconomically and suffers excessive wear at considerable risk of damage. LIQUI MOLY Radiator Cleaner removes deposits containing oil and lime, and ensures that the engine runs reliably and at the optimum temperature. Does not contain aggressive acids or alkalis.
Section 1 - Preparing the Engine for Thermostat Removal
In order to remove the BMW E90 thermostat, the cooling system must be drained first and the cooling fan removed. Removing the cooling fan is a very simple procedure that will free up valuable space, allowing you enough room to remove the hard-to-reach thermostat coolant hoses. You do not need to remove the radiator to perform this repair.- Jack and support the vehicle at all wheels. You cannot correctly drain the coolant system if you only raise the front of the vehicle...it must be level. For more information on jacking and supporting you BMW please see our article BMW Jacking and Supporting for Repairs and Maintenance.
- Remove the front belly pan from underneath the engine. It is usually held in place with phillips head screws.
- If you are working on a turbocharged E90 3 series (like the 335i we are using for this article), please proceed to the next step to remove the turbo intercooler from the bottom of the radiator. If you are not working on a turbocharged engine, please proceed to step 5.
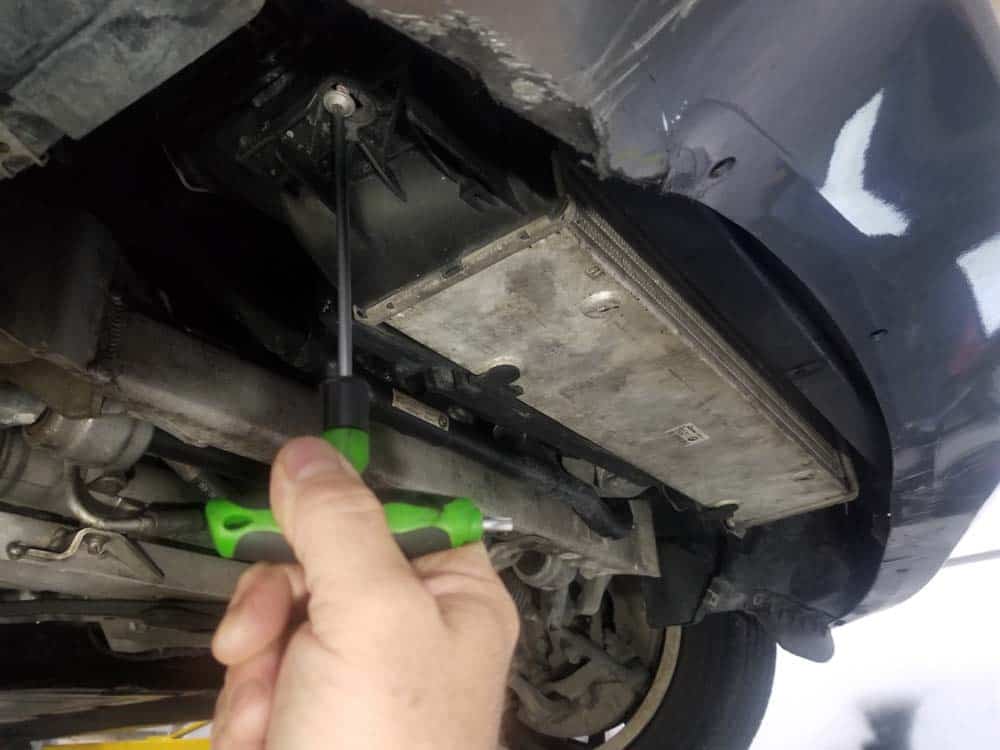
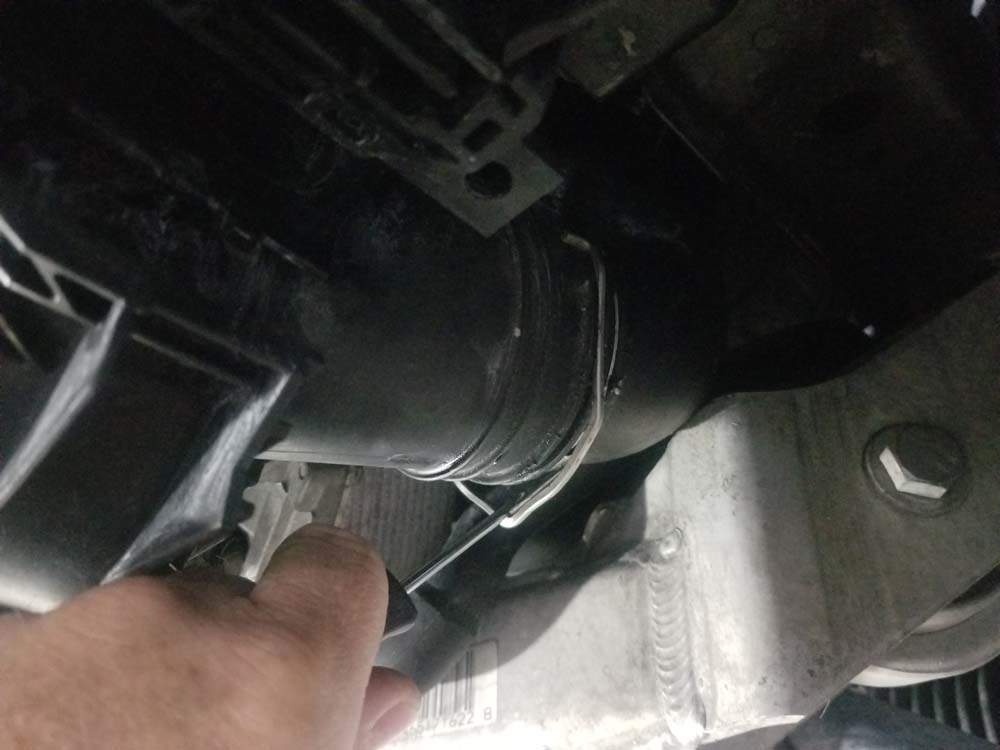
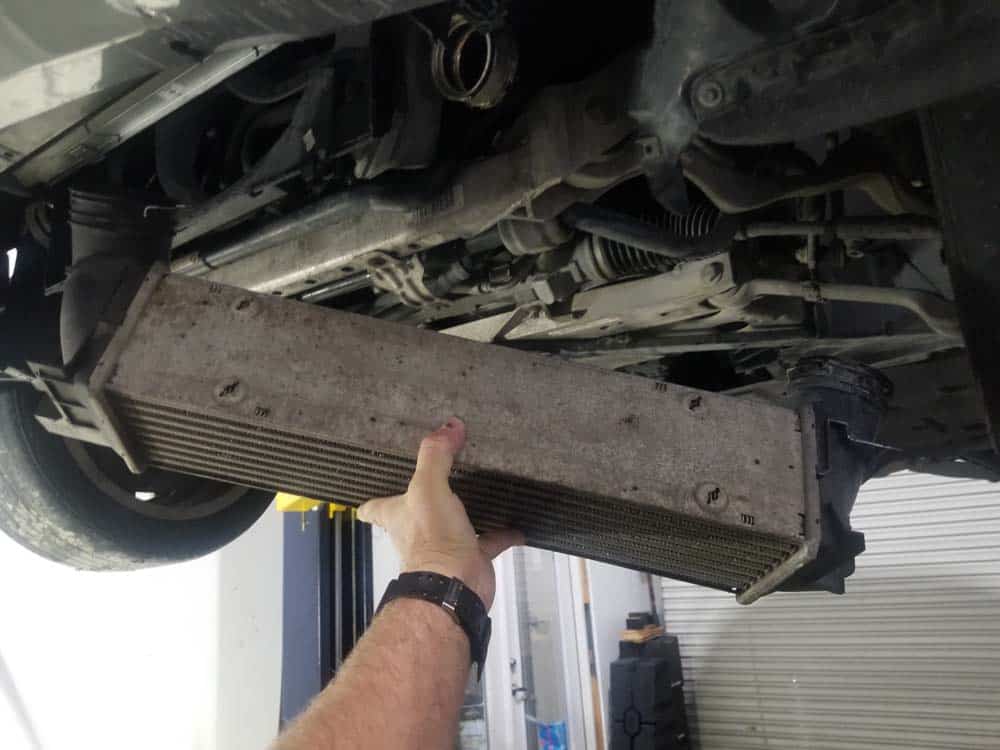
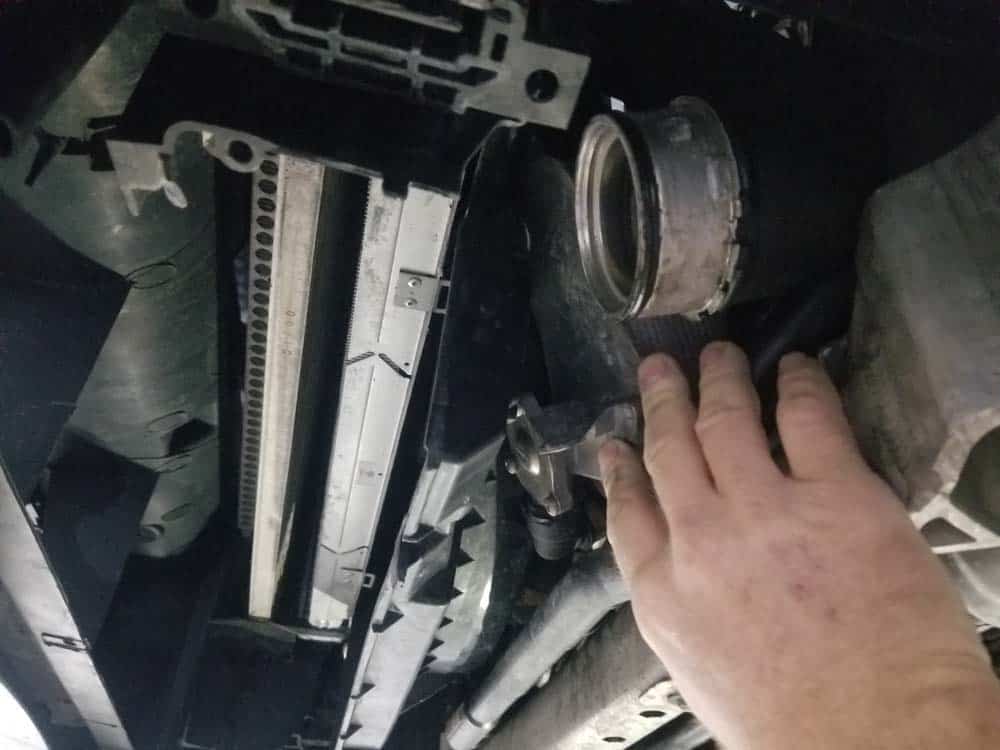
- To remove the turbocharger intercooler, use a T25 Torx bit to remove the two intercooler mounting screws. Release the metal locking clips securing the left and right charge pipes and remove the intercooler from the vehicle.
- Remove the cap from the coolant expansion tank. The cap must be removed or else the coolant system will not drain properly in the next step.

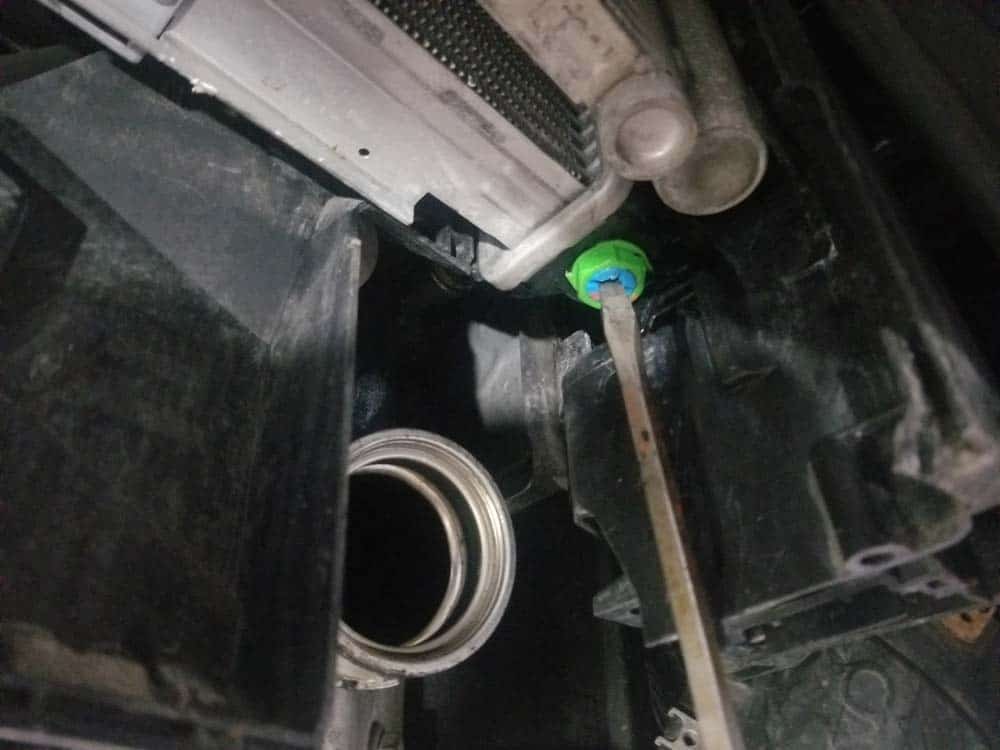
- Using a large flat blade screwdriver, remove the drain plug from the bottom left side of the radiator. Allow the radiator to thoroughly drain.
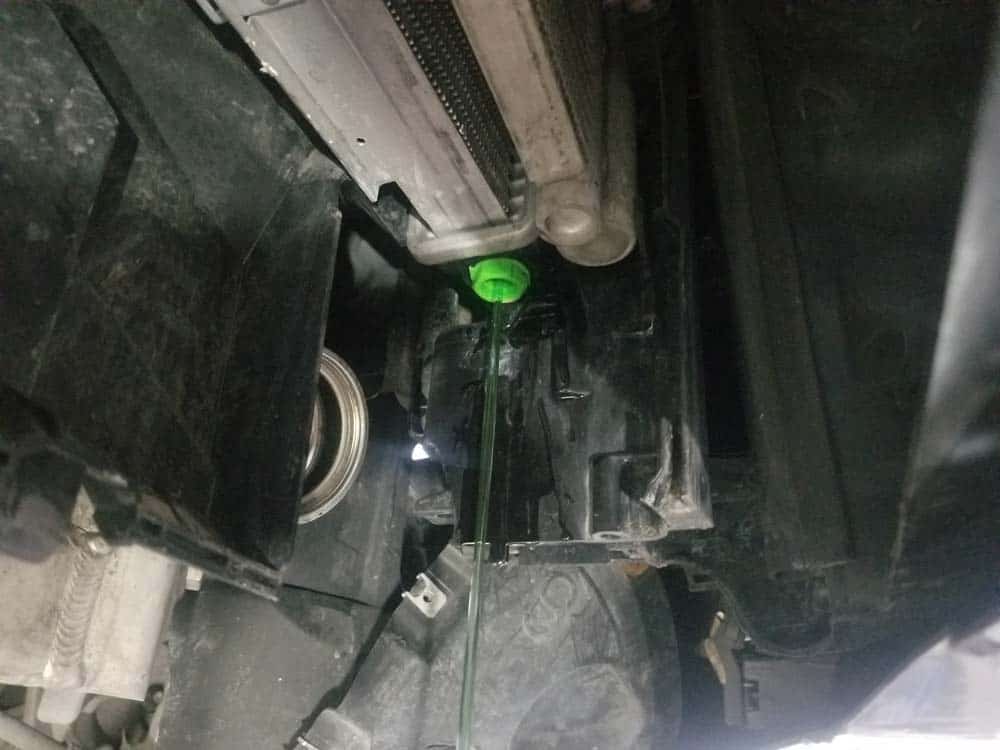
- When the radiator is completely drained, replace the plug. DO NOT wait to replace the plug! We cannot tell you how many mechanics forget to replace it because they get distracted at the end of the repair.
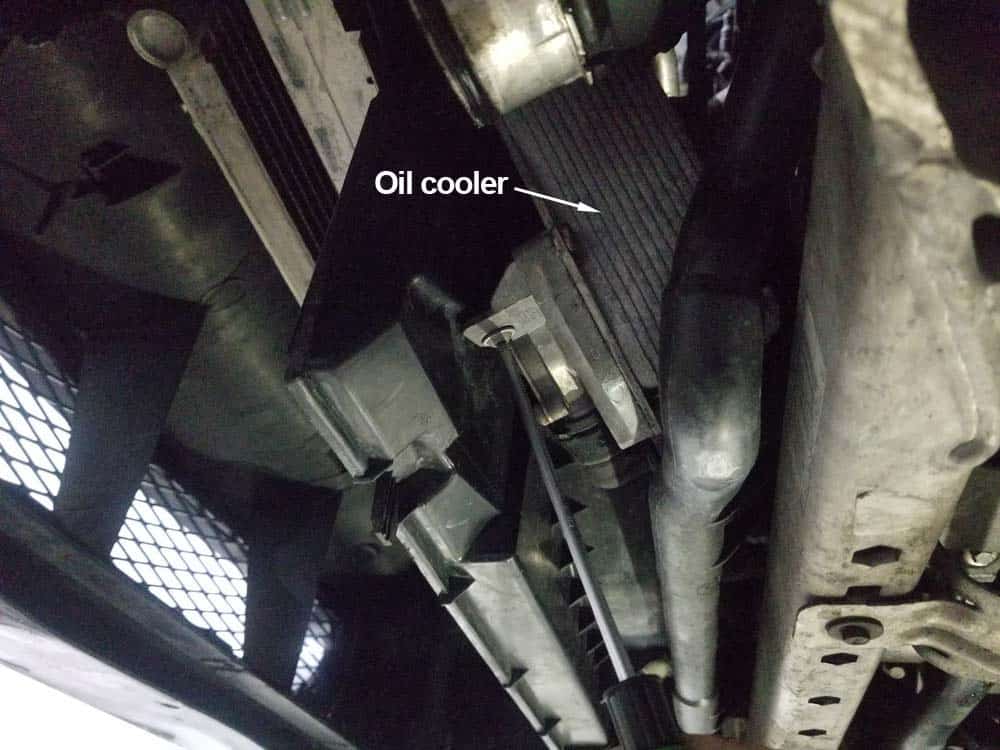
- Next, the cooling fan must be replaced. Start by removing the engine oil cooler from the bottom left side of the cooling fan. It is simply held in place with one T25 torx screw. Gently push the cooler back and out of the work area.
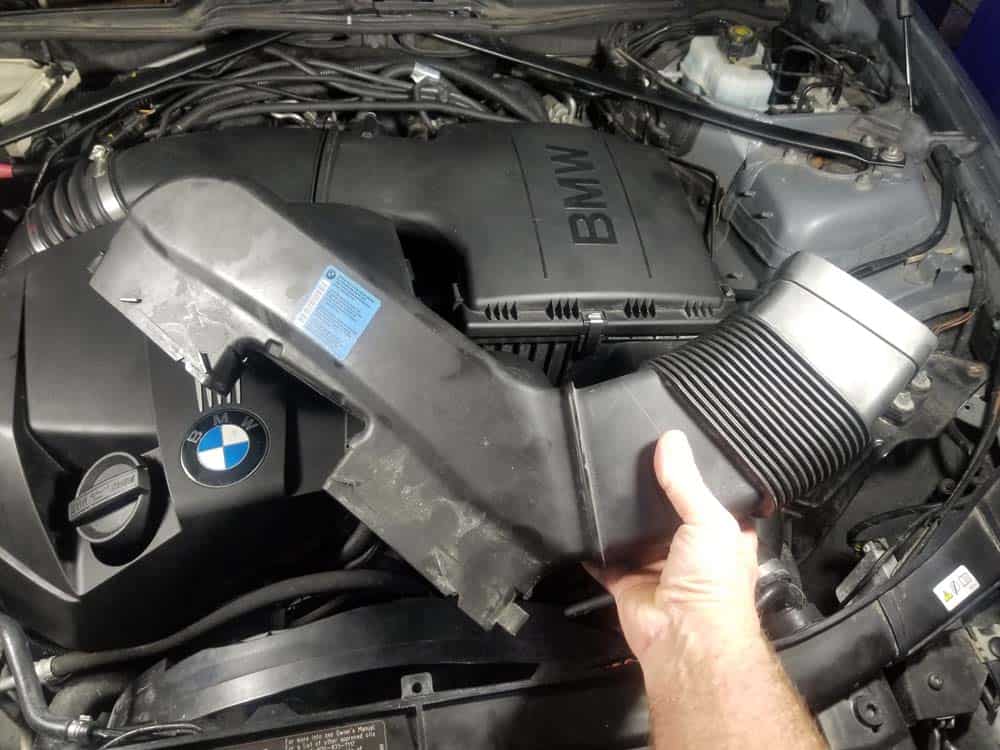
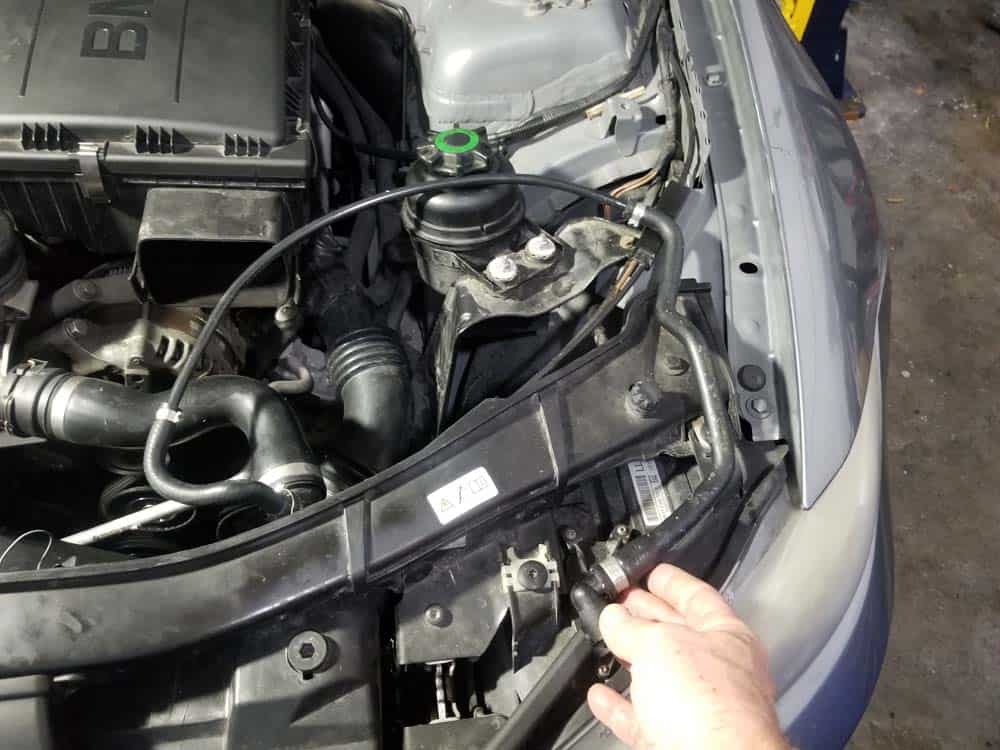
- Moving back to the engine bay, remove the two torx bolts anchoring the intake duct to the suction hood at the front of the car. Unsnap the intake duct from intake muffler and remove it from the vehicle.

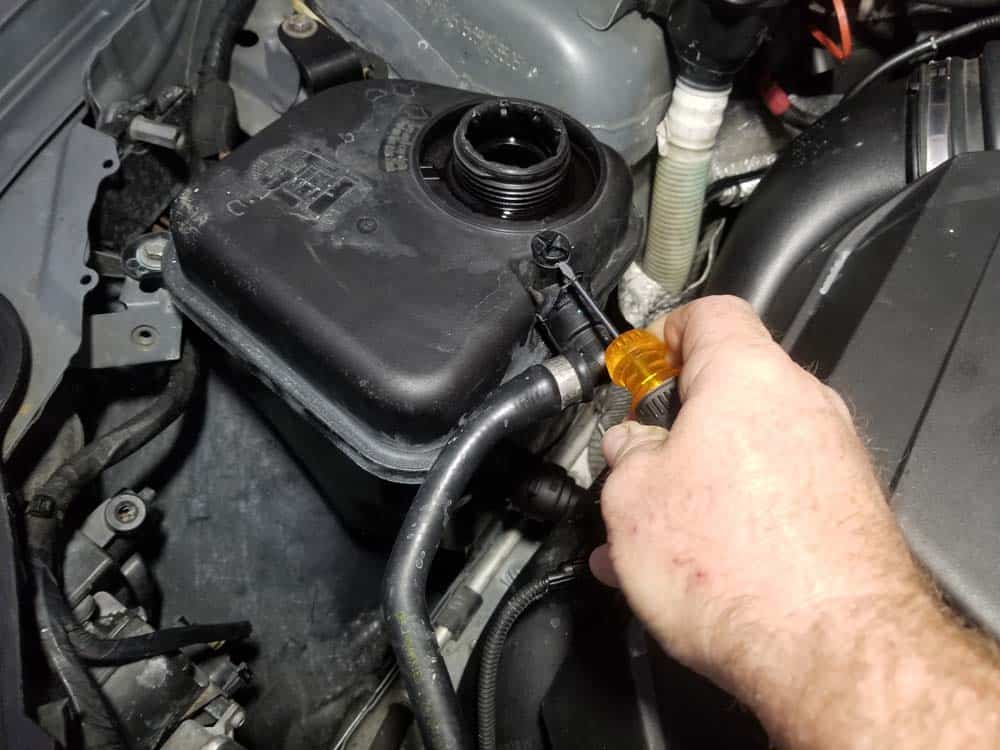
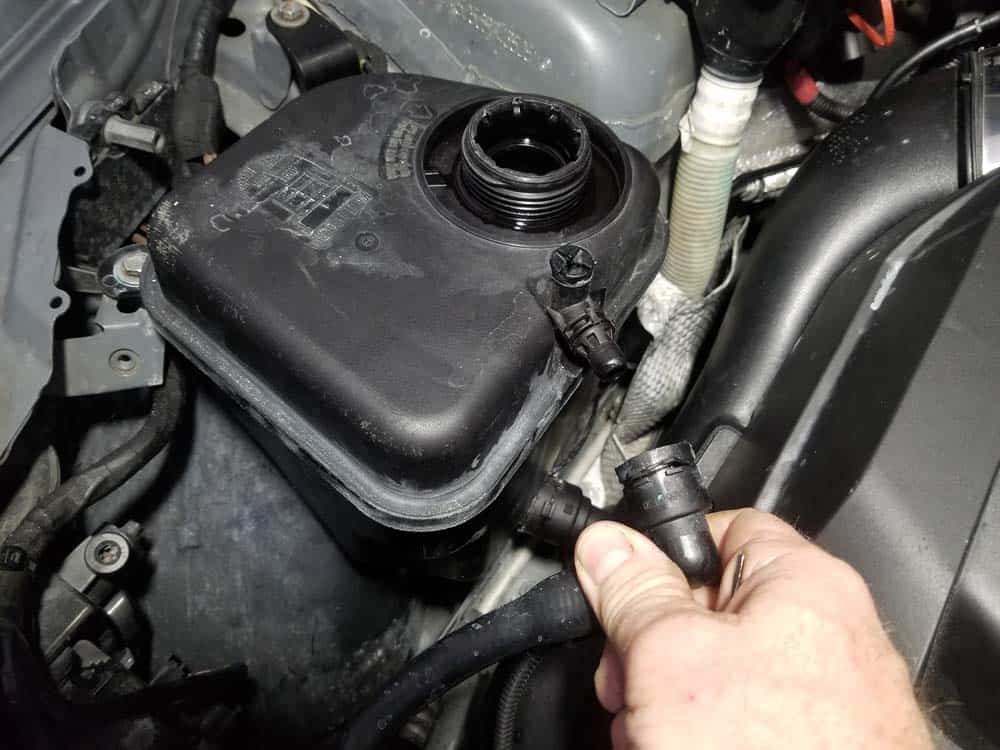
- Release the locking clip on the expansion tank vent hose and remove it from the expansion tank. Unclip it from the top of the radiator and gently lay it out of the way.
- Unplug the cooling fan's wiring harness from the left side of the fan.
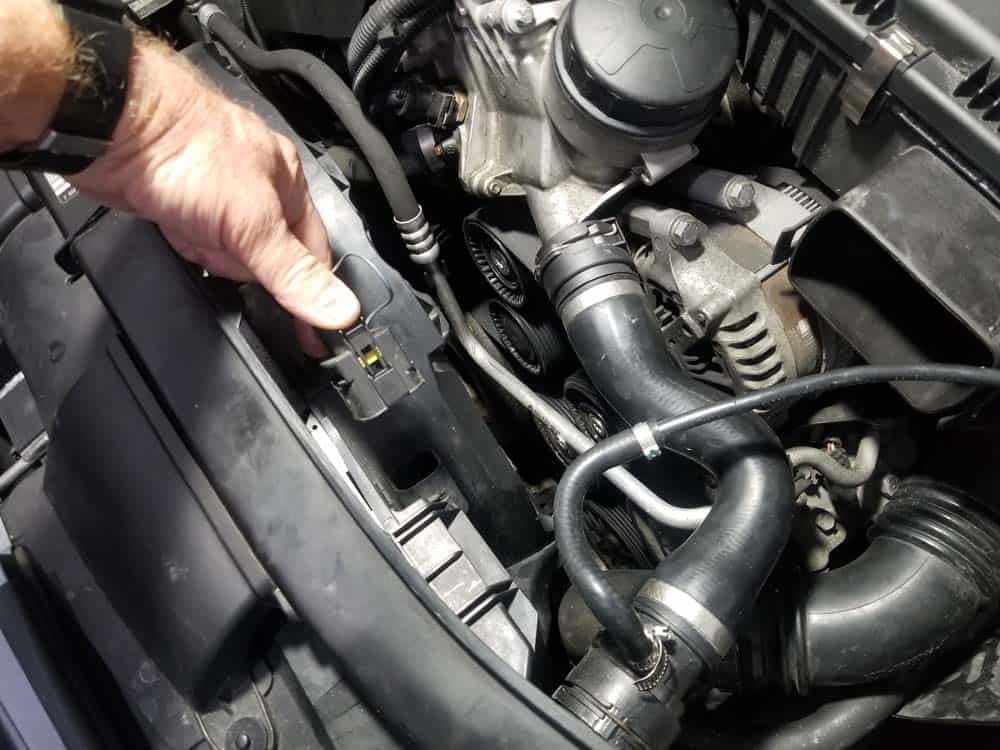
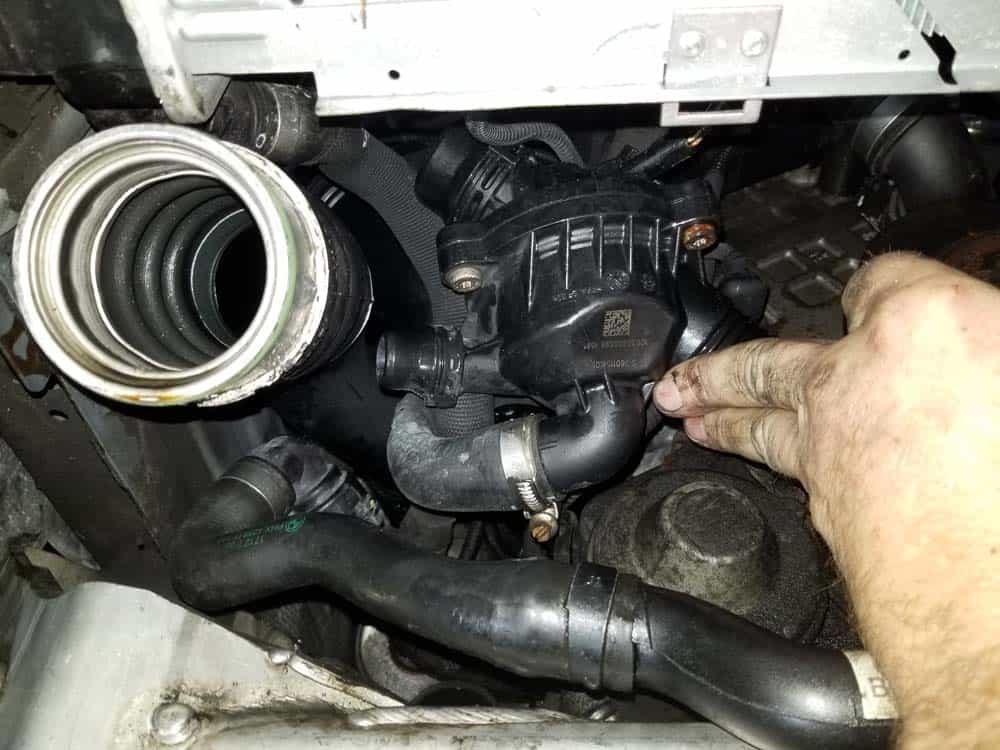
- On the left side of the cooling fan, find the fan's plastic release tab. While pressing on the release tab with your finger (see image below), pull up on the cooling fan until it slides out of the engine. Remove the cooling fan from the vehicle.

- You now have clear access to the thermostat and its coolant hoses.
Section 2 - Removing the Thermostat from the Engine
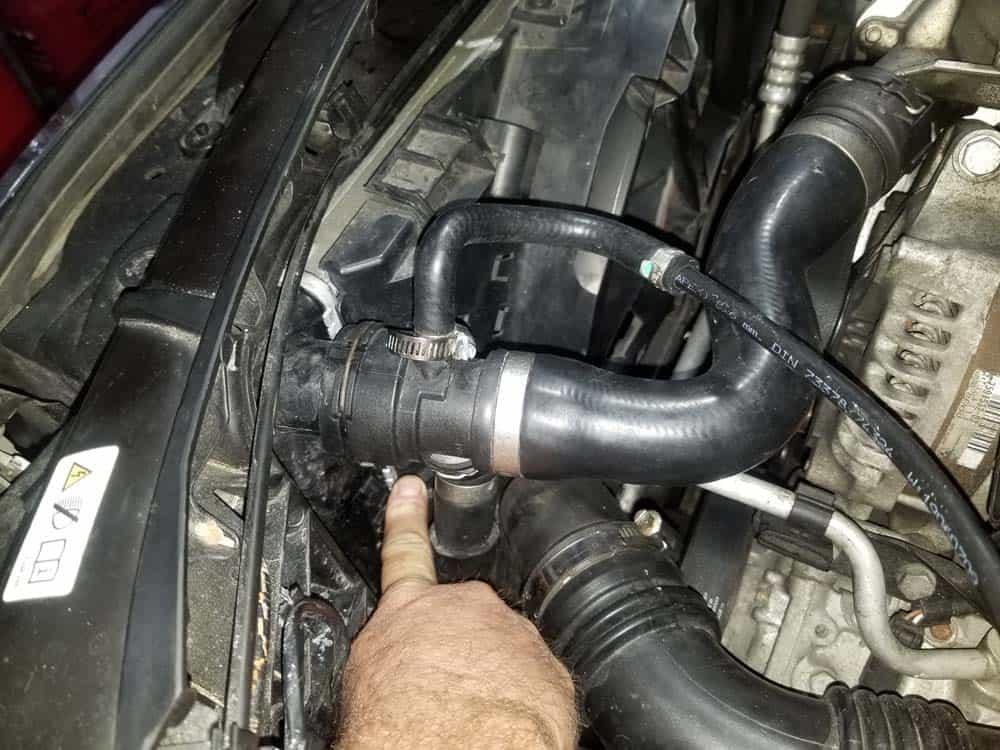
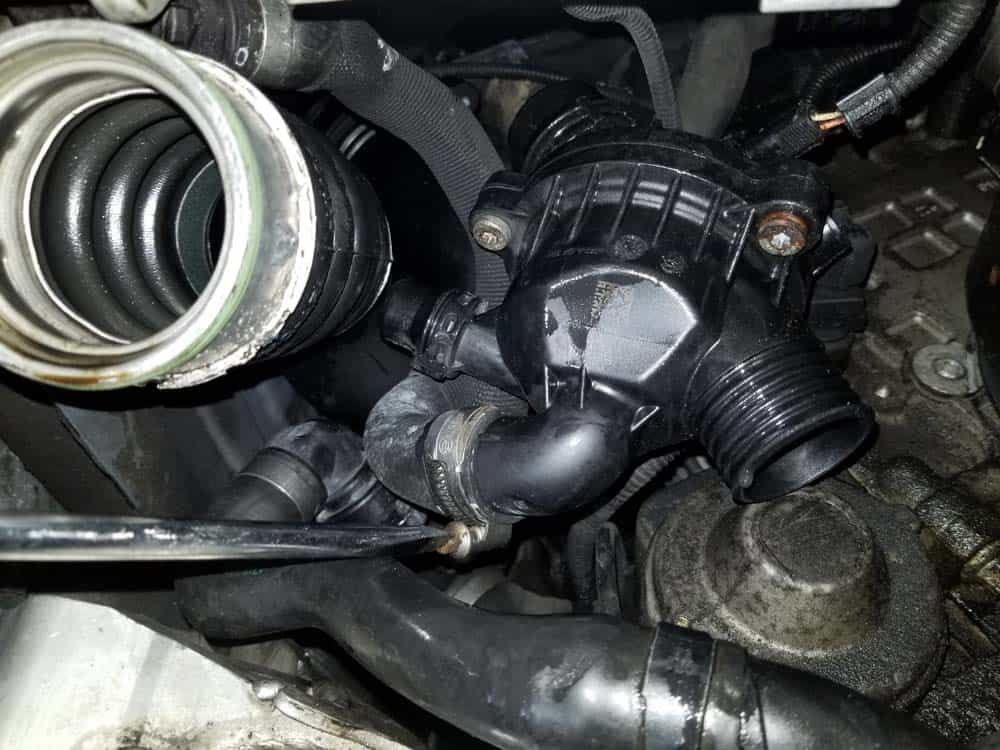
There are four coolant hoses that need to be removed from the E90's thermostat. As discussed at the beginning of this article, removing the hoses from the thermostat can be challenging simply due to the tight confines where it is located. If you follow our instructions below carefully, you will not have any problem removing and reinstalling it.- Locate the heater return line that runs across the front of the vehicle. It is good practice to loosen this hose to avoid breaking it when attempting to remove the thermostat. Using a T30 torx bit, remove the two screws anchoring the return line to the frame.

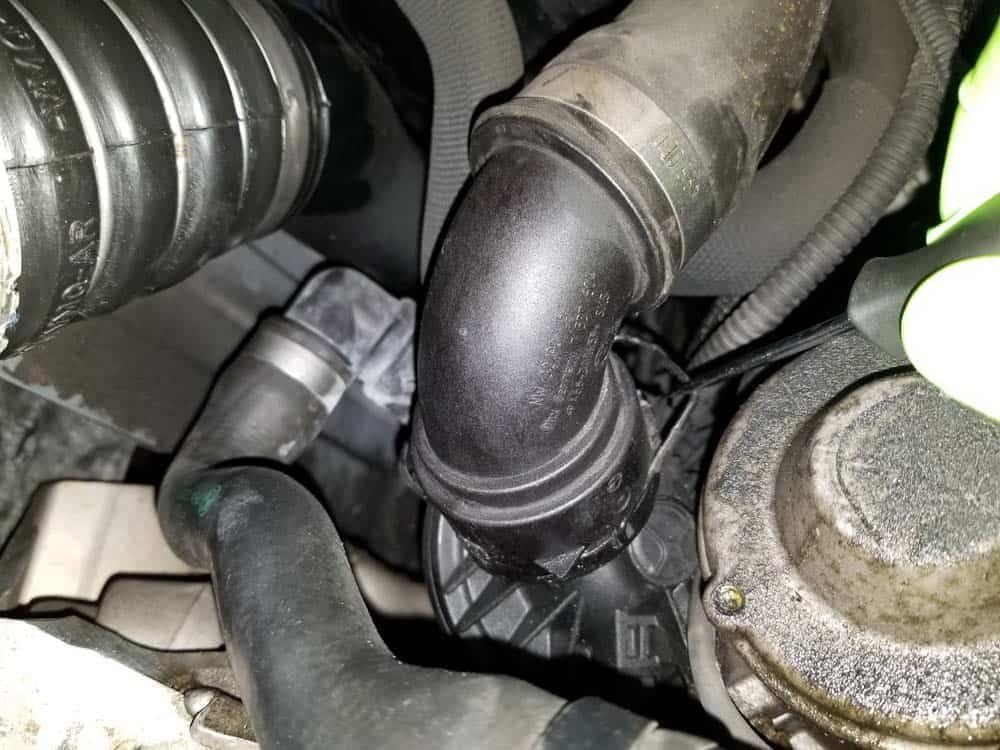
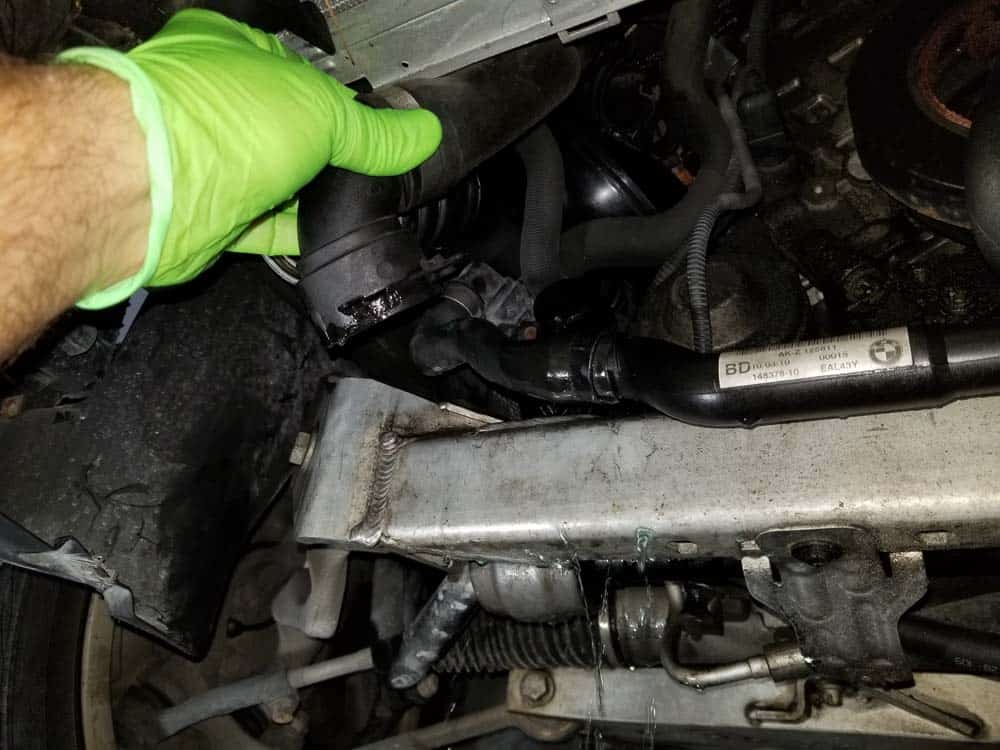
- Remove the lower radiator hose from the front of the thermostat by using a straight metal pick (or small flat blade screwdriver) to release its metal locking clamp and pulling it free. You may have to rock the fitting back and forth to get it off of the thermostat - they tend to get stuck over time.
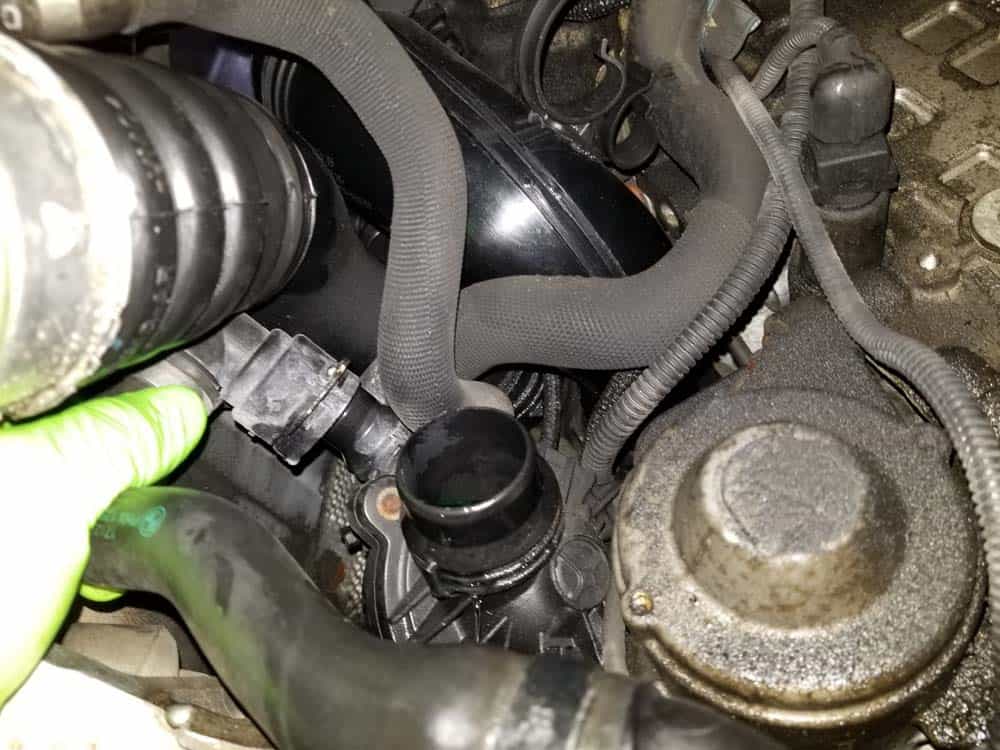
- Next, remove the heater return line from the right side of the thermostat by releasing the metal locking clip and pulling it free.

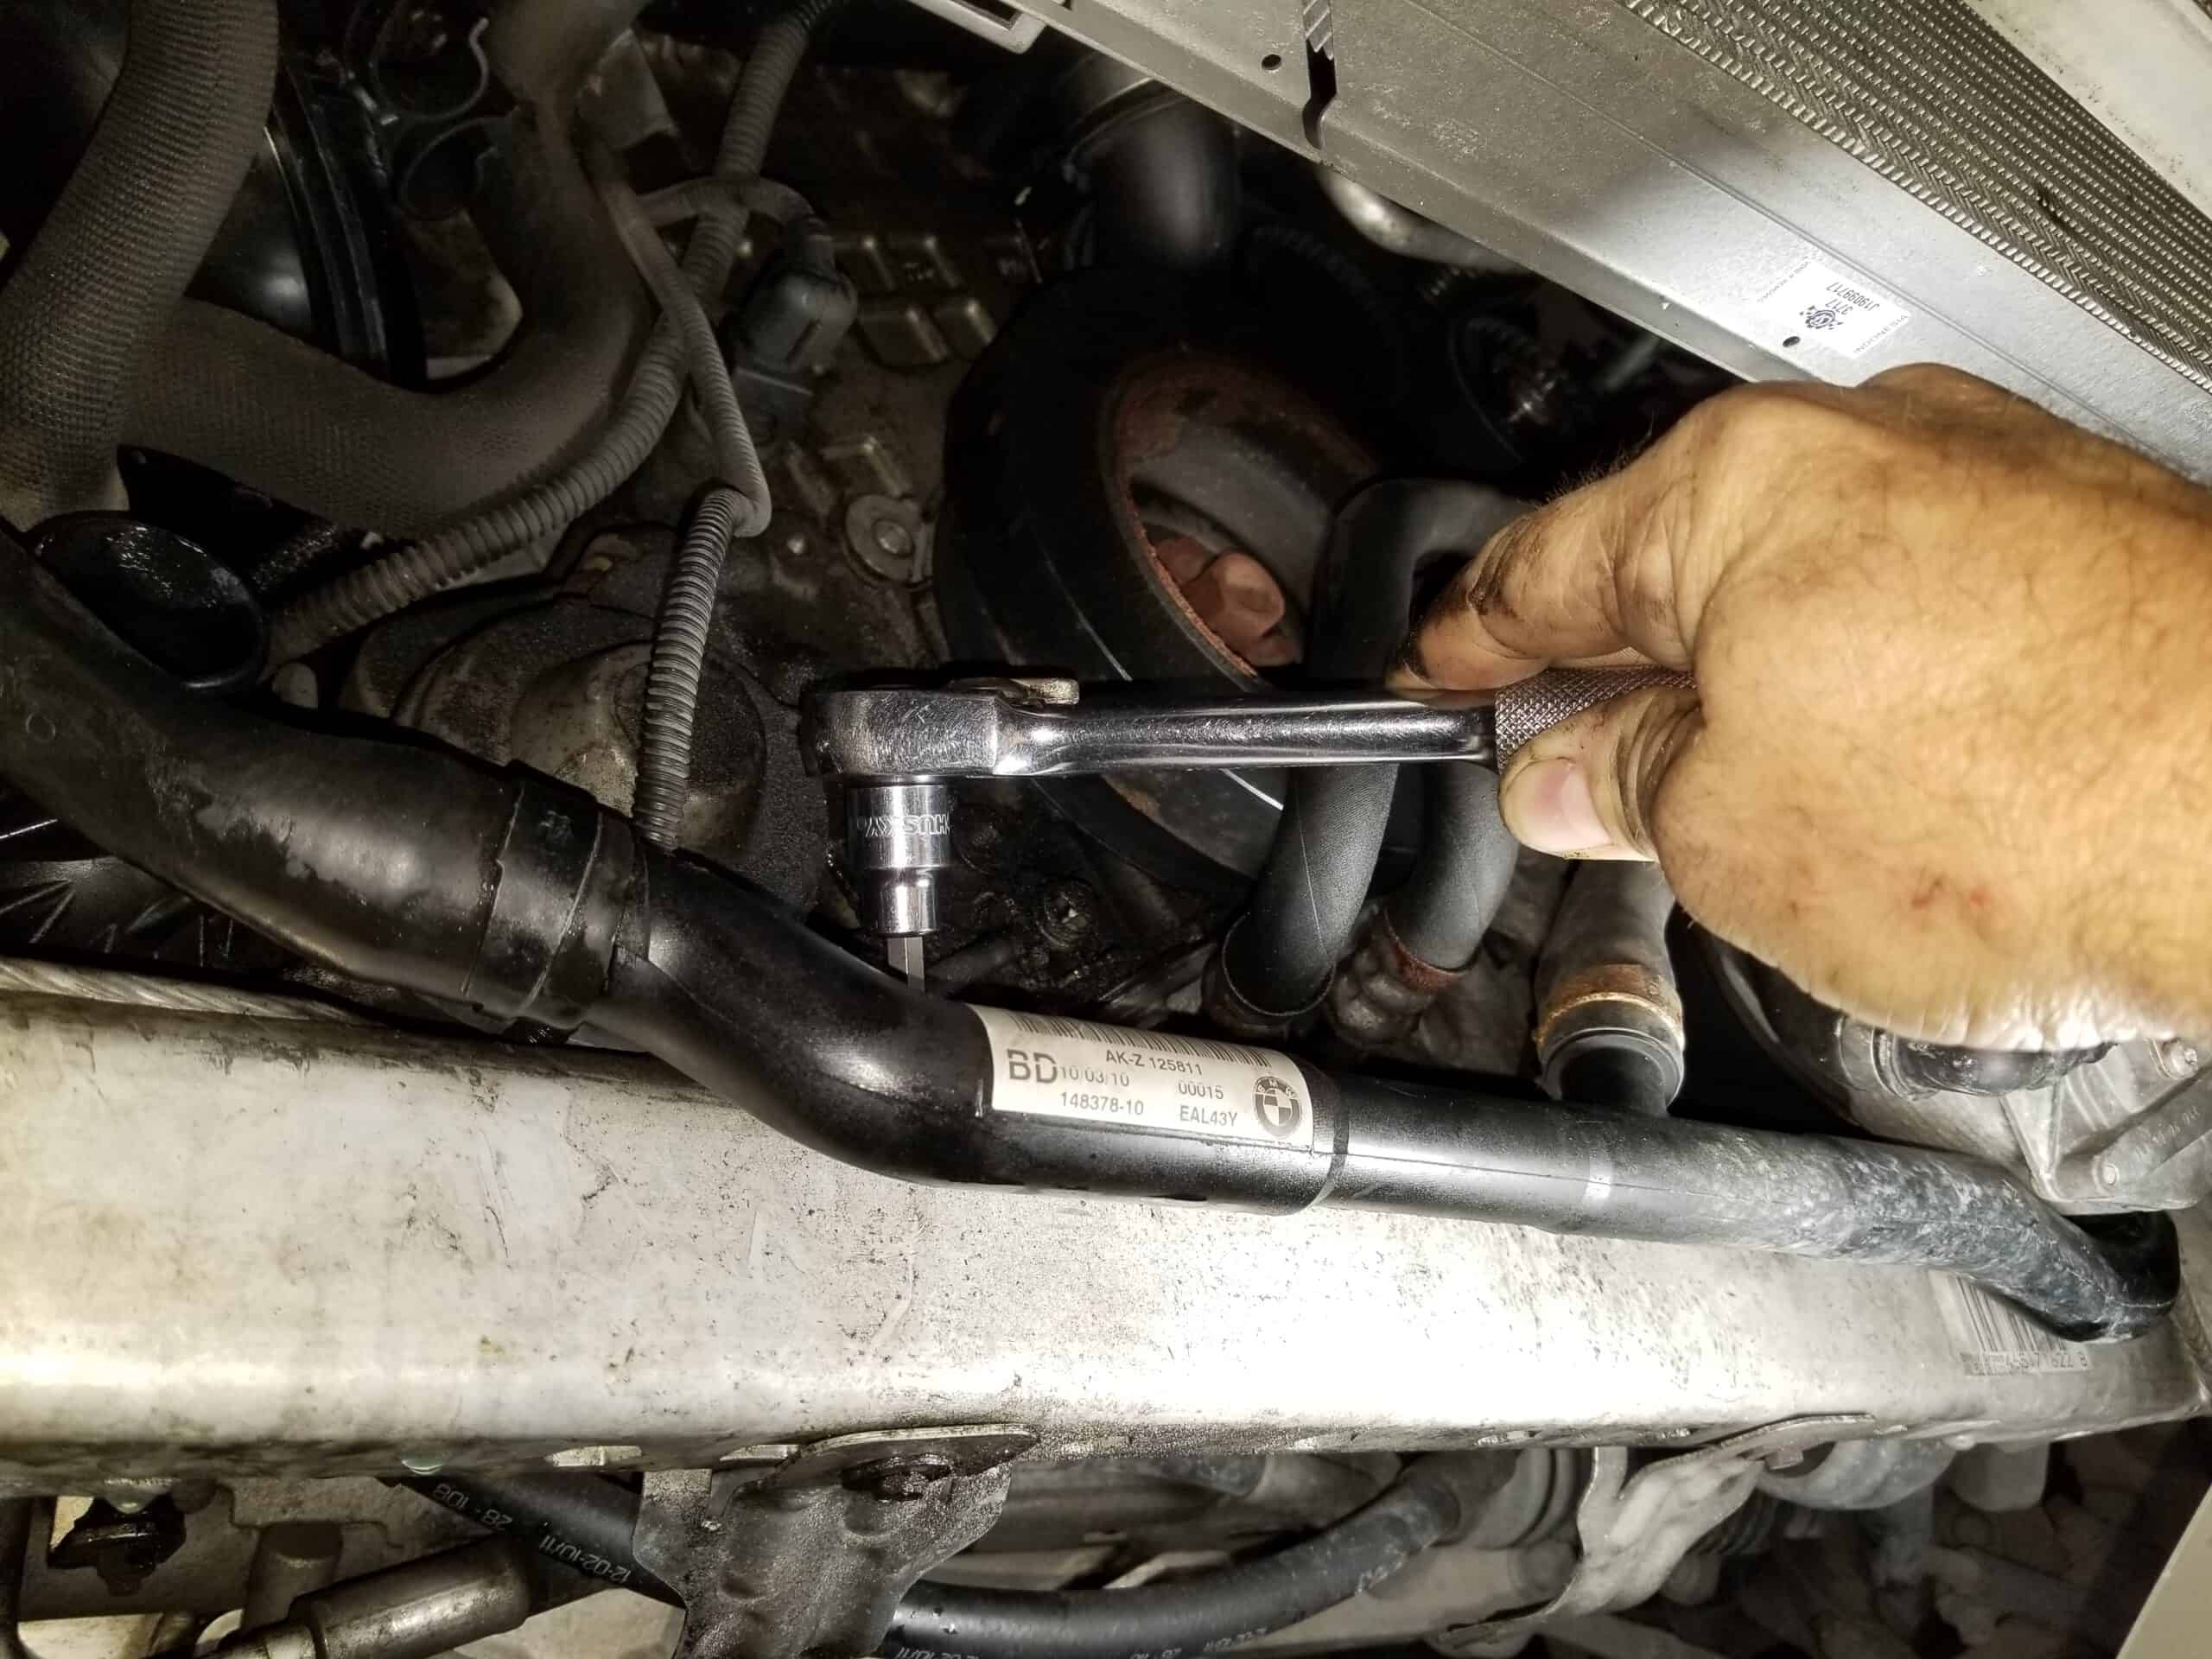
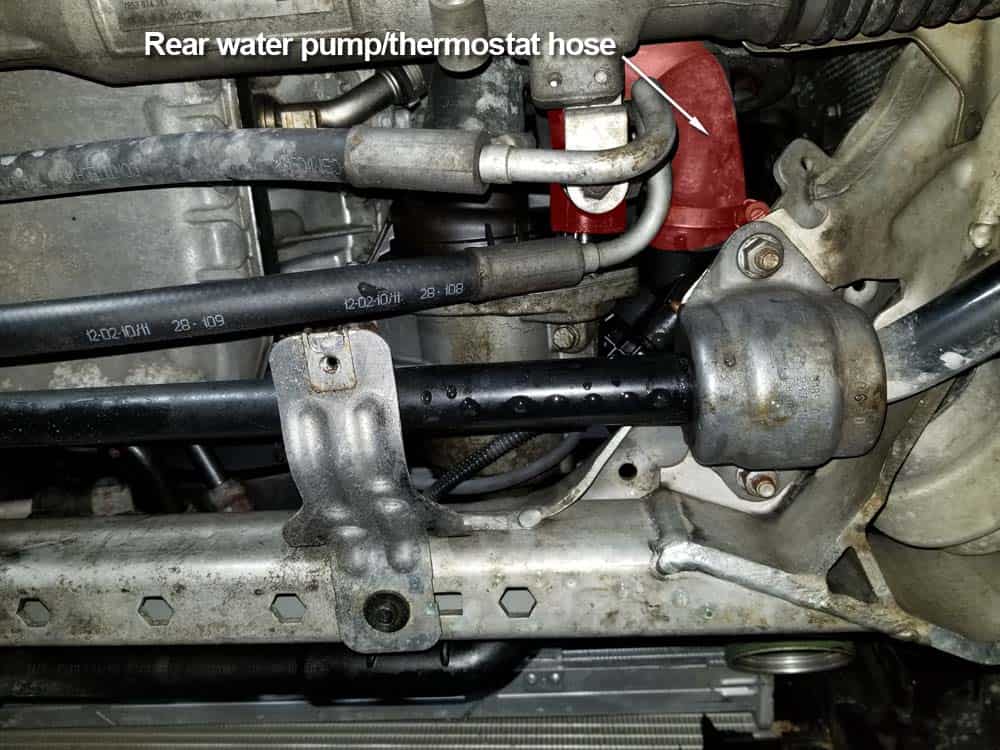
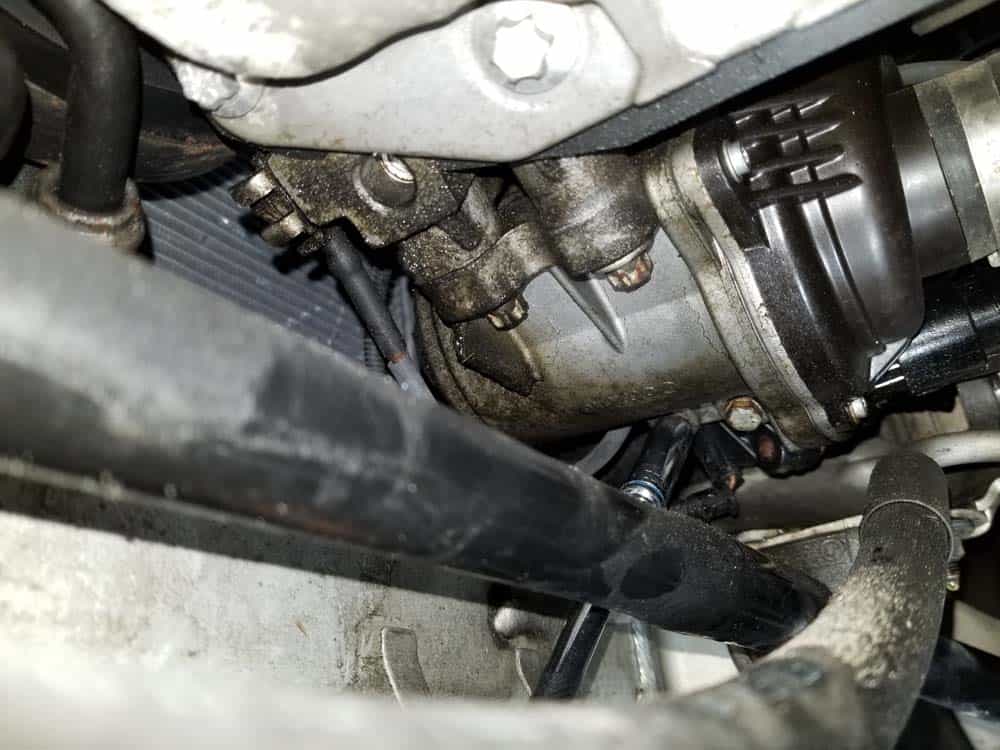
- Move under the vehicle and locate coolant line that runs from the rear of the thermostat to the water pump. Use a flat blade screwdriver to loosen its hose clamp, then pull it free from the thermostat.
- The final cylinder head coolant hose cannot be accessed until the thermostat is rotated away from the engine (step 8 below).
- Locate the thermostat's two mounting bolts on the lower left side of the thermostat. Use a 10mm socket wrench to remove the two bolts. The thermostat is now free an can be rotated forward.
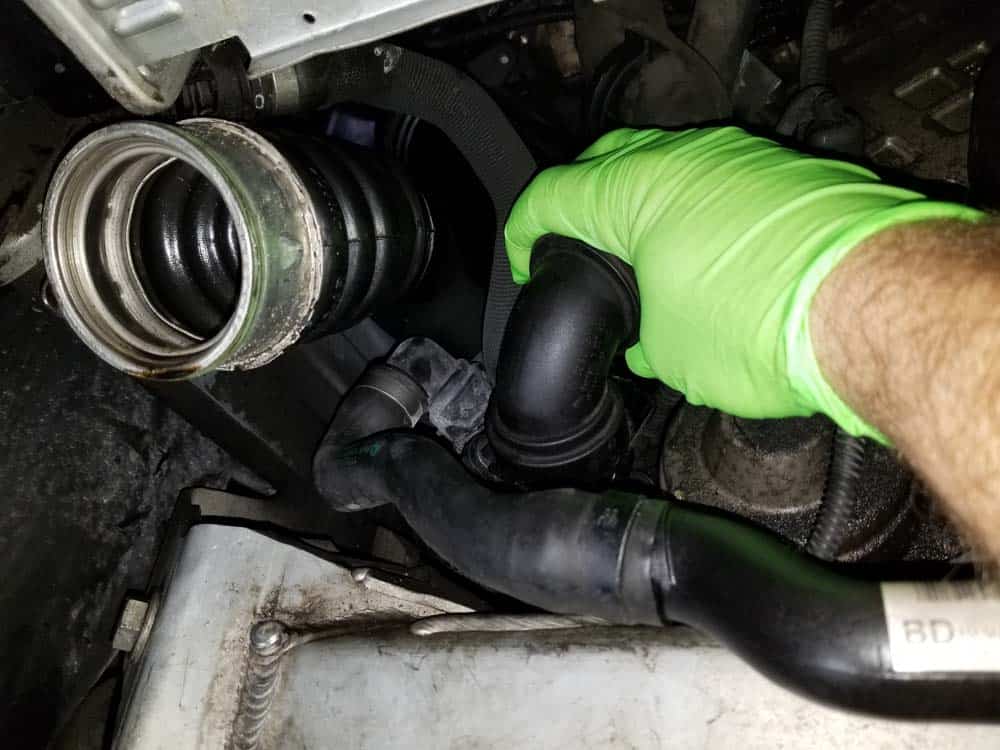
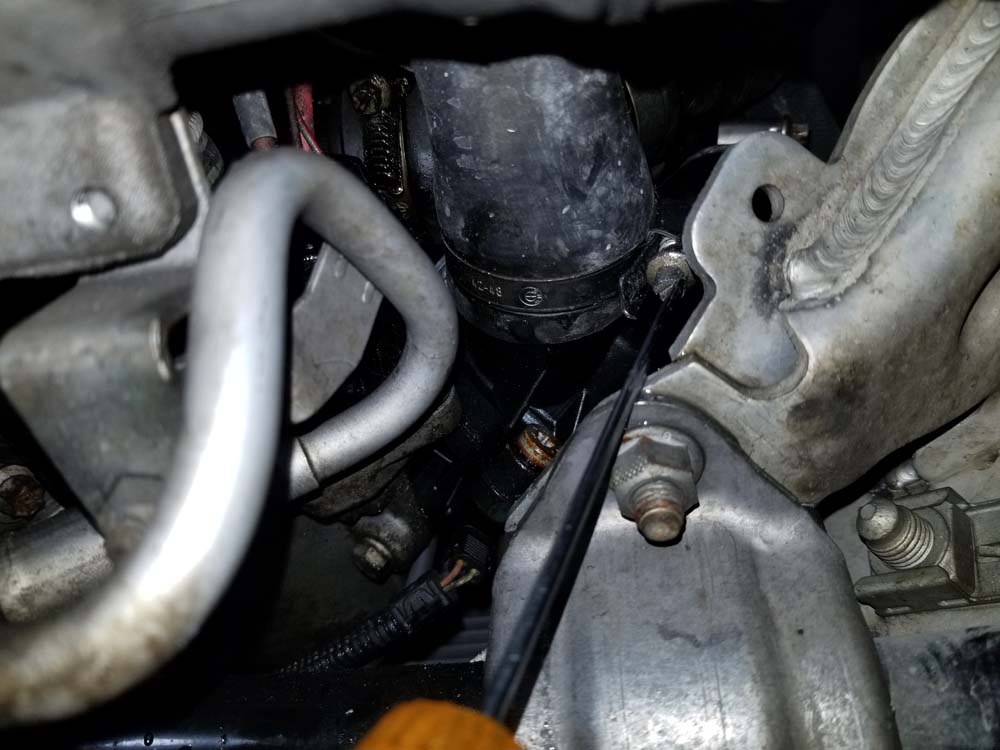
- Grasp the front of the thermostat and rotate it so the rear cylinder head coolant line can be accessed.
- Use a screwdriver to loosen the cylinder head coolant hose clamp. Pull the hose free from the thermostat.
- The thermostat can now be removed from the front of the engine. Use a small flat blade screwdriver to release the thermostat's electrical plug and pull it free.

- Remove the thermostat from the vehicle.
Section 3 - Installing the New Thermostat and Final Reassembly
Installation and reassembly of your vehicle is very straightforward, it is just the above steps in reverse. We have included an easy reassembly checklist with important torque values for your convenience. You will need to refill the coolant and bleed the system after reassembly - please see section 4 below for detailed steps on how to do this. BMW E90 Thermostat Replacement Checklist
***The following steps were performed on a 2011 335i...other models may vary.- Plug the electrical connector back into the thermostat.
- Connect the cylinder head coolant hose back on to the thermostat and tighten its hose clamp.
- Rotate the thermostat back into the engine.
- Install the two thermostat mounting bolts and torque them to 6 Nm (4.5 ft-lb).
- Reinstall the water pump hose on the rear of the thermostat and tighten its hose clamp.
- Close the locking clip on the heater return hose and push it onto the thermostat until your hear it click into place.
- Close the locking clip on the lower radiator hose and install it back onto the thermostat. Make sure you hear it click into place.
- Install the heater return line back onto the frame of the vehicle using the two T30 mounting screws.
- Install the cooling fan back into the front of the vehicle.
- Reinstall the cooling fan plug.
- Close the locking clip on the expansion tank vent hose and install it back on the expansion tank.
- Reinstall the intake duct.
- Reinstall the transmission cooler onto the back of the cooling fan.
- ***If you are working on a turbocharged engine, reinstall the intercooler. MAKE SURE you hear the charge pipes click into place on the intercooler..loose charge pipes will cause a rough idle and check engine light.
- Reinstall the front belly pan.
- Refill and bleed the coolant system (see Section 4 below).
Section 4 - Refilling and Bleeding the Coolant System
It is very important that the coolant system is refilled and bled correctly to remove any air pockets. Not properly purging the system of air can cause the engine to overheat. Fortunately, the BMW E90 has an automated coolant bleeding system that makes the process very easy. Always use Genuine BMW Anti-Freeze/Coolant mixed 50/50 with distilled water.- A battery charger should be attached to your vehicle while refilling the system and purging it of air. The reason for this is you will be drawing current from the battery for about 15-20 minutes without the engine running.
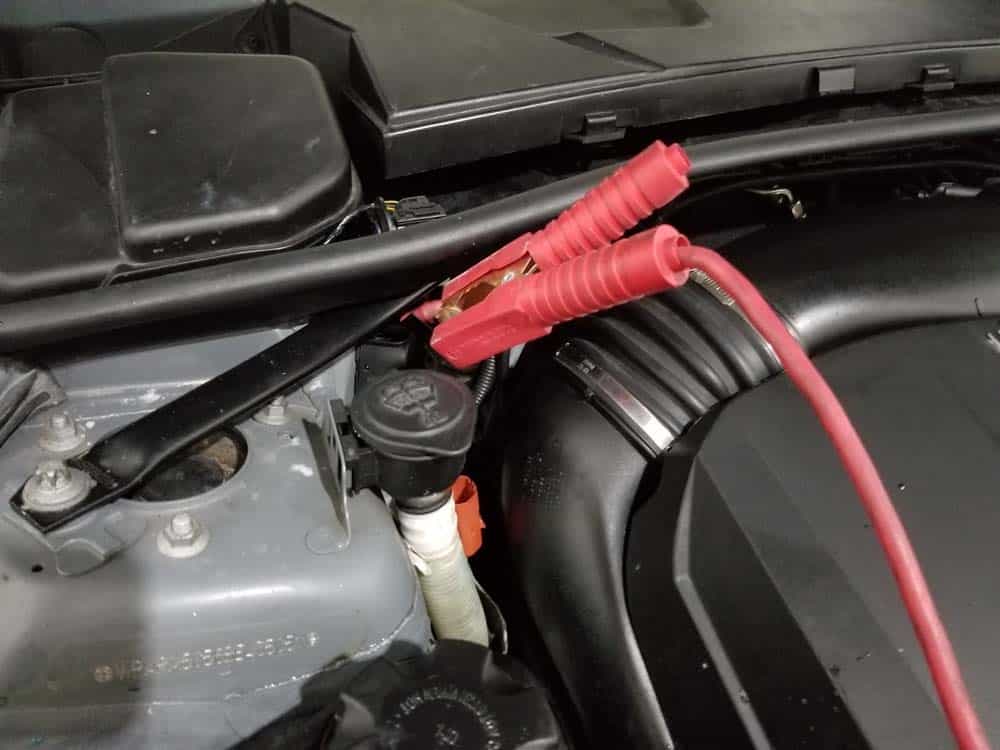
- Attach a battery charger to the battery terminals in the engine compartment as shown below and put it on its lowest setting. NEVER attach a battery charger directly to the battery itself in the rear of the vehicle...you could cause catastrophic damage to sensitive electronics if you do.
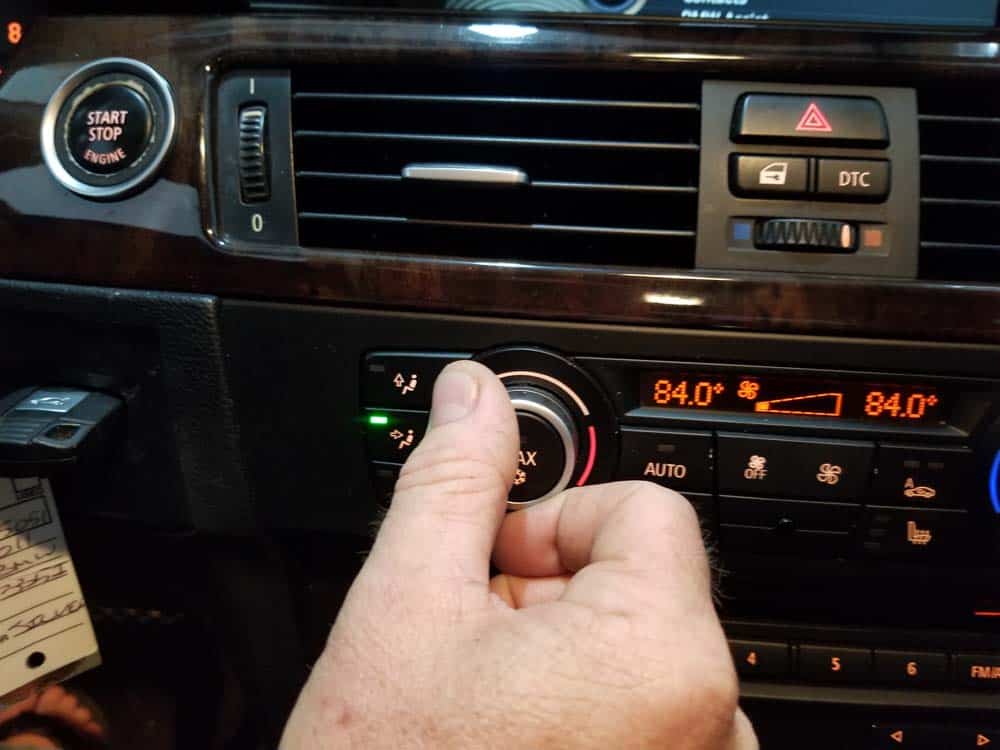
- First, the auxiliary water pump needs to be activated to circulate the coolant through the system while you fill the expansion tank. The auxiliary pump is activated when the vehicle's driver's side heater is set to its maximum setting and the blower is at its lowest setting.
- Start by turning on the ignition so the air conditioning settings can be changed. DO NOT start the car...just turn on the ignition!
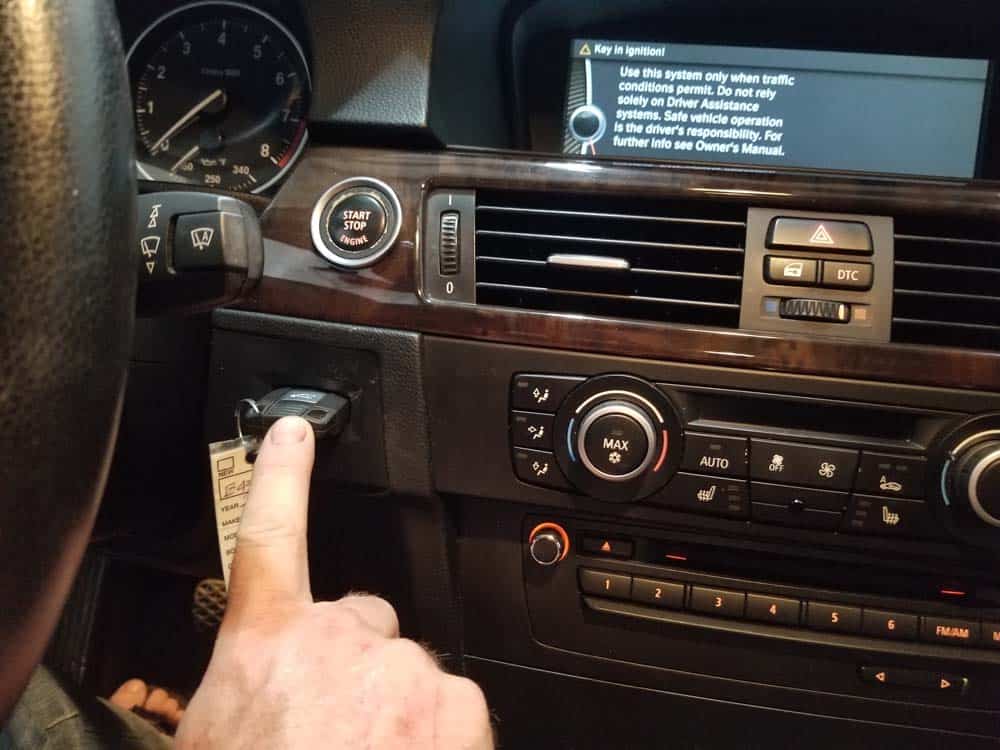
- Turn the heat all the way up on the driver's side temperature controller.
- Turn the blower down to its lowest setting.
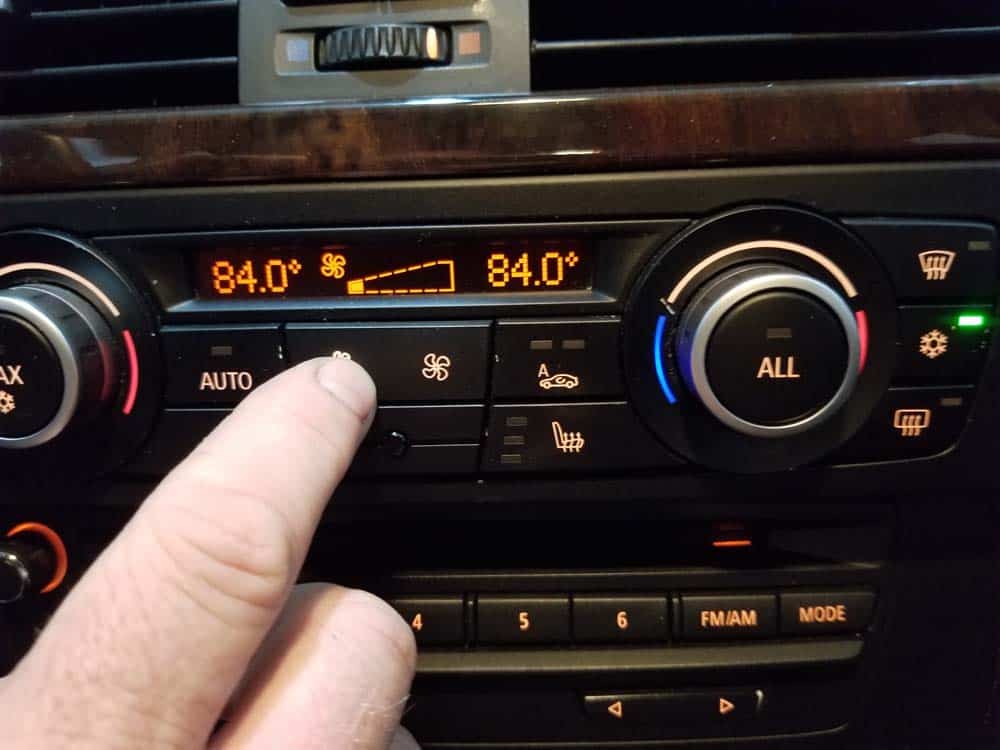
- The auxiliary pump is now activated. Move to the front of the vehicle.
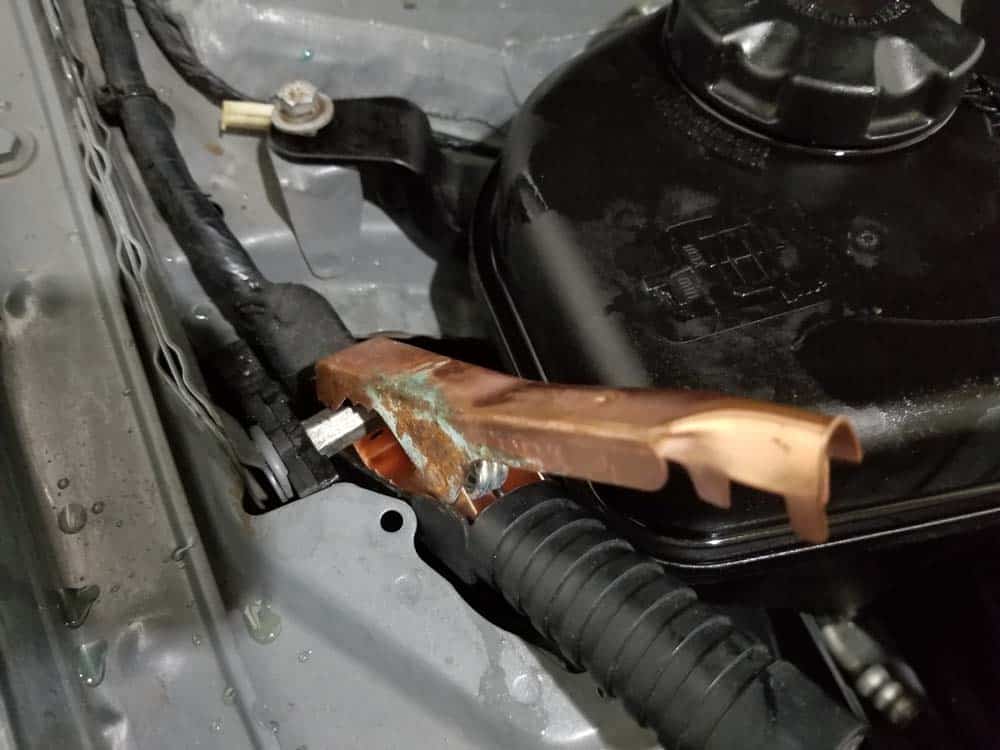
- Open the bleed screw on the expansion tank with a large flat blade screw driver.
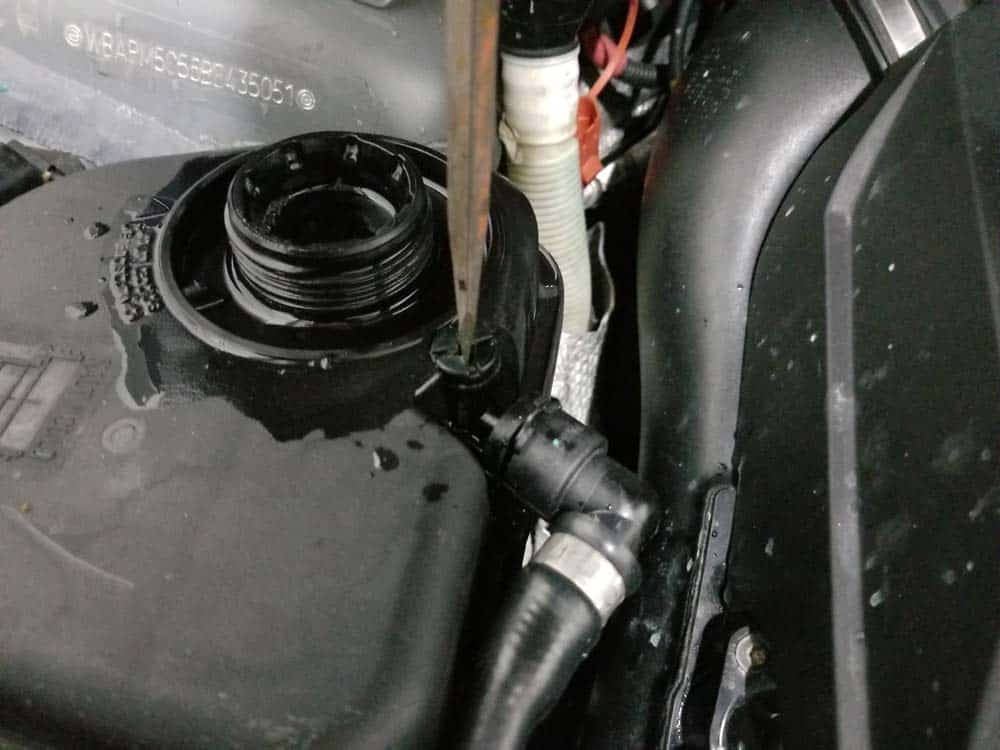
- Start filling the expansion tank with a 50/50 mixture of Genuine BMW Anti-freeze/Coolant and distilled water. When the tank fills up, stop pouring until the level drops. When the coolant level in the tank stops dropping and starts to come out of the bleed screw, stop pouring. Tighten the bleed screw and replace the cap on the expansion tank.
- Move back inside the vehicle.
- Turn the vehicle off. You must turn the vehicle off to reset the system before initiating the automated bleeding process.
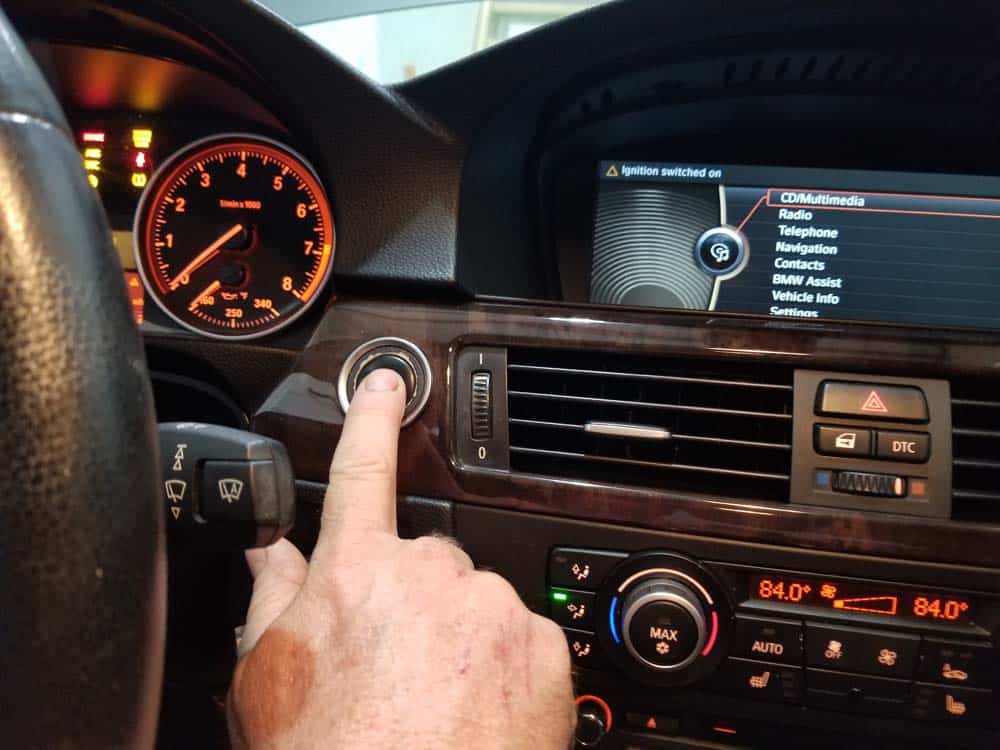
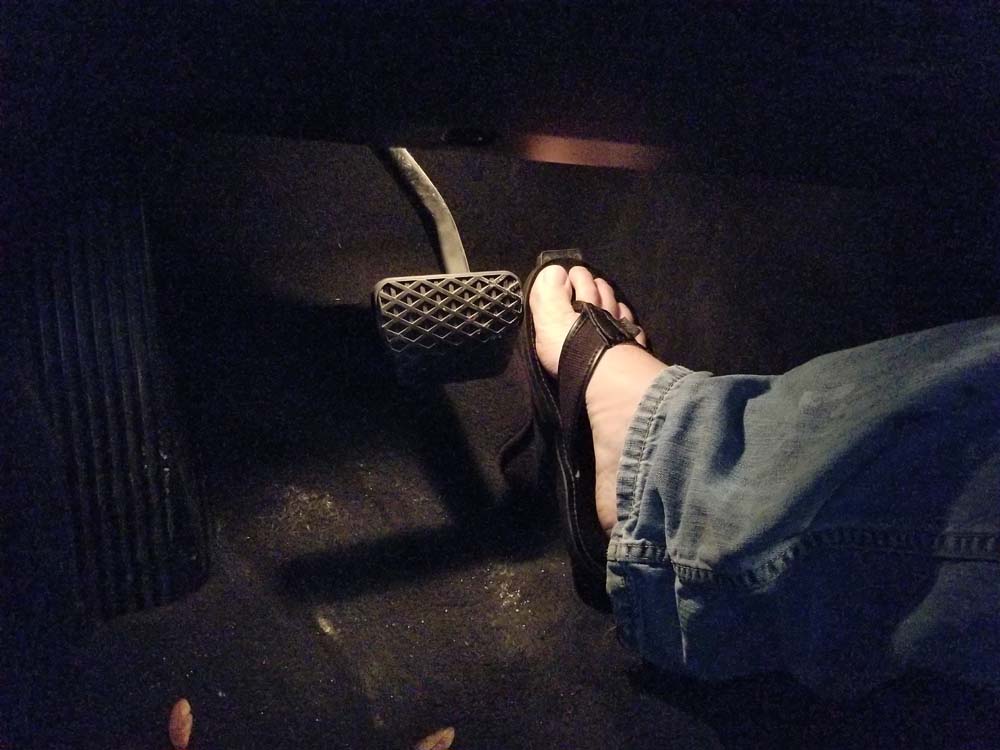
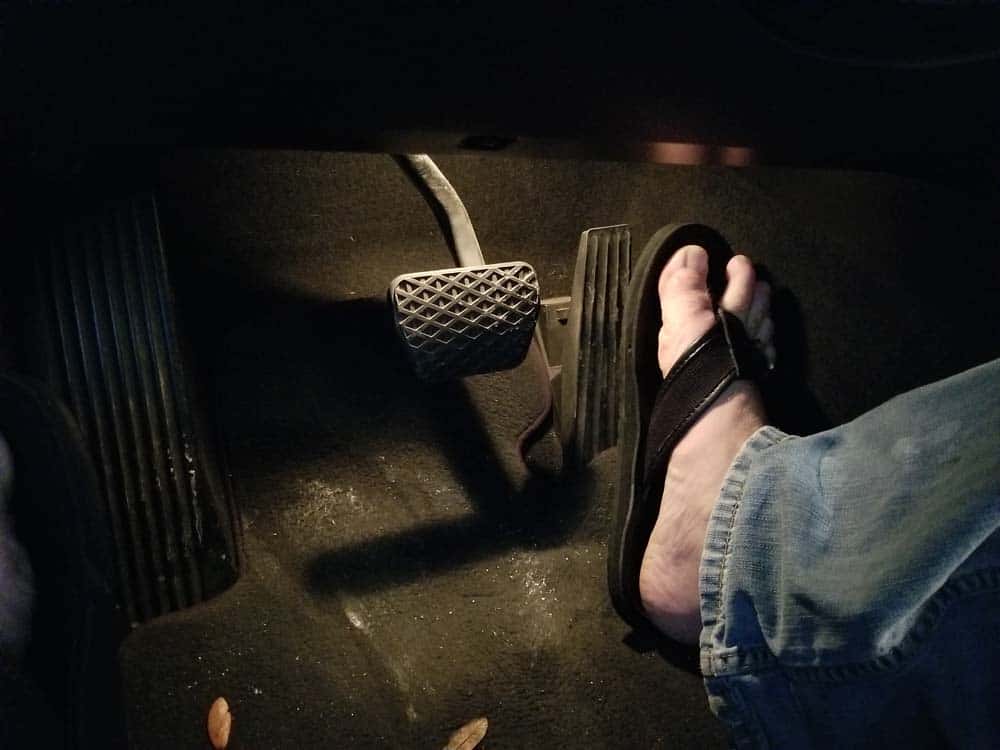
- Turn the ignition back on. DO NOT start the engine...just turn on the ignition. Hold the accelerator down with your foot for 12 seconds and then release. This will initiate the automated bleeding process.
- Move to the front of the vehicle. You should be able to clearly hear the water pump running as it bleeds the coolant system.
- The automated bleeding process lasts approximately 12 minutes. After it is finished you can start the vehicle and check for normal operation.
BMW E90 Thermostat Replacement Finished