
Affiliate link disclosure – The BMW Repair Guide uses affiliate links in their site. For more information on affiliate links, please click here.
Repair Summary
This article gives detailed instructions on replacing the rear shock absorbers in a BMW E61 5 series touring wagon. Even though we used a 2006 530xi touring wagon to perform this repair, this article can be applied to any 2006-2010 5 series touring wagon including the 535xi with minor modifications to the repair steps.
See all vehicles this article applies to
E61 5 Series 550i
E61 5 Series 530d
E61 5 Series 545i
E61 5 Series 535d
E61 5 Series 530xi
E61 5 Series 530xd
E61 5 Series 525i
E61 5 Series 530i
E61 5 Series 525xi
E61 5 Series 525d
E61 5 Series 523i
E61 5 Series 520d
A BMW E61 rear shock replacement will return that factory feel to your 2006-2010 touring wagon.
One of the most iconic (and missed) vehicles ever built by BMW is the 2006-2010 5 series wagon. It was sadly replaced in the U.S. by BMW's high-demand line of small SUVs, forcing many disappointed baby boomers into these "soccer mom-mobiles" or the smaller 3 series wagon. The good news is there are still quite a few E61 5 series touring wagons available and most of them for a pretty decent price. The bad news is the majority of these vehicles have traversed that magical 100,000-mile line where maintenance issues start arising.
One of the big issues with 100K plus 5 series wagons is the suspension....especially the rear shocks. Age and general wear and tear slowly degrade the BMW E61 rear shocks to the point where they fail, and it usually happens quickly. And there are no doubts when the rear shocks fail on an E61 wagon - just listen to your buttocks. Driving a 2006-2010 5 series wagon with no rear shocks is like riding a tricycle down a cobblestone street. Bumps become bone-jarring and can actually be quite scary. It is very important that if you are experiencing symptoms of failing rear shocks that they be replaced immediately to avoid further damage to the rear end of your touring wagon....especially the rear air suspension system.
The good news is a BMW E61 rear shock replacement is relatively simple for the home mechanic and can easily be done in the family garage...except for one caveat: a lot of trim needs to be removed from the rear trunk area to access and unbolt the top of the shock absorbers. BMW, unfortunately, buried the rear shock-to-body mounts under a mountain of plastic trim and carpeted panels. But if you are able to take a deep breath and get past that, performing your own BMW E61 rear shock replacement will save you A LOT of money. High-quality OEM rear shocks can be purchased cheaply - installing them yourself will save a very expensive trip to the dealership. We give you detailed step-by-step instructions below along with a comprehensive parts list for your convenience.


View the detailed parts diagram for this repair.
Includes detailed part diagrams, part numbers and links to purchase all of the required components needed to complete this repair.

Before starting this repair, you must have the following required parts.
BMW E61 Touring Wagon
These are the same factory shock absobers that would be installed at the BMW Dealership.
BMW E61 Touring Wagon
The piston head design allows independent tuning of the compression and rebound damping forces to provide optimum ride comfort and performance without compromise. This product features monotube gas pressure construction and the same quality as the world famous Bilstein Monotube Gas Pressure Shocks in a new twin tube design.
BMW E61 Touring Wagon
This rubber stop prevents your suspension from damage due to excessive compression on large bumps. If it's rotted or missing, you may notice loud noises when your suspension bottoms out.
BMW E61 Touring Wagon
These are the same factory shock mounts that would be installed at the BMW dealership.
Section 1 - Accessing the Top Shock Mounts
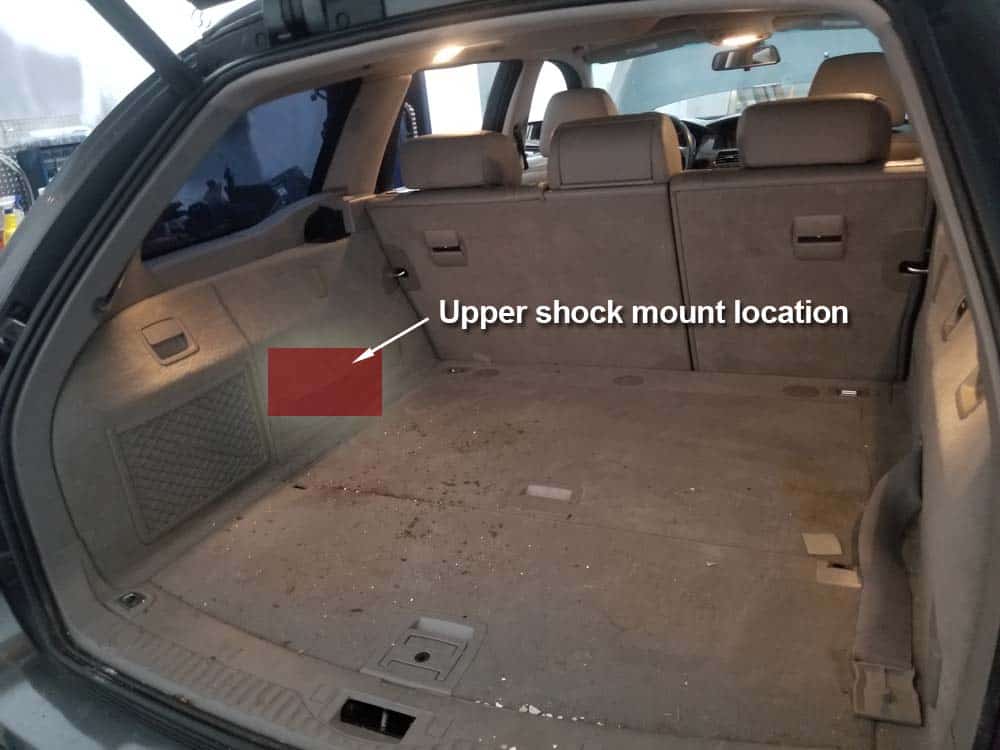
Before removing the BMW E61 rear shocks from underneath the vehicle, the top shock mounts must be accessed. As mentioned at the beginning of this article, the top shock mounts in the BMW E61 touring wagon are buried underneath plastic trim that requires time and patience to remove. We cannot stress enough using patience during this section - if a piece of trim will not come loose DO NOT FORCE IT or it will break. If a piece of trim will not easily pull free it means you have missed a fastener.- Open up the trunk compartment and identify the general location of the upper rear shock mounts.
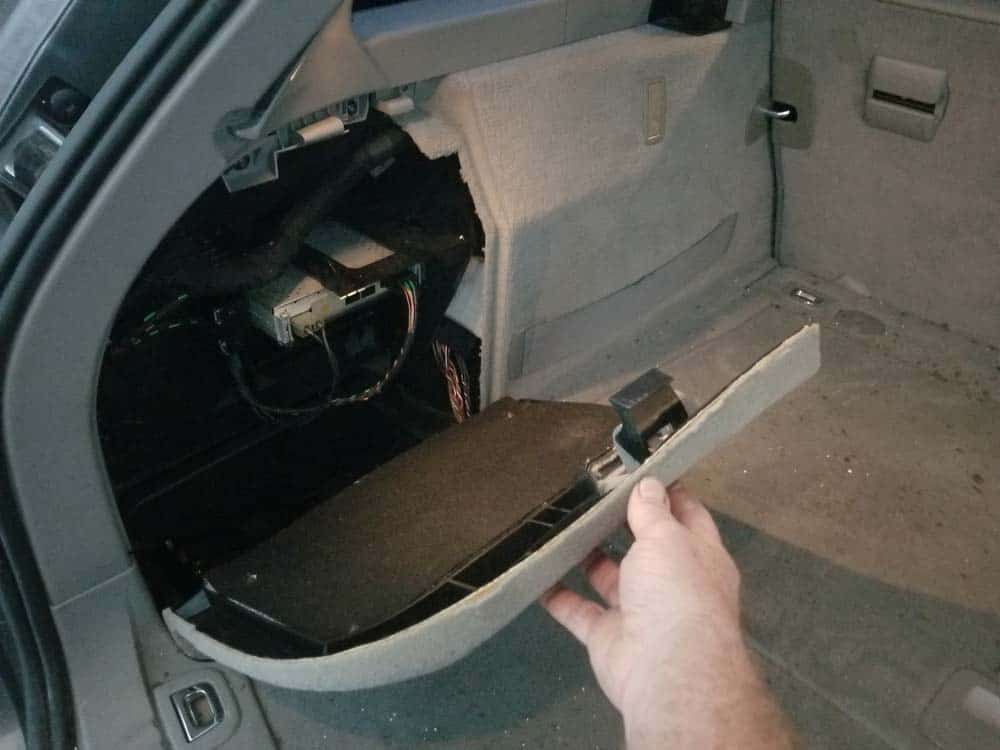
- Starting on the left side of the vehicle, remove the storage compartment cover.
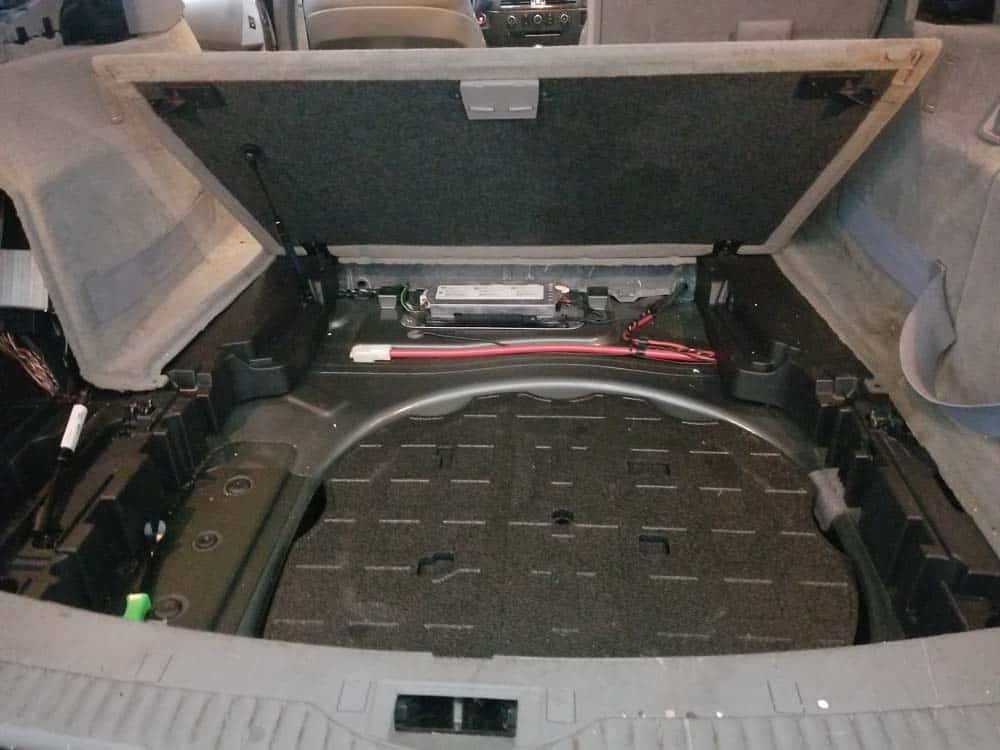
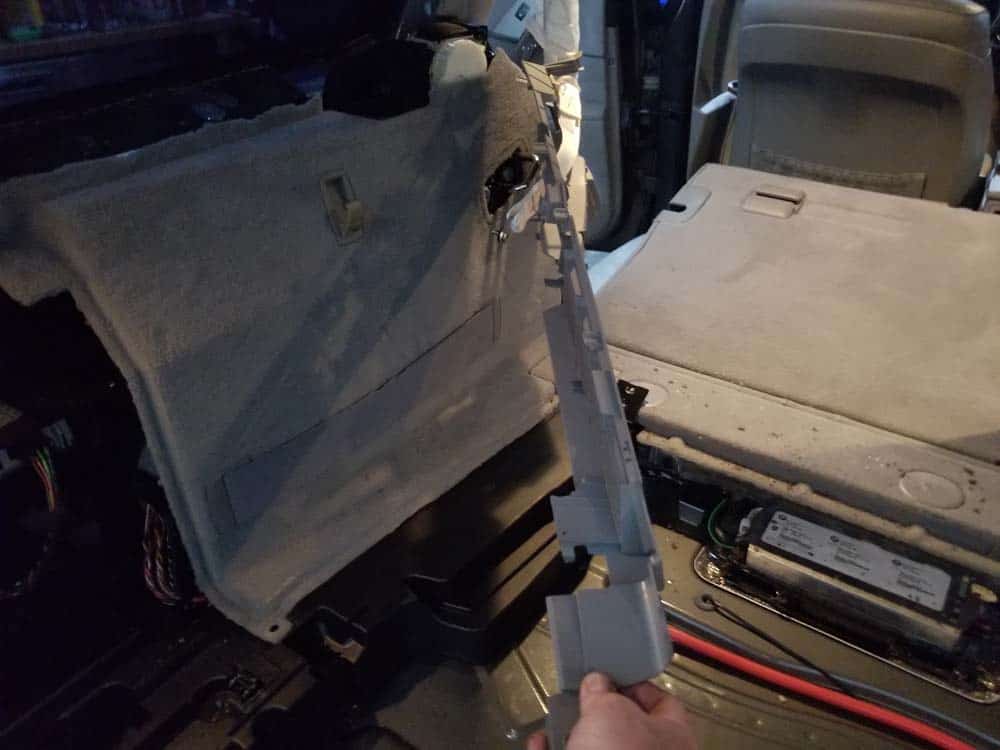
- Remove the spare tire compartment cover by fully raising it and disconnecting its gas spring mechanism. Remove the cover from the vehicle.
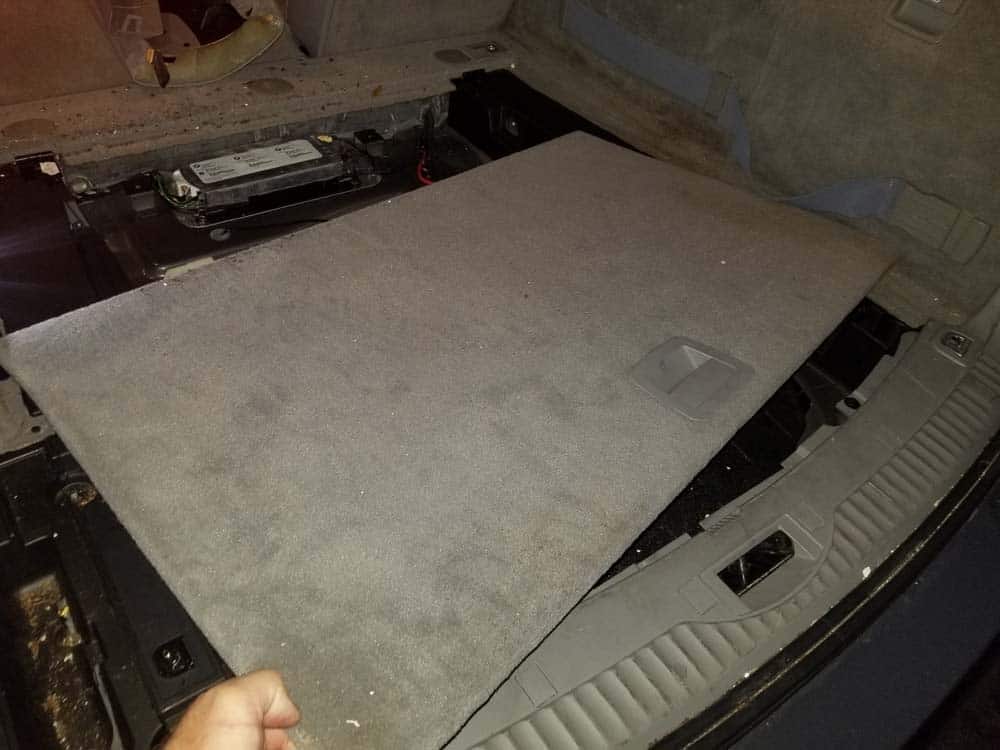
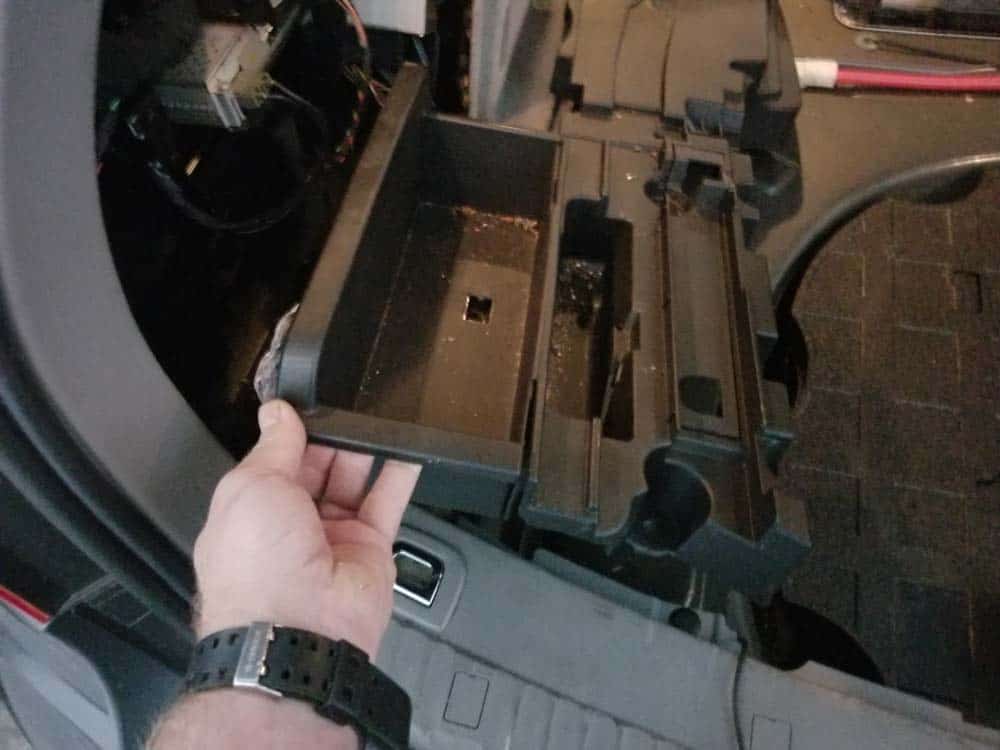
- Raise the cover on the forward storage compartment. Grasp the storage trunk floor and remove it from the vehicle.
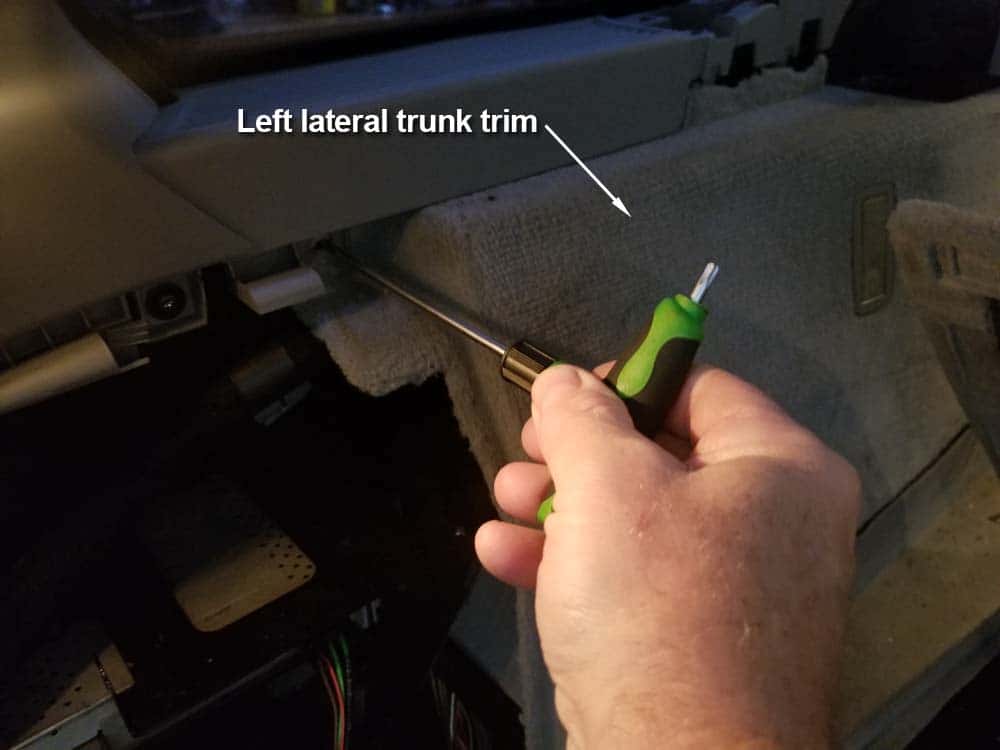
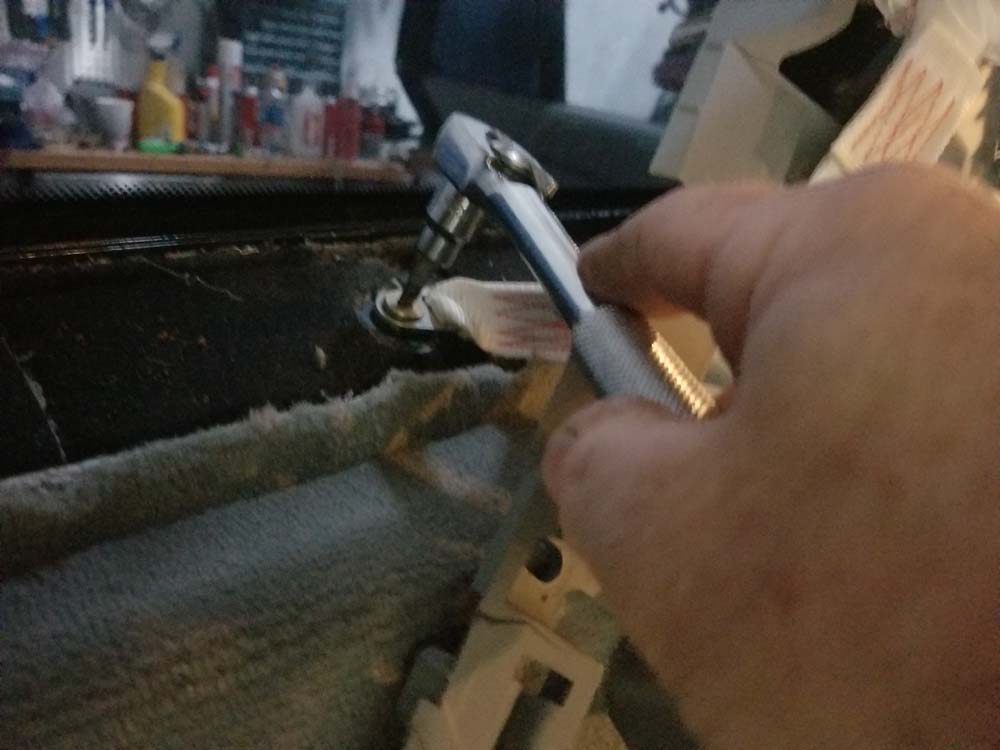
- Using a T20 torx bit, remove the trim screw anchoring the left lateral trim component to the body of the vehicle.
- Use a 10mm nut driver to remove the two plastic nuts anchoring the left plastic storage tray to the floor of the trunk.
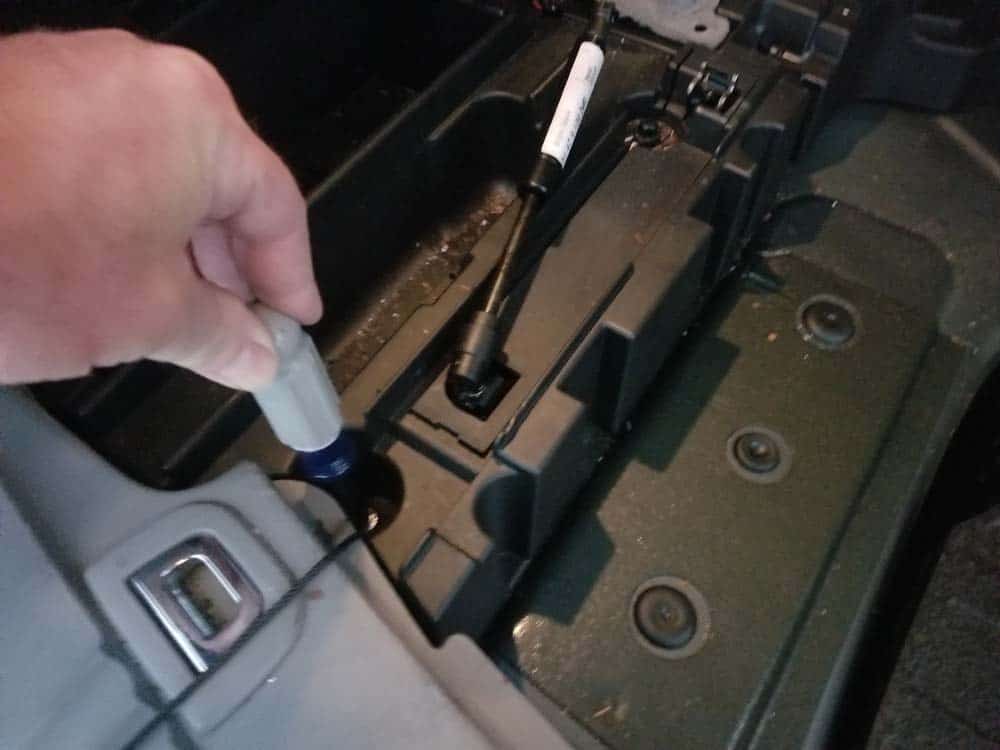
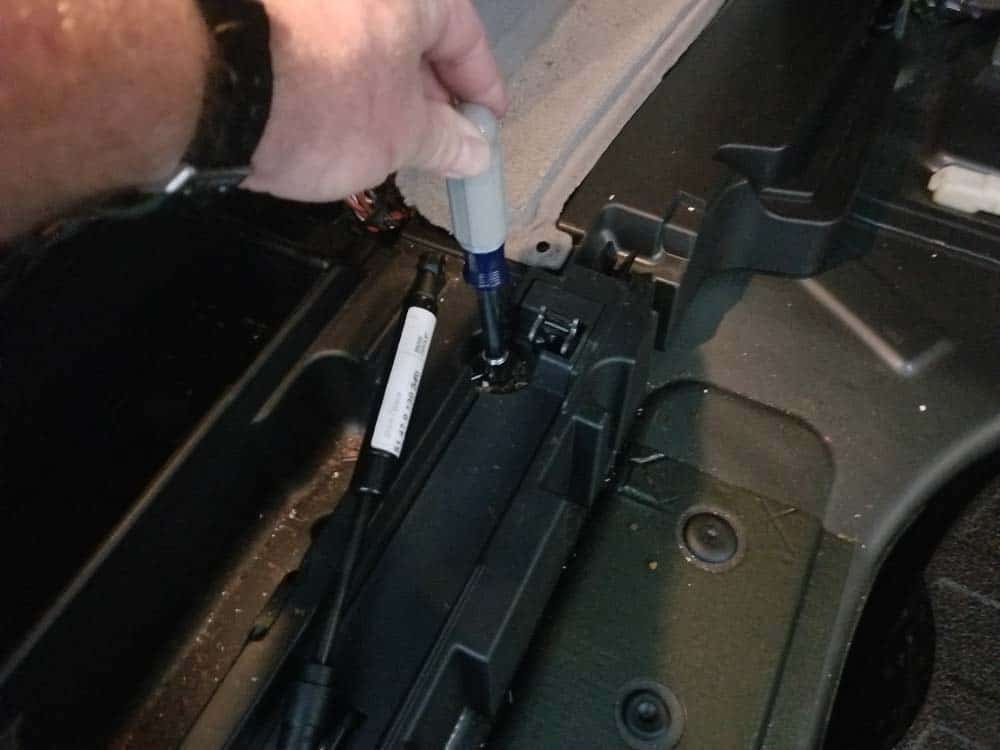
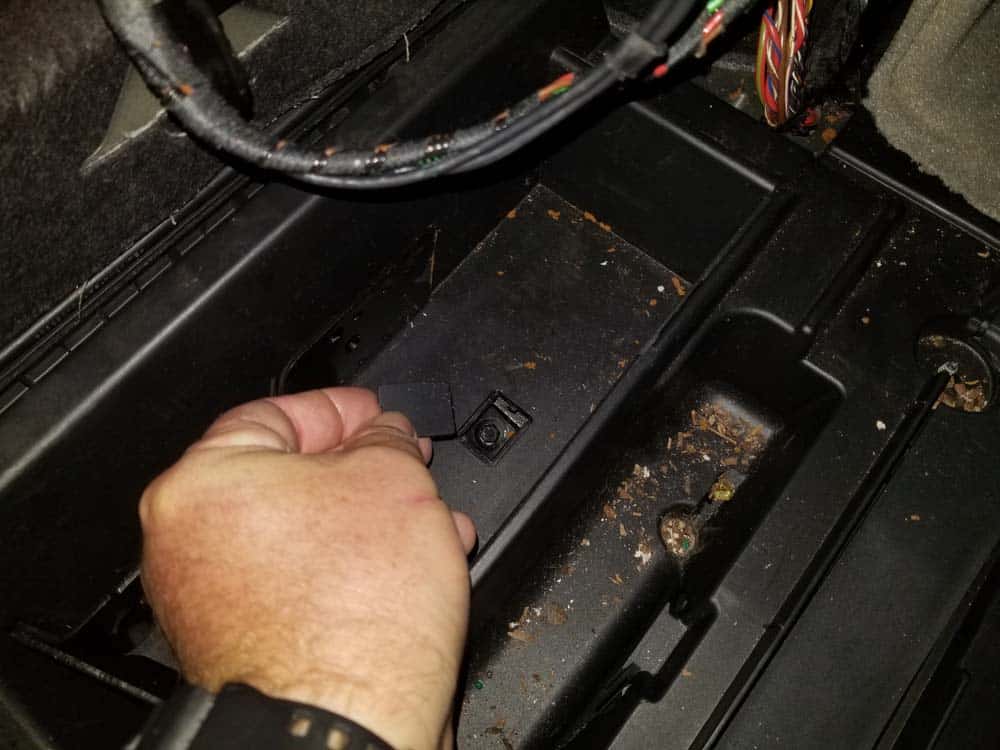
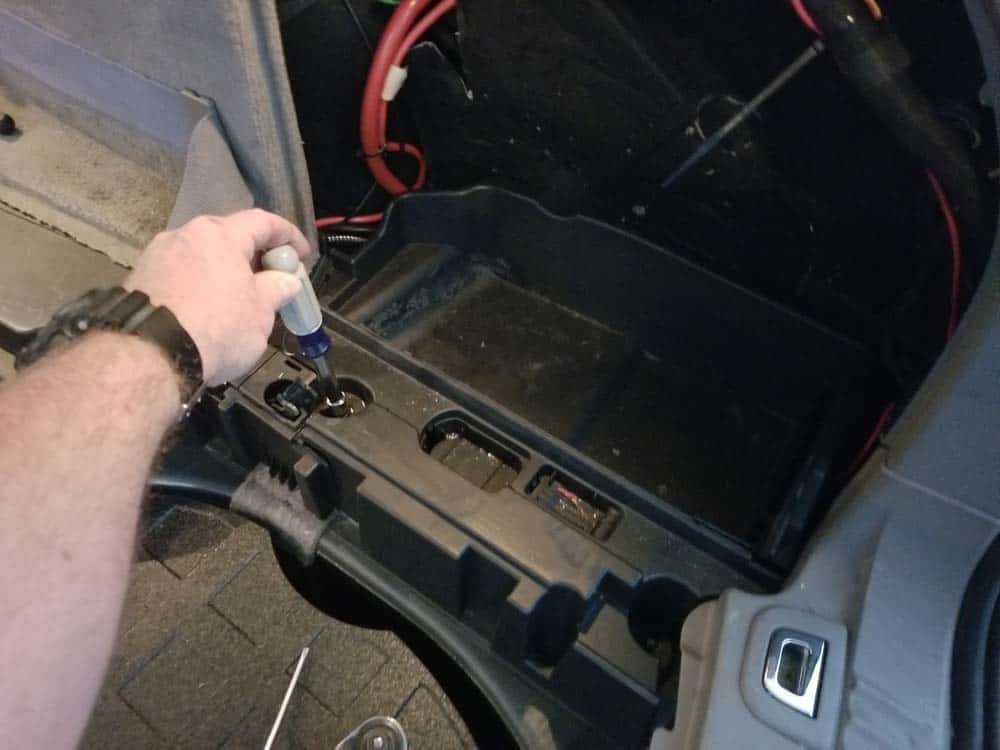
- Remove the small plastic cover from inside the plastic storage tray and locate the 8mm screw hidden inside of it. Remove the screw with an 8mm nut driver.
- Using a trim removal tool, remove the plastic rivet anchoring the bottom of the lateral trunk trim.
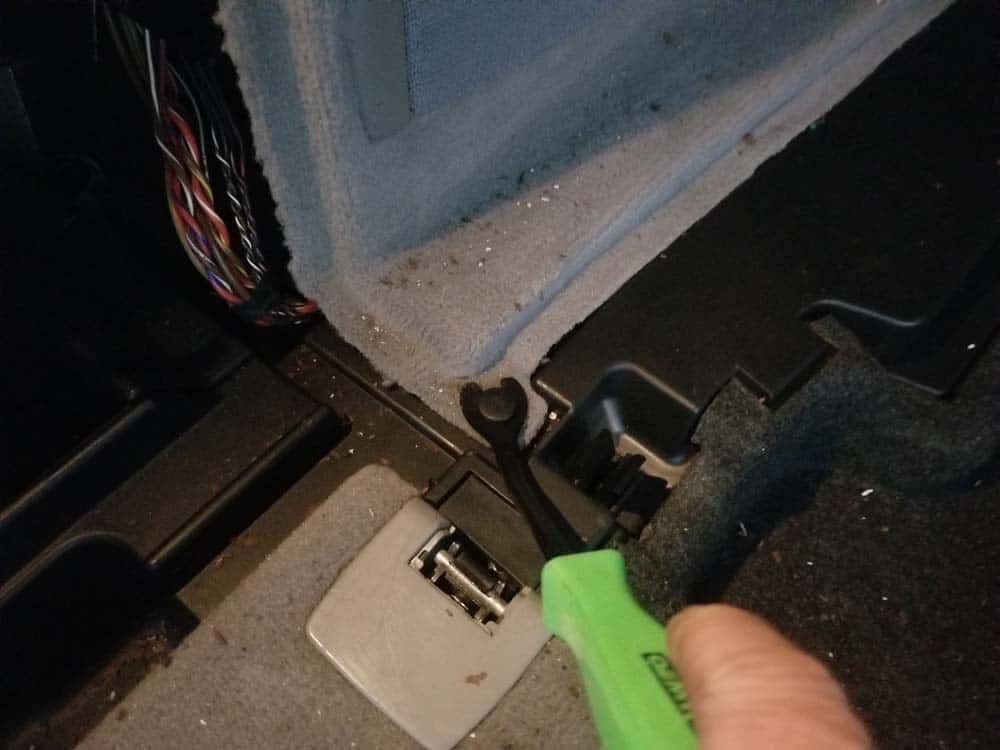
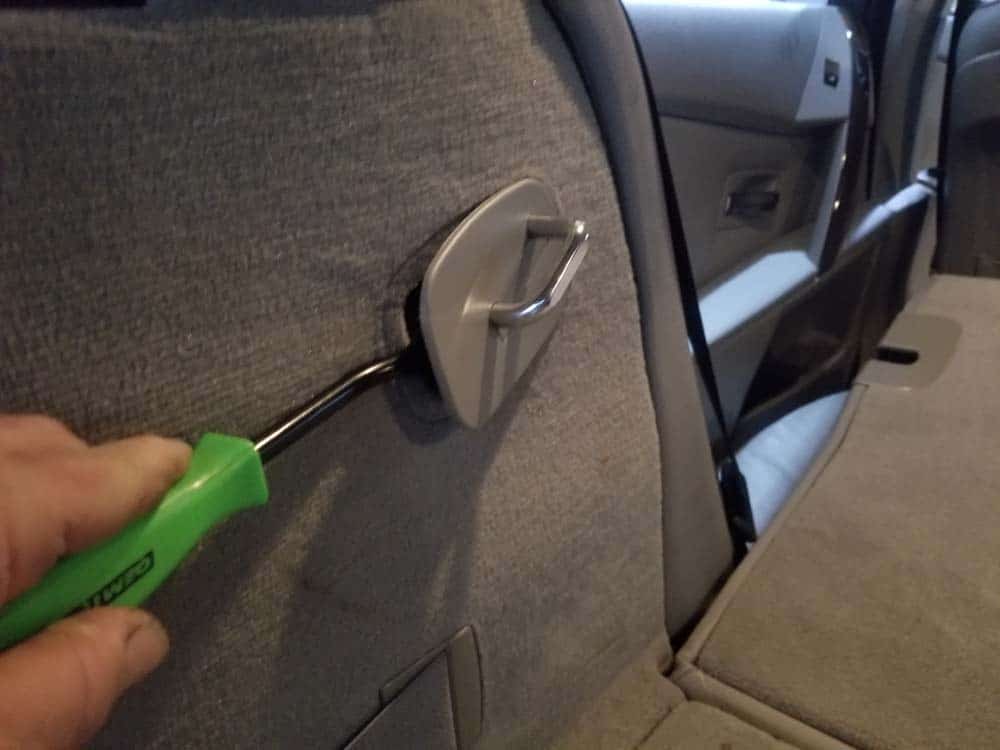
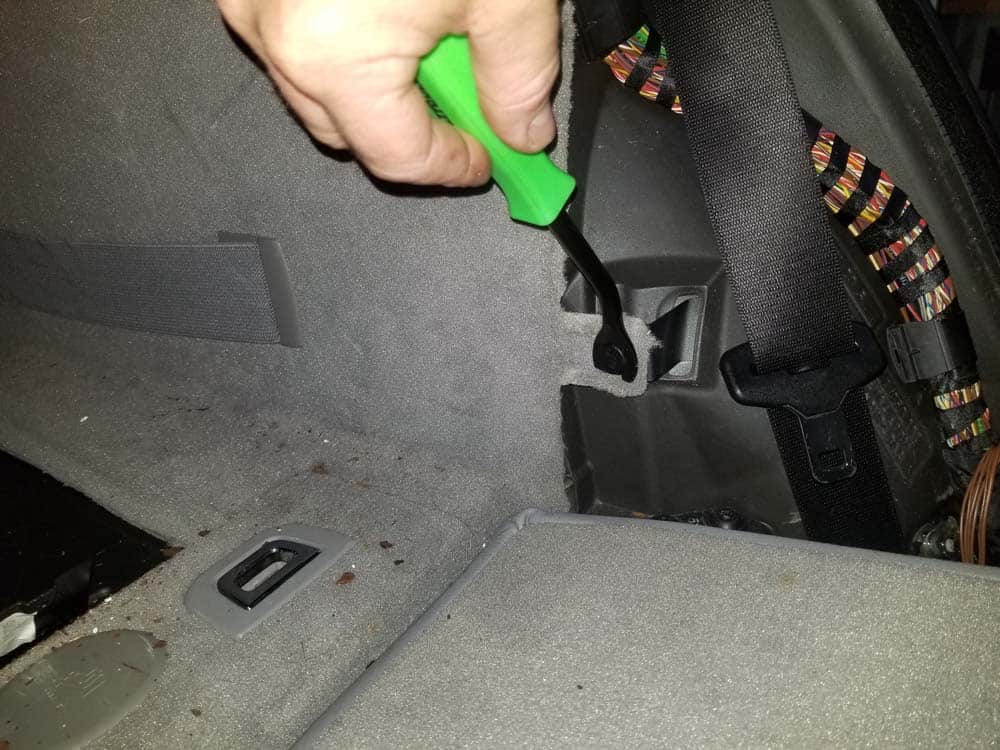
- Use a trim removal tool to remove the plastic cover off of the rear seat locking bar.
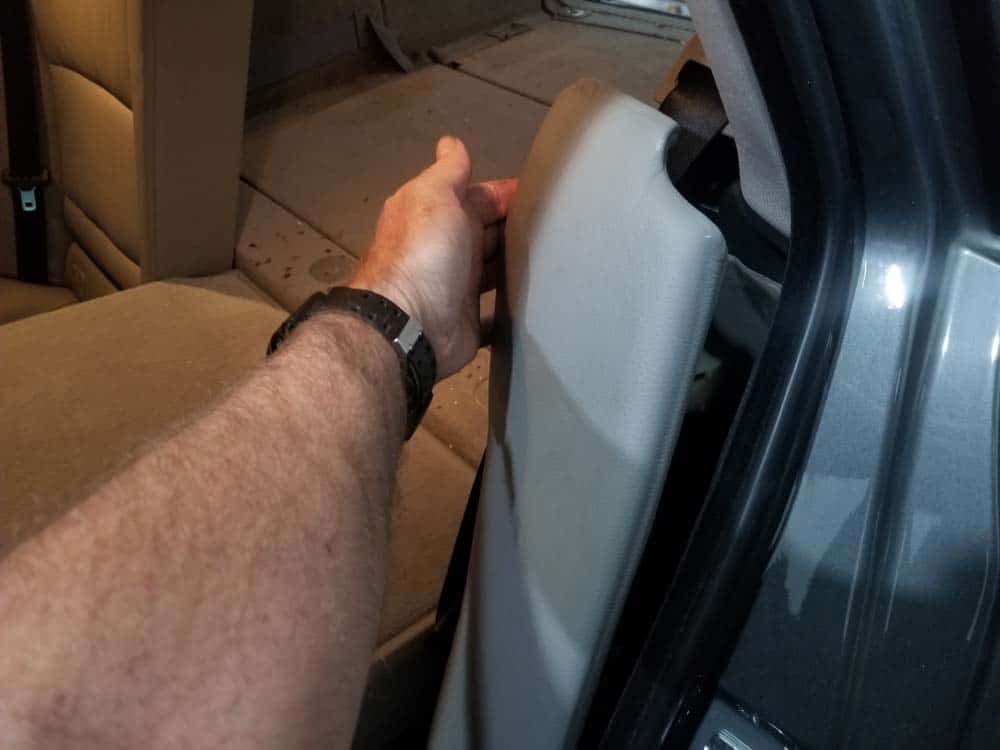
- Grasp the rear seat side cushion and pull it free from the vehicle.
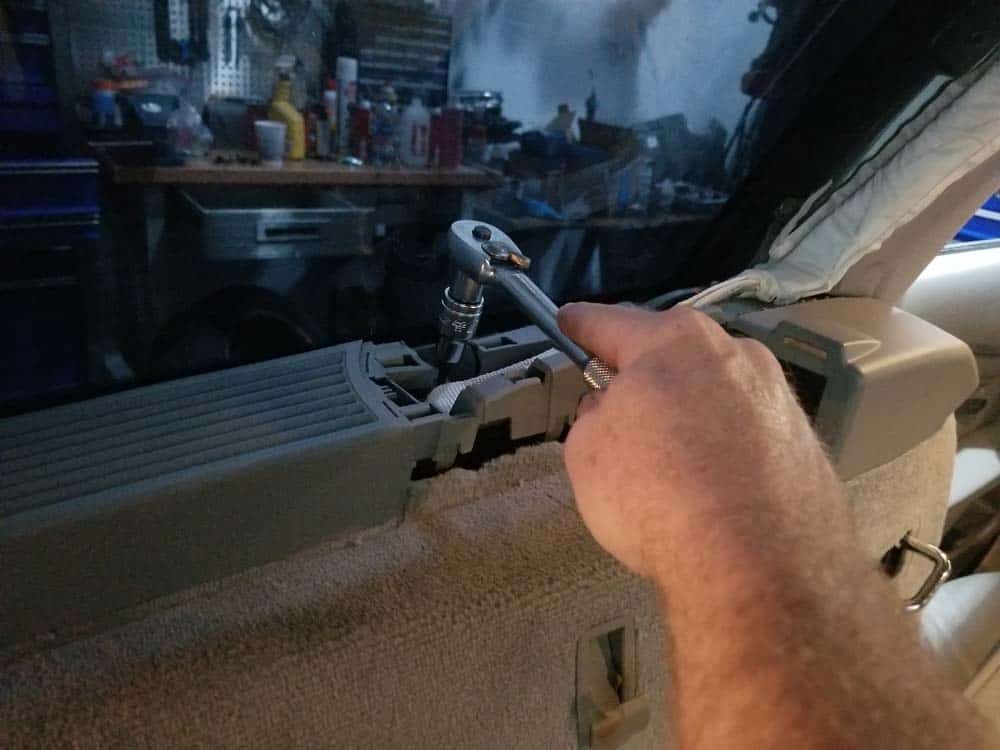
- Using an 8mm nut driver, remove the screw anchoring the front of the rear window trim.

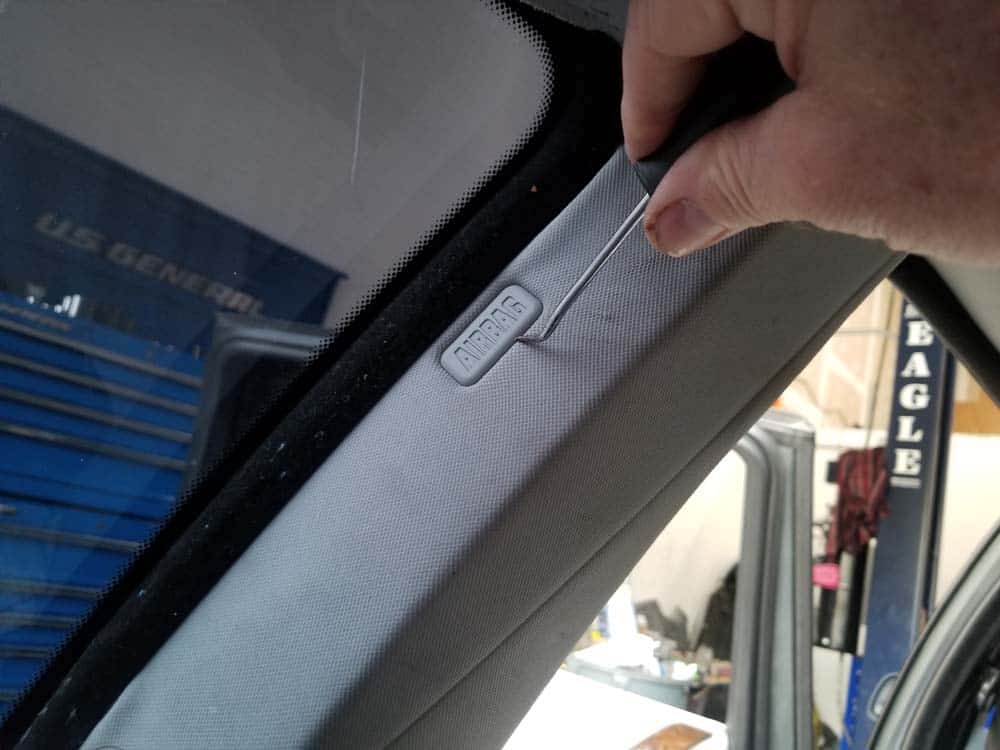
- Grasp the side airbag trim cover and remove it from the vehicle.
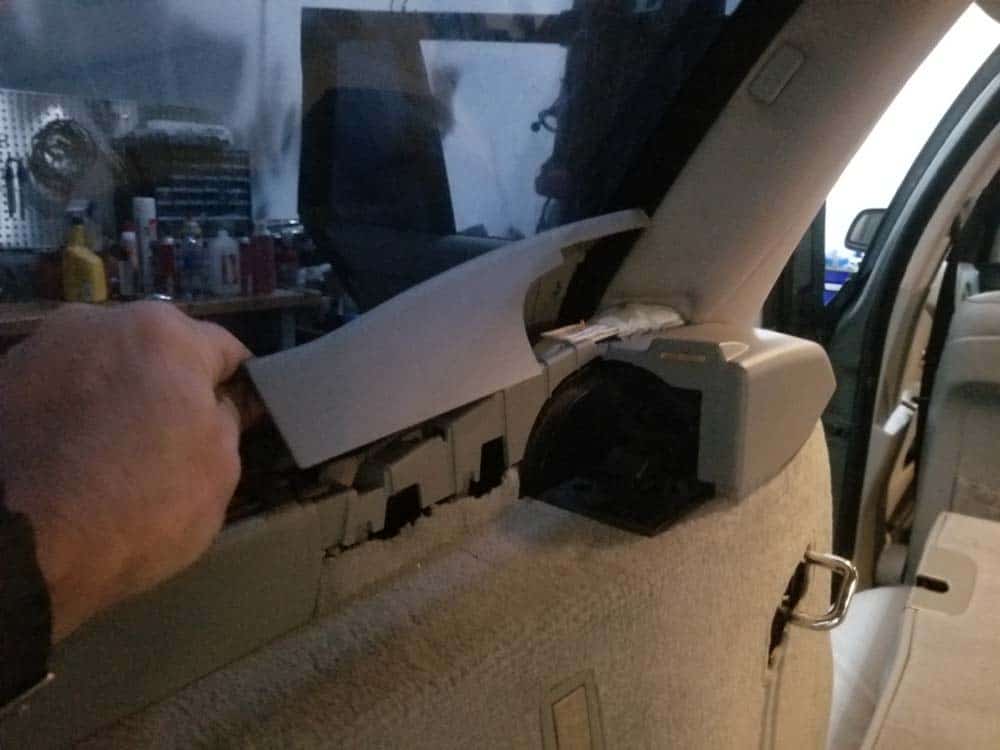
- Remove the “Airbag” cover cap from the rear C pillar piece so the mounting bolt can be accessed.
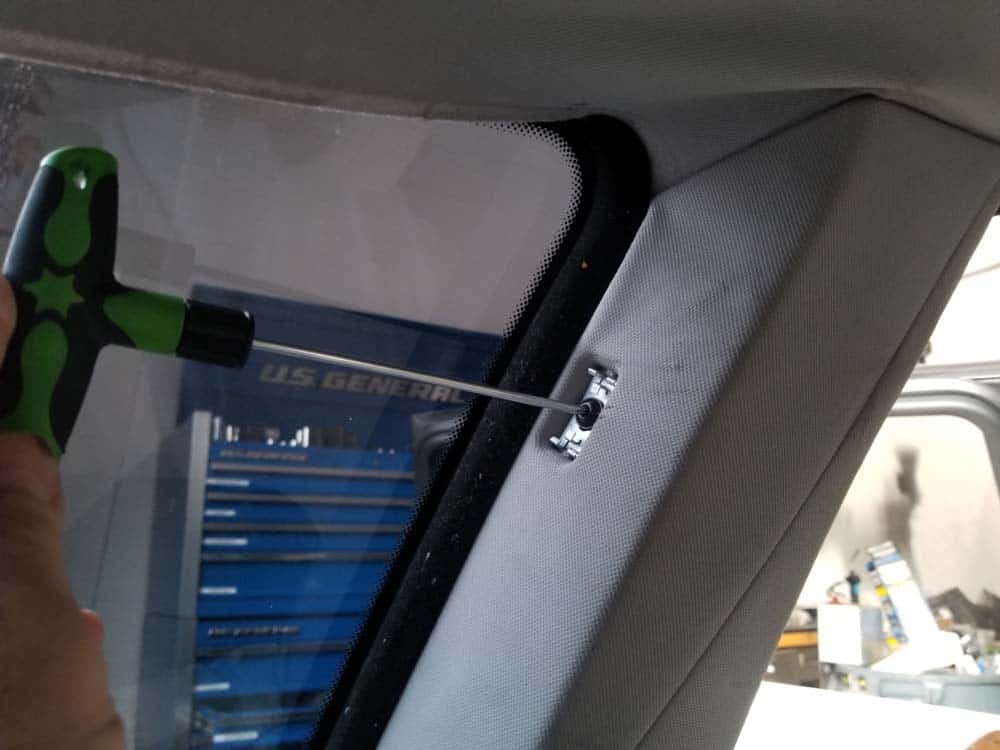
- Remove the C pillar mounting bolt with a T20 torx bit. Remove the rear portion of the C pillar trim.
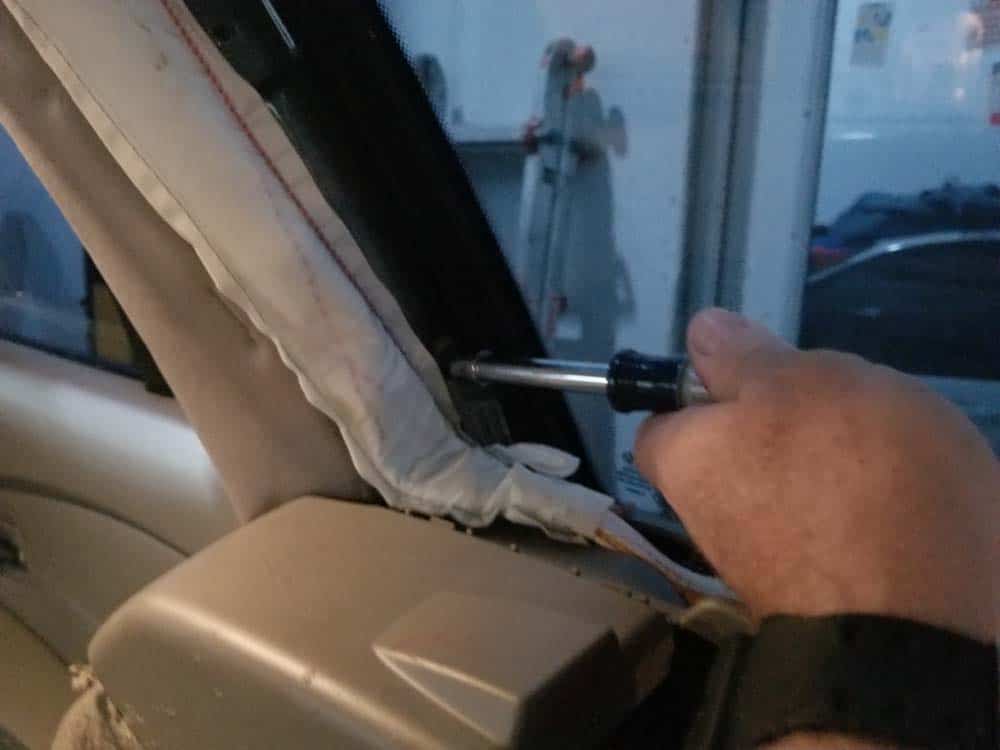
- In order to remove the lateral trim panel so the top shock mount can be accessed, the side airbag must be unbolted and swung out of the work area. First, use a T27 torx bit to remove the bolt anchoring the side window trim.
- Using an 8mm nut driver, remove the screw anchoring the window trim to the C pillar as shown below.
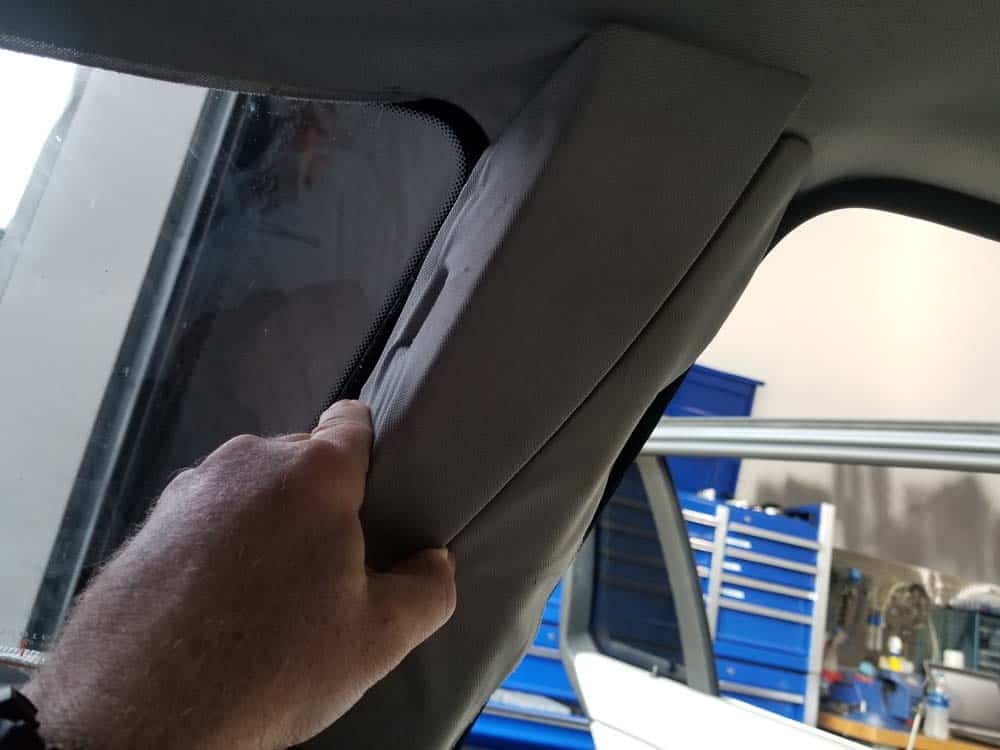
- Carefully lift the side window trim until the side airbag anchor bolt can be accessed. Use a T30 torx bit to remove the bolt.
- With the bolt removed, carefully swing the side airbag and window trim out of the work area.
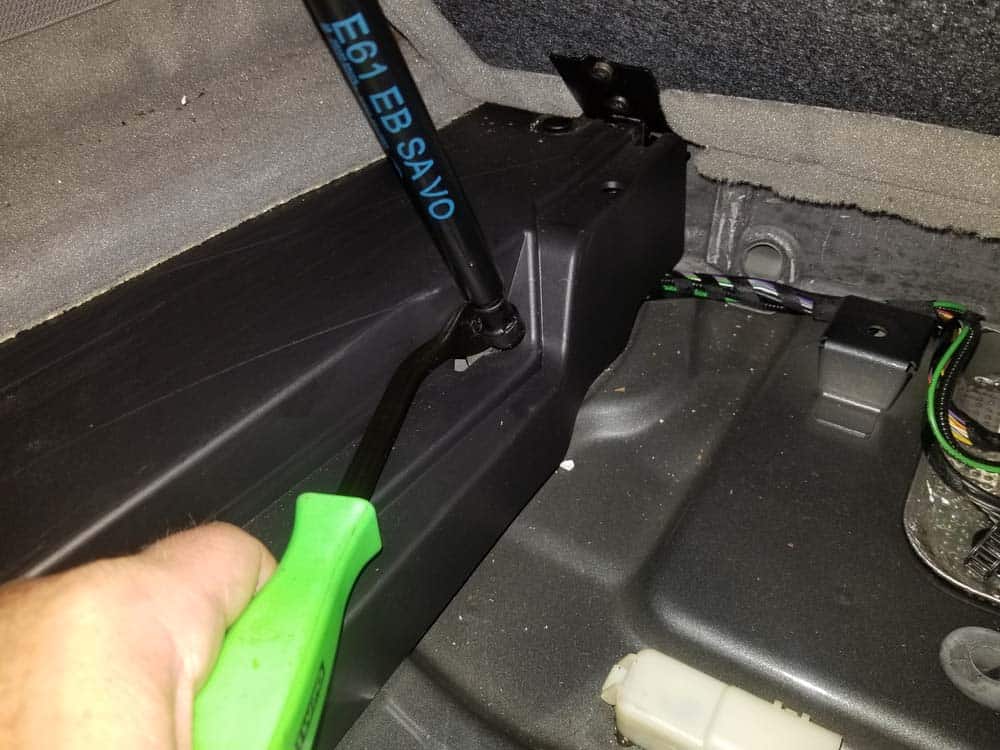
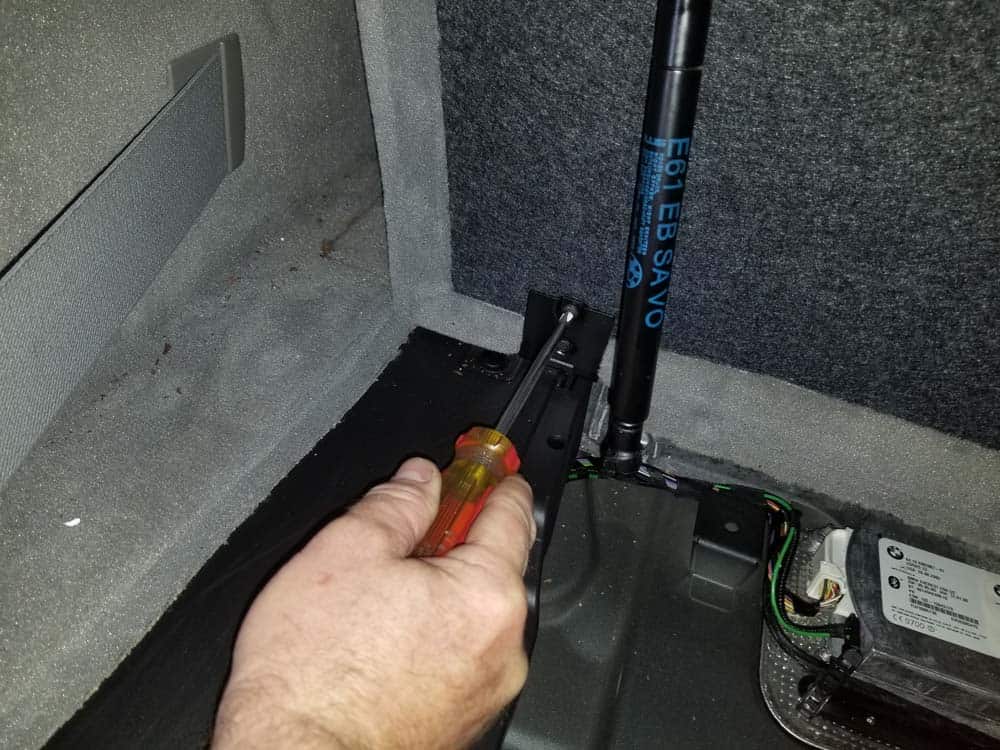
- Next, remove the cover off of the forward trunk storage compartment. Use a trim tool to pry the gas spring off then use a phillips screwdriver to remove the hinges. Remove the cover from the vehicle.
- Using a trim tool, remove the plastic rivet from the front of the lateral trim.
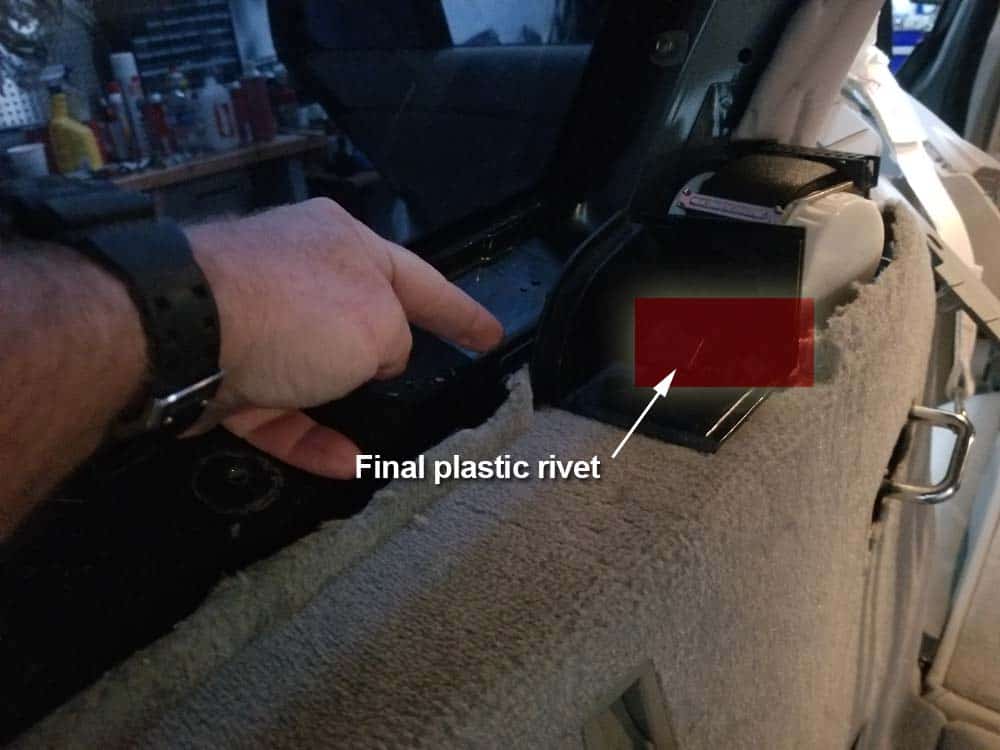
- The final plastic rivet securing the lateral trim to the vehicle is located on the top. It is difficult to see...you will need to position yourself over the top of the trim to see it. Use a trim removal tool to remove the plastic rivet.
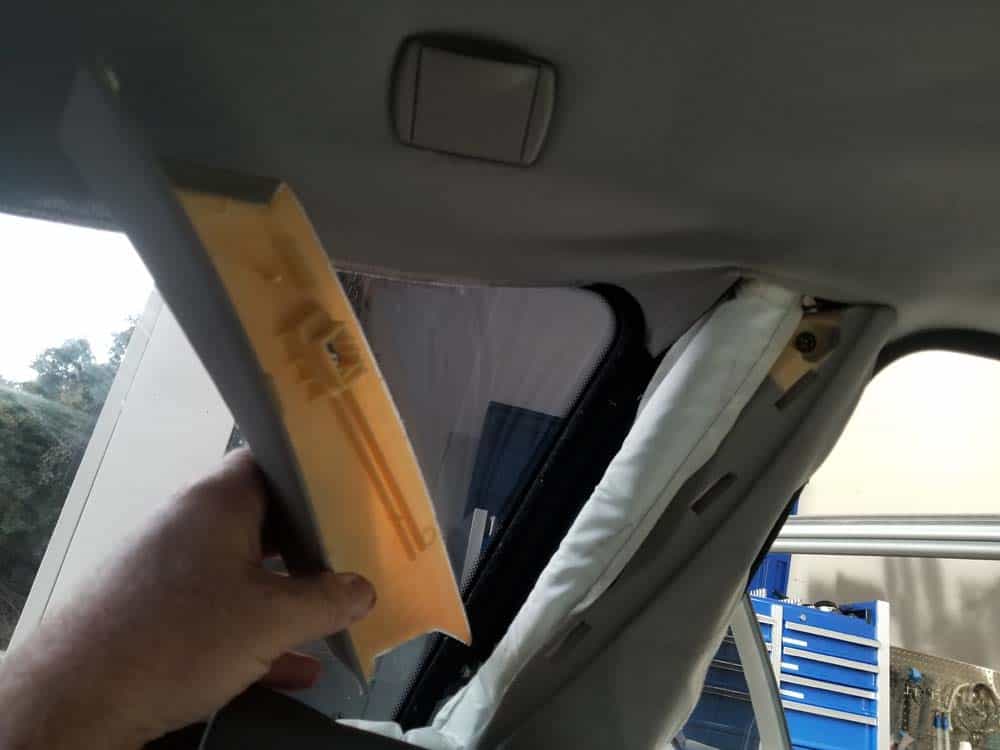
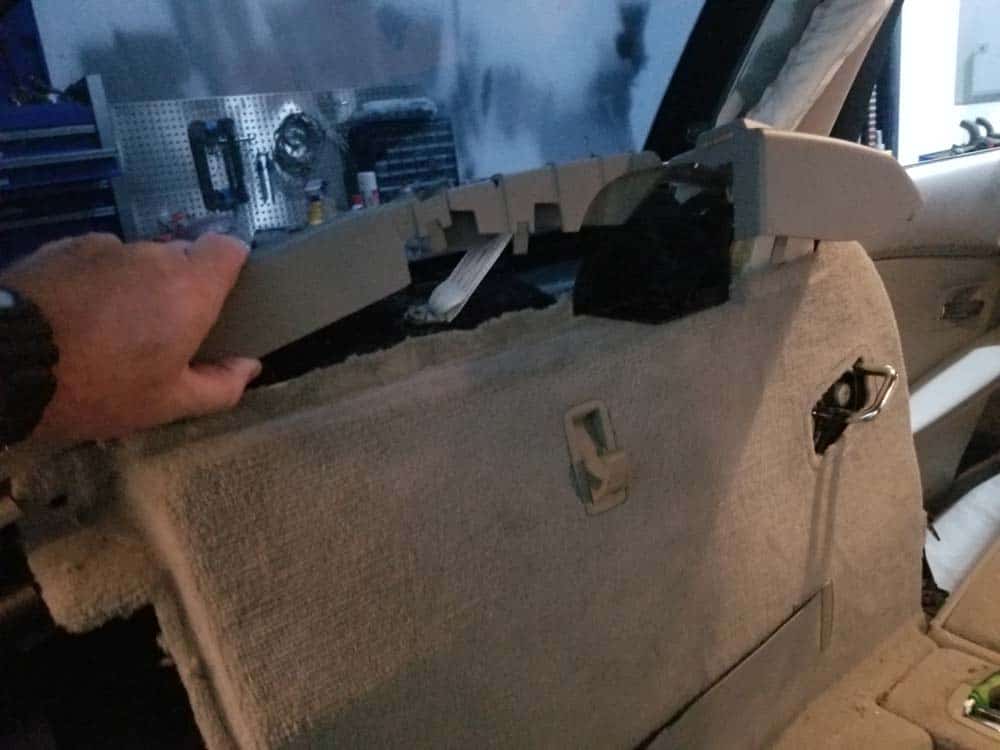
- With the lateral panel now completely loose, grasp the side storage tray trim and carefully remove it from the work area. Remember...if the trim does not not remove easily without resistance then you most likely have missed a fastener.
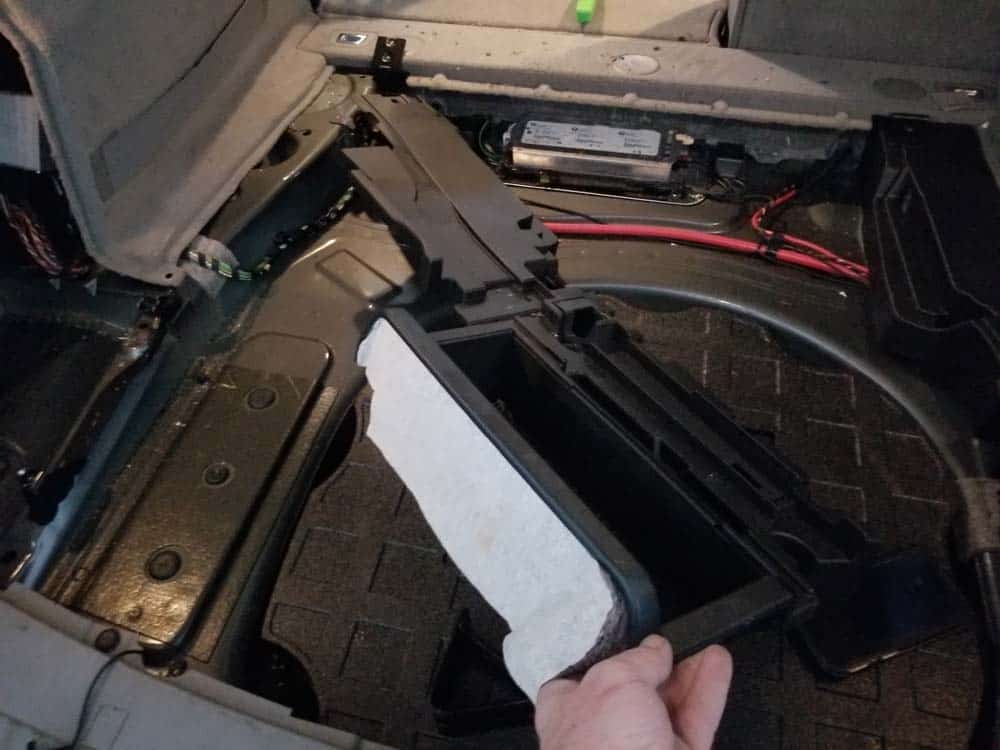
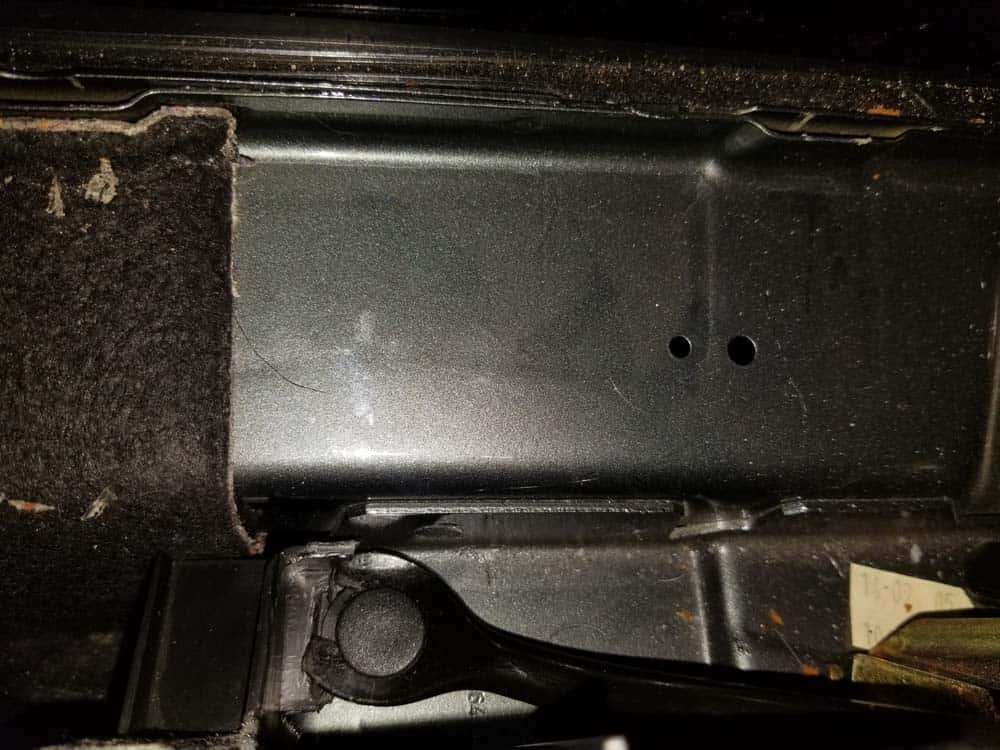
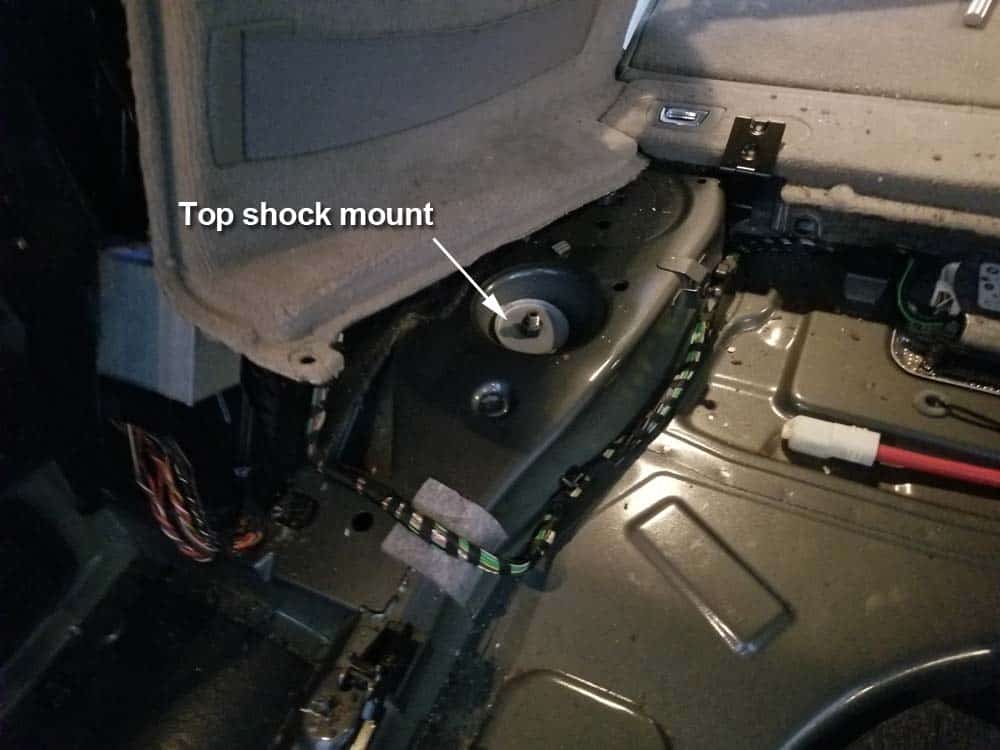
- You can now access the top shock mount.
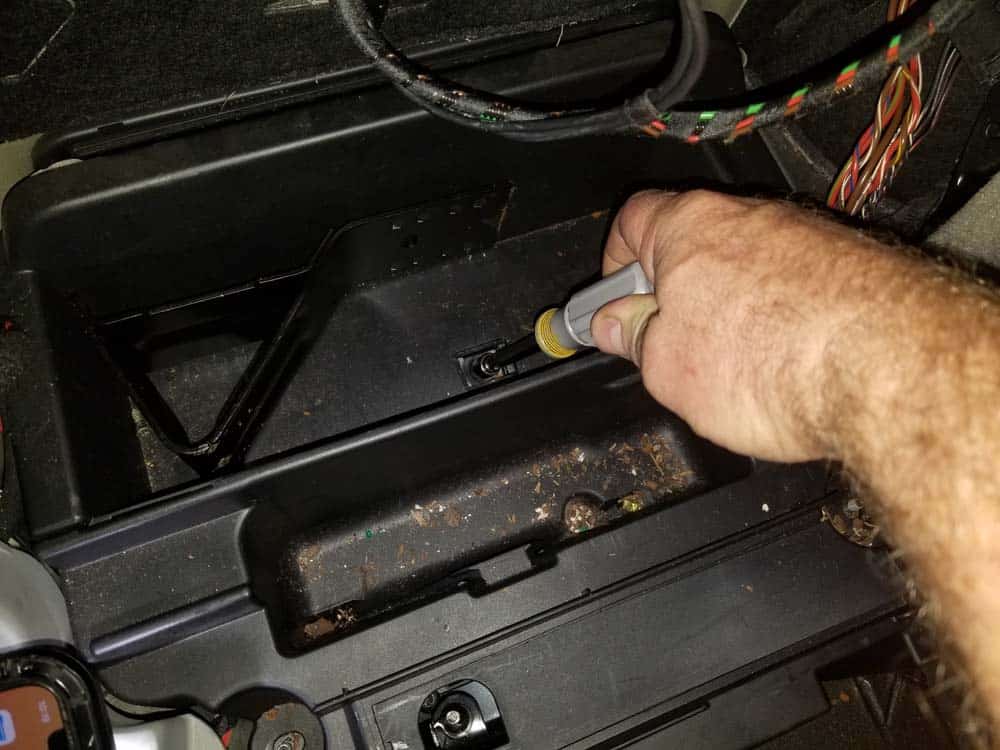
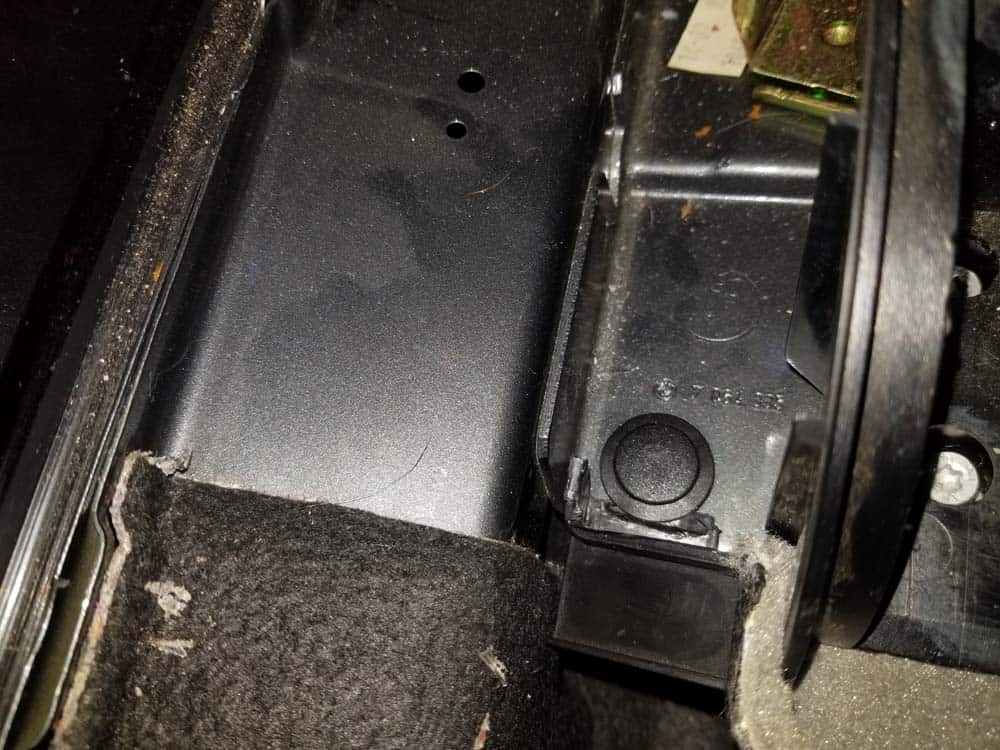
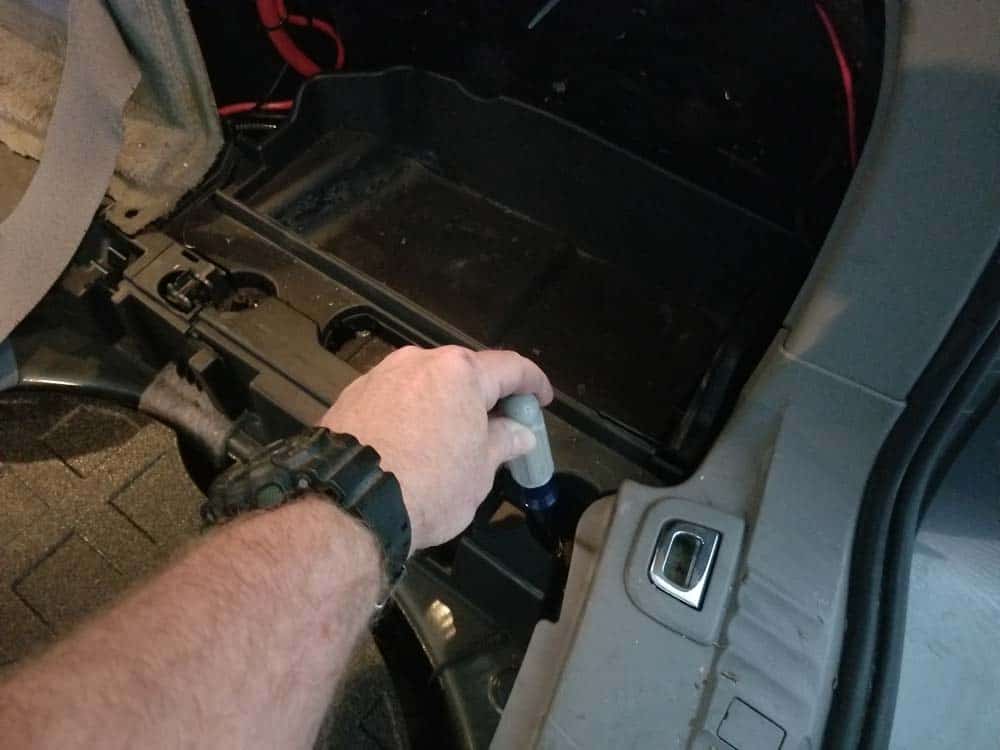
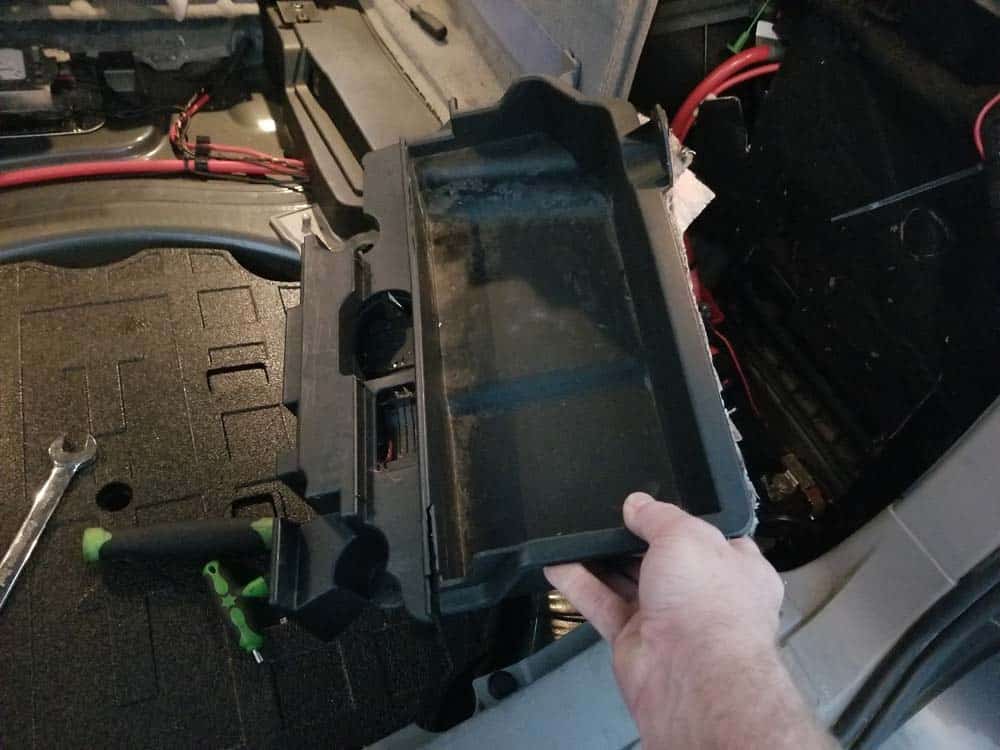
- The right side of the vehicle is exactly the same as above except for removing the battery storage tray. It is simply held in place with two plastic 10mm nuts as shown below.
Section 2 - Removing the Rear Shock
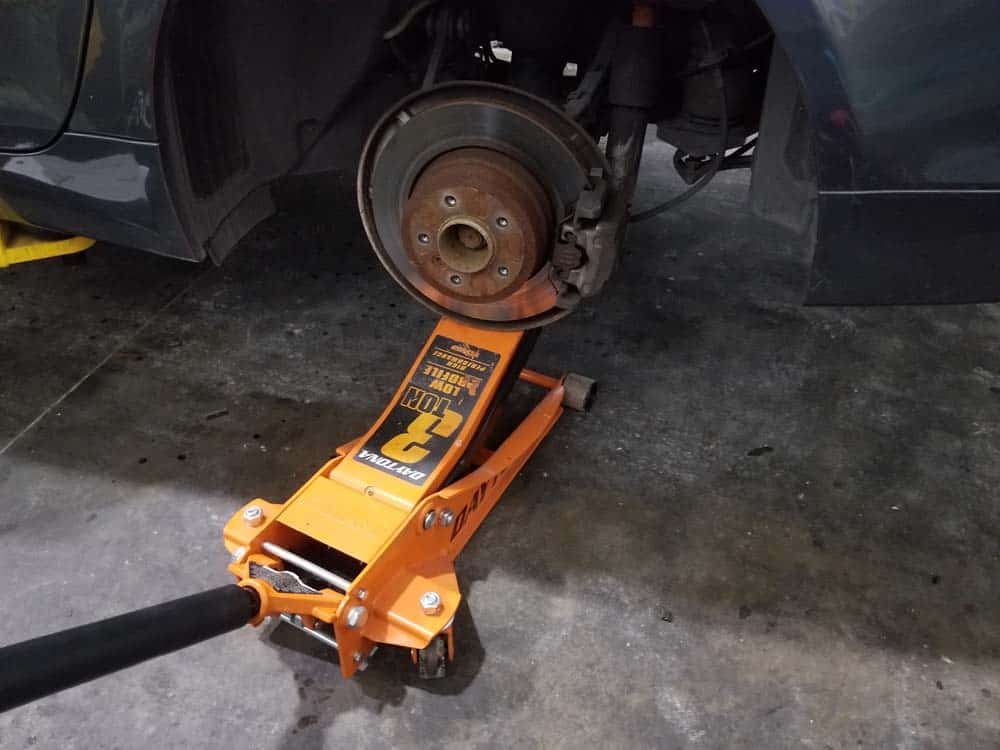
Now that the interior trim has been removed, removing the rear shock is simple. It is important that the rear wheel hub is firmly supported with a floor jack when the top shock mount is unbolted. This will keep the wheel hub from dropping abruptly and possibly damaging brake lines or suspension parts.- Jack and support the rear of the vehicle. Remove the rear wheels. Position a floor jack under the wheel hub and raise it enough so the suspension does not fall when the top shock mount is unbolted in the next step.
- Using an 18mm open end wrench and a 6mm hex bit, remove the top mounting nut from the rear shock.

- Slowly lower the floor jack until the top of the shock is clear of the vehicle. The rear shock is anchored to the wheel hub with one M14 bolt.
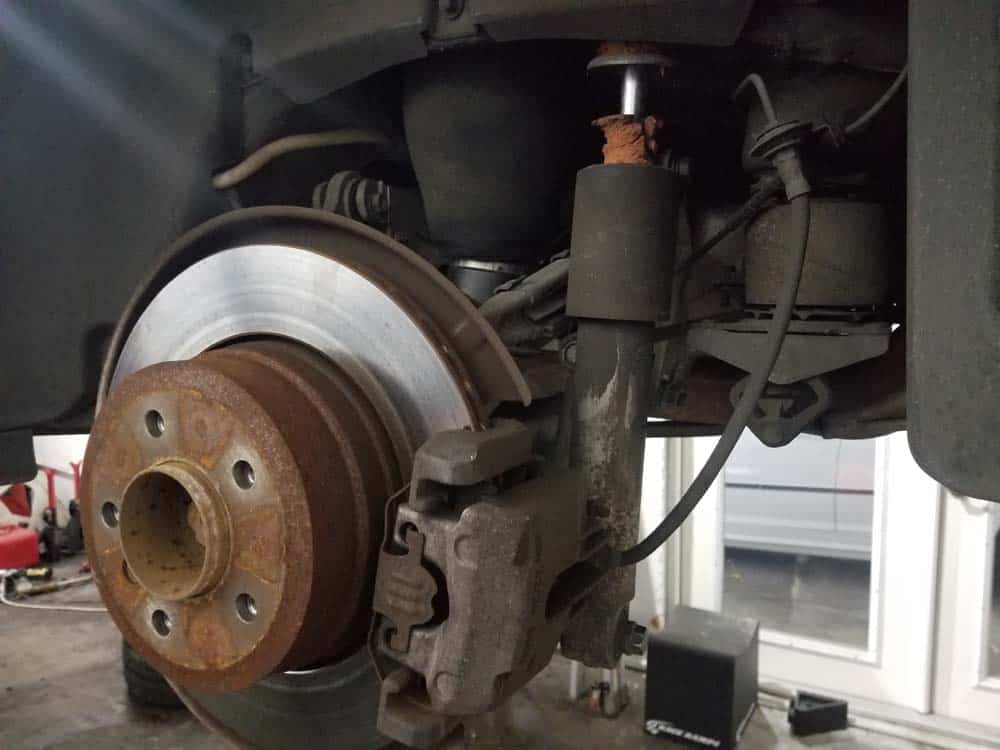
- Use an 18mm socket wrench to remove the lower mounting bolt.
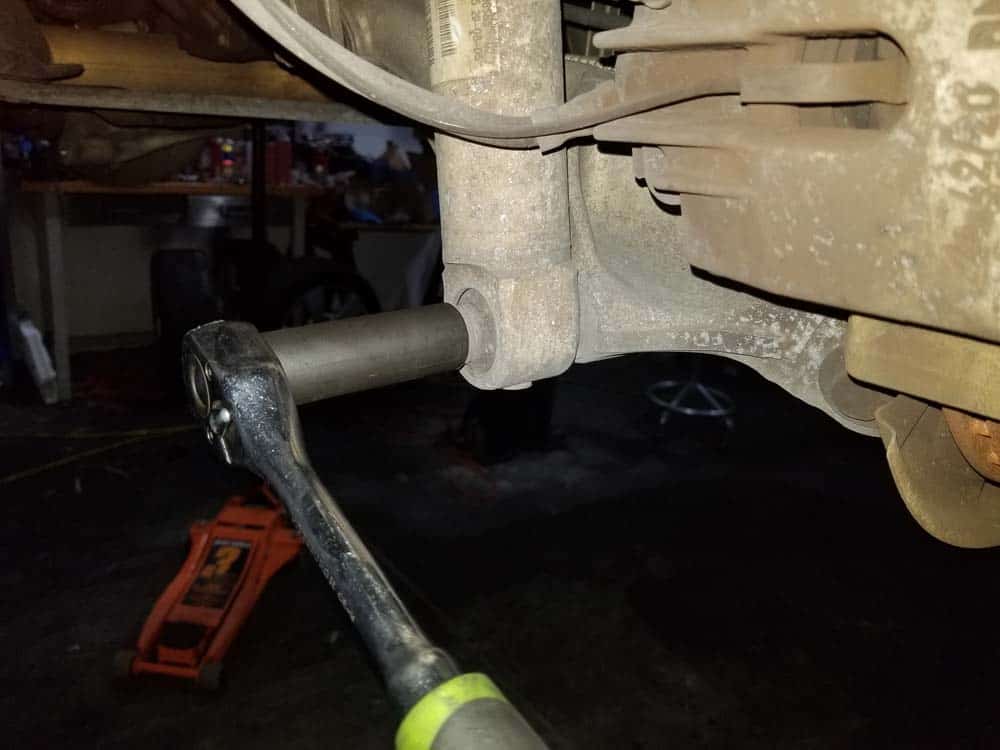
- Remove the shock from the vehicle.

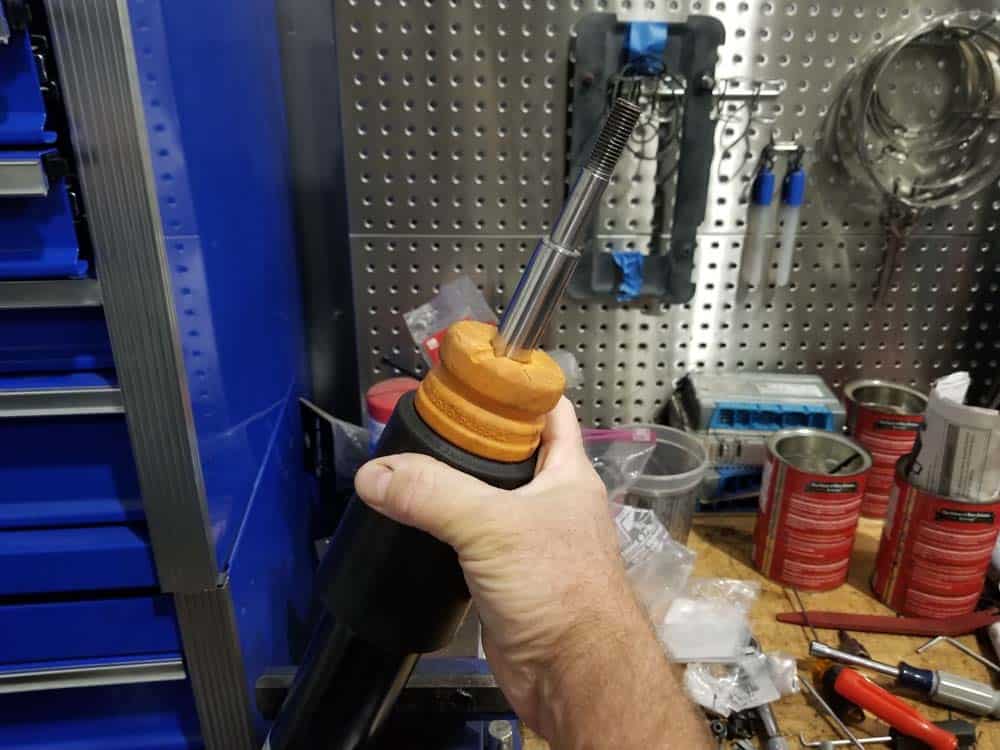
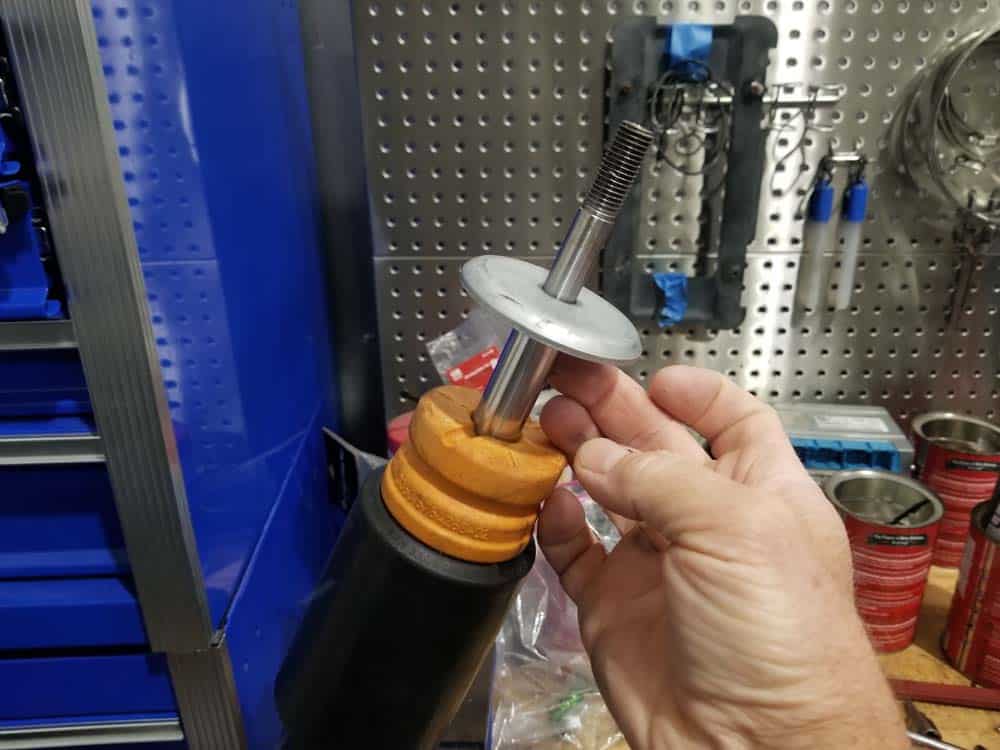
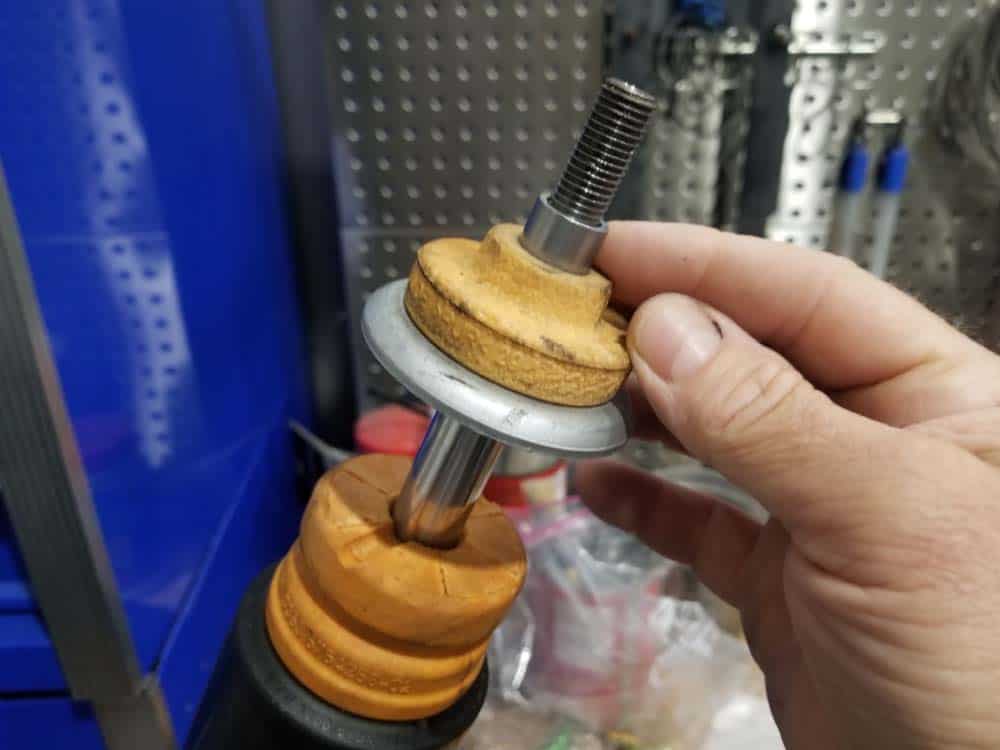
- Assemble the new shocks using new bump stops and foam mounts as shown below. Make sure the support cups are installed correctly...the flat side of the cup should always be pressed against the foam mount (see images below and schematic diagram in Section 3).
Section 3 - Vehicle Reassembly
Reassembly of the vehicle is very straightforward with no special procedures. Always install new foam shock mounts (two per shock) and bump stops when performing a BMW E61 rear shock replacement. Please see our parts list above if you require assistance. The following diagram shows the correct way to install the rear shock parts on the e61 5 series touring wagon. We have also included a handy checklist below with required torque values to aid in reassembly.BMW E61 Rear Shock Reassembly Checklist
***The following steps were performed on a 2006 530xi touring wagon...other models may vary.- Install the new shock on the wheel hub. Install the shock mounting bolt and torque to 141 Nm (104 ft-lb).
- Install the upper foam shock mount and supporting cup. Install a new upper shock mounting nut and torque to 27 Nm (20 ft-lb).
- Reinstall the trunk trim following the steps in Section 1 above in reverse.
BMW E61 Rear Shock Replacement Finished