
Affiliate link disclosure – The BMW Repair Guide uses affiliate links in their site. For more information on affiliate links, please click here.
Repair Summary
The following article gives detailed instructions on replacing the front control arms on a BMW E60 5 series xDrive (all wheel drive) car. Even though we have used a 2006 BMW 530xi to perform this installation, this article can be applied to any E60 or E61 5 series xDrive vehicle with minor modifications.
See all vehicles this article applies to
E60 5 Series M5
E60 5 Series 523Li
E60 5 Series 550i
E60 5 Series 545i
E60 5 Series 540i
E60 5 Series 535d
E60 5 Series 530xi
E60 5 Series 530xd
E60 5 Series 530Li
E60 5 Series 530i
E60 5 Series 530d
E60 5 Series 525i
E60 5 Series 525xi
E60 5 Series 525Li
E60 5 Series 525d
E60 5 Series 523i
E60 5 Series 520i
E60 5 Series 520d
E60N 5 Series 550i
E60N 5 Series 525xi
E60N 5 Series 540i
E60N 5 Series 535xi
E60N 5 Series 535i
E60N 5 Series 535d
E60N 5 Series 530xi
E60N 5 Series 530xd
E60N 5 Series 530Li
E60N 5 Series 530i
E60N 5 Series 528xi
E60N 5 Series 530d
E60N 5 Series 528i
E60N 5 Series 525Li
E60N 5 Series 525xd
E60N 5 Series 525i
E60N 5 Series 525d
E60N 5 Series 523Li
E60N 5 Series 523i
E60N 5 Series 520Li
E60N 5 Series 520d
E60N 5 Series 520i
A BMW E60 xDrive front control arm replacement can help cure the shaking and vibration in your 2004-2010 5 series all wheel drive sedan or touring wagon.
There are a lot of situations that can cause the front end of your E60 xDrive 5 series car to uncontrollably vibrate or shake - worn or unbalanced tires, worn engine mounts, damaged suspension parts and/or damaged front differential components. Unfortunately, the only way to really know what is affecting your BMW E60 is to get underneath it and diagnose where the source of the problem is coming from.
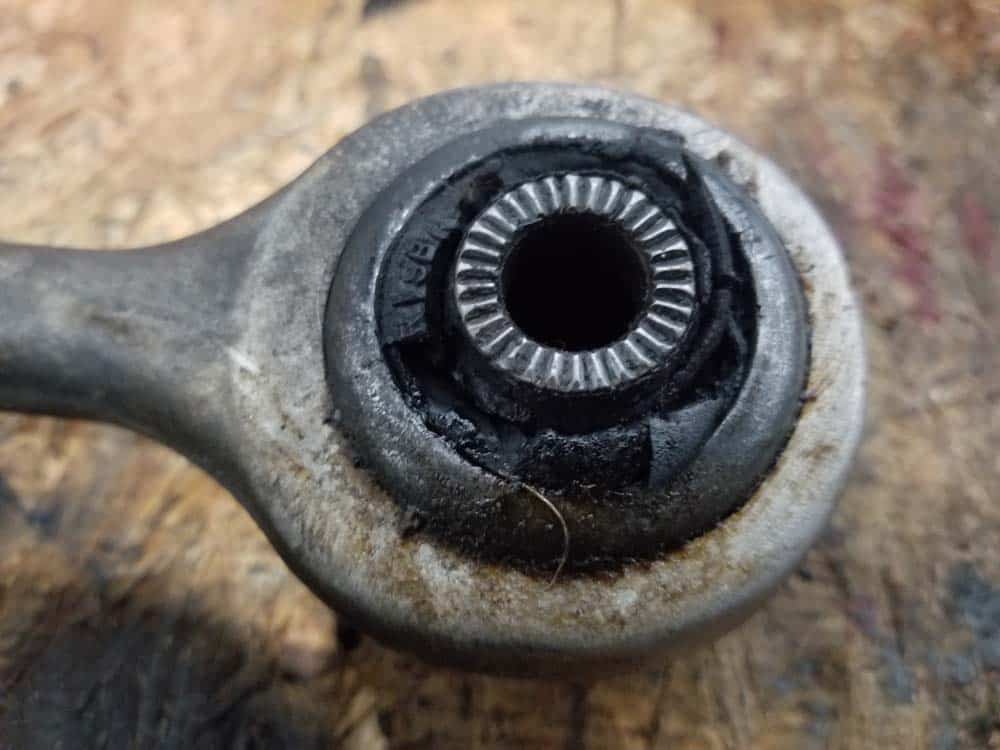
The front control arms on all BMW E60 xDrive vehicles are a very common source of front-end suspension issues. The control arms connect the steering knuckle on the BMW 5 series to the frame of the car and regulate (or "control") the forward and backward motion of the front wheels. If the bushings and/or ball joints become damaged or worn, the control arms lose their ability to effectively regulate this forward and backward movement. The result is front-end vibration while driving and braking. Classic symptoms of damaged or worn front control arm components are vibration or shaking during driving (at all speeds), clunking or squeaking sounds when turning, front-wheel shimmying causing vibrations in the steering wheel, and knocking sounds when going over bumps. Very worn control arms can cause bone-jarring jolts, usually when hitting bumps in the road at high speeds.
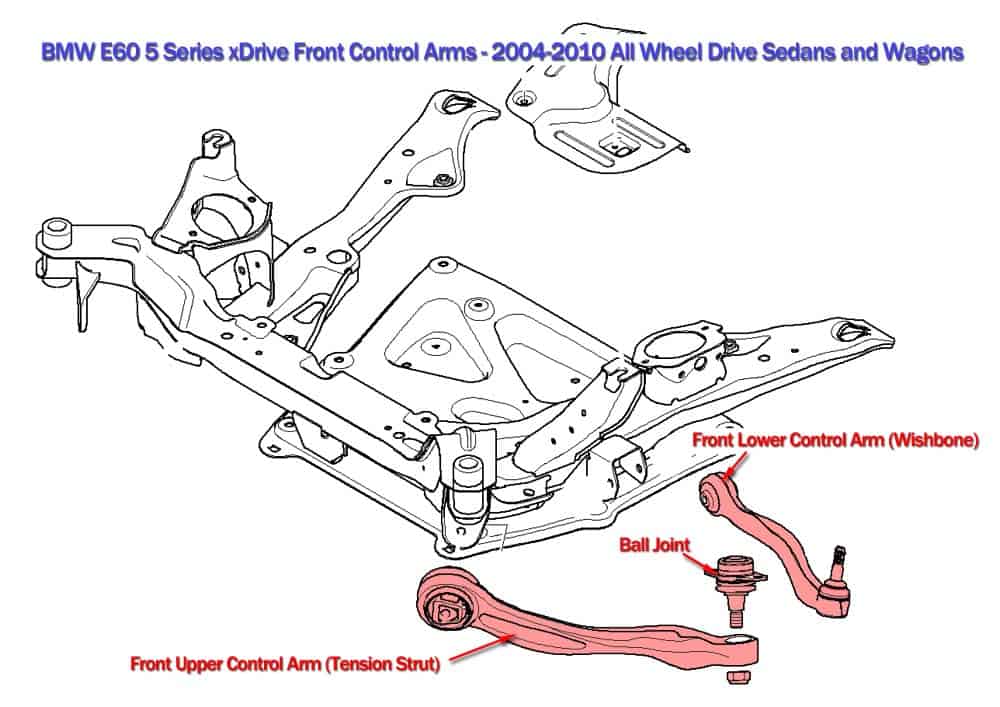
There are several different names that are used for the two BMW E60 xDrive front control arms; they often cause confusion as to what exactly is being referenced. The front upper control arm is also known as the "tension strut". The front lower control arm is also known as the "wishbone" or "rear position control arm".
A BMW E60 xDrive front control arm replacement is a straightforward repair for the home mechanic that can equate to huge savings by avoiding the repair shop. There are no special tools needed, but it does require jacking and supporting the front end of your vehicle. It is strongly recommended that both the front upper and lower control arms are replaced when doing this repair. Always replace the tension strut ball joints when replacing the upper control arms; not replacing the ball joints with the tension strut is like changing your engine oil but not replacing the dirty filter...it's a complete waste of money and time. It is also very important to replace the control arms on both sides of the vehicle. Not replacing both sides of the car can cause detrimental front-end alignment issues in your vehicle.
A quick note on removing the control arm ball joints
There is a lot of discussion in online forums on how to remove the ball joints when performing a BMW E60 xDrive front control arm replacement. Many of the techniques discussed for removing the front ball joints on the E60 xDrive are very misleading and completely unnecessary. Removing the front control arm ball joints in your BMW E60 only requires the use of a ball-peen hammer and a steel punch; there is absolutely to need to purchase or fabricate special tools to remove them. We show you how to do it in the repair steps below.


If the video does not appear below, please click here to view
View the video version of this repair.
View the detailed parts diagram for this repair.
Includes detailed part diagrams, part numbers and links to purchase all of the required components needed to complete this repair.
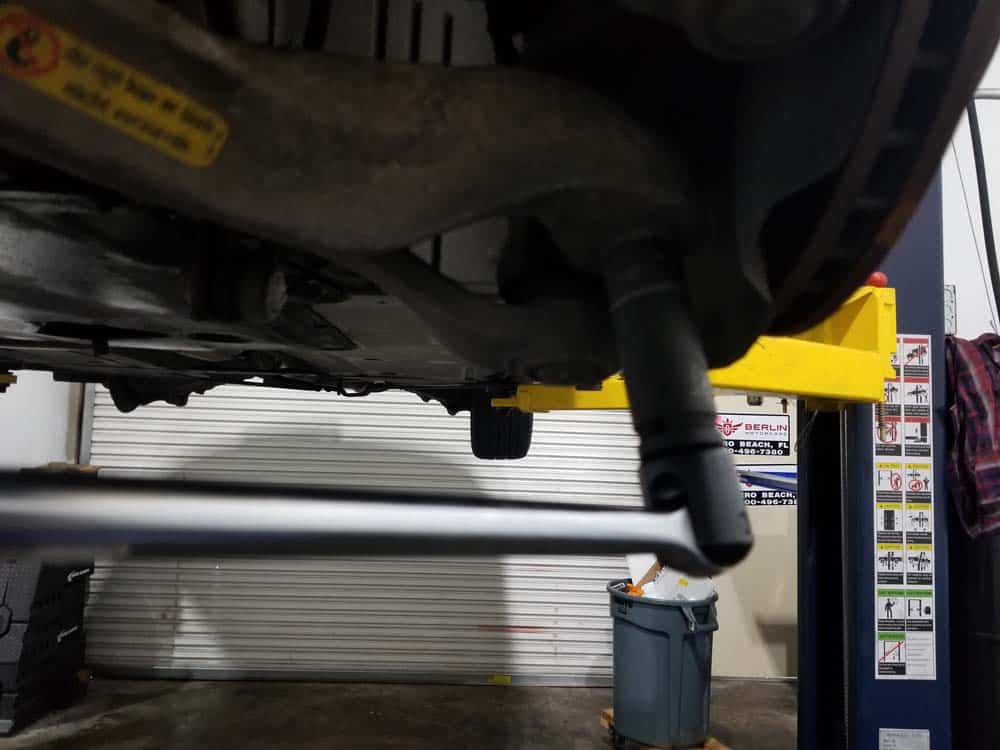
Section 1 - Removing the BMW E60 xDrive Front Control Arms
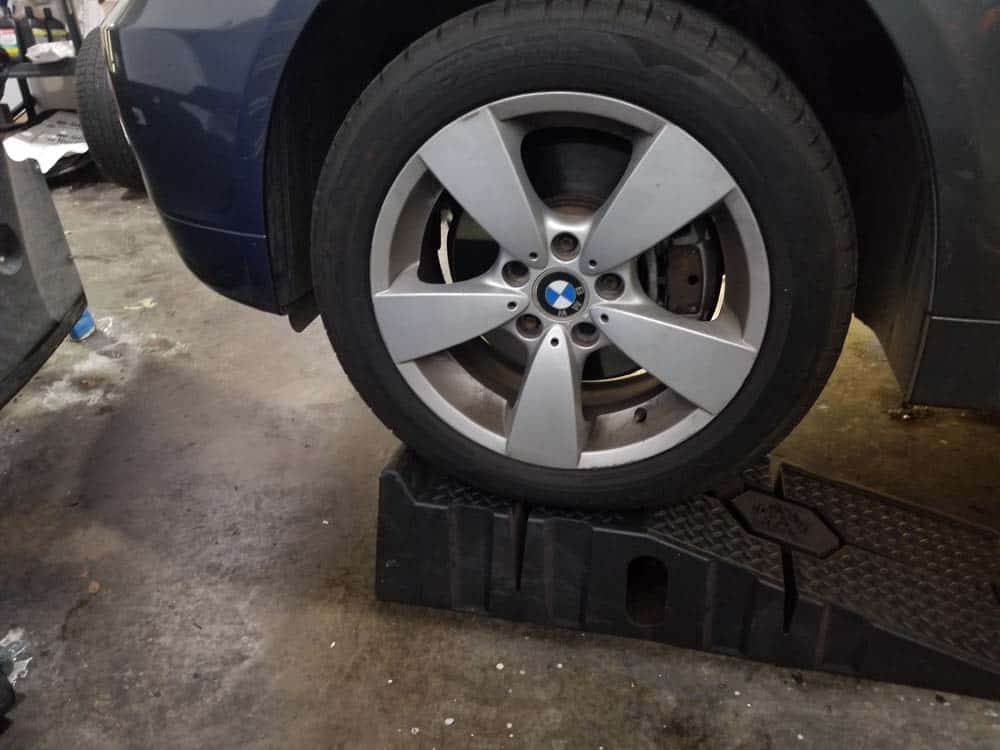
- Using a 17mm socket and breaker bar, loosen the lug nuts on the front wheels. DO NOT remove the lug nuts...you simply want to loosen them so they can be removed when the front end is lifted in the next step.
- Raise and support the front end of the vehicle using the jack stand method. For more information on jacking and supporting your BMW, please refer to our article BMW Jacking and Supporting for Repairs and Maintenance.
- Remove the front wheels from the vehicle.
- Use a phillips screwdriver to remove the belly pan (skid plate) from the undercarriage of the vehicle.

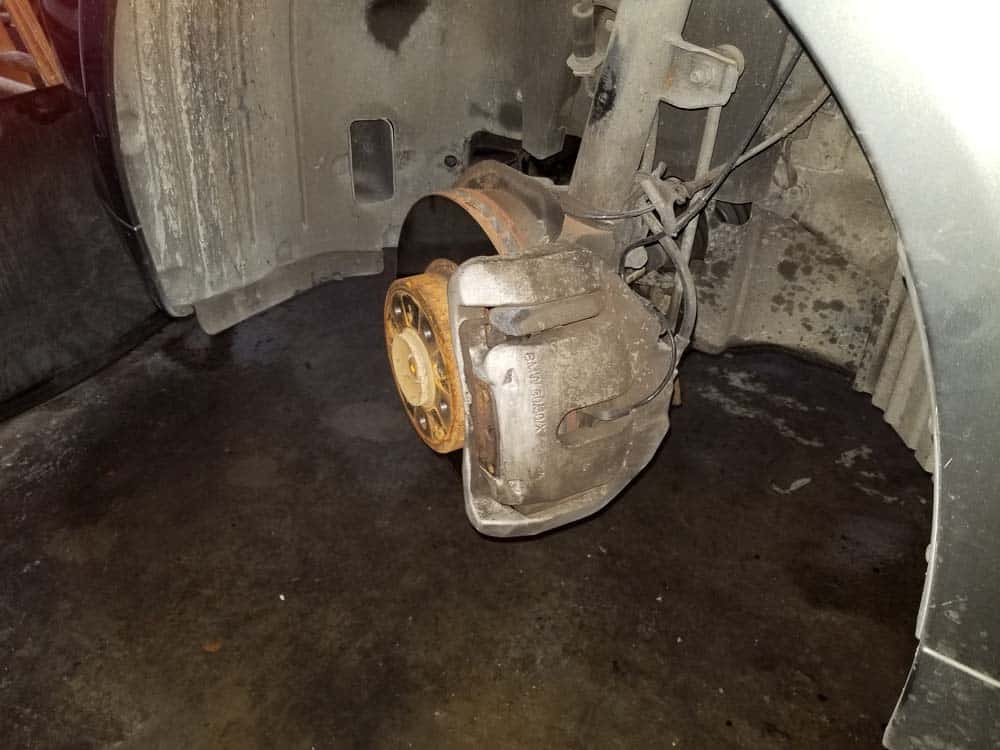
- Starting on the left side of the vehicle, identify the front upper control arm (tension strut).
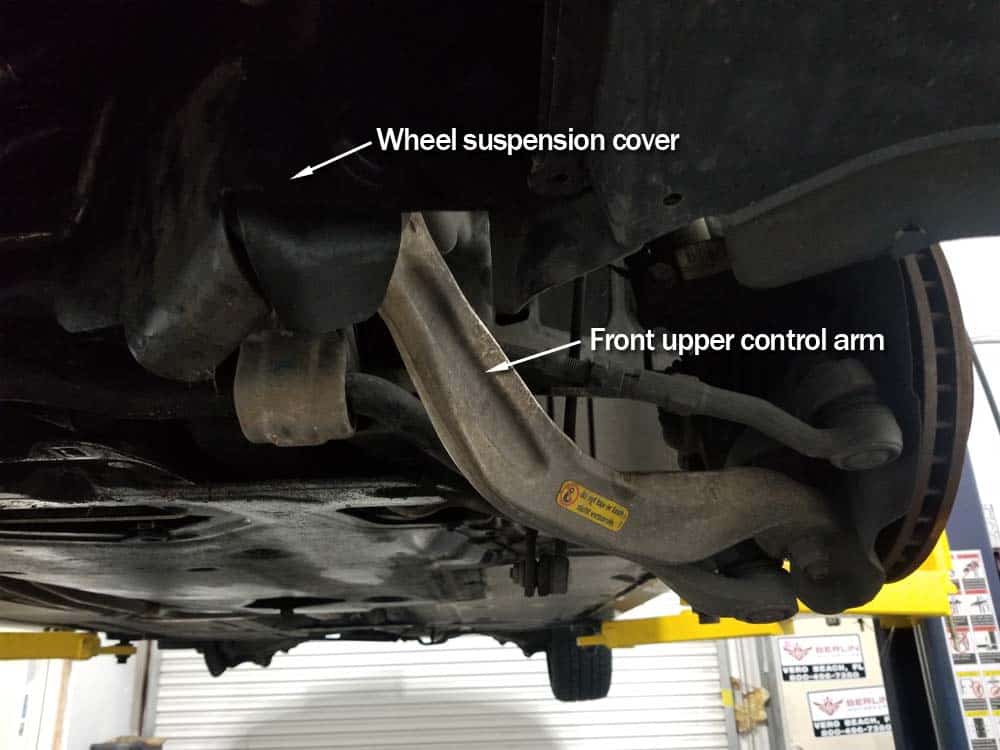
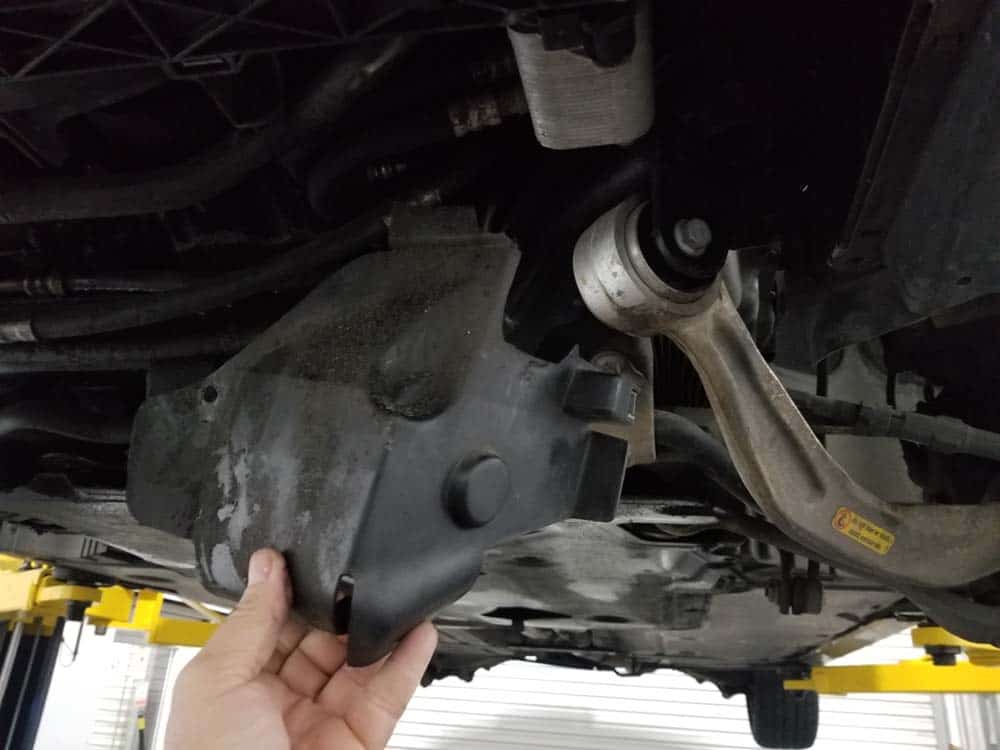
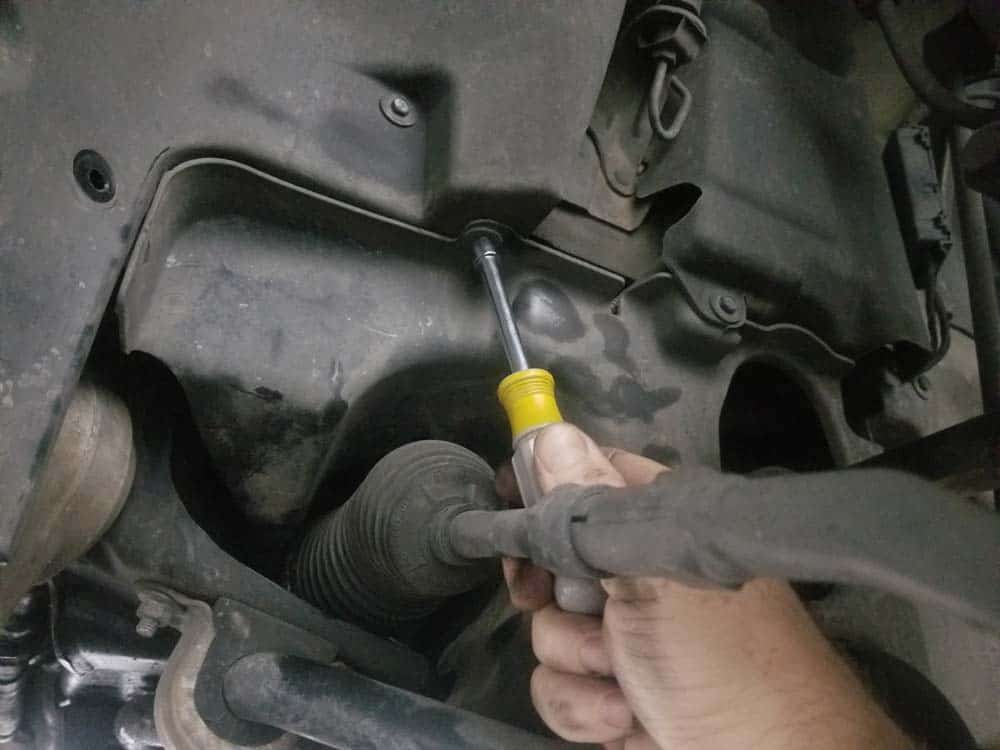
- Remove the left wheel suspension cover. It is held in place with an 8mm screw and a plastic rivet. Use a flat blade screwdriver to pry the plastic rivet out. Lift the suspension cover up and out of the vehicle.
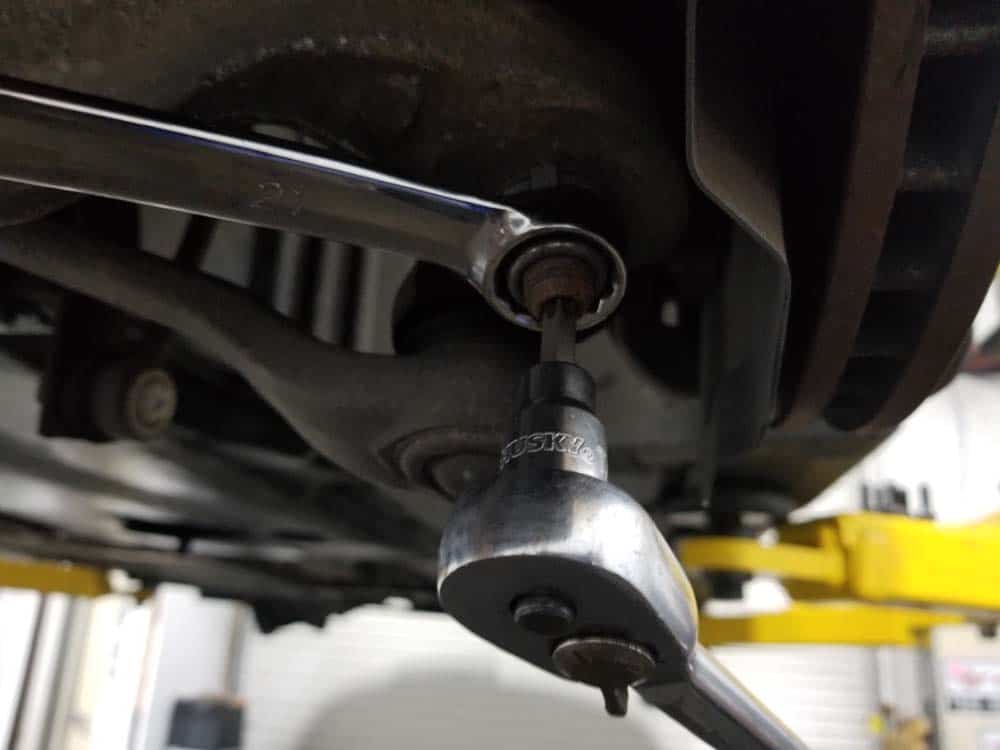
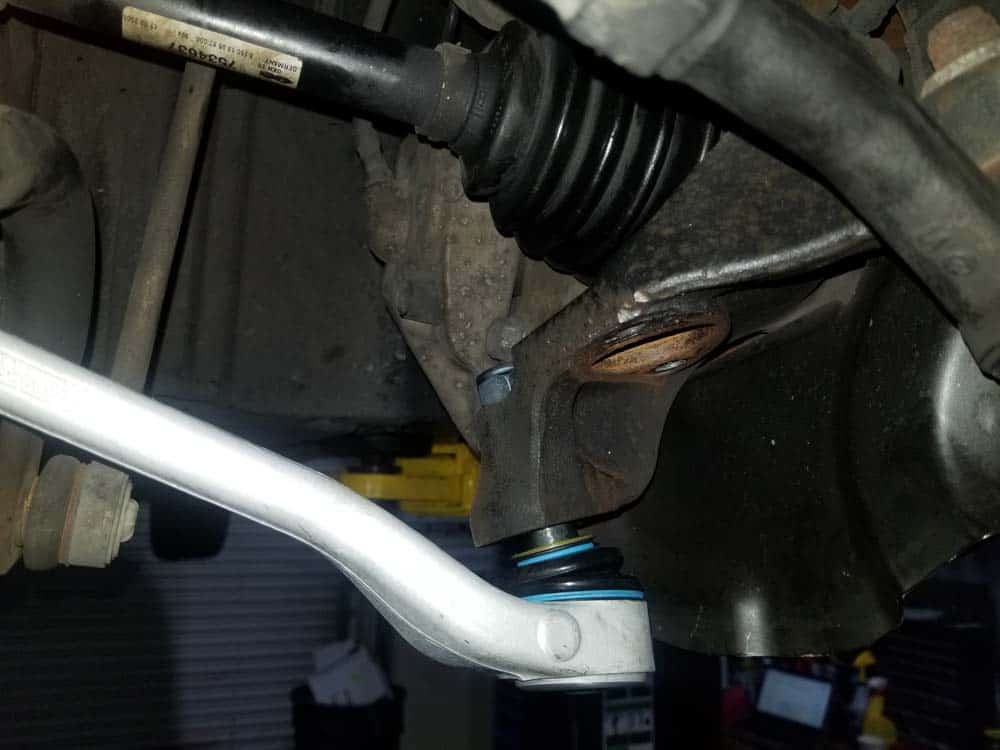
- The upper control arm is connected to the steering knuckle via a ball joint. Use a 21mm socket with a breaker bar to loosen the ball joint mounting nut.
- With the nut loose, use a 21mm open end wrench and a T40 torx bit to remove the nut. Note that the T40 torx bit keeps the ball joint from spinning while removing the nut.

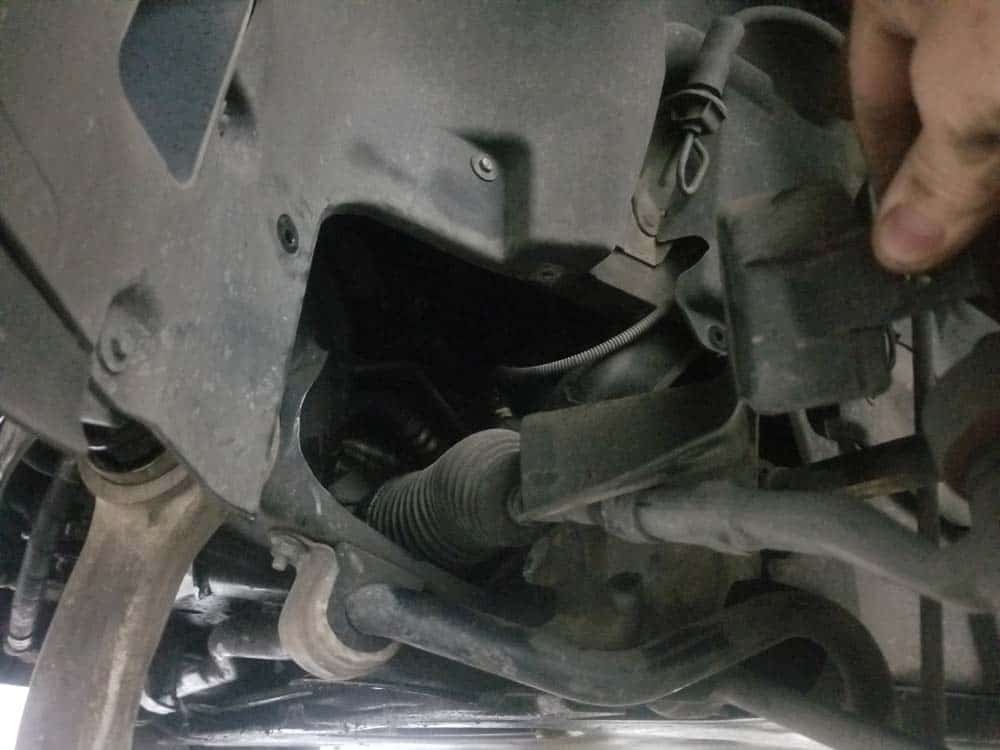
- Use an 8mm socket wrench to remove a couple of the screws anchoring the side suspension cover. You don’t need to remove all of the screws… you just want to remove a couple so the cover can be folded back. This will allow the rear of the upper control arm to be accessed with an open end wrench.
- Use a breaker bar and an 18mm socket to loosen the upper control arm bushing mounting bolt...it is torqued tight. Use an 18mm socket wrench and an 18mm open end wrench to remove the control arm bushing mounting bolt and nut.
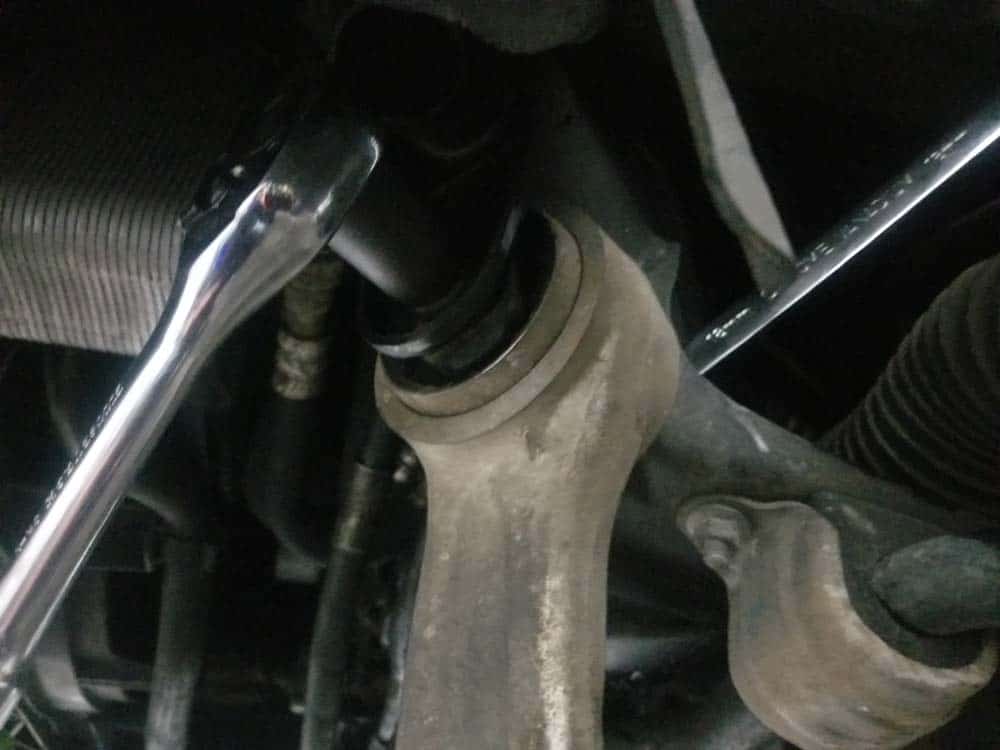
- Use a T50 torx bit and a breaker bar to loosen the two bolts anchoring the upper control arm ball joint to the steering knuckle. Remove the torx bolts from the ball joint.
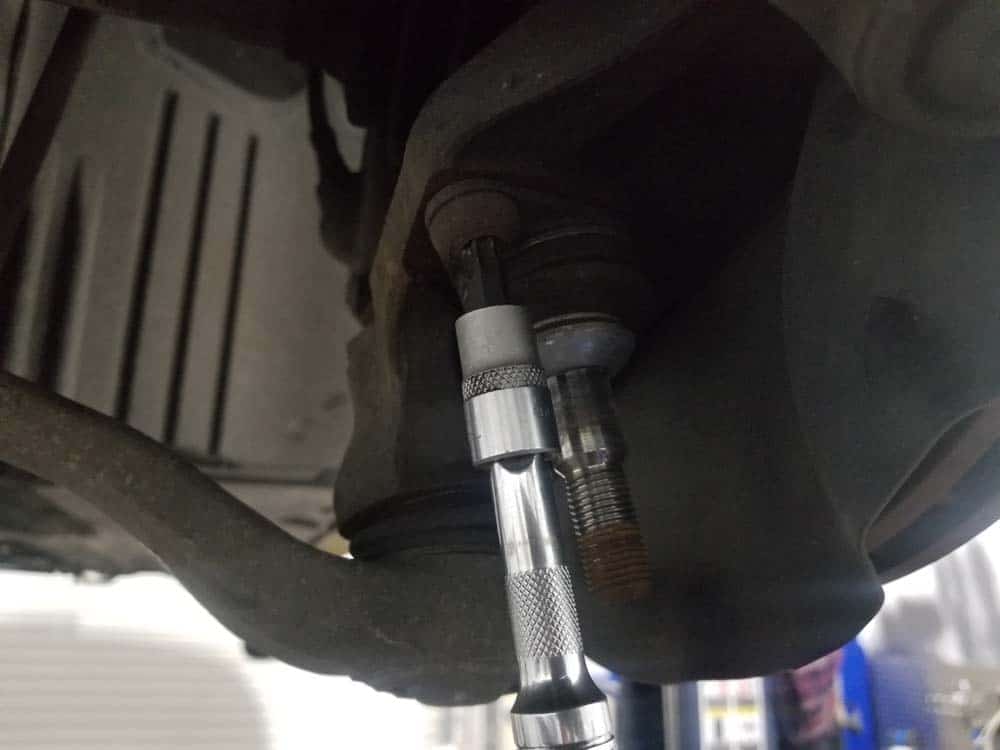
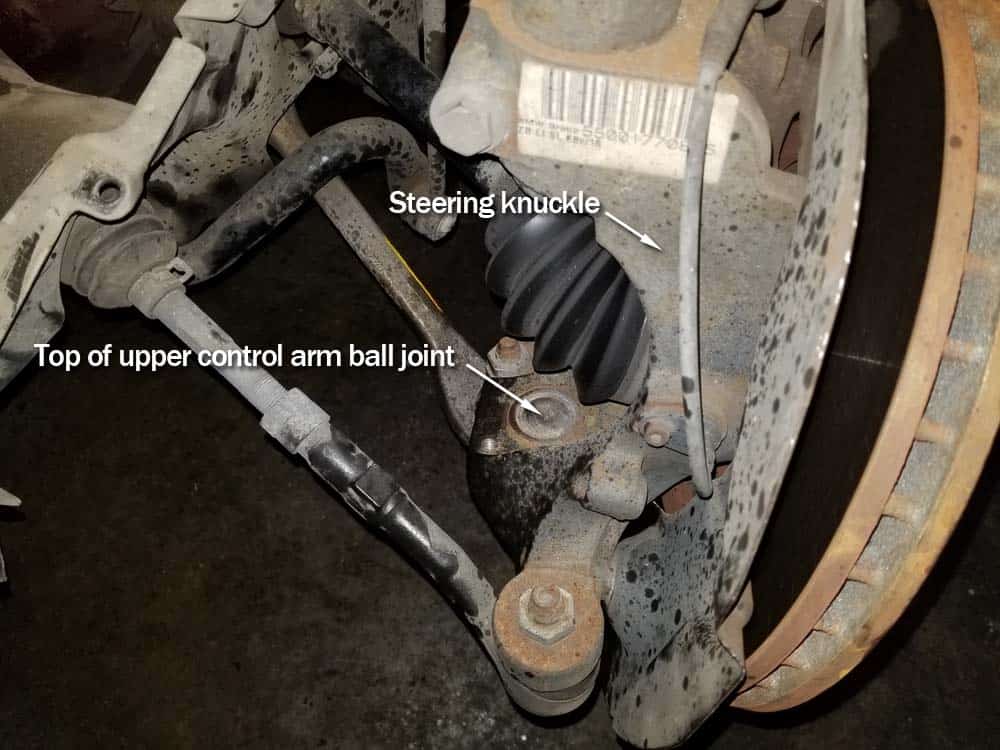
- The next step is to remove the upper control arm ball joint from the steering knuckle so it can be replaced. Removing the ball joint is a very simple procedure that is often over analyzed by mechanics. There are no special tools needed...it will easily dislodge from the steering knuckle with a steel center punch and a ball peen hammer. First, turn the steering wheel so the front of the steering knuckle is facing "out" (turn it to the left if you are working on the left wheel). You can now easily locate the top of the ball joint in the steering knuckle.
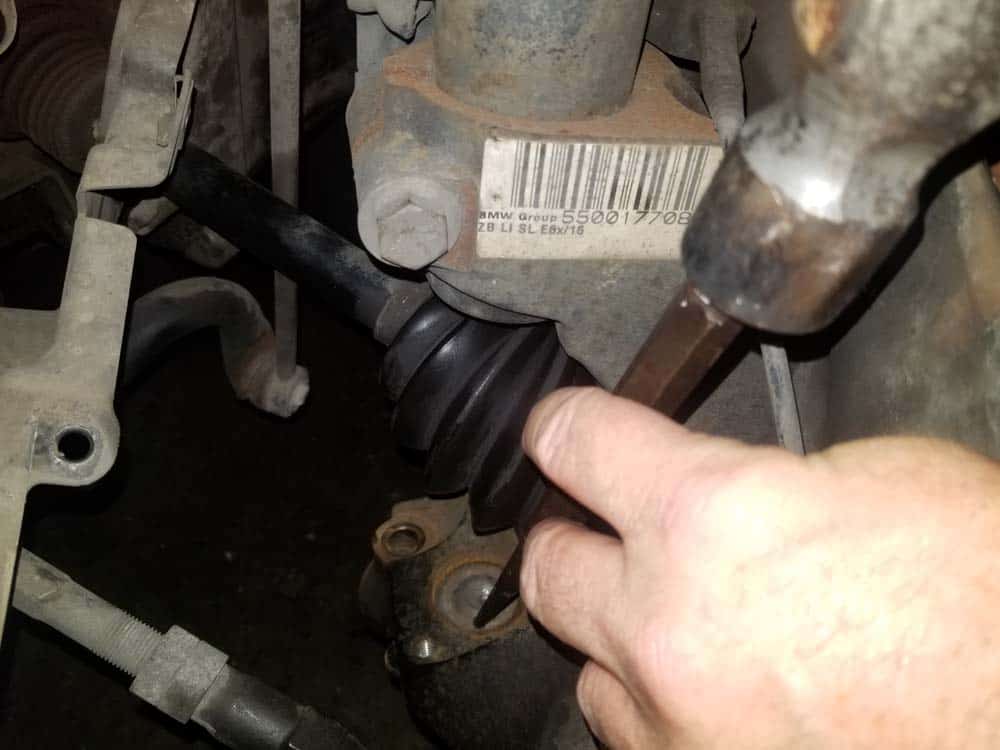
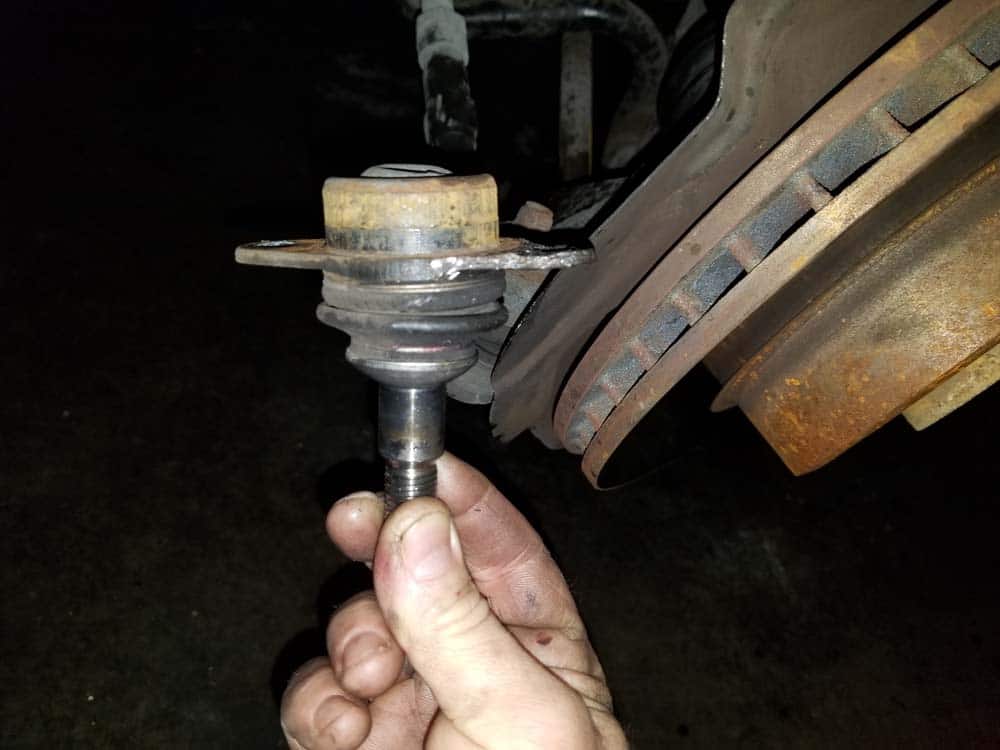
- Using a 6" steel center punch and a ball peen hammer, strike the top of the upper control arm ball joint until slides out of the bottom of the steering knuckle. Usually 10-20 strikes with the hammer will get the ball joint out. If the ball joint is being particularly obstinate, try spraying it with a penetrating lubricant like Blaster PB and allowing it to soak for 15 minutes.
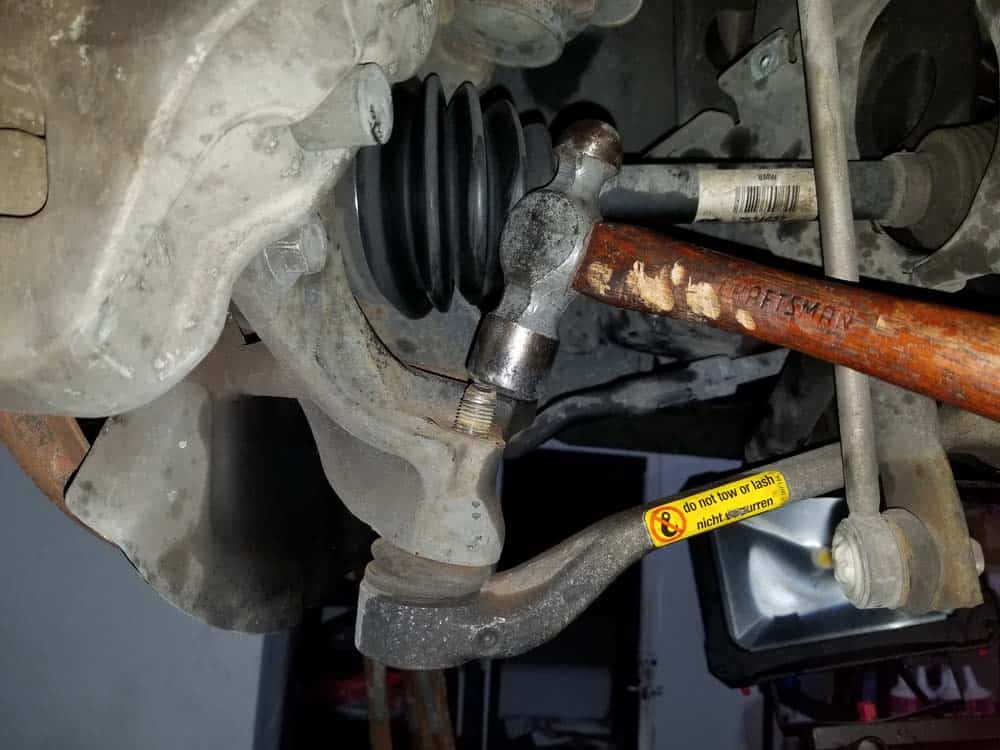
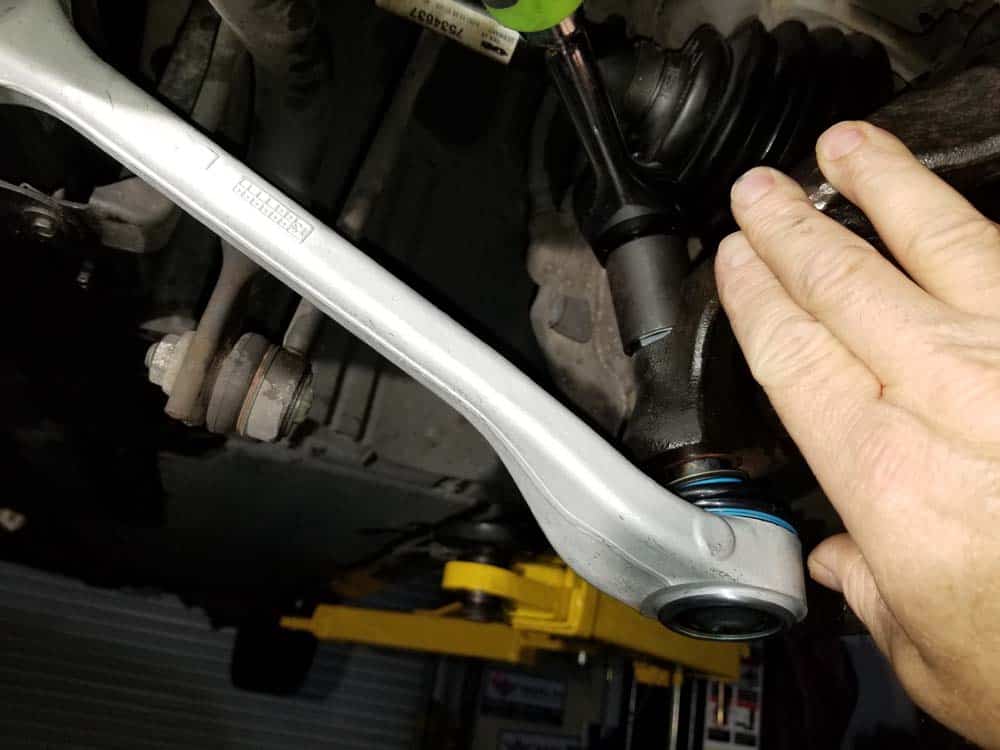
- Now move to the front lower control arm (wishbone). The lower control arm is also anchored to the steering knuckle via a ball joint. Use a 24mm socket and breaker bar to first loosen the ball joint mounting nut. Remove the nut from the ball joint.
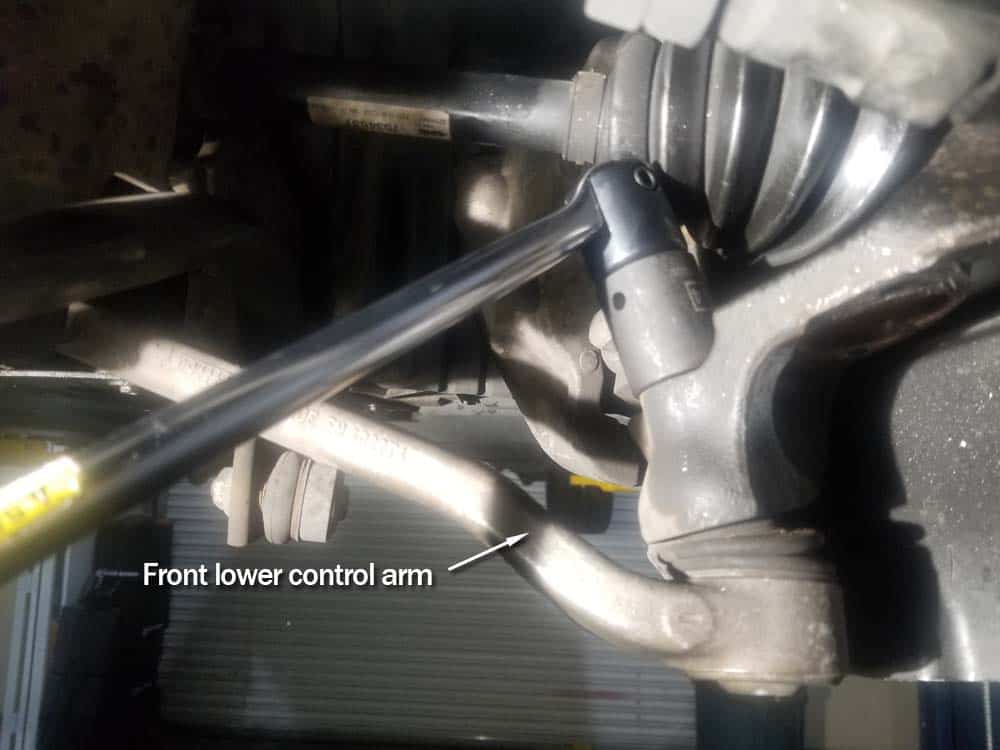
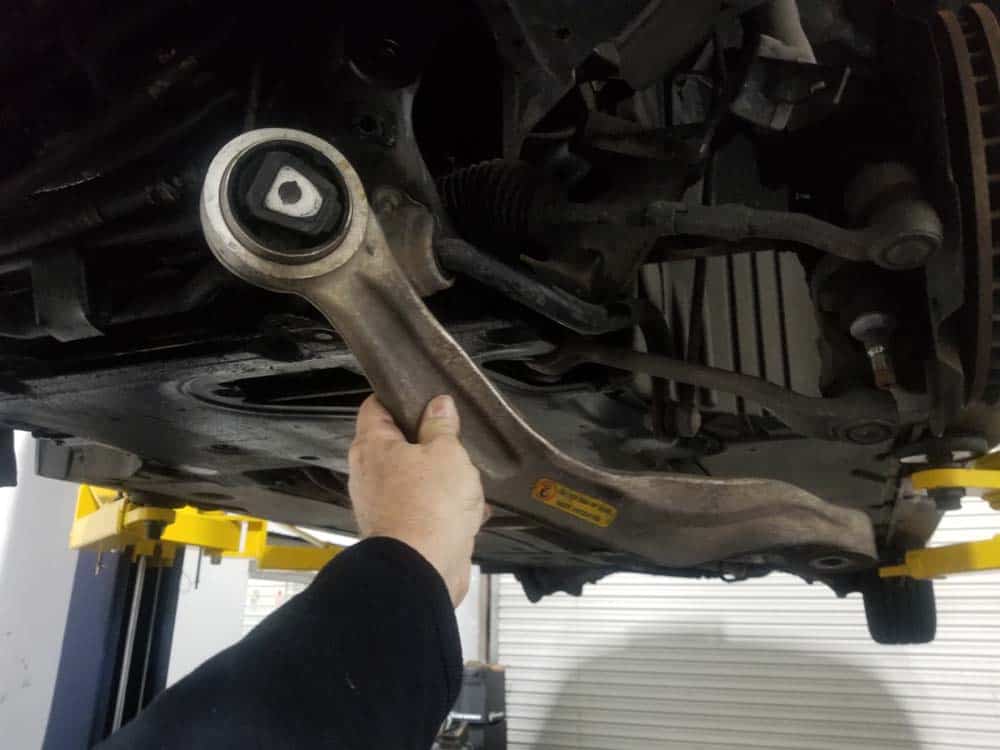
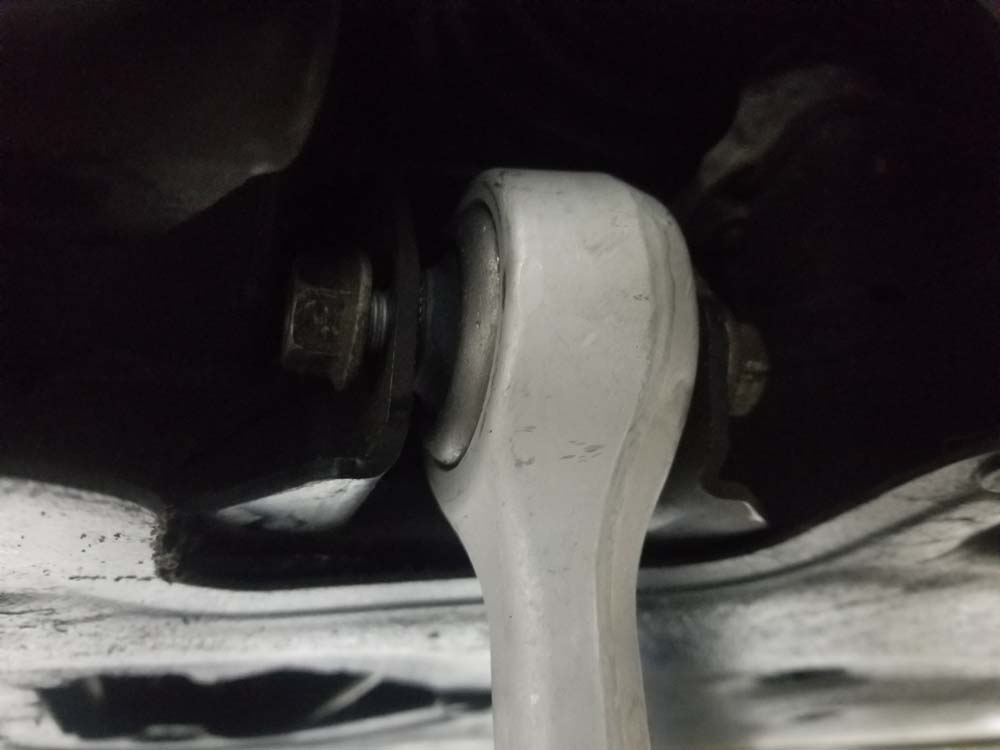
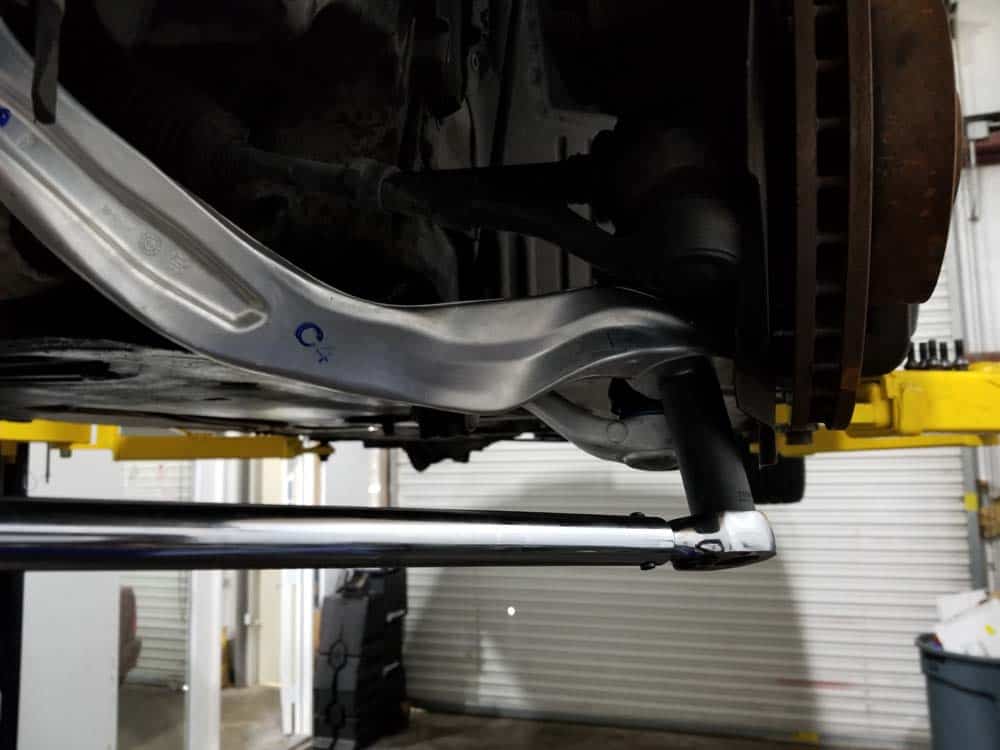
- Turn the steering wheel so you can access the lower control arm ball joint from the back of the steering knuckle (to the right if you are working on the left side of the car). Strike the ball joint mounting bolt with hammer until the ball joint separates from the steering knuckle. When the ball joint is loose you can pull the control arm down with your hand as shown below.
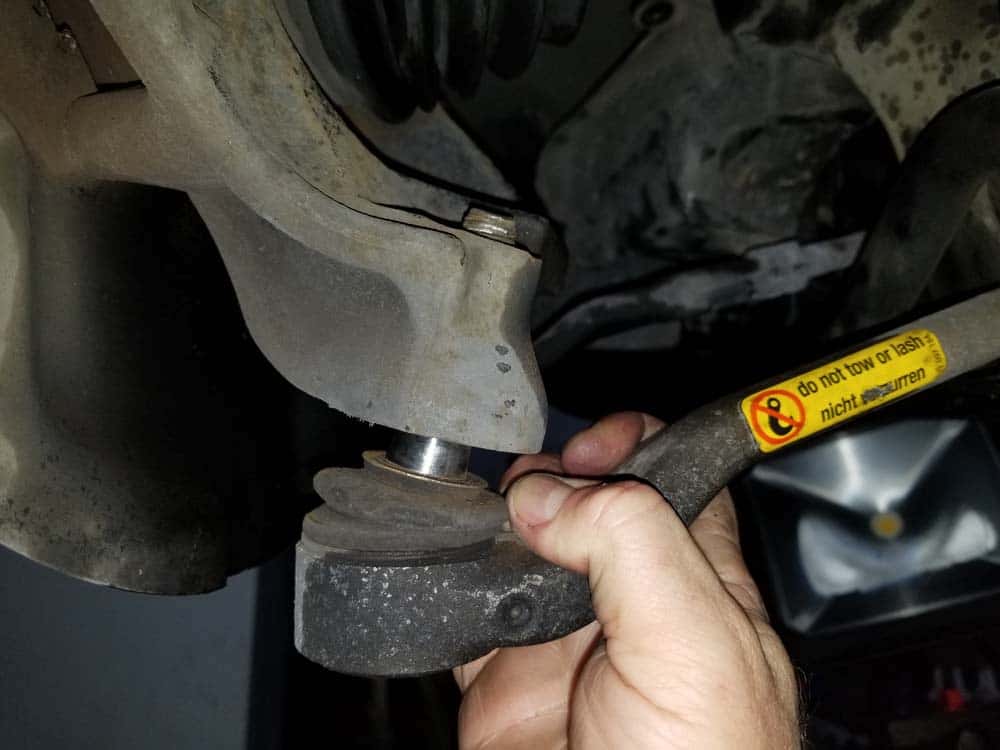
- Use an 18mm socket wrench and open end wrench to remove the bolt anchoring the lower control arm bushing to the frame. Remove the lower control arm from the vehicle.

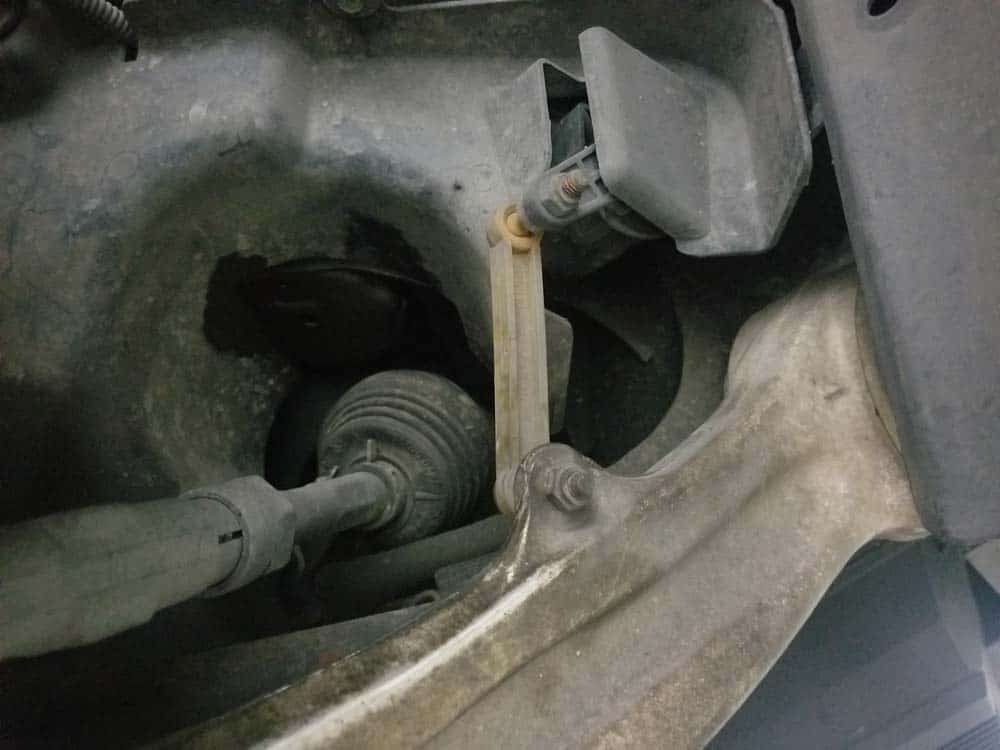
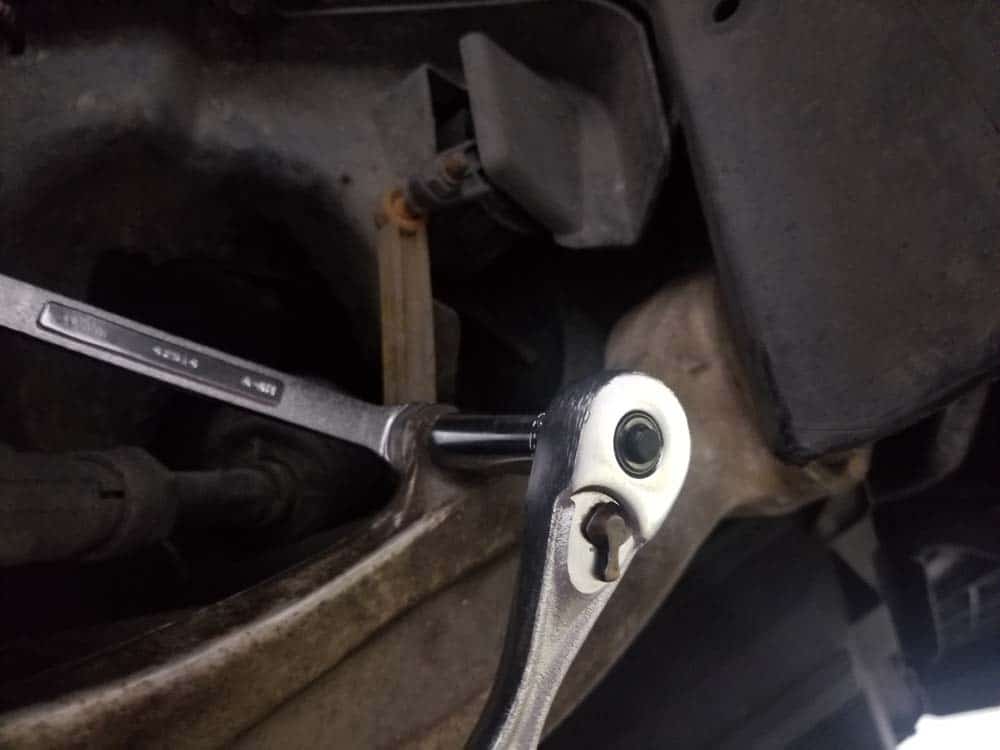
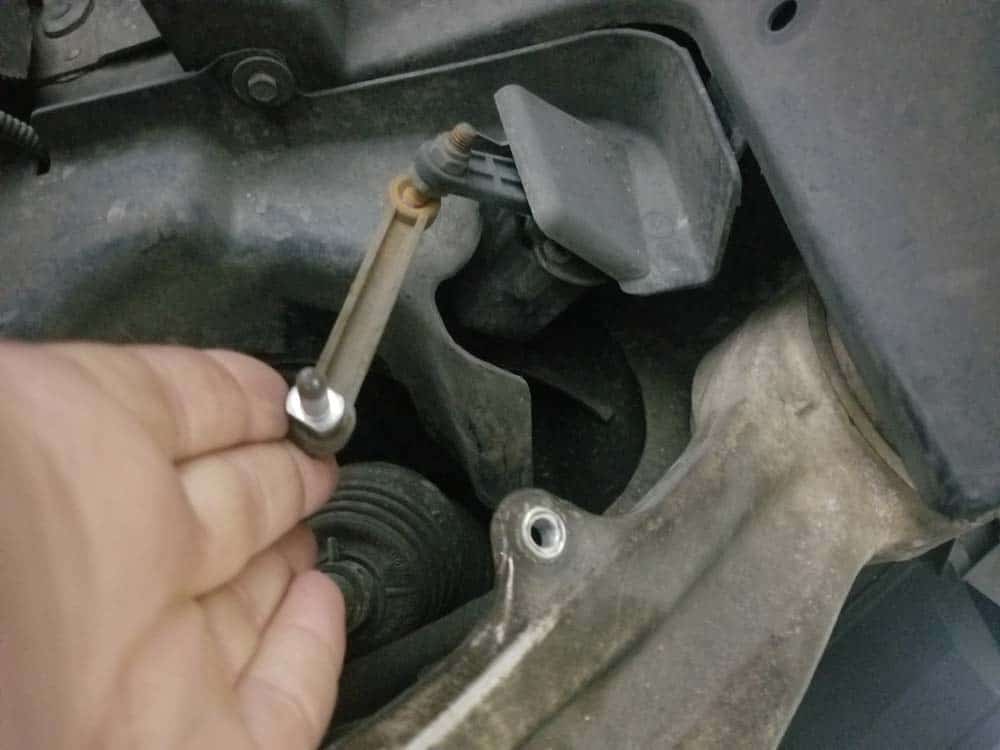
- Repeat the above steps on the right side of the car. Note that the right upper control arm has the headlight vertical aim control sensor attached to it. Use a 10mm socket wrench and a 10mm open end wrench to remove the nut securing the sensor's regulating rod to the top of the control arm. Pull the rod free.
Section 2 - Installing the new BMW E60 xDrive Front Control Arms
When installing the new control arms you must either put the vehicle back on the ground or lower the steering knuckles onto jack stands before torquing the upper and lower control arm bushing mounting bolts. This is called “loading” the front end of the car - it simply means that the full curb weight of the vehicle must be “loaded” on the control arms before torquing the bushing bolts. This is a very important step in avoiding premature failure of the bushings. Not torquing the control arm bushing bolts with the vehicle fully loaded will most likely cause the bushings to bind and prematurely fail. Loading the front end of the car only pertains to the bushing mounting bolts...it is perfectly fine to torque the ball joint mounting bolts and nuts on the BMW E60 without loading the front end.- Unpack the new control arms. Always double check to make sure you have the correct part numbers before installing.
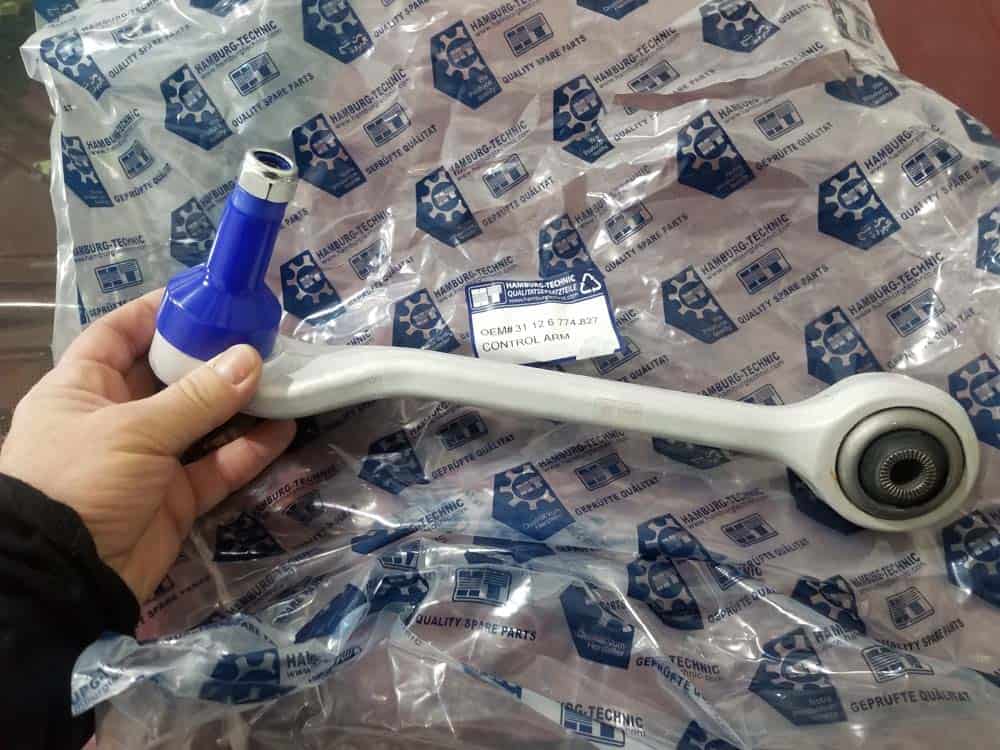
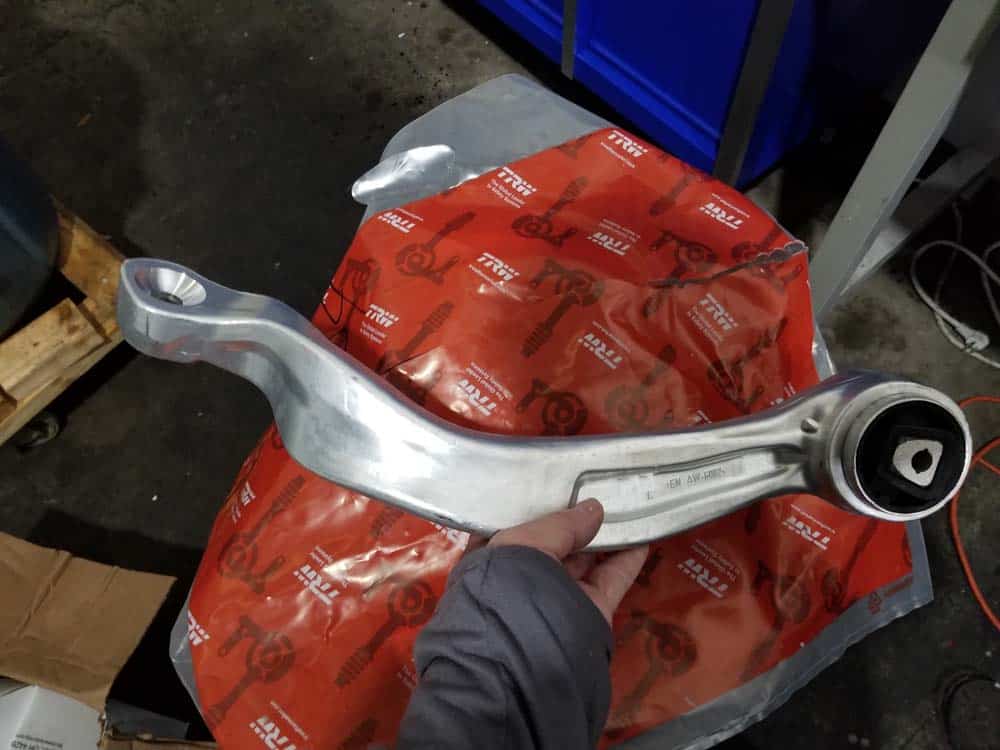
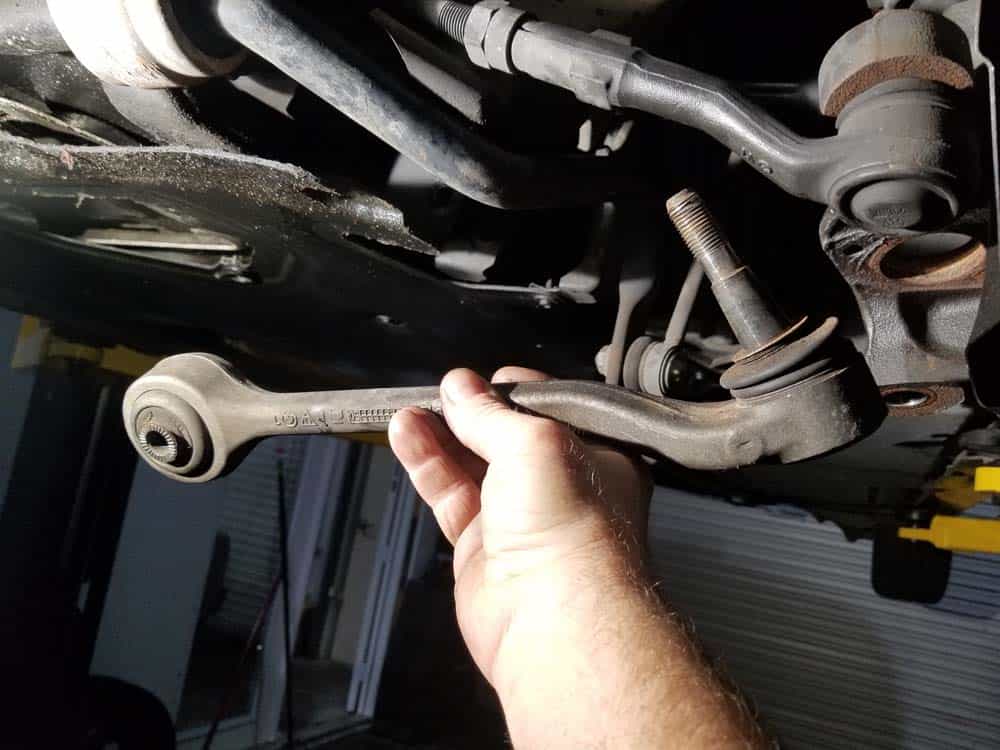
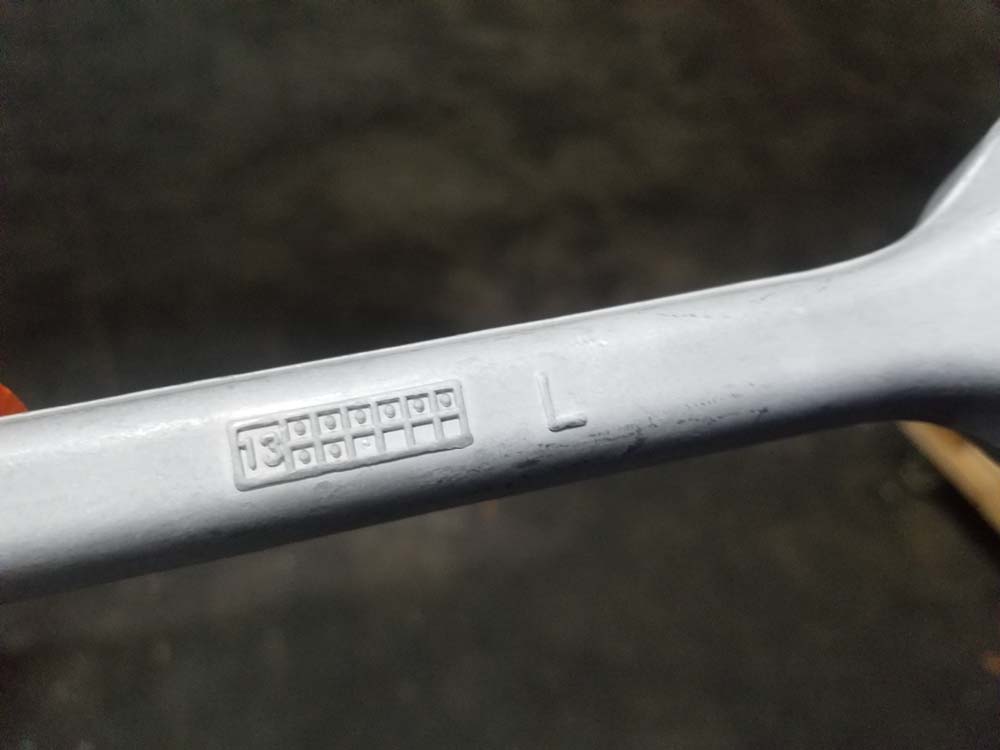
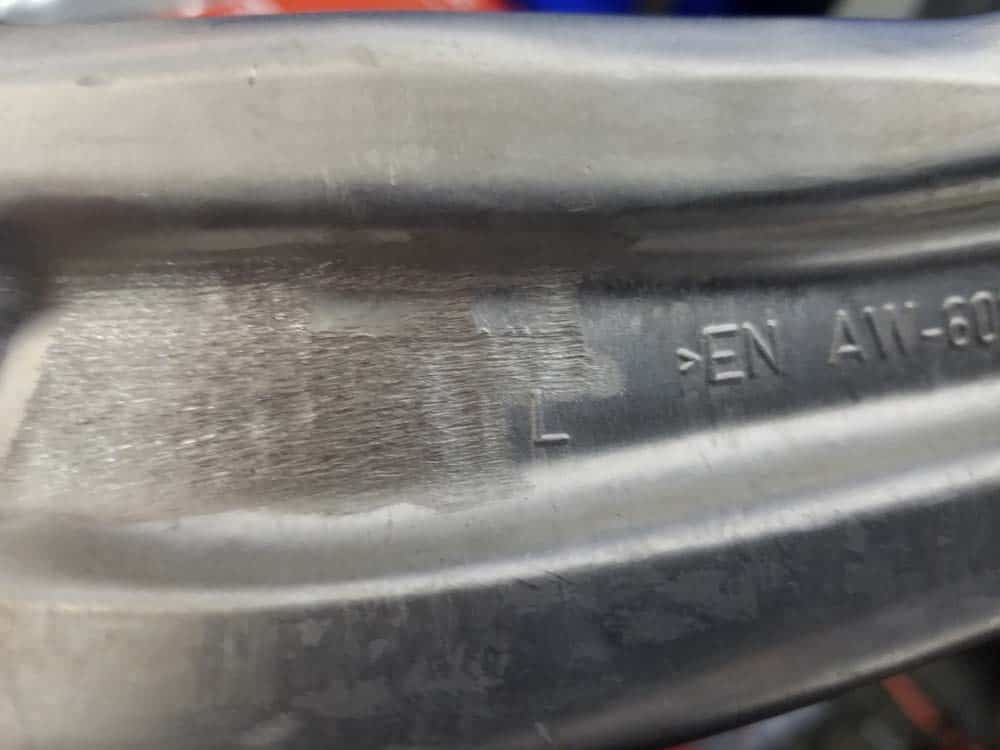
- Verify you have the correct front upper and lower control arms for the left side of the car. There should be an “L” or an “R” embossed into the sides of the arms so you don’t get confused.
- Install the lower control arm bushing mounting bolt. Make sure the nut is facing towards the front of the car. Snug up the nut with an 18mm socket and open end wrench but DO NOT torque it yet. The front end must be loaded before torquing this mounting bolt.
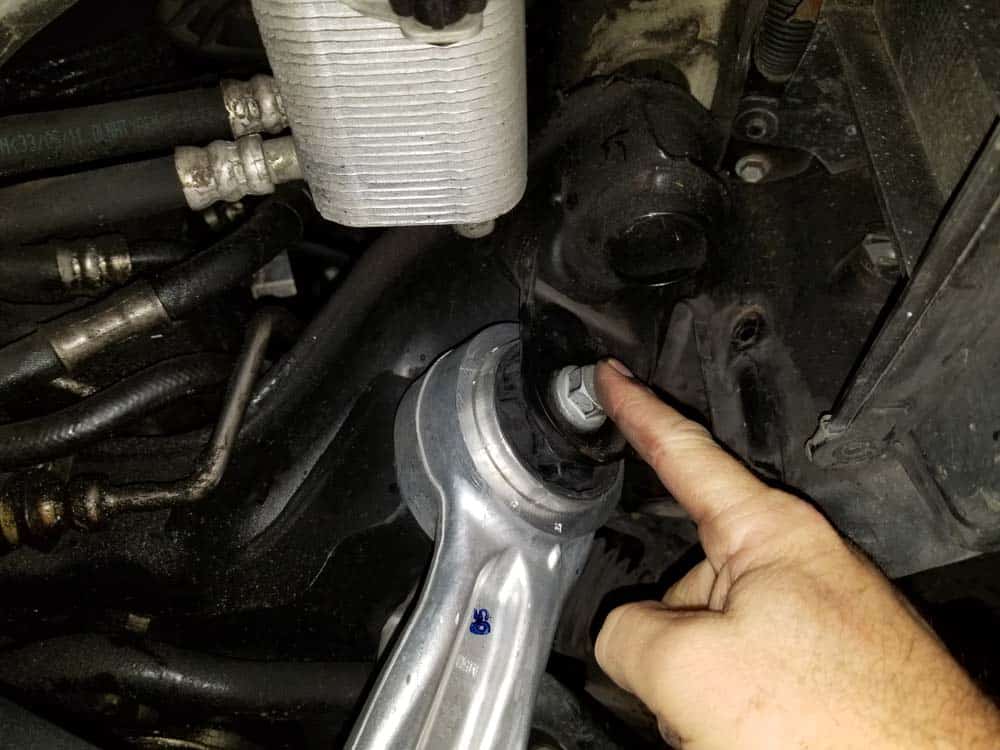
- Install the lower control arm ball joint into the steering knuckle.
- Using a 24mm (new replacement nuts may be 22mm) socket, slowly tighten the lower control arm ball joint lock nut. Tightening the nut slowly will press the ball joint into the steering knuckle. Torque the ball joint to the following value: 165 Nm (122 ft-lb). ***This may seem like a lot of torque, but it is the correct value for the M14 ball joint nut.
- Install the upper control arm (tension strut) bushing mounting bolt and nut. Make sure the nut is facing towards the rear of the vehicle. Make the nut snug with an 18mm socket and open end wrench. Do not torque it yet. The front end must be loaded before torquing this mounting bolt.
- Install the new upper control arm ball joint in the steering knuckle. Install new torx mounting bolts and tighten them with the T50 torx bit - alternate the tightening back and forth between the two bolts so the ball joint is slowly pressed back into the steering knuckle. Torque the mounting bolts to 60 Nm (44 ft-lb).
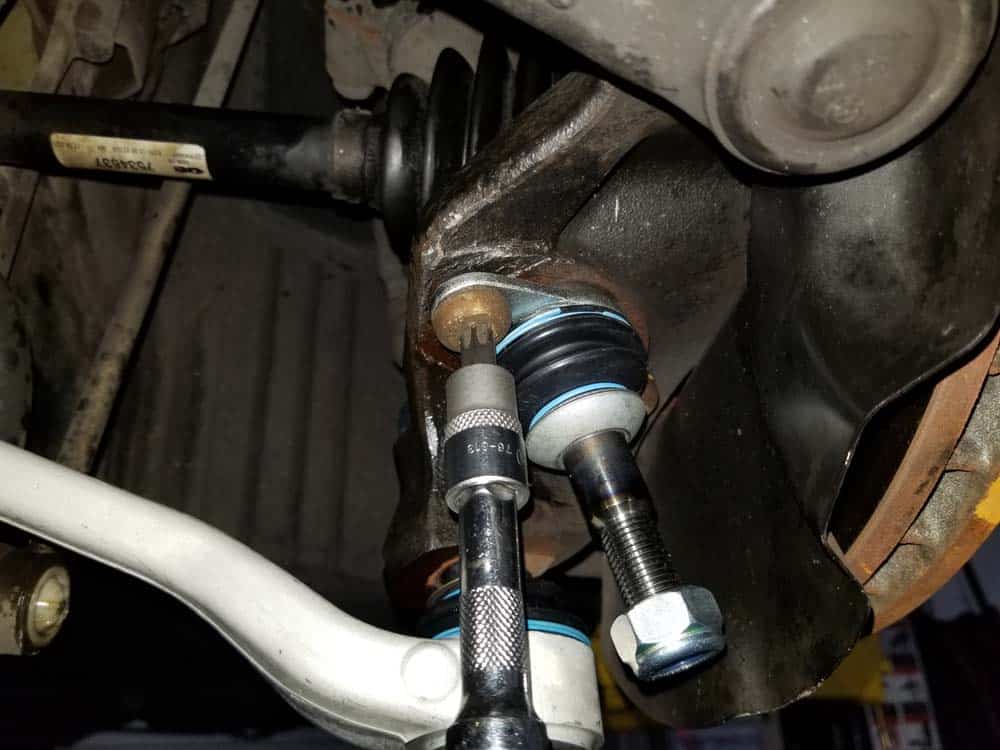
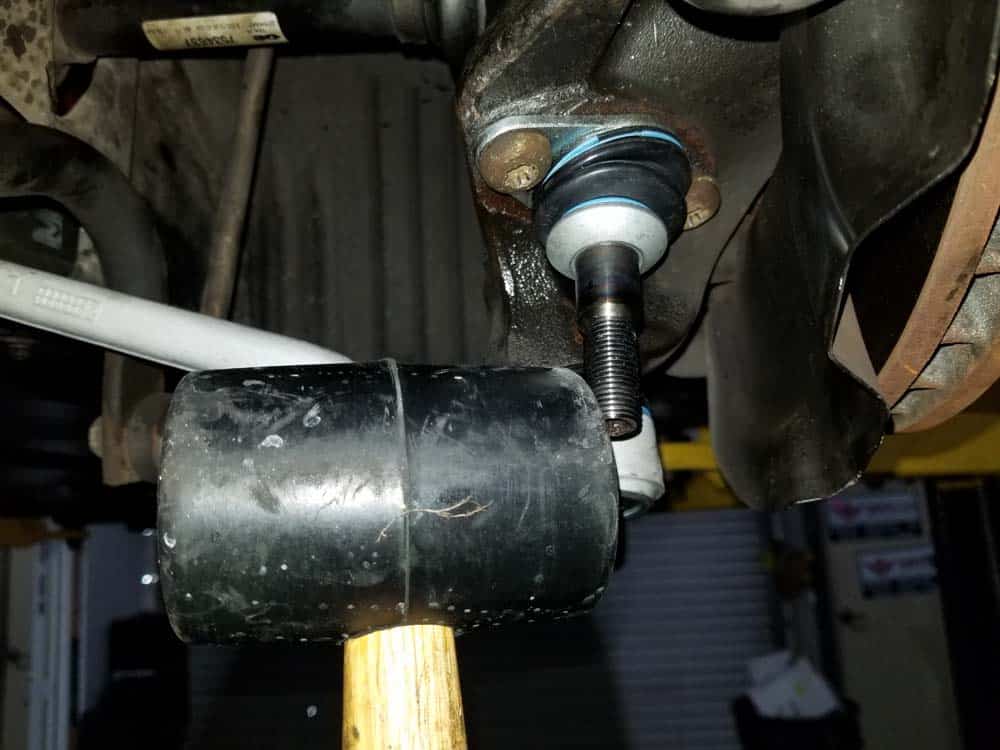
- Use a rubber mallet to gingerly tap the ball joint and control arm until they line up and join together correctly. NEVER use a steel hammer...you can damage the threads of the ball joint. If you are having a difficult time getting the upper control arm on the ball joint, turn the steering wheel a little so the steering knuckle faces in towards the middle of the car (to the right if you are working on the left control arm).

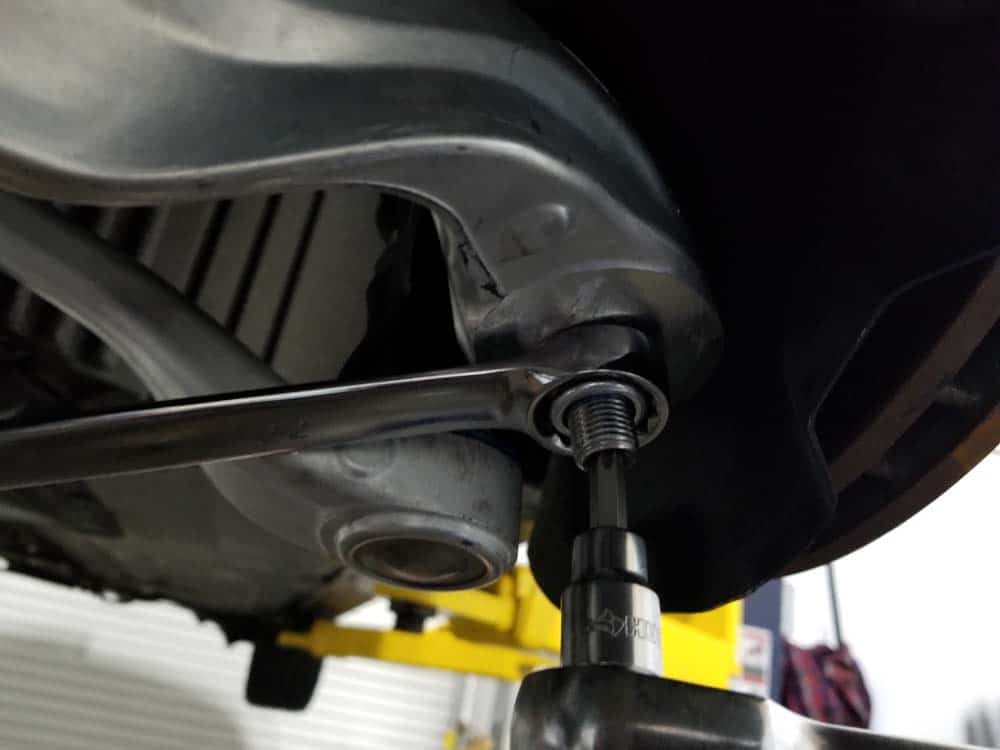
- When the new upper control arm is properly aligned on the ball joint, install and tighten the lock nut with a 21mm (new replacement nuts may be 22mm) open end wrench and T40 torx bit. Using a torque wrench, torque the nut to: 165 Nm (122 ft-lb). ***Once again...this may seem like a lot of torque but it is the correct value for the M14 ball joint nut.
- Repeat the above steps on the right control arms. Don’t forget to reinstall the headlight sensor's regulating rod on the top of the right control arm.
Section 3 - Loading the Front End and Finishing Control Arm Installation
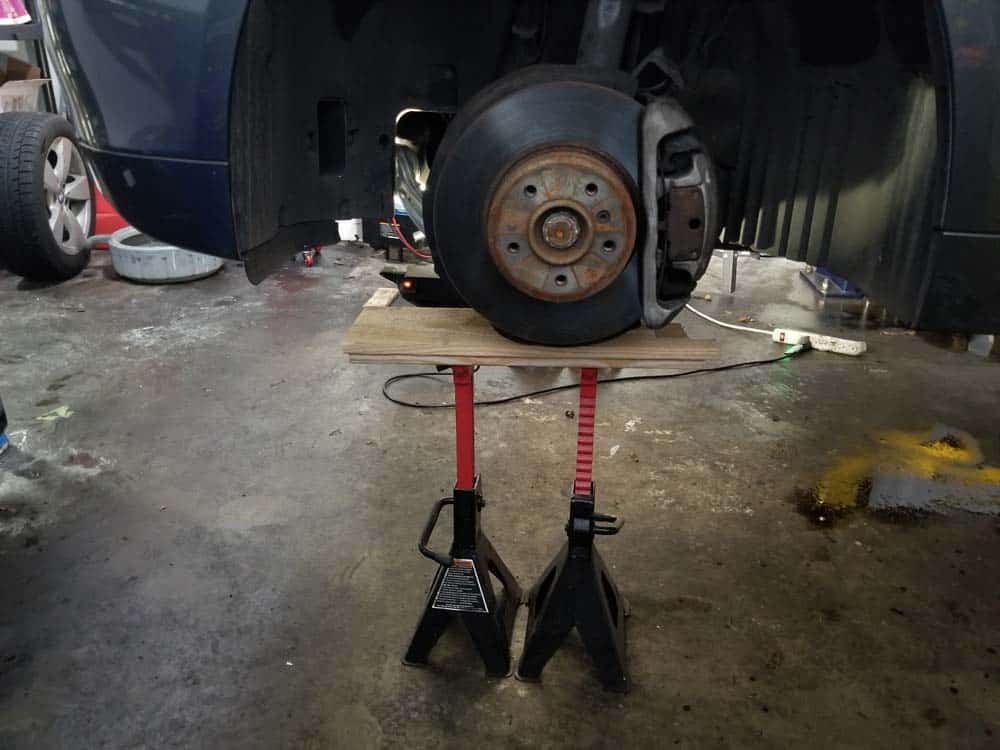
As discussed earlier in this article, the full curb weight of the vehicle must be applied to the front control arm bushings (loading the front end) before their mounting bolts can be torqued. The reason for this is because the bushings will bind up and prematurely fail if the mounting bolts are torqued with no weight on the wheels. There are two ways to load the front end. You can position jack stands under the steering knuckles and lower the vehicle until it rests fully on them - the jack stands will simulate the vehicle's wheels and load the front end of the vehicle. Alternatively, you can reinstall the front wheels and lower the vehicle onto wheel ramps or stands to load the front end.- Load the front end of the vehicle using either jack stands or ramps. We like to use two jack stands with wood planks to protect the steering knuckle and ball joints as shown below.
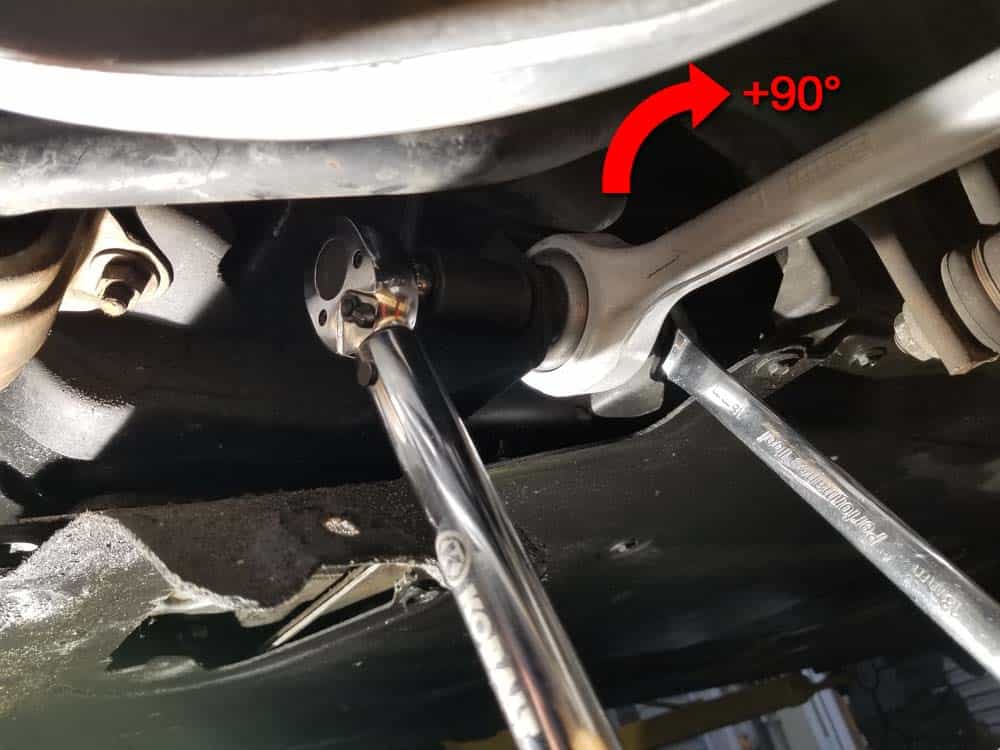
- Torque the two upper control arm (tension strut) bushing bolts to 100 Nm (74 ft-lb) + 90 degree turn.
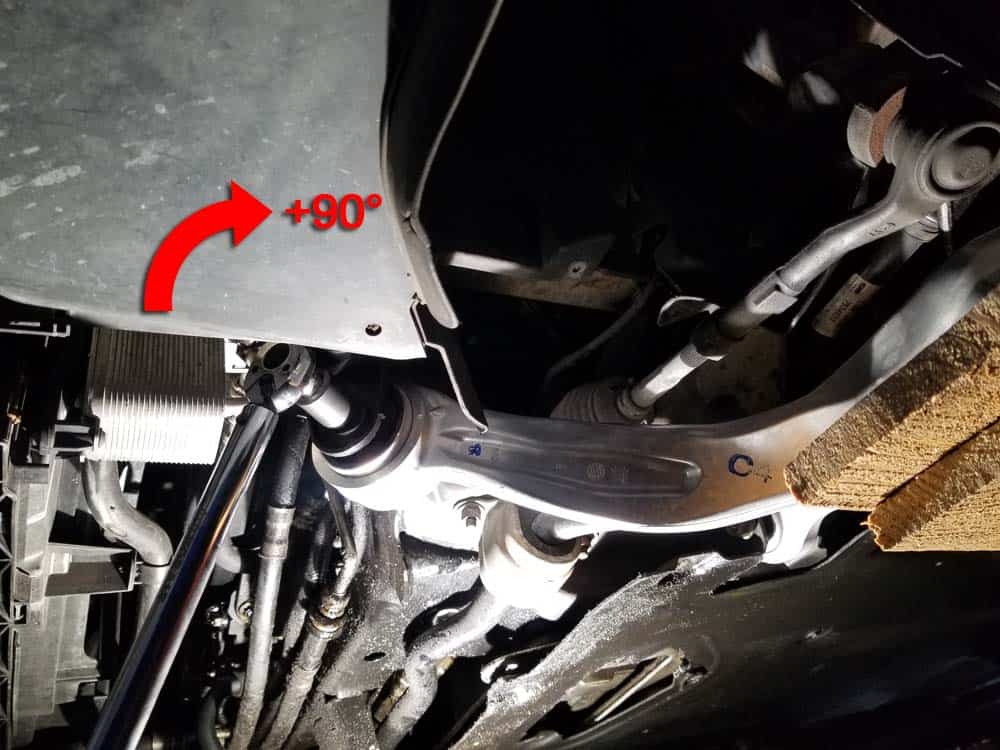
- Torque the two lower control arm bushing bolts to 100 Nm (74 ft-lb) + 90 degree turn.
- Replace the side suspension covers, the wheel suspension covers and the belly pan.
- Re-install the front wheels and torque the lug nuts to 120 Nm (90 ft-lb).
BMW E60 xDrive Front Control Arm Repair Finished