
Affiliate link disclosure – The BMW Repair Guide uses affiliate links in their site. For more information on affiliate links, please click here.
Repair Summary
This article gives detailed instructions on replacing the thermostat in a 2006-2010 BMW E60 5 series vehicle with the N52 6 cylinder engine. Even though we used a 2006 530xi touring wagon to perform this repair, this article can be applied to any vehicle with the N52 engine including the 1,3,5,6,7 X1,X3,X5 and Z4 with minor modifications to the repair steps.
See all vehicles this article applies to
E60 5 Series M5
E60 5 Series 523Li
E60 5 Series 550i
E60 5 Series 545i
E60 5 Series 540i
E60 5 Series 535d
E60 5 Series 530xi
E60 5 Series 530xd
E60 5 Series 530Li
E60 5 Series 530i
E60 5 Series 530d
E60 5 Series 525i
E60 5 Series 525xi
E60 5 Series 525Li
E60 5 Series 525d
E60 5 Series 523i
E60 5 Series 520i
E60 5 Series 520d
E60N 5 Series 550i
E60N 5 Series 525xi
E60N 5 Series 540i
E60N 5 Series 535xi
E60N 5 Series 535i
E60N 5 Series 535d
E60N 5 Series 530xi
E60N 5 Series 530xd
E60N 5 Series 530Li
E60N 5 Series 530i
E60N 5 Series 528xi
E60N 5 Series 530d
E60N 5 Series 528i
E60N 5 Series 525Li
E60N 5 Series 525xd
E60N 5 Series 525i
E60N 5 Series 525d
E60N 5 Series 523Li
E60N 5 Series 523i
E60N 5 Series 520Li
E60N 5 Series 520d
E60N 5 Series 520i
A BMW E60 thermostat replacement in your 2006-2013 5 series can help prevent a rough idling engine and help clear MAP cooling error codes.
The U.S. version of the E60 5 series sedan and touring wagon was delivered to customers in model year 2006 sporting the new N52 6 cylinder engine. The N52 engine was a lightweight, more efficient, version of its predecessor the M54 featuring a new composite magnesium/aluminum crankcase. The N52 also was built with an advanced intelligent heat management system which included an electric cooling fan, electric water pump, and MAP thermostat.
Intelligent heat management in the N52 engine is a complex system that is managed by the engine control module (DME). In general terms, engine heat is electronically controlled in the N52 engine depending on a complex set of data; the temperature of the engine can actually be manipulated by the DME depending upon required driving conditions. If you are interested in learning more about engine heat management and how it affects your 2006-2010 5 series, please see page 47 of the BMW Technical Training Document 2007 NG6 Engines in our Virtual Library.
The BMW E60 thermostat is a critical part of the N52 heat management system. It is an electric (MAP) thermostat that is manipulated by the DME. The DME can not only control the opening and closing of the MAP thermostat but also the actual degree to which it is opened. This is done by an electronic heating element inside the thermostat. The DME can open and close the MAP thermostat to pre-determined degrees based on the needs of the engine and the driver.
Even though the BMW E60 thermostat is controlled electronically, it is still a mechanical part. Like all mechanical parts that are subjected to the brutal operating conditions of the engine, it will eventually fail (no part lasts forever). The tell-tale signs that you may require a BMW E60 thermostat replacement include one or more of the following: rough cold idling engine and loss of interior cabin heat. Since the MAP thermostat has a "fail-safe" function that keeps it open under fault conditions, engine overheating is normally not a symptom of thermostat failure. A failing BMW E60 thermostat may also display the Service Engine Light and the following error codes: P1619 and P1620. Please be aware that the preceding symptoms may also be indicative of other issues with the cooling system besides the thermostat - the entire cooling system should be diagnosed before performing a BMW E60 thermostat replacement.
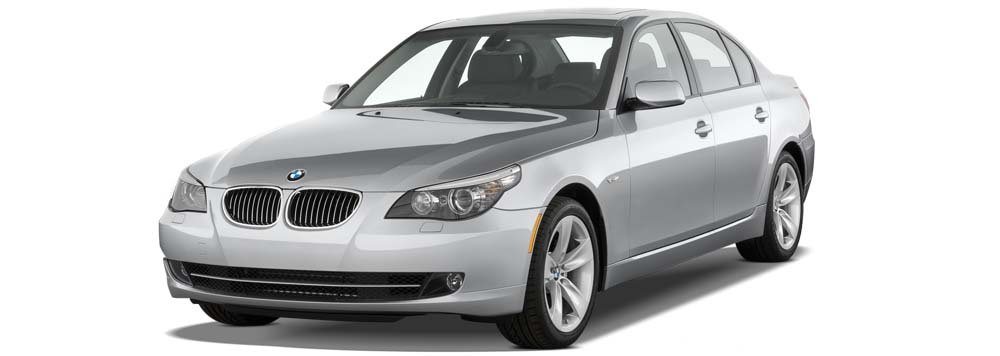
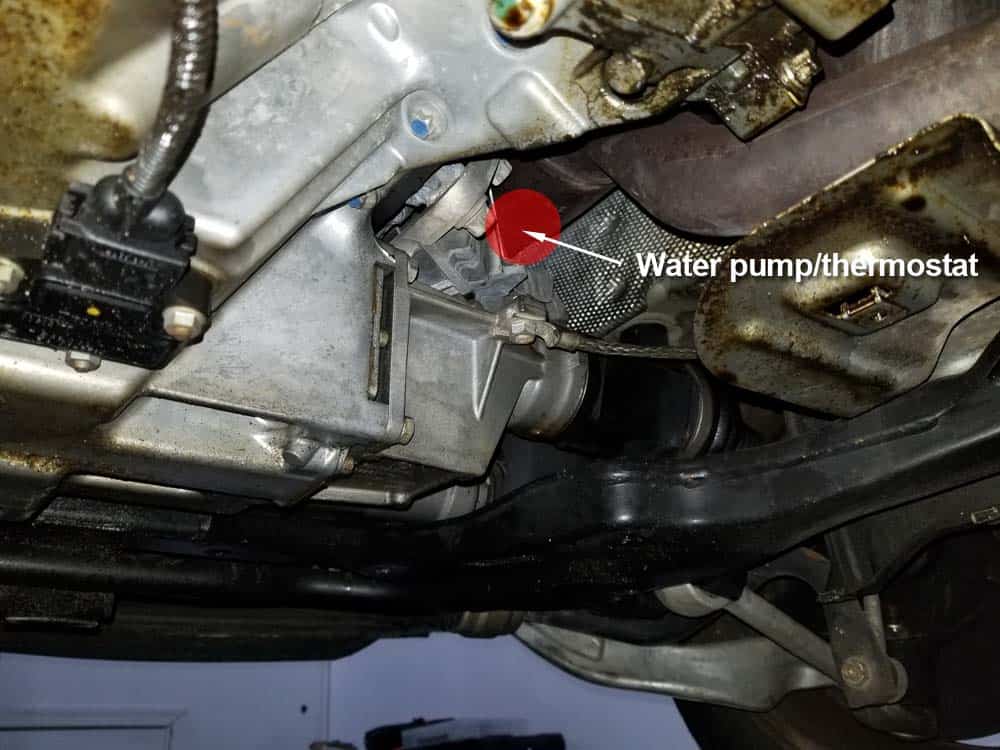
A BMW E60 thermostat replacement requires raising the front of the vehicle and draining the coolant system. The thermostat is located under the vehicle on the right side of the engine block. The repair is a bit challenging due to the tight confines around the thermostat and the fact that you will be under a raised vehicle working. We give you detailed step-by-step instructions below along with a parts list for your convenience.


View the detailed parts diagram for this repair.
Includes detailed part diagrams, part numbers and links to purchase all of the required components needed to complete this repair.
Section 1 - Preparing the BMW E60 Thermostat for Removal
Removing the BMW E60 thermostat is a tough job because of its location. Since the thermostat and water pump are integrally connected in such a tight space, it is nearly impossible (as well as impractical) to remove one without the other. The thermostat is located on the lower right side of the engine block attached to the engine block, tucked in tight against the frame of the vehicle. In order to extract it from the engine, you will (most likely) need to remove the rear underbody protection panel and reinforcement plate in order to gain access to the rear hose connections. All-wheel xDrive models (like the touring wagon used in this article) are even more of a challenge...the front differential and right drive axle block access to the back of the water pump and thermostat. Use patience and don't get frustrated while doing this repair; removing the thermostat from a BMW E60 challenges even professional mechanics.- Jack and support your vehicle using the "four corner" wheel stand method. Please see our article BMW Jacking and Supporting for Repairs and Maintenance for more information on how to safely support your vehicle for this repair.
- Remove the front belly pan from the vehicle. It is usually held in place with phillips head screws.
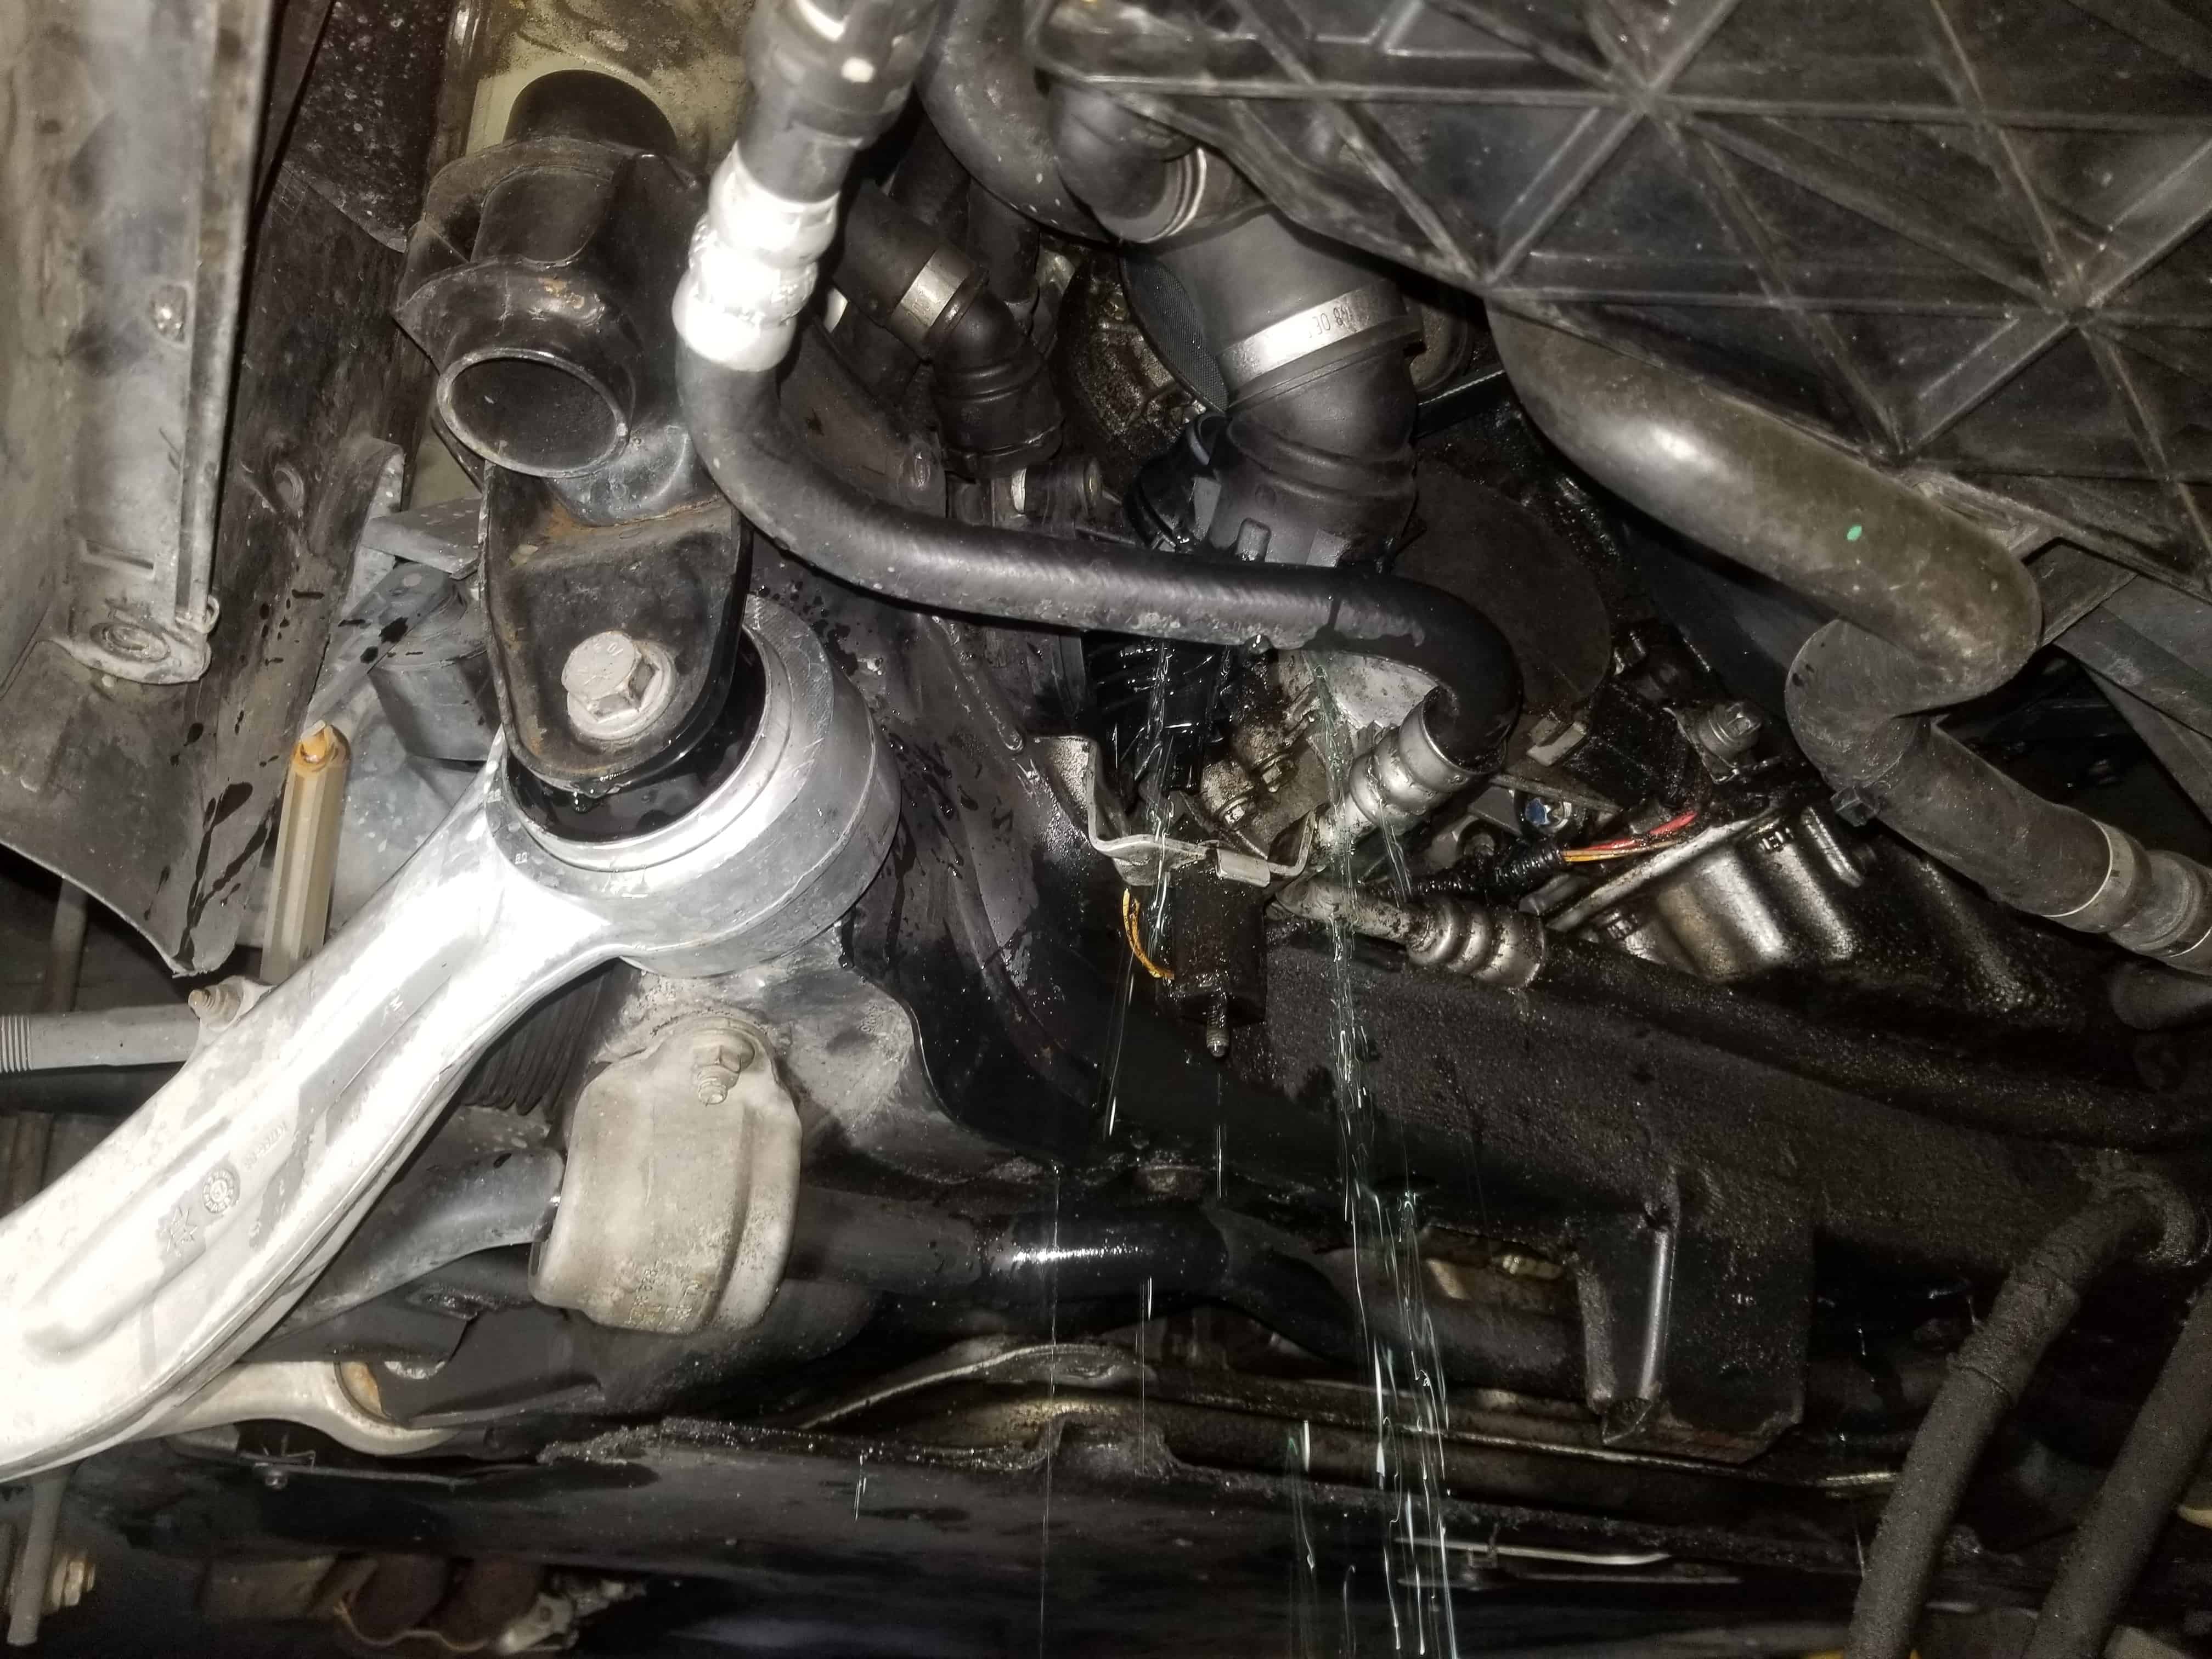
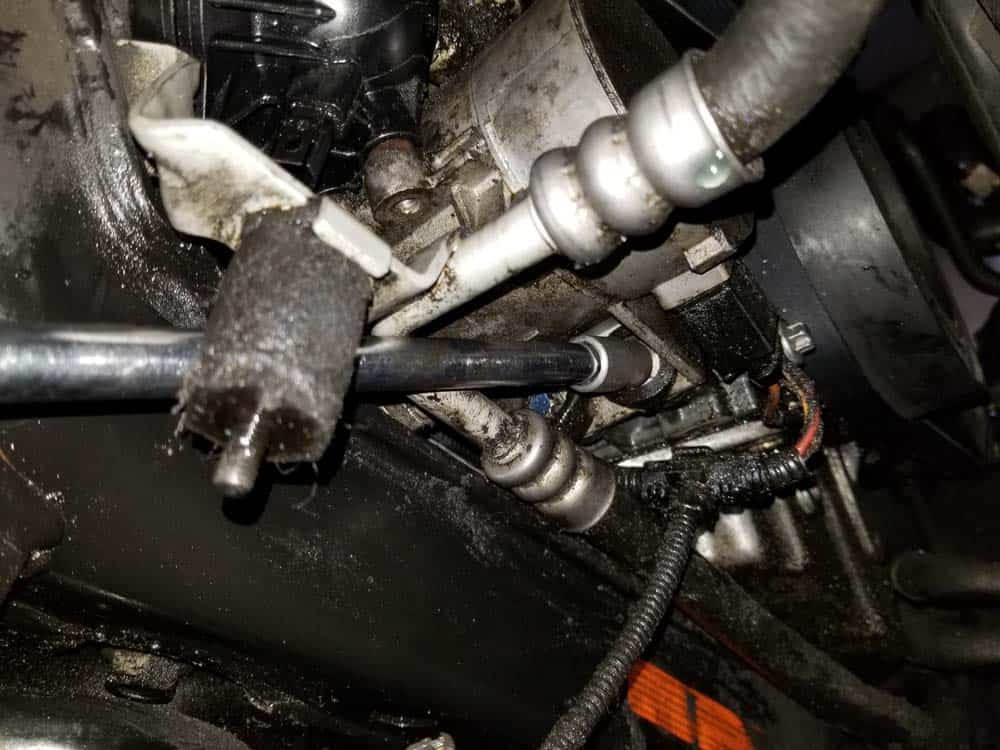
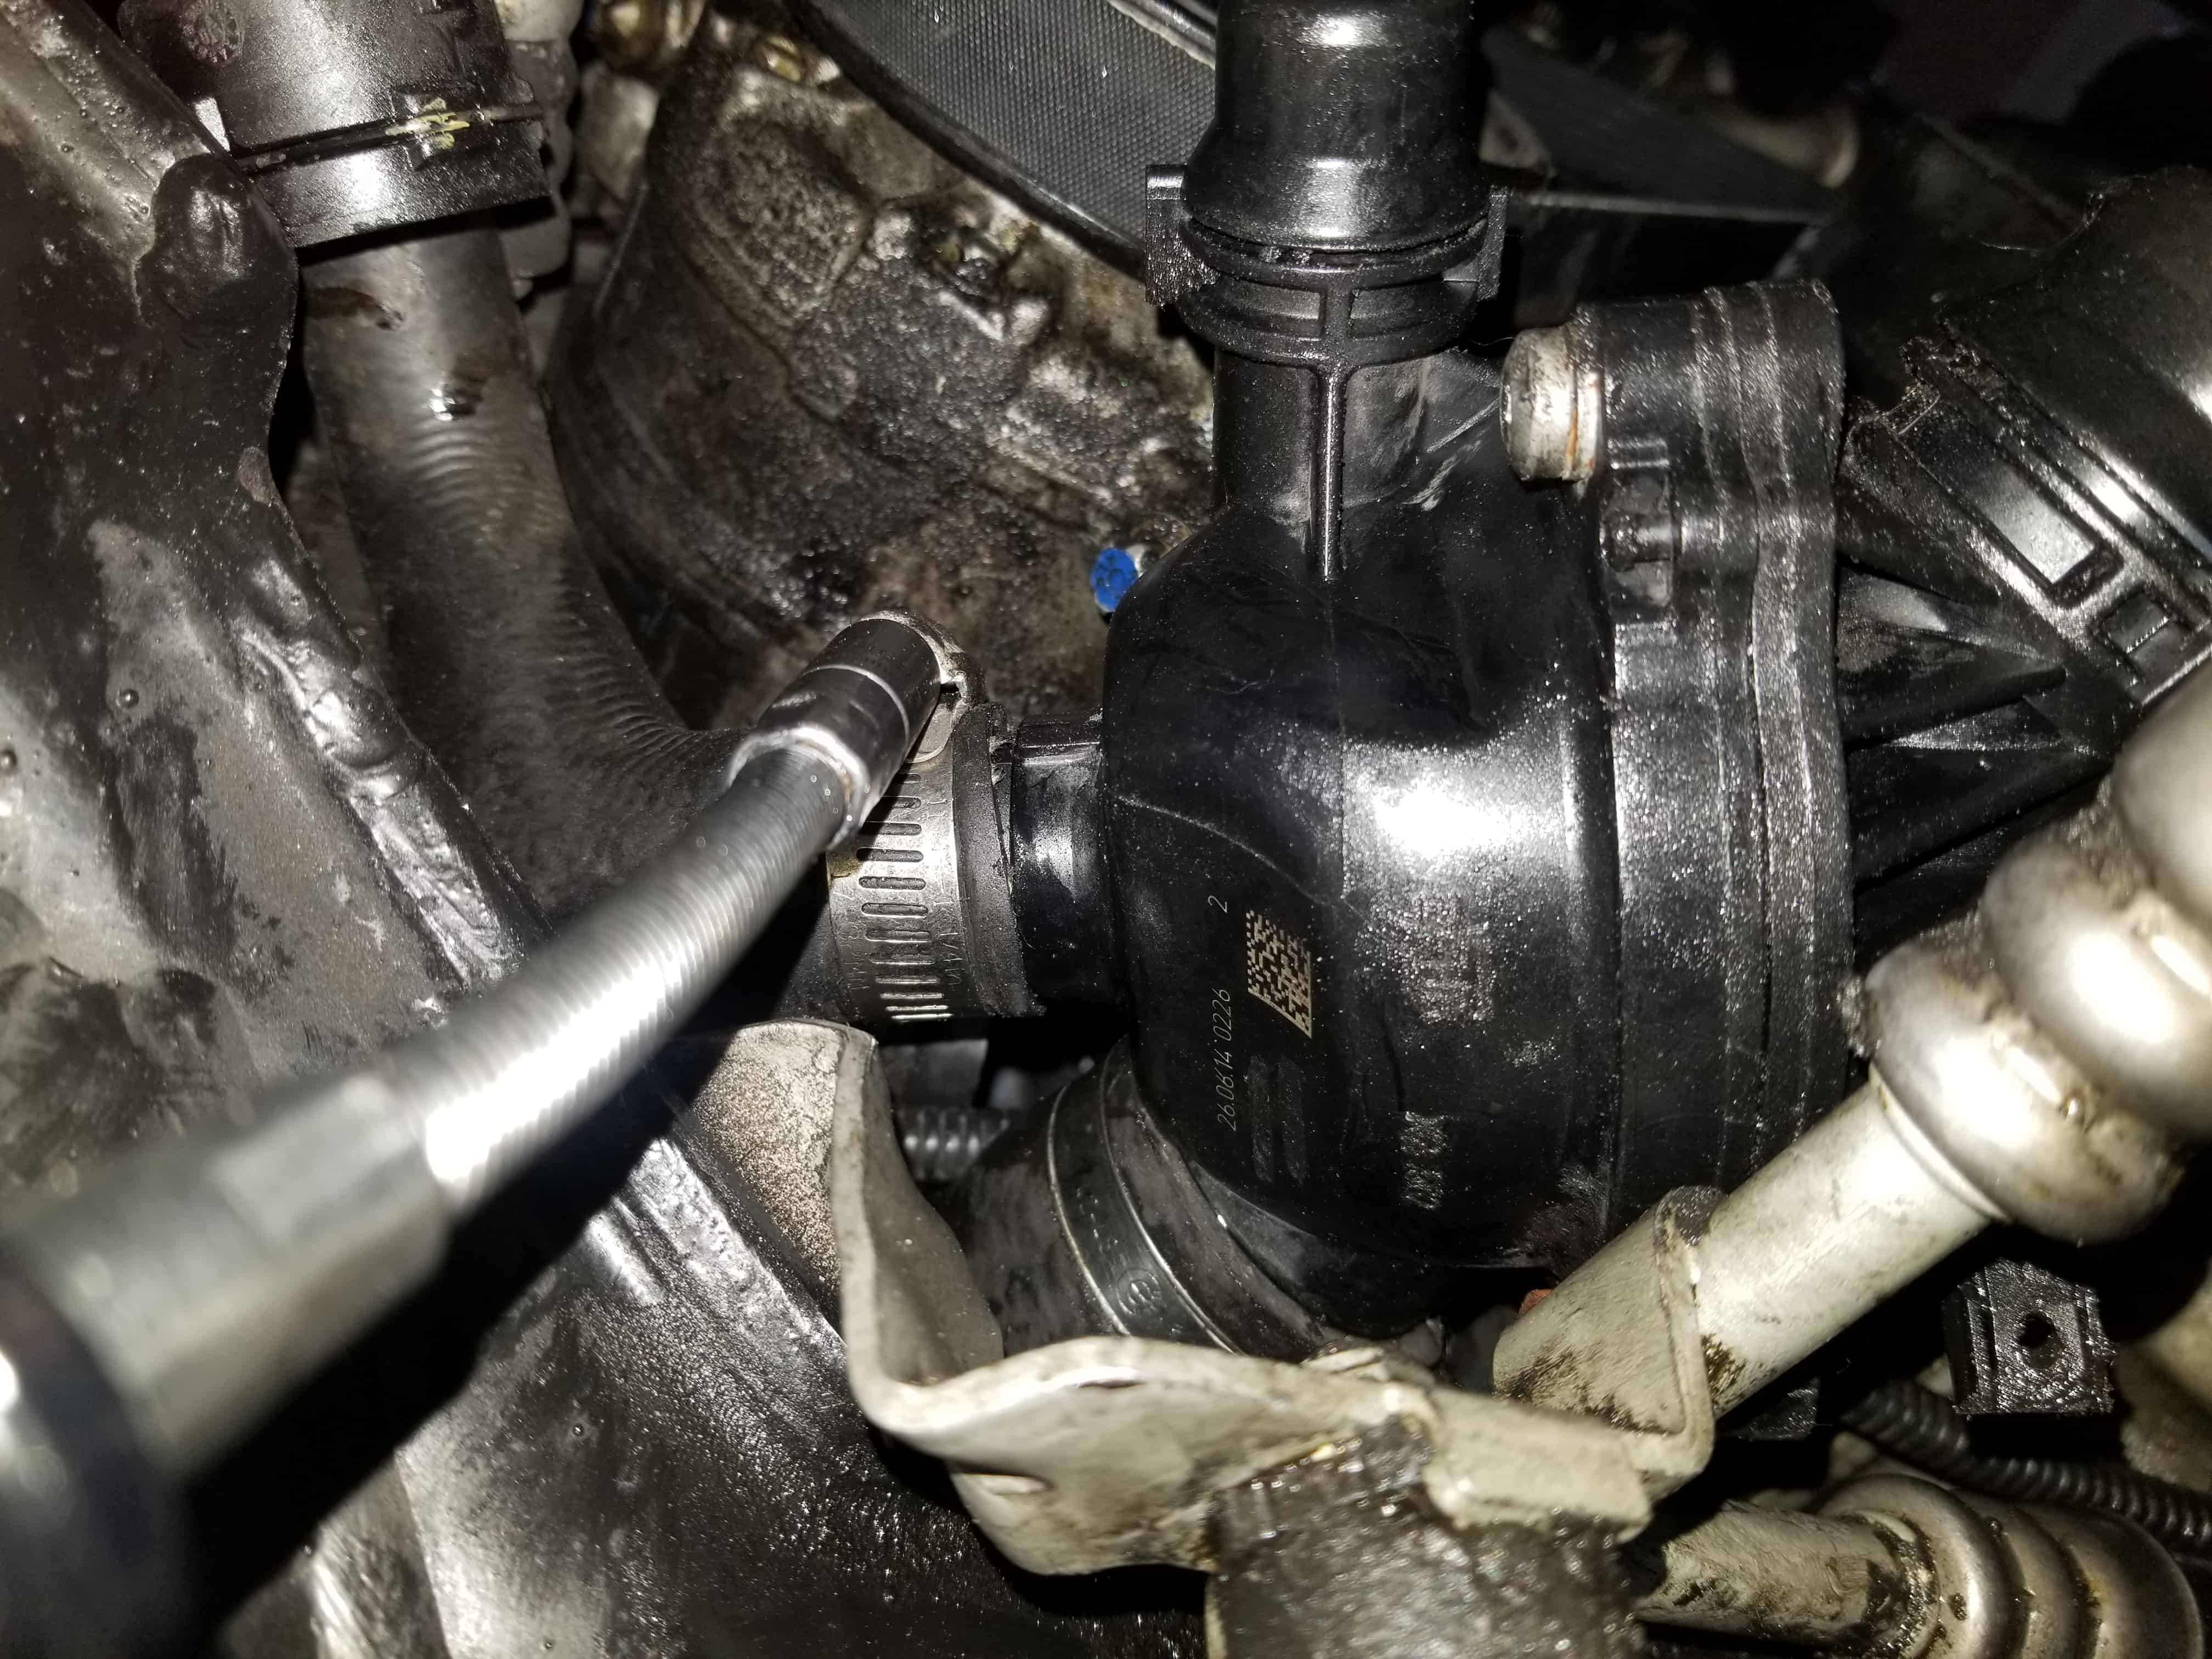
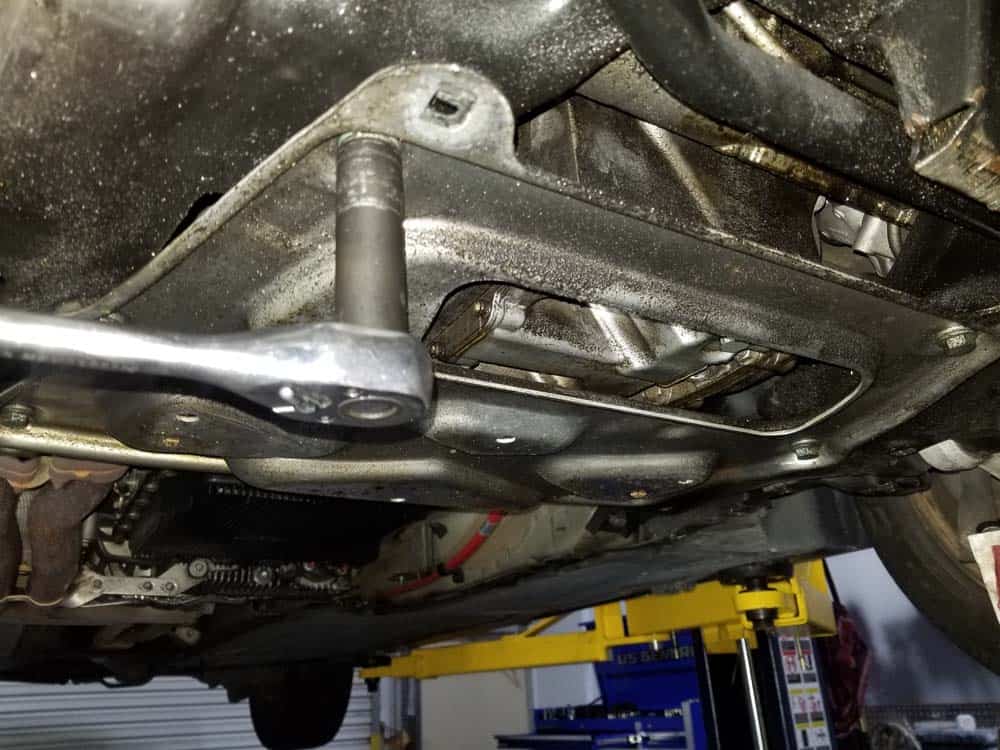
- Locate and identify the thermostat. It is mounted on the right side of the engine, just above the front crossmember.
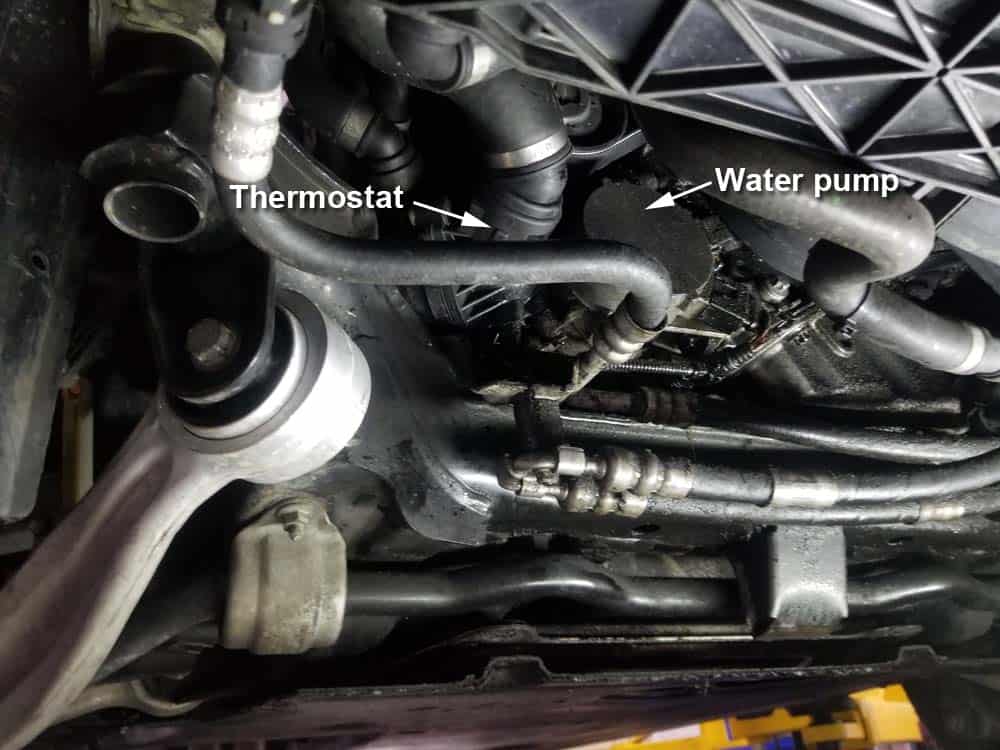
- Use a 10mm socket wrench to remove the power steering expansion hose. You may need to hold the mounting bracket as you loosen the nut to keep it from twisting.

- Gently pull the power steering expansion hose back and bungee cord it out of the work area.
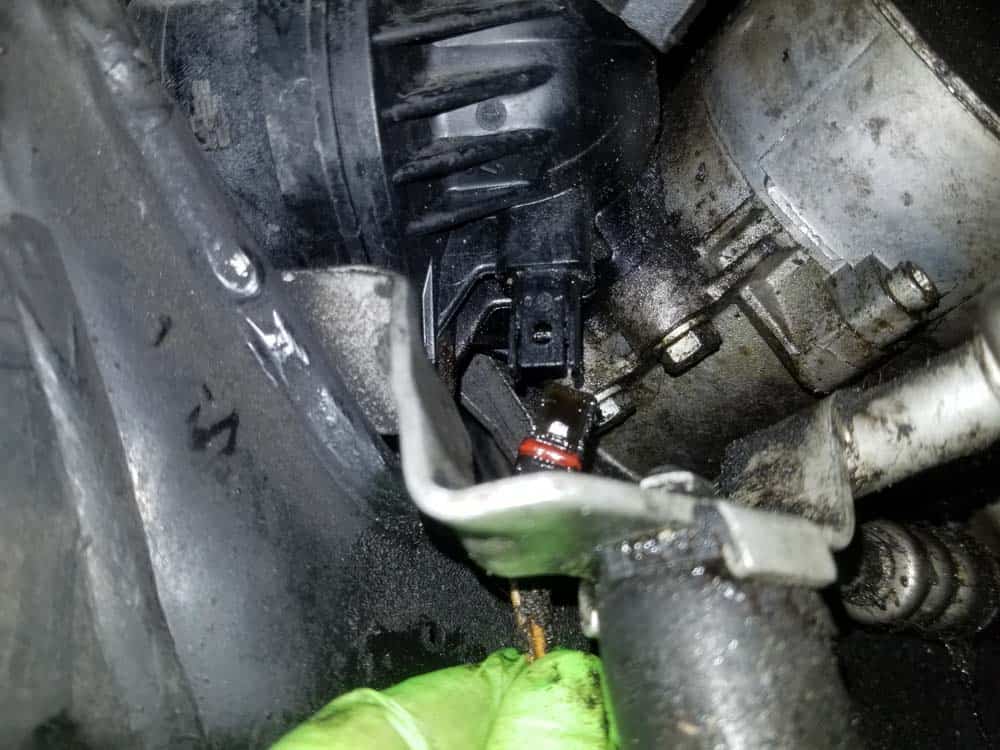
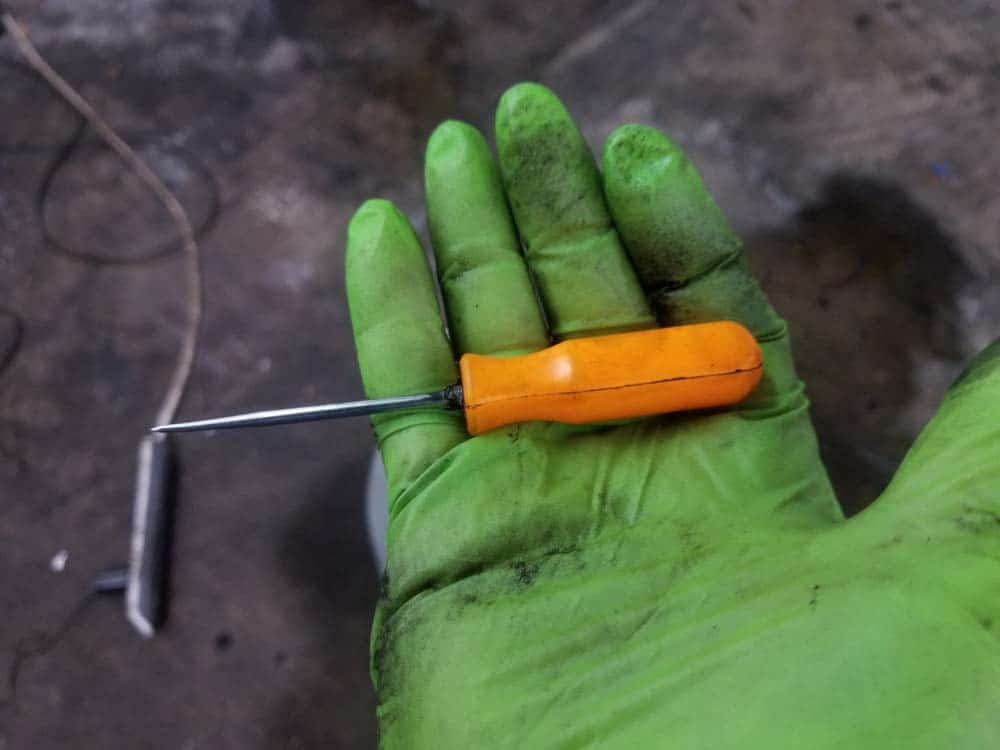
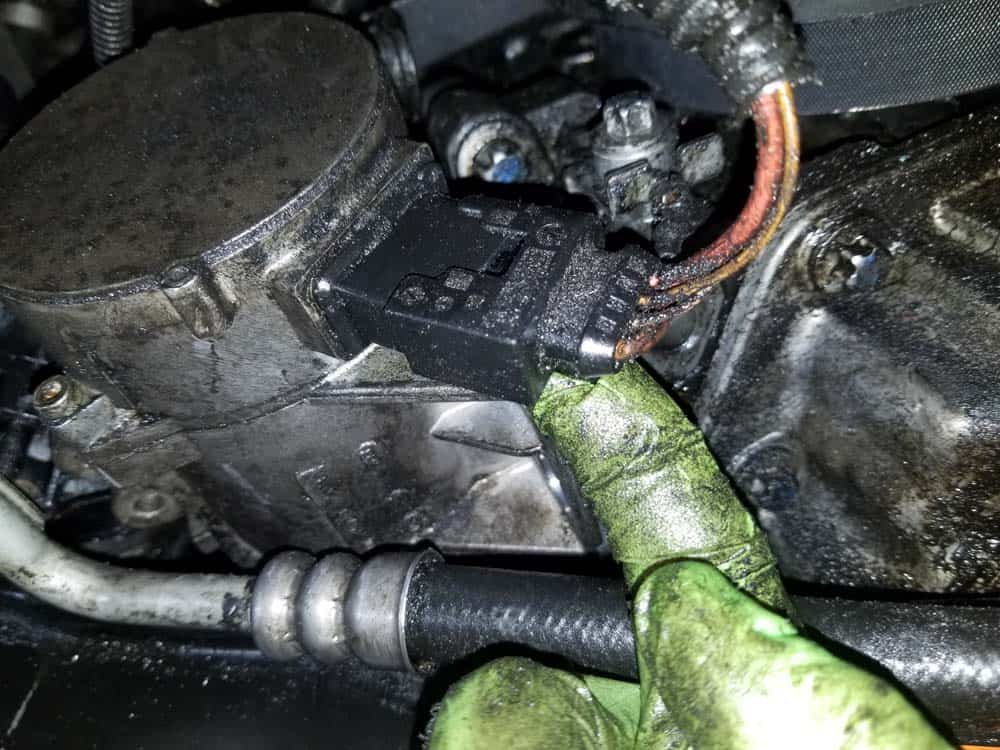
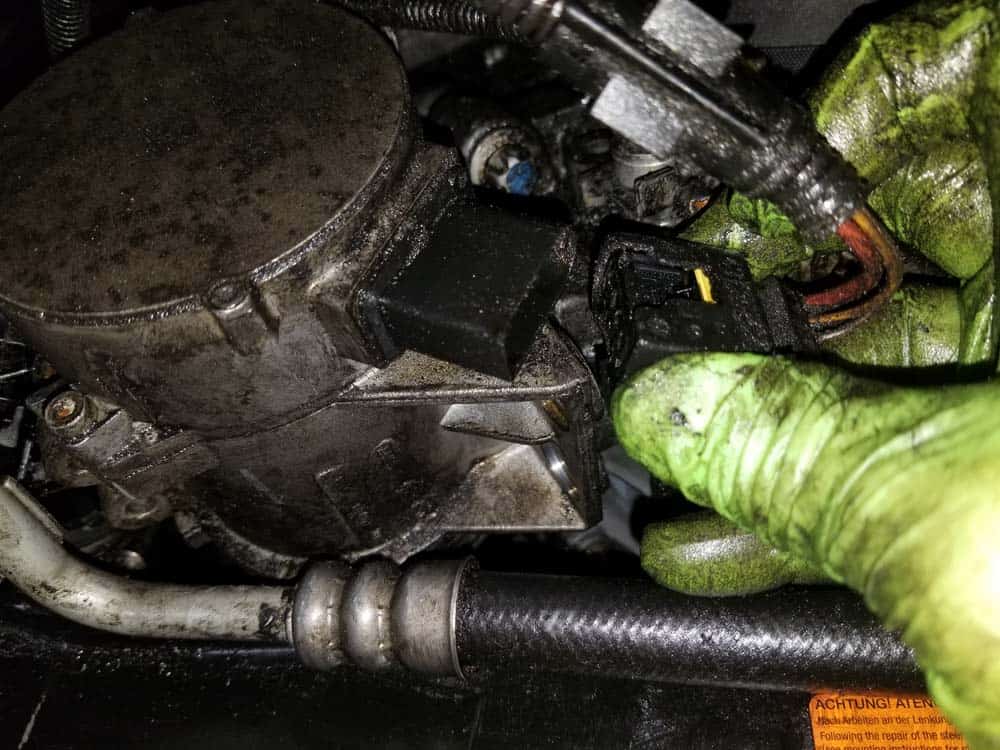
- Use a metal pick to gently raise the plastic locking tab on the thermostat's electrical connector. Pull the plug free from the thermostat.
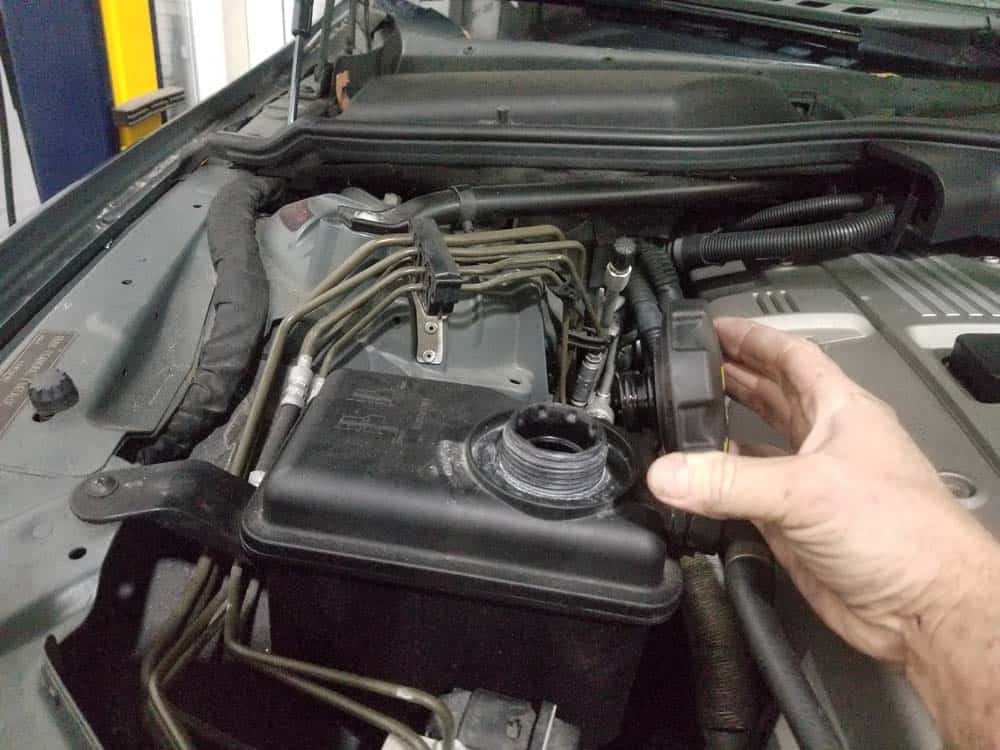
- Next, the engine block needs to be drained. Make sure the cap is removed off of the coolant expansion tank before proceeding to the next step.
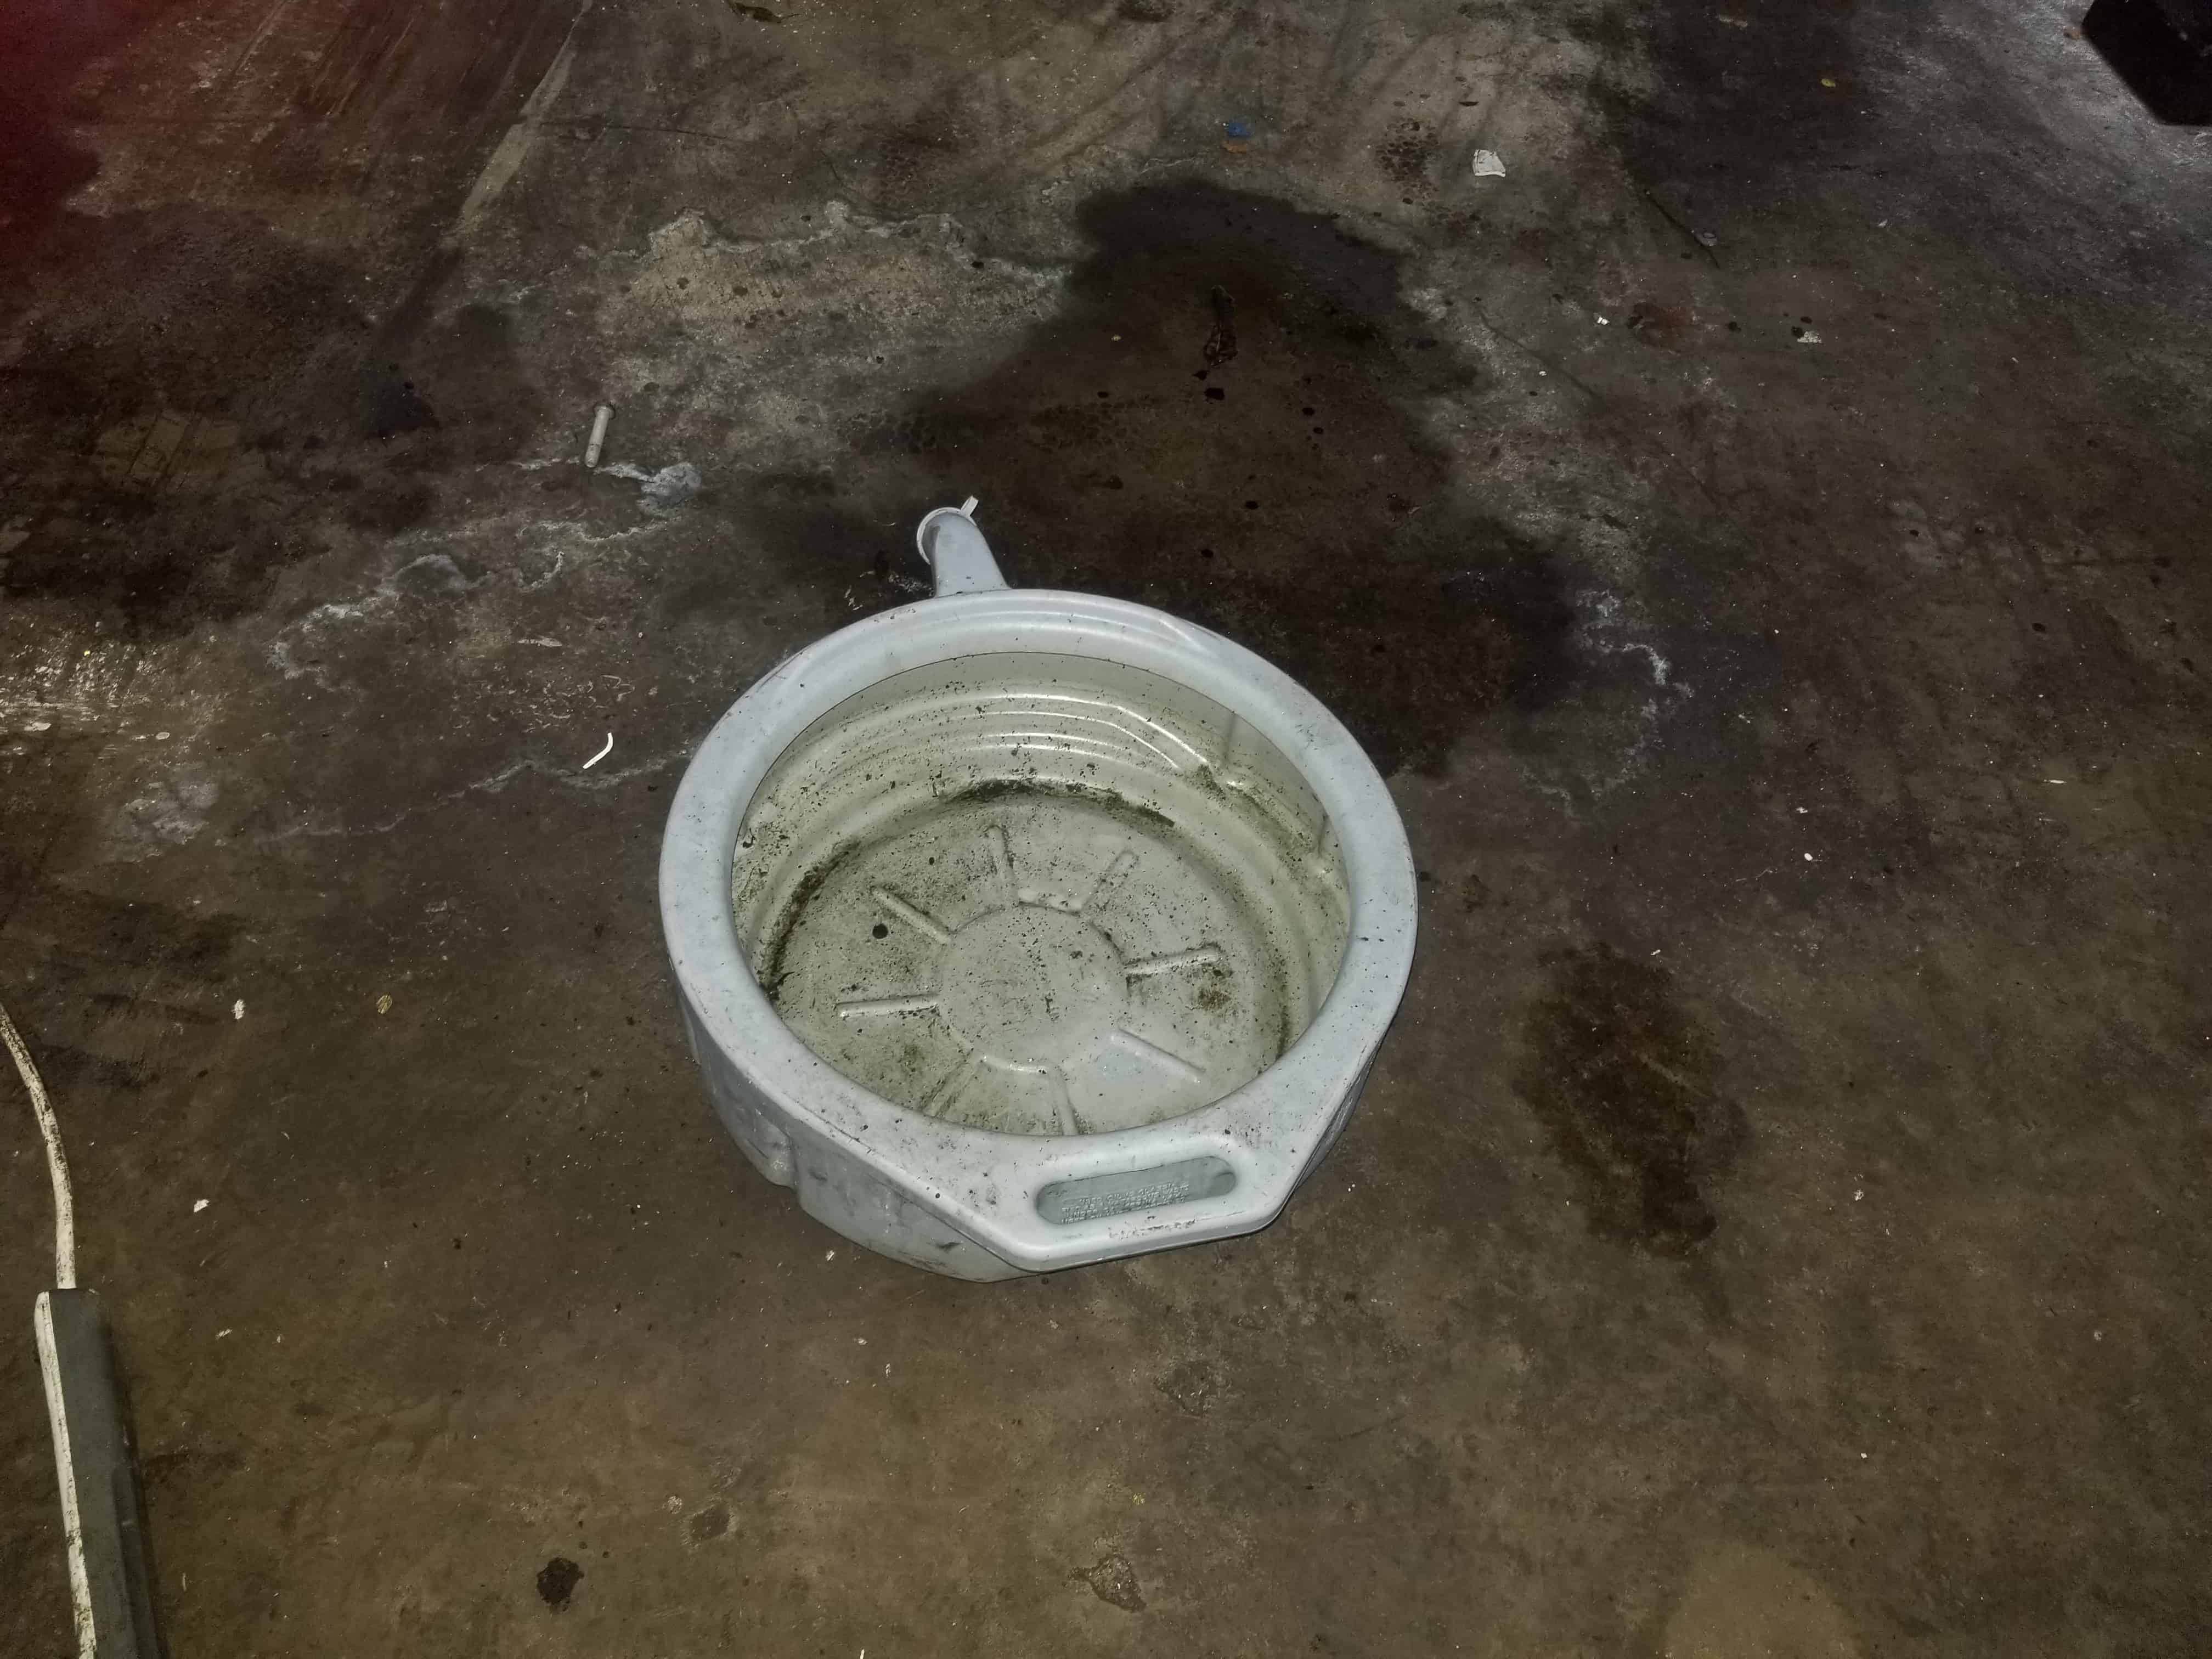
- Move a large drain pan under the thermostat. When the hose is pulled free you will drain out about 1 gallon of coolant.
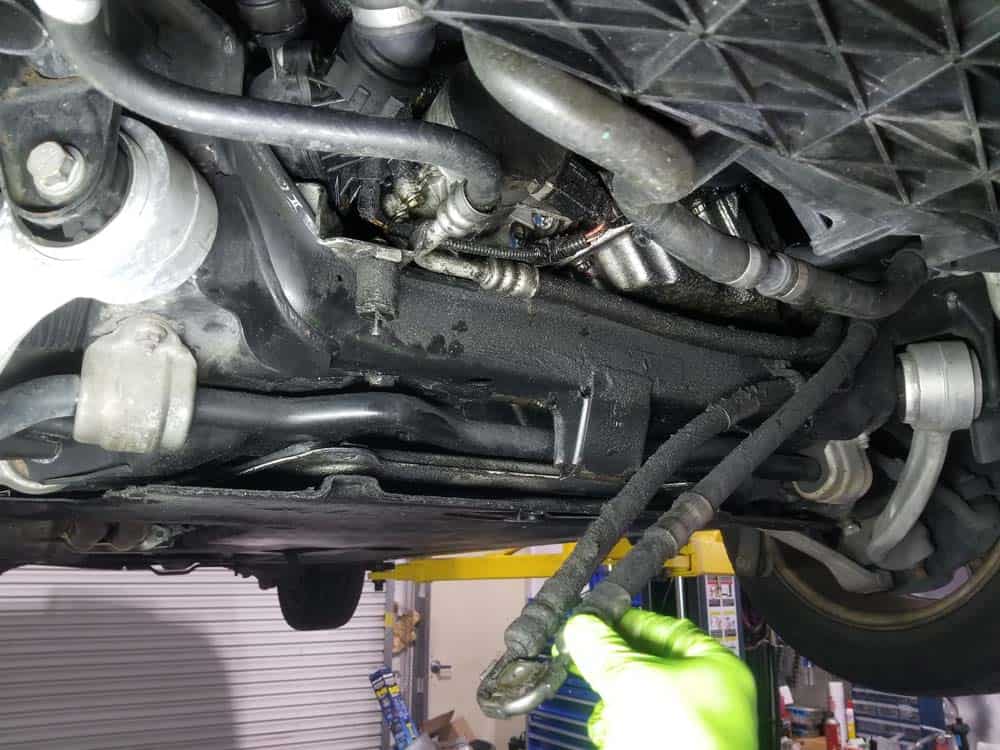
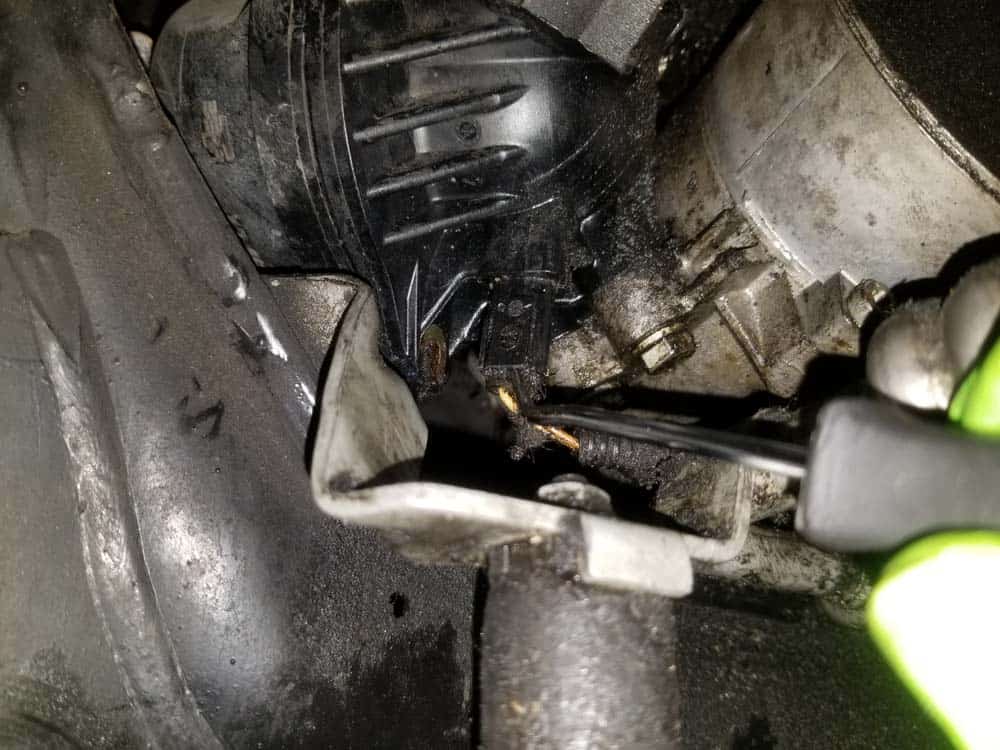
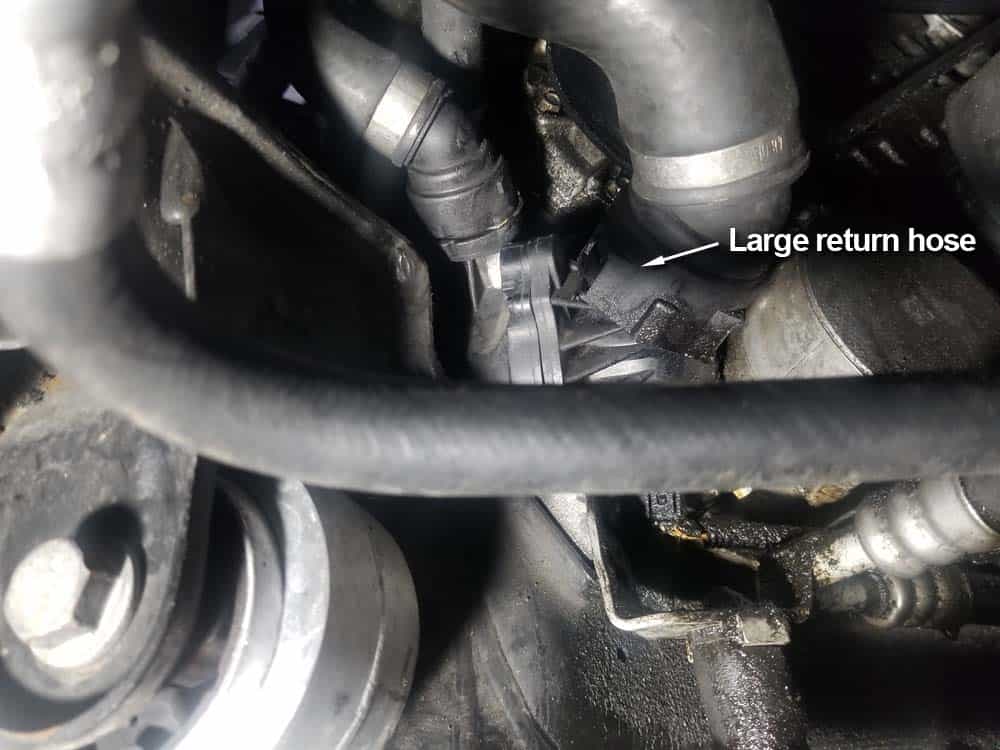
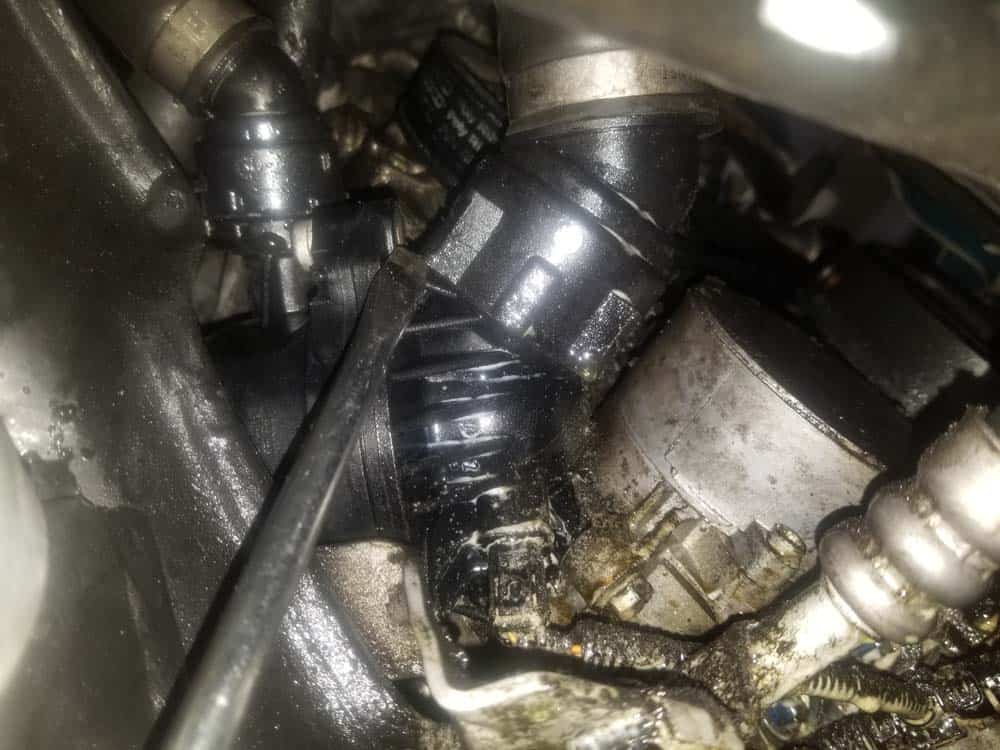
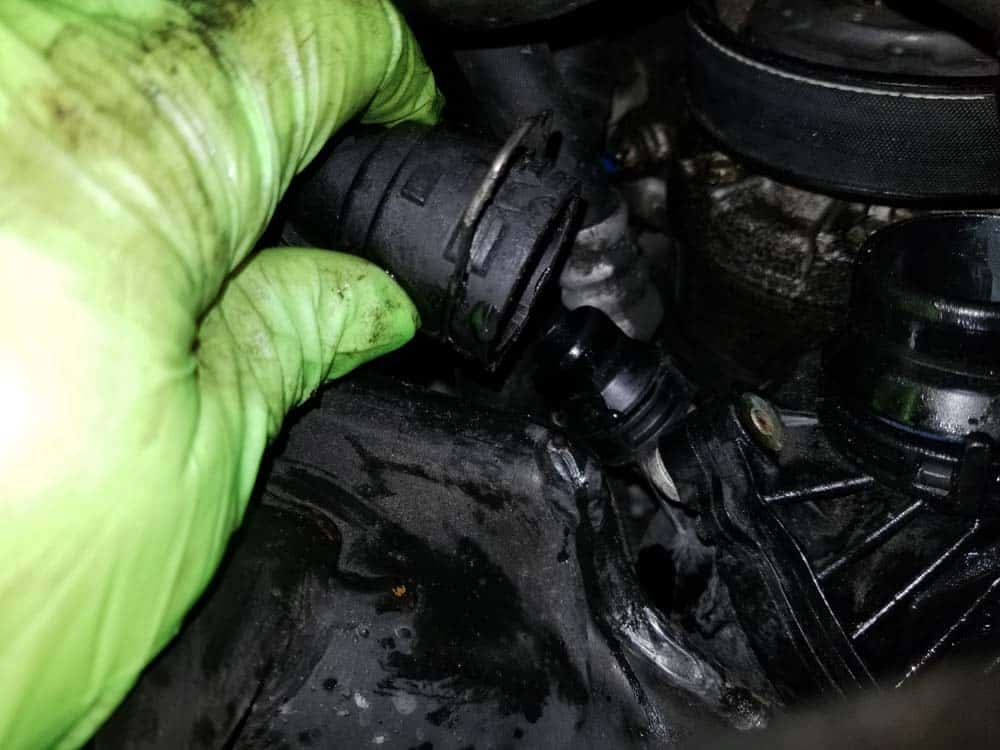
- To remove the coolant return hose from the front of the thermostat, you will have to release its locking clip. This can be a little tricky since the metal locking clip is located on the top of the hose. We suggest using a straight metal pick to release the clip as shown below.
- With the clip released, grasp the hose and pull it free from the thermostat. If the hose is being stubborn, use a large flat blade screwdriver to pry it free. BE AWARE...the thermostat is filled with coolant and it will come out quickly as soon as the hose is pried loose. Keep your face away from the work area when removing the coolant hose.
- Let the engine block thoroughly drain. This usually takes about 10 minutes.
- Next, remove the heater return hose from the right side of the thermostat. It should not have any coolant in it so there won't be any mess when it is removed.
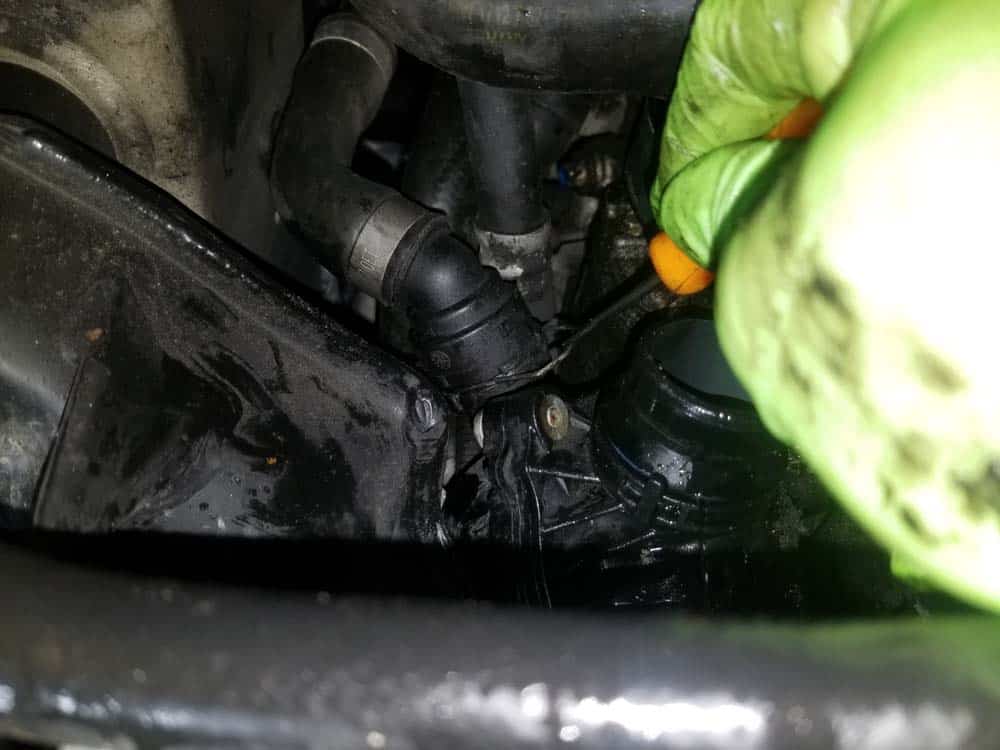
- Use a 10mm socket wrench to remove the thermostat's two mounting bolts. We like to remove the bolts now so the thermostat can be freely moved around - this will make it easier to extract in later steps.
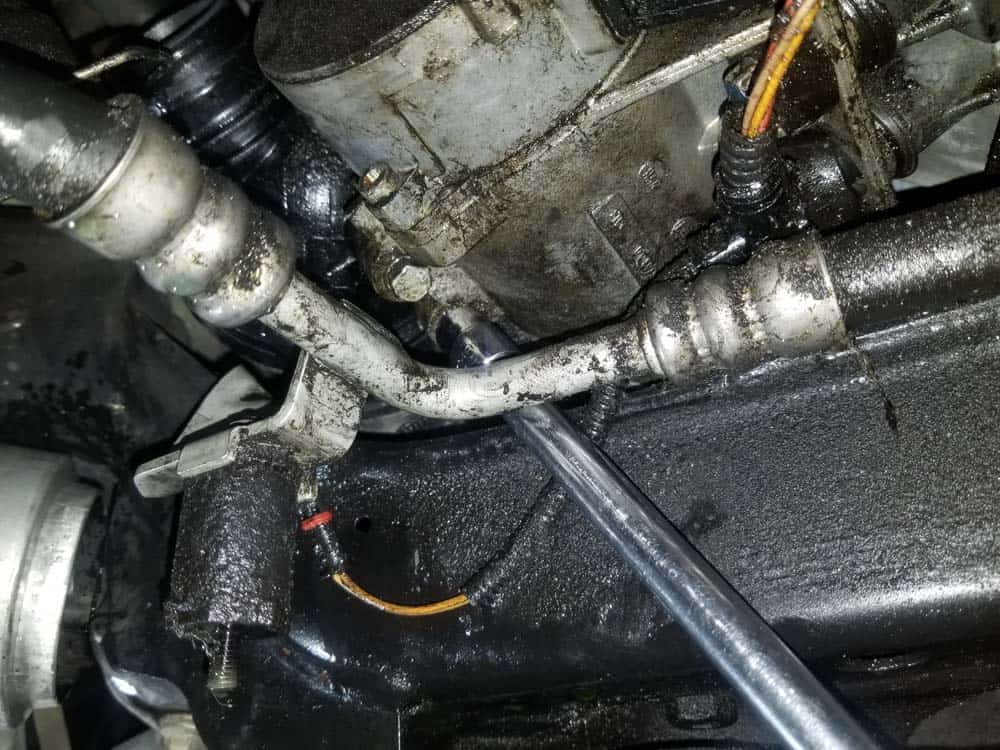
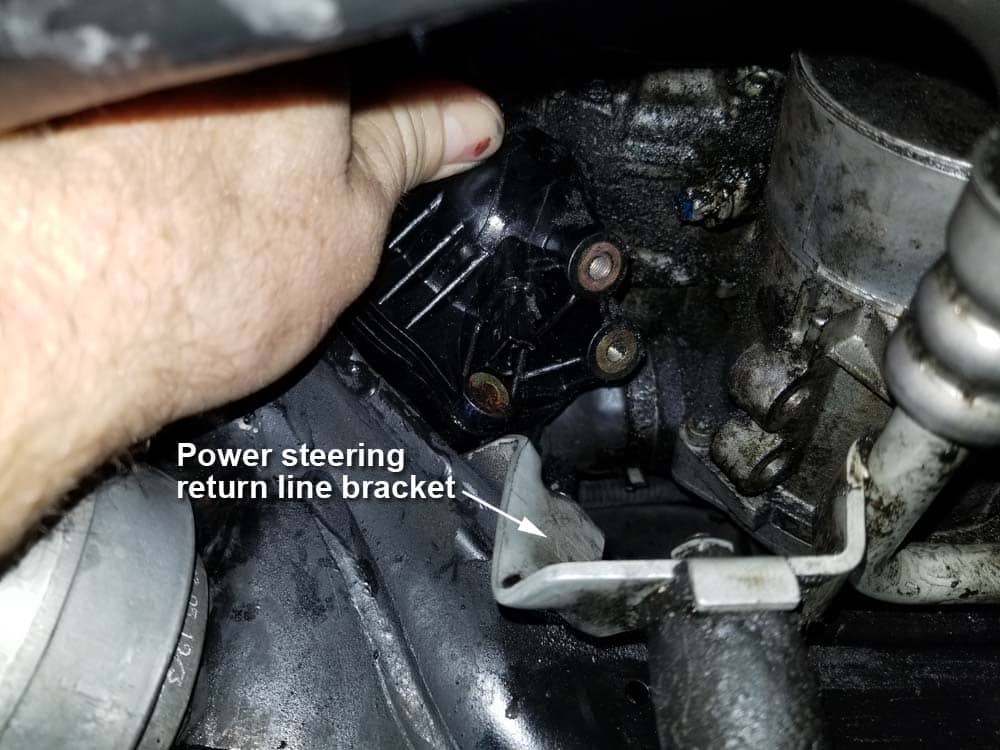
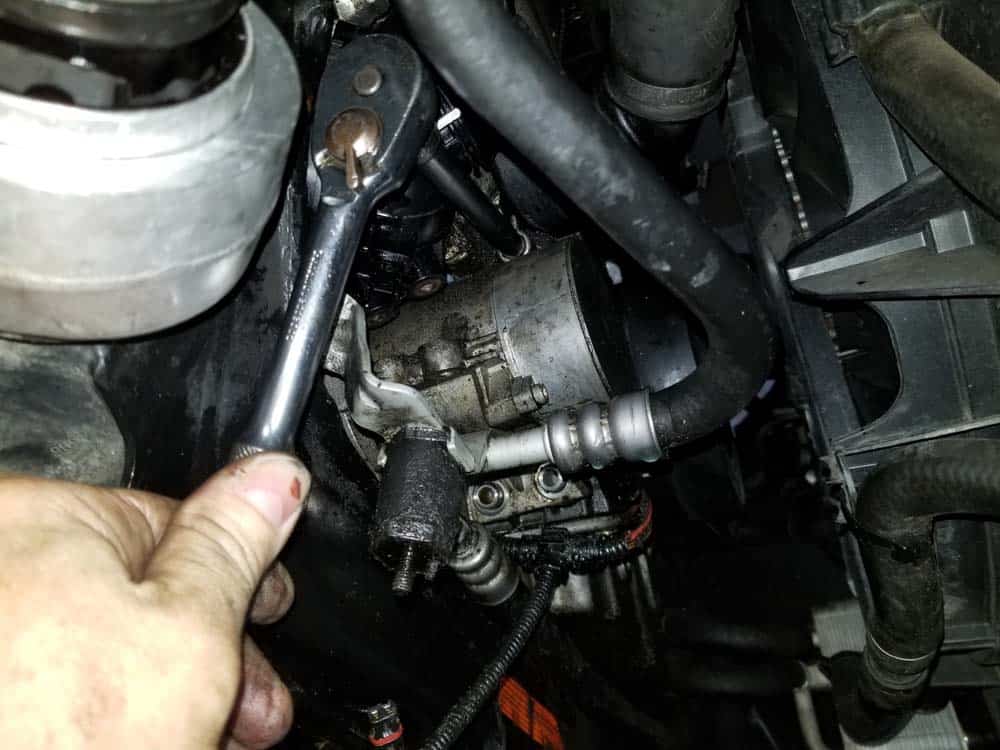
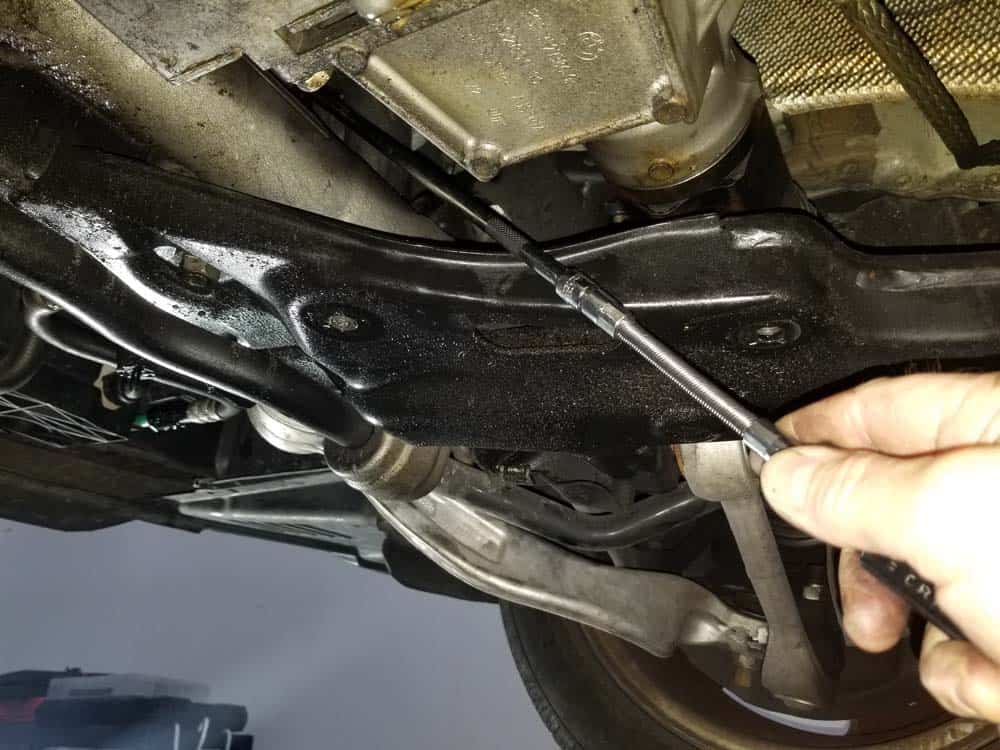
- The power steering return pipe is unfortunately welded to its bracket, making it difficult to access the water pump mounting bolts. We like to slightly loosen the bracket's mounting bolt so the line can be swiveled back and forth without putting too much stress on the hose. Loosening the bolt also will give you the extra bit of added room you will need to extract the water pump and thermostat in later steps. Start by gently pushing the thermostat up and back so the return line's mounting bolt can be accessed.
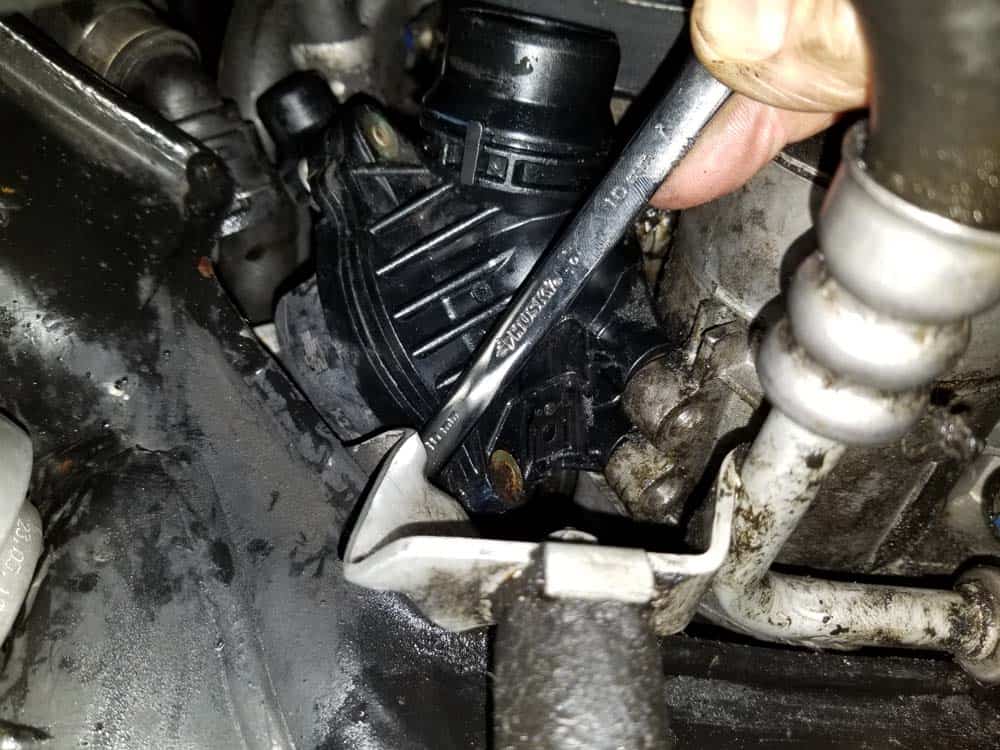
- Use a 10mm open end wrench to slightly loosen the bolt. DO NOT remove the bolt...just loosen it 1/2 turn.
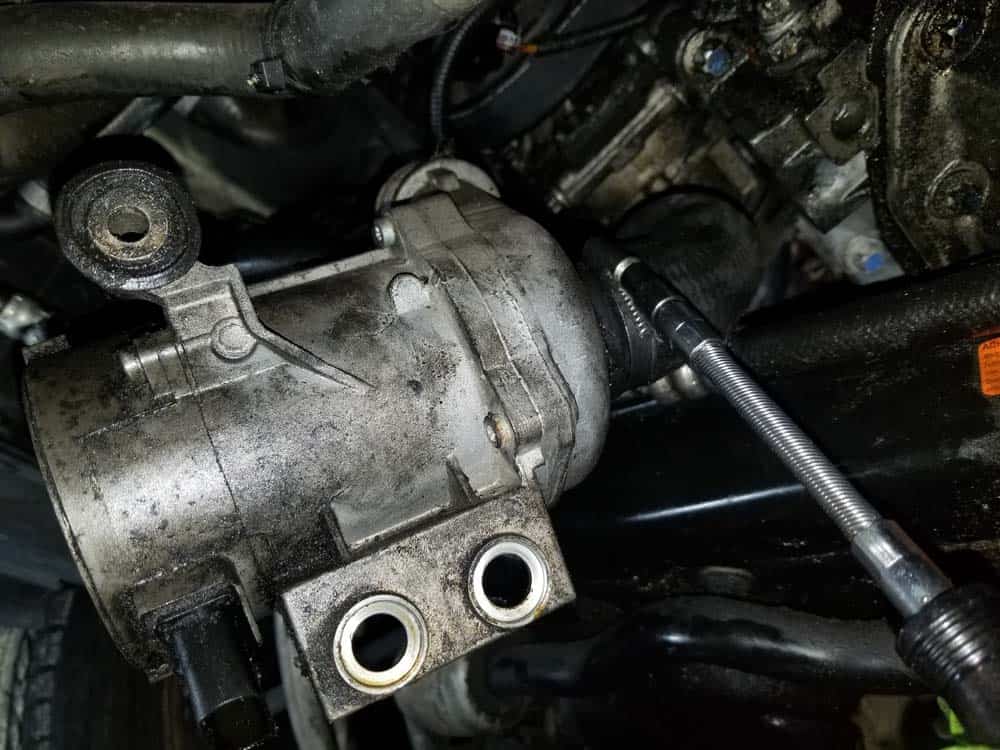
- With the return line loose, you can easily access the water pump's lower mounting bolts. Use an E14 external torx socket to remove them both.
- Remove the water pump's upper mounting bolt with the E14 socket.
- Disconnect the electrical connection from the water pump by depressing the locking tab on the back of the plug and pulling it free.
- Turn the thermostat so you can access the cylinder head coolant line. Loosen its hose clamp and pull it free from the thermostat. If it is stuck, use a flat blade screwdriver to gently pry it free.
Section 2 - Removing the Thermostat from the Engine
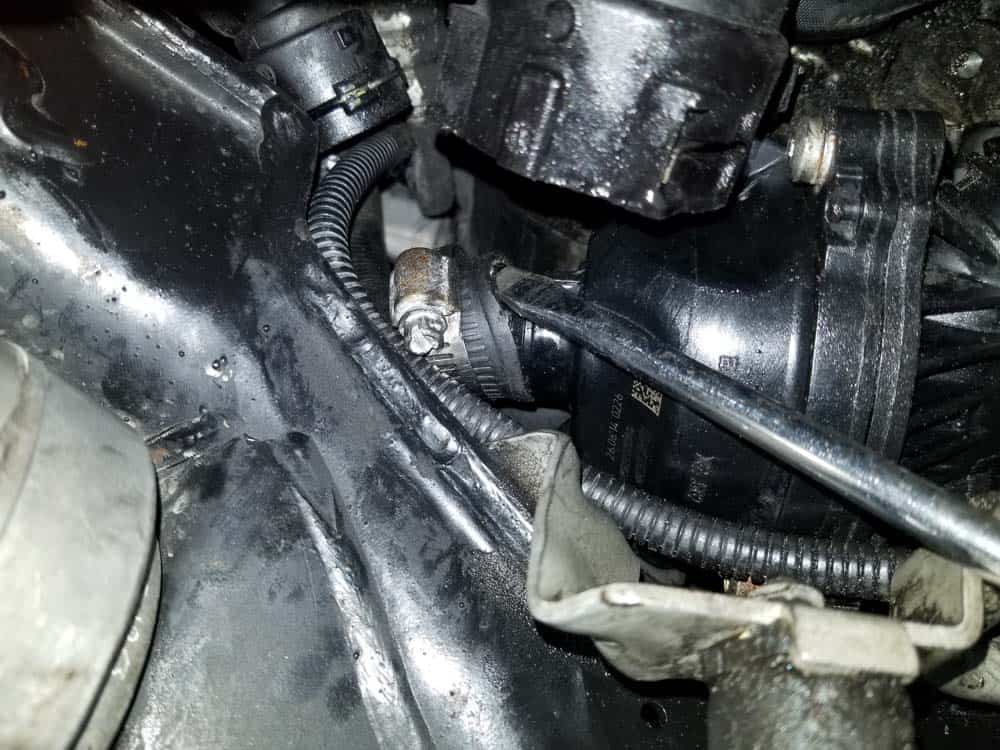
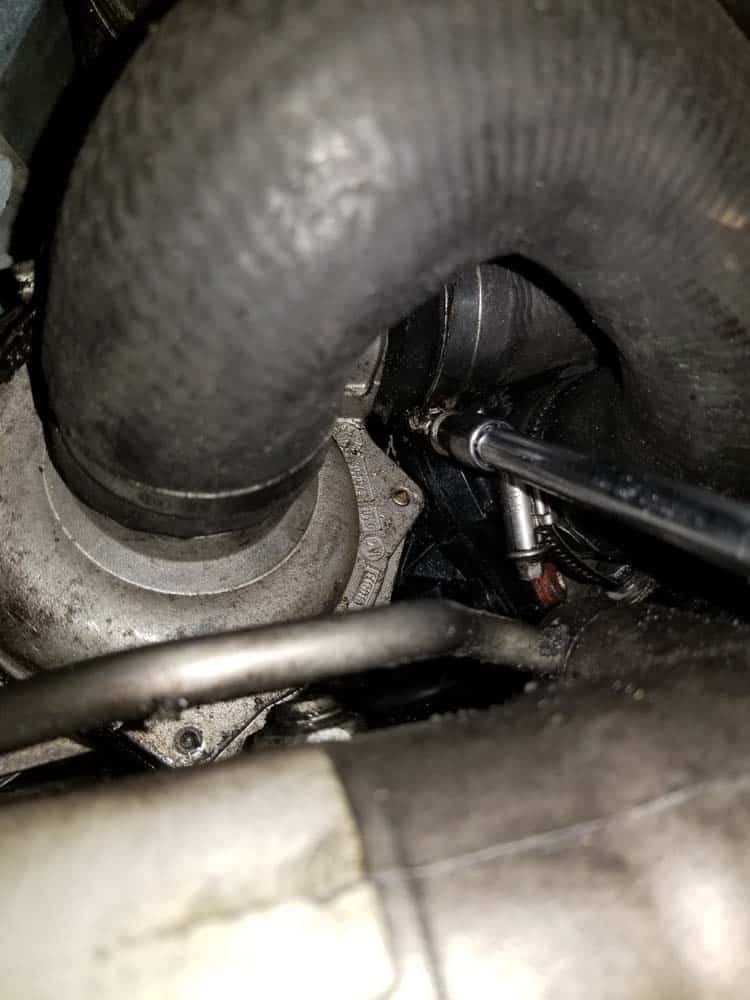
After completing the preceding Section 1, the thermostat is close to being ready for removal. There is still the engine block coolant hose connected to the right rear side of the water pump that is not allowing the two parts to be extracted from the engine. The easiest solution to removing the water pump's rear coolant hose is to loosen its hose clamp from the front of the engine...but unfortunately, it doesn't always work out that way. Most likely you will have to loosen it from underneath the car. Please follow our steps to make the procedure go as smoothly as possible.- Push the thermostat to the side and locate the engine block coolant hose connected to the rear of the water pump. If you are able to access the hose clamp's worm screw, go ahead and loosen it now and proceed to step 6 below. If the worm screw is turned toward the back of the engine (like ours is below), then proceed to the next step. It will have to be removed from underneath the vehicle.
- Remove the rear belly pan from the vehicle. It is usually held in place by a combination of 8mm screws.
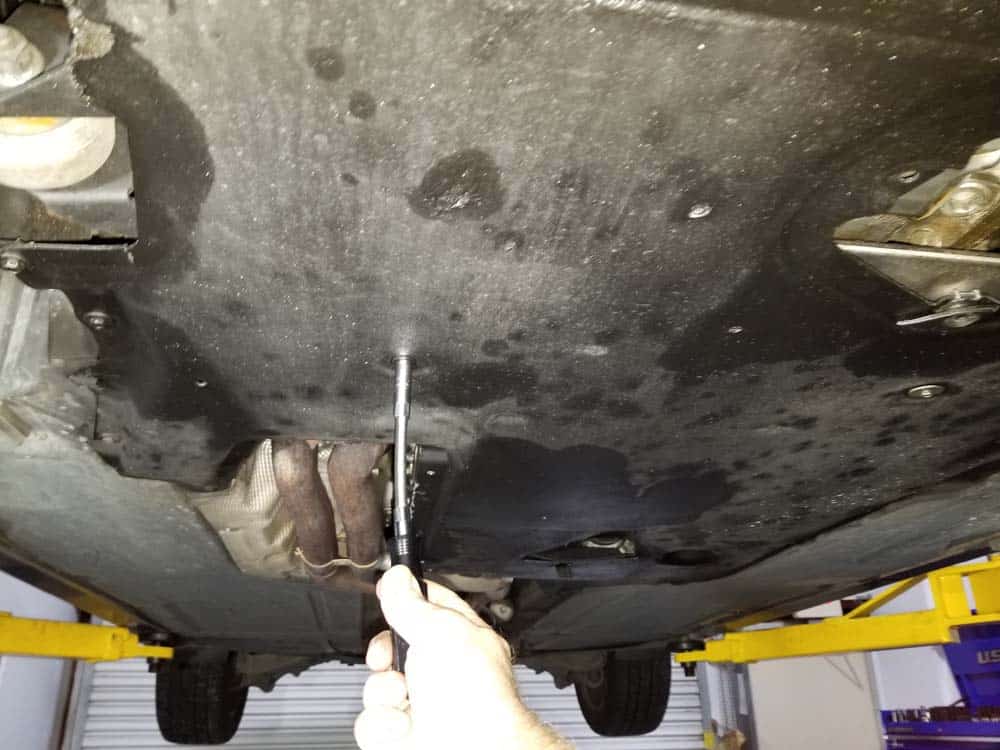
- Remove the reinforcement plate. It is held in place with six 16mm bolts.
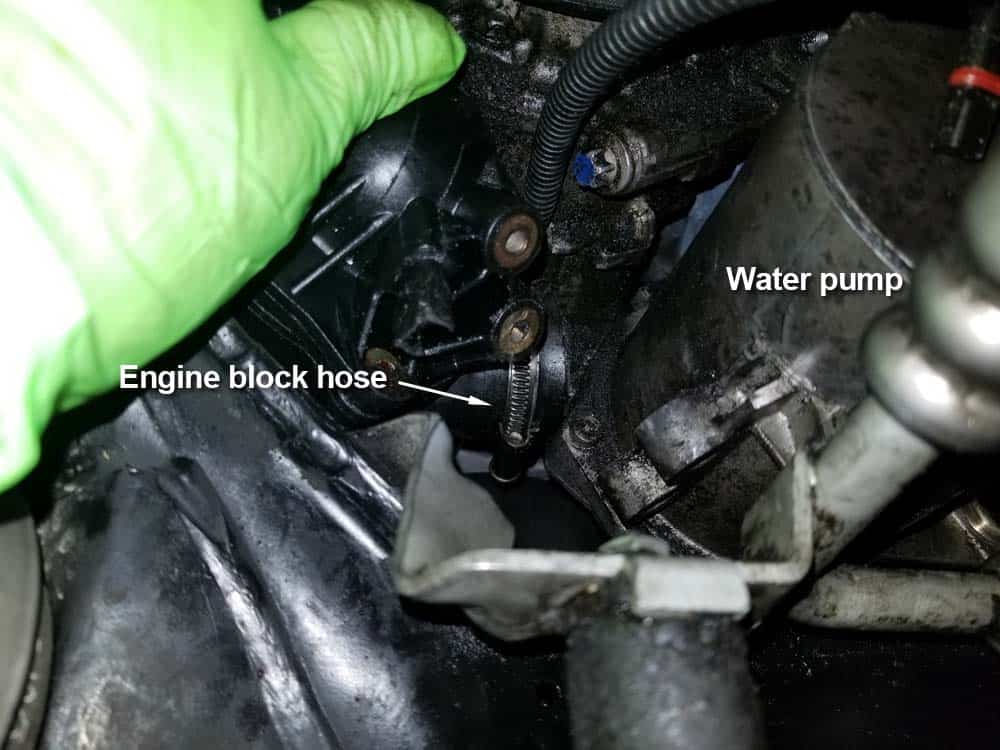
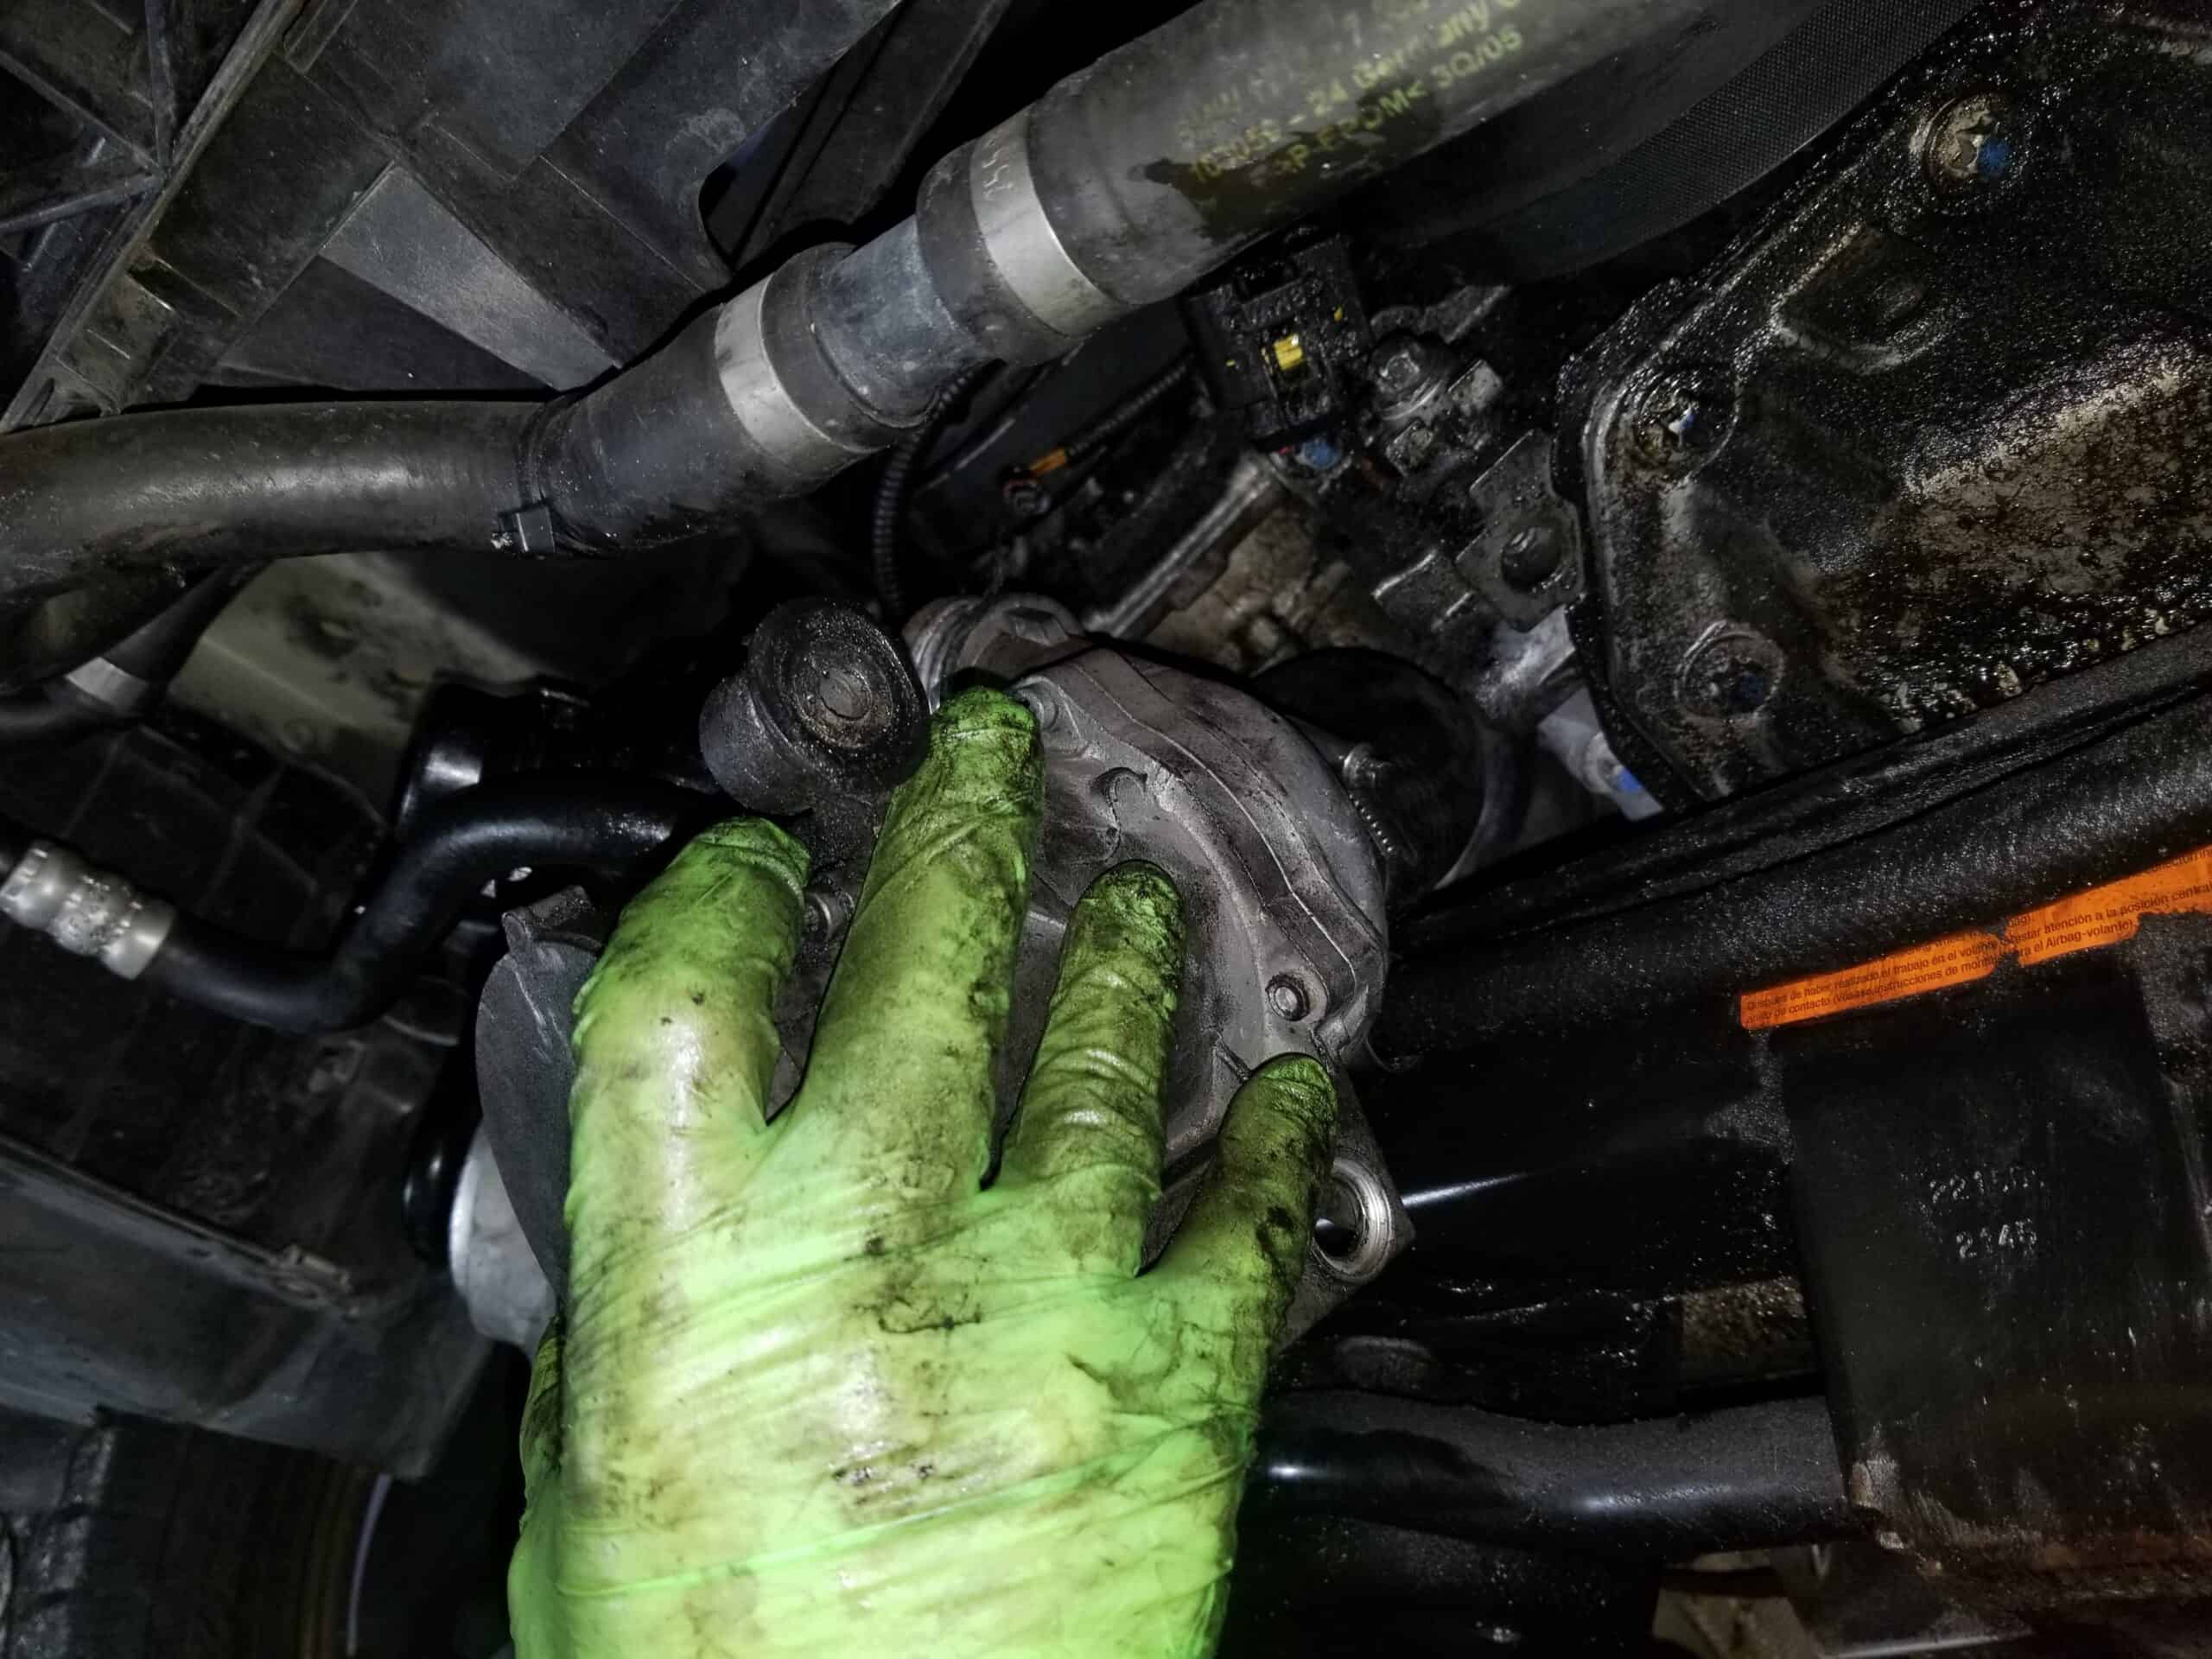
- Visually locate the the back of the water pump and the engine block coolant hose. You may have to put your hand up inside the engine to move the water pump so you have clear access to the hose clamp.
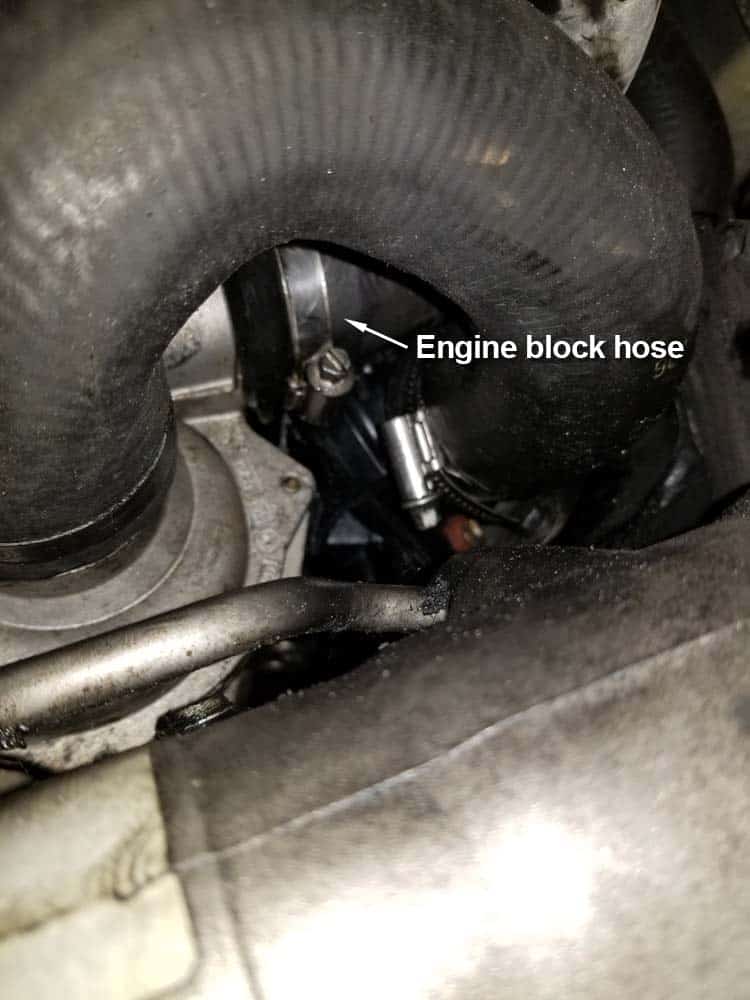
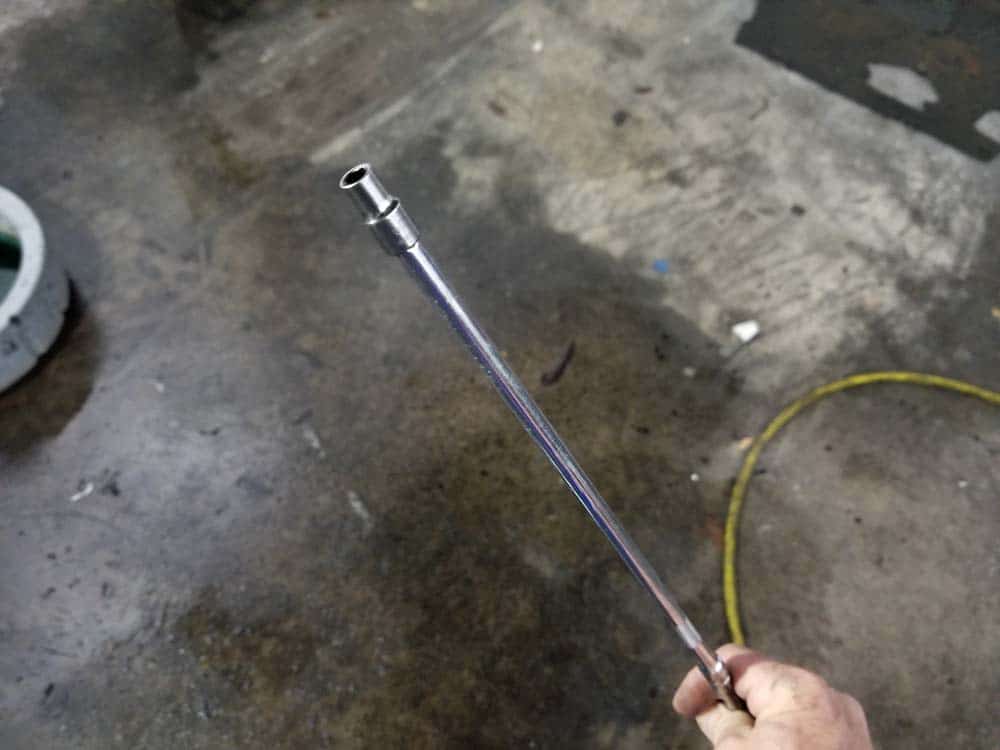
- Use a long extension with a socket to loosen the engine block coolant hose clamp (avoid using a flat blade screwdriver...they tend to slip). When the clamp is loose, move back to the front of the engine.
- Grasp the water pump and pull it from the engine. The engine block coolant hose will slip off of the water pump when you pull it free.
- Remove the thermostat hose from the back of the water pump. Remove the water pump from the vehicle.
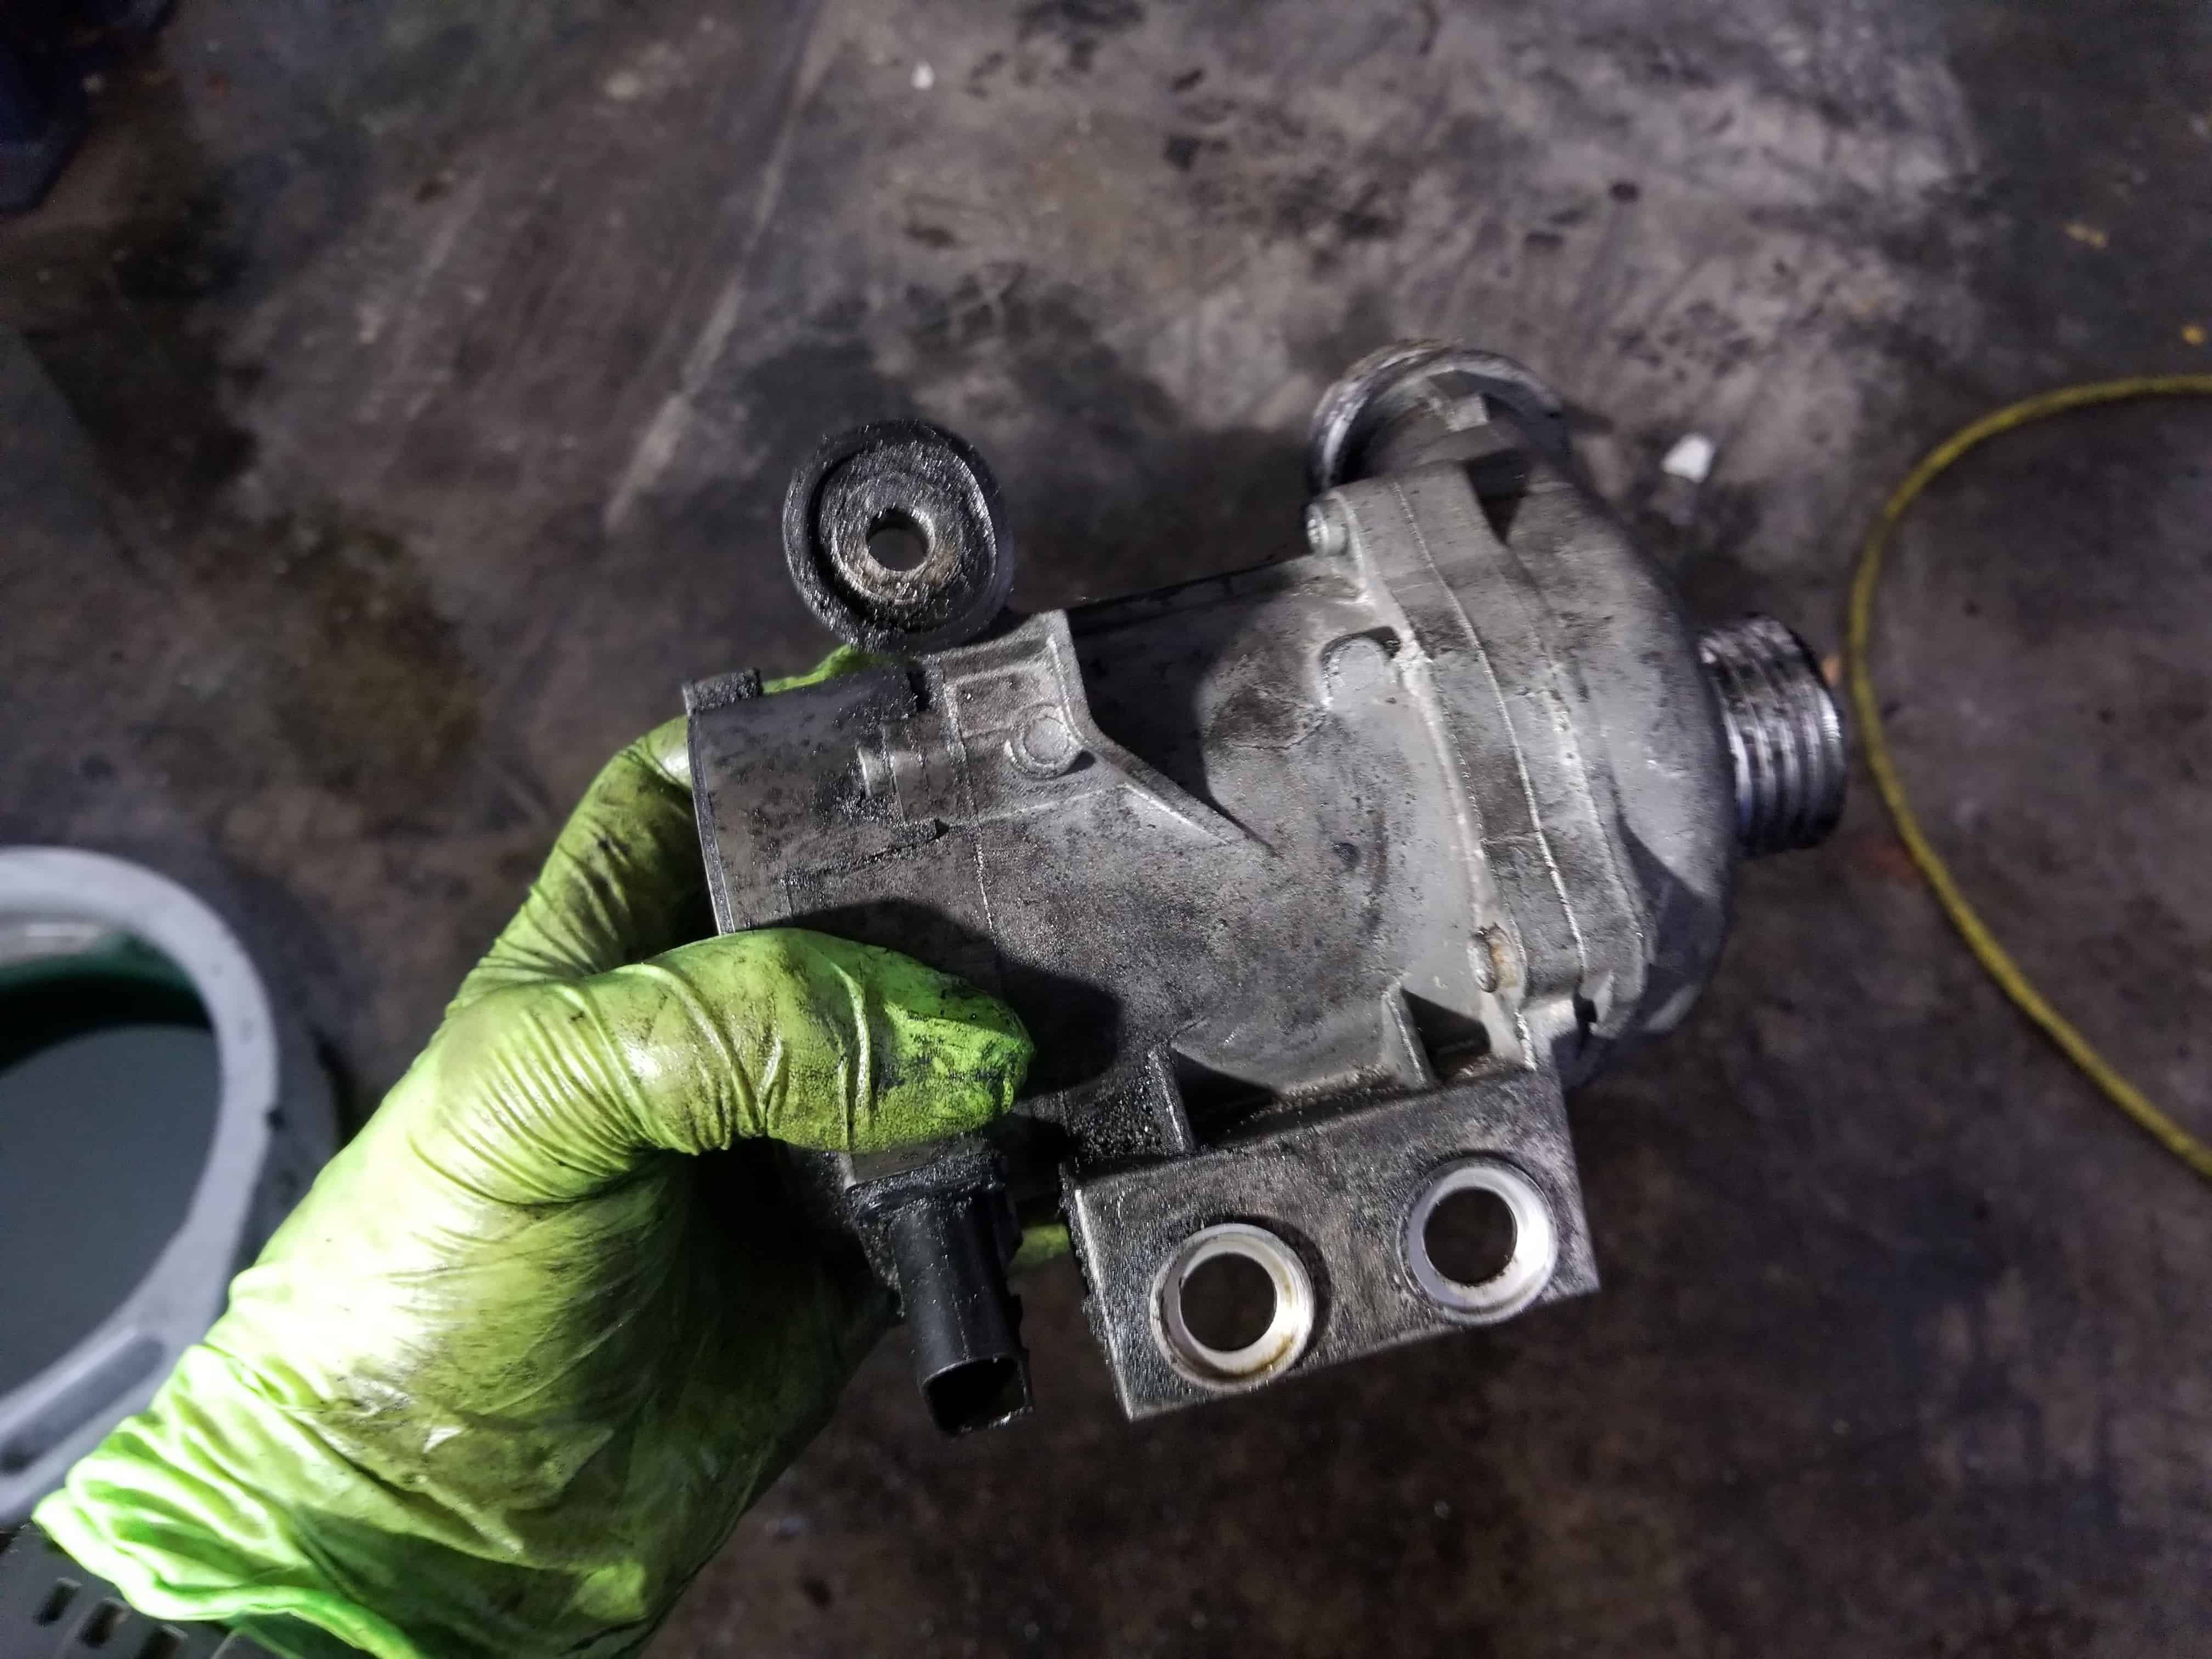
- Grasp the thermostat and remove it from the vehicle.
Section 3 - Final Reassembly
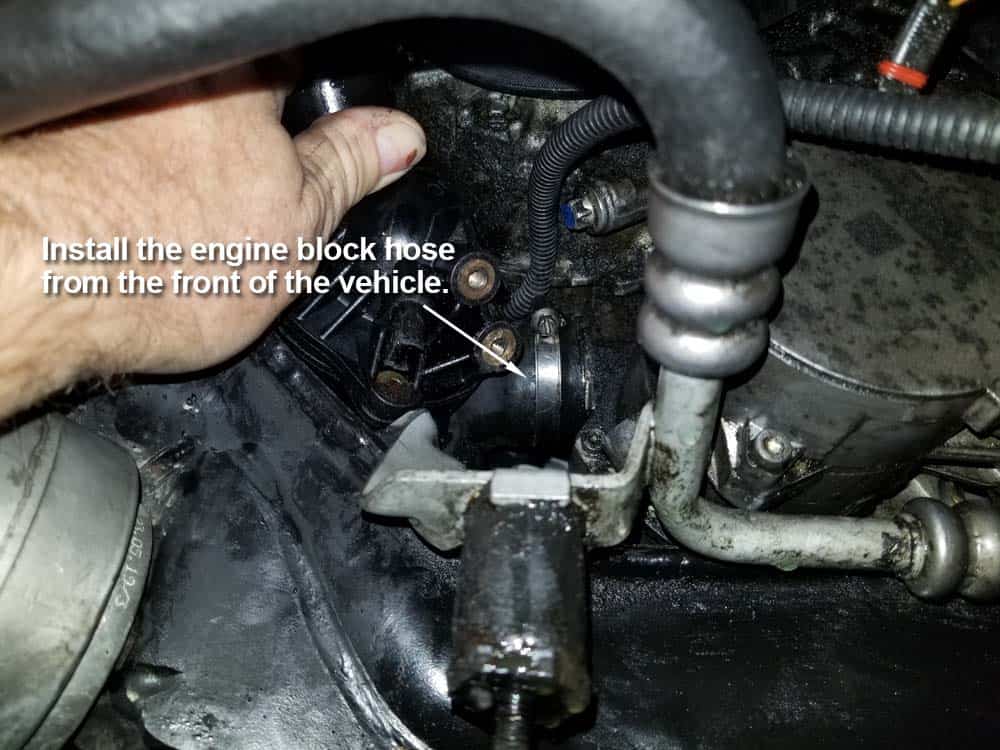
Reassembly of the vehicle is fairly straightforward with one exception: the engine block coolant line should be attached to the water pump from the front of the engine. Attempting to reconnect the engine block coolant line to the water pump from underneath the car is completely unnecessary and frankly a waste of time and energy. Please see step 5 in the reassembly checklist below for more information.BMW E60 Thermostat Reinstallation Checklist
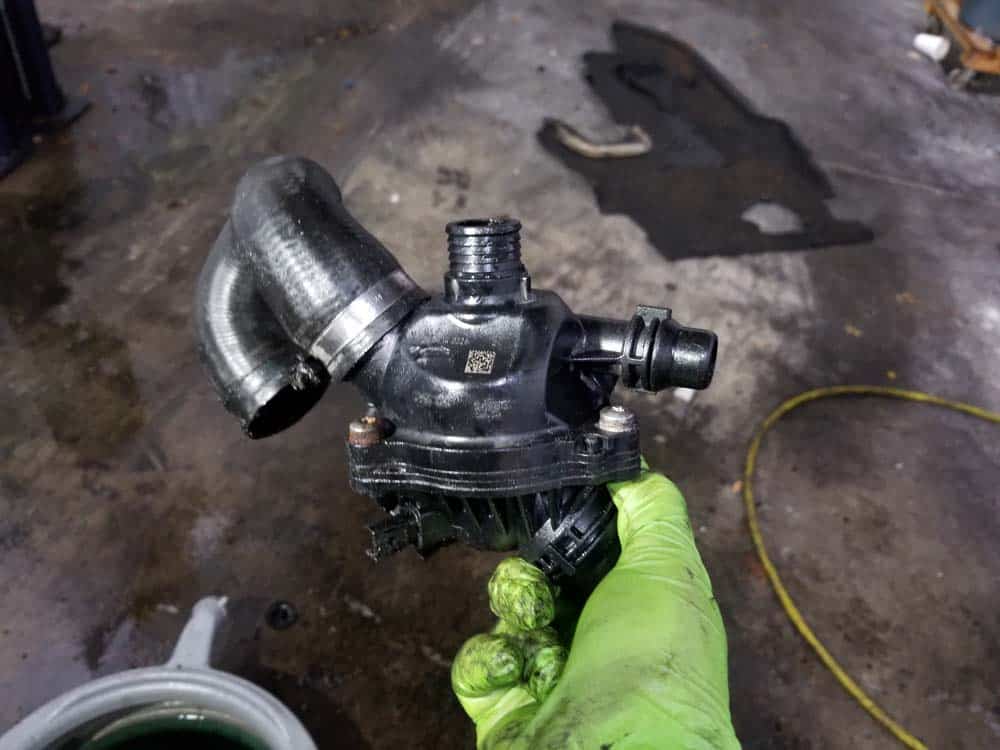
***The following steps were performed on a 2006 530xi touring wagon...other models may vary.- Attach the thermostat/water pump hose to the back of the new thermostat. Make sure it is oriented correctly. Tighten its hose clamp.
- Install the new thermostat back into the engine.
- Attach the thermostat/water pump hose to the back of the water pump. Tighten the hose clamp.
- Insert the water pump back into the engine.
- Attach the engine block coolant line to the back of the water pump and tighten its hose clamp (see our discussion at the beginning of this section concerning this).
- Attach the cylinder head coolant line back to the thermostat and tighten its hose clamp.
- Plug the water pump electrical connector back in.
- Line the water pump up with the engine block and install its three mounting bolts. Torque the bolts to 25 Nm (18 ft-lb).
- Tighten the power steering line bracket bolt until snug.
- Line the thermostat up with water pump and install its two mounting bolts. Torque the mounting bolts to 6 Nm (4.5 ft-lb).
- Reattach the heater return hose to the side of the thermostat. Make sure you hear it click into place.
- Reinstall the coolant return hose to the front of the thermostat. Make sure you hear it click into place
- Plug the thermostat electrical connector back in.
- Replace the power steering expansion hose back on its bracket and tighten its mounting nut until snug.
- If you have to remove the reinforcement plate under the vehicle, reinstall it and torque its six mounting bolts to 50 Nm (37 ft-lb).
- If you had to remove the rear belly pan reinstall it.
- Install the front belly pan.
- Proceed to Section 4 below for instructions on refilling your engine coolant and purging the system of air.
Section 4 - Refilling and Bleeding the Coolant System
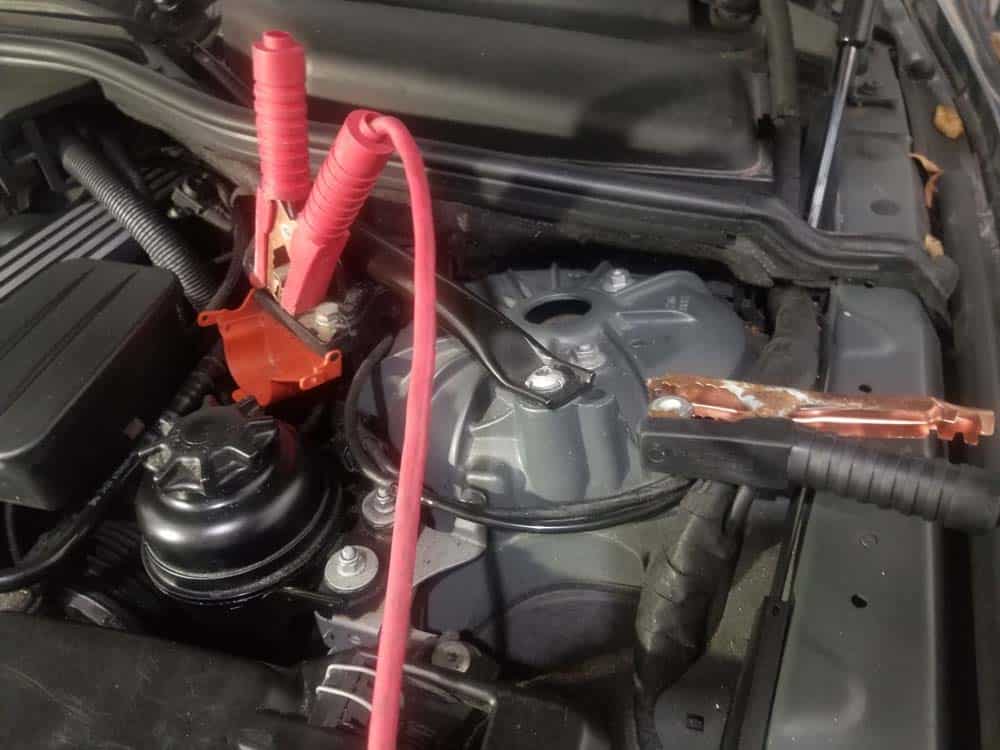
Your BMW E60 5 series has an automated bleeding process to purge air from the cooling system. The automated process is controlled by the engine control unit and lasts about 12 minutes.- A battery charger should be attached to your vehicle while refilling the system and purging it of air. The reason for this is you will be drawing current from the battery for about 15-20 minutes without the engine running.
- Attach a battery charger to the battery terminals in the engine compartment as shown below and put it on its lowest setting. NEVER attach a battery charger directly to the battery itself in the rear of the vehicle...you could cause catastrophic damage to sensitive electronics if you do.
- First, the auxiliary water pump needs to be activated to circulate engine coolant through the system while you fill it. The pump is activated when the vehicle's heat is set to its maximum setting and the blower is at its lowest setting.
- Start by applying the brake and turning on the ignition.
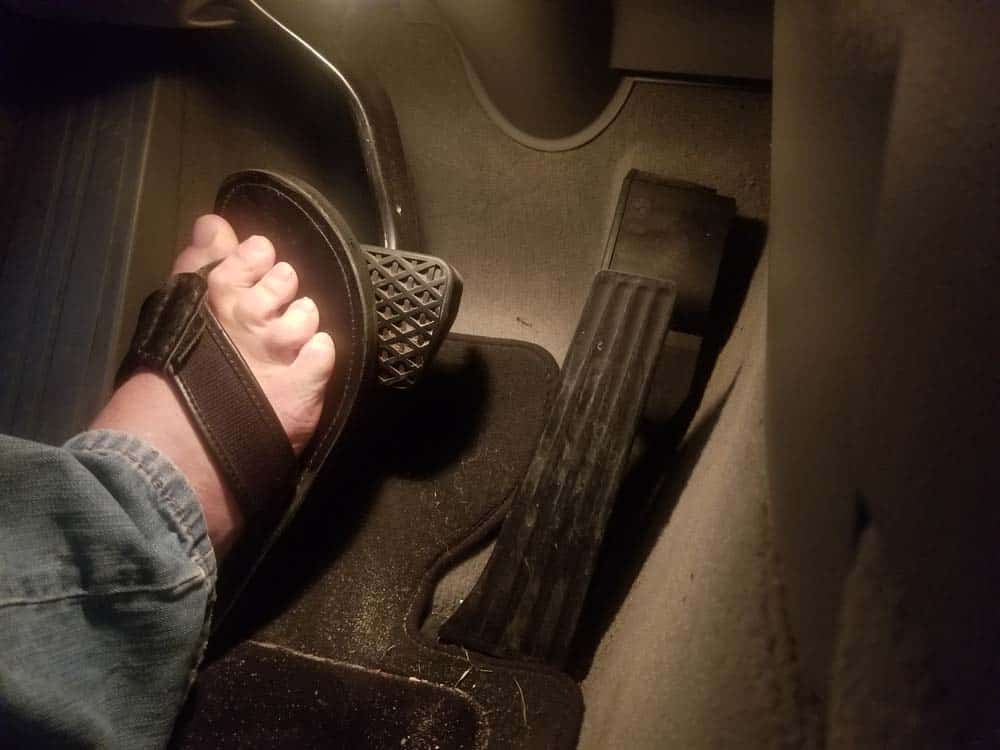
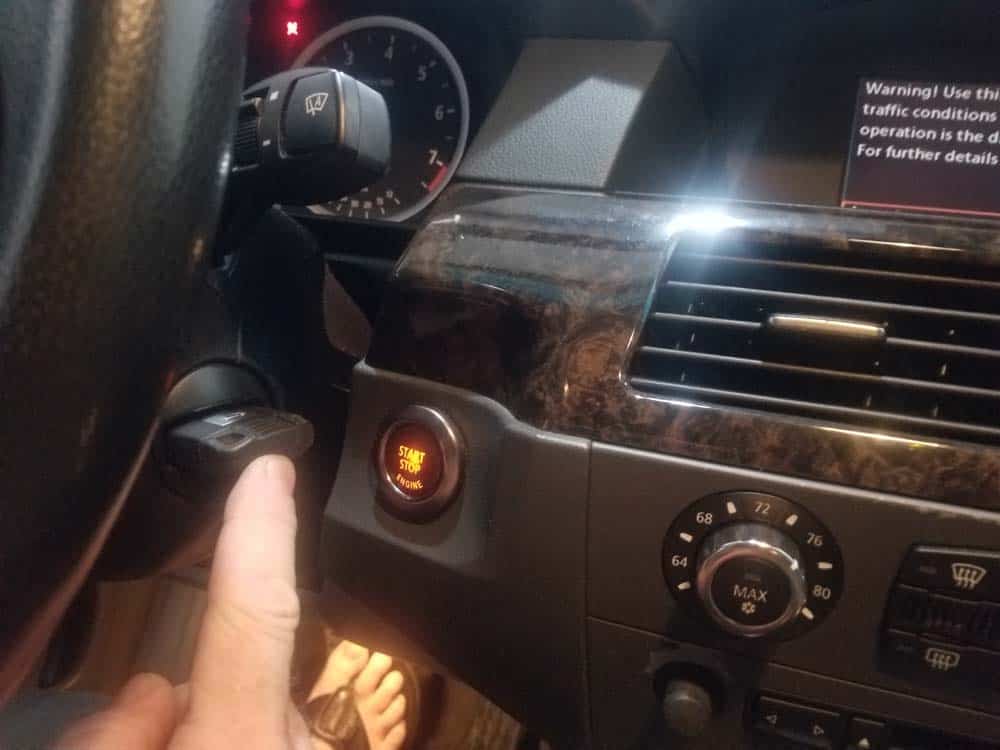
- Release the brake pedal and push the engine start button (do not push the engine start button with the brake pedal depressed or you will start the vehicle). This will allow you to now change the HVAC settings on the dashboard and in the iDrive.
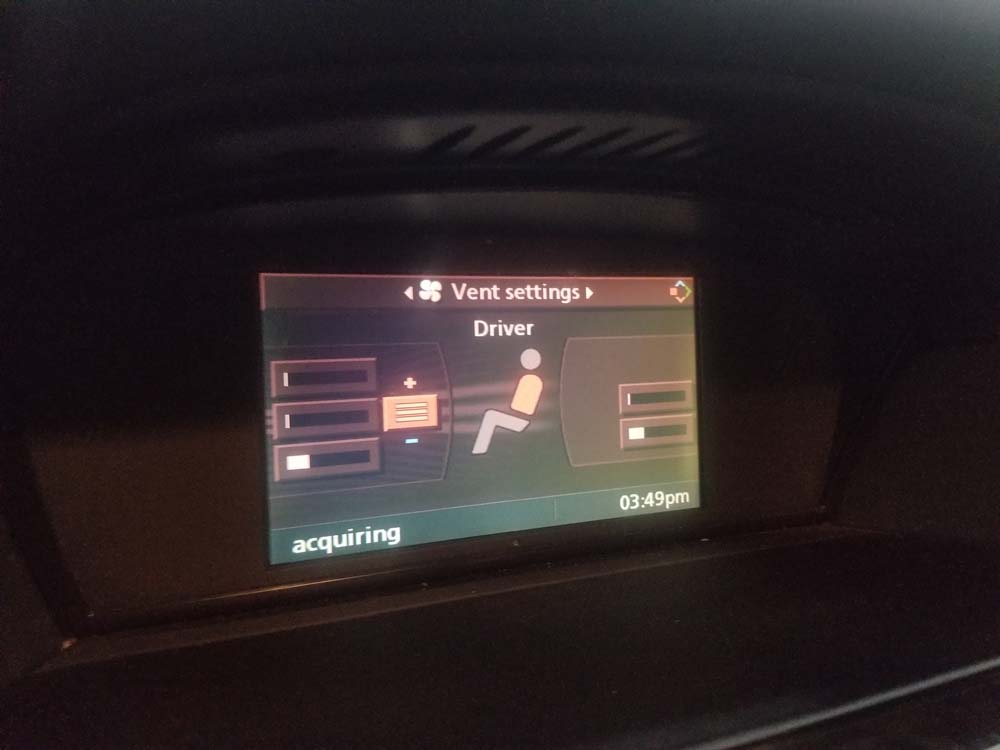
- In the iDrive, set the driver's side temperature to full heat.
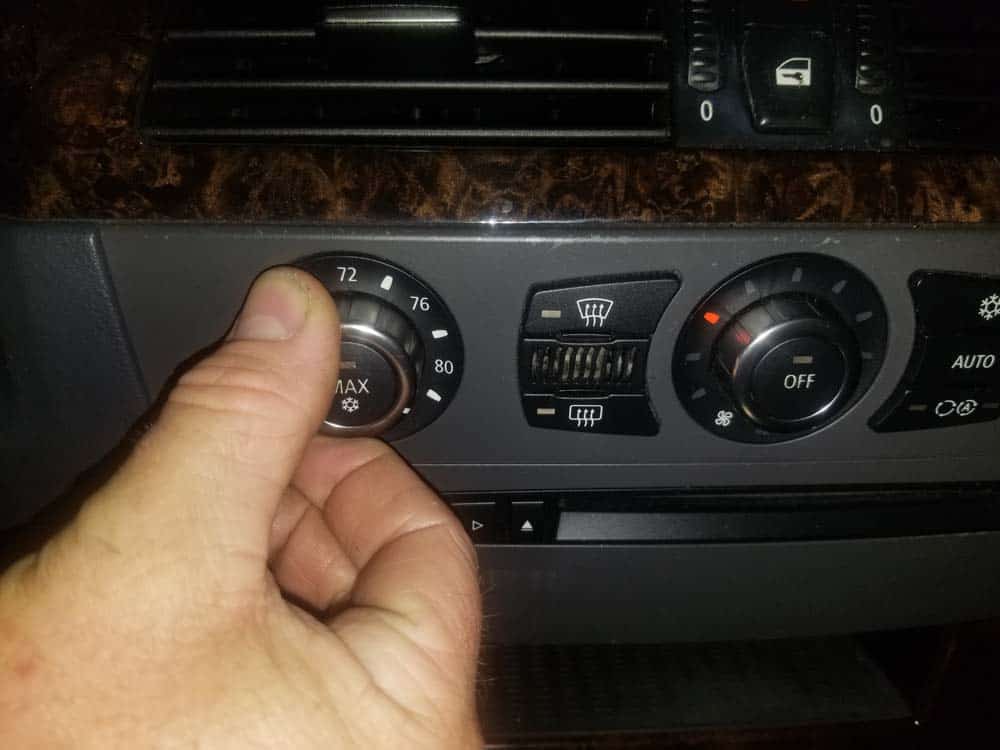
- On the dashboard, turn the driver's side temperature control to full heat.
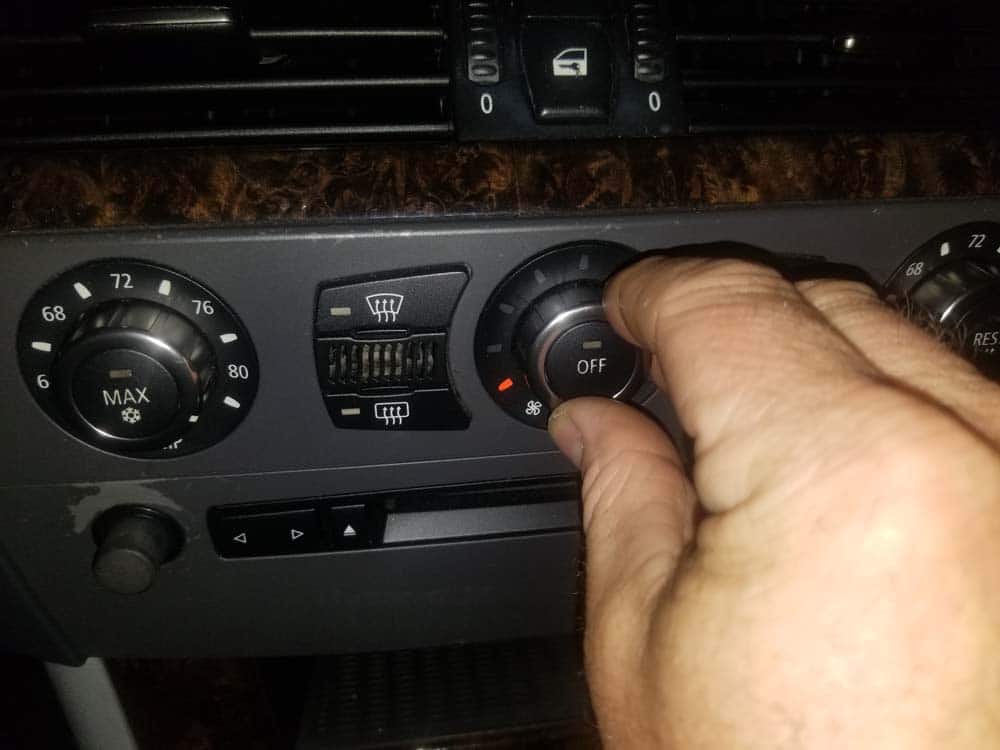
- Set the blower speed to low.
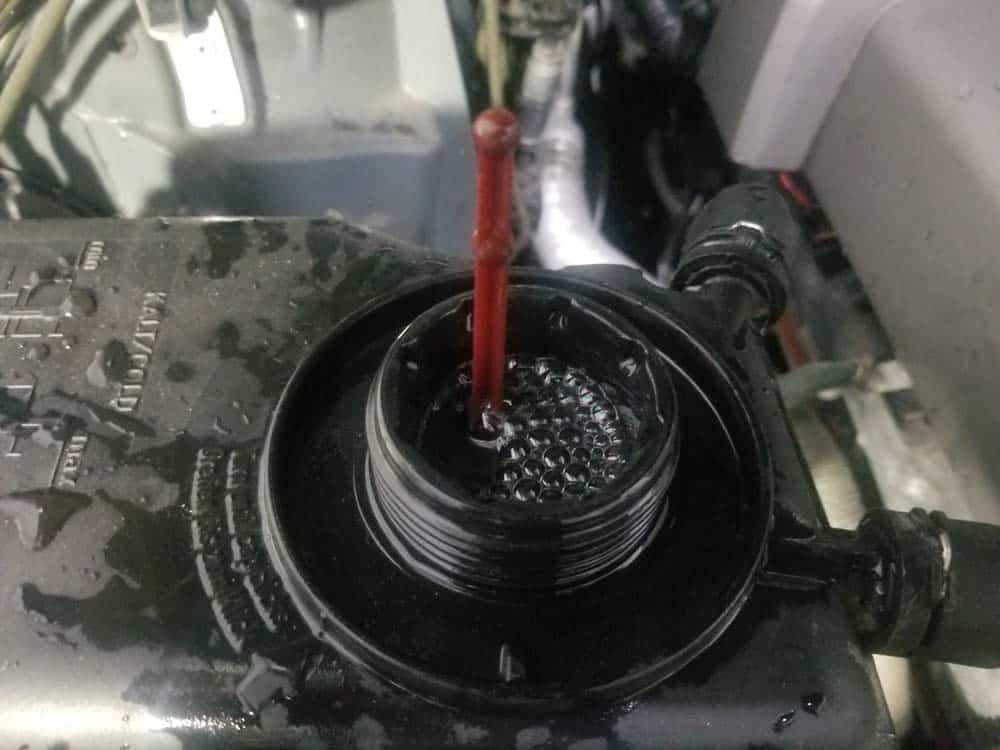
- Next, pour a 50/50 mixture of Genuine BMW Antifreeze/Coolant mixed with distilled water into the expansion tank until it is completely full. Wait for the level to go down, then refill it again. Repeat this procedure until the level no longer drops and the expansion tank is full. It should take about 1 gallon to refill the system.
- Put the cap securely back on the expansion tank.

- Move back to the drivers seat of the vehicle. Turn the vehicle off. The vehicle must be turned off before proceeding to the next step.
- Now the coolant must be purged of any air (also know as the bleeding process) . Removing any air pockets from the coolant prevents the engine from possibly overheating. The N52 engine in your 5 series vehicle has an automated bleeding process that is controlled by the electric water pump.
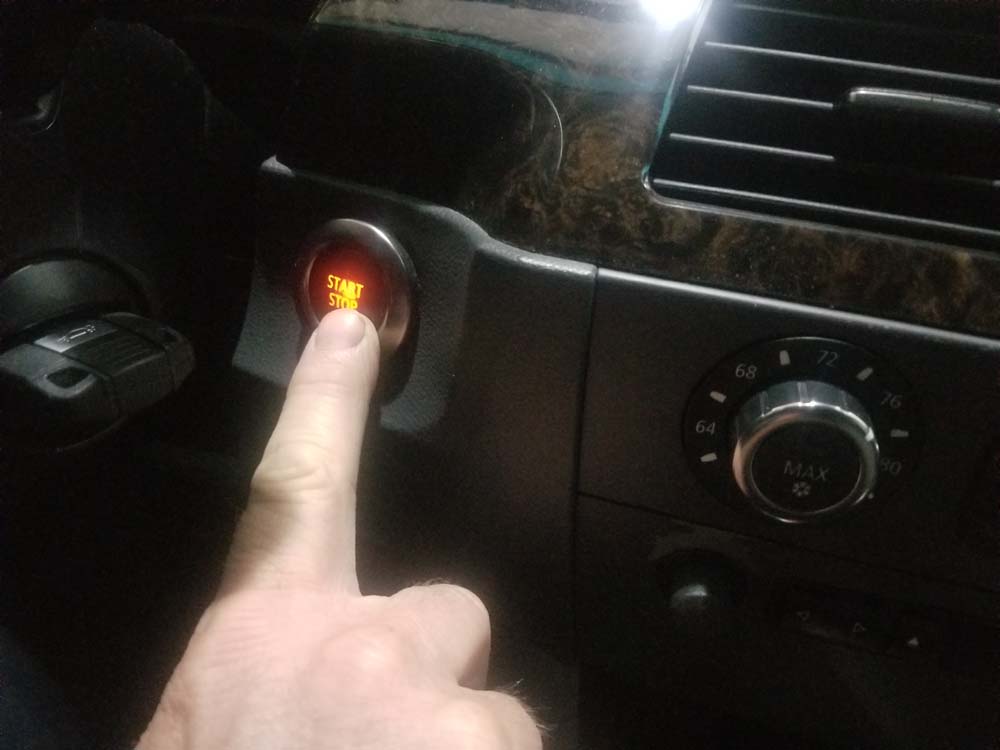
- Begin by turning the ignition back on, releasing the brake pedal and pushing the start button again (steps 2 and 3 above).
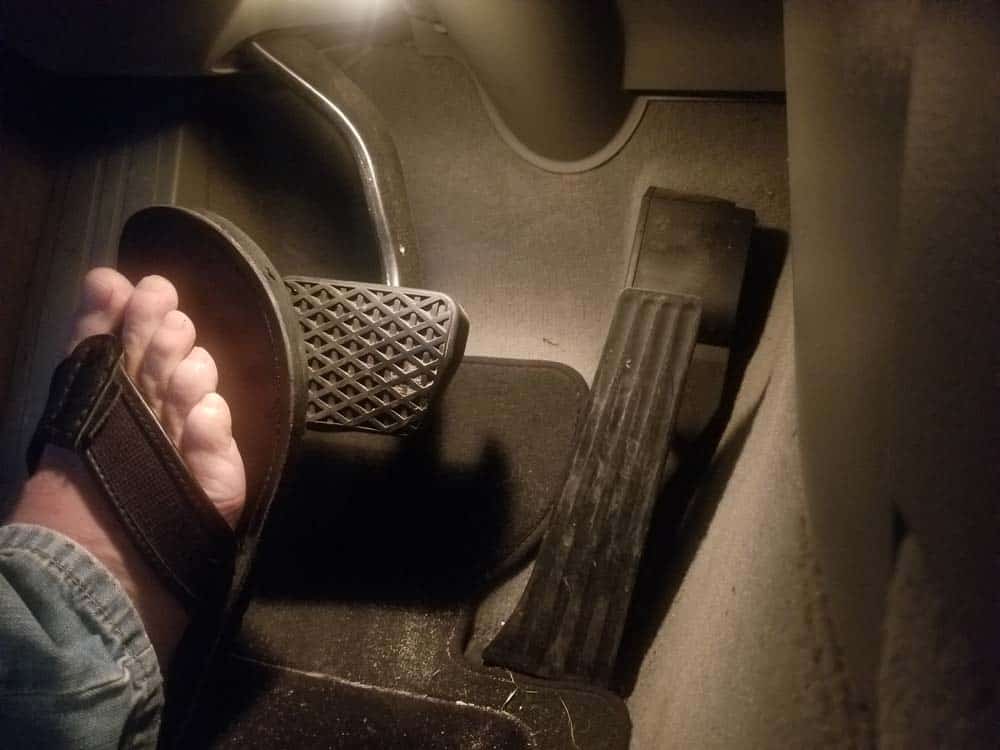
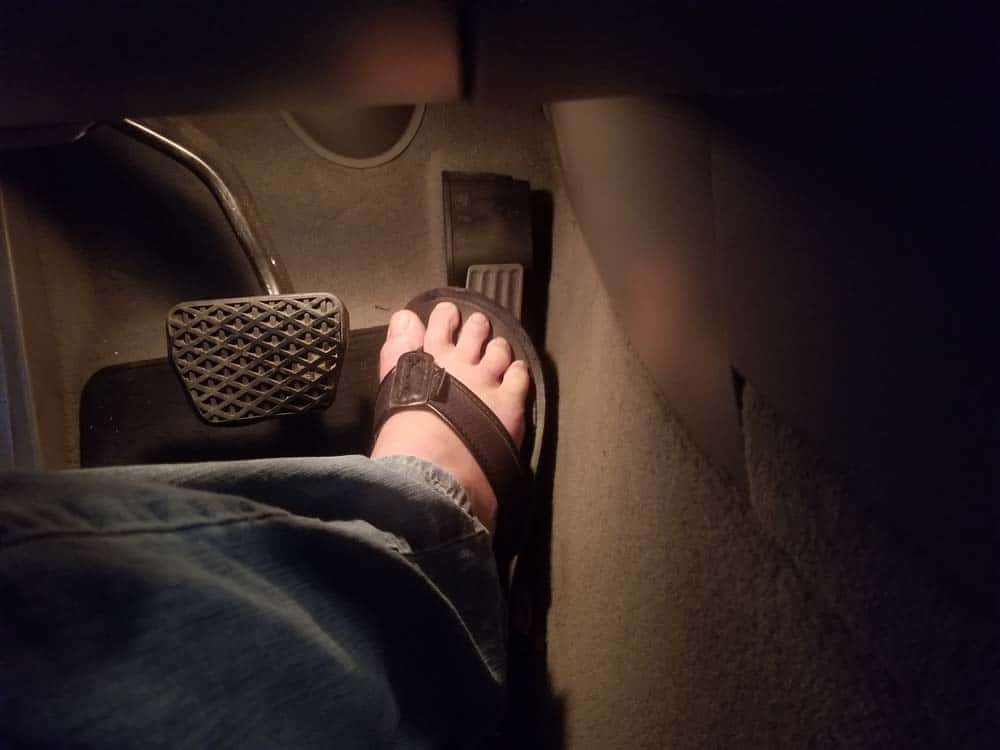
- Push the accelerator down with your foot for 12 seconds. This will activate the water pump and commence the automated coolant bleeding process.
- Move to the front of the vehicle and listen for any sounds at the front right side of the engine. You should hear the faint sound of the water pump and coolant being circulated through the system. If you cannot hear the water or the pump then remove the expansion tank cap, visually check that the water is circulating, then quickly replace the cap.
- The automated bleeding process lasts for approximately 12 minutes. When it is finished, turn the vehicle off and disconnect the battery charger.
- Open the coolant reservoir and top off if necessary.
BMW E60 Thermostat Replacement Finished