
Affiliate link disclosure – The BMW Repair Guide uses affiliate links in their site. For more information on affiliate links, please click here.
Repair Summary
This article gives detailed instructions on replacing the fuel injectors in a BMW E46 3 series vehicle. Even though we used a 2000 323i to perform this repair, this article can be applied to any 1998-2006 3 series vehicle with minor modifications to the repair steps.
See all vehicles this article applies to
E46 3 Series 325ti
E46 3 Series 318td
E46 3 Series 320td
E46 3 Series 318ti
E46 3 Series 330xi
E46 3 Series 330i
E46 3 Series 330xd
E46 3 Series 330d
E46 3 Series 316ti
E46 3 Series 328i
E46 3 Series 325xi
E46 3 Series 325i
E46 3 Series 320i
E46 3 Series 323i
E46 3 Series 320d
E46 3 Series 318i
E46 3 Series 318d
E46 3 Series 316i
E46 3 Series M3 CSL
E46 3 Series M3
E46 3 Series 330Ci
E46 3 Series 330Cd
E46 3 Series 325Ci
E46 3 Series 323Ci
E46 3 Series 320Ci
E46 3 Series 320Cd
E46 3 Series 318Ci
E46 3 Series 328Ci
E46 3 Series 316Ci
E46 3 Series 323i 2.4
E46 3 Series 316i 1.9
E46 3 Series 316i 1.6
A BMW E46 fuel injector replacement can help cure a rough idle and overall poor engine performance.
No matter how much we pamper our BMWs, the sheer volume of contaminates being forced into our automobiles will, unfortunately, catch up to us. When we consider that an average BMW E46 3 series that has been driven 100,000 miles consumes approximately 4,000 gallons of gasoline, we start to realize the enormous quantity of fuel that is being pumped into the engine.
It is a known fact that just about every gallon of fuel we dispense into our vehicles is contaminated to a certain degree. The most common contaminants are water and particulate matter (dirt and rust). Water is the number one enemy of fuel systems - it causes corrosion in the fuel tank and metal lines which can eventually break loose and get caught in the BMW E46's fuel filter and injectors. Dirt and rust in the gasoline can also end up in the filter and fuel rail, clogging injectors and causing poor performance.
The BMW E46 fuel injectors are simple electronically controlled valves that when energized open and close a needle plunger, allowing pressurized fuel to be sprayed into the intake manifold where it is mixed with air for combustion. They are precisely regulated by the engine control module (DME) - any conditions that keep them from performing normally (clogged nozzles from contaminates, carbon build-up or mechanical failure) can severely affect the engine performance.
Even though water and particulate contamination are the most prominent sources of BMW fuel injector failure, there are also other causes. Fuel restricting hydrocarbon deposits (or carbonization) can build up on the tip of the fuel injector; this is very common in BMW engines that use "cheap" low octane fuel that does not combust evenly. Fuel injectors can also succumb to mechanical failure. As we always say here at the Repair Guide "no mechanical part lasts forever"...especially those in the engine compartment subjected to continual heat and stress.
Symptoms of dirty, clogged, or mechanically failing BMW E46 fuel injectors are; rough idling, stalling out, poor acceleration, engine misfires and instrument cluster warning lights. Since these symptoms can also indicate other issues within your fuel system (including a faulty fuel pump or clogged fuel filter), the BMW Repair Guide recommends diagnosing your issue prior to replacing the injectors.
BMW 3 Series fuel injectors have a definitive service life, and although there is no specific maintenance schedule defined in the Service and Warranty Information for them, the BMW Repair Guide strongly recommends replacing them every 100,000 miles. A BMW E46 fuel injector replacement in the 1998-2006 3 series is actually a relatively simple procedure for any home mechanic with average ability and can save a very expensive trip to the dealership or local repair shop.


View the detailed parts diagram for this repair.
Includes detailed part diagrams, part numbers and links to purchase all of the required components needed to complete this repair.
Section 1 - Preparing for the BMW E46 Fuel Injector Replacement
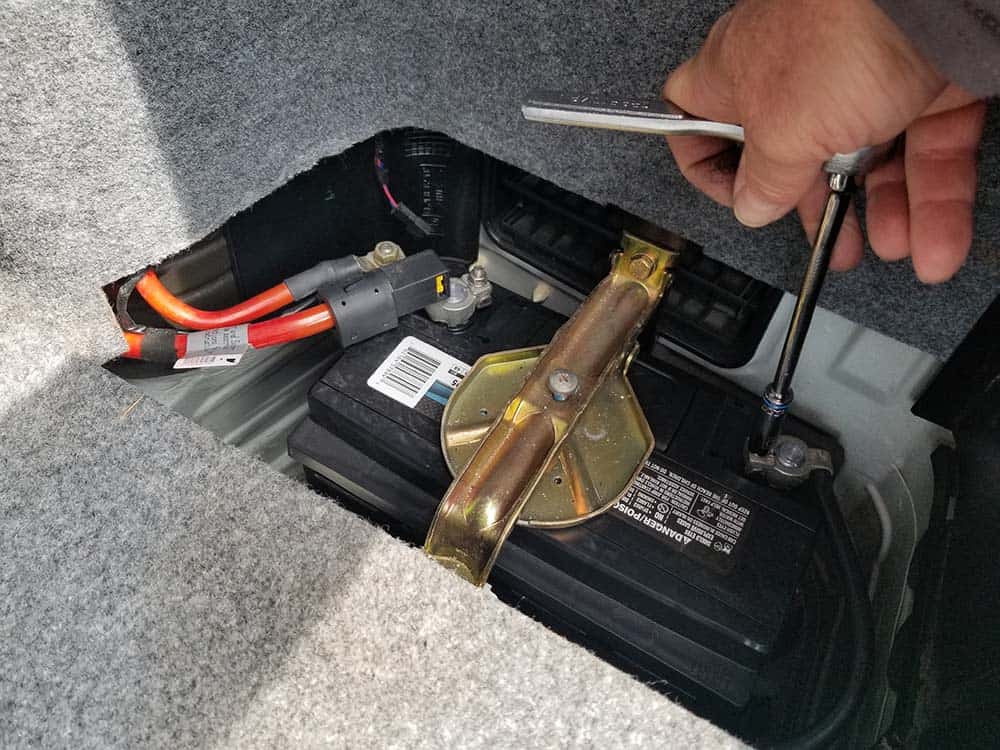
As discussed above, the fuel injectors in the BMW E46 3 series are located on the top of the intake manifold underneath the fuel rail. The microfilter housing will need to be removed in order to access the fuel injectors.- Before starting this repair you must disconnect the negative terminal from your battery. Attempting work on your engine's electrical system without disconnecting the battery can cause catastrophic damage to sensitive electronics.
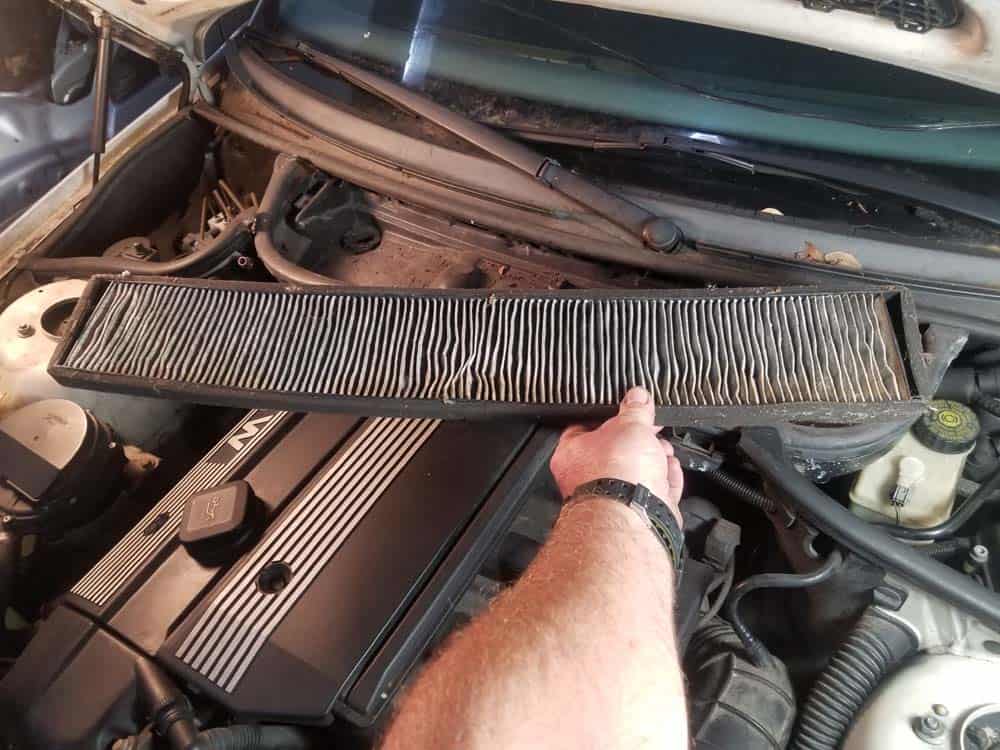
- Begin by removing the microfilter (cabin air filter) cover. It is held in place with three thumb screws. Remove the microfilter element.
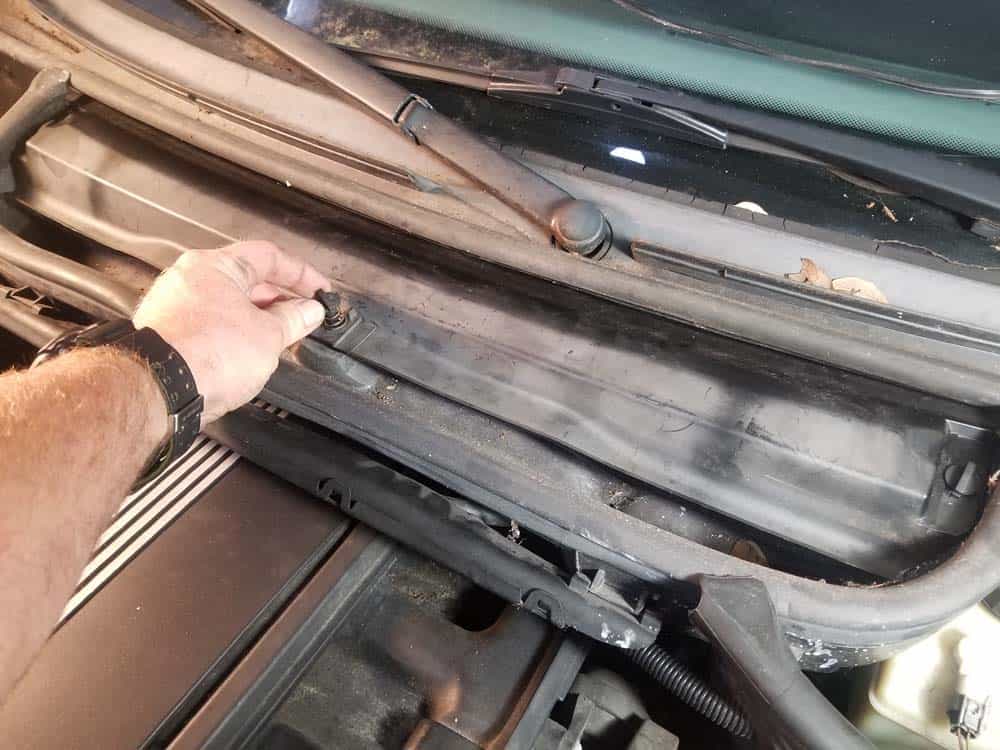
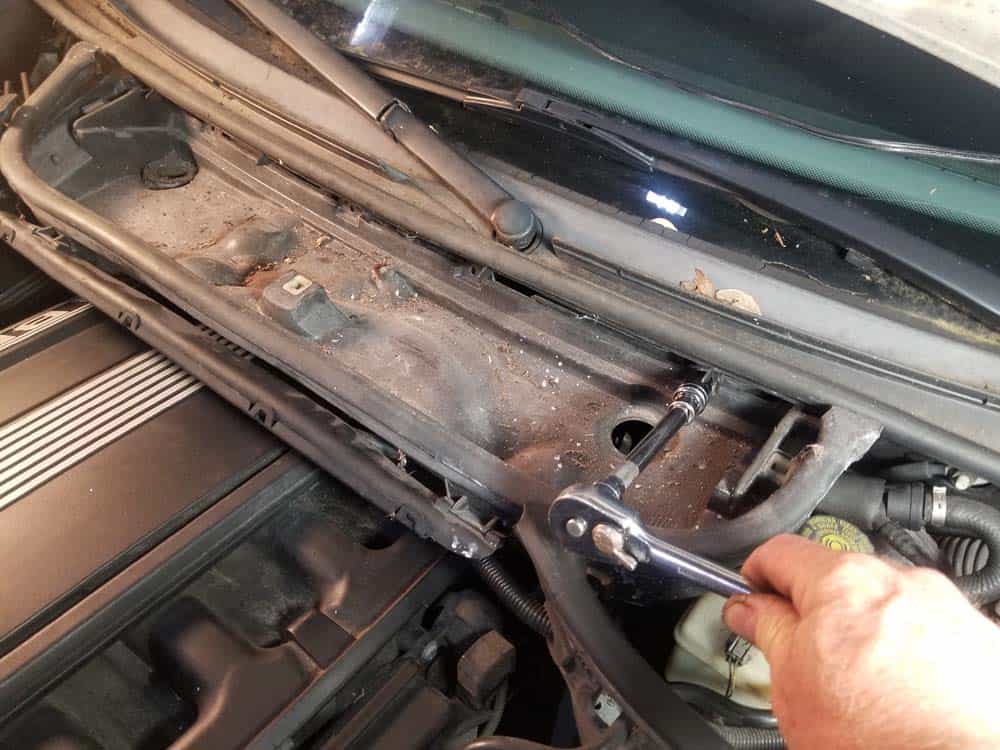
- Remove the four T30 torx screws securing the microfilter housing to the body of the vehicle.
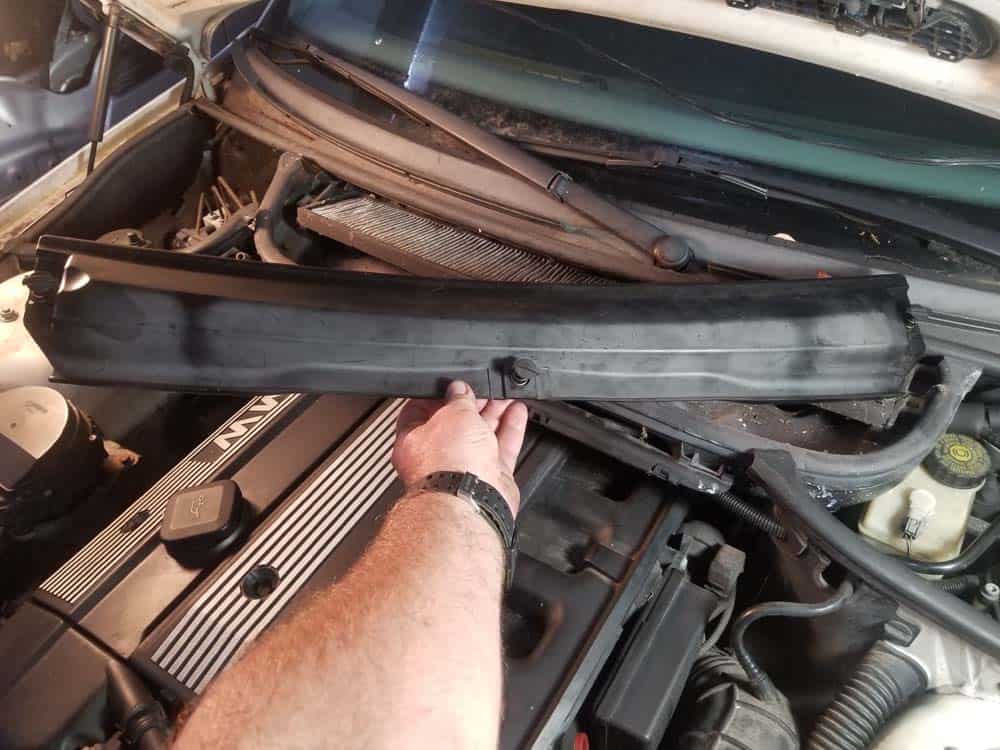
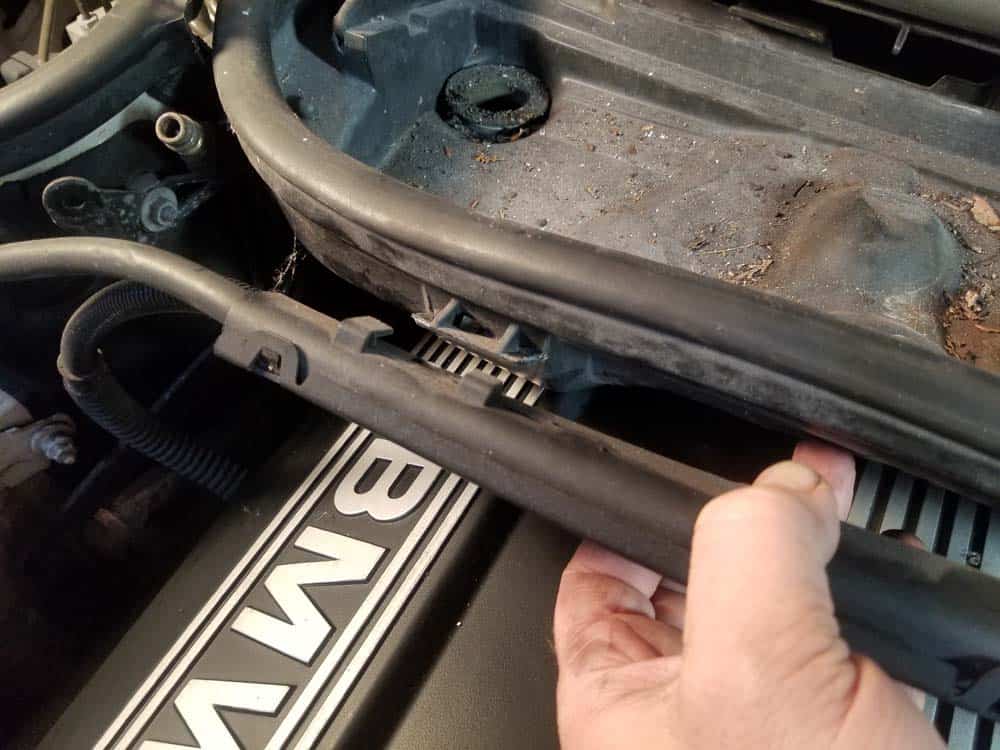
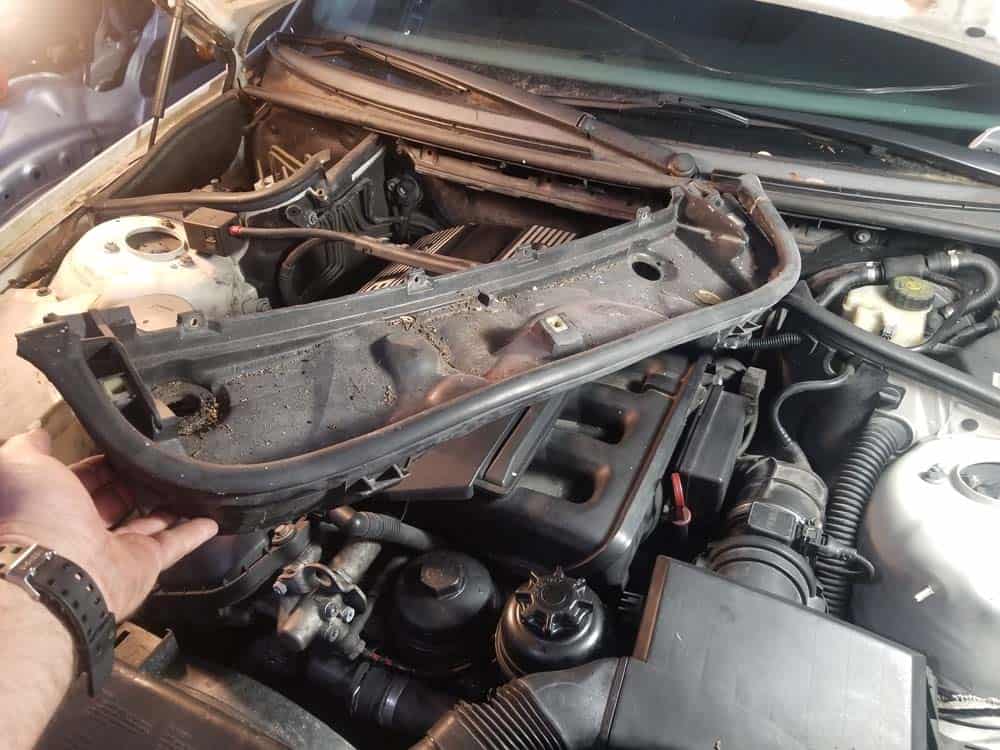
- Pull the battery cable guide free from the front of the microfilter housing. Remove the microfilter housing from the vehicle.
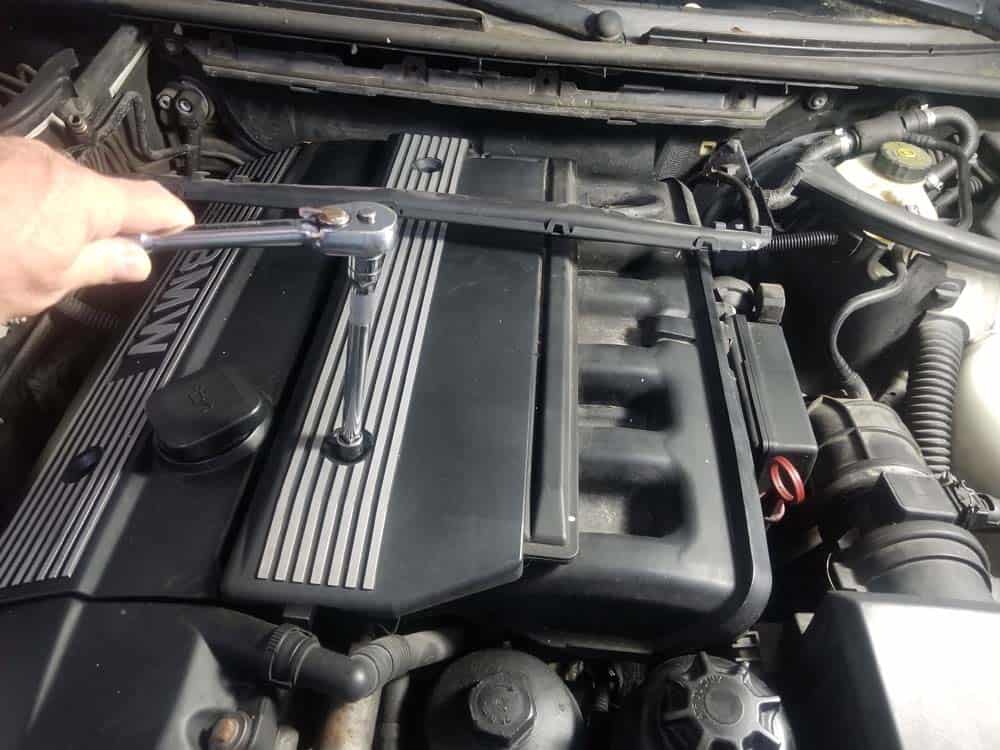
- Remove the two 10mm bolts securing the left engine cover to the fuel rail. Remove the engine cover from the vehicle.

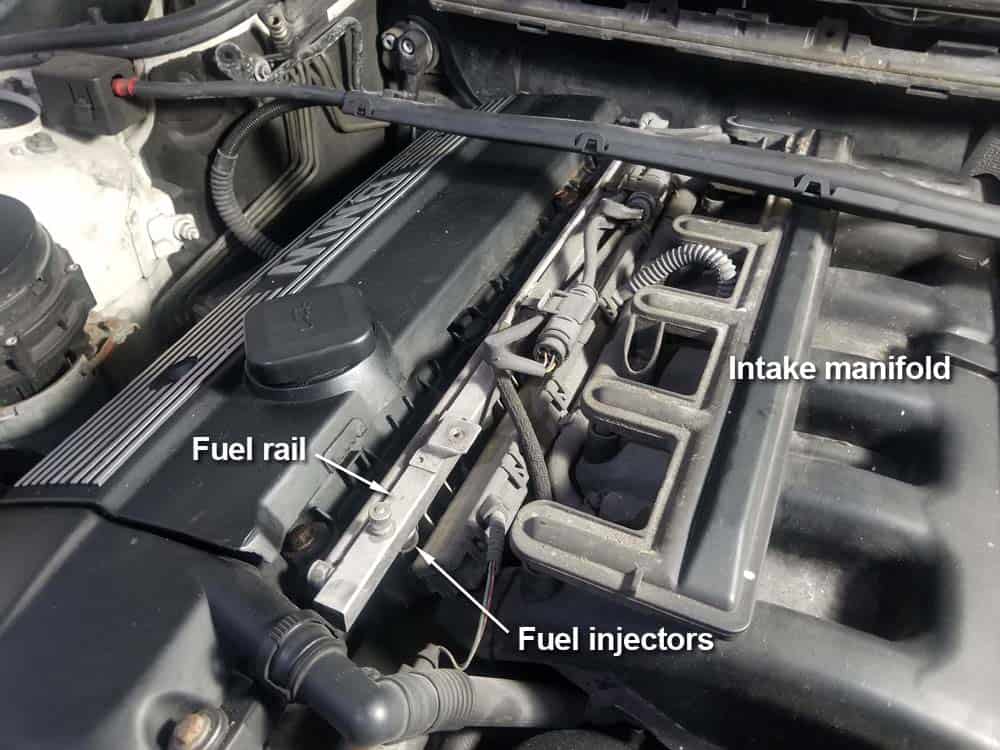
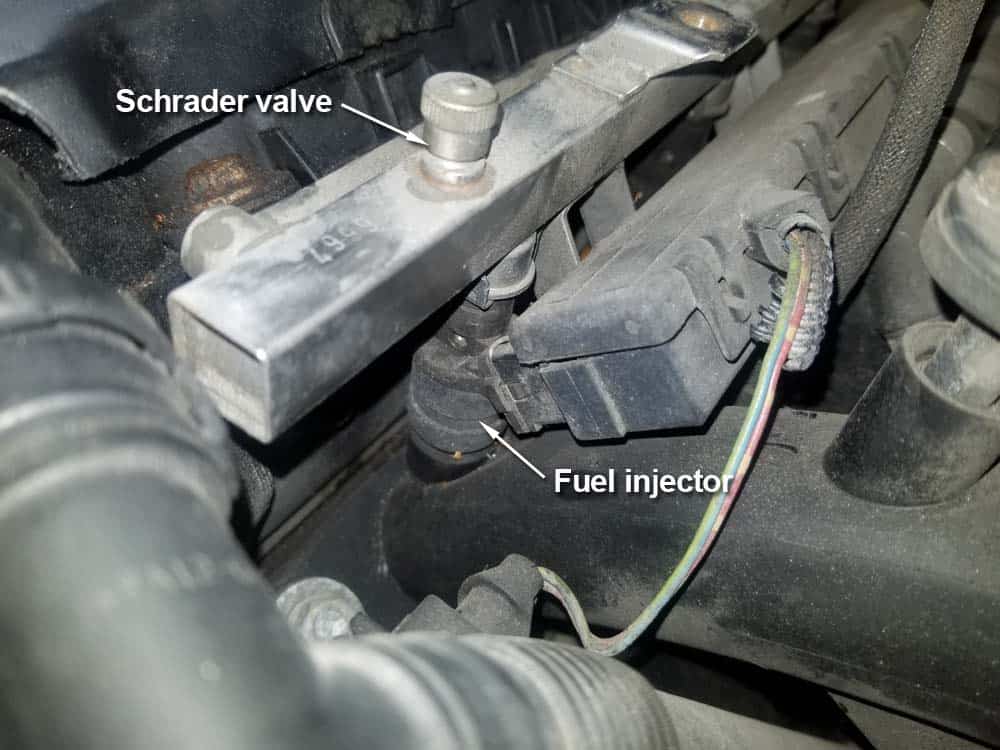
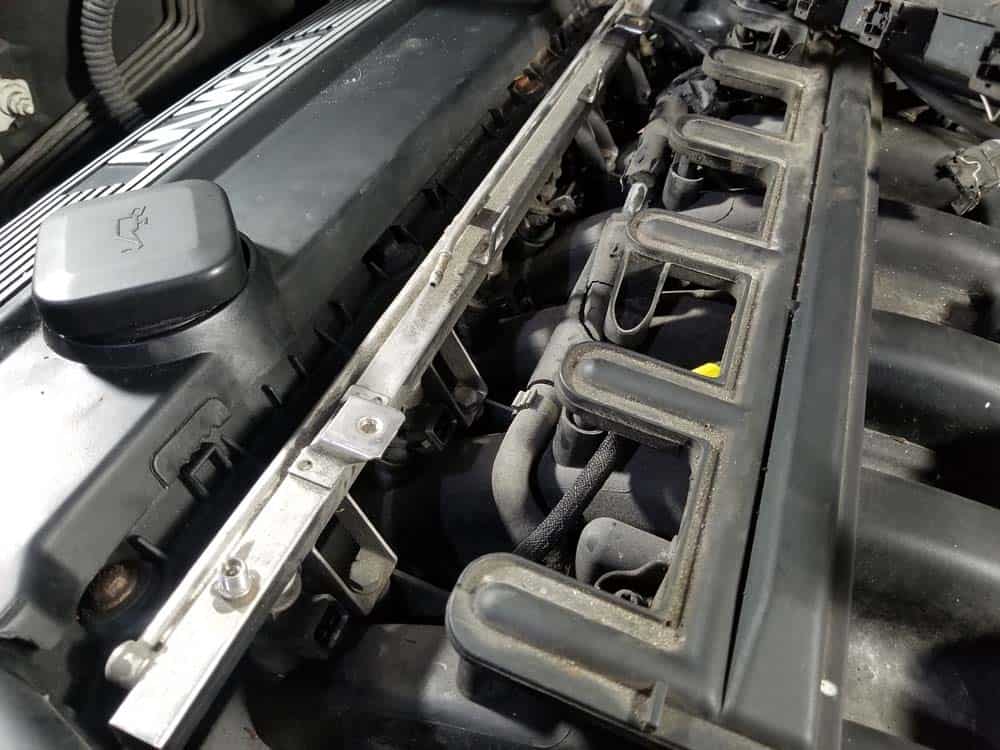
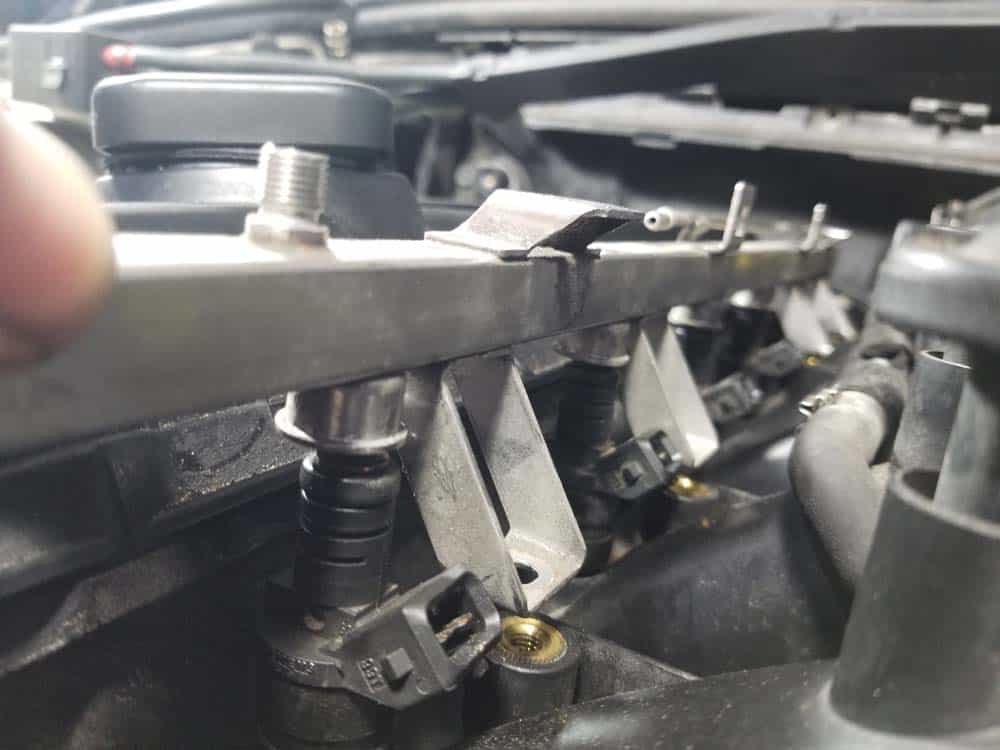
- Identify the fuel injectors. They are mounted to the bottom of the fuel rail as shown in the following image.
- To prepare the fuel rail for removal, begin by unclipping the oxygen sensor wires from the top of the fuel rail as shown below. Carefully stow them safely out of the work area. Also remove the oxygen sensor mounting clips from the fuel rail...this will give you extra space for removing the wiring harness in step 11 below.
- Disconnect the vacuum lines from the top of the fuel rail. We like to mark connections like these with high visibility tape so we don't miss them during reassembly.
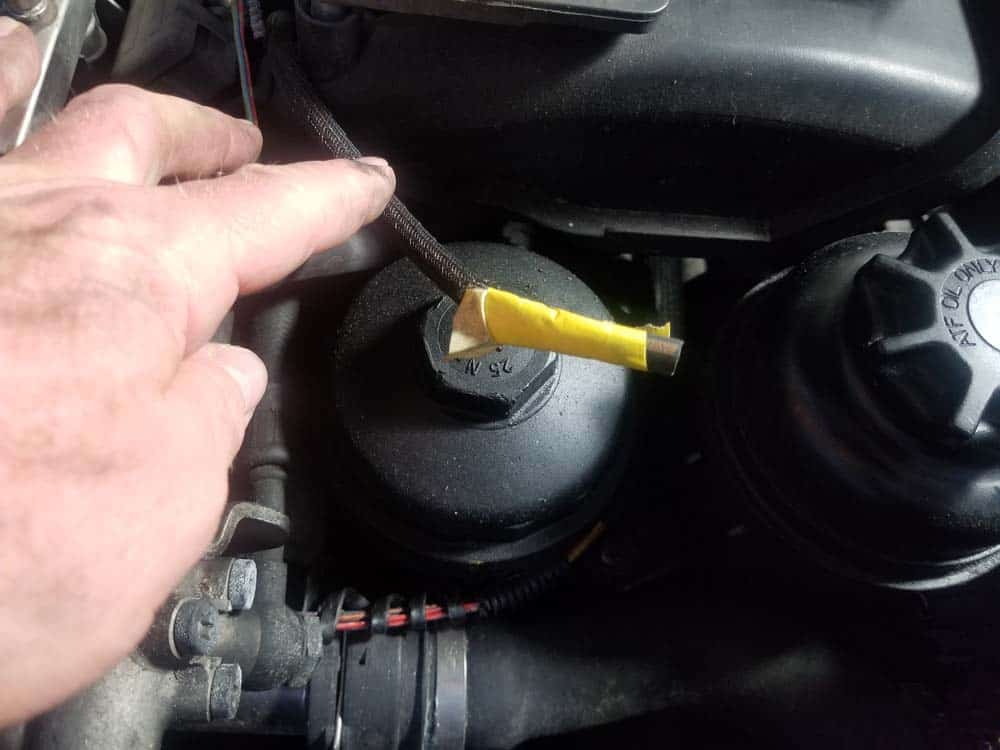
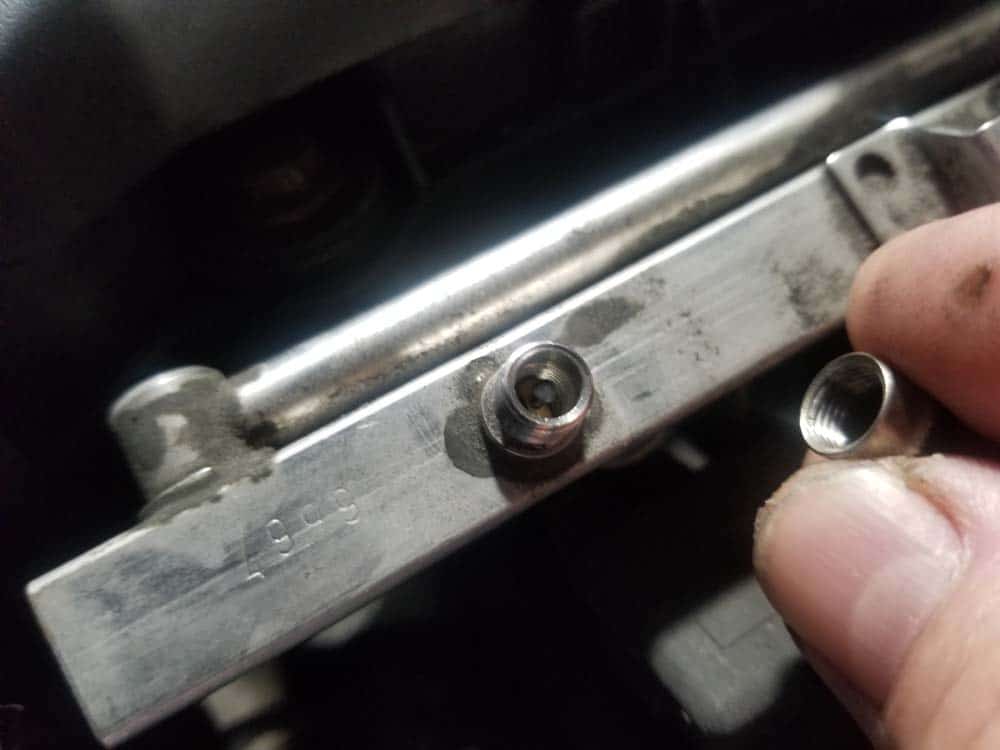
- Next, the pressure in the fuel rail needs to be released. This is a very simple procedure that does not require any special tools. Start by locating the Schrader valve on the end of the fuel rail and remove its protective cap. The Schrader valve is the same valve found in a car or bicycle tire.
- Put several rags down around the valve to catch and fuel that may come out. Use a small flat blade screwdriver to depress the valve (like letting air out of a tire) until all of the pressure is released from the rail.
- Next, the fuel injector wiring harness will need to be removed. The reason why the harness must be removed now is because the mounting bolts for the fuel rail are located underneath it - they unfortunately cannot be removed with the wiring harness in place. This can often be a frustrating part of the repair - use patience and follow our directions below carefully and you won’t have any issues.
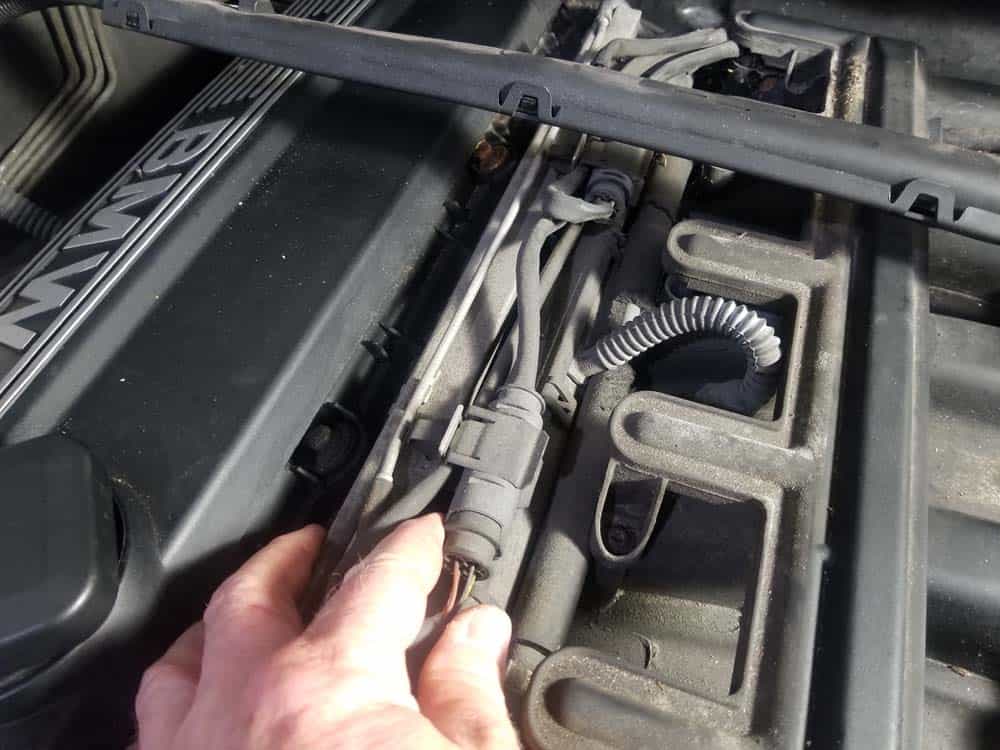
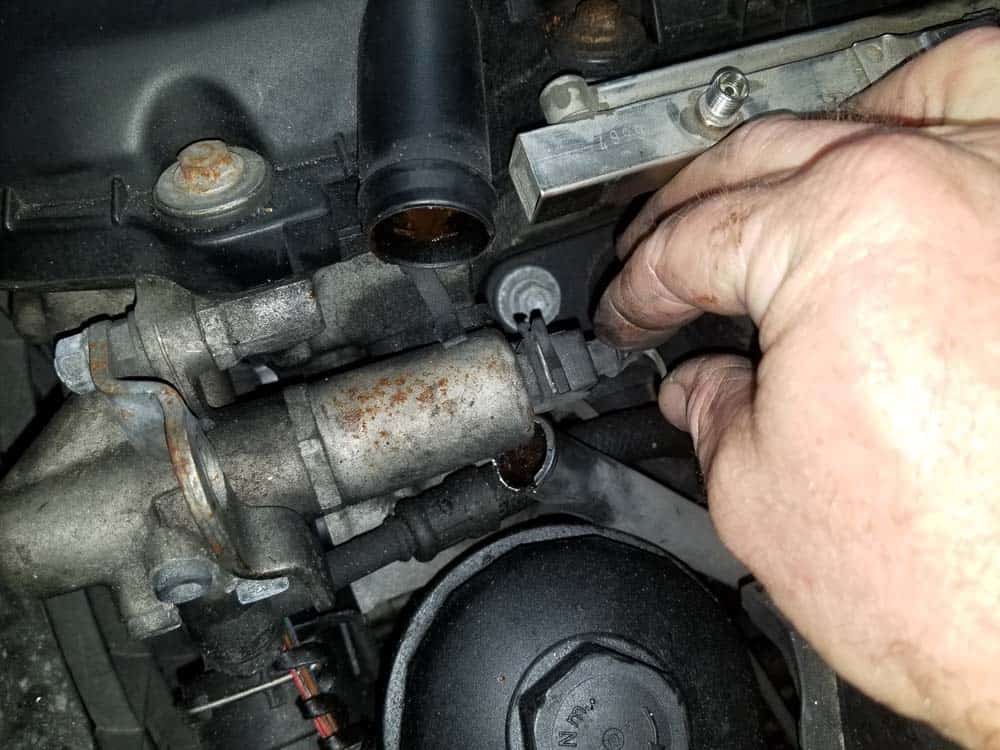
- First, unplug the solenoid valve on the front of the engine. You may need to remove the crankcase breather hose from the valve cover like we did to get gain enough access to the plug.
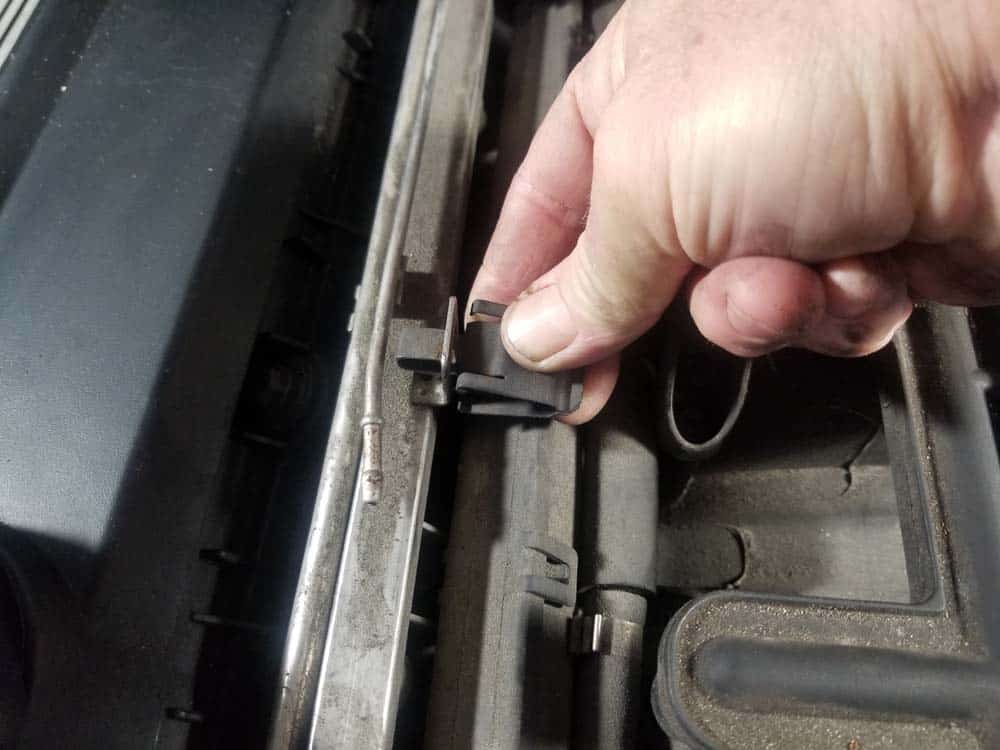
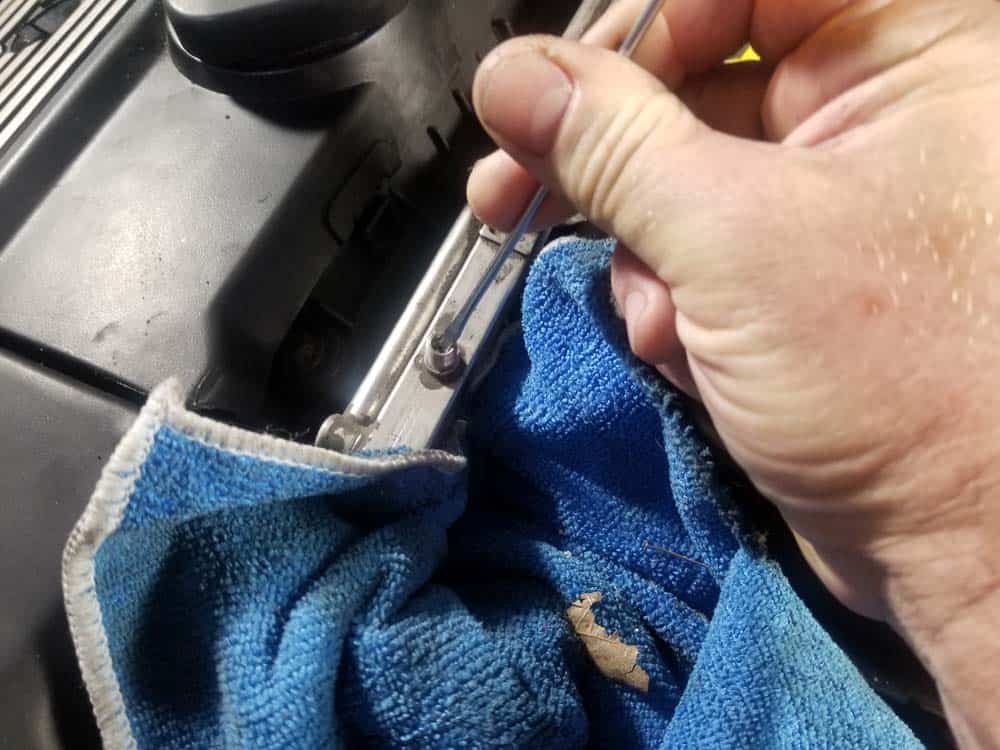
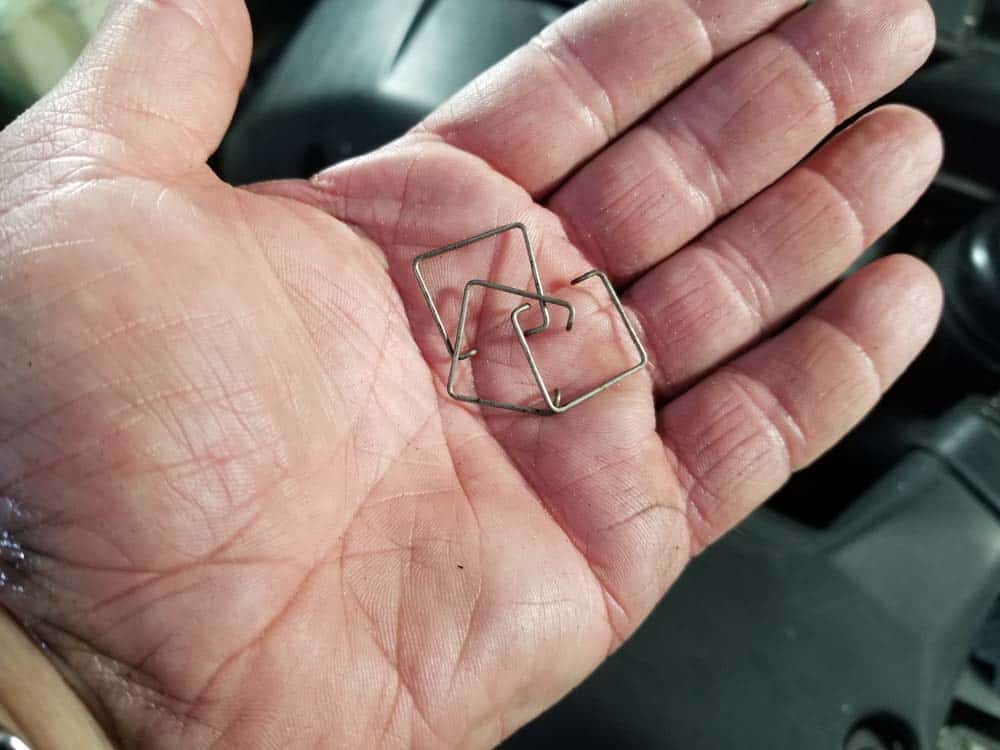
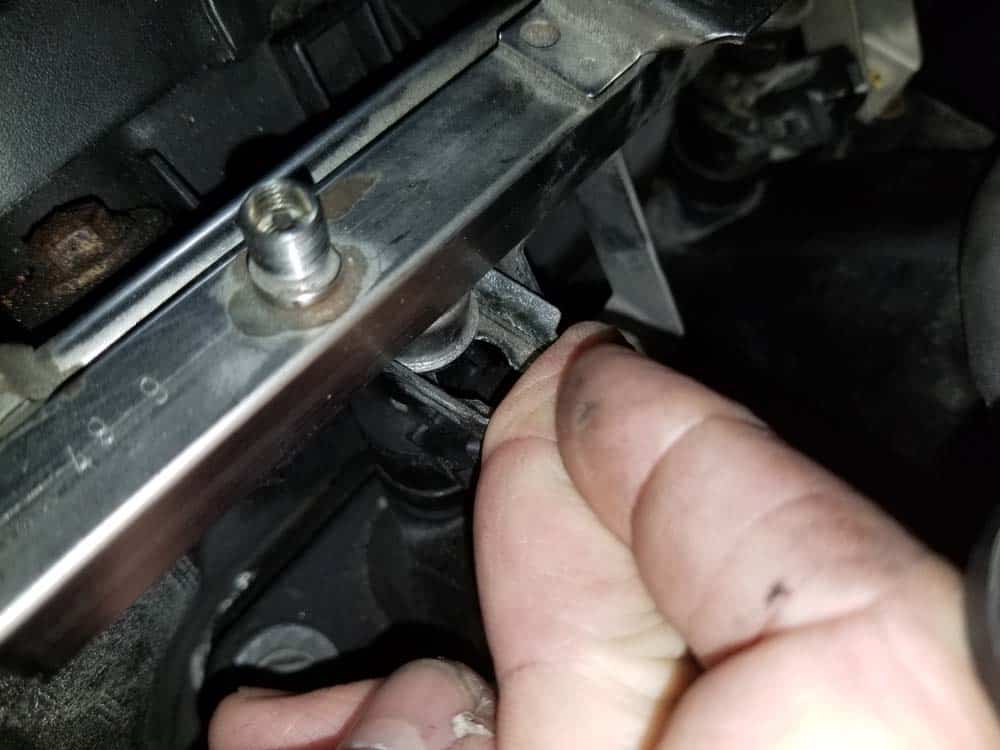
- The wiring harness is connected to each fuel injector with a metal clip as shown below. It is important to understand that only one side of the metal clip has to be released to remove the wiring harness from the injector.
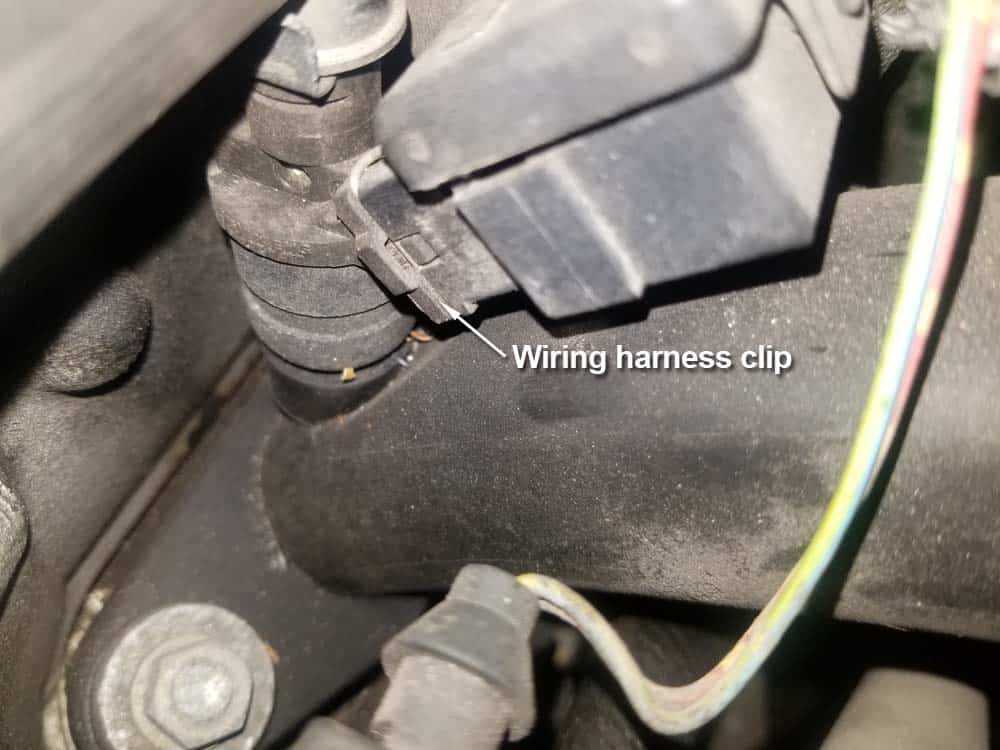
- Starting at the first injector, use a steel pick or flat blade screwdriver to pull one side of the metal clip free. Remember...only one side of the clip has to be released as shown below. Repeat on the other five injectors.
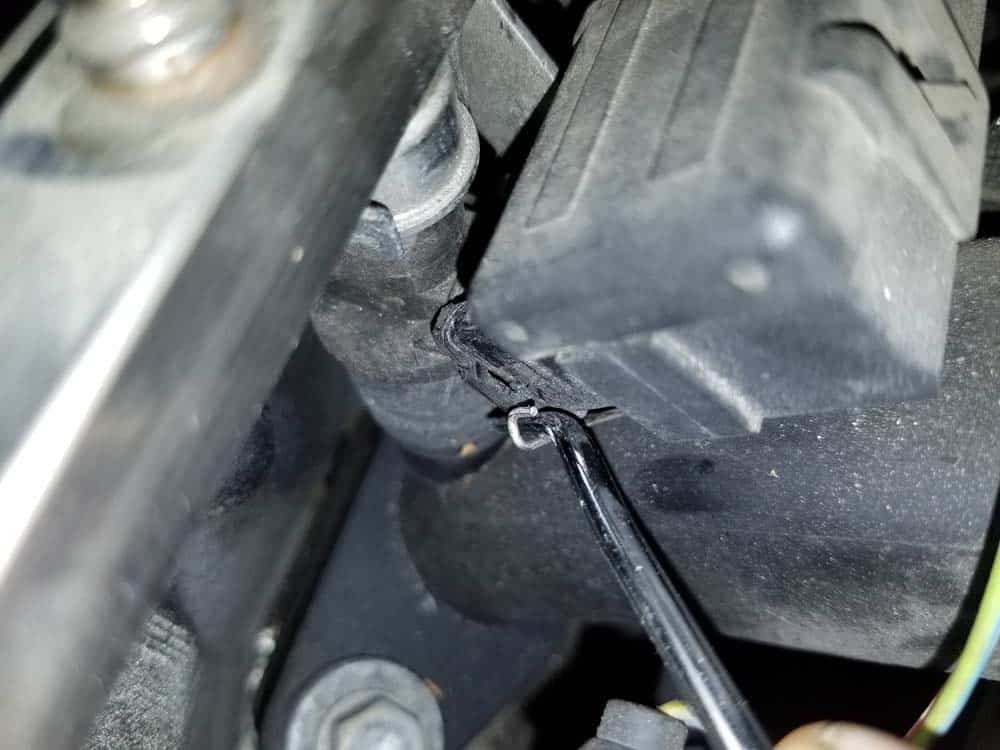
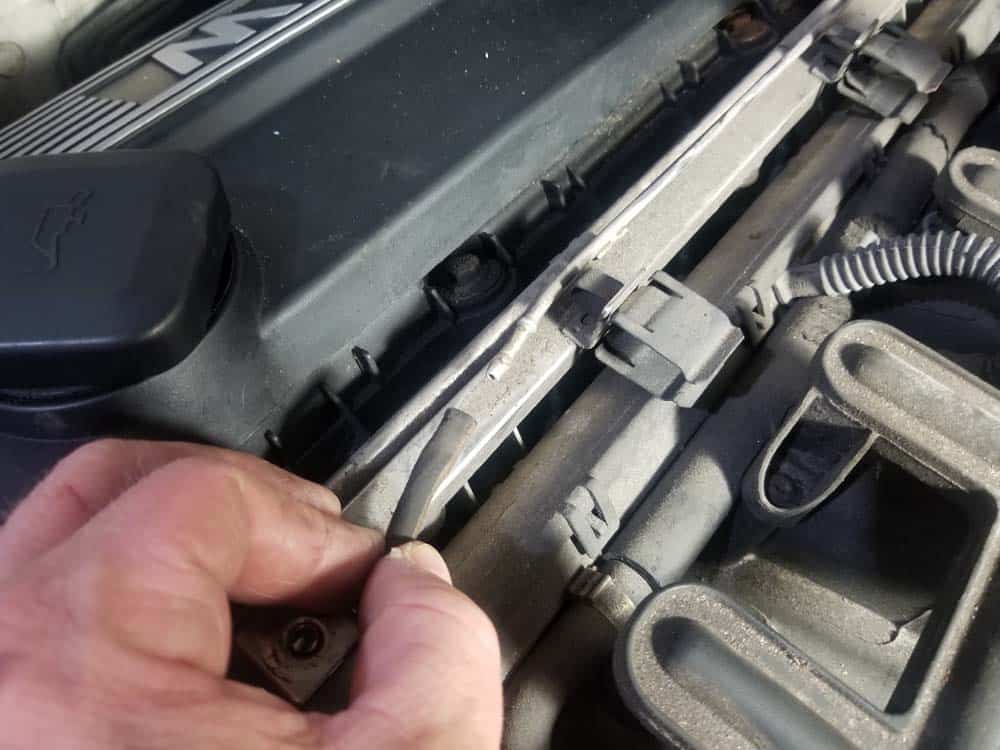
- When all wiring harness clips have been released, slowly start pulling the wiring harness loose from the injectors. DO NOT force it off. If it will not release from an injector, make sure the wiring harness clip didn’t snap back into place.
- If you are sure every clip is released and you still cannot get the wiring harness to pull free from the injectors, GENTLY pry it loose with a large flat blade screwdriver as shown below.
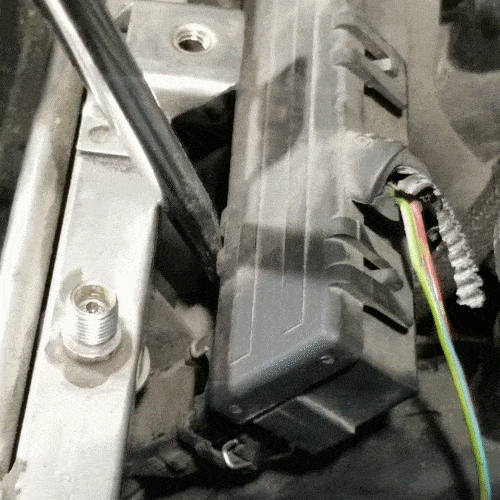
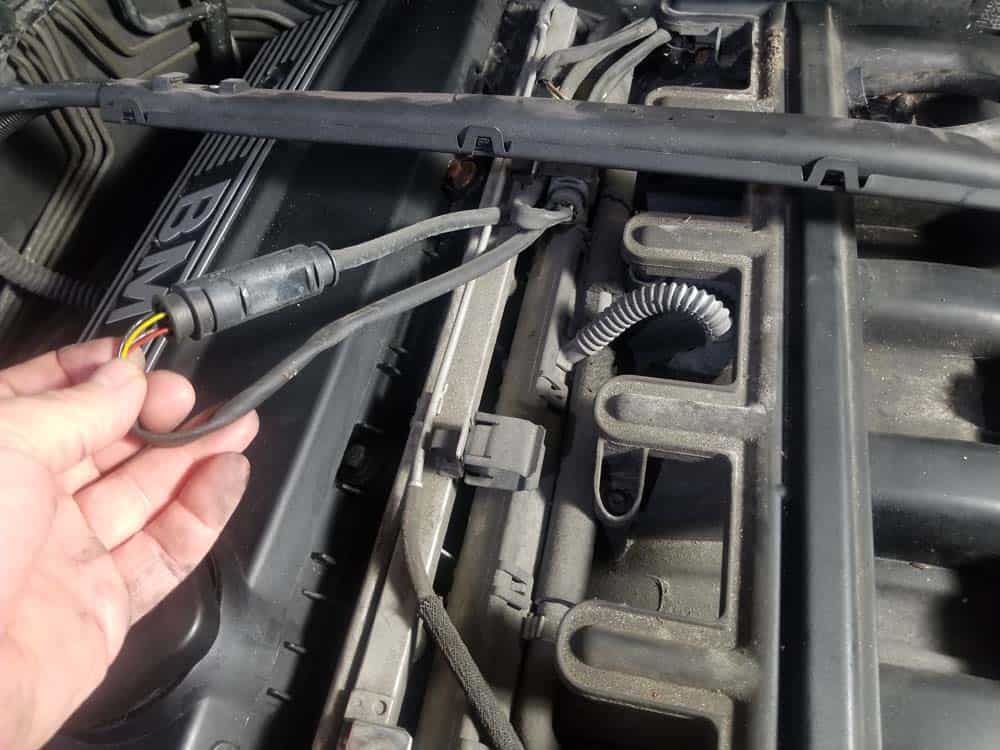
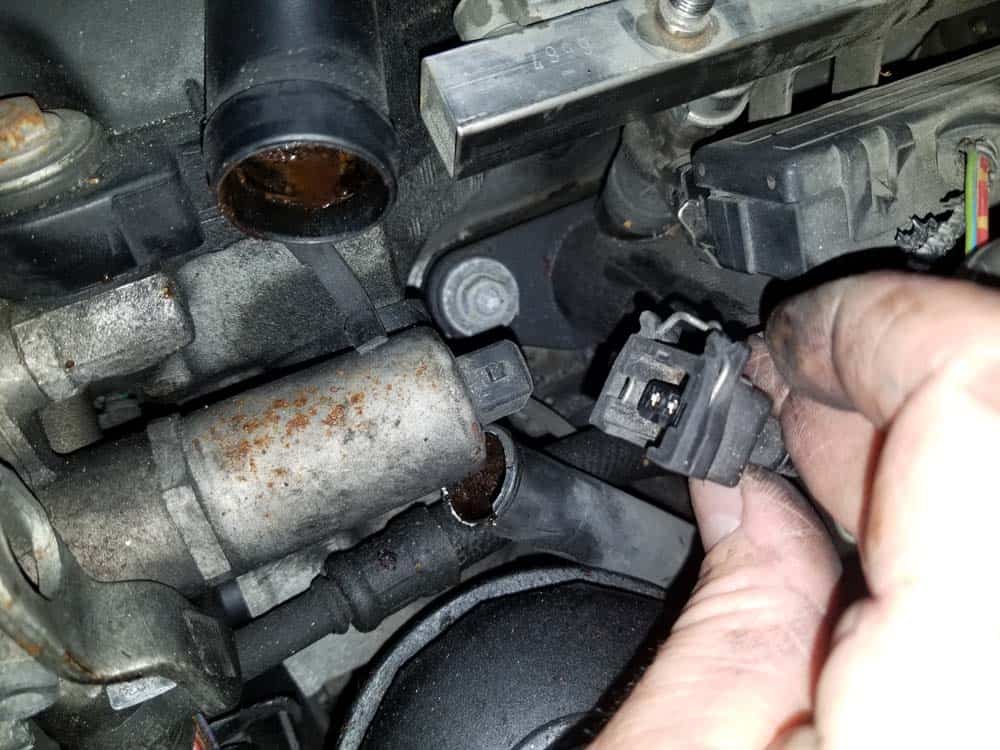
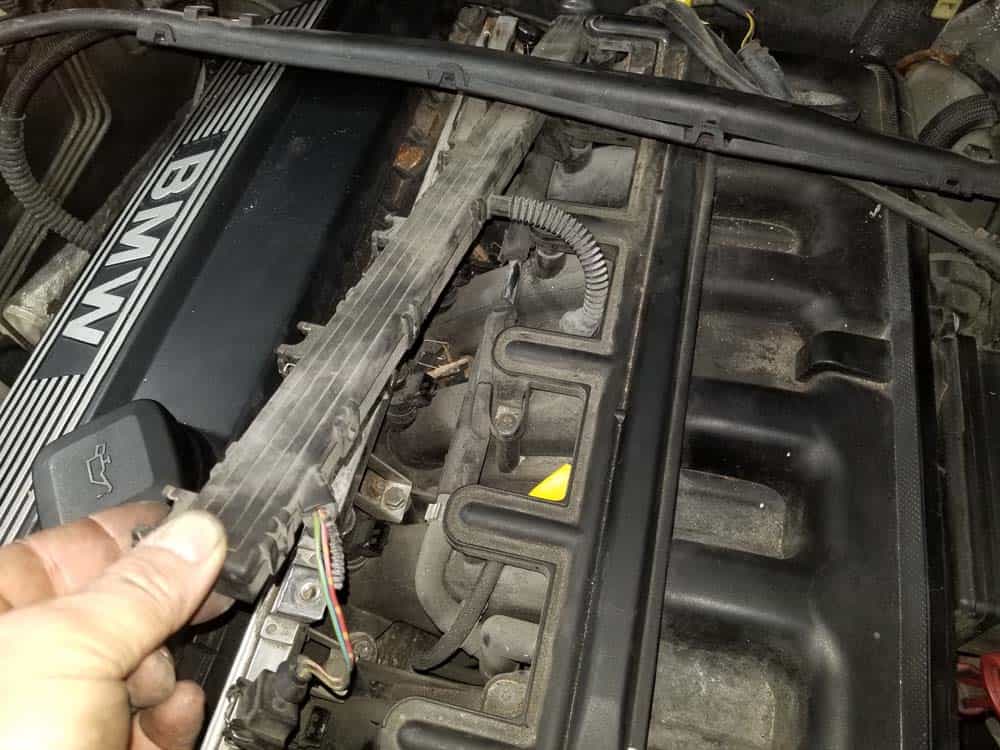
- When the wiring harness is free from the injectors, disconnect it from the intake air temperature sensor and carefully stow out of the work area.
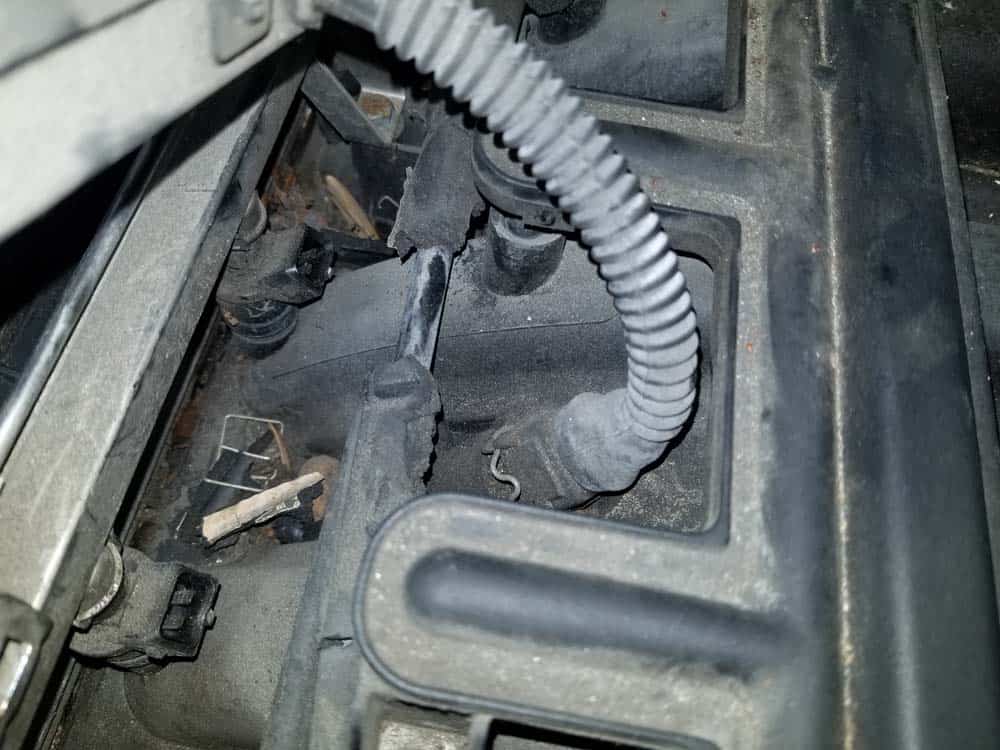
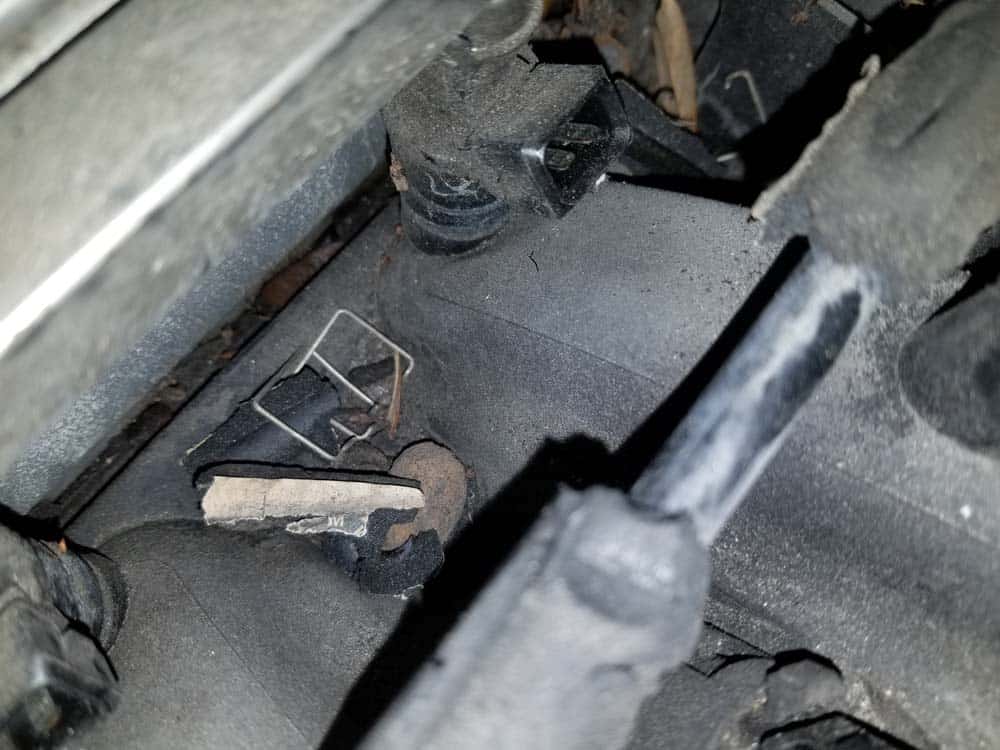
- You will probably lose a few clips during removal….they will usually just fall down on top of the intake manifold as shown below. Use a magnet to retrieve them.
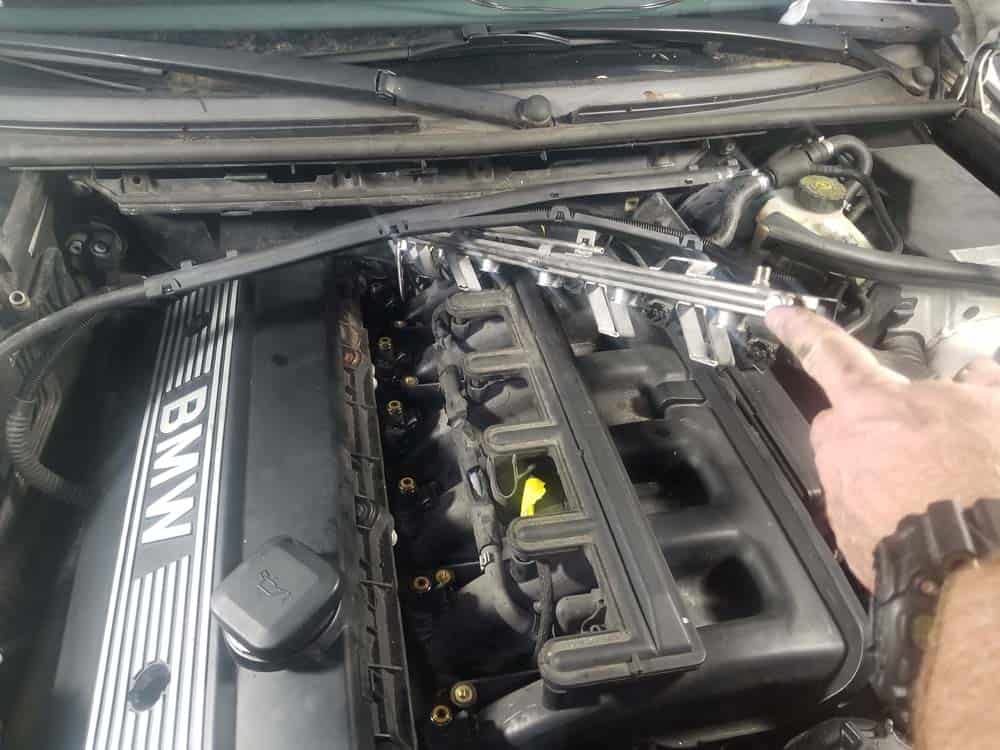
- You can now access the fuel rail mounting bolts.
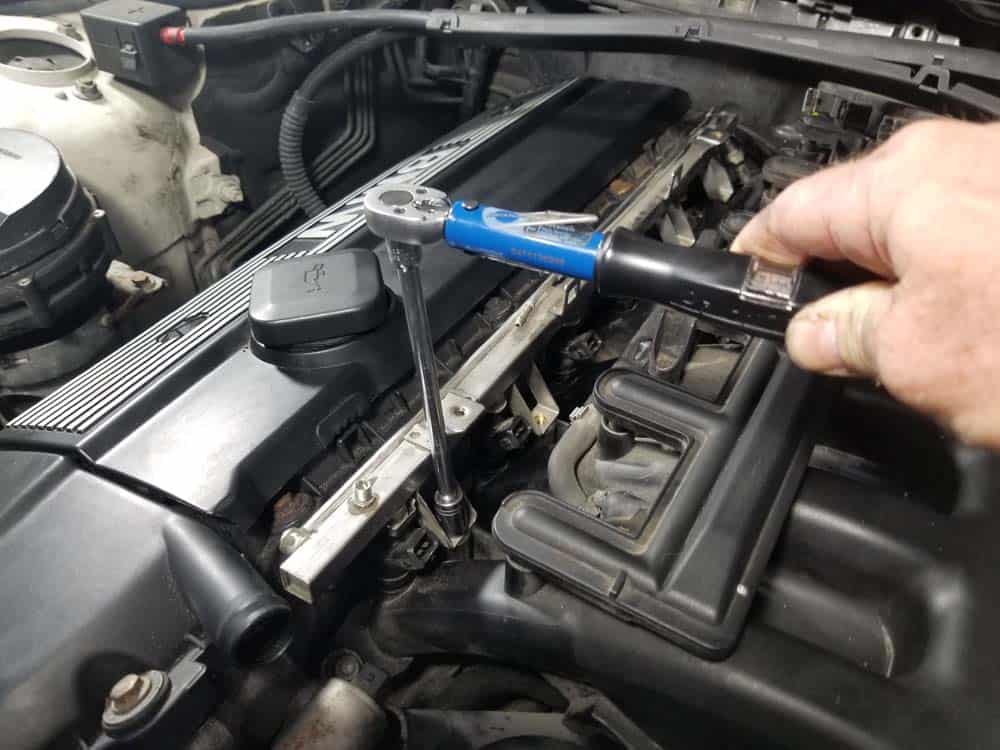
- Remove the four fuel rail mounting bolts with a 10mm socket wrench.

Section 2 - Removing and Reinstalling the Fuel Injectors
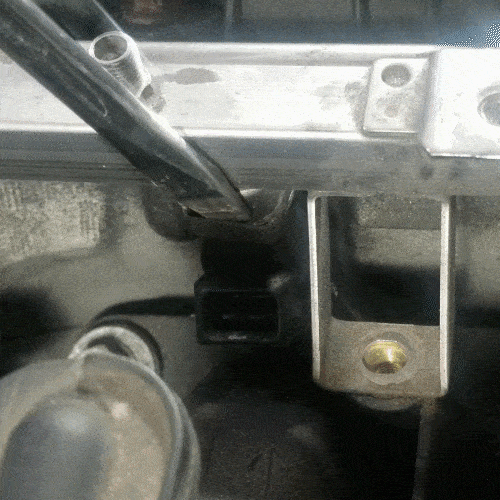
Contrary to other repair articles you may read, there is absolutely no need to disconnect the fuel lines to the fuel rail prior to removing the injectors. This is welcomed news for most mechanics since the fuel line disconnects are behind the engine and are very difficult to access without removing the intake manifold. Also contrary to other repair articles, we believe it is much easier to remove the fuel injectors AFTER the fuel rail is unclipped from them. Many fuel injectors on older vehicles like the E46 become heavily carbonized and are literally impossible to pull free with the fuel rail. Many mechanics will try and pry the injectors out with the fuel rail, causing possible damage to the intake manifold or plastic valve cover. Removing the fuel rail first then pulling each individual injector is a much easier, safer and efficient process.- Each fuel injector is secured to the fuel rail with a metal holder clip.
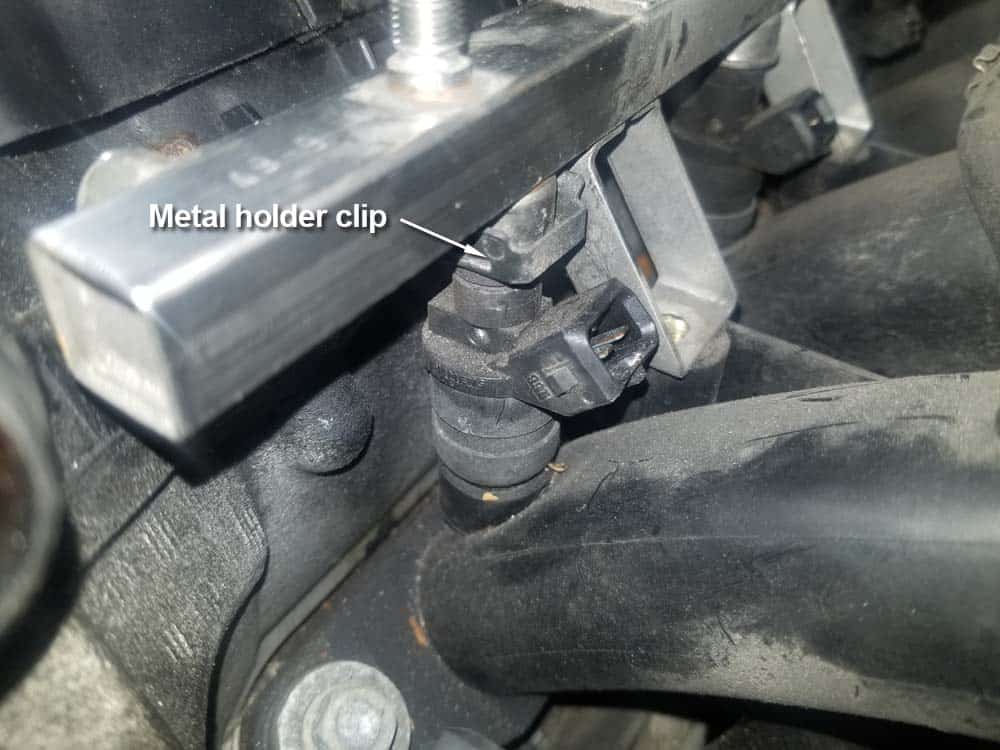
- Removing the metal clips are simple. Use a large flat blade screwdriver and pry them out into your hand as shown below.
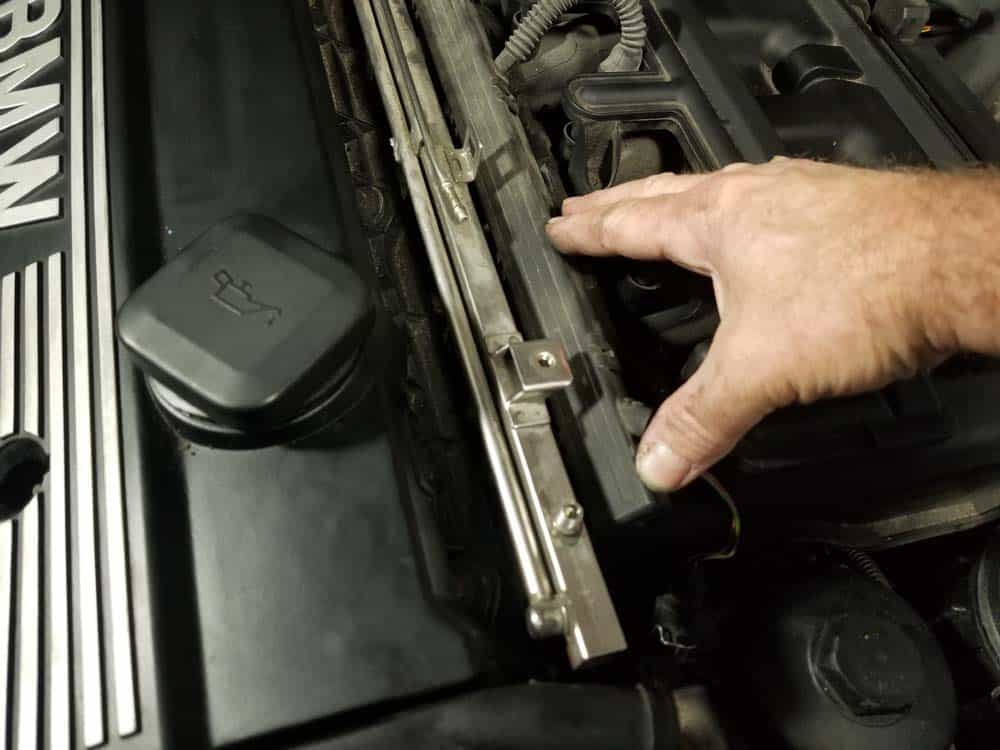
- With the metal clips removed, you can now pull up on the fuel rail to release it from the fuel injectors. CAREFULLY stow the fuel rail out of the work area being sure not to put unnecessary strain on the fuel line connections behind the engine.
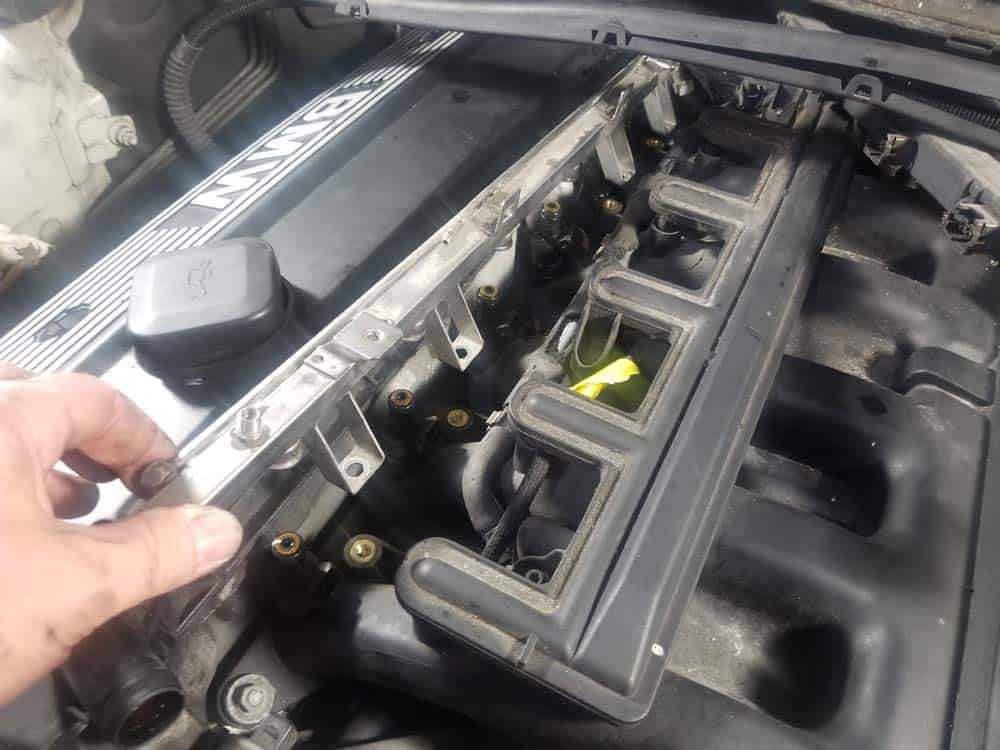
- Pull the fuel injectors out of the engine (or any that came out with the fuel rail). If you find one that is stuck, try turning it back and forth while pulling until it releases from the intake manifold.

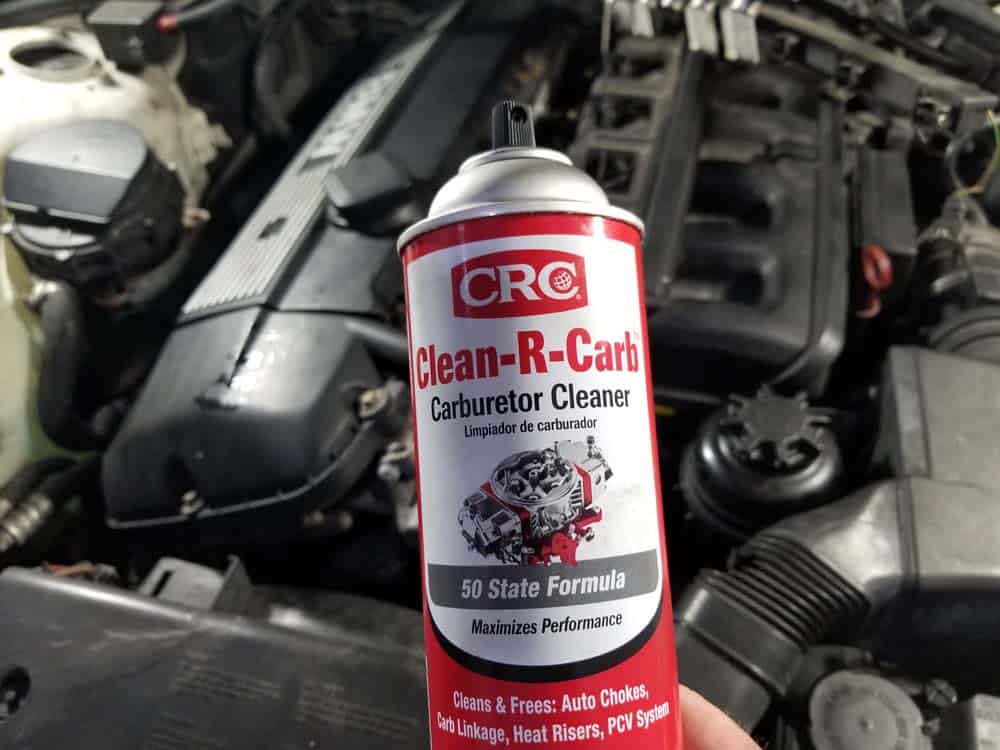
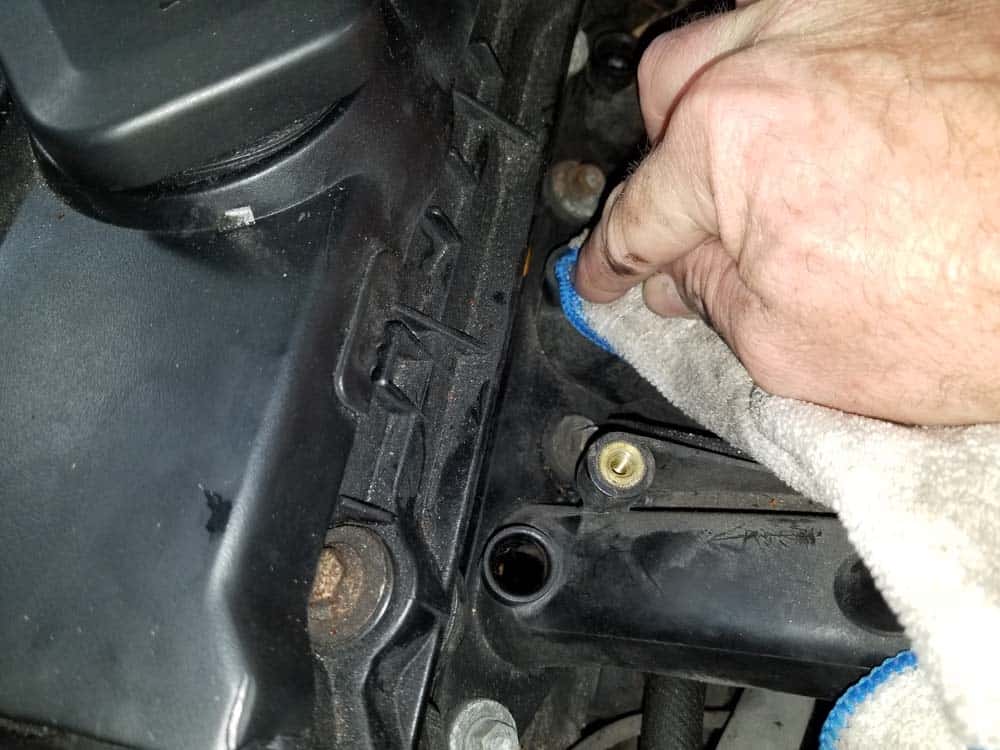
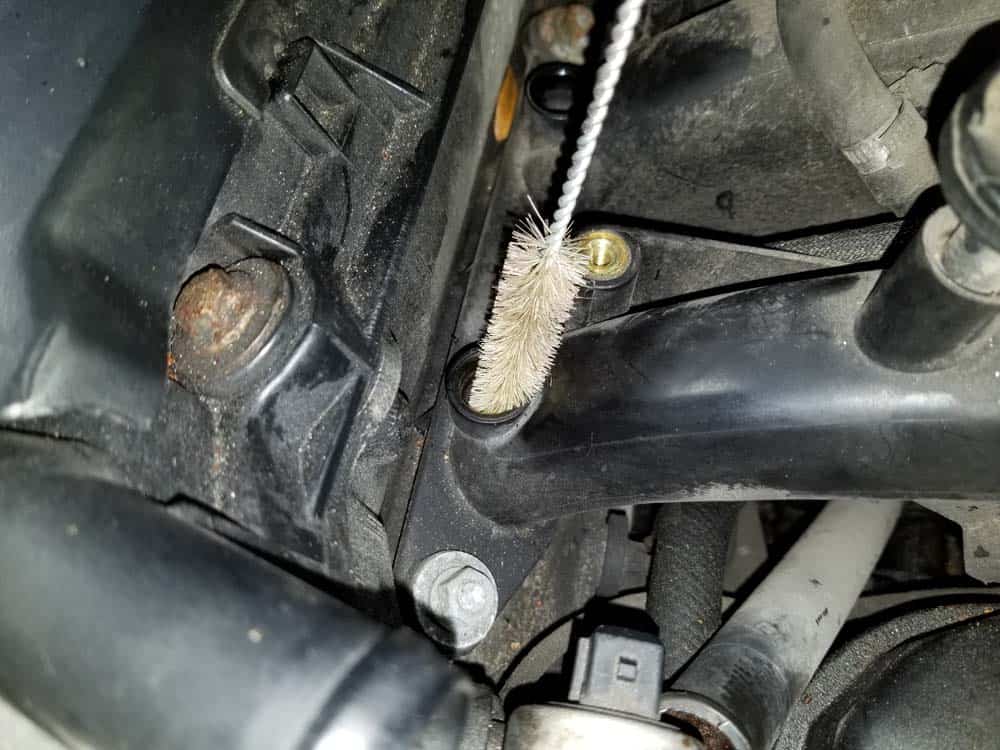
- Before installing the new injectors, thoroughly clean the mounting holes in the intake manifold with CRC Clean-R-Carb and a clean towel. If the holes have a large amount of gunk in them, you may need to use a round brush to clean them out as shown below.
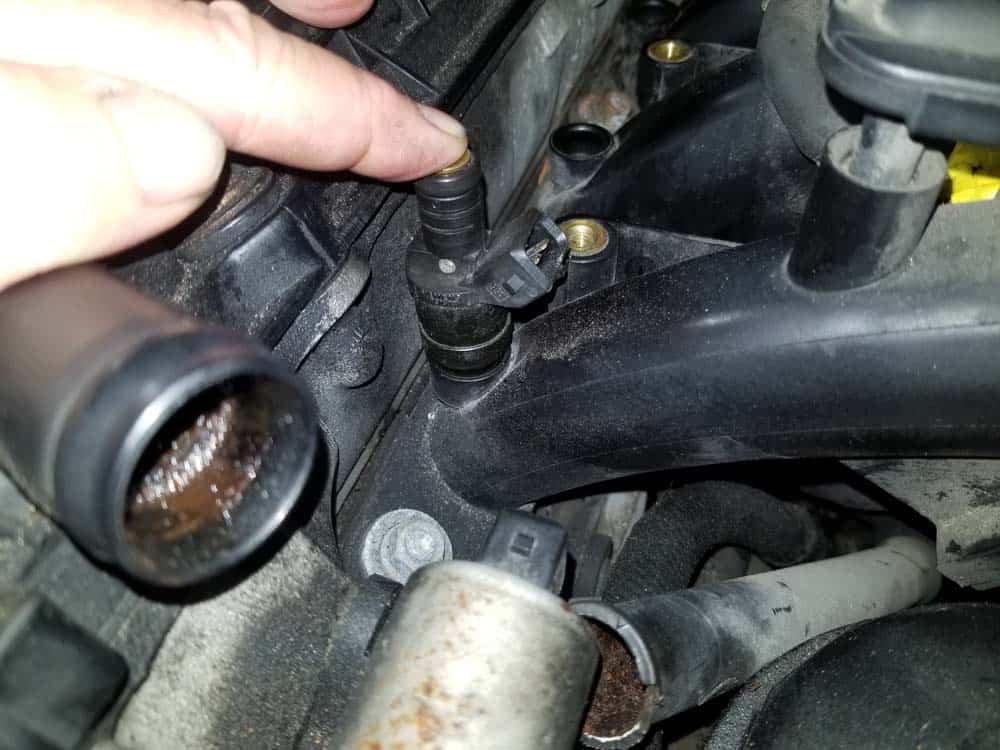
- Install the new fuel injectors. Make sure they are snug inside the intake manifold and their electrical connection is facing out correctly.
- Install the fuel rail back on top of the injectors. Make sure the injectors line up with the fuel rail holes. Once it is lined up correctly, press it firmly into place with the palm of your hand.

- Reinstall the metal holder clips.
- Install the four fuel rail mounting bolts and torque to 10 Nm (7 ft-lb).
- Before installing the wiring harness back on the injectors, make sure all of the clips are installed. DO NOT leave one side of the clip off. The clips should be completely installed on the wiring harness (see below).

- Push the wiring harness onto fuel injectors until you hear it click into place. Make sure each injector is firmly engaged into the wiring harness.
- Plug the wiring harness back into the solenoid valve and the air temperature sensor. Replace the crankcase breather hose if it was removed.
- Replace the vacuum lines back to the top of the fuel rail.
- Before finishing the rest of the reassembly, connect the battery and start the vehicle. Make sure there are no visible leaks in the fuel rail, injectors, or the fuel line connections behind the engine.
- Reassemble the rest of the vehicle following Section 1 steps 1-5 in reverse.
BMW E46 Fuel Injector Replacement Finished