
Affiliate link disclosure – The BMW Repair Guide uses affiliate links in their site. For more information on affiliate links, please click here.
Repair Summary
The following article gives detailed instructions on performing a rough idle repair on a BMW E46 3 series car. Even though we have used a 2003 BMW 325ci to perform this installation, this article can be applied to any E46 3 series vehicle with the M52 or M54 six cylinder engine (with minor modification), including the 323i, 328i and 330i coupe, sedan and convertible.
See all vehicles this article applies to
E46 3 Series 325ti
E46 3 Series 318td
E46 3 Series 320td
E46 3 Series 318ti
E46 3 Series 330xi
E46 3 Series 330i
E46 3 Series 330xd
E46 3 Series 330d
E46 3 Series 316ti
E46 3 Series 328i
E46 3 Series 325xi
E46 3 Series 325i
E46 3 Series 320i
E46 3 Series 323i
E46 3 Series 320d
E46 3 Series 318i
E46 3 Series 318d
E46 3 Series 316i
E46 3 Series M3 CSL
E46 3 Series M3
E46 3 Series 330Ci
E46 3 Series 330Cd
E46 3 Series 325Ci
E46 3 Series 323Ci
E46 3 Series 320Ci
E46 3 Series 320Cd
E46 3 Series 318Ci
E46 3 Series 328Ci
E46 3 Series 316Ci
E46 3 Series 323i 2.4
E46 3 Series 316i 1.9
E46 3 Series 316i 1.6
If your 3 series is showing rpm fluctuations when holding the accelerator at a constant speed, or if the engine rpm in your car repeatedly drops and then recovers when idling, then it may be time for a BMW E46 rough idle fix.
We say it in most articles we write, so excuse us for being redundant. But for many of us our BMWs are unfortunately getting old. Ok...insert your sad frowny face emoji here.
When Bimmers get over ten years old, it's time to face the facts that many engine parts are going to need replacement, especially in the air intake system. The intense heat of the engine compartment, compounded by the age and "wear and tear" of the vehicle, plays havoc on the hoses, boots, gaskets and valves that make up your BMW's air intake system.
A BMW E46 rough idle repair is a fairly simple job that requires replacing your DISA and idle control valves. If you are interested in what the DISA and idle control valves do, please refer to our rough idle repair article for the BMW E60 5 series where we go into a more in depth discussion.
The BMW Repair Guide recommends replacing both valves when fixing a BMW with a rough idle on startup. Since both parts have a maximum life span of approximately 100,000 miles if one is failing most likely the other is ready to go as well. Do yourself a favor and spend the extra money and replace both parts.


View the detailed parts diagram for this repair.
Includes detailed part diagrams, part numbers and links to purchase all of the required components needed to complete this repair.

Before starting this repair, you must have the following required parts.
BMW E36 and E46
The idle air control valve, also commonly referred to as the idle control valve, is an engine management component that is found in one form or another on the majority of road-going vehicles. Its purpose is to control and regulate the engine's idle speed, increasing and decreasing it as necessary to keep up with operating conditions. When the idle control valve fails it can cause all sorts of issues with the vehicle, and in some cases may even render it undrivable.
BMW E46 320i, 323i and 328i
Air adjustment unit controls the path of the air in the intake manifold, allowing either a shorter or longer runner length. A common source of trouble causing low RPM sluggishness and accompanied by a clicking sound from the engine bay.
BMW E46 325i
Air adjustment unit controls the path of the air in the intake manifold, allowing either a shorter or longer runner length. A common source of trouble causing low RPM sluggishness and accompanied by a clicking sound from the engine bay.
BMW E46 330i
Air adjustment unit controls the path of the air in the intake manifold, allowing either a shorter or longer runner length. A common source of trouble causing low RPM sluggishness and accompanied by a clicking sound from the engine bay.
BMW E36 323i, 328i and M3
Often overlooked, a clean air filter can make a noticeable difference in performance and fuel economy in your vehicle. When a vehicle's air filter is not properly serviced, it restricts air flow into the engine which directly translates to less horsepower to the wheels.
All BMW E46 models
Made to reduce the amount of dust, dirt, and allergens making it's way into the cabin, this carbon filter will keep everything out of your interior. By filtering out dust and dirt, those contaminants don't make it into your HVAC system, making everything work easier and cleaner.
Section 1 - BMW E46 Rough Idle on Startup
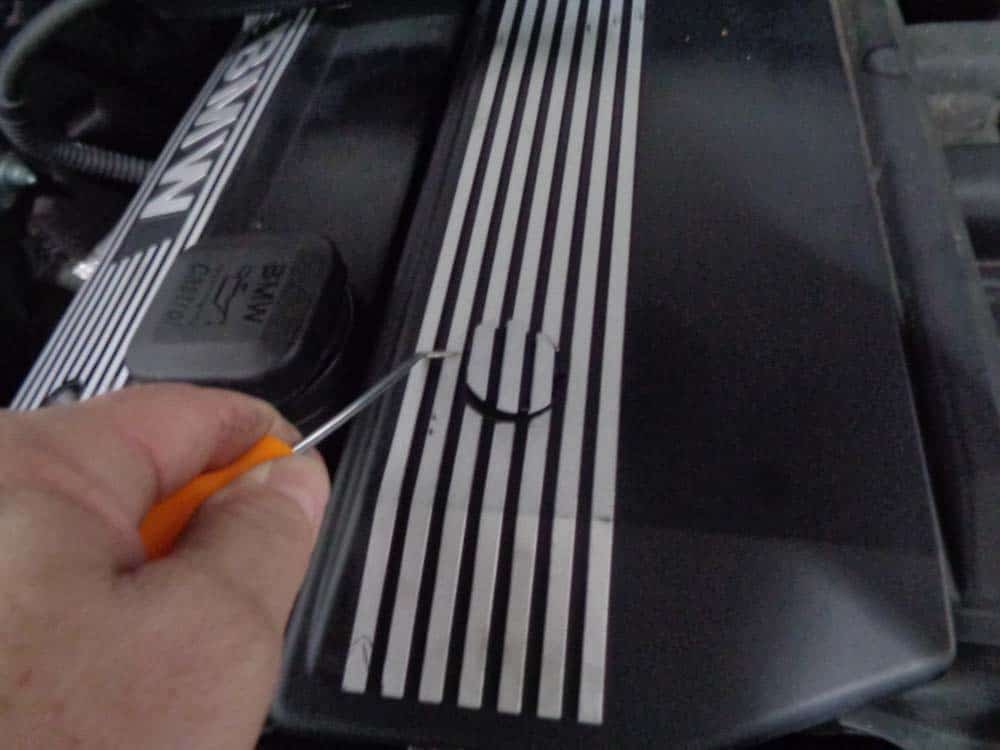
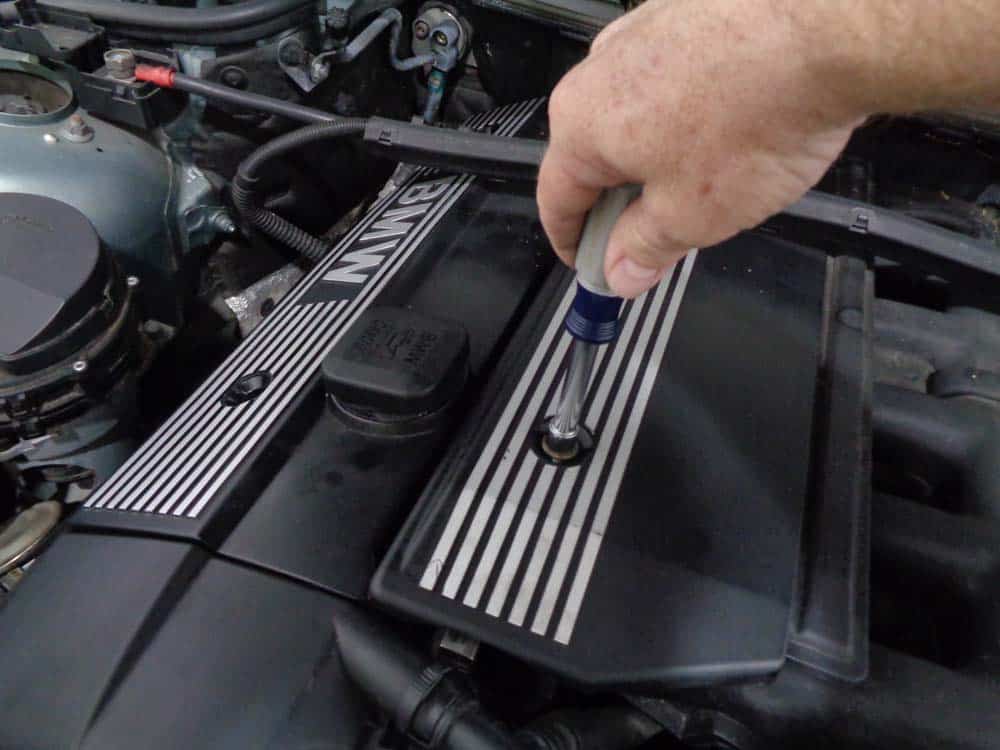
Repairing the rough idle in your BMW E46 3 series car requires replacing both the DISA and idle control valves and replacing them with new ones. Make sure that you take your time during reassembly to avoid any leaks in the intake system, especially when reinstalling the intake boot.- Remove the right side engine cover using a metal pick and a 10mm nut driver as shown below.
- Twist the three spring latches counterclockwise to unlock and release the cabin filter cover.

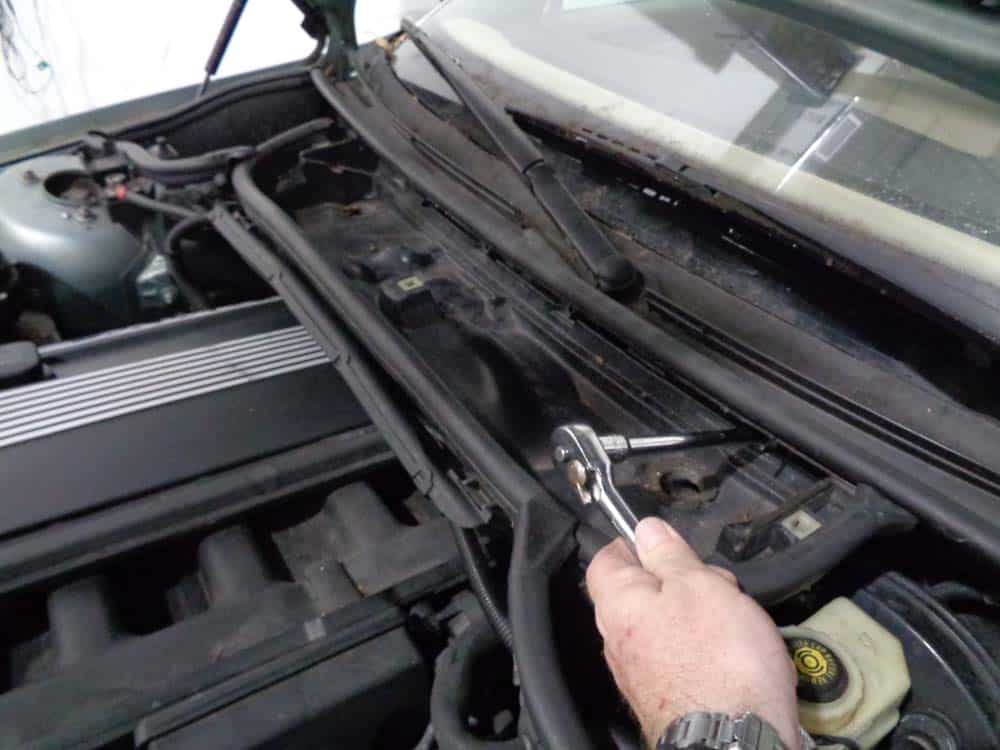
- Using a torx T30 bit remove the three screws securing the filter housing to the fire wall. Remove the filter housing from the vehicle.
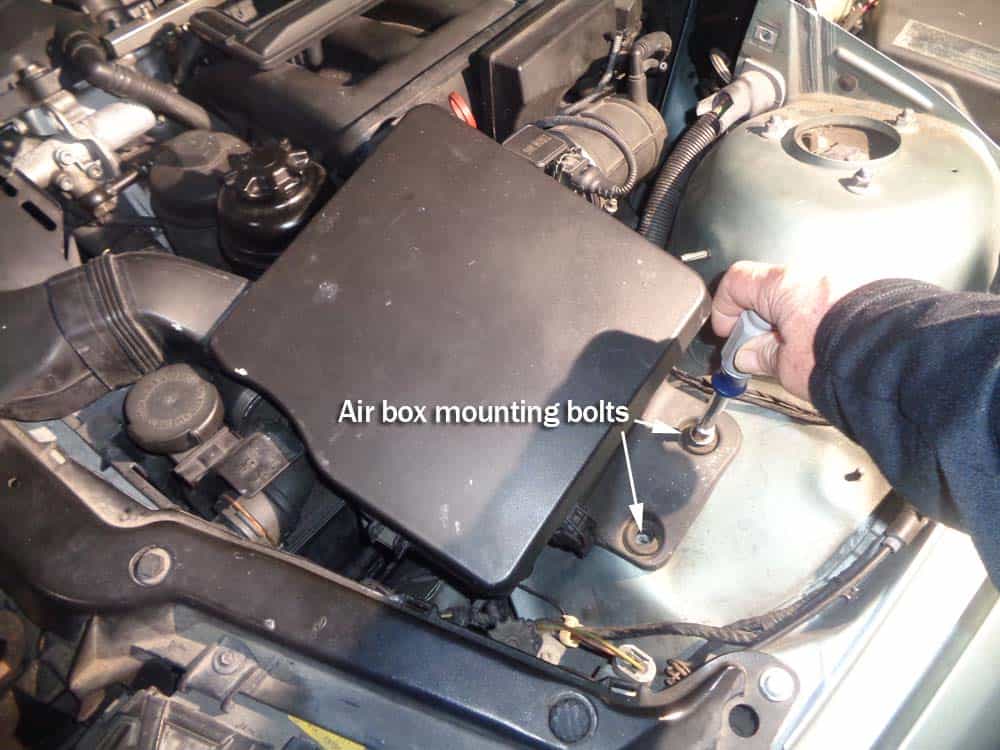
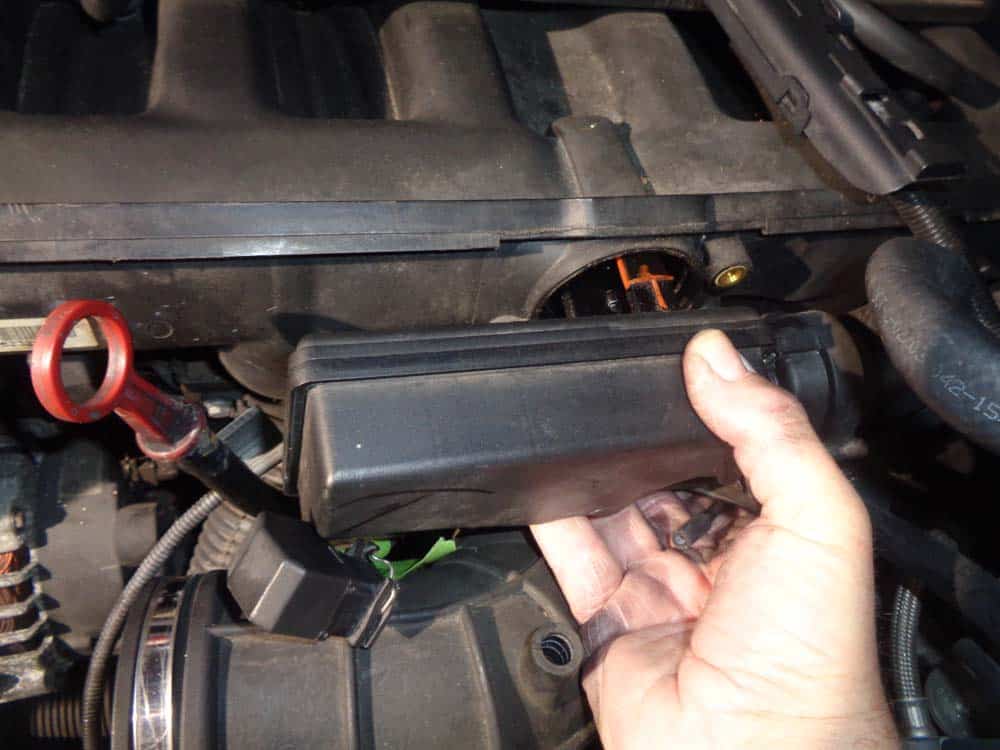
- The next step in the BMW E46 rough idle repair is to remove the intake muffler (air box) from the engine compartment. Use a 10mm nut driver or socket wrench to remove the two mounting bolts anchoring the air box to the body of the vehicle.
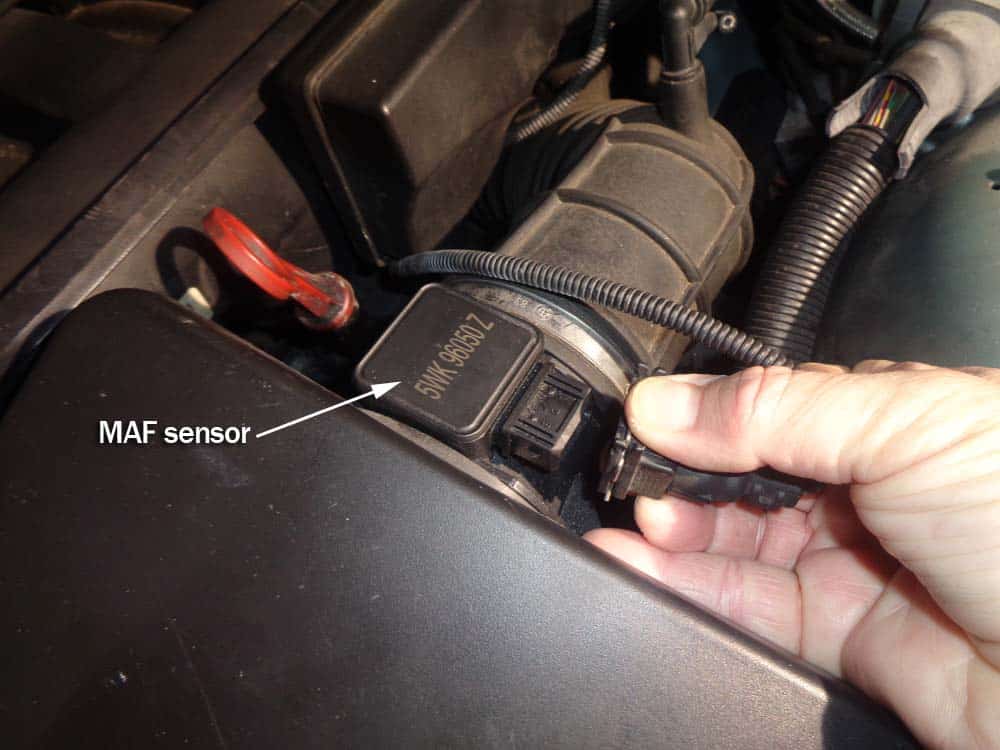
- Disconnect the Mass Air Flow (MAF) sensor.
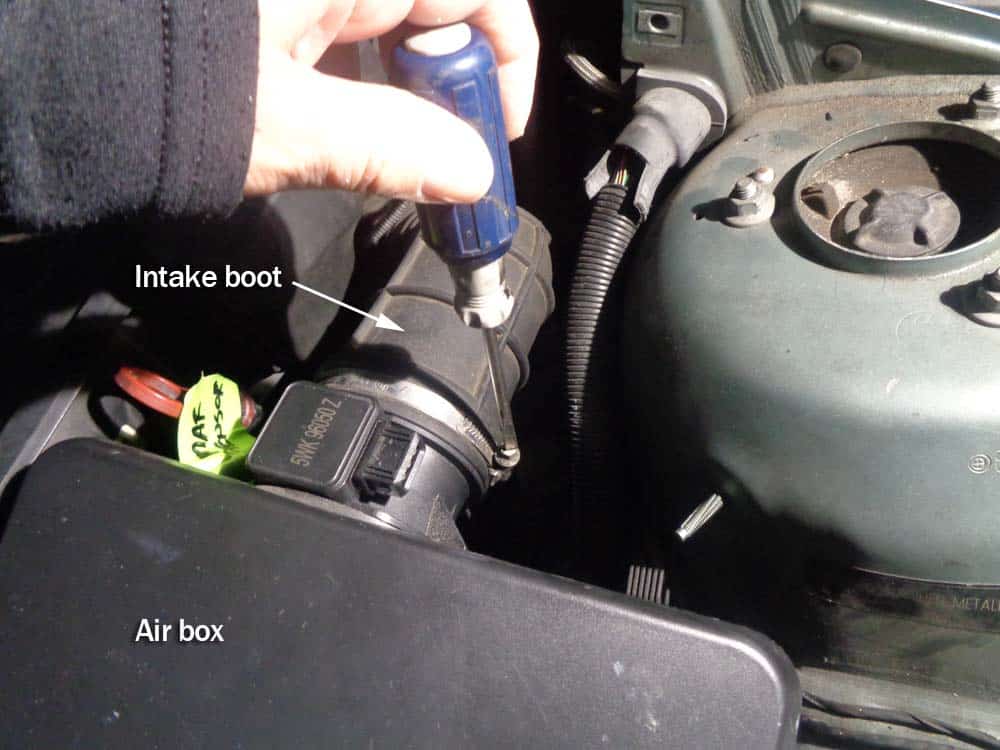
- Using a flat blade screwdriver, loosen the hose clamp connecting the air intake boot to the air box.
- Remove the air box from the engine compartment.

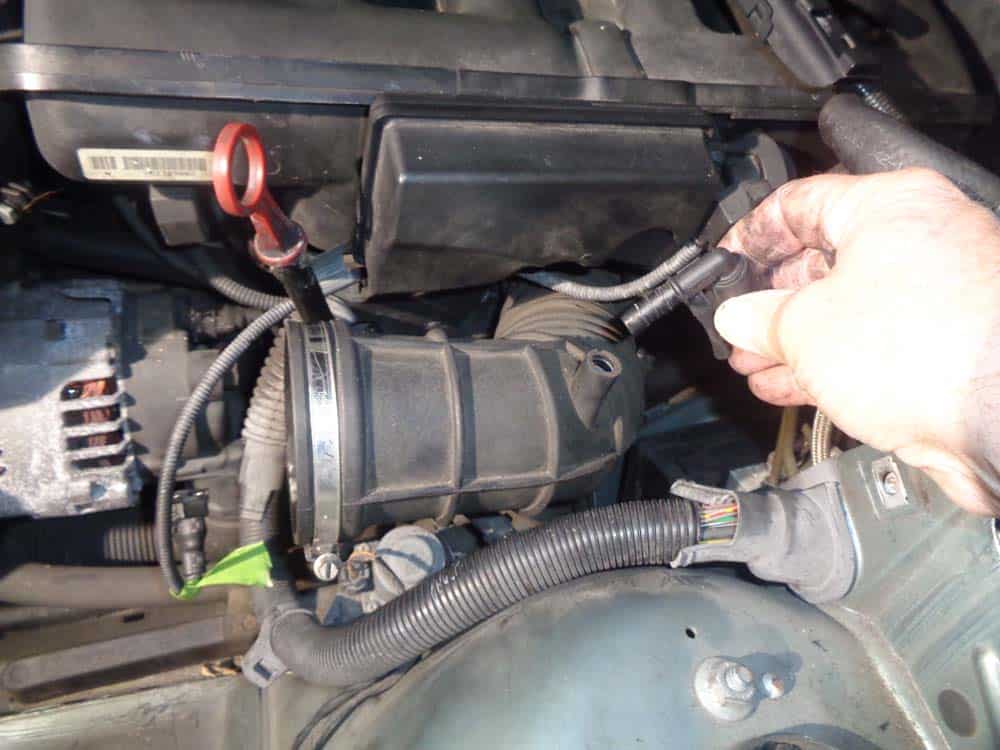
- Remove the vacuum line from the intake boot.
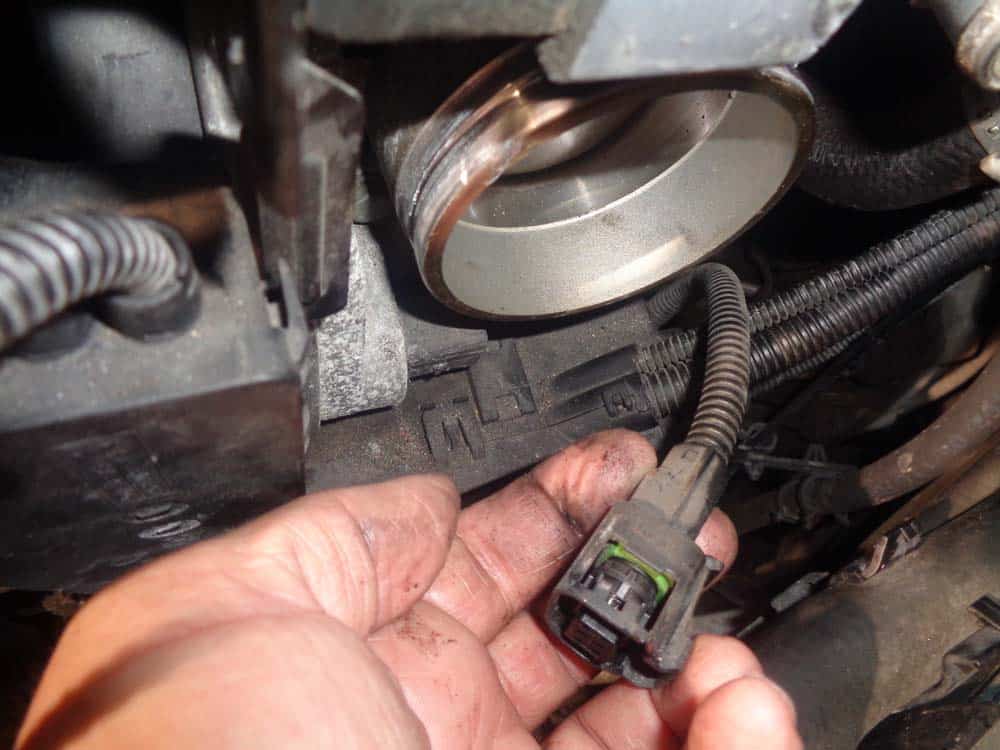
- Remove the DISA valve electrical connector. The release spring is on the back side of the connector.

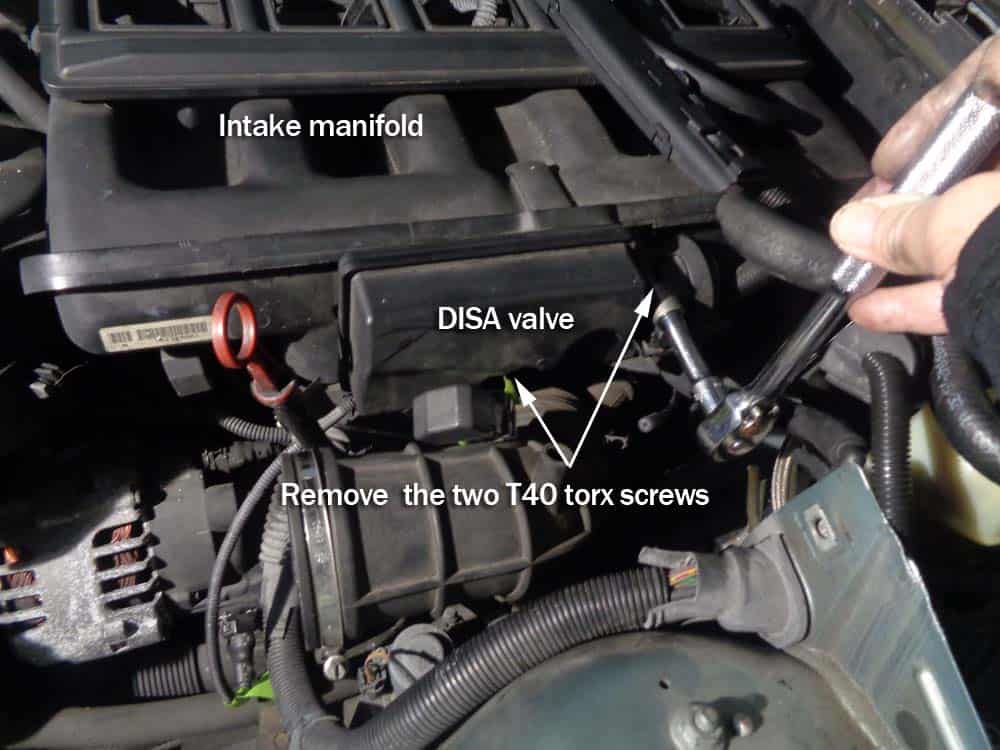
- Using a T40 torx bit, remove the two screws anchoring the DISA valve to the intake manifold. Grasp the DISA valve and carefully remove.
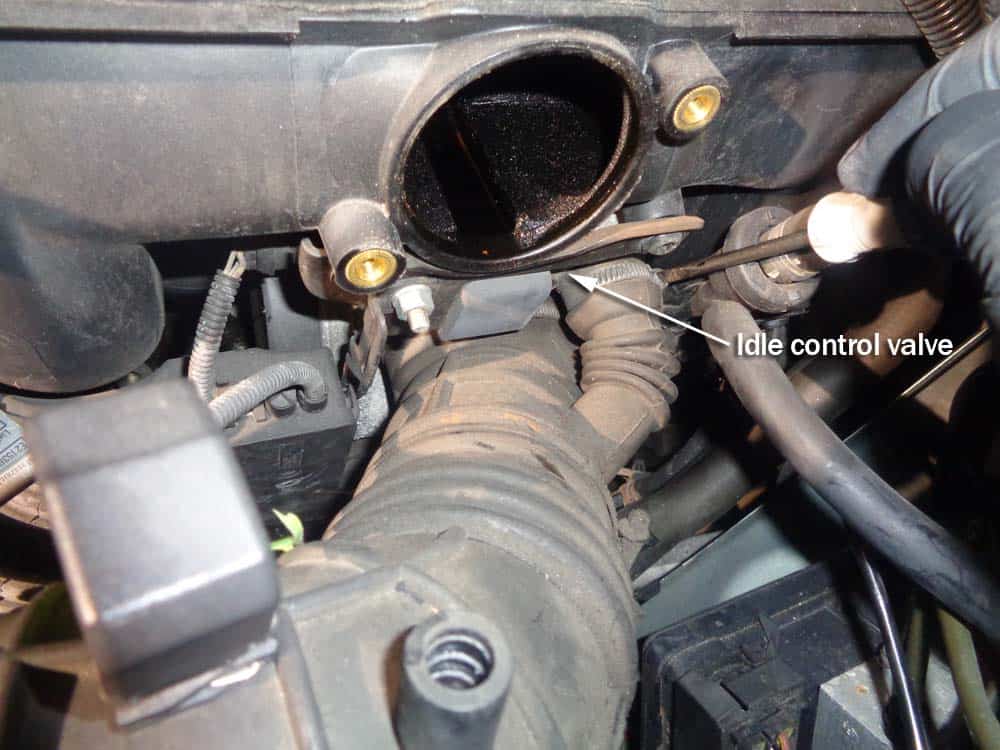
- Using a flat blade screwdriver, loosen the hose clamp anchoring the top hose of the intake boot to the idle control valve. Pull the top hose off of the idle control valve being careful not to bend or tear it (there is a screw below it we need to get to in the next step).
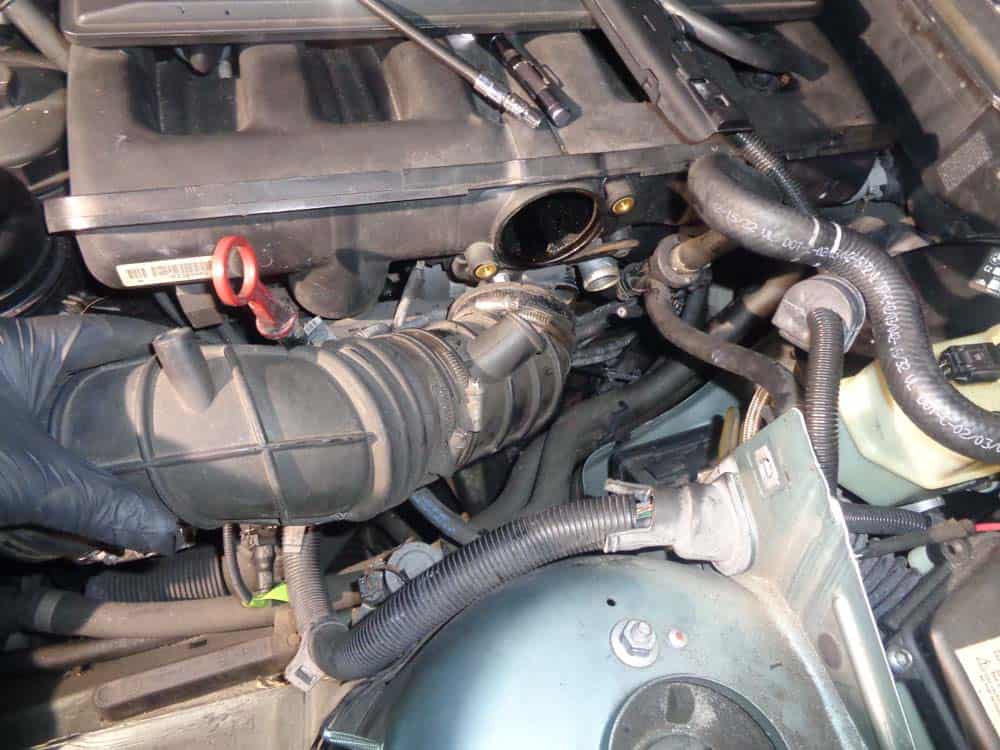
- Using a flat blade screwdriver, loosen the hose clamp anchoring the intake boot to the throttle body. Pull the intake boot off of the throttle body and remove from vehicle. You will notice from the photo below we damaged our intake boot during removal. This boot had 140,000 miles on it and ripped apart during removal.

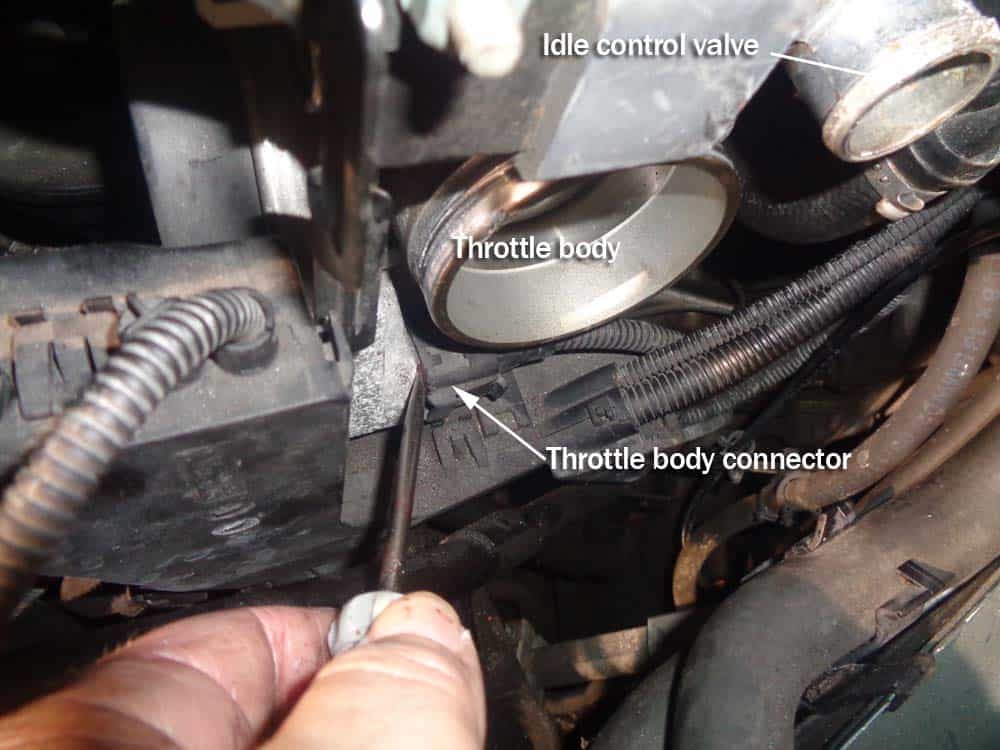
- Disconnect electrical connection to the throttle body. You may need the help of a flat blade screwdriver to get it loose.
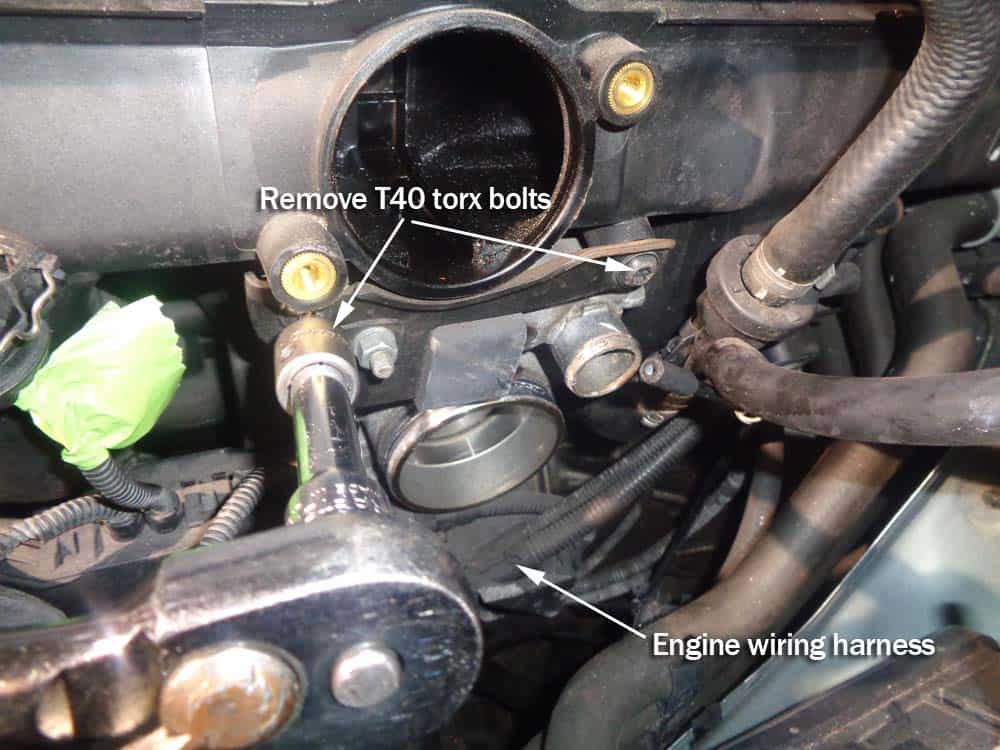
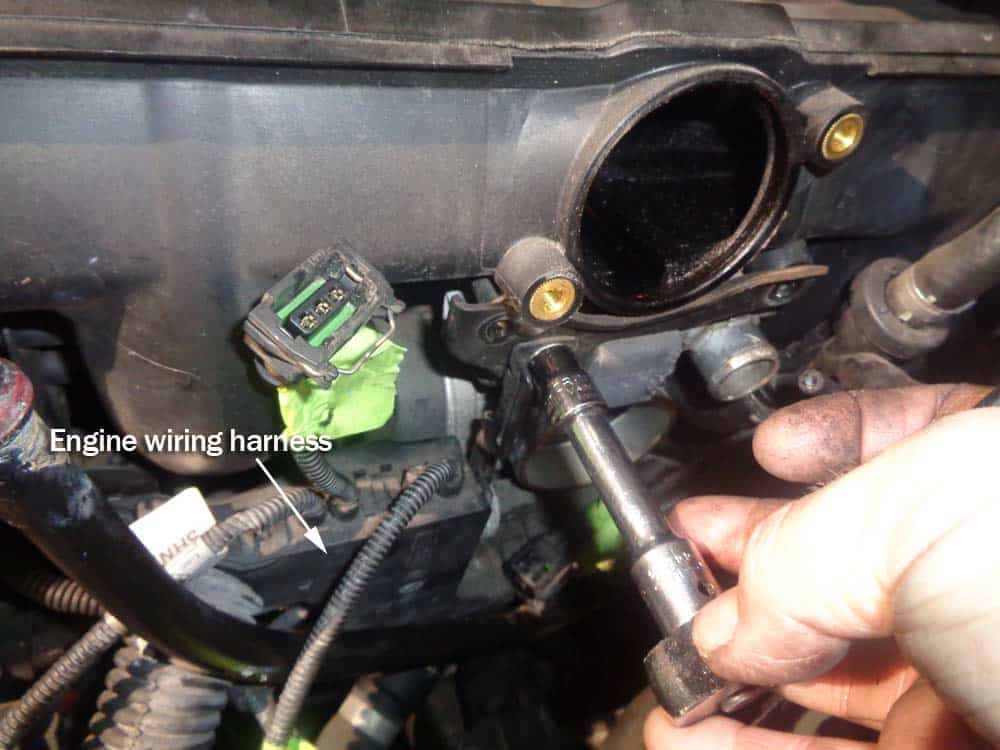
- Now it is time to loosen the engine wiring harness so the idle control valve can be removed from the manifold. Start by removing the top two T40 torx bolts.
- Next move down the wiring harness and remove the 10mm bolt using a nut driver or socket and wrench.
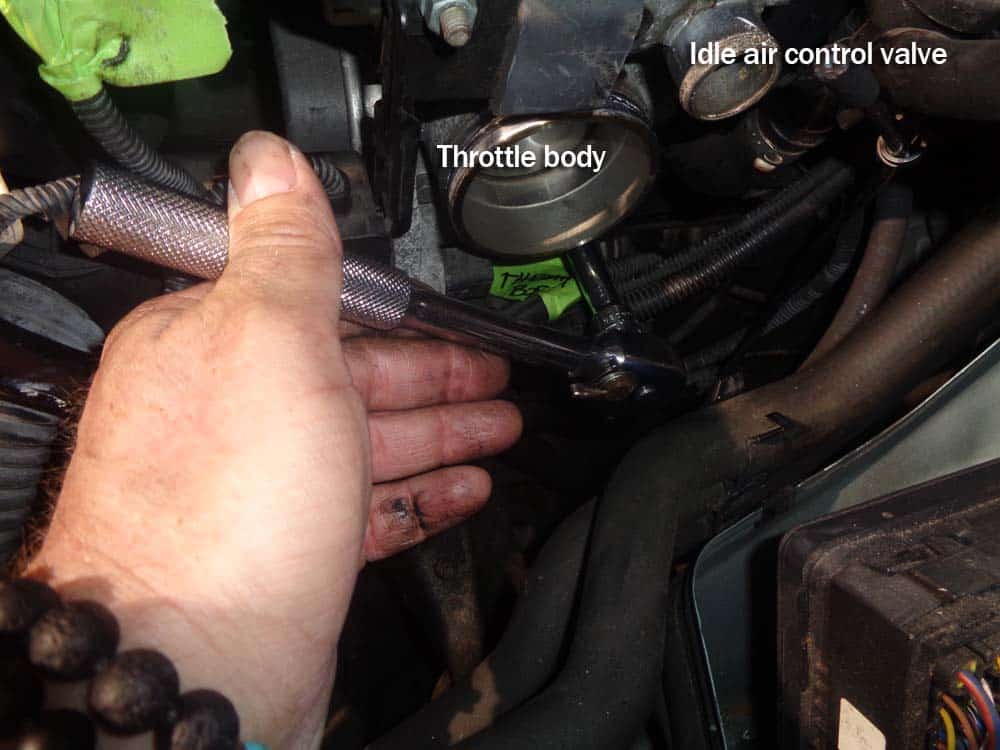
- Next, the bottom throttle body mounting bolt must be removed. Use a 10mm socket wrench with extension.
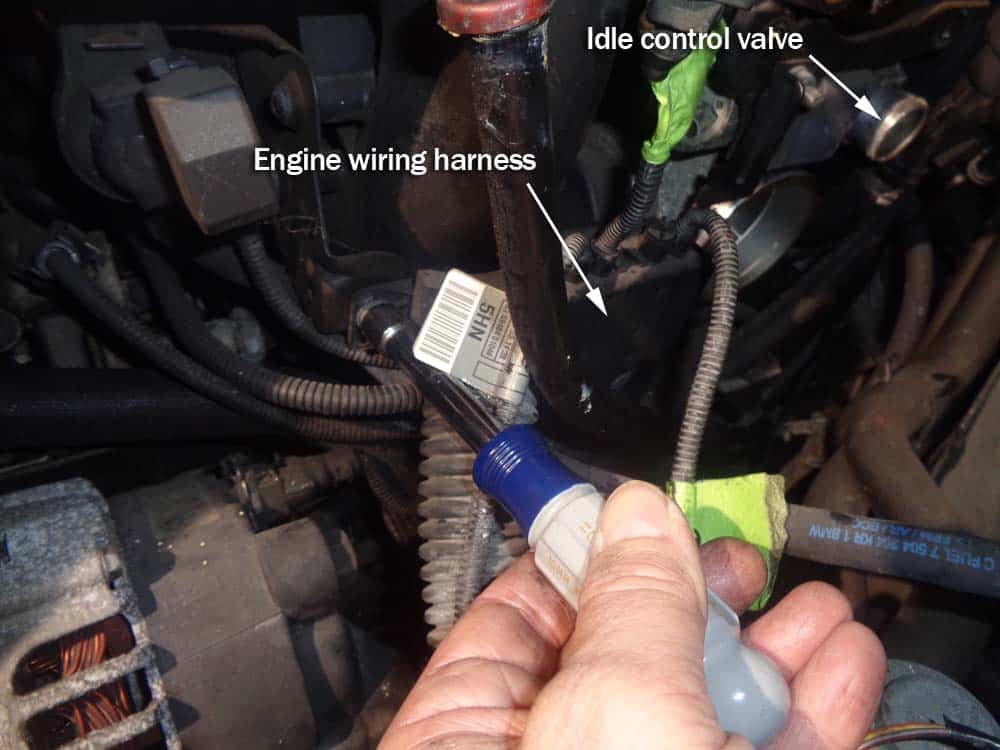
- Finally, remove the 10mm bolt anchoring the engine wiring harness to the idle control valve.
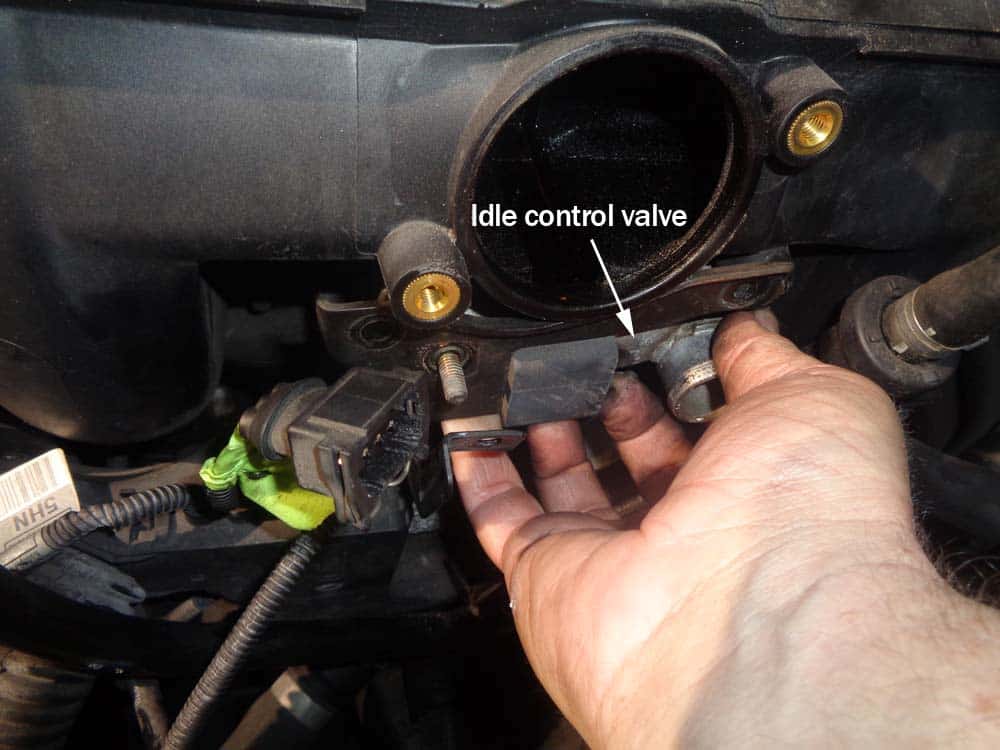
- Grasp the idle control valve and pull it out of the intake manifold.
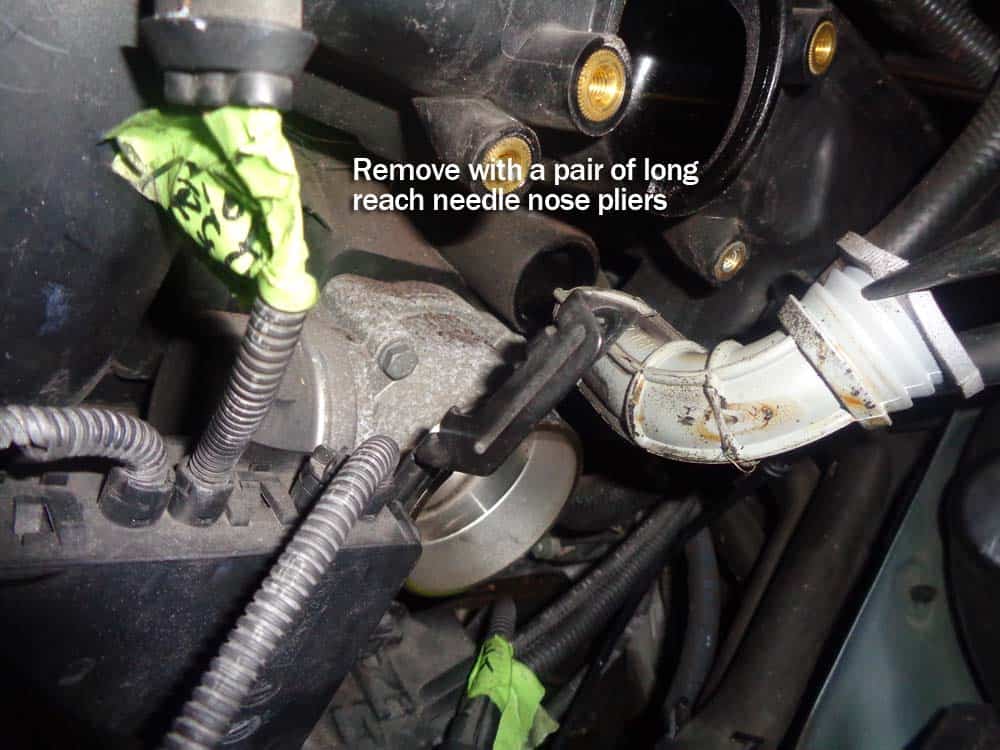
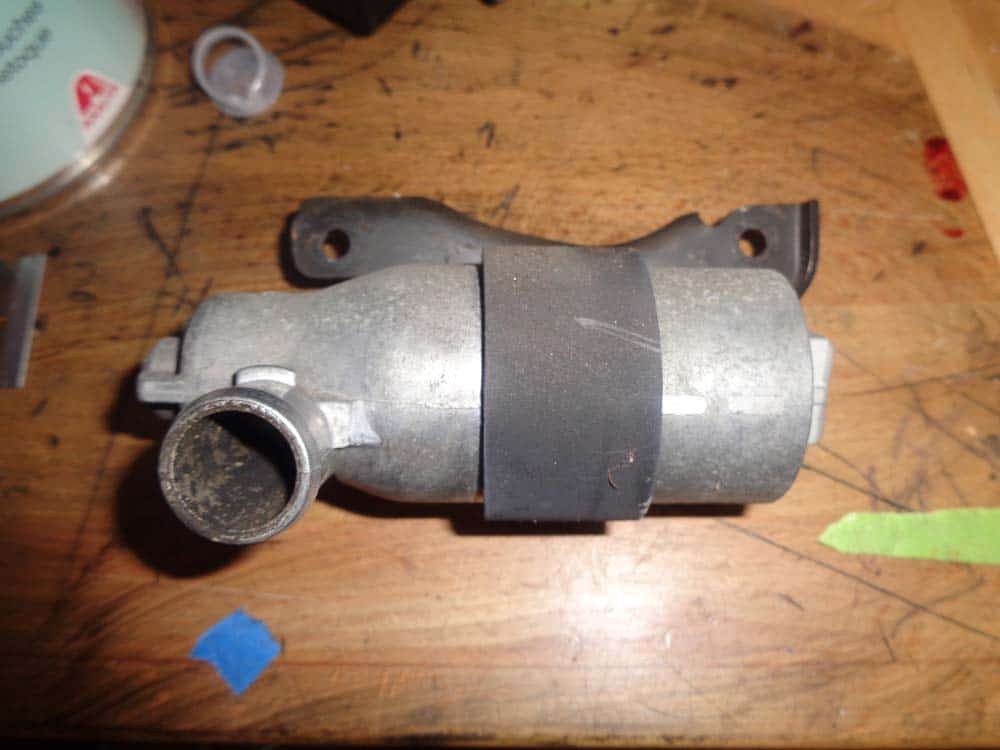
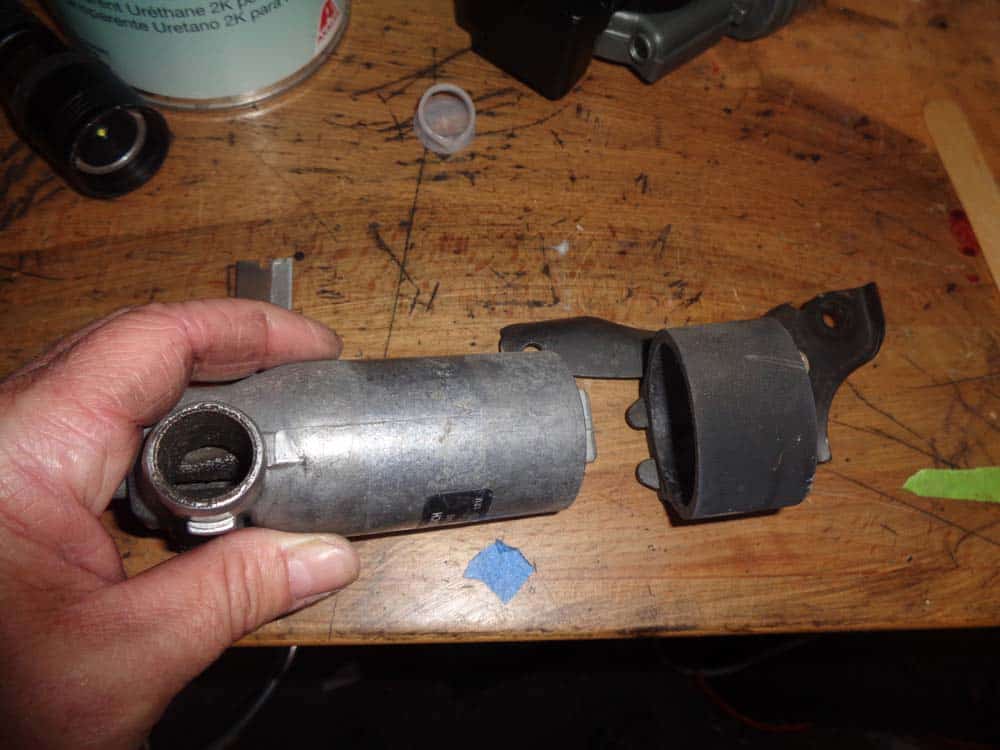
- Locate the idle control valve rubber grommet and remove with a pair of long reach needle nose pliers.

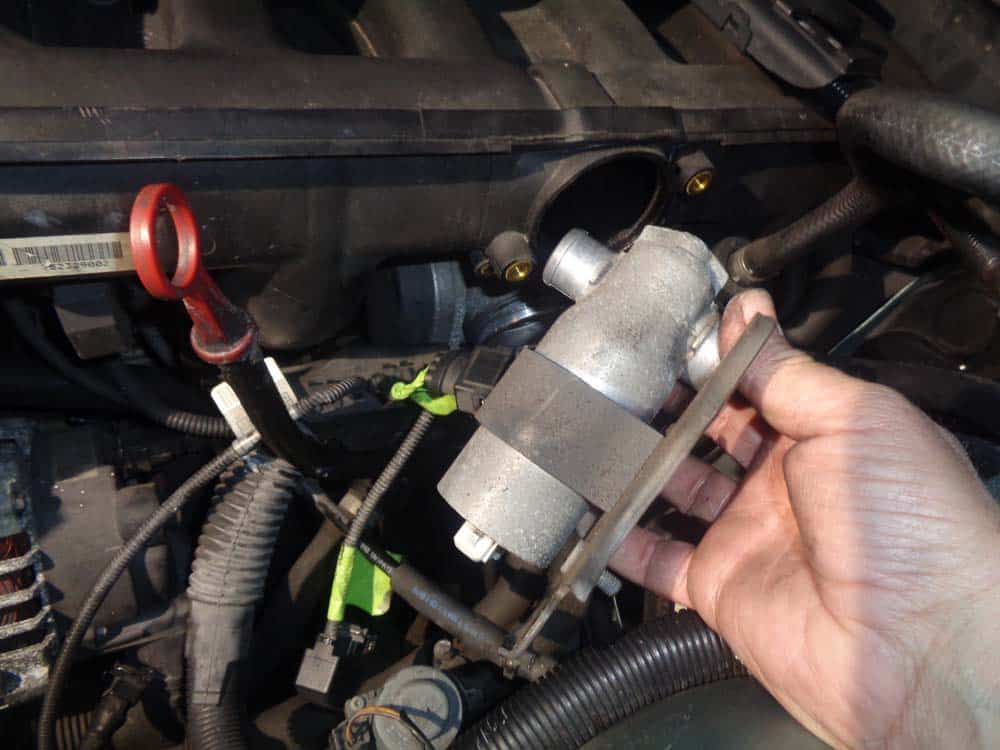
- Remove the idle control valve mount by sliding the valve out of the rubber retaining sleeve. Note the position of the valve in the mount during reassembly.
- Reassemble the vehicle using a new idle control valve, DISA valve and rubber grommet. Make sure the new idle control valve grommet is correctly seated in the intake manifold so you have a nice tight fit with no leaks.
BMW E46 Rough Idle on Startup Finished