
Affiliate link disclosure – The BMW Repair Guide uses affiliate links in their site. For more information on affiliate links, please click here.
Repair Summary
The following article gives detailed instructions on performing a coolant expansion (reservoir) tank replacement on a BMW E46 3 series car. Even though we have used a 2003 BMW 325ci to perform this installation, this article can be applied to any E46 3 series vehicle, including the 323i, 328i and 330i coupe, sedan and convertible.
See all vehicles this article applies to
E46 3 Series 325ti
E46 3 Series 318td
E46 3 Series 320td
E46 3 Series 318ti
E46 3 Series 330xi
E46 3 Series 330i
E46 3 Series 330xd
E46 3 Series 330d
E46 3 Series 316ti
E46 3 Series 328i
E46 3 Series 325xi
E46 3 Series 325i
E46 3 Series 320i
E46 3 Series 323i
E46 3 Series 320d
E46 3 Series 318i
E46 3 Series 318d
E46 3 Series 316i
E46 3 Series M3 CSL
E46 3 Series M3
E46 3 Series 330Ci
E46 3 Series 330Cd
E46 3 Series 325Ci
E46 3 Series 323Ci
E46 3 Series 320Ci
E46 3 Series 320Cd
E46 3 Series 318Ci
E46 3 Series 328Ci
E46 3 Series 316Ci
E46 3 Series 323i 2.4
E46 3 Series 316i 1.9
E46 3 Series 316i 1.6
The BMW E46 coolant expansion tank is a part that commonly fails in all 1998-2006 3 series cars.
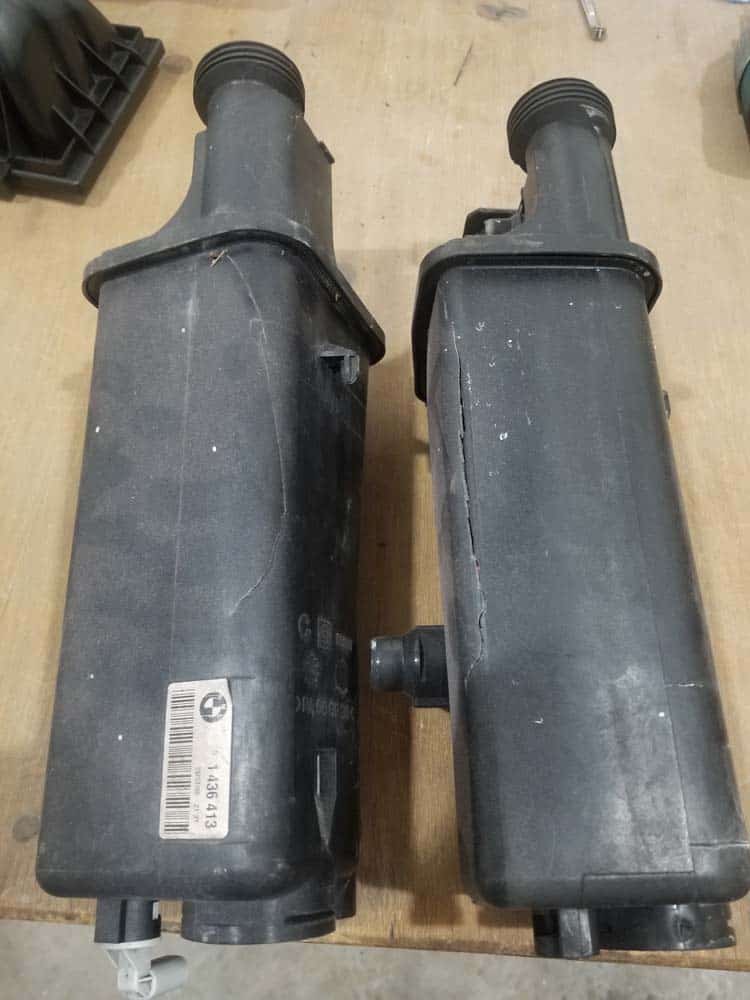
If you search enough online forum threads, you will quickly realize that one of the BMW E46's "Achilles Heels" is the coolant expansion tank. As the BMW E46 expansion tank ages, the prolonged heat and pressure it is subjected to causes the plastic to weaken. Eventually, the walls of the tank give out causing it to fracture...usually along the corners. A ruptured expansion tank can range from a small, slow dripping crack, to a large volcanic explosion that can eject coolant all over your engine compartment.
The following are images of two failed BMW E46 coolant expansion tanks that we have replaced here at the Repair Guide. Notice how the plastic cracked on the corner of the right tank - this one literally exploded under the hood of the car.
Indications that your BMW E46 coolant expansion tank may be damaged include one or more of the following: constantly having to add coolant to your car, coolant running down the side of the tank, coolant on the ground under the tank, or white "steam" seen coming from the vicinity of the tank. If you encounter any of these conditions DO NOT drive the vehicle. A fractured tank can cause overheating and catastrophic engine damage.
Your vehicle's expansion tank acts as a buffer for expanding engine coolant. Without it, your coolant system would quickly become over-pressurized and fail. A ruptured expansion tank can quickly lose coolant and lead to engine overheating - it should be replaced immediately if you determine it has been compromised.


View the detailed parts diagram for this repair.
Includes detailed part diagrams, part numbers and links to purchase all of the required components needed to complete this repair.
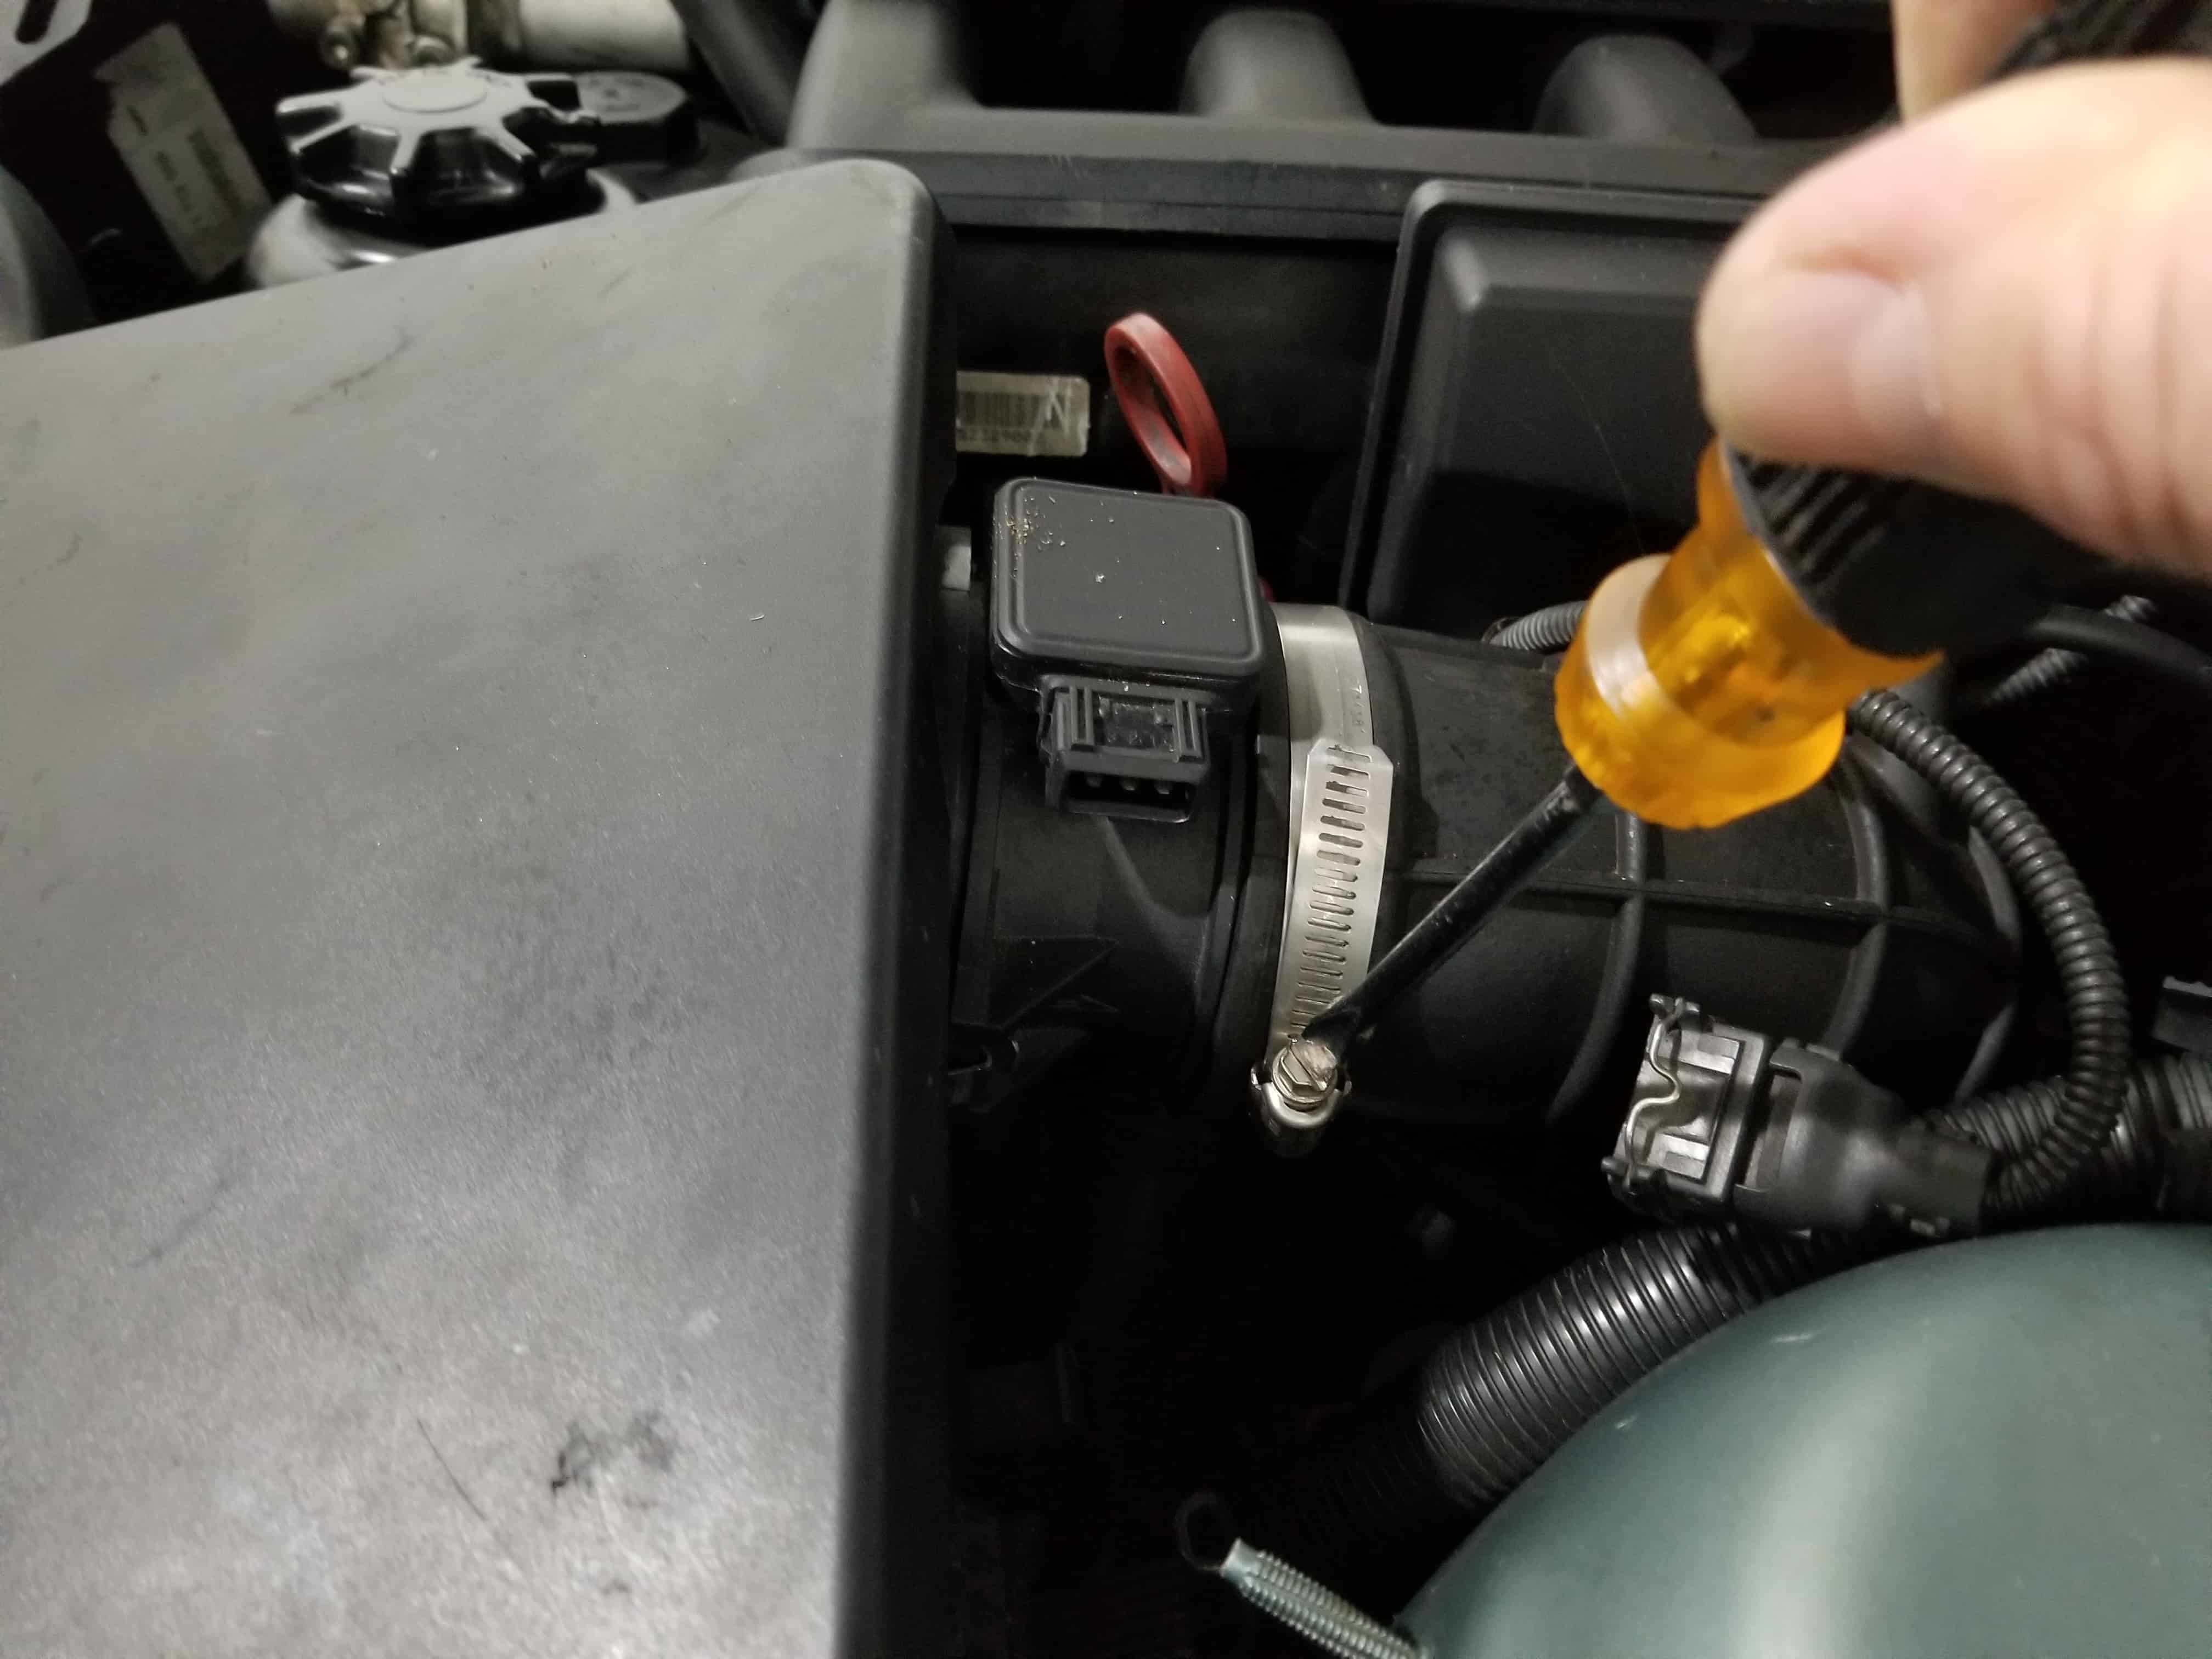
Section 1 - Preparing for the BMW E46 Coolant Expansion Tank Removal
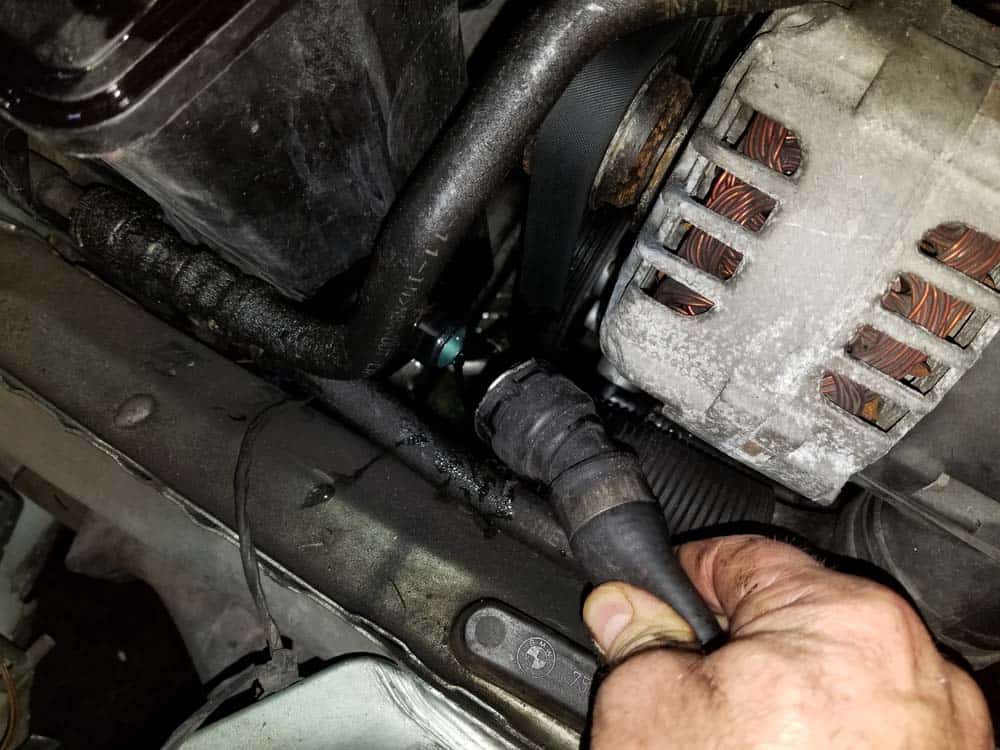
- To gain full access to the BMW E46 coolant expansion tank, the vehicle’s intake muffler will need to be removed. Start by disconnecting the mass air flow (MAF) sensor's electrical connection.
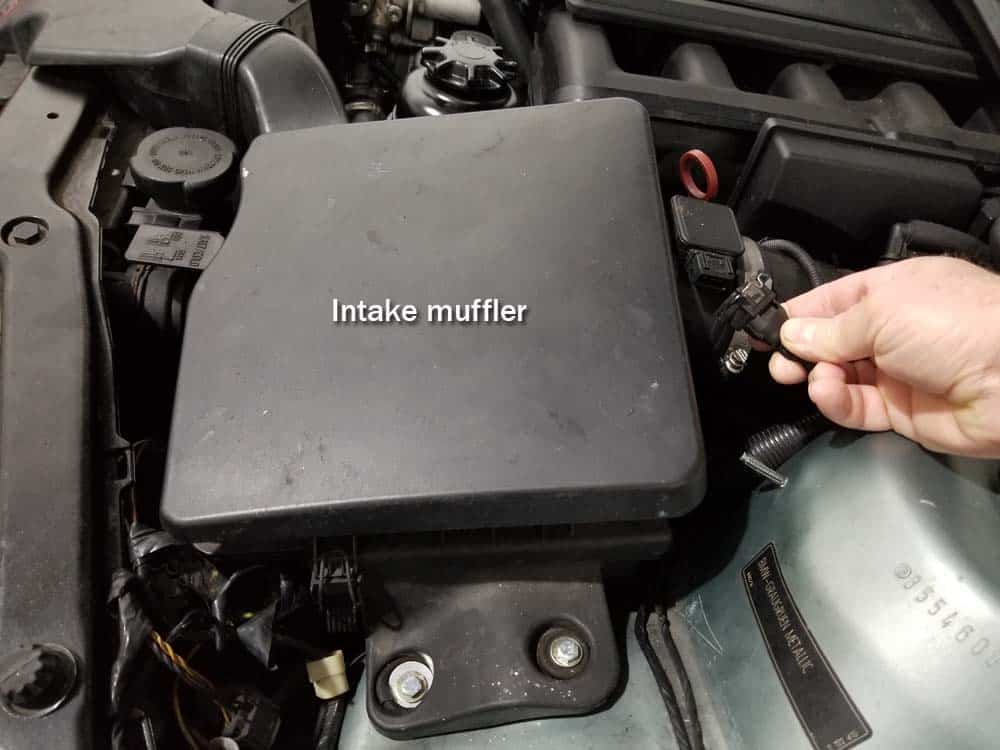
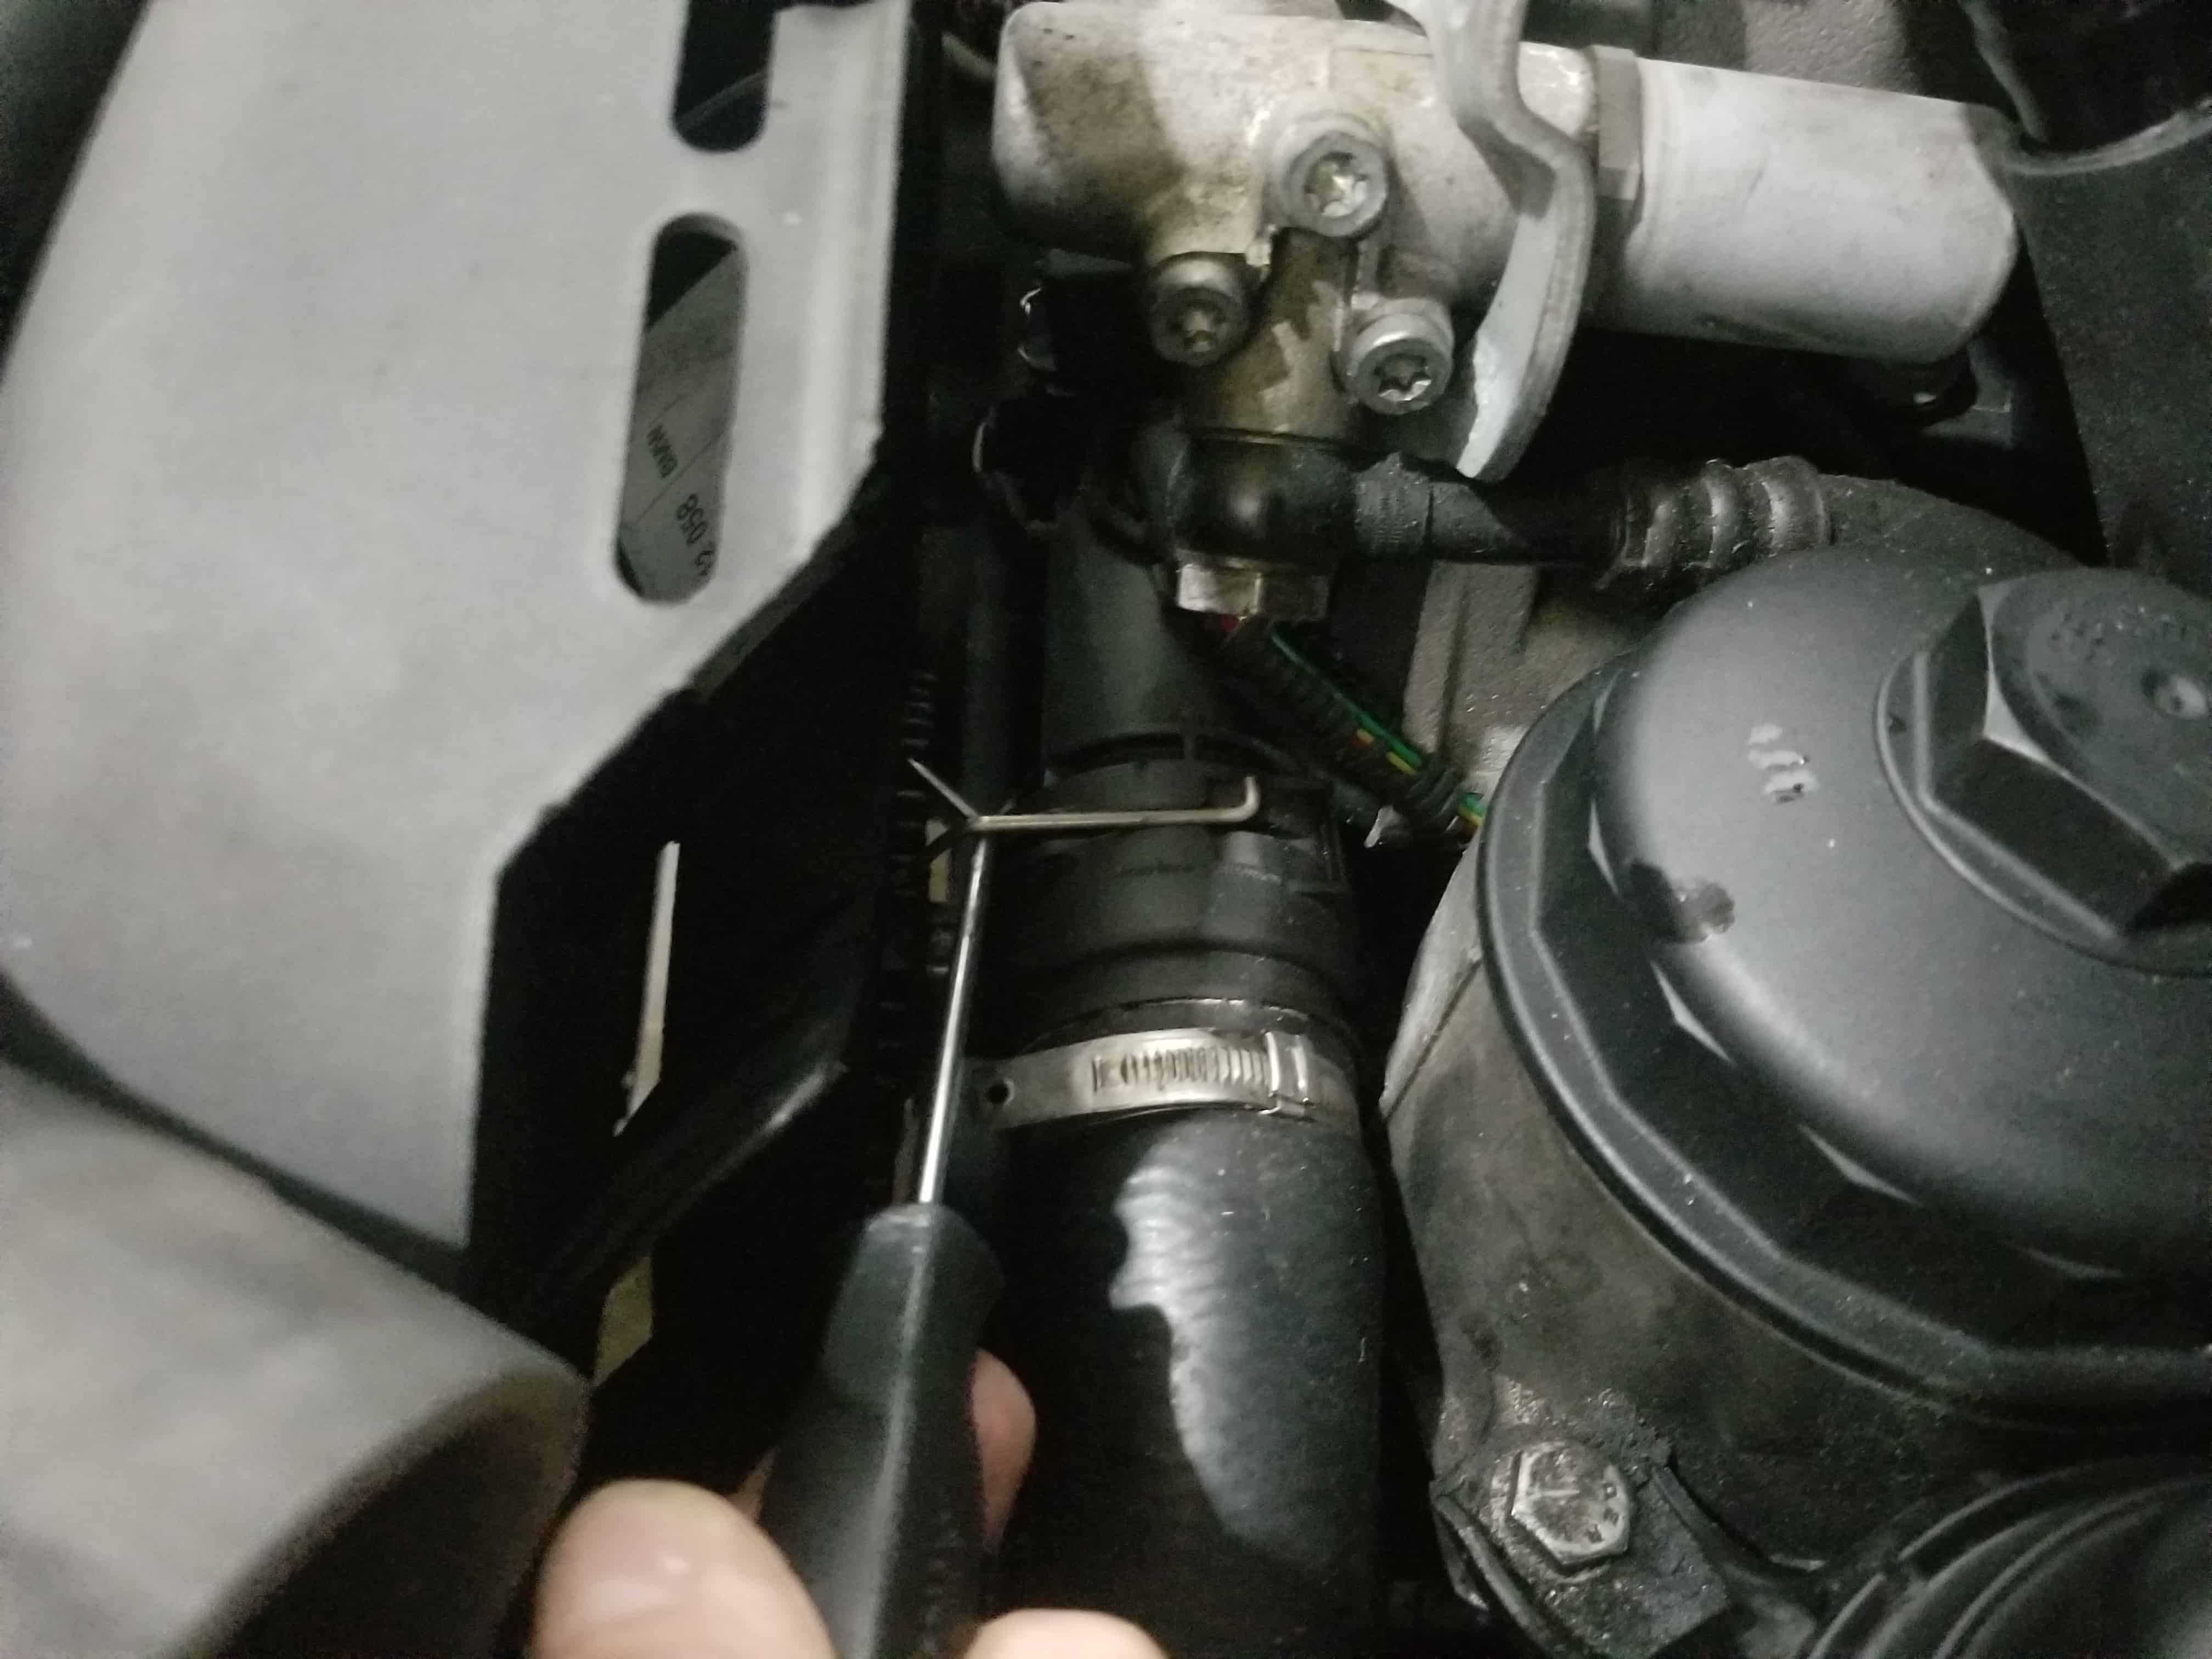
- Use a flat blade screwdriver to loosen the hose clamp securing the intake boot to the intake muffler.
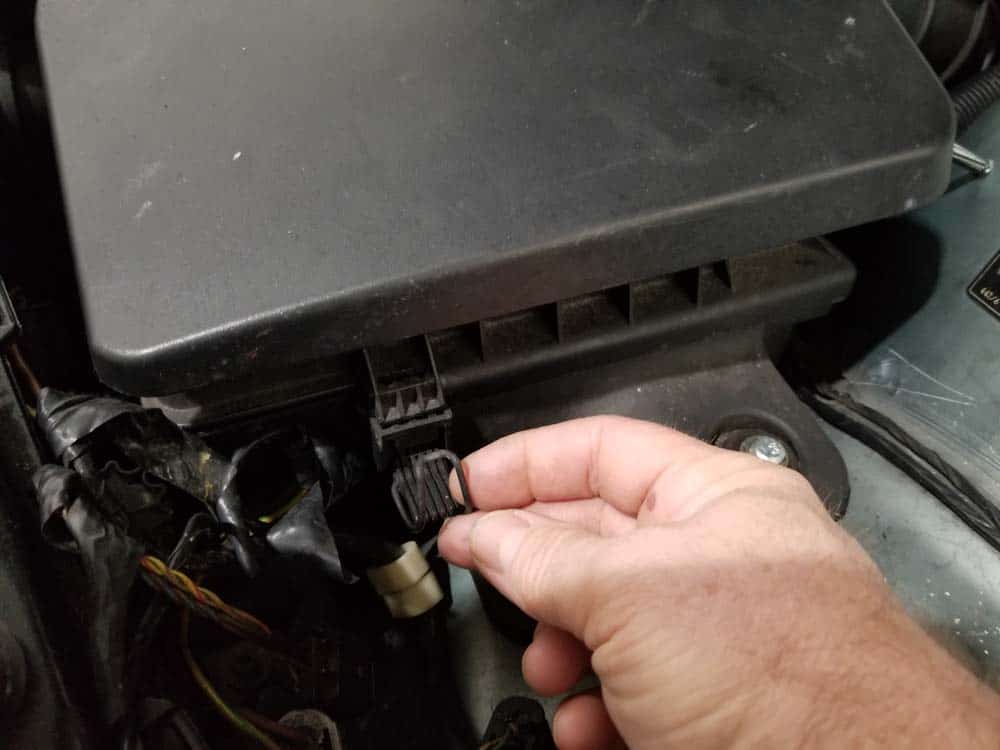
- Unlatch the four clamps on the lid of the intake muffler. Note that one of the clamps is difficult to get to...use a metal pick to release if you can't reach it with your fingers. Remove the lid from the vehicle.
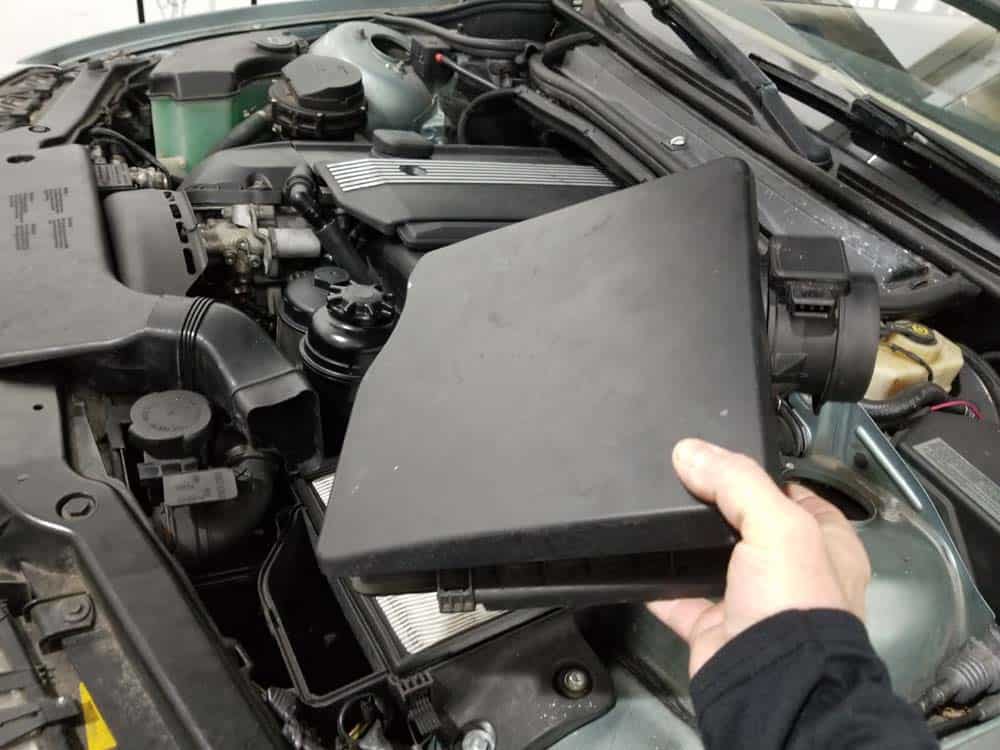
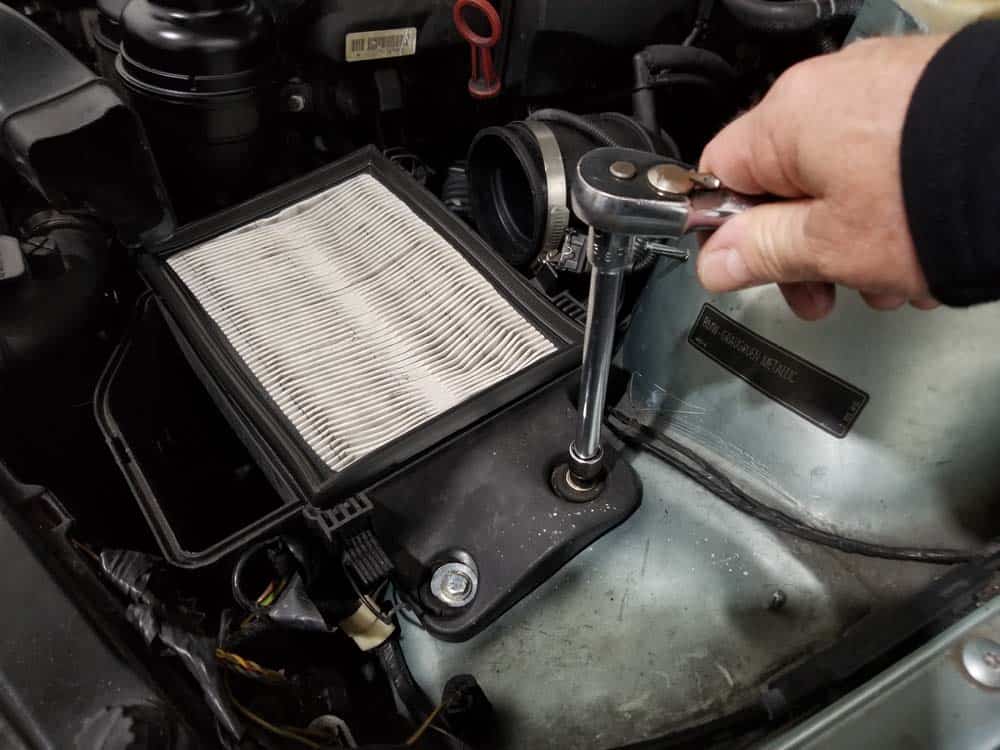
- Using a 10mm socket wrench, remove the two intake muffler mounting bolts. Remove the intake muffler from the engine compartment.

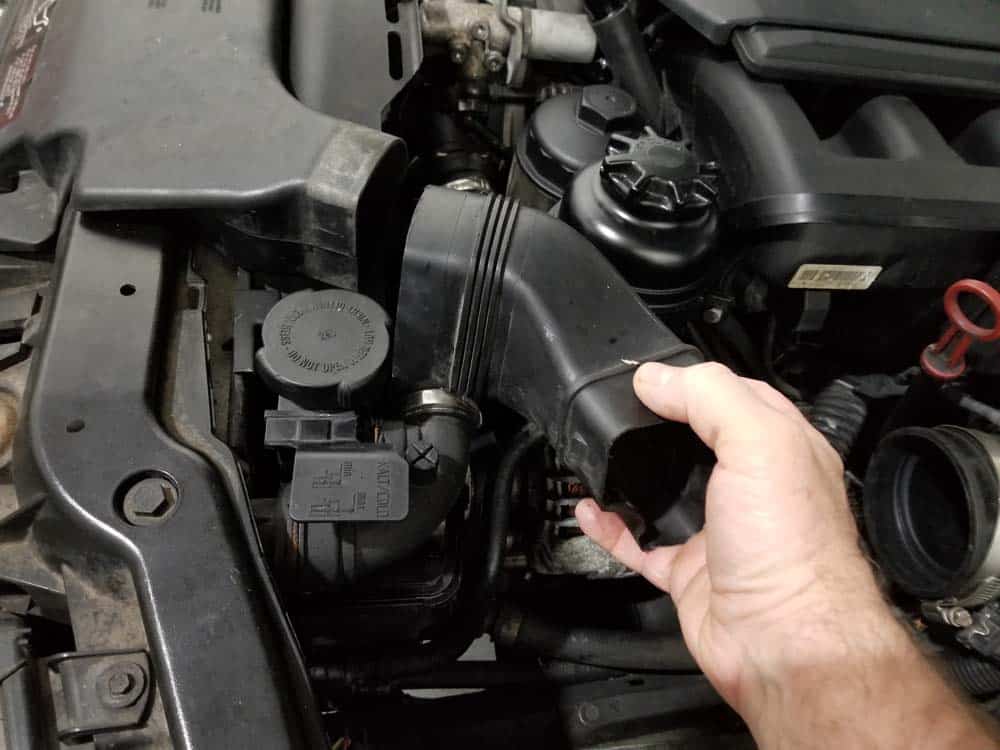
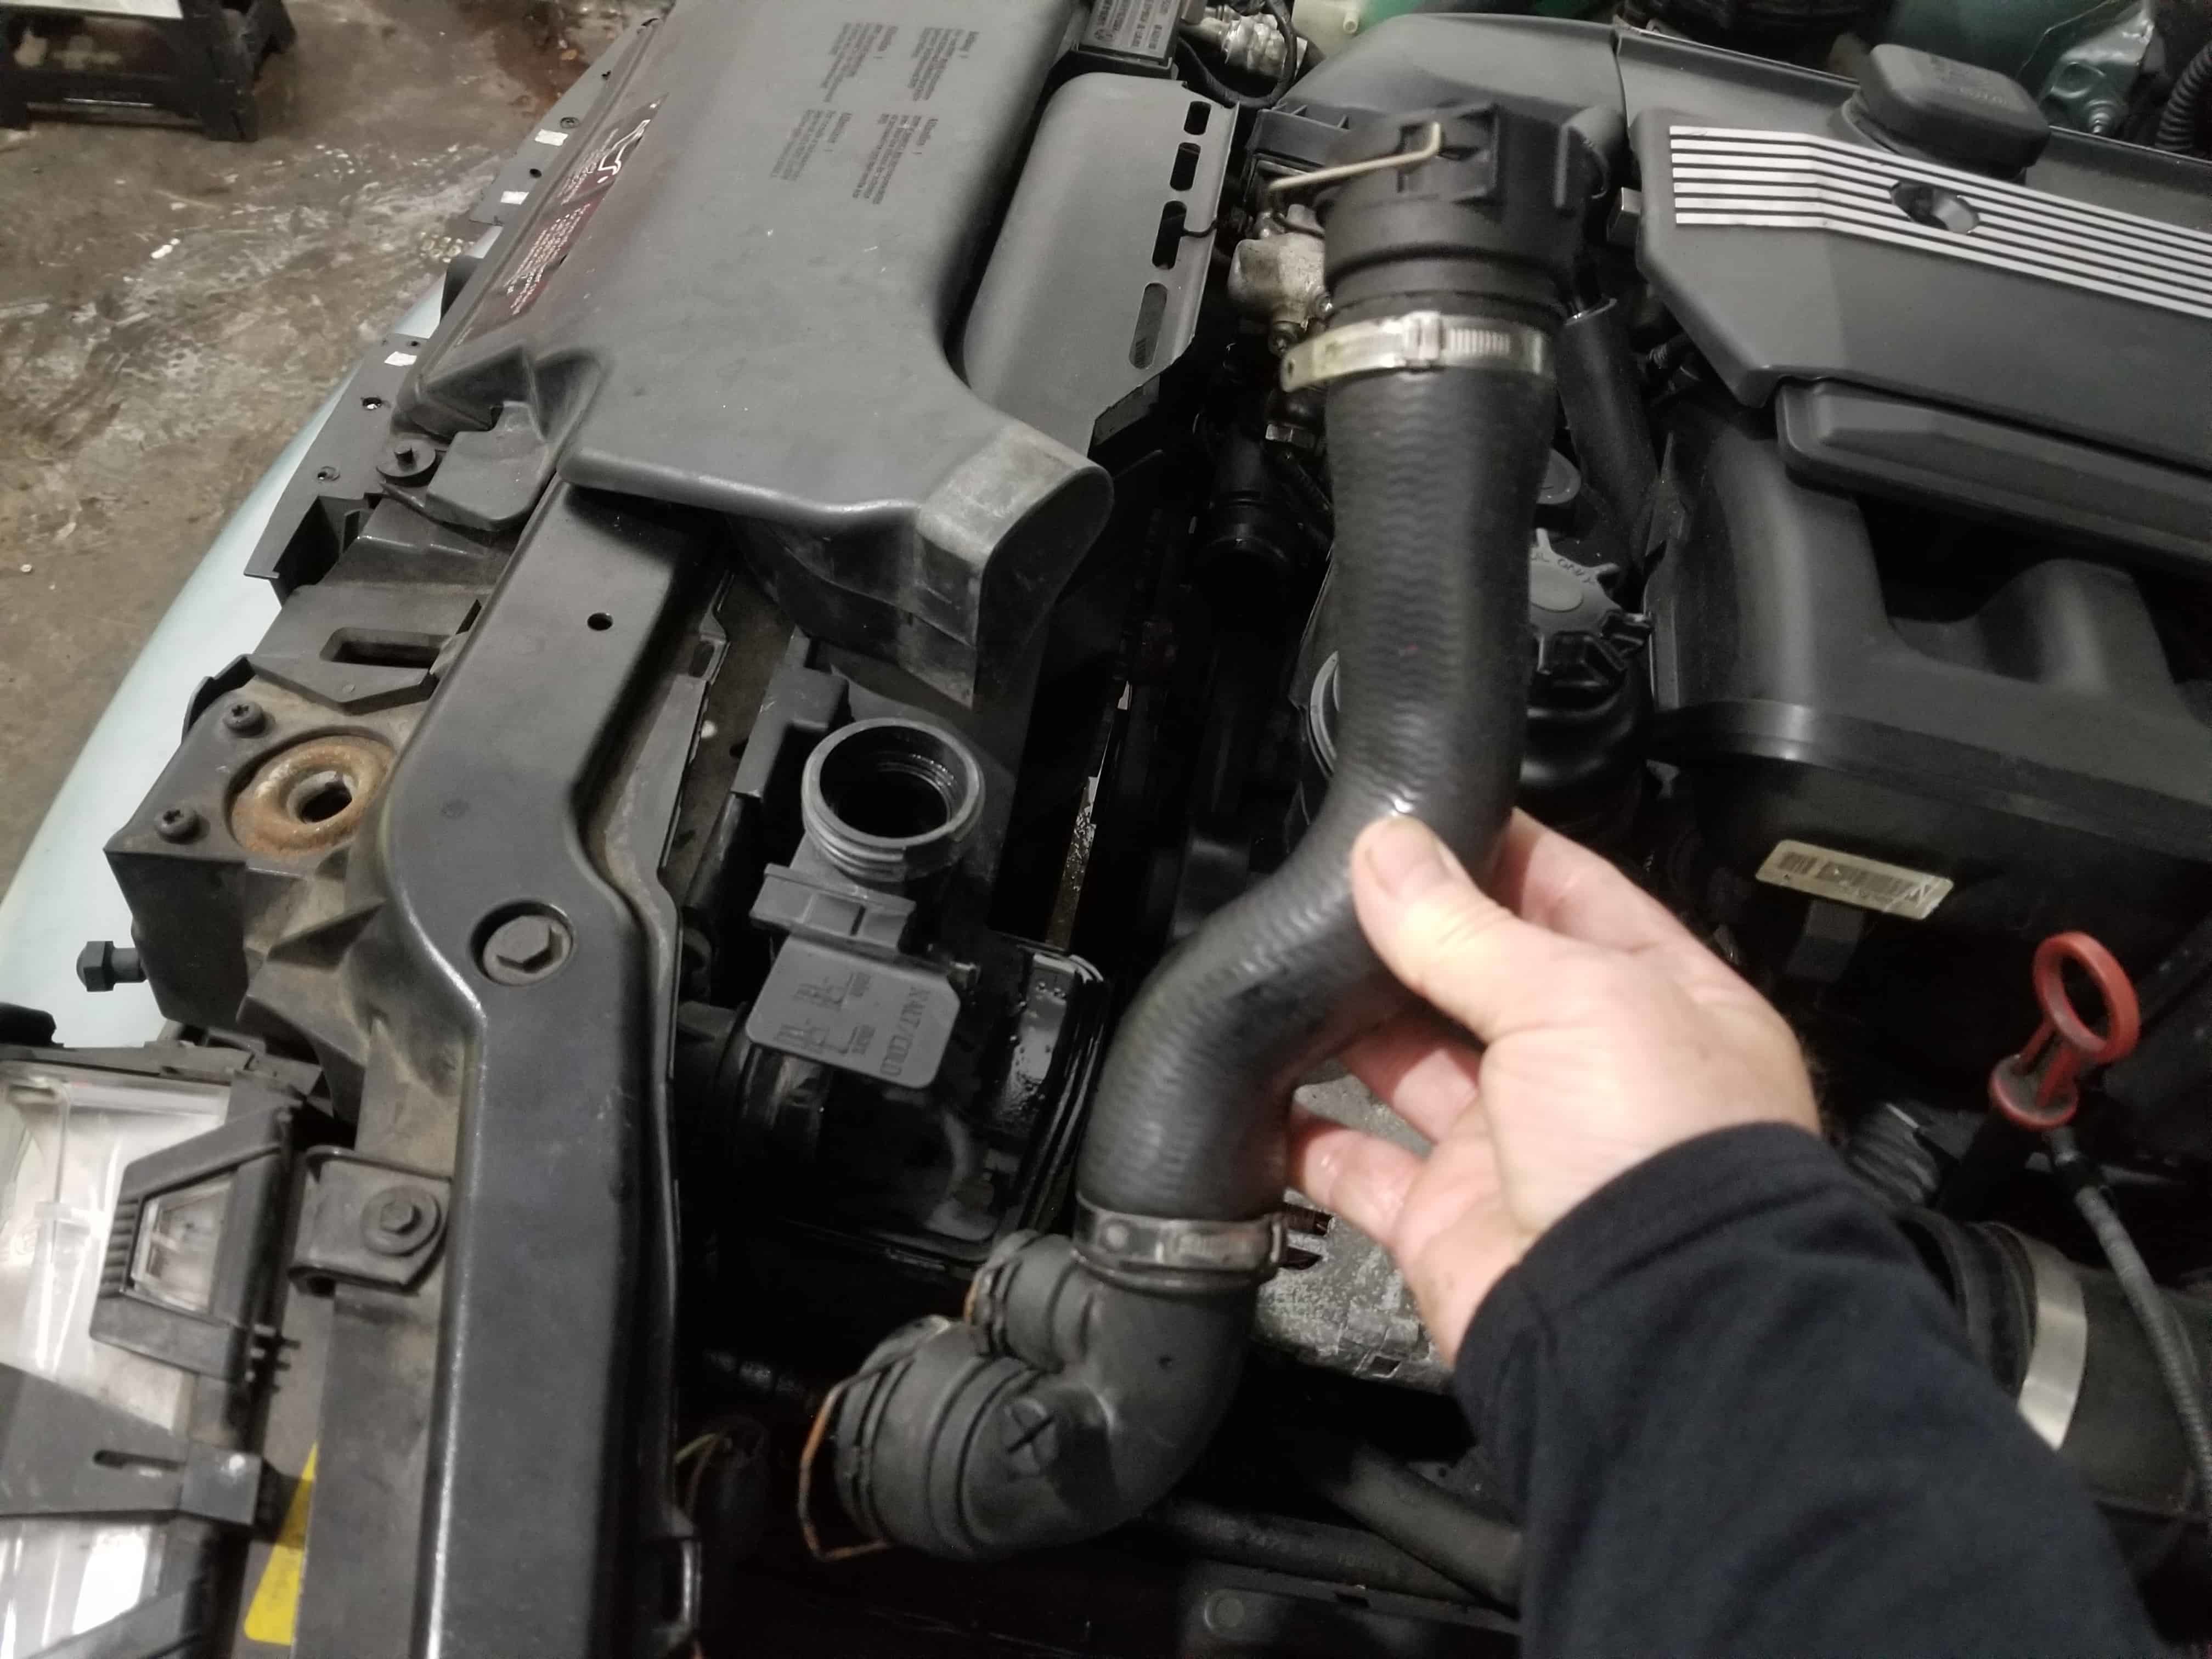
- Remove the plastic air intake tube.
- You now have clear access to the BMW E46 coolant expansion tank.
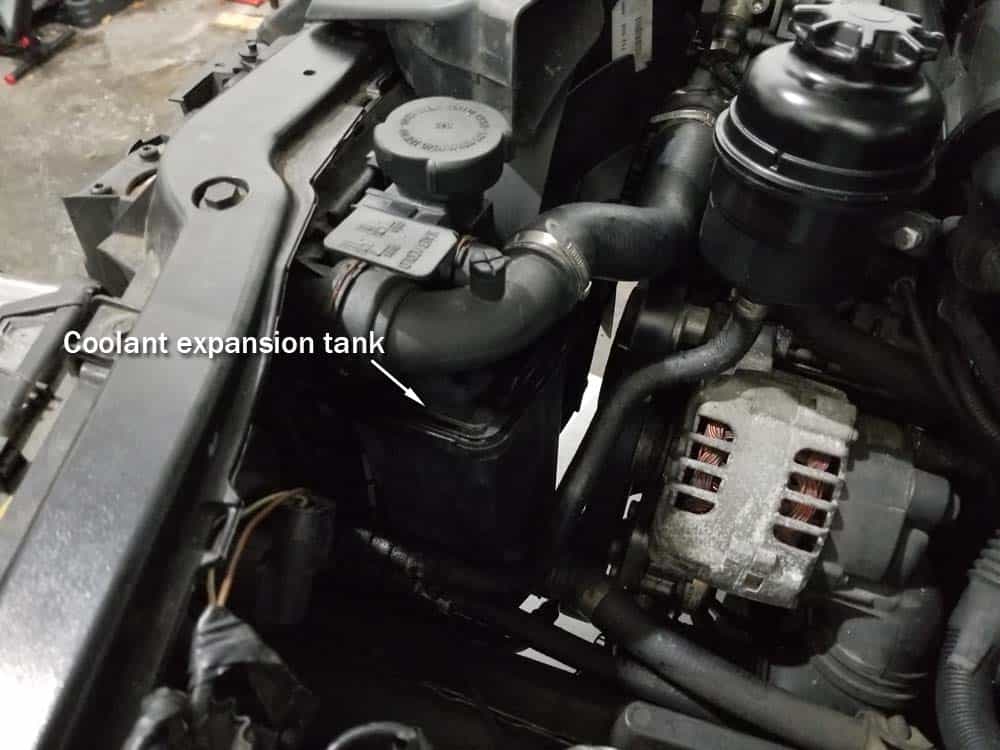
Section 2 - Removing the Old Coolant Expanion Tank
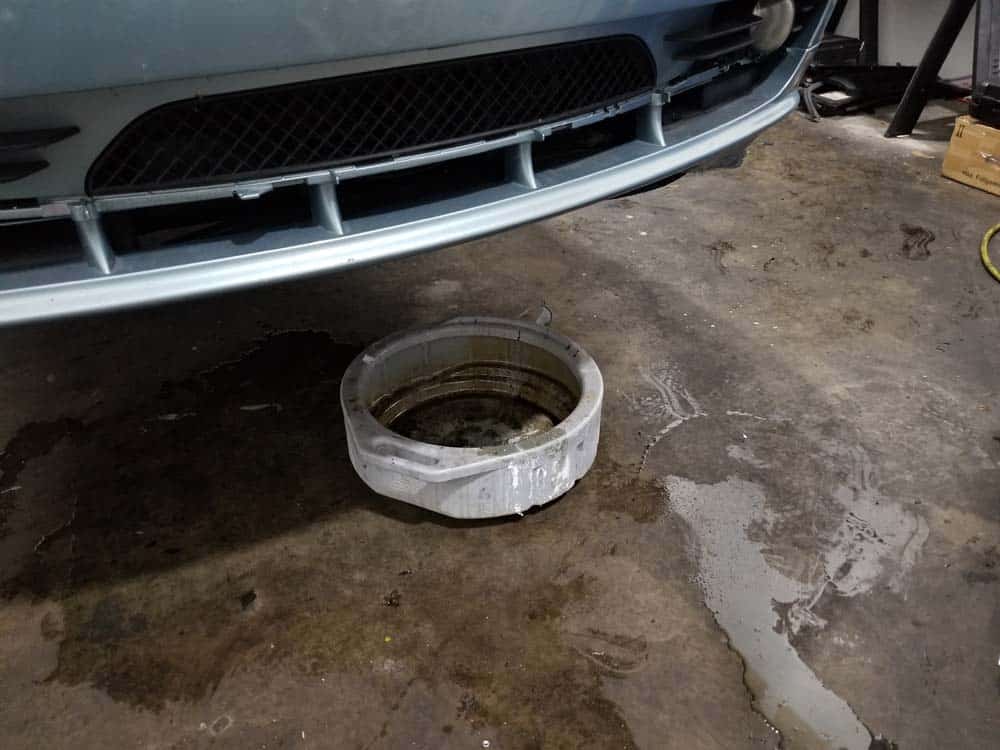
- The expansion tank will need to be drained of its coolant before it can be removed. The quickest way to do this is to disconnect the lower coolant hose from the back of the tank and allow the fluid to drain out. Start by positioning a 5 gallon drain pan on the ground under the expansion tank.
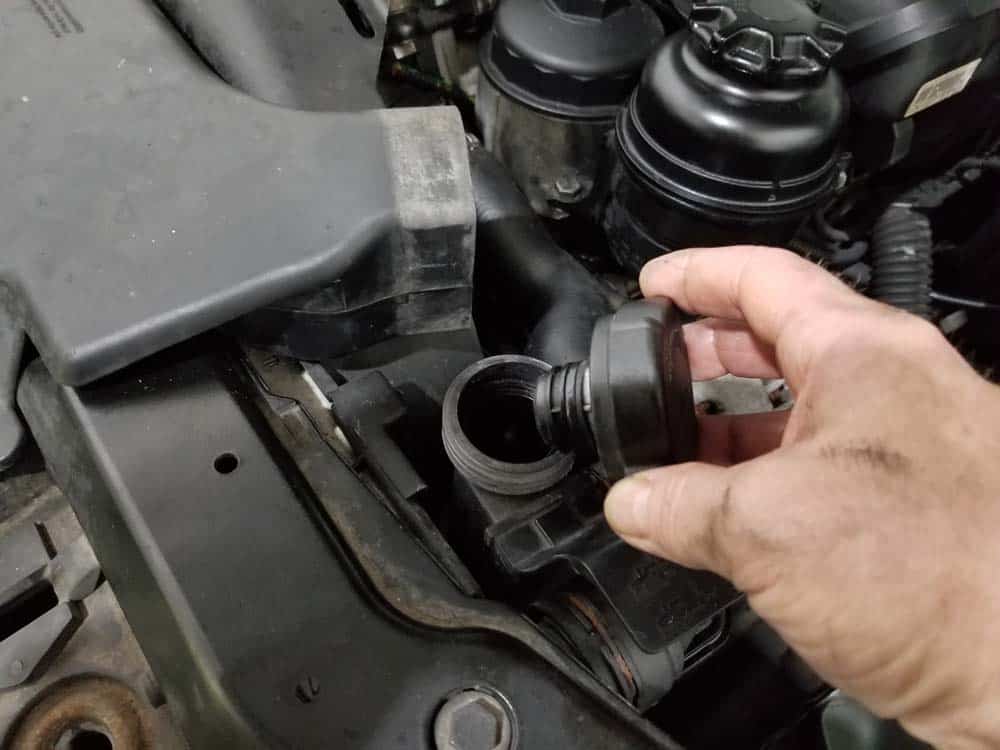
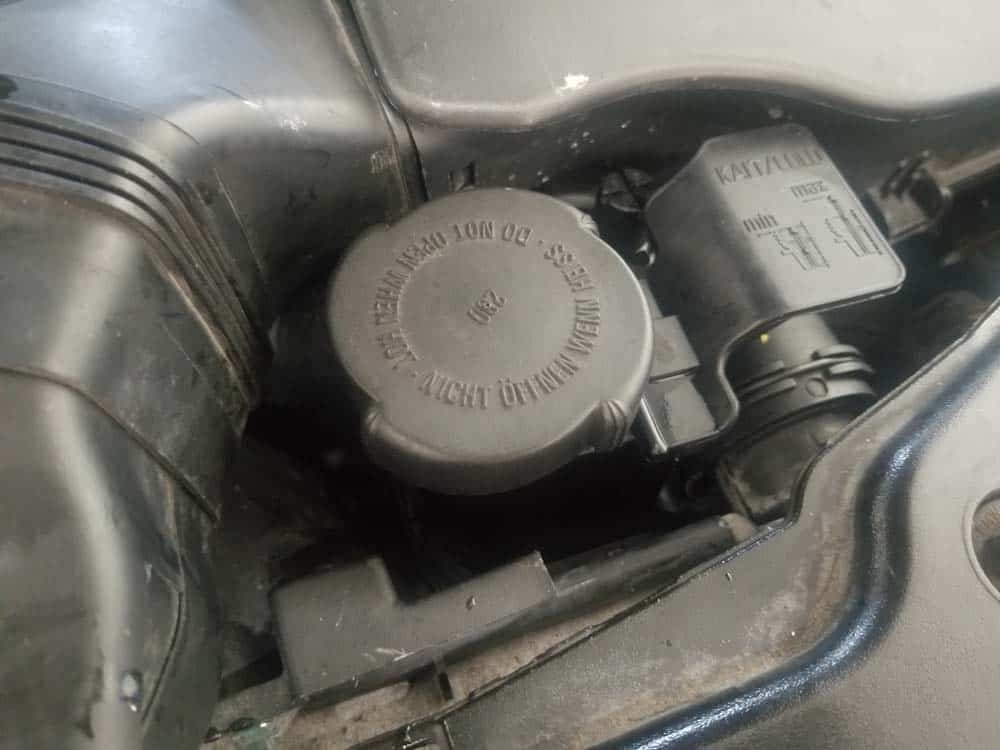
- Remove the cap from the expansion tank.
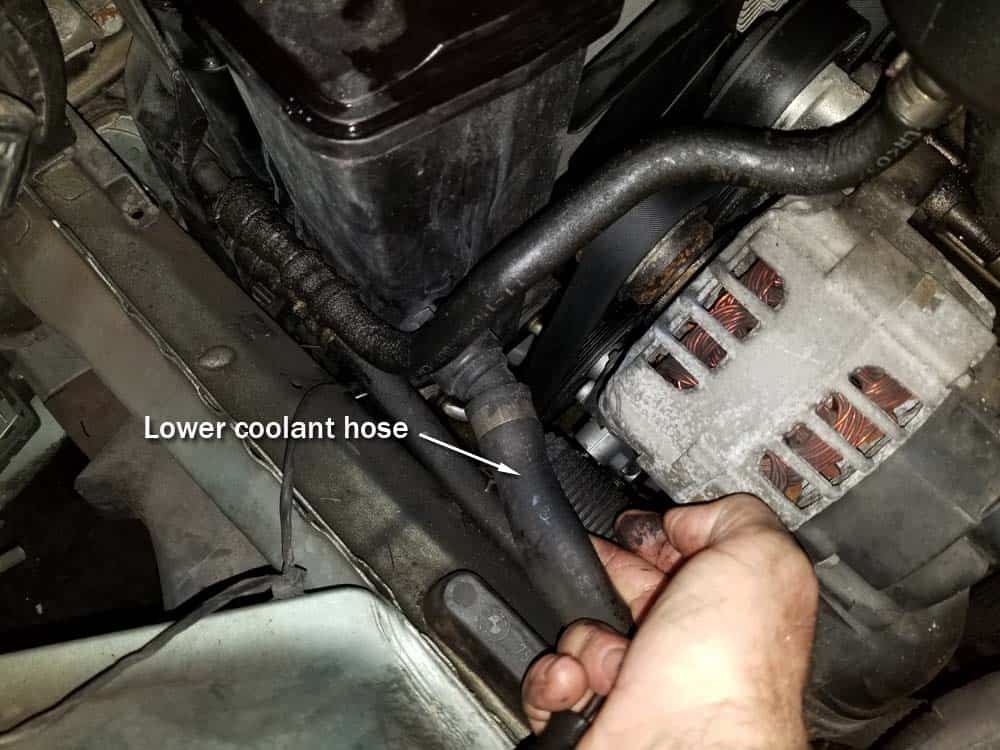
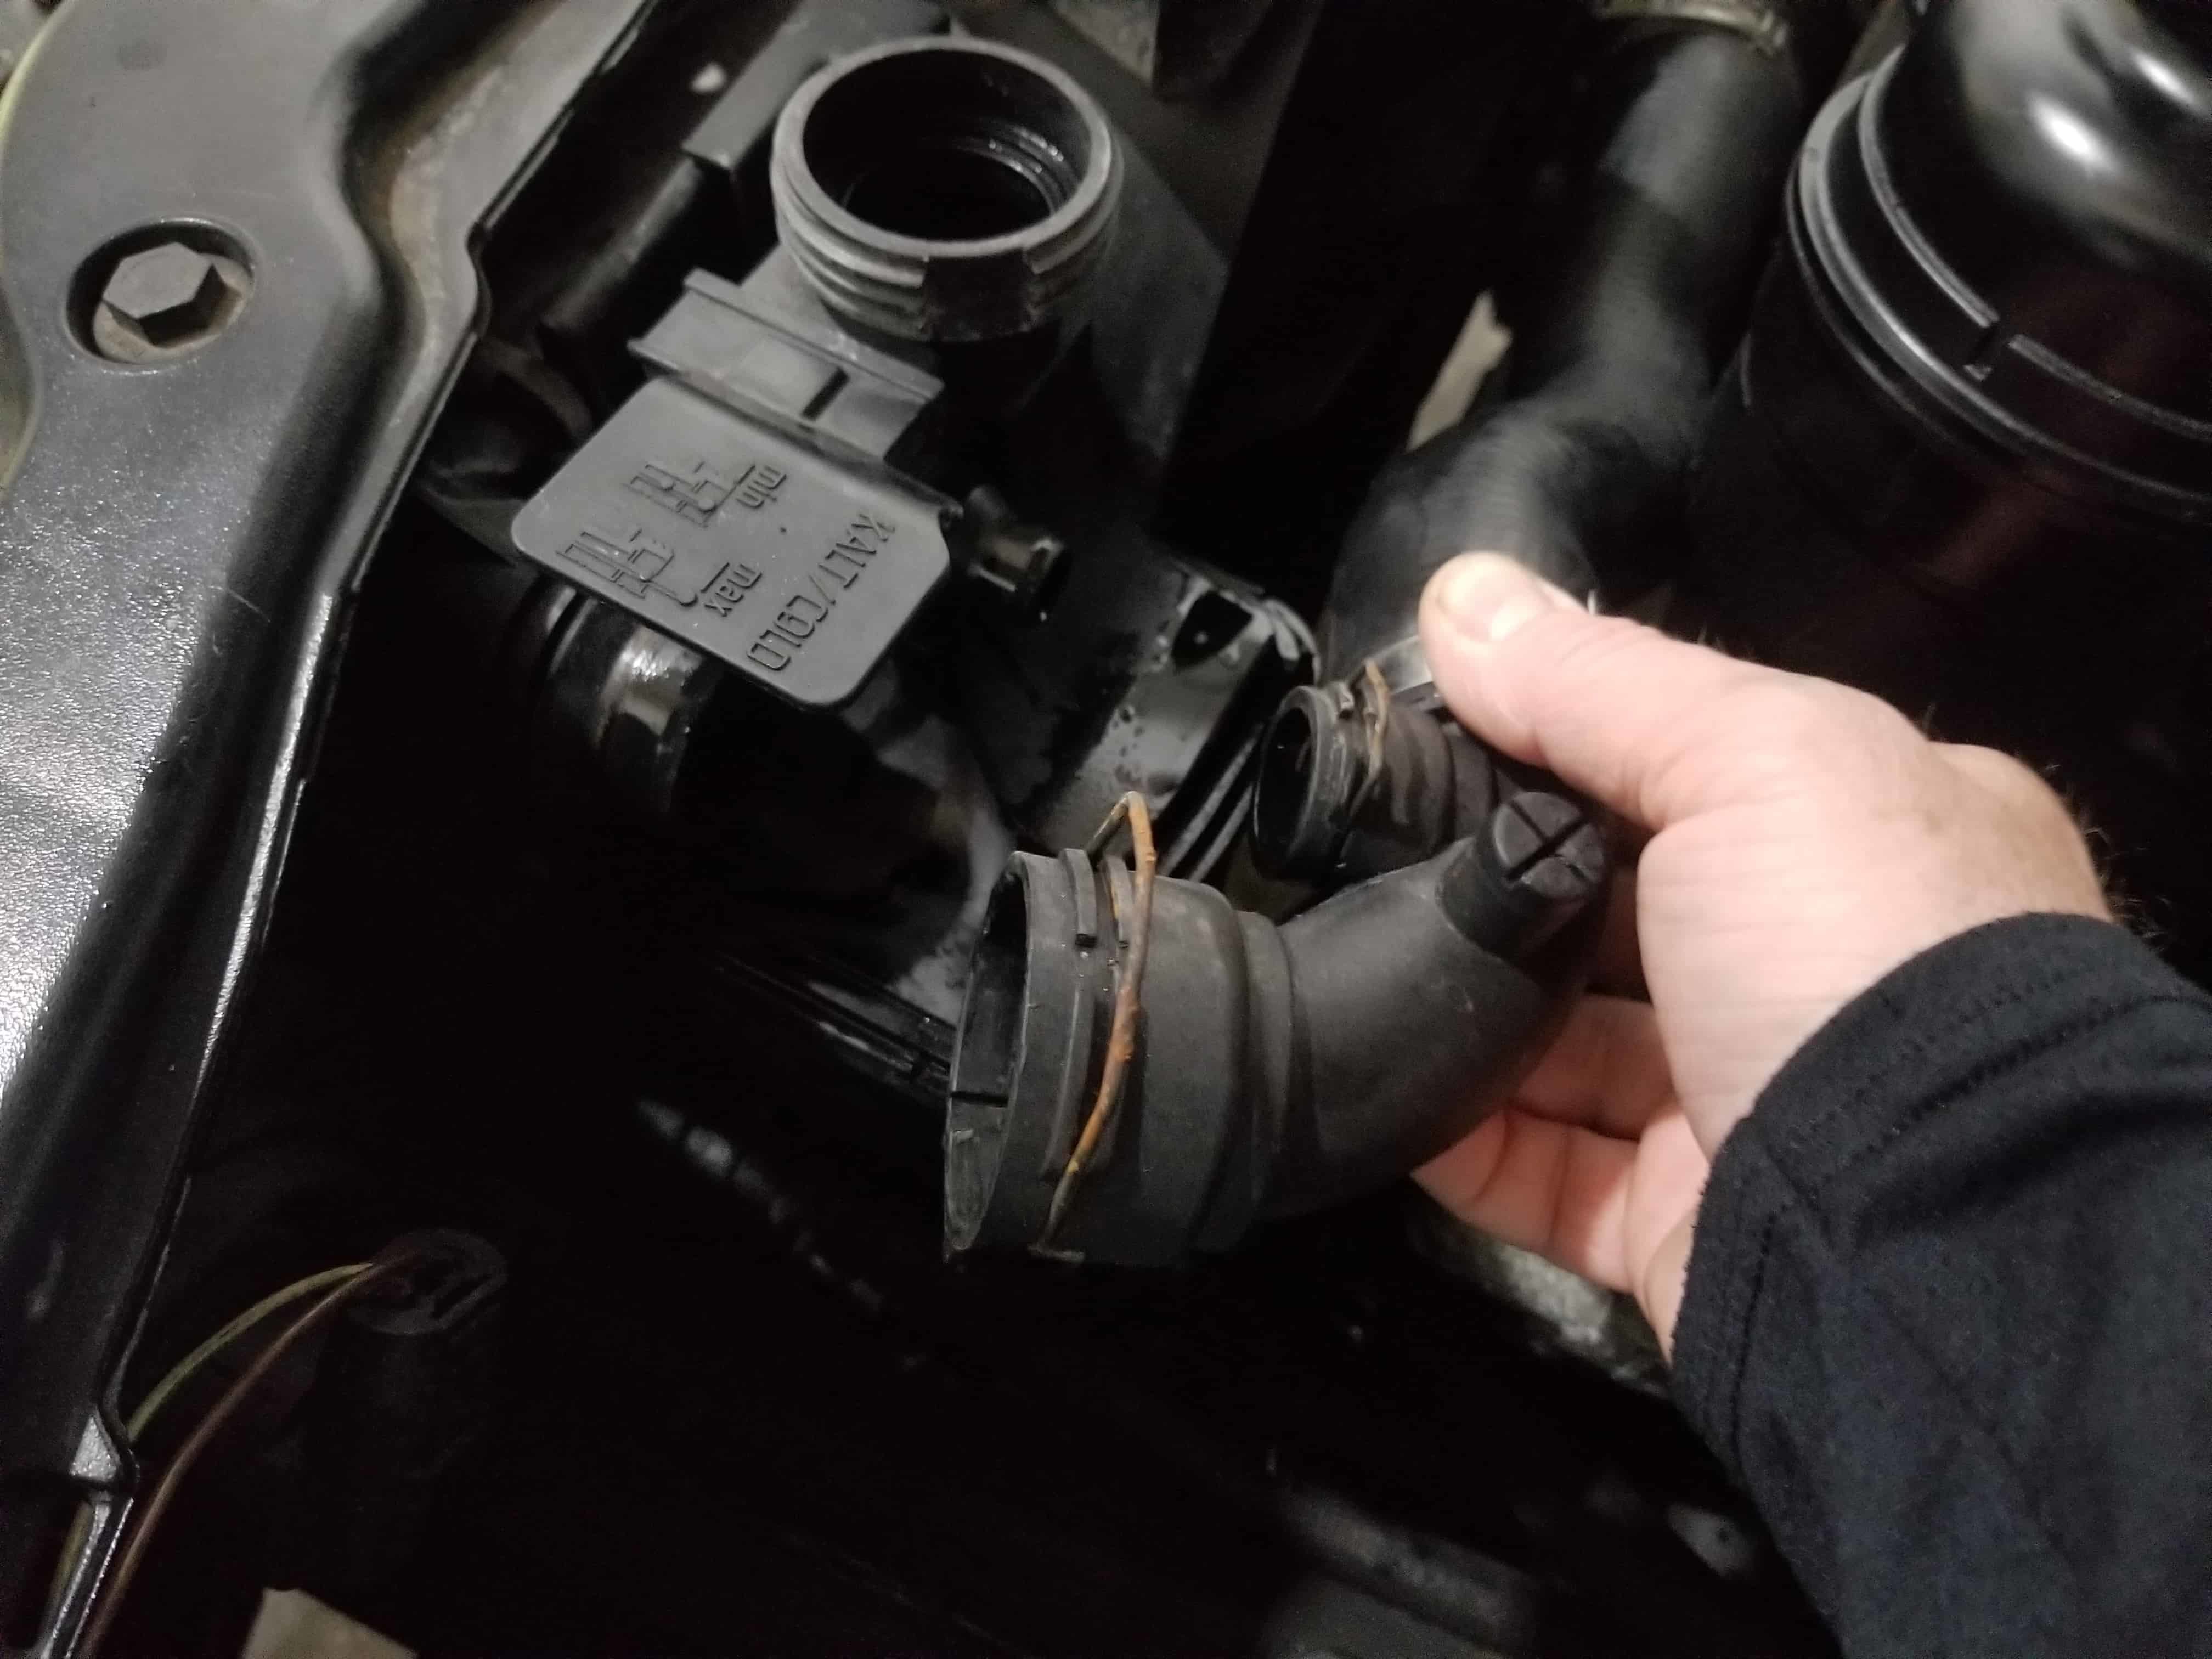
- Locate the lower coolant hose attached to the rear of the expansion tank. Use a metal pick to release the locking clip on the end of the hose. Pull the hose loose from the expansion tank and allow all of the coolant to thoroughly drain out.
- Release the locking clips on the upper coolant (water pump) hose and remove it from the vehicle.


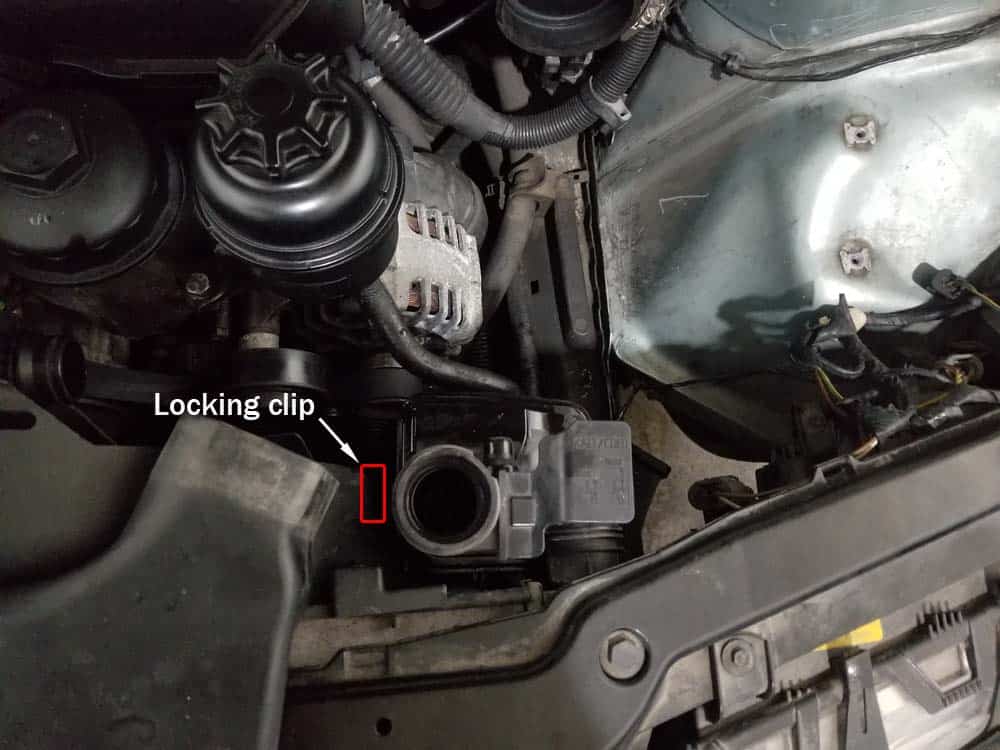
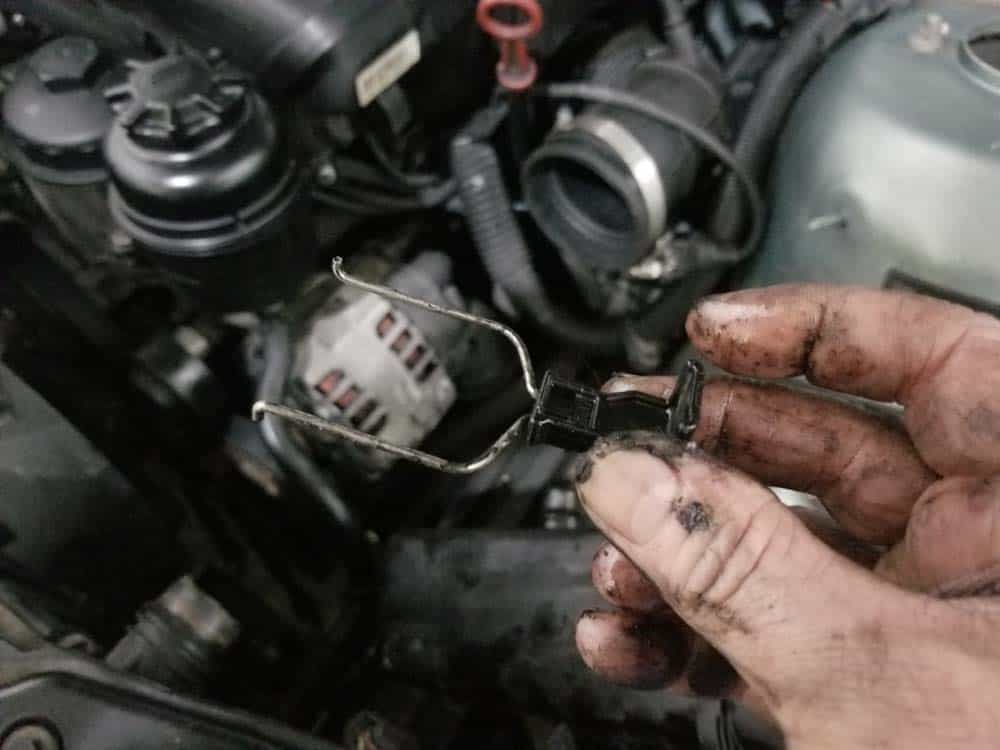
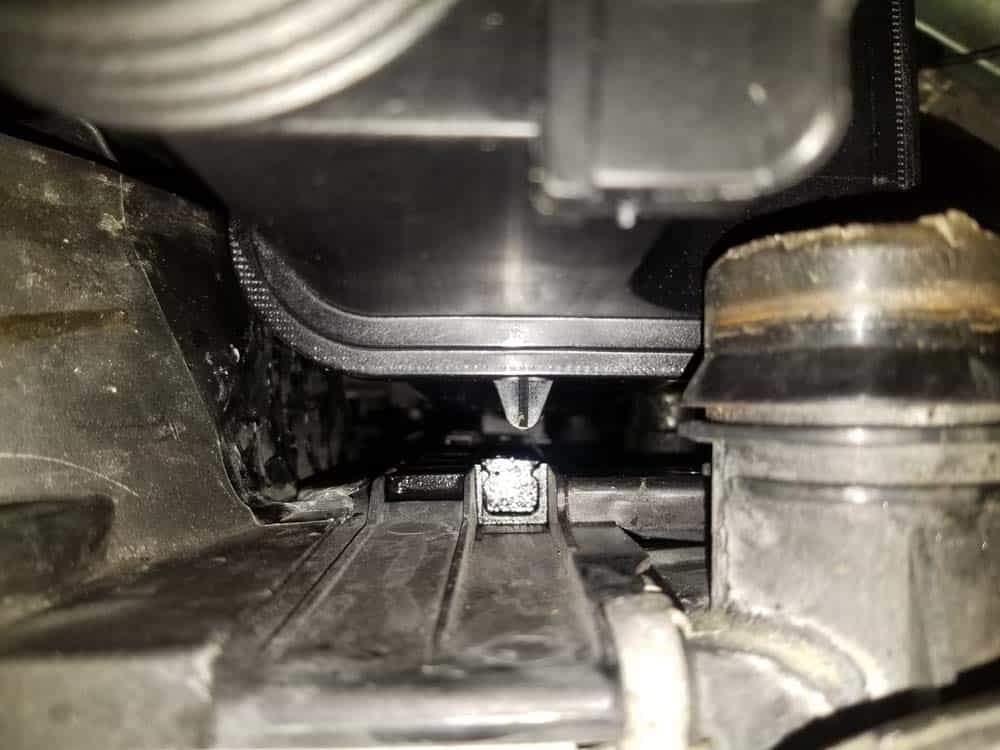
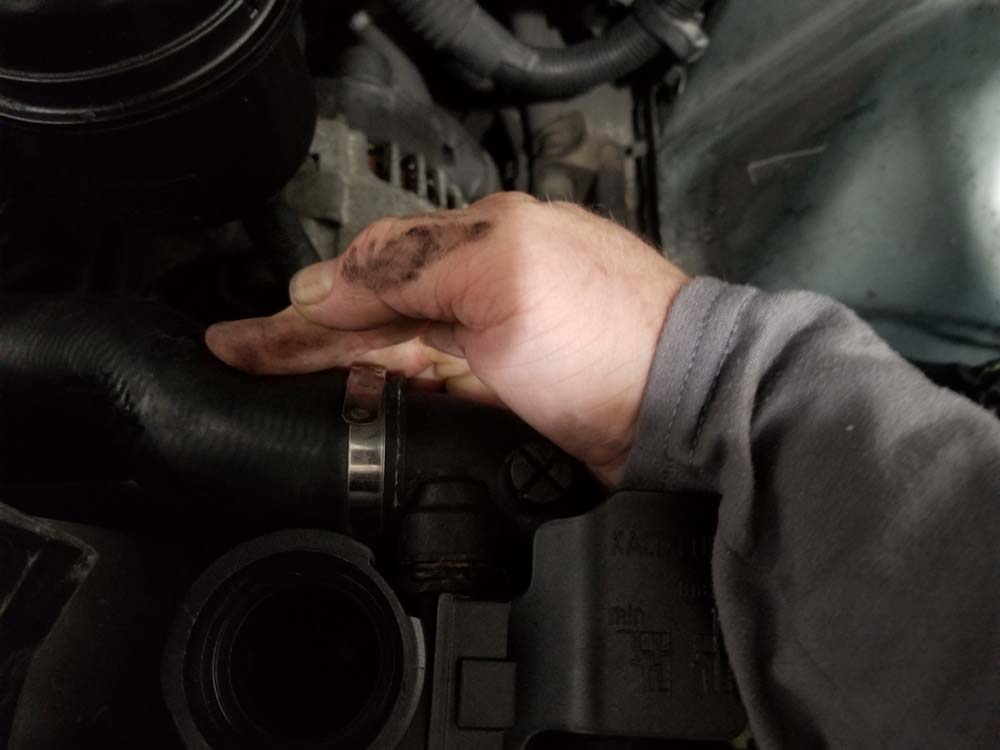
- The final step to removing the expansion tank is to release the locking clip on the bottom of the tank. The locking clip is located on the bottom right side of the tank. To release the clip, simply reach your hand down and slide it out.
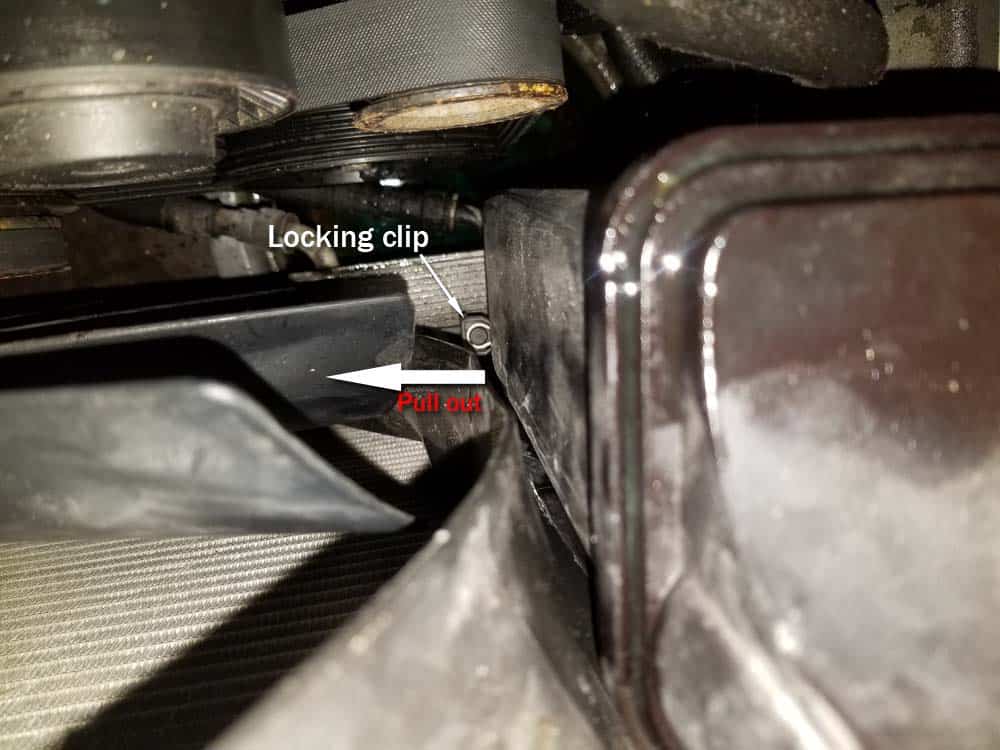
- Grab the top of the expansion tank with two hands and attempt to pull it free from the radiator. You may have to gently rock it back and forth to get it to release. Older tanks may be particularly stubborn and require a couple of small taps with a screwdriver and rubber mallet on the bottom to get them to release.

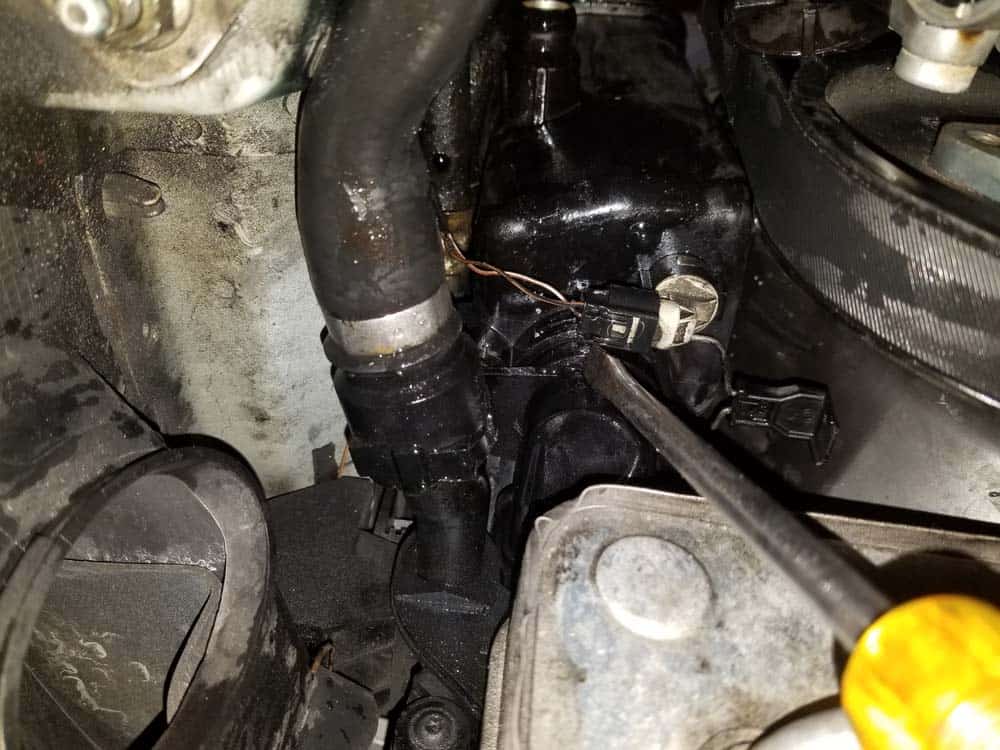
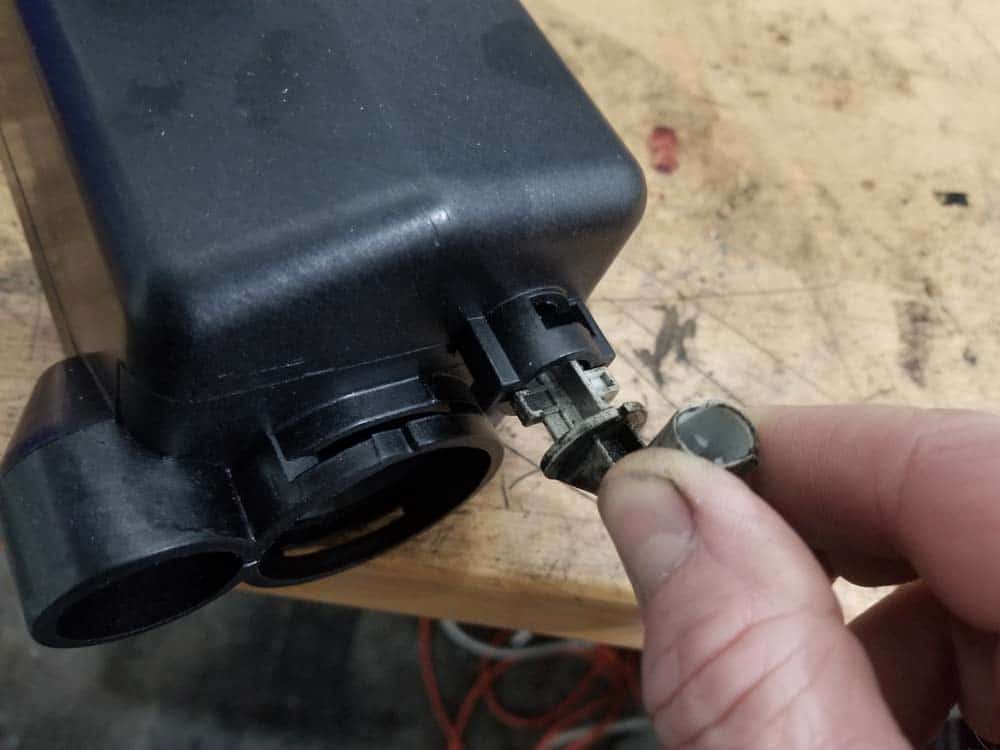
- When the expansion tank is loose, flip it over and disconnect the level sensor.
- Don't lose the locking clip...you will need to use this on the new tank.
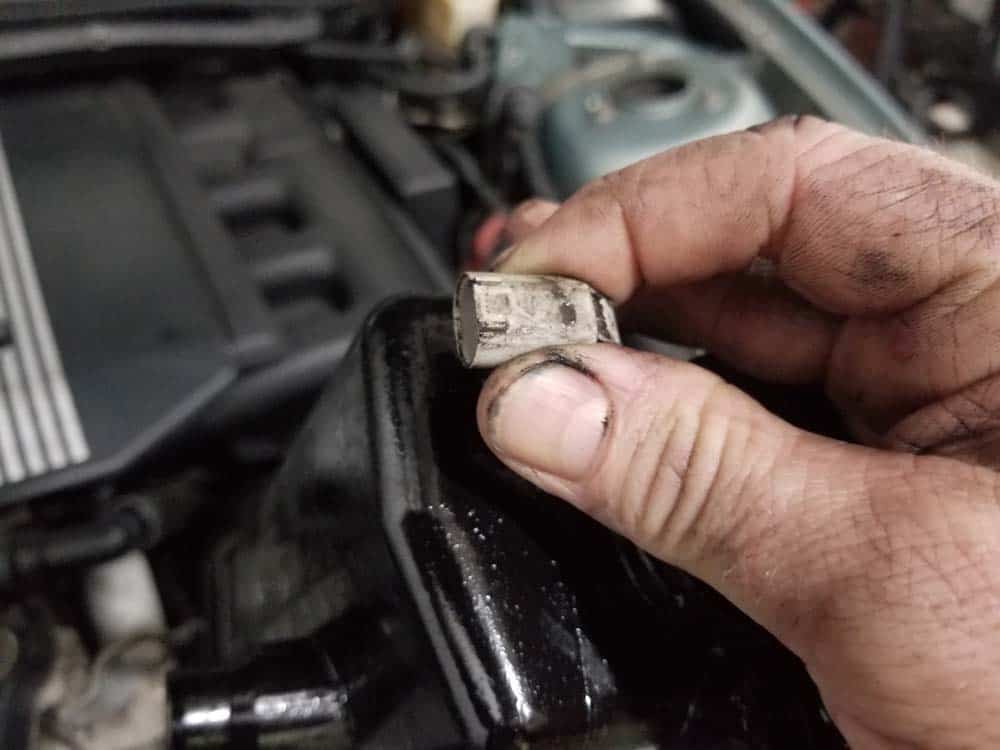
- If you are going to reuse the old level sensor, turn it clockwise to release it from the bottom of the tank.
Section 3 - Installing the New BMW E46 Coolant Expansion Tank
Installing the new BMW E46 coolant expansion tank is a very simple procedure - it is very important though that you take your time and double check that the tank is correctly seated on the two bottom radiator fittings. Remember to also secure the locking clip when you reinstall the tank...this is a step that many mechanics overlook.- Unpack the new coolant expansion tank and place on a bench.

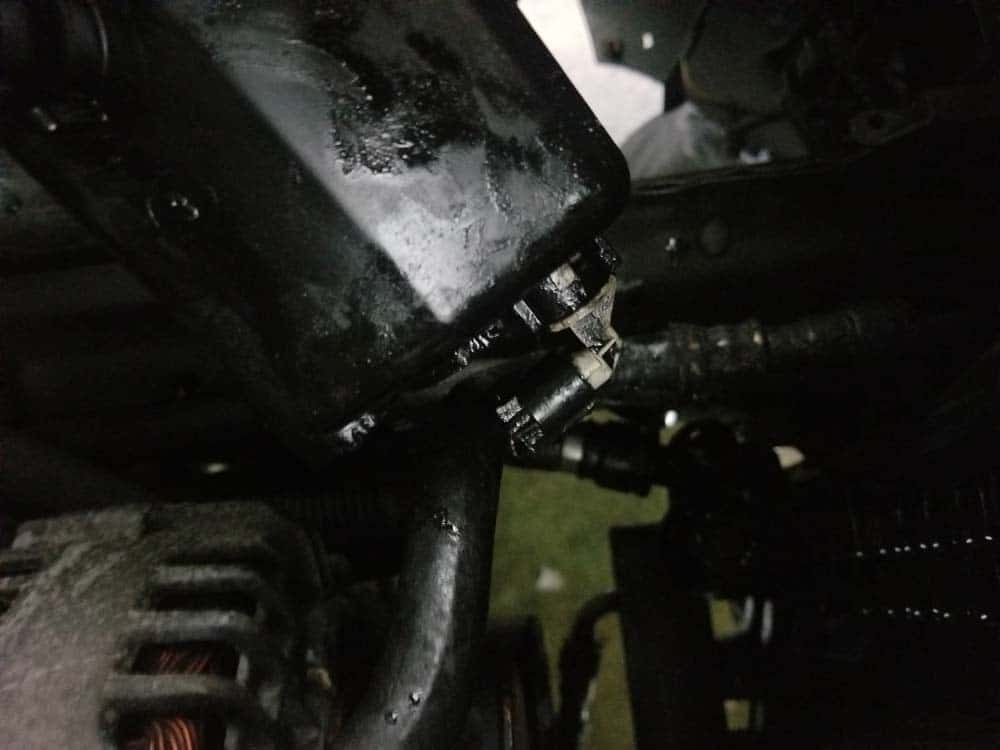
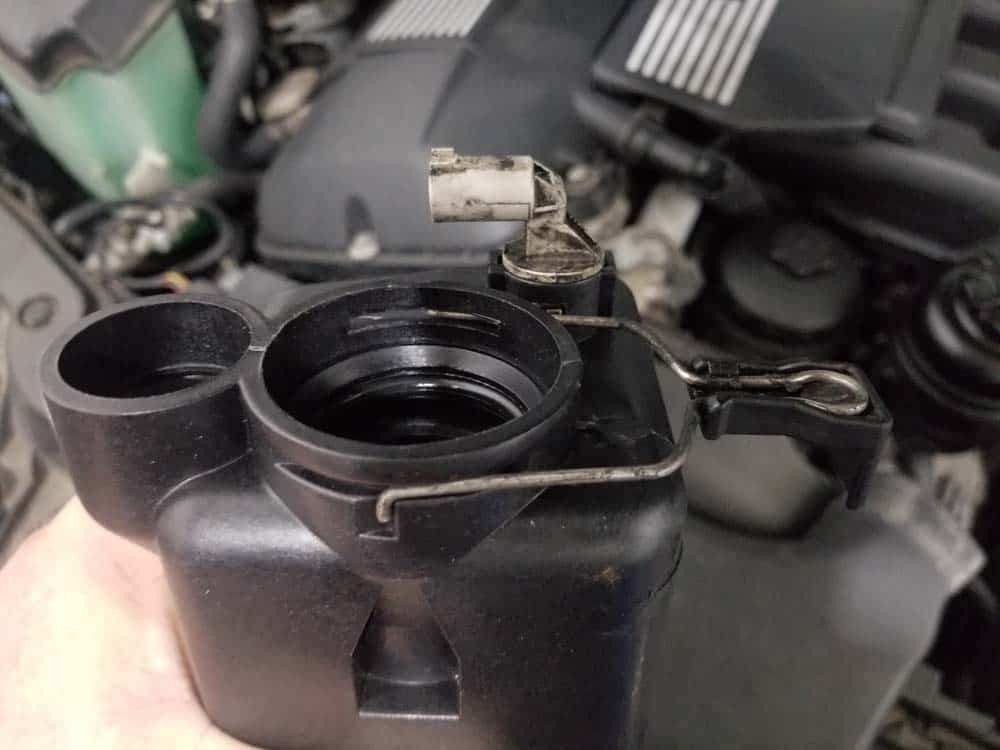
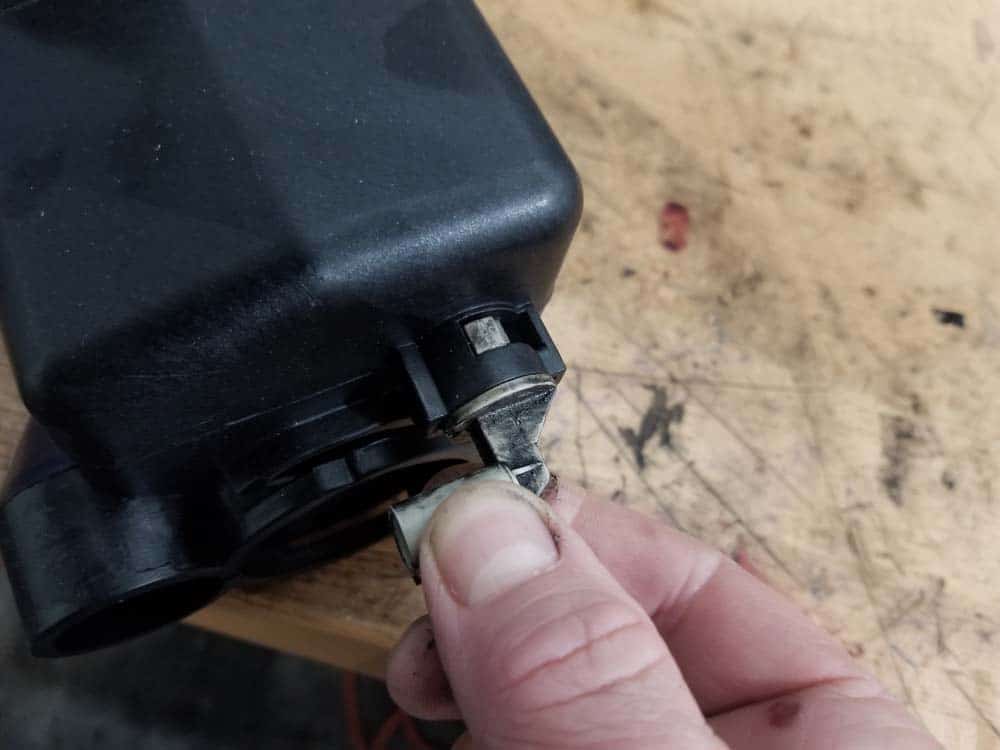
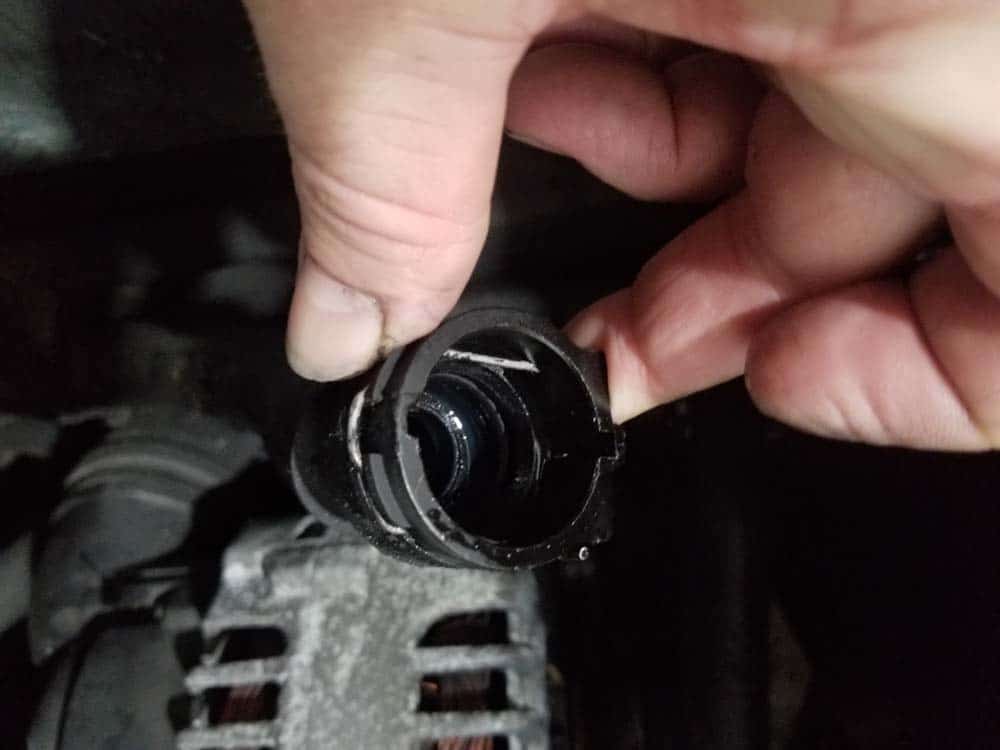
- Reinstall the locking clip on the bottom of the tank as shown below. Make sure it is in the “open” position while reinstalling the tank.
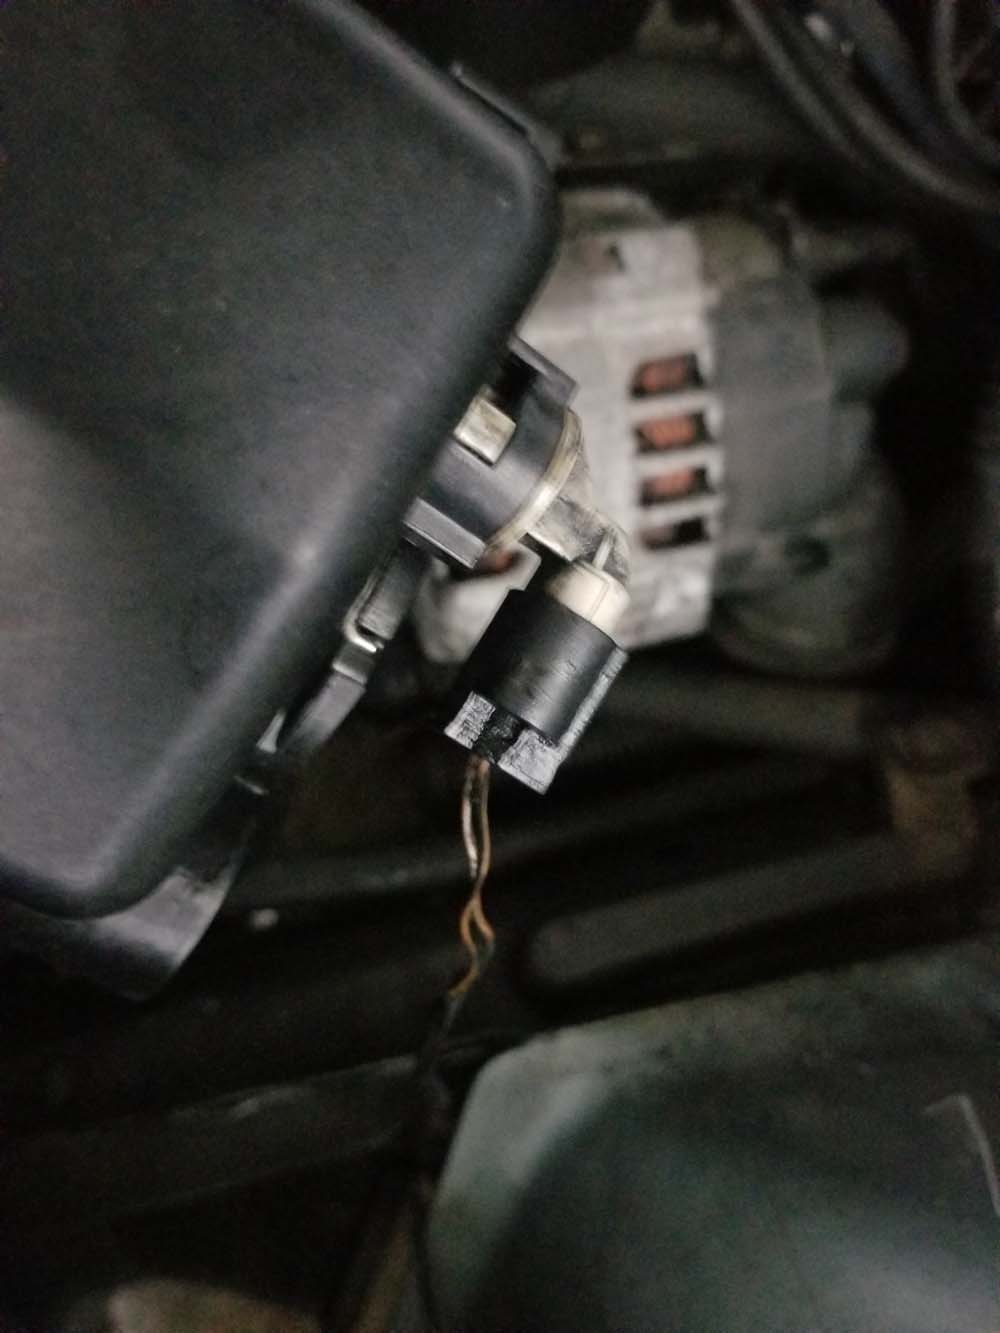
- Install the new (or old) coolant level sensor by inserting it into its opening and turning it counter clockwise until it locks in place.
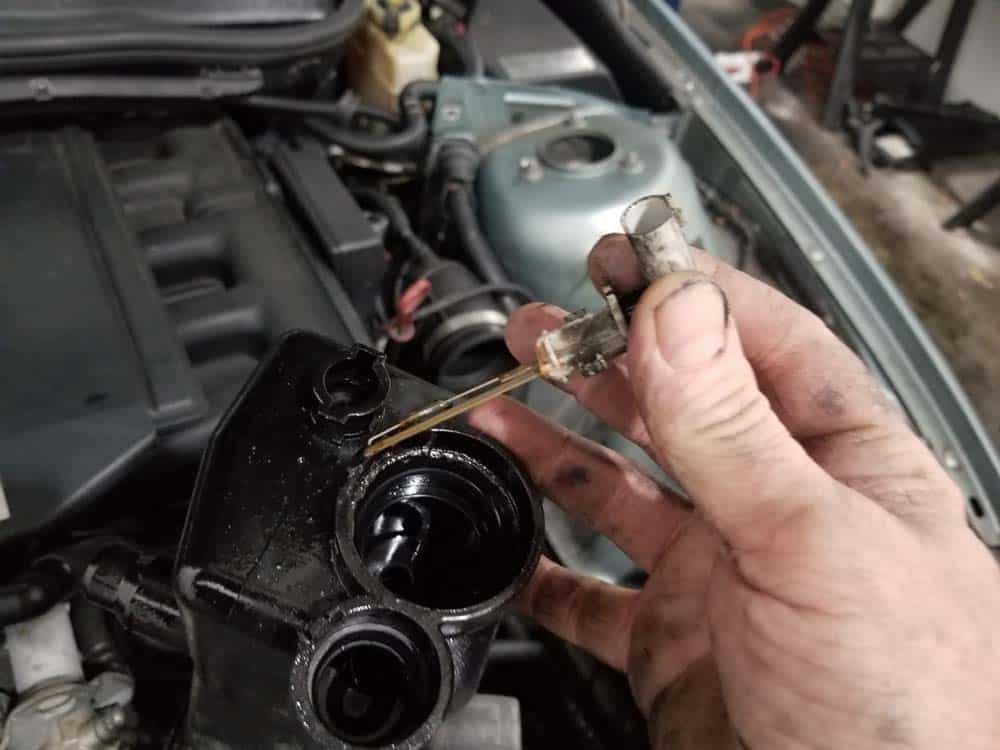
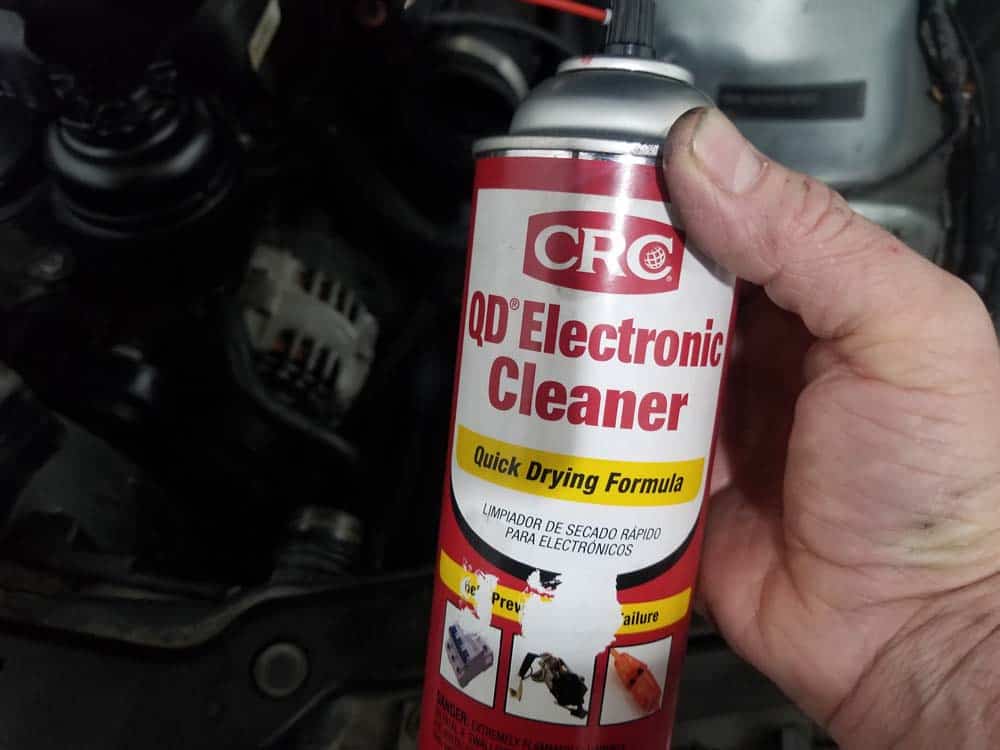
- Use some CRC Electronic Cleaner to thoroughly spray out the sensor connections. Oil and coolant can build up in these connections causing the sensor to malfunction.
- Reinstall the coolant level sensor electrical connection. Make sure it is properly routed under hoses so the tank does not pull on the connection when installed.
- Visually locate the two fittings on the expansion tank mounting plate that the tank connects to.
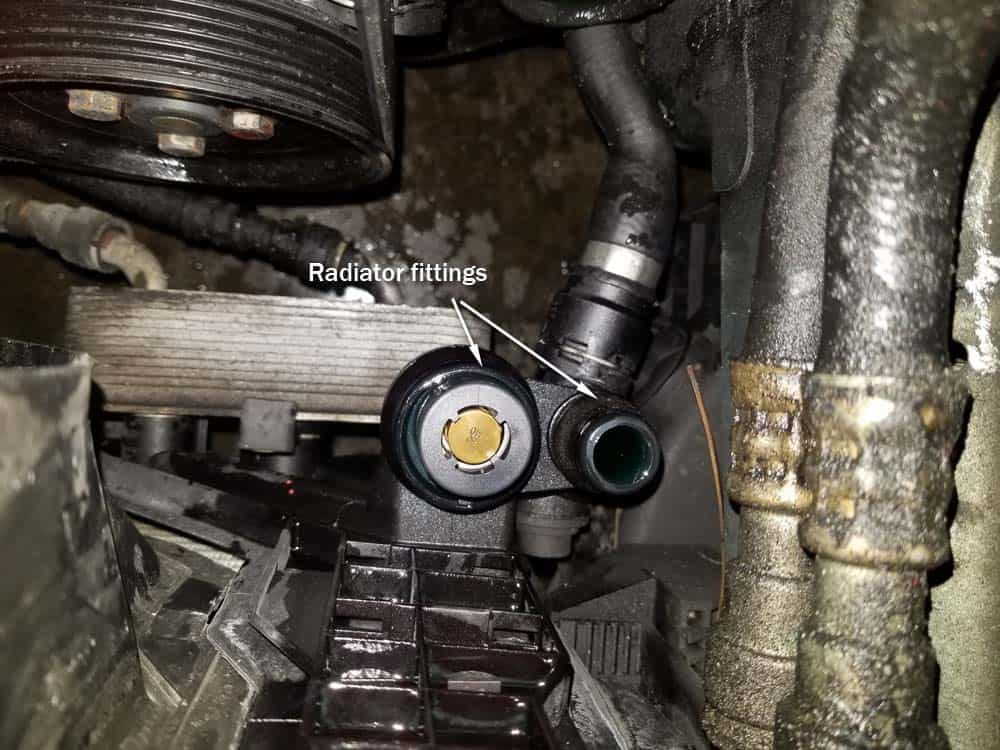
- Slowly lower the new expansion tank onto the mounting plate fittings. Note that the tab on the back of the tank should fit into the groove on the radiator.
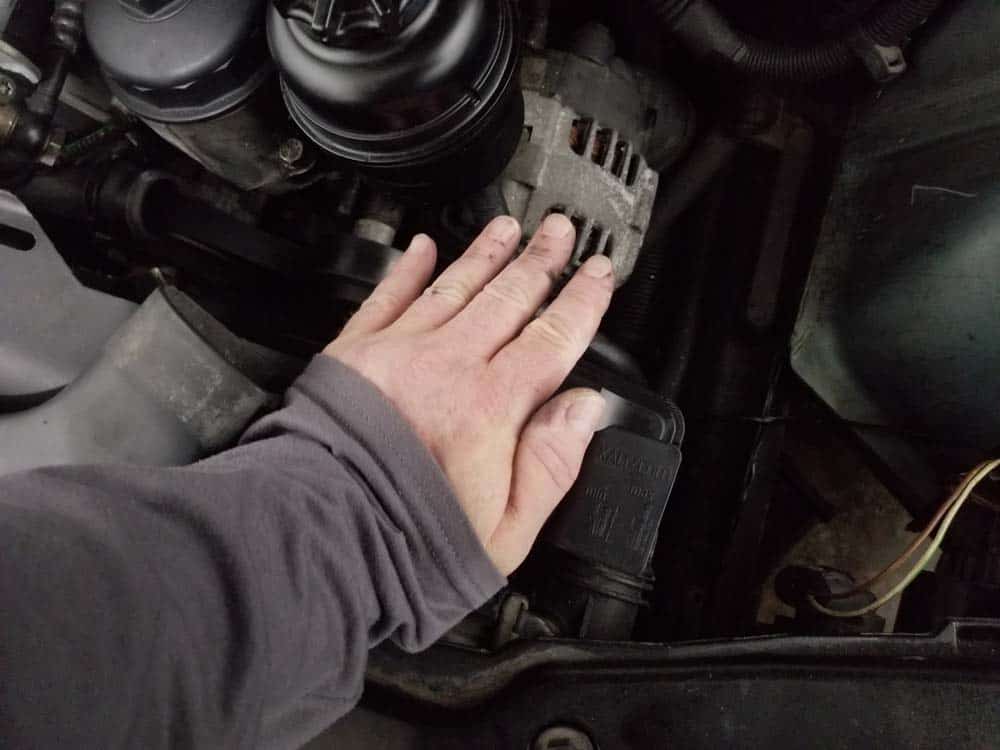
- When you are confident the tank is positioned correctly, use the palm of your hand to push the expansion tank firmly onto the expansion tank plate. Reach down the right side of the tank and push the locking clip in.
- Reinstall the lower coolant hose. Always close the locking clip BEFORE installing the coolant hoses on their fittings. You want to hear them “snap” into place when installed.
- Reinstall the upper coolant hose on the water pump and then on the expansion tank. Use both hands to firmly pull on the hose until you hear it click on the expansion tank fittings.
- Reinstall the intake muffler and all of its components per Section 1 above.
Section 4 - Refilling the System with Coolant, Bleeding, and Testing
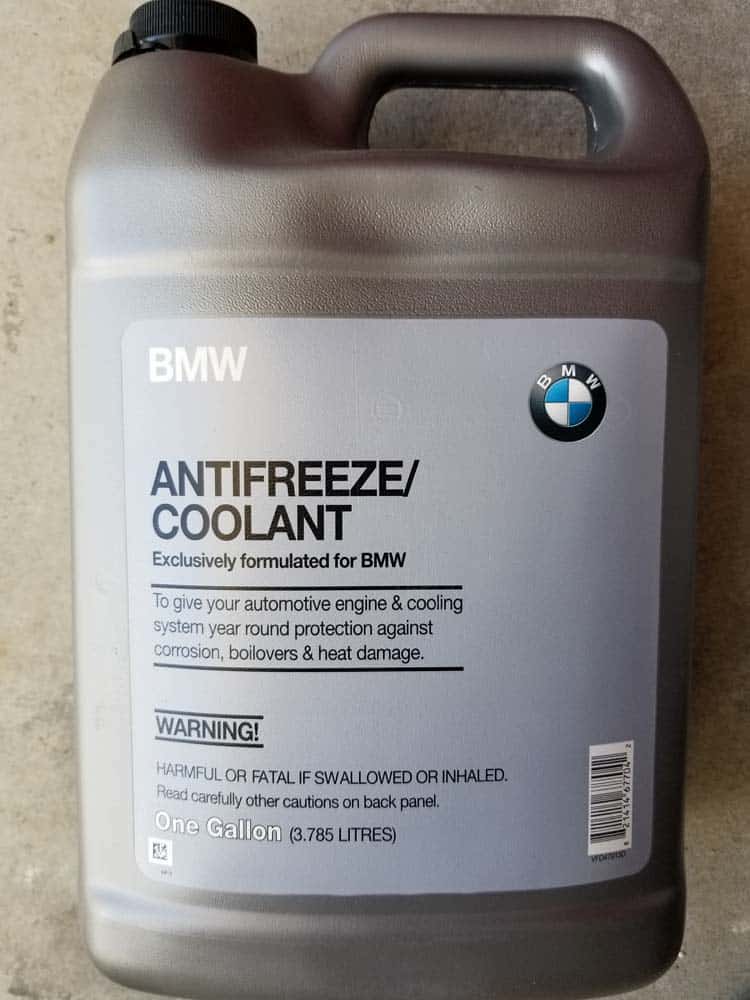
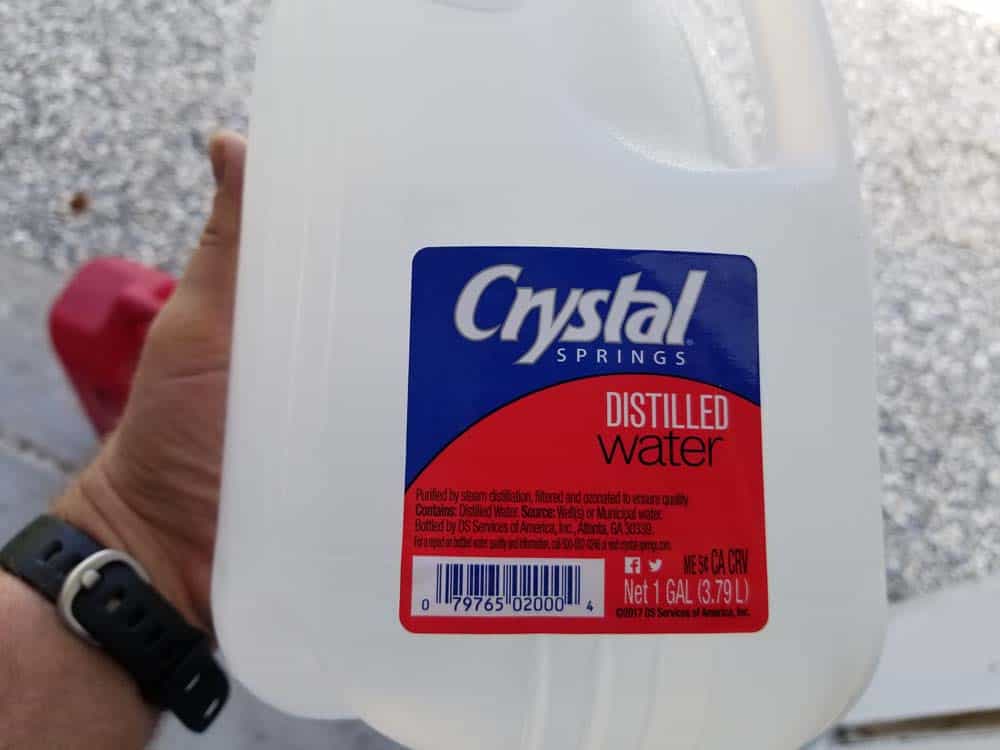
Refilling and bleeding the coolant system in your BMW E46 3 series car is a very simple procedure. The goal is to remove any air bubbles trapped in the coolant line that could potentially cause the engine to overheat. Unlike many other repair articles, the BMW Repair Guide uses the "double bleed" approach on their BMW E46 3 series cars. This is a proven method that we have used for years with 100% success. The double bleed method entails purging the air out of the coolant system twice; once with the engine off, and then again with the engine running. We have found this to be the most complete method of removing all of the air out of the E46 cooling system.- Only use Genuine BMW Antifreeze/Coolant mixed 50/50 with distilled water in your vehicle. Using any other brand of antifreeze/coolant in your BMW is strongly discouraged. Genuine BMW Antifreeze/Coolant was specifically engineered for your BMW...other brands may not cool your engine correctly.
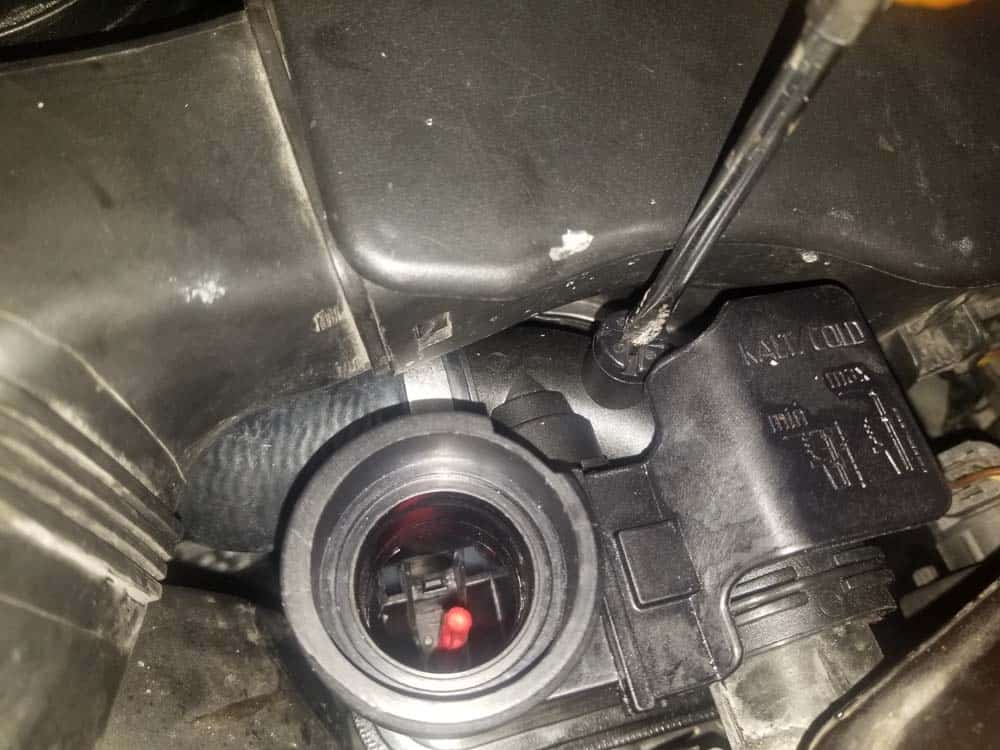
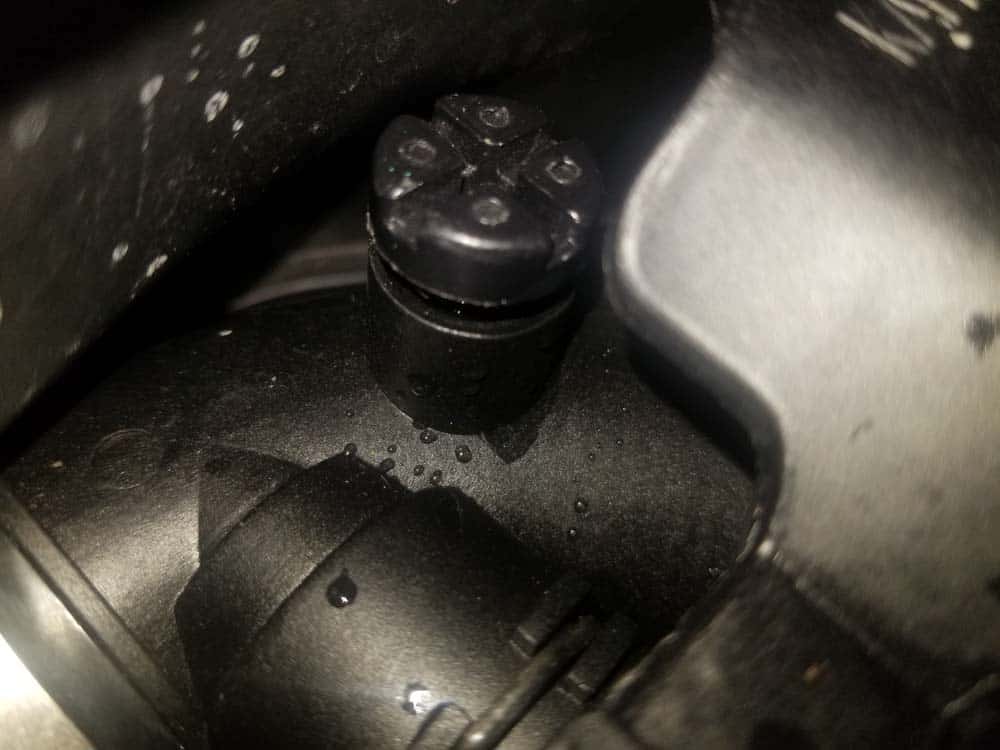
- Loosen the bleed screw on the upper coolant hose.
- Turn the ignition on. Do not start the vehicle.

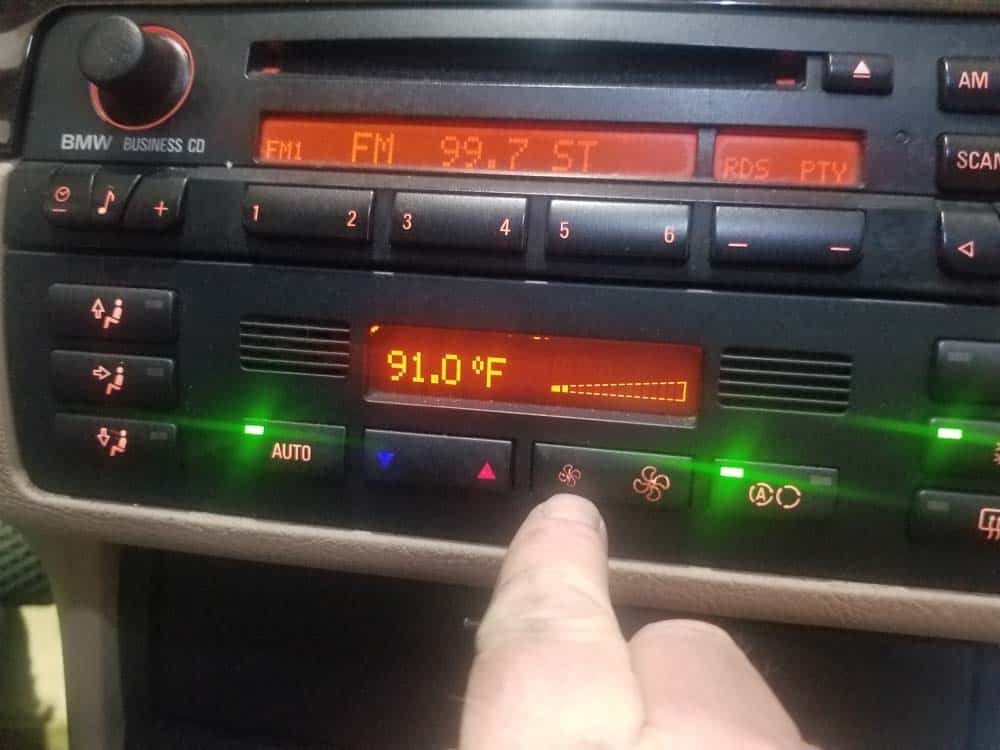
- Set the HVAC temperature controls to full warm and the fan speed to its lowest setting (this opens the heater core and activates the secondary electric coolant pump).
- Slowly fill the expansion tank with coolant until it starts to spill from the bleeder screw.
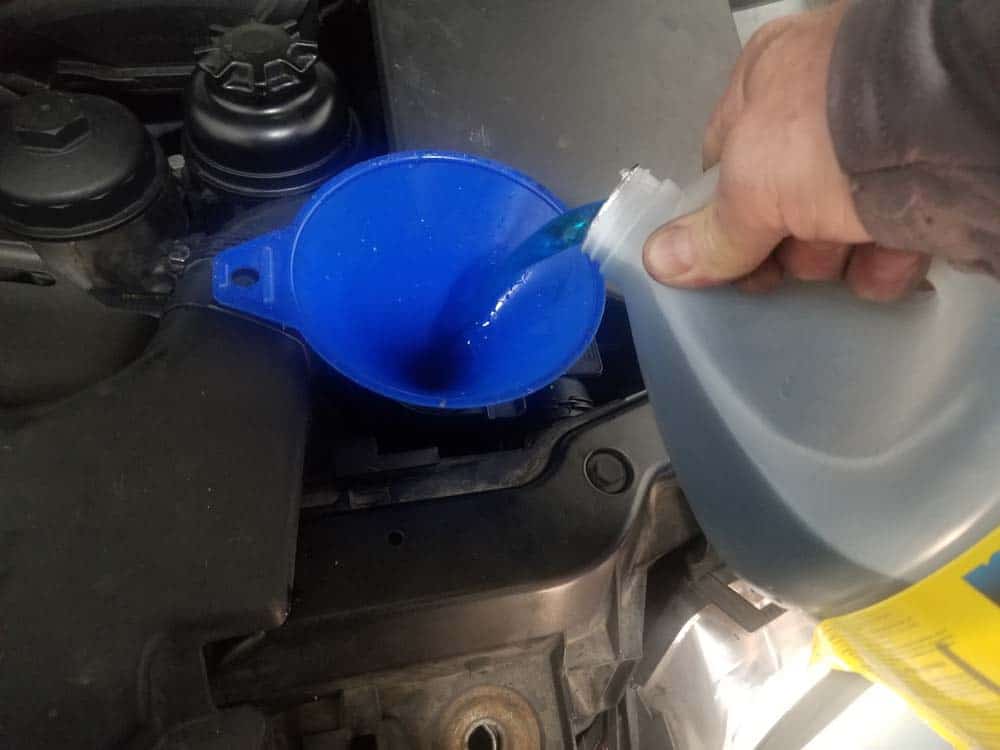
- When the coolant spilling from the bleed screw is free of air bubbles (just a steady stream of coolant), tighten the screw and replace the expansion tank cap.
- Start the engine.
- With the engine running, loosen the bleeder screw again. You should get more air bubbles coming out until there is a steady stream of coolant being pushed out of the bleeder hole. Tighten the bleeder screw.
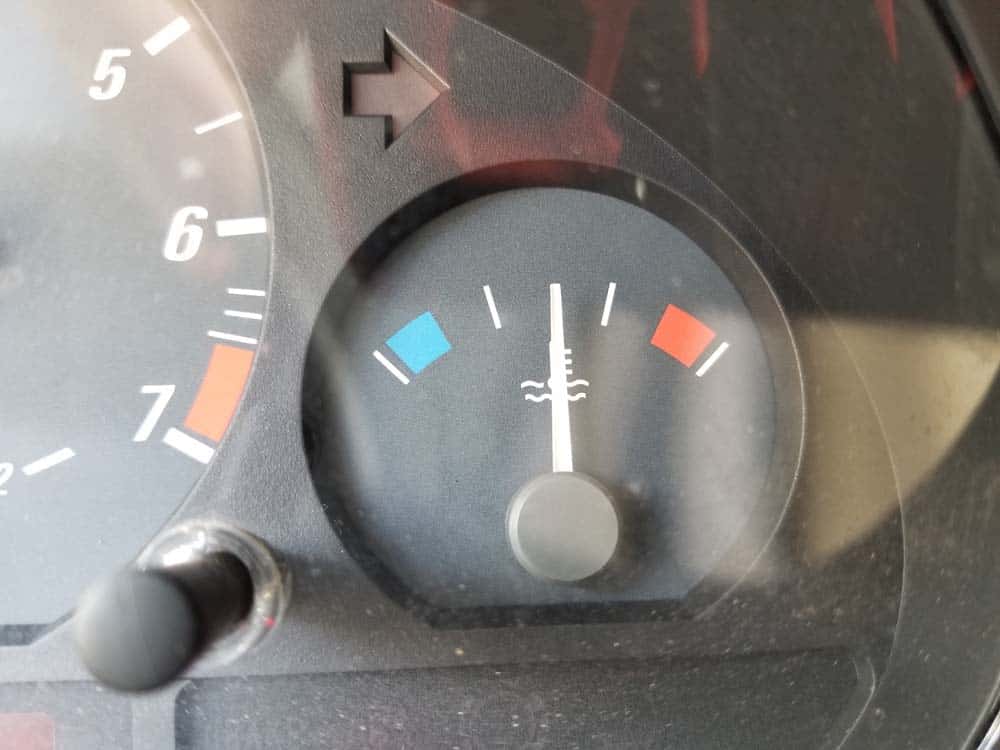
- Allow engine to reach operating temperature (about 5 minutes if cold). Keep an eye on the engine temperature gauge...the needle should stay right in the middle. Check all of the hoses for leaks.
- Allow the engine to cool down. Recheck the coolant level in the expansion tank and top off if necessary.
BMW E46 Coolant Expansion Tank Replacement Finished