
Affiliate link disclosure – The BMW Repair Guide uses affiliate links in their site. For more information on affiliate links, please click here.
Repair Summary
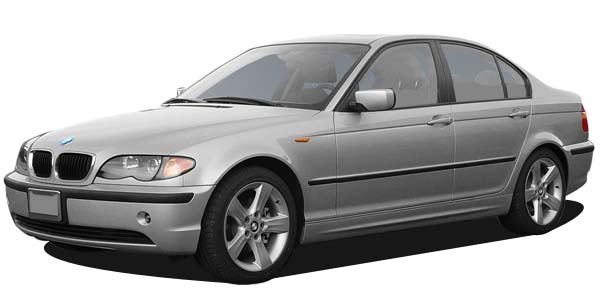
The following article gives detailed instructions on performing a blower resistor replacement on a BMW E46 3 series car. Even though we have used a 2003 BMW 325ci to perform this installation, this article can be applied to any E46 3 series vehicle, including the 323i, 328i and 330i coupe, sedan and convertible.
See all vehicles this article applies to
E46 3 Series 325ti
E46 3 Series 318td
E46 3 Series 320td
E46 3 Series 318ti
E46 3 Series 330xi
E46 3 Series 330i
E46 3 Series 330xd
E46 3 Series 330d
E46 3 Series 316ti
E46 3 Series 328i
E46 3 Series 325xi
E46 3 Series 325i
E46 3 Series 320i
E46 3 Series 323i
E46 3 Series 320d
E46 3 Series 318i
E46 3 Series 318d
E46 3 Series 316i
E46 3 Series M3 CSL
E46 3 Series M3
E46 3 Series 330Ci
E46 3 Series 330Cd
E46 3 Series 325Ci
E46 3 Series 323Ci
E46 3 Series 320Ci
E46 3 Series 320Cd
E46 3 Series 318Ci
E46 3 Series 328Ci
E46 3 Series 316Ci
E46 3 Series 323i 2.4
E46 3 Series 316i 1.9
E46 3 Series 316i 1.6
If the air has stopped blowing in your 3 series, then you probably need to replace your BMW E46 blower resistor and blower motor assembly. When one part fails, the other is not far behind, so it is best to replace both.
***This article deals with replacing the BMW E46 blower resistor only. To learn how to replace the blower motor on your car, read our article BMW E46 Blower Motor Replacement.
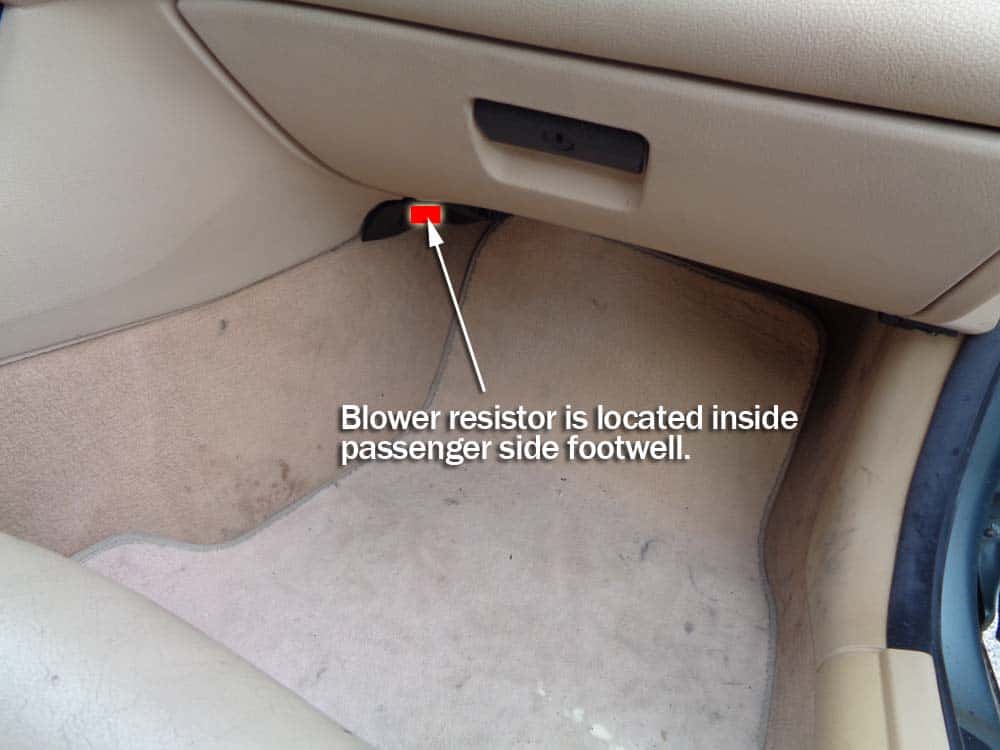
Replacing a BMW E46 blower resistor is a pain in the neck...literally. The blower resistor (also known as the "final stage") for the E46 3 series was mysteriously buried by BMW engineers in the passenger side footwell at the back of the center console. Replacing it requires laying on your back and executing a few advanced yoga moves.
The good news is a new BMW E46 blower resistor is fairly cheap, and you need very few tools to perform this repair. And the even better news is this repair will save you a ton of money by not getting a repair shop involved.
The BMW E46 blower resistor is an electronic part that controls the fan speed of your vehicle's heating, ventilation, and air-conditioning (HVAC) system. Since most drivers constantly change the fan speed of their HVAC system, the resistor is prone to extreme wear and is a common point of failure in most BMWs. Symptoms of a bad resistor are: the system is stuck on one fan speed, some speeds are not available, or the system is not blowing any air out of the vents. Although not necessary, the BMW Repair Guide suggests changing your BMW E46's blower motor as well when replacing a bad resistor; since both parts are linked to each other, failure of one usually means the other is not far off from breaking as well.


View the detailed parts diagram for this repair.
Includes detailed part diagrams, part numbers and links to purchase all of the required components needed to complete this repair.
Section 1 - Removing the BMW E46 Blower Resistor
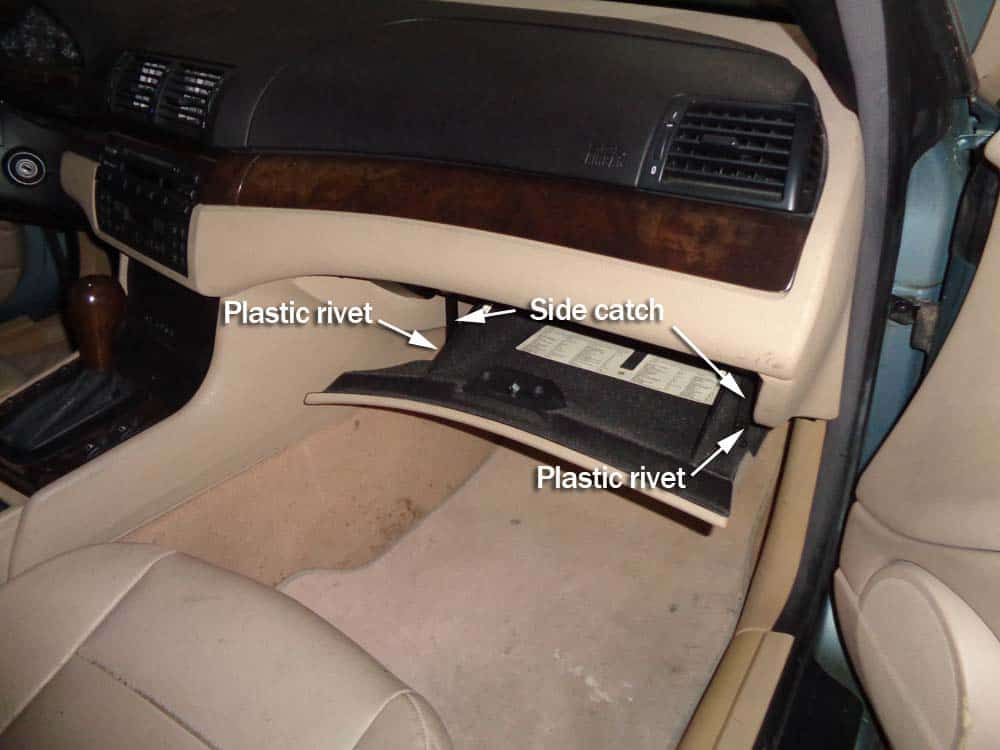
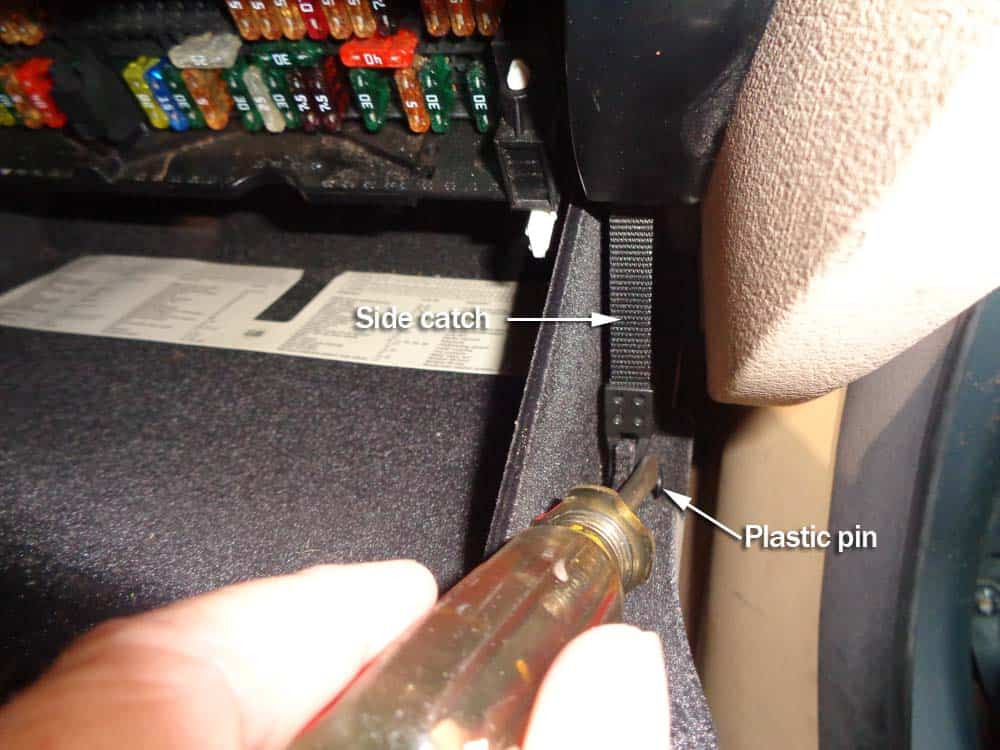
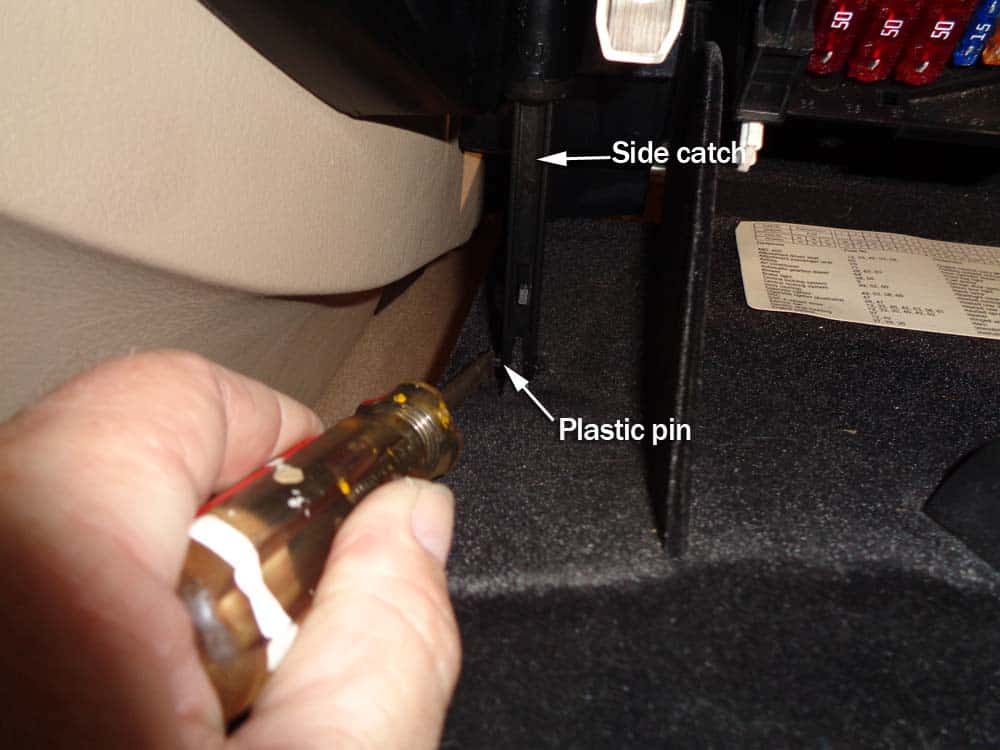
- In order to access the BMW E46 blower resistor, you will need to remove the passenger side glove compartment. The first step is to detach the door from the side catches by removing two plastic pins (rivets) with a flat blade screwdriver.
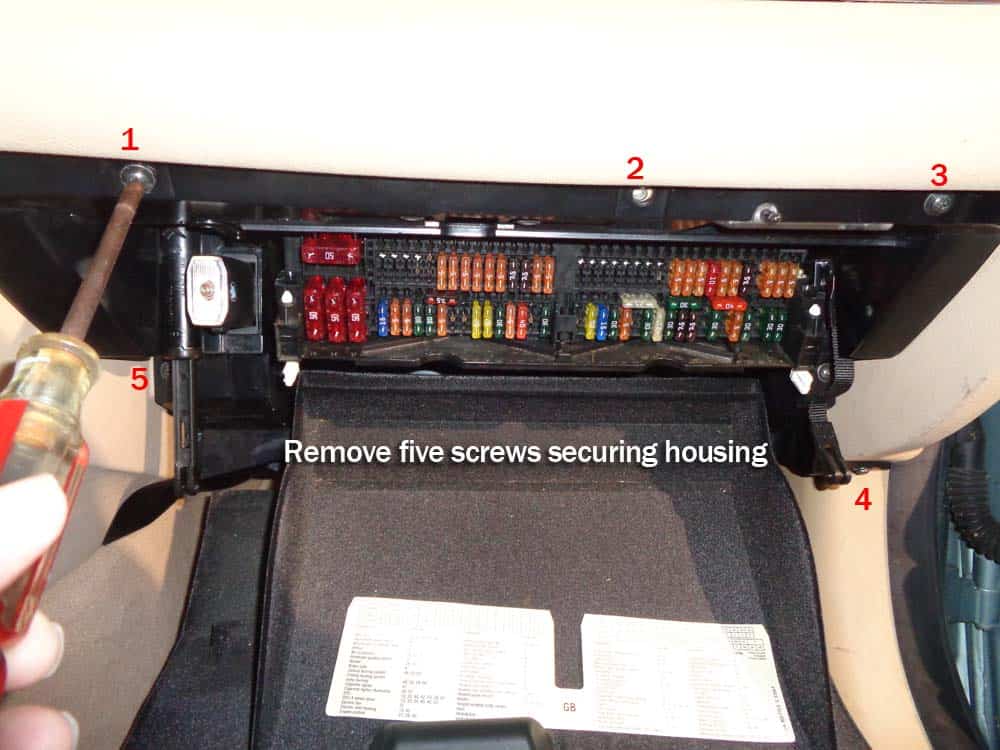
- Now it's time to remove the glove box housing. Remove the five phillips head screws securing the housing to the dashboard.
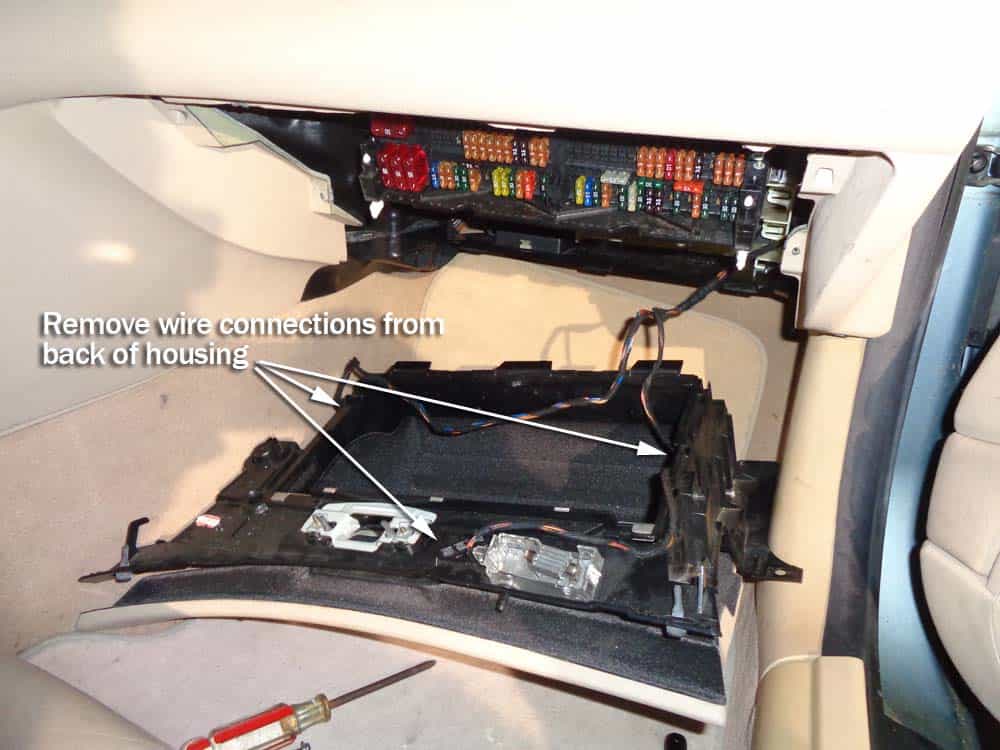
- Disconnect all wiring harnesses from back of glove box housing.
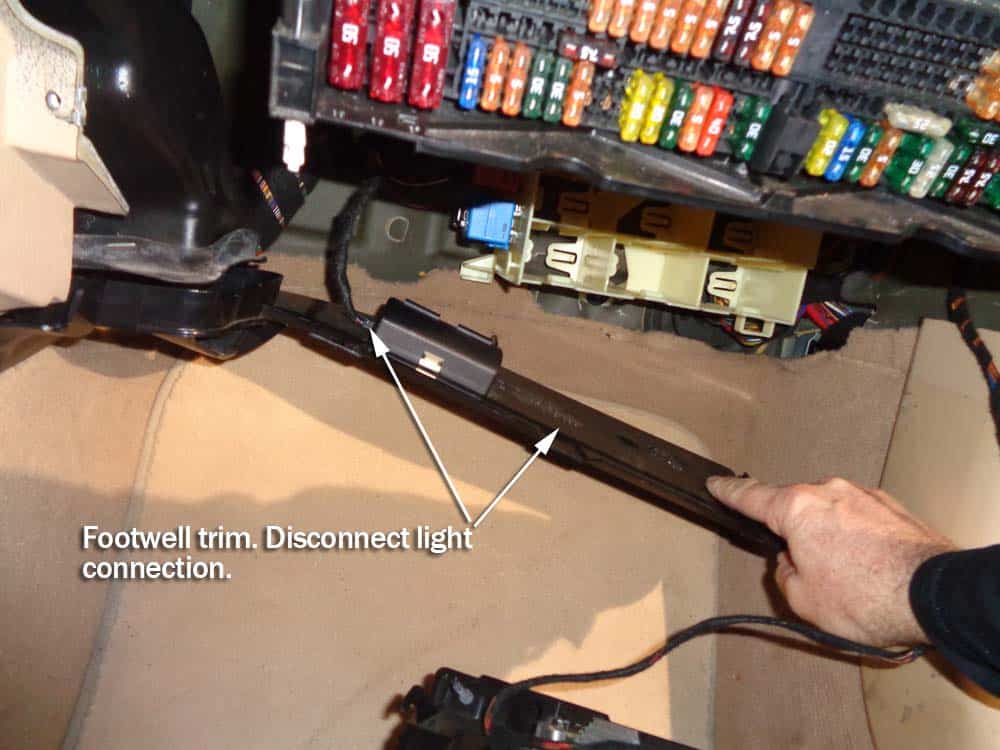
- Remove the black plastic trim panel that contains the footwell courtesy light. The piece of trim does not have screws...it simply pulls out. We suggest pulling the right side out first.
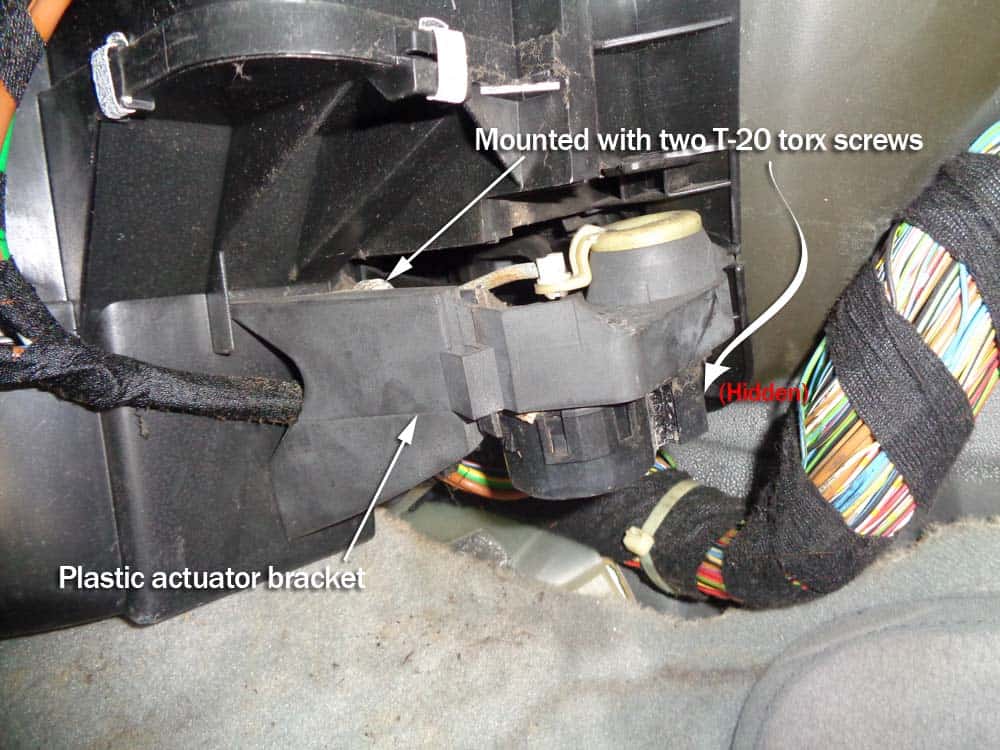
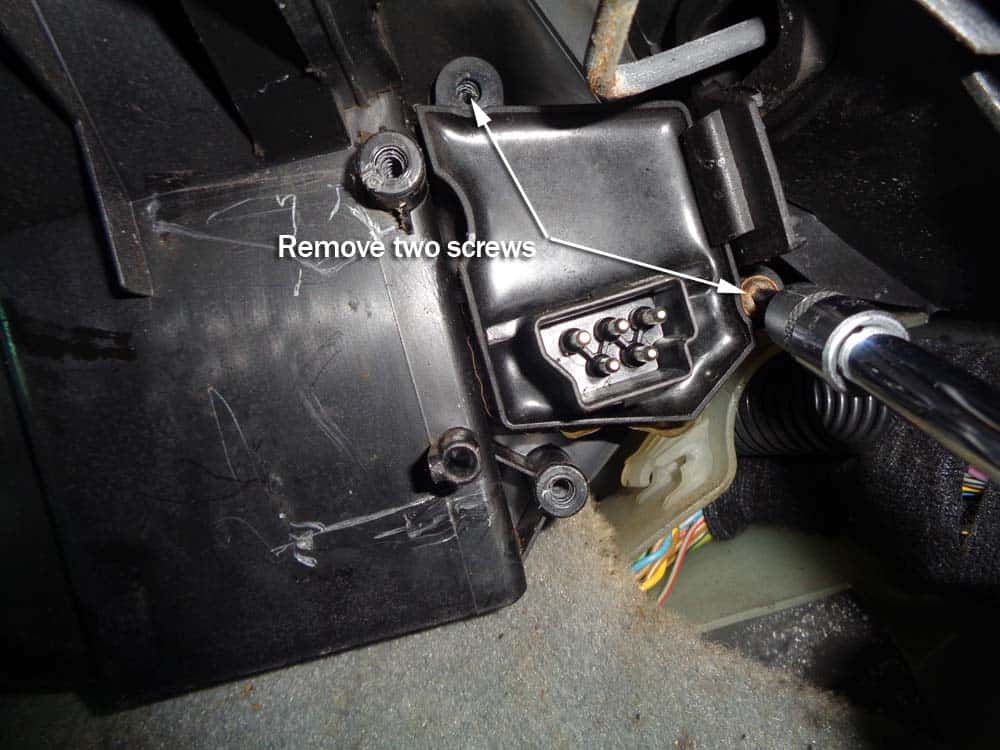
- Move to the lower left corner of the footwell until you see the black actuator housing (also known as the A/C motor bracket). This must be removed to get to the blower resistor which is inconveniently mounted behind it. There are two T20 screws anchoring it...one (the left one) is difficult to spot. Use a flashlight if necessary to get to it.
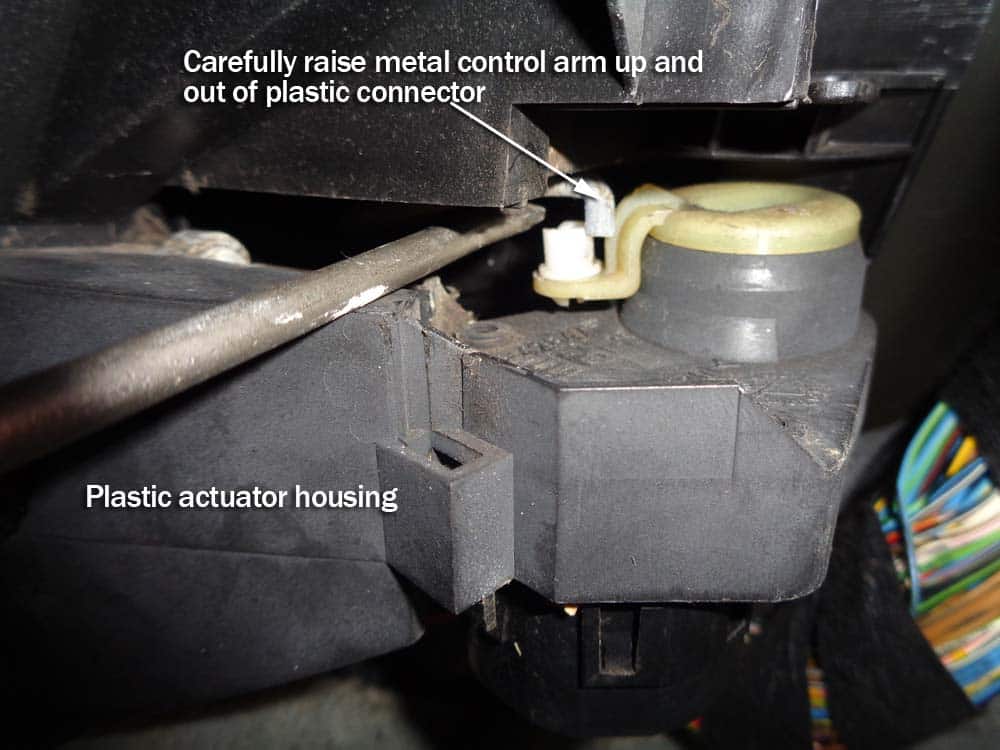
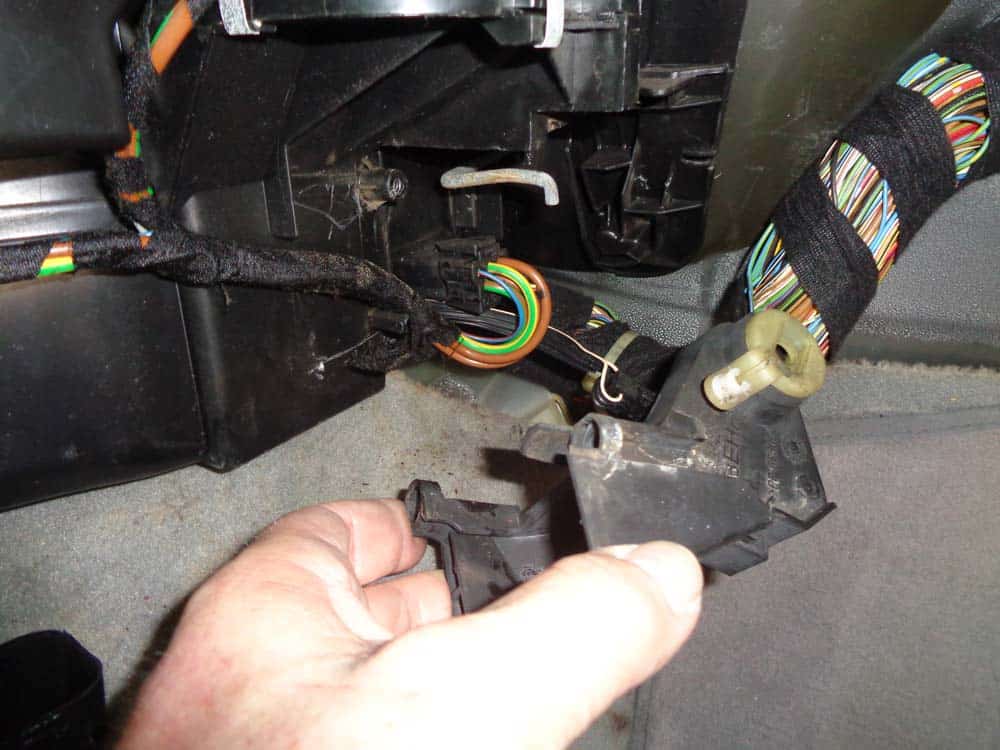
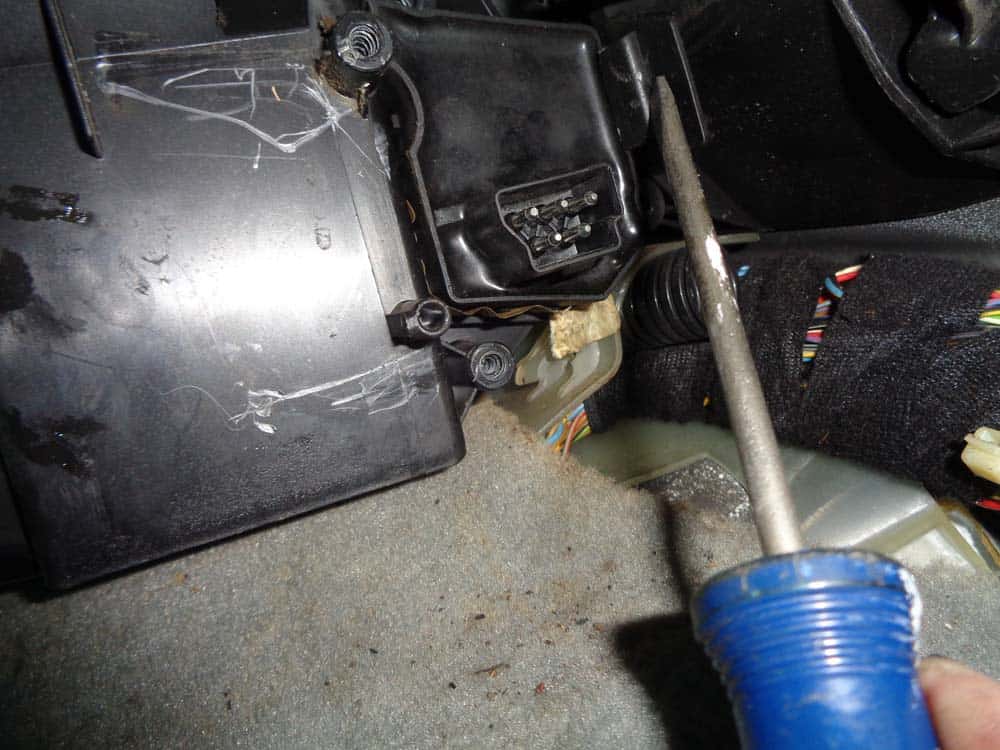
- Using a flat blade screwdriver, gently pry the metal control arm up and out of the white plastic connector on the plastic actuator housing. It is very important not to break the white connector during the process. If you do break the white connector, you can order a new actuator housing here. Remove the actuator housing and place out of the way (you do not need to disconnect its electrical connector).
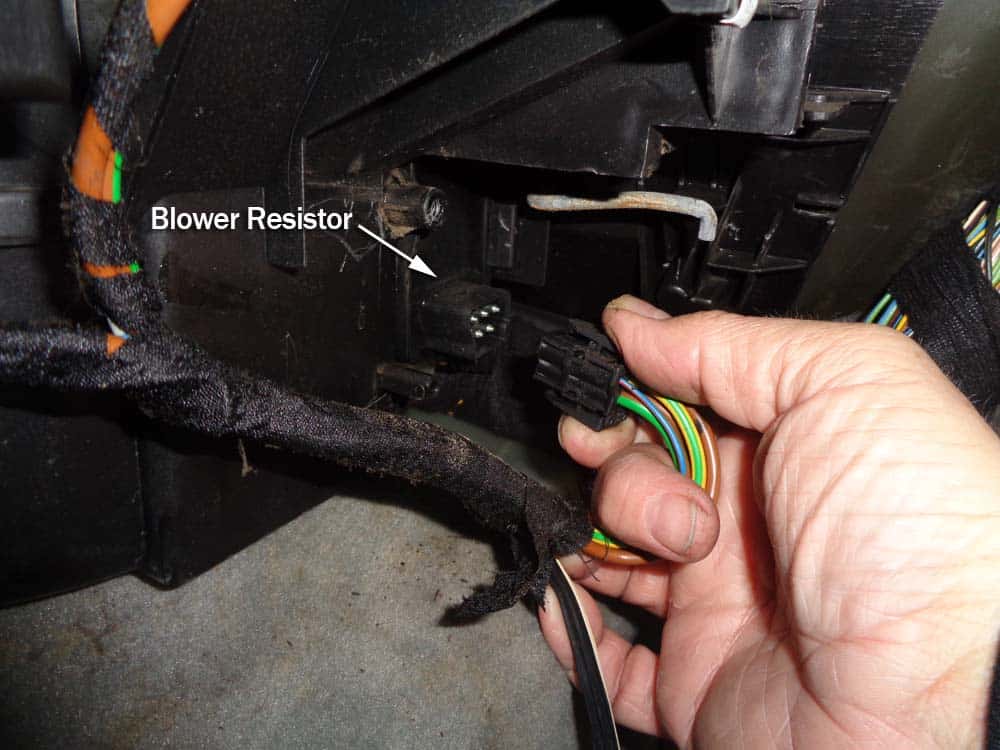
- The BMW E46 blower resistor is now visible. Unplug the electrical connector to the blower resistor. You now have easy access to the two blower resistor screws.
- Remove the two screws securing the blower resistor using a T20 torx bit.
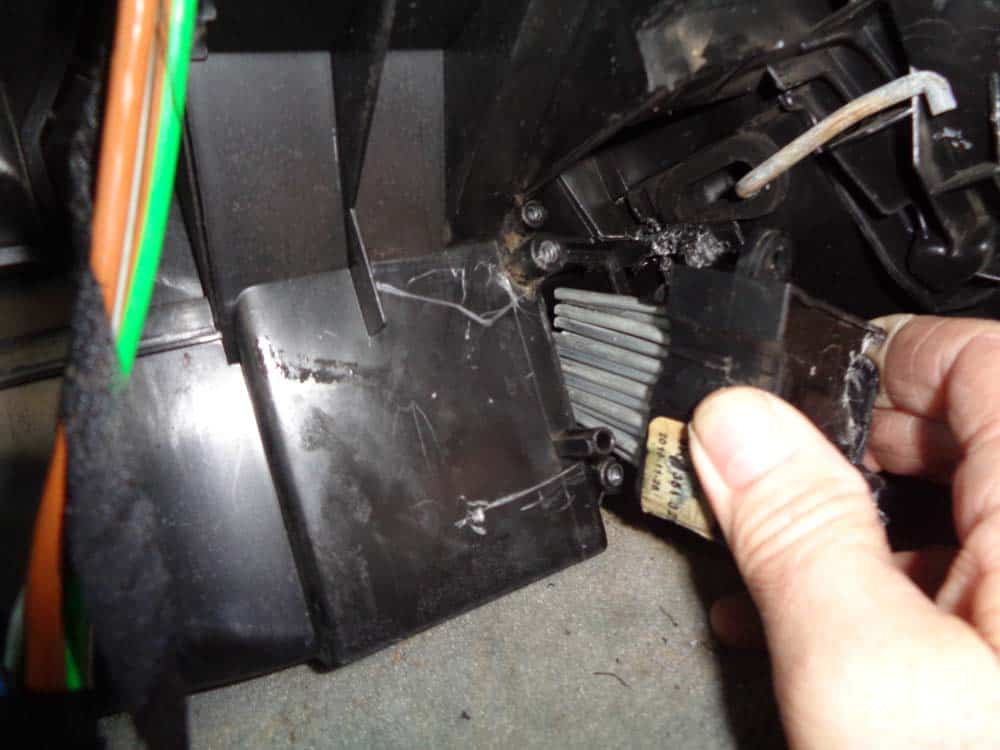
- Use a flat blade screwdriver to release the clip holding the BMW E46 blower resistor in place. This clip can be tough to access...we suggest putting as much pressure on it as possible while pulling on the resistor until it becomes free.
- Remove the BMW E46 blower resistor from dashboard.
Section 2 - Installing the New BMW E46 Blower Resistor
To install the new blower resistor, simply follow the above steps in reverse order. Be aware there are a couple tricky parts during installation.- Reinstalling the A/C motor bracket can be frustrating. Make sure it is lined up correctly (refer to one of the photos above) and start by inserting the lower right screw first. The upper left screw is tough to get to and is better installed second. (see Section 1-step 5 above)
- Make sure the metal control arm is accessible (not buried under dash) when you reinstall the A/C motor bracket. Use care and patience when reattaching the control arm to the actuator bracket plastic fitting.
BMW E46 Blower Resistor Replacement Finished