
Affiliate link disclosure – The BMW Repair Guide uses affiliate links in their site. For more information on affiliate links, please click here.
Repair Summary
This article gives detailed instructions on removing the intake manifold in a BMW with the M52 6 cylinder engine. Even though we used a 2000 323i to perform this repair, this article can be applied to any 1995-2000 BMW vehicle with the 6 cylinder M52 engine including the 3,5,7 and Z3 with minor modifications to the repair steps.
A BMW M52 intake manifold removal is an important step in many 1995-2000 six cylinder engine repairs.
The M52 engine was the workhorse six-cylinder engine found in many BMW models from 1995-2000. It was replaced by the updated M54 six-cylinder engine in 2001, but many M52s are still running strong on the road today. When properly maintained, the BMW M52 engine is still considered a highly reliable engine that is relatively easy to service.
Due to the confined space in the engine compartment, a BMW M52 intake manifold removal is a critical step in many repairs. Removing the intake manifold opens up the entire left side of the engine compartment allowing easy access to the starter motor, alternator, oil filter housing, fuel, and vacuum lines as well as the engine coolant and heater system. Being able to quickly and efficiently remove the M52 engine's intake manifold is a necessary skill for all BMW mechanics.
One of the more notorious issues with the BMW M52 engine are vacuum leaks caused by deteriorating vacuum hoses and a failing crankcase ventilation system. A complete BMW M52 intake manifold removal allows easier access to all of the critical parts of the intake system and provides the ability to do a more thorough vacuum system analysis and repair.
Many mechanics are intimidated by removing the intake manifold from an M52 engine - this perception is superfluous. In fact, with a little practice, a BMW M52 intake manifold removal can be executed very quickly and easily. The amount of wires and vacuum lines seems overwhelming at first - but once you understand the system and where everything connects, removing and reinstalling the manifold becomes a very straightforward procedure.


View the detailed parts diagram for this repair.
Includes detailed part diagrams, part numbers and links to purchase all of the required components needed to complete this repair.

Before starting this repair, you must have the following required parts.
All BMW vehicles with M52 and M54 six-cylinder engines
These gaskets should be replaced each time the intake manifold is removed.
BMW E36 & E46 (323i, 325i, 328i) / E39 (528i) / Z3 (2.8)
This profile gasket is used in between the throttle body unit and the intake manifold.
All BMW models
5 foot roll, 3.5mm vacuum tubing. Multiple uses in BMW vacuum system, including secondary air sytem and intake manifold applications.
BMW E46 323i, 325i and 328i
This tube is located in the air intake and connects directly to the throttle valve.
Section 1 - Removing the Upper Electrical Connections
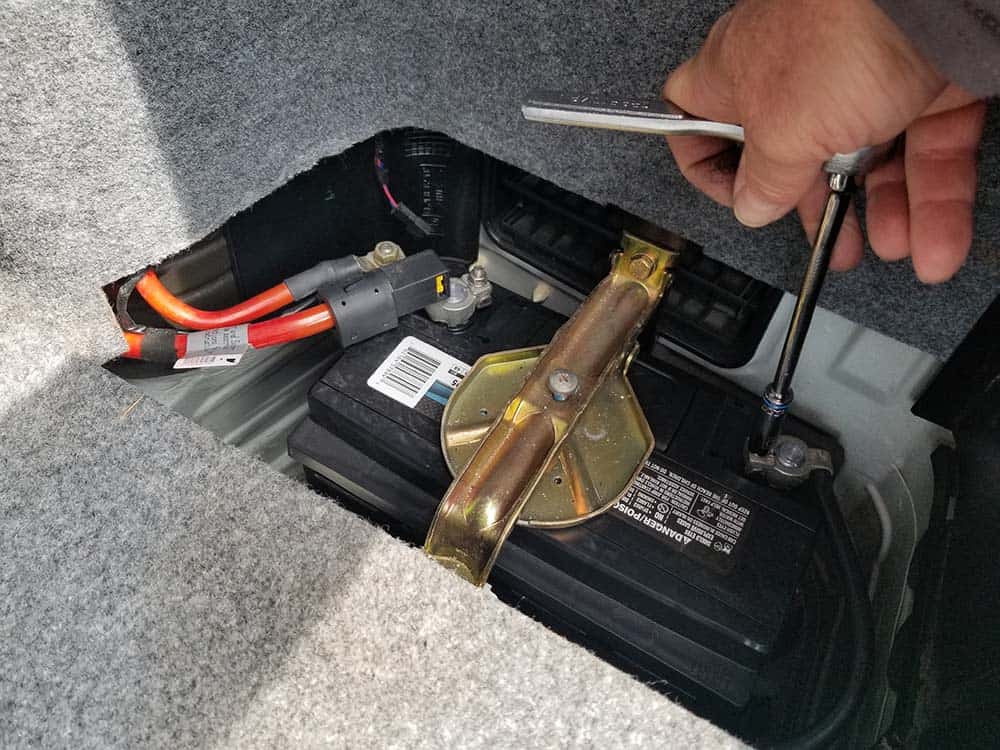
A BMW M52 intake manifold removal starts at the top of the engine. The upper electrical connections, including the fuel injector wiring harness, must be cleared out of the way to make room manifold removal. ***The following steps were performed on a 2000 323i...other models may vary. - Before starting this repair you must disconnect the negative terminal from your battery. Attempting work on your engine's electrical system without disconnecting the battery can cause catastrophic damage to sensitive electronics.
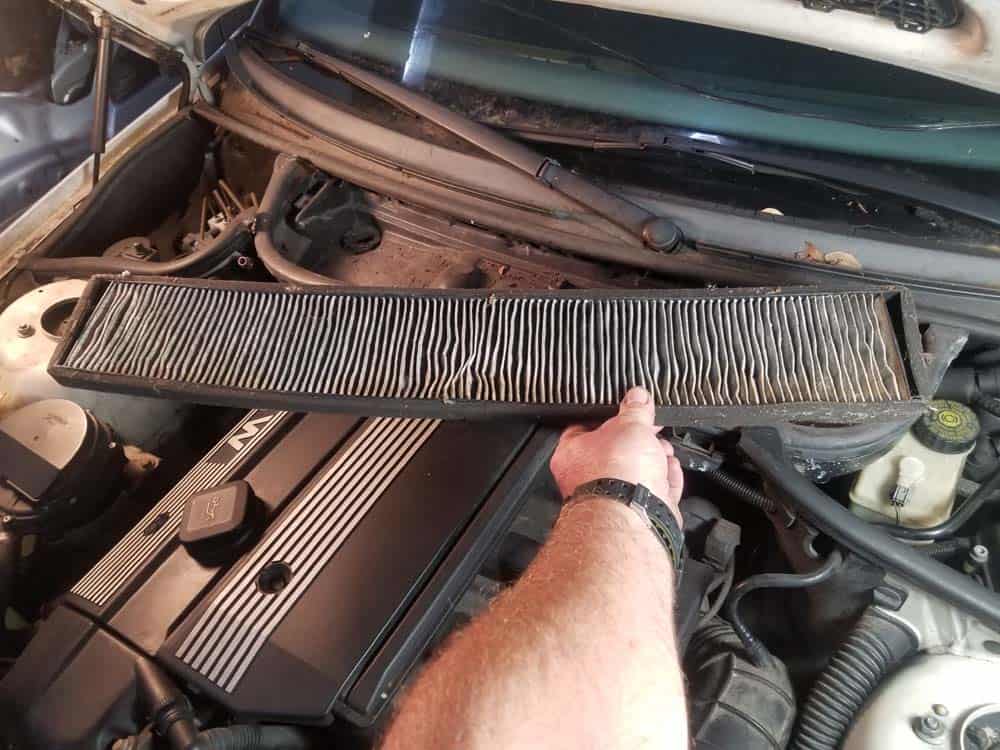
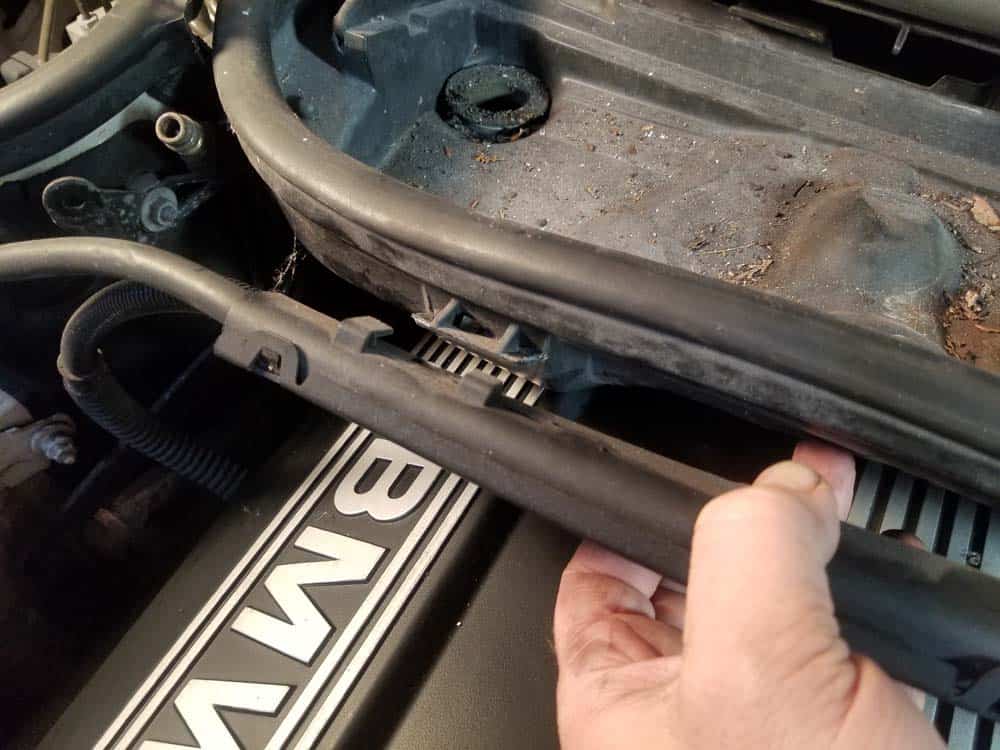
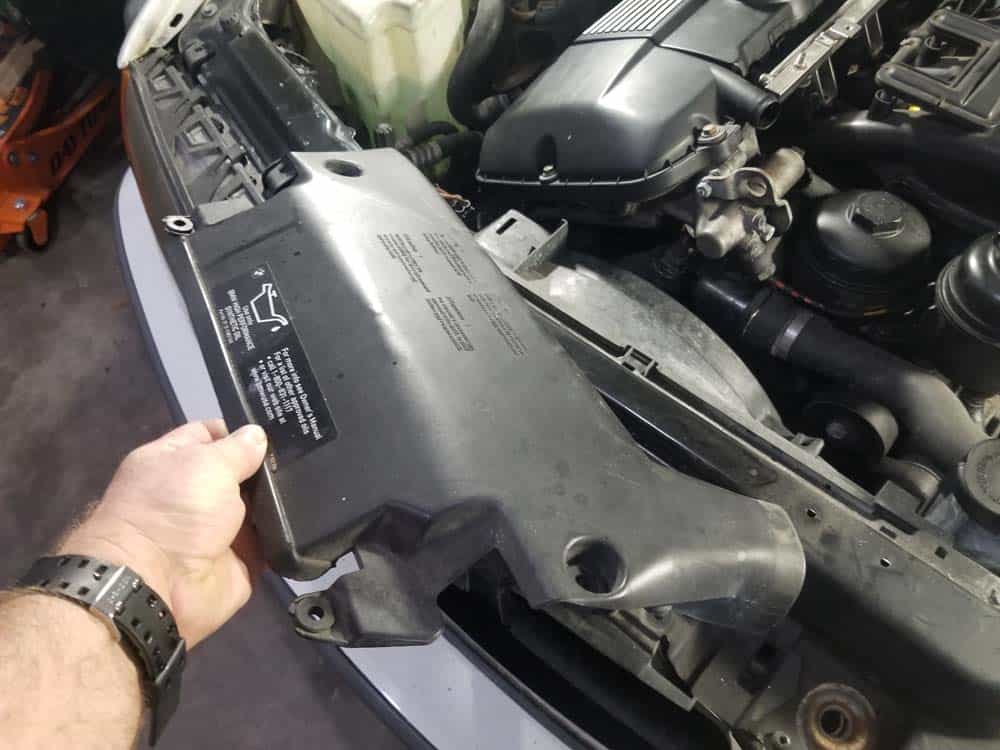
- Begin by removing the microfilter (cabin air filter) cover. It is held in place with three thumb screws. Remove the microfilter element.
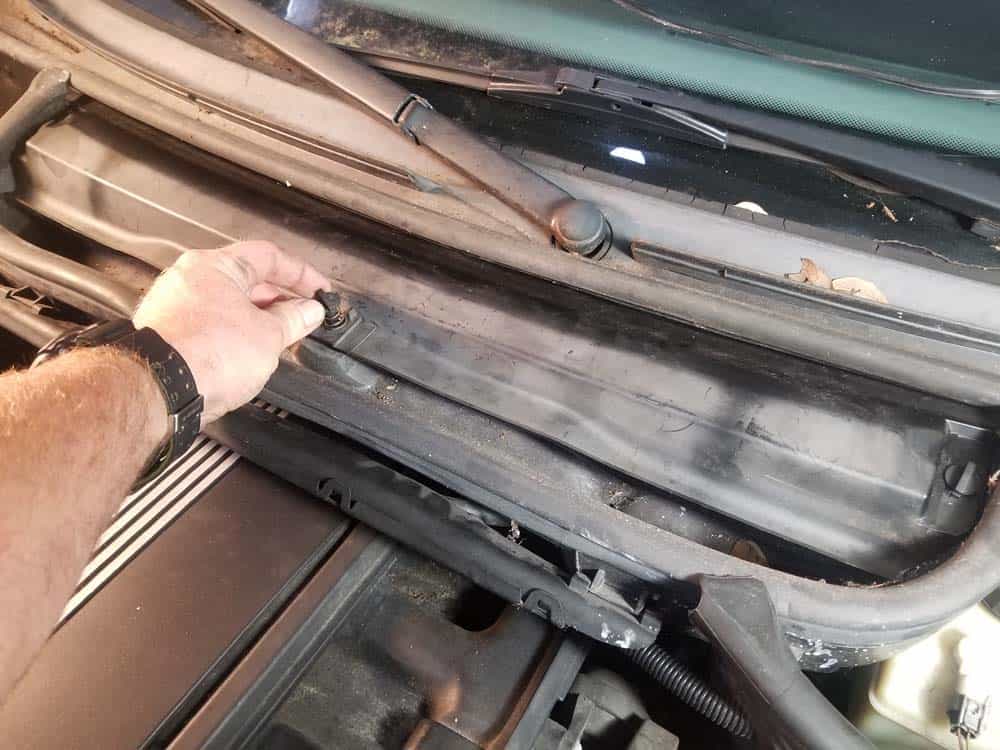
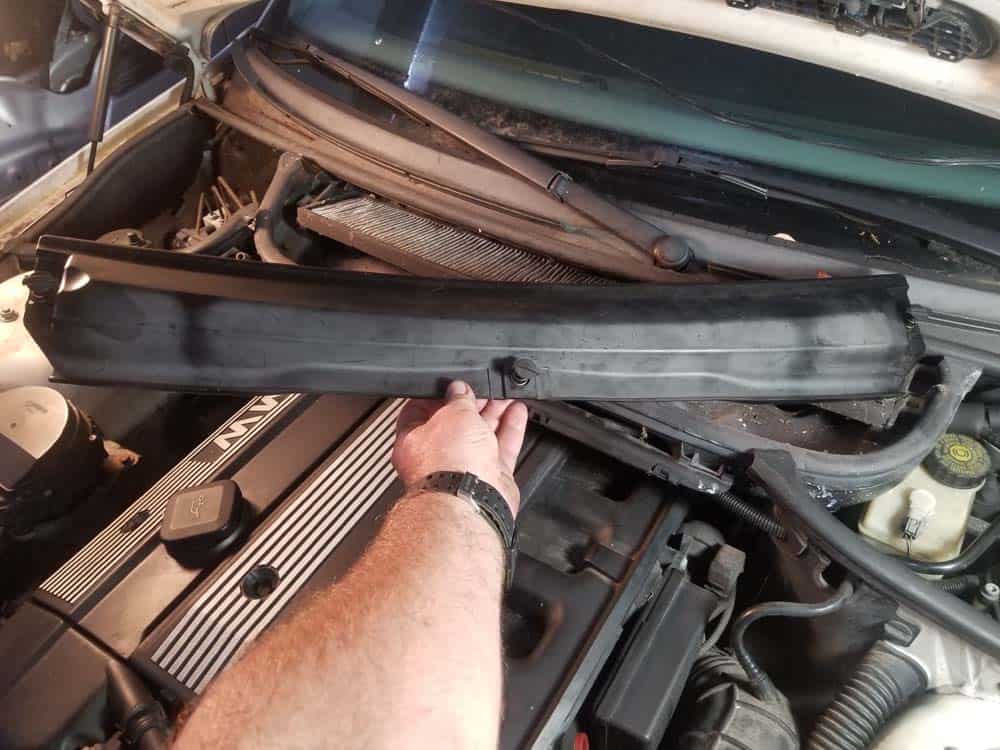
- Remove the four T30 torx screws securing the microfilter housing to the body of the vehicle.
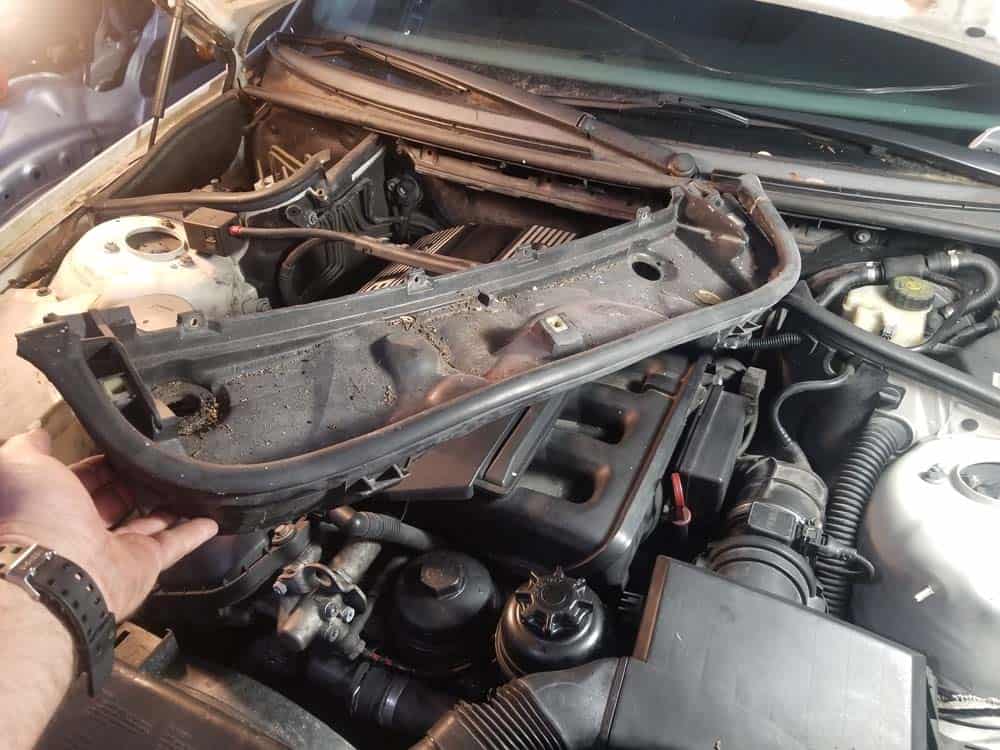
- Pull the battery cable guide free from the front of the microfilter housing. Remove the microfilter housing from the vehicle.
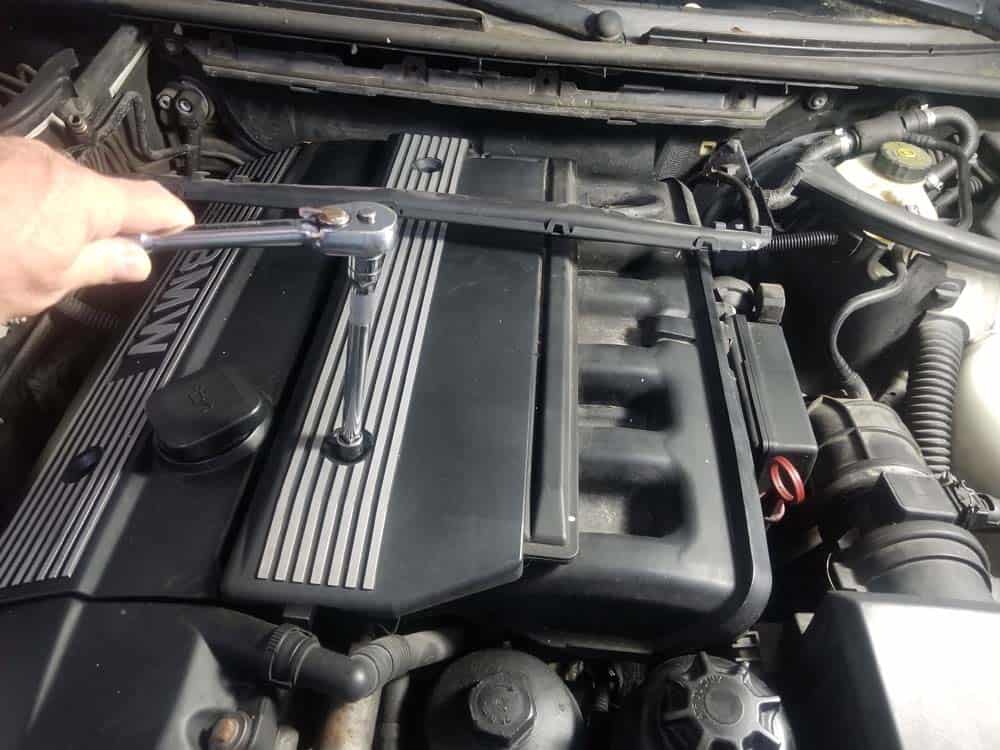
- Remove the two 10mm bolts securing the left engine cover to the fuel rail. Remove the engine cover from the vehicle.

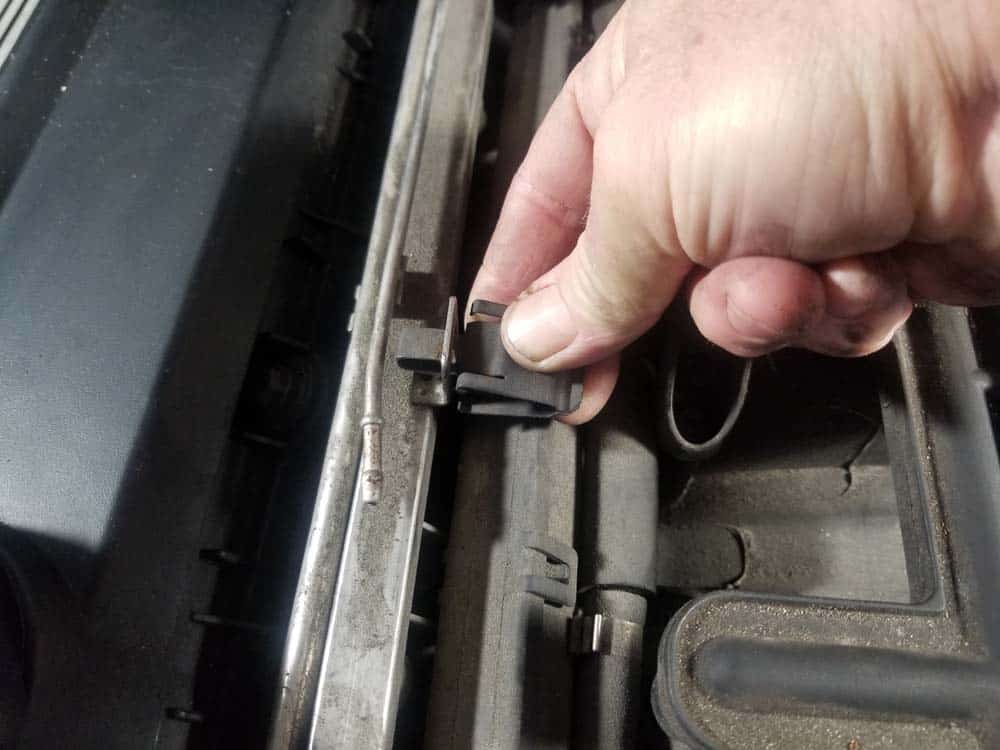
- Begin by unclipping the oxygen sensor wires from the top of the fuel rail as shown below. Carefully stow them safely out of the work area. Also remove the oxygen sensor mounting clips from the fuel rail...this will give you extra space for removing the wiring harness.
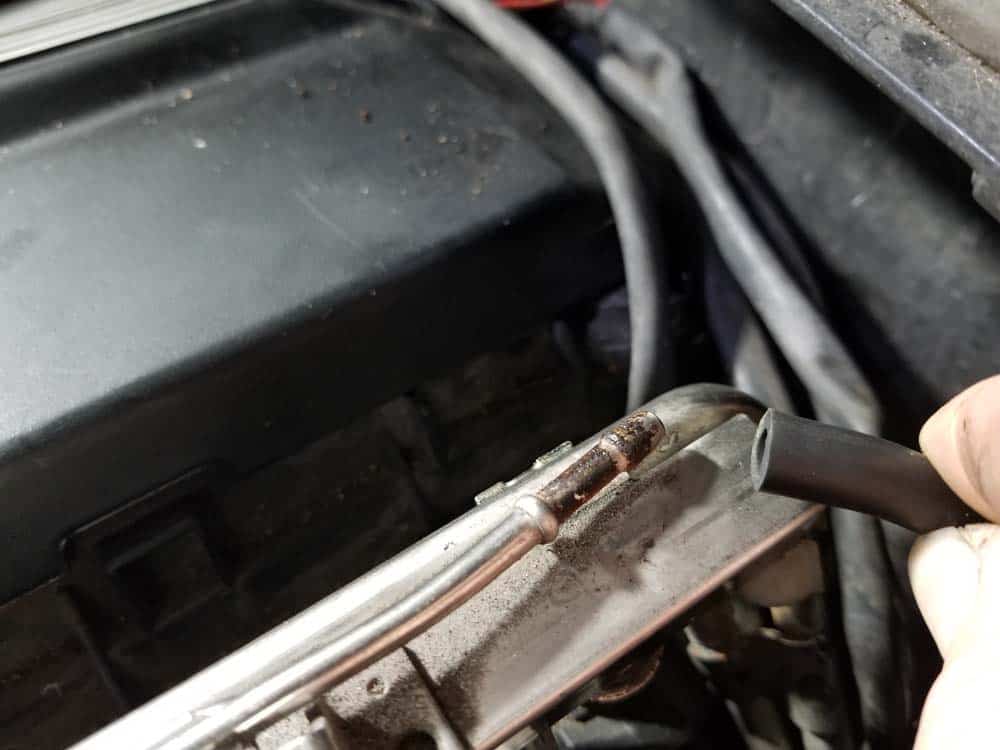
- Disconnect the rear vacuum line from the top of the fuel rail. It is not necessary to remove the front fuel rail vacuum line unless you are planning on replacing it...it is connected to the PCV valve on the bottom of the intake manifold and does not hinder the removal process.
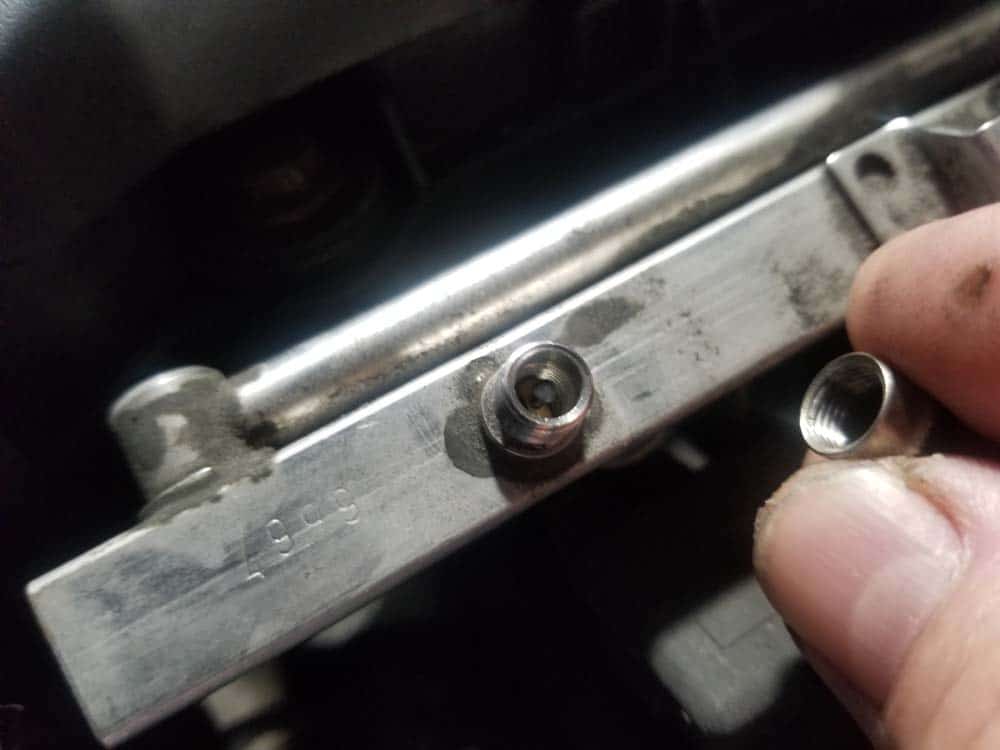
- Now is a great time to release the fuel rail pressure. This will save you from a mess when you disconnect the fuel lines from the intake manifold later on in this article. This is a very simple procedure that does not require any special tools. Start by locating the Schrader valve on the end of the fuel rail and remove its protective cap. The Schrader valve is the same valve found in a car or bicycle tire.
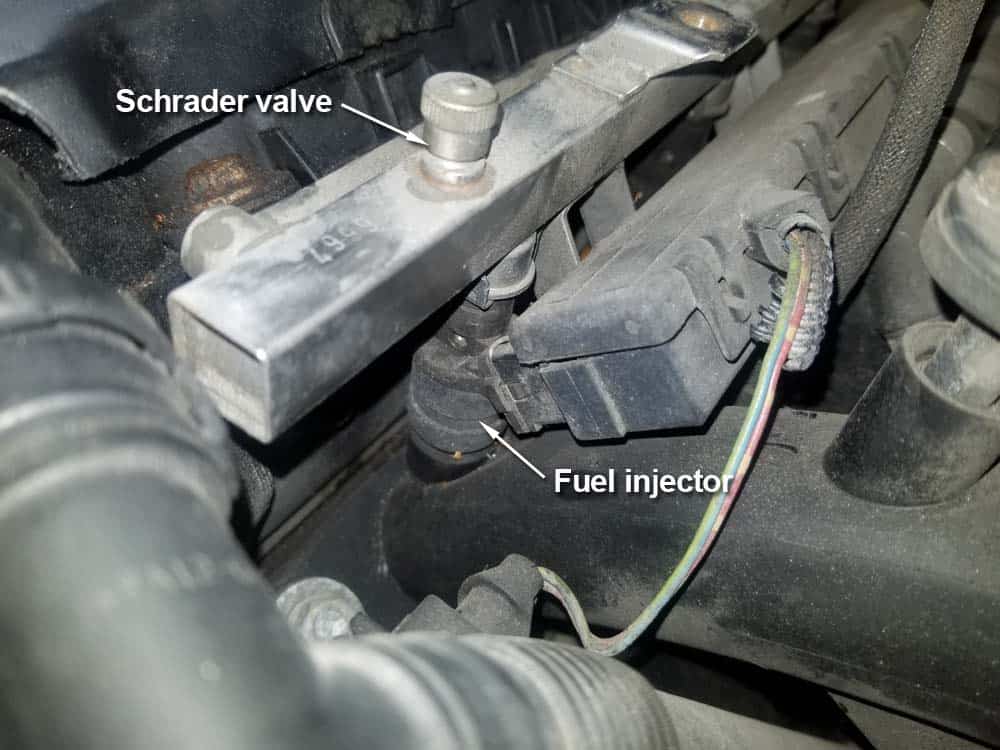
- Put several rags down around the valve to catch and fuel that may come out. Use a small flat blade screwdriver to depress the valve (like letting air out of a tire) until all of the pressure is released from the rail.
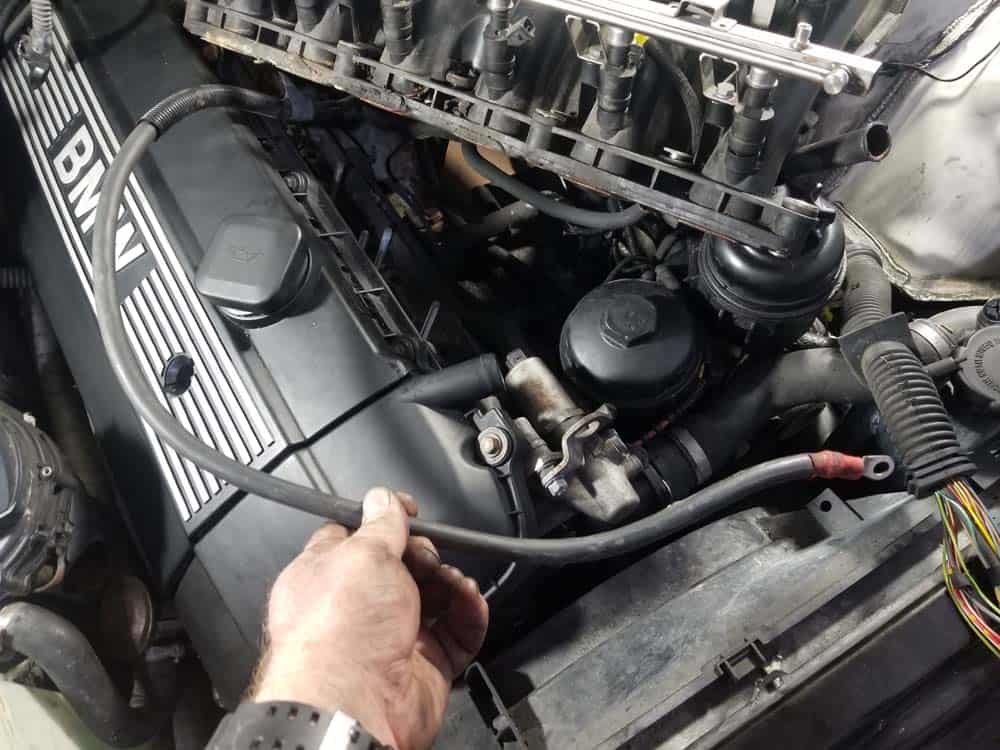
- Unplug the crankcase breather hose from the valve cover.
- Next, unplug the solenoid valve on the front of the engine.
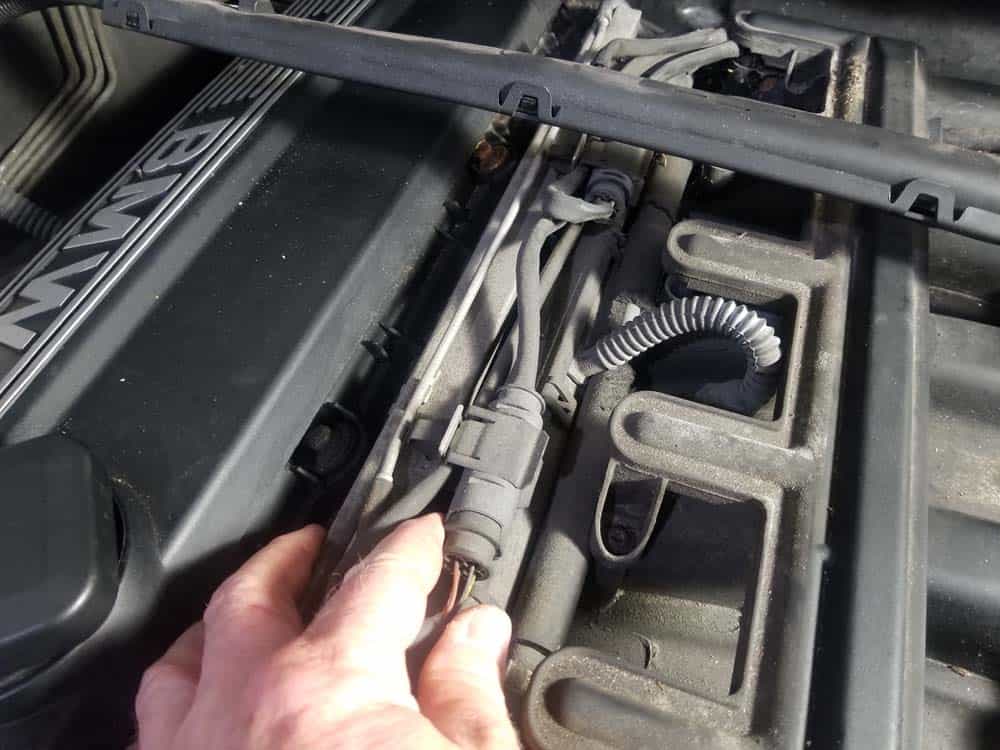
- To prepare the intake manifold for removal, the fuel rail wiring harness needs to be removed. The wiring harness prevents proper removal and installation of the intake manifold mounting bolts. Trying to remove and install the intake manifold mounting bolts with the fuel injector wiring harness installed can cause damage to the fuel injectors and should be avoided.
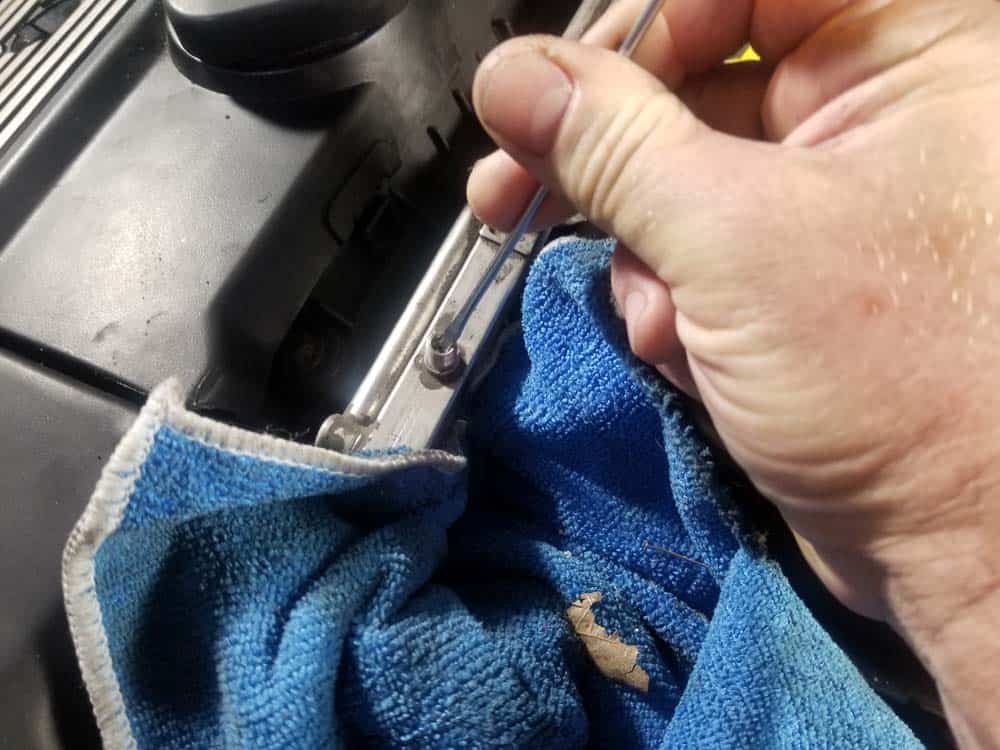
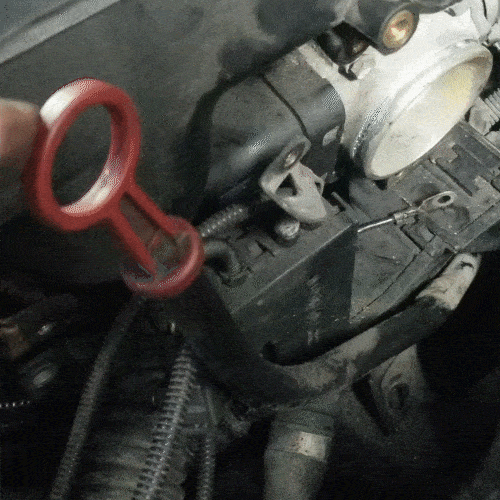
- The wiring harness is connected to each fuel injector with a metal clip as shown below. It is important to understand that only one side of the metal clip has to be released to remove the wiring harness from the injector.
- Starting at the first injector, use a steel pick or flat blade screwdriver to pull one side of the metal clip free. Remember...only one side of the clip has to be released as shown below. Repeat on the other five injectors.
- When all wiring harness clips have been released, slowly start pulling the wiring harness loose from the injectors. DO NOT force it off. If it will not release from an injector, make sure the wiring harness clip didn’t snap back into place.
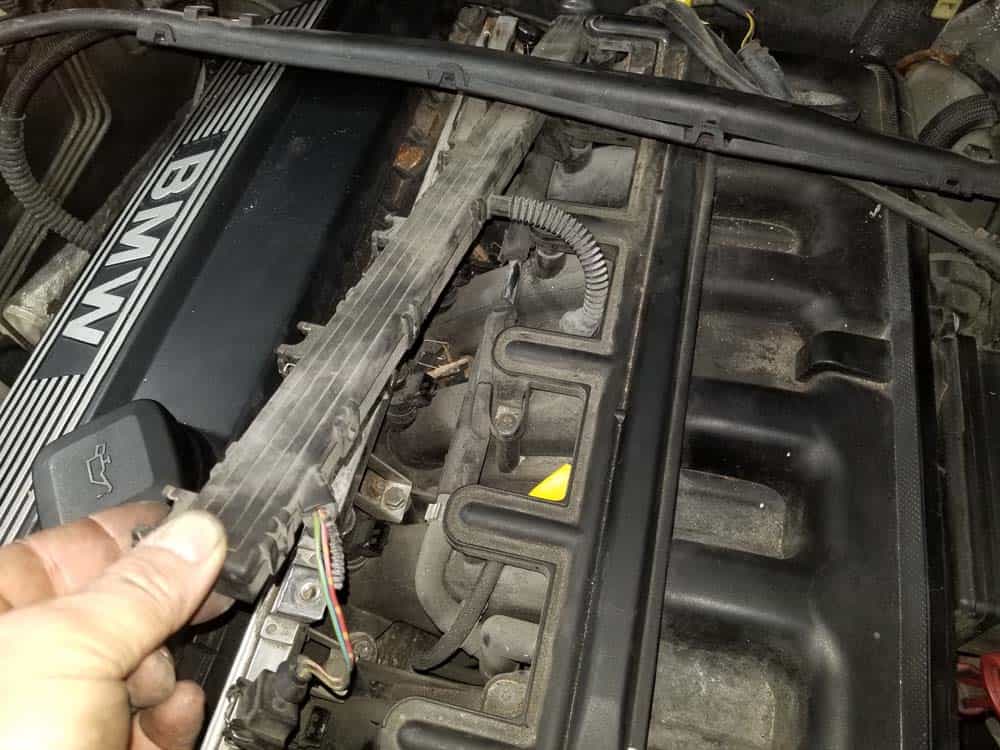
- If you are sure every clip is released and you still cannot get the wiring harness to pull free from the injectors, GENTLY pry it loose with a large flat blade screwdriver as shown below.
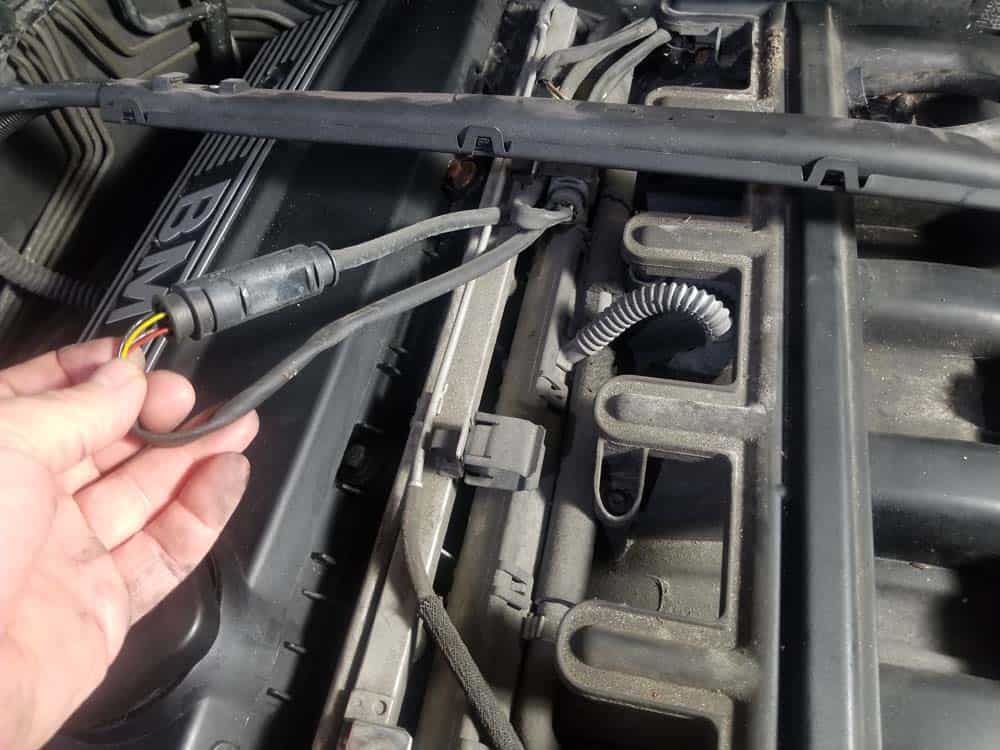
- When the wiring harness is free from the injectors, disconnect it from the intake air temperature sensor and carefully stow out of the work area.
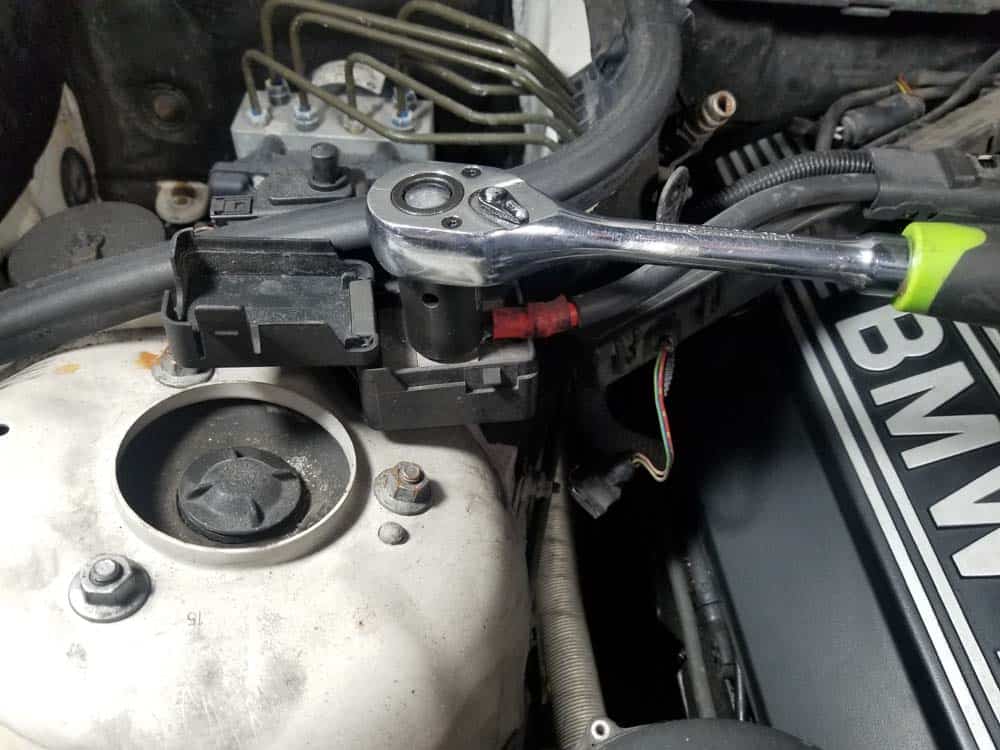
- Use a 19mm socket wrench to remove the positive battery cable from its terminal on the left side of the engine. Unsnap the cable guide and remove the battery cable and wiring harness. Lay the positive battery cable to the side away from the work area.

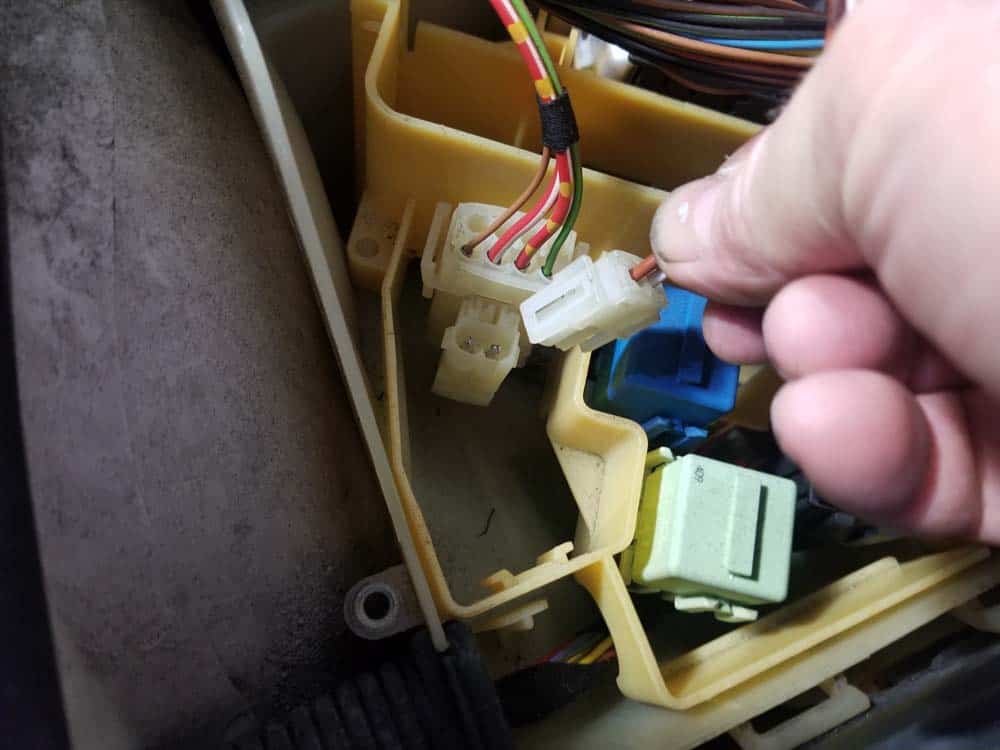
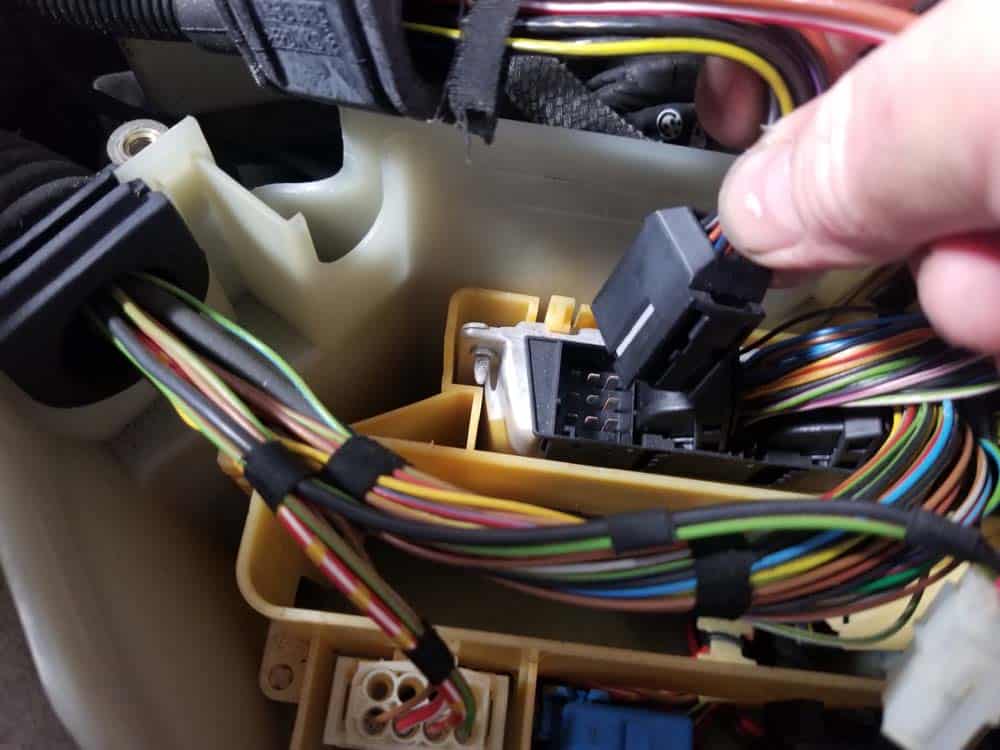
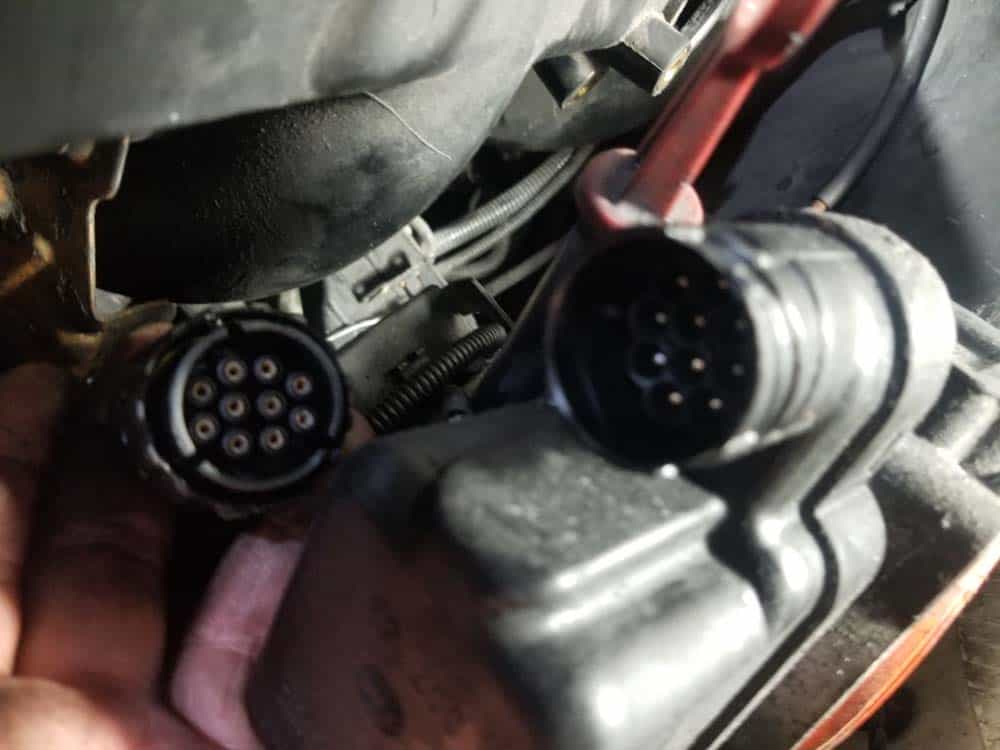
- Using a T30 torx bit, remove the top from the electronics box (E-box) on the right side of the engine compartment. Locate the two engine wiring harness connections and remove them. Fold the engine wiring harness out of the way of the work area.

- The intake manifold is now clear of all of the upper electrical wiring.
Section 2 - Removing the Air Intake System
In the BMW M52 engine, the intake manifold's lower mounting bolt is located behind the throttle body. This means that the air intake system, including the intake boot and throttle body, must be removed in order to access the bolt. Look at this as an opportunity to replace high failure rate parts like the idle control valve, DISA valve, and infamous intake boot which is prone to cracking and causing a rough idle. Even though you may be performing a BMW M52 intake manifold removal for another repair, spending a few extra bucks now while you have the system apart will save you a lot of headaches down the line.- Remove the intake snorkel from the front of the car. It is held in place with two plastic rivets.
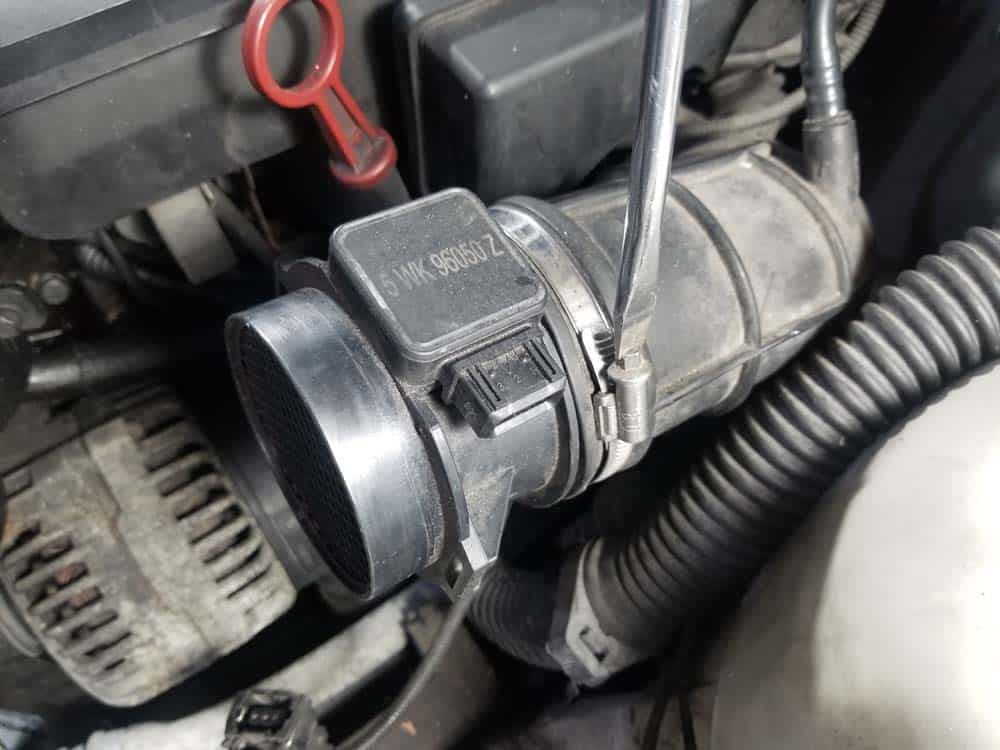
- Using a 10mm socket wrench, remove the two bolts anchoring the intake muffler to the vehicle. Unclip the intake muffler from the mass air flow (MAF) sensor and remove from the vehicle.
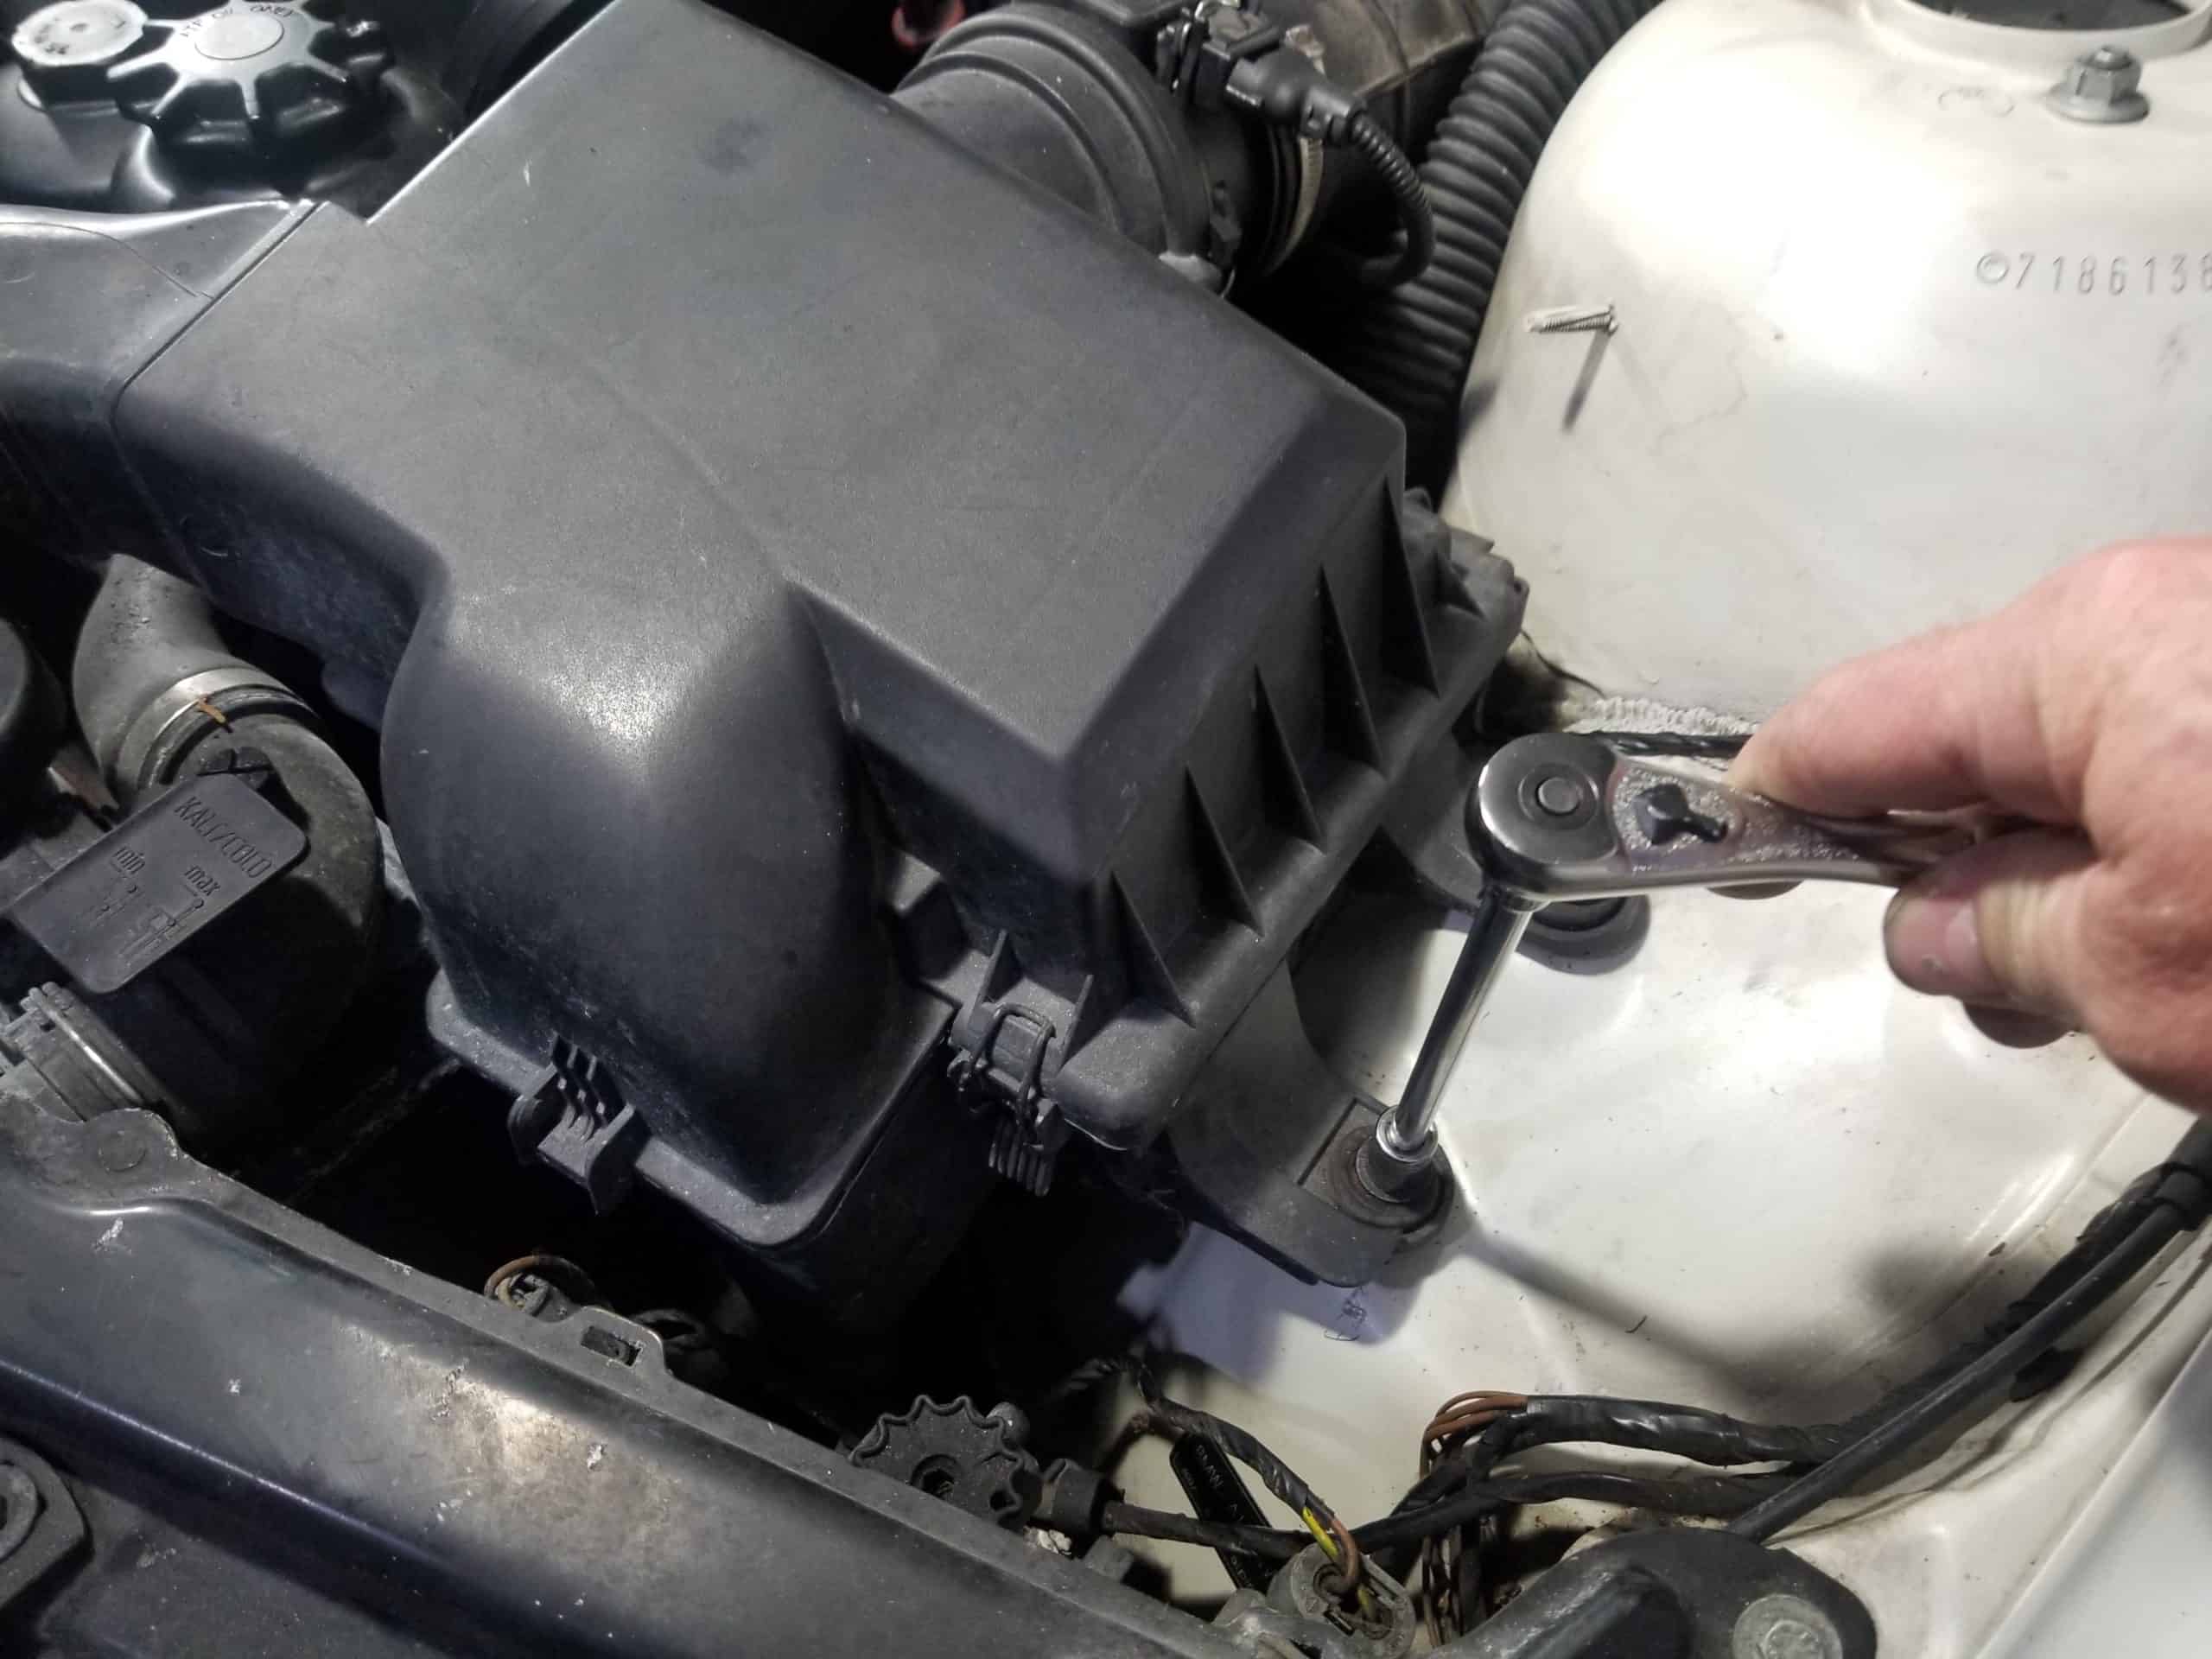
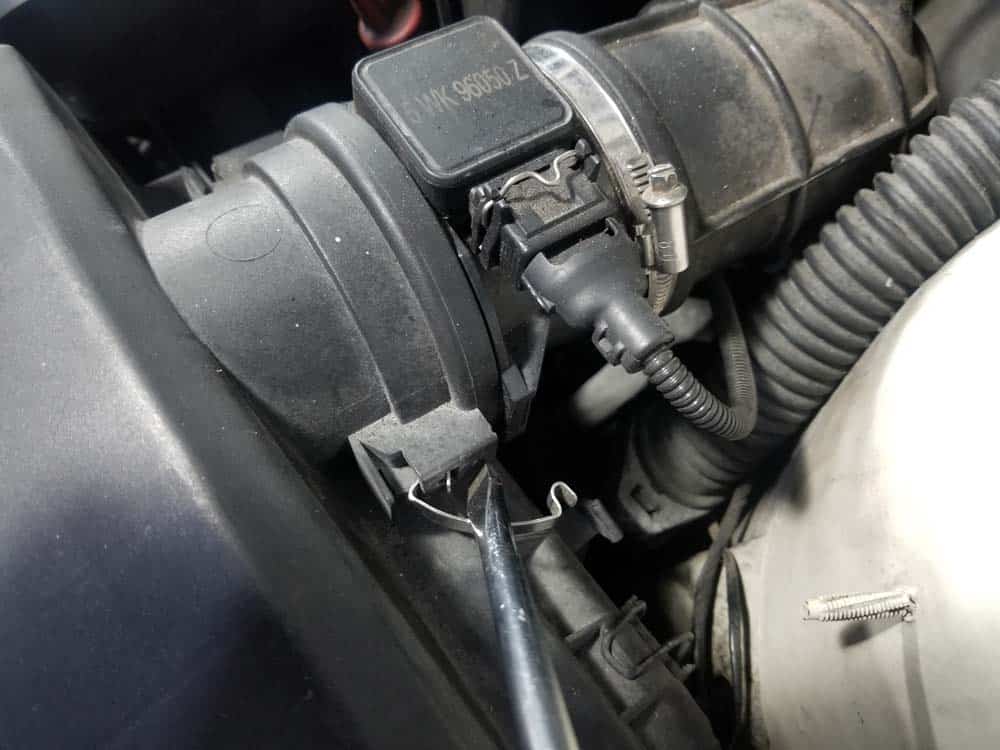
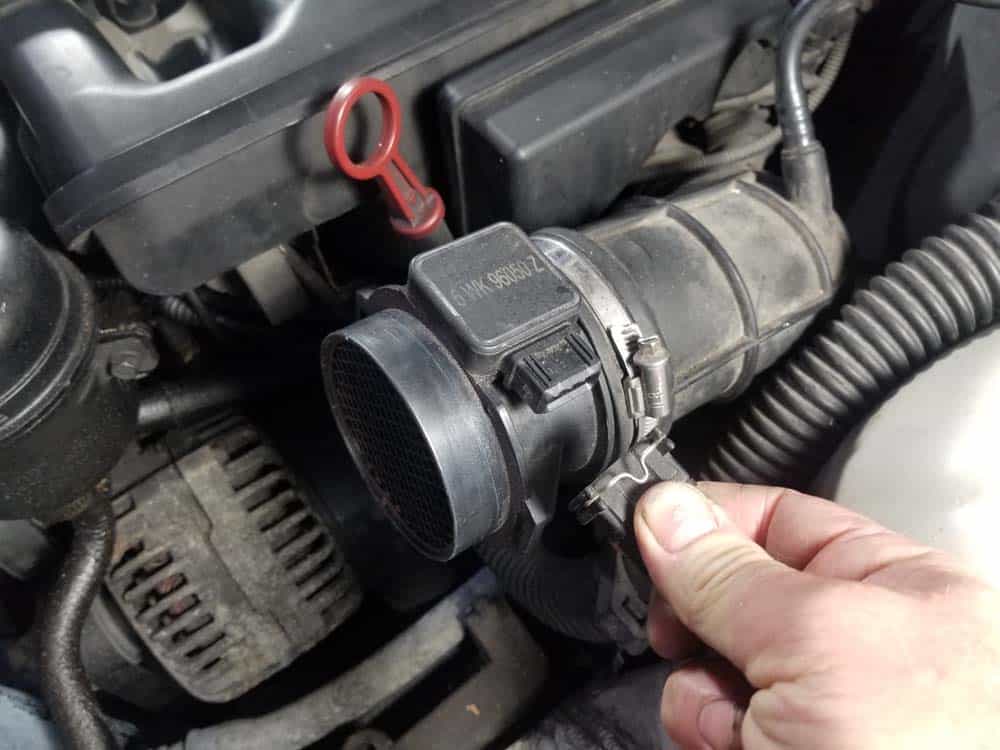
- Unplug the MAF sensor. Loosen the hose clamp connecting the MAF sensor to the intake boot. Carefully remove the MAF sensor and store in a safe place - the MAF sensor is very sensitive...take extra care not to drop it or store it anywhere it could get damaged.

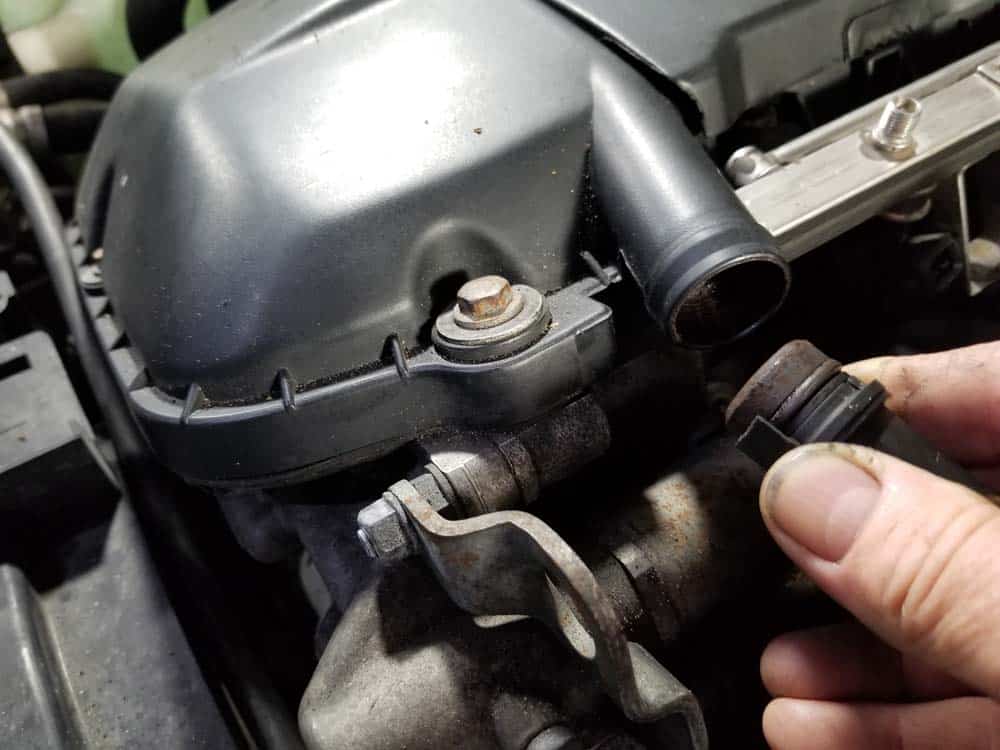
- Unplug the electrical connection to the fuel tank vent valve - it is located at the front of the intake manifold next to the power steering fluid reservoir.
- Remove the vacuum line from the bottom of the fuel tank vent valve.
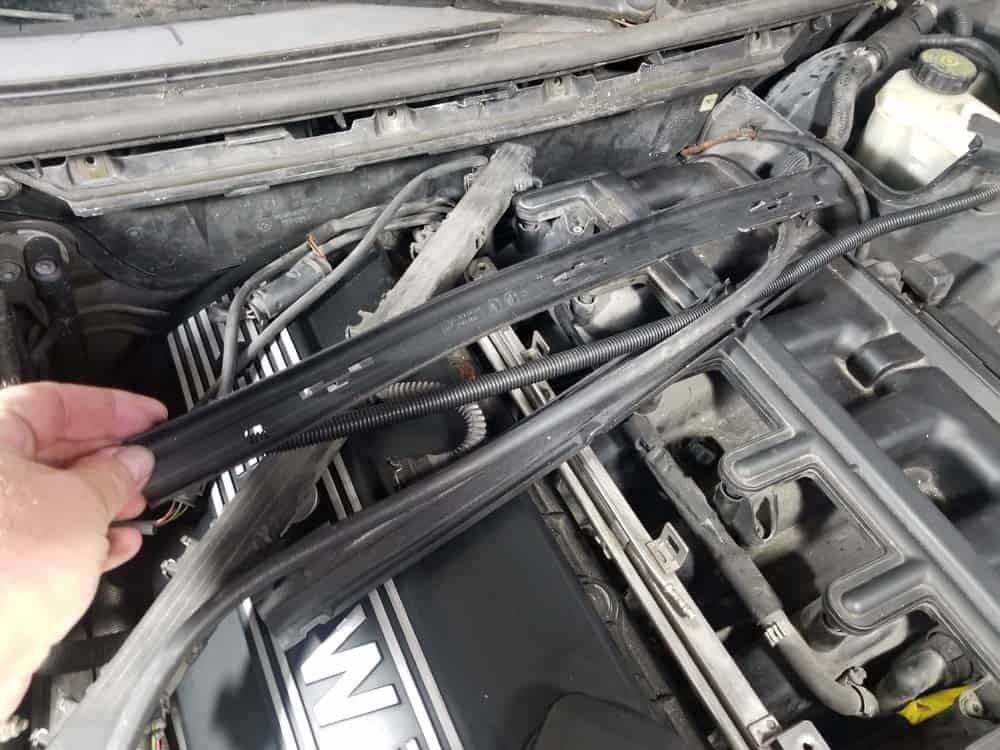
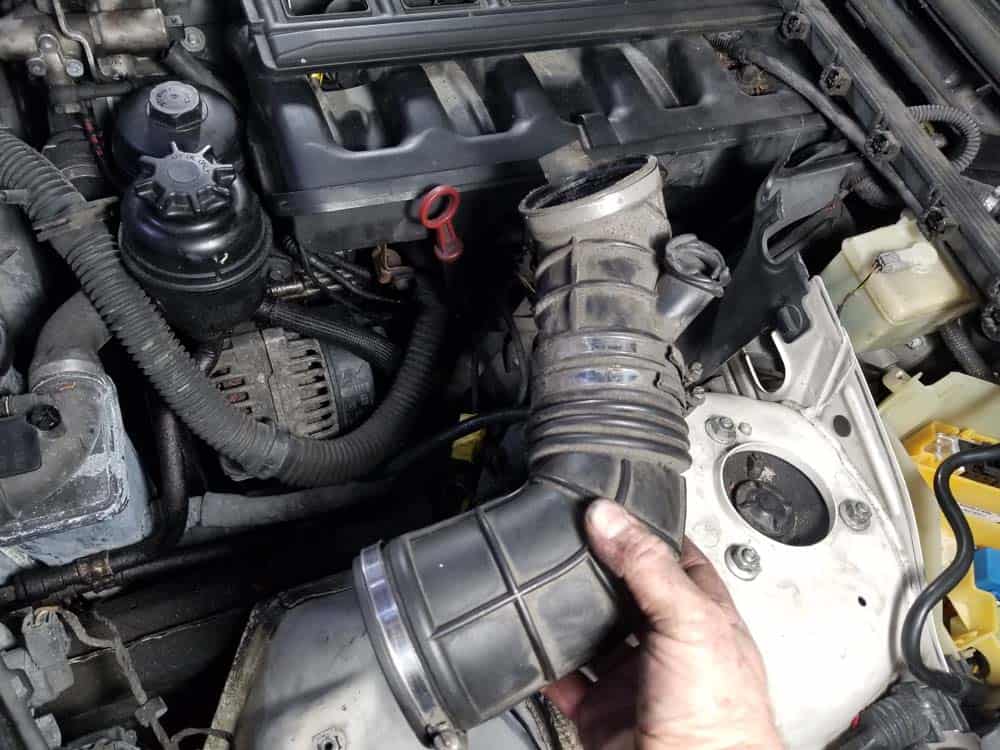
- Remove the vacuum line from the top of the intake boot. Be careful...this connection tends to get brittle with age and can easily break like ours did. The good news is intake boots are cheap...you can order a replacement from our parts list.
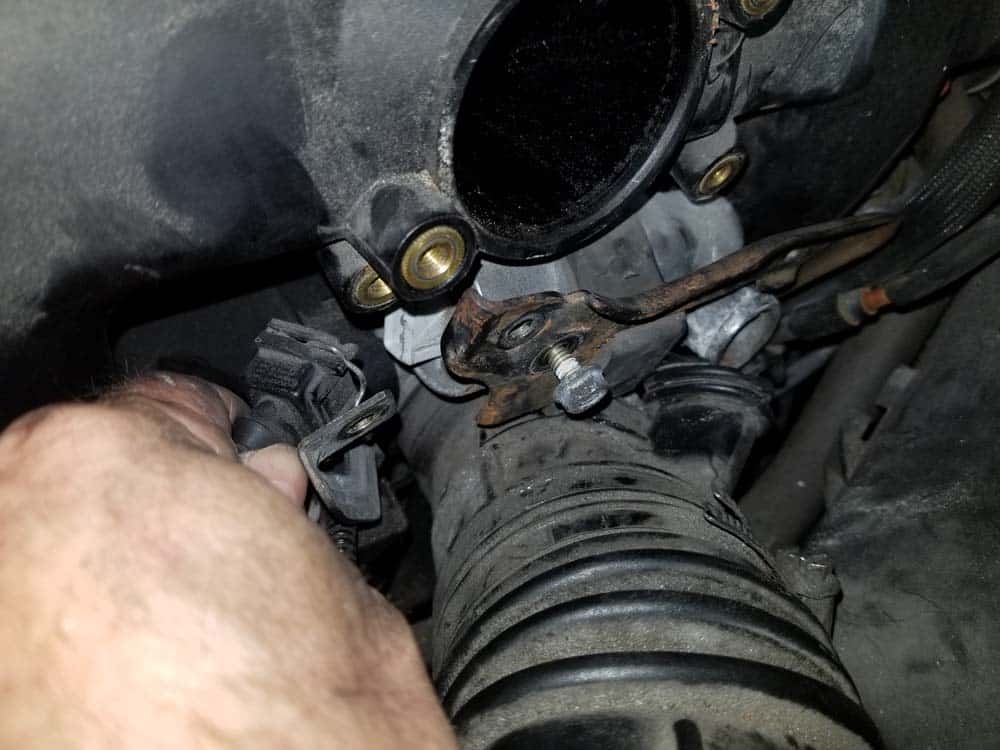
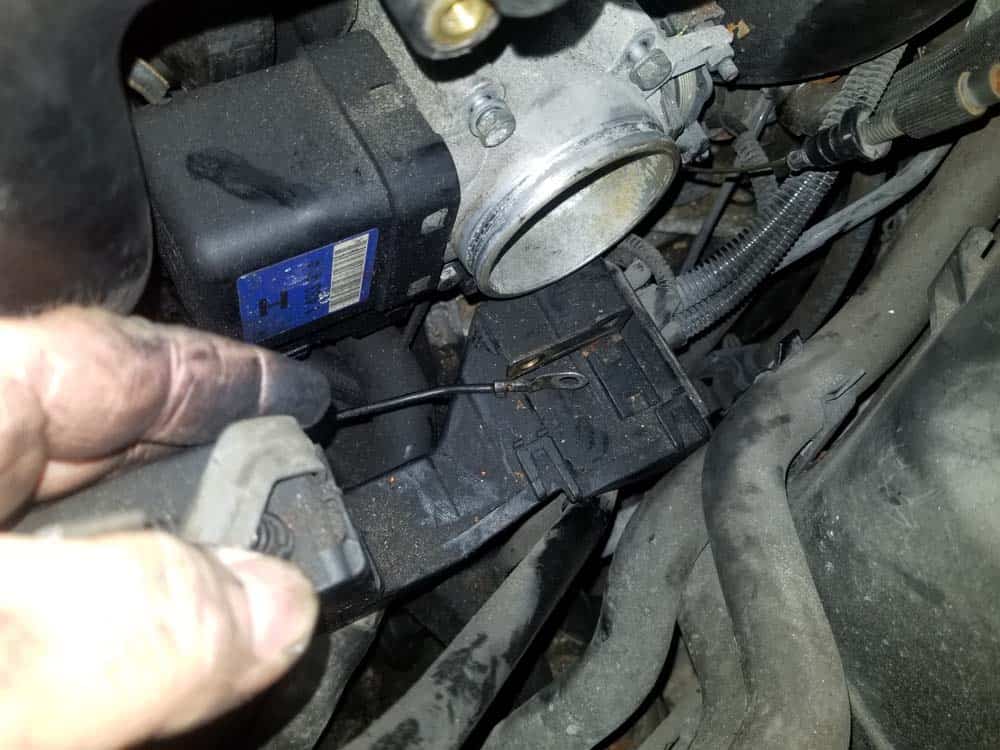
- Next unplug the DISA valve. The DISA valve is held in place with two T40 bolts. Remove the bolts and CAREFULLY pull the DISA valve free of the intake manifold.
- Using a 10mm socket wrench, remove the wiring harness support bracket from the idle control valve.
- Remove the idle control valve bracket’s two T40 bolts. Roll the bracket back.
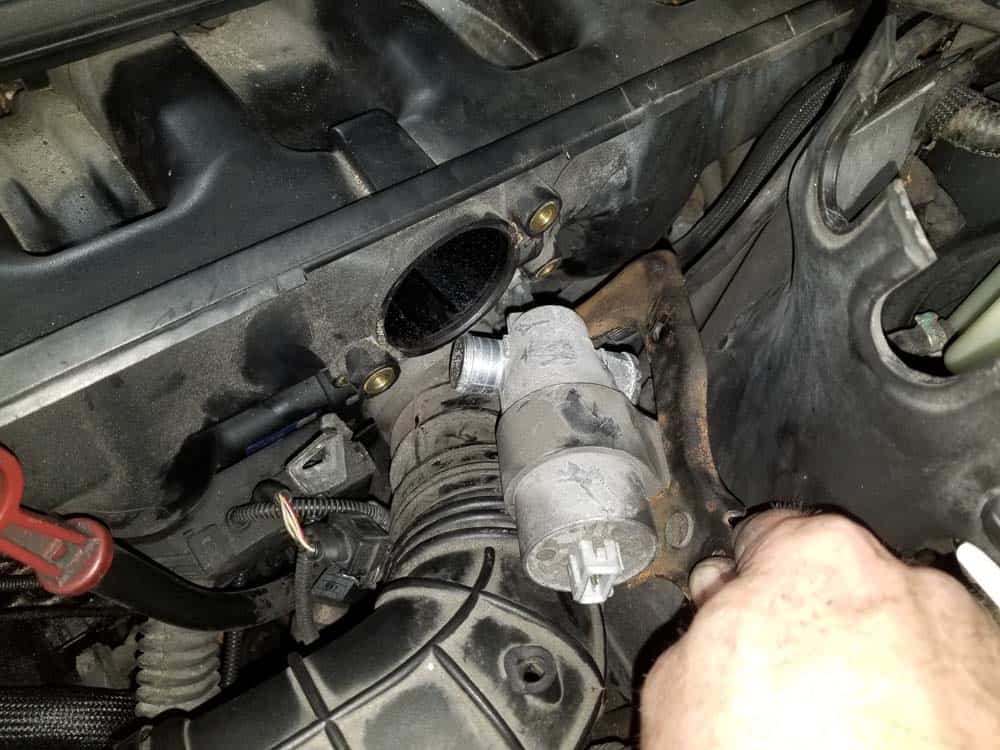
- Removing the idle control valve is always a challenge. Start by loosening the intake boot hose clamp. Remove the intake boot from the idle control valve. You may need to use the assistance of a flat blade screwdriver to get it off.
- Unplug the idle control valves electrical connection.
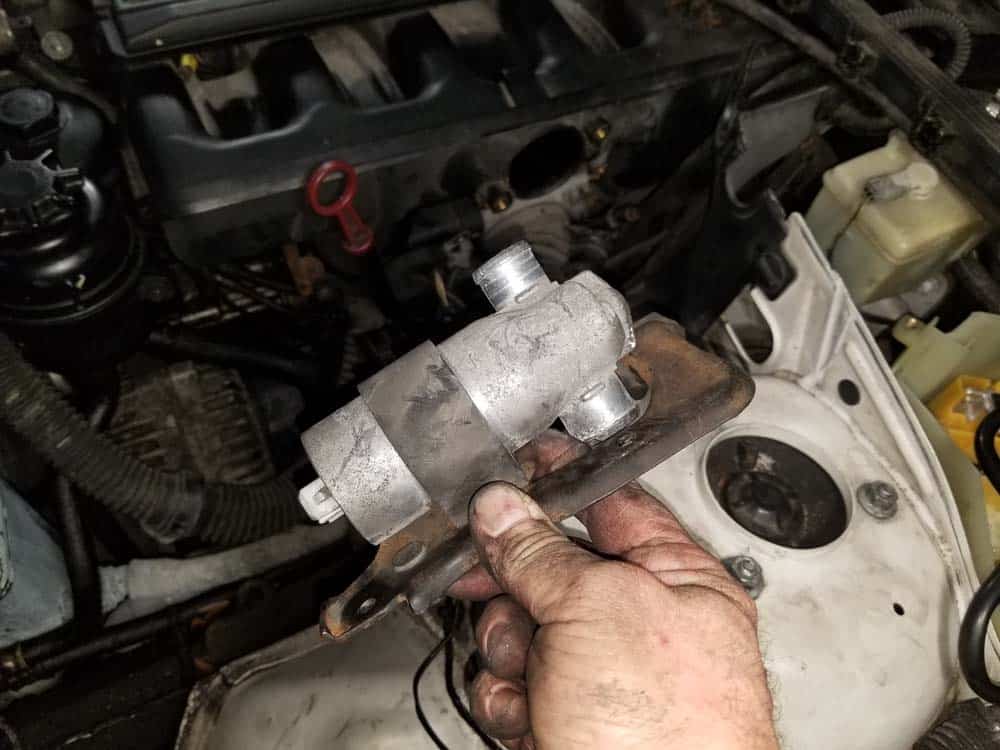
- Grasp the idle control valve and remove it from the intake manifold. It may take some twisting and turning to get it out...older valves tend to get stuck and need to be worked out slowly.
- Disconnect the throttle cable from the idle control valve bracket.

- Remove the idle control valve from the engine.
- Loosen the hose clamp on the intake boot where it attached to the throttle body.
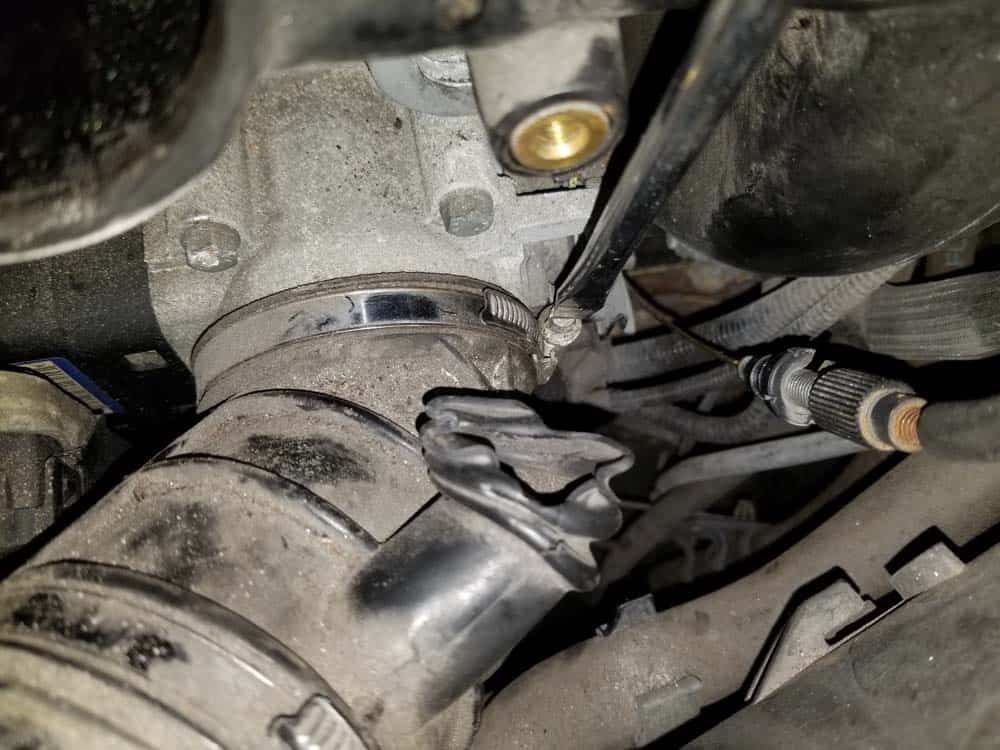
- Grasp the intake boot and pull it off the throttle body. Remove it from the vehicle.
- The wiring harness now needs to be disconnected from the bottom of the intake manifold. The reason is because there is not enough space to remove the throttle body with the wiring harness in place.
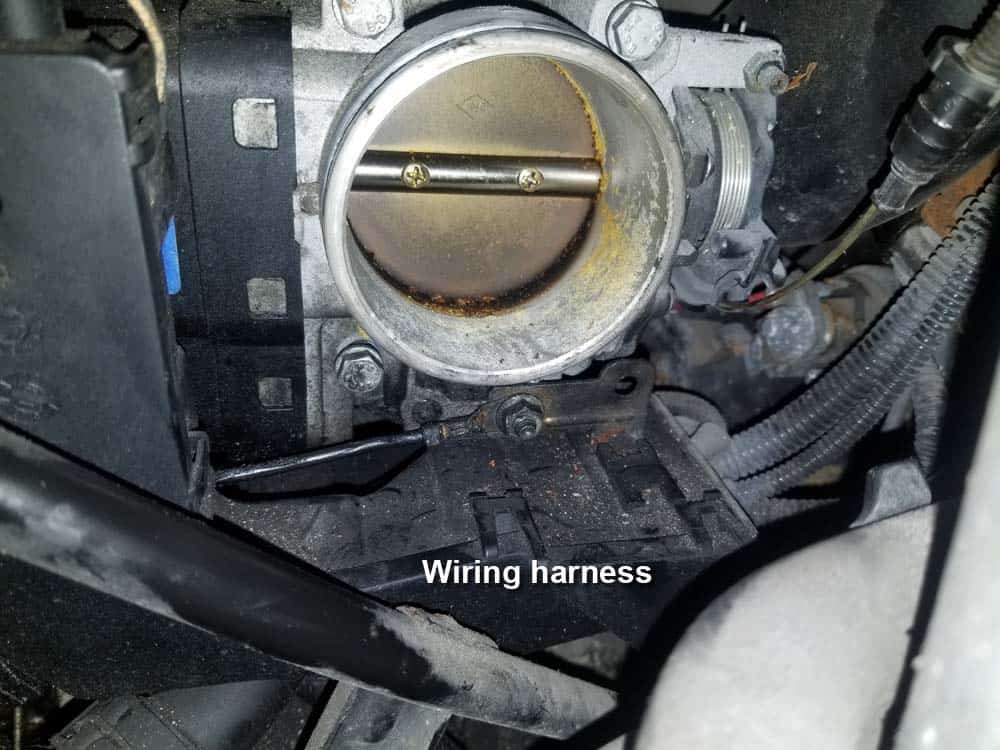
- Start by removing the 10mm nut securing the engine grounding strap and the wiring harness to the bottom of the throttle body.
- Next, remove the front 10mm bolt securing the wiring harness to the intake manifold.
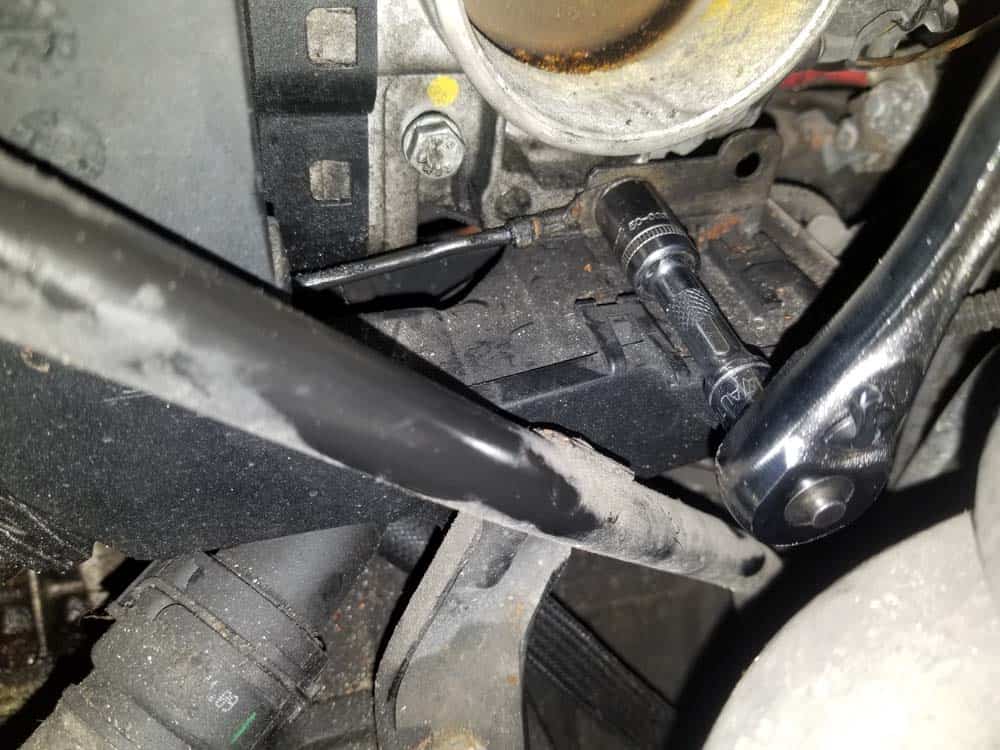
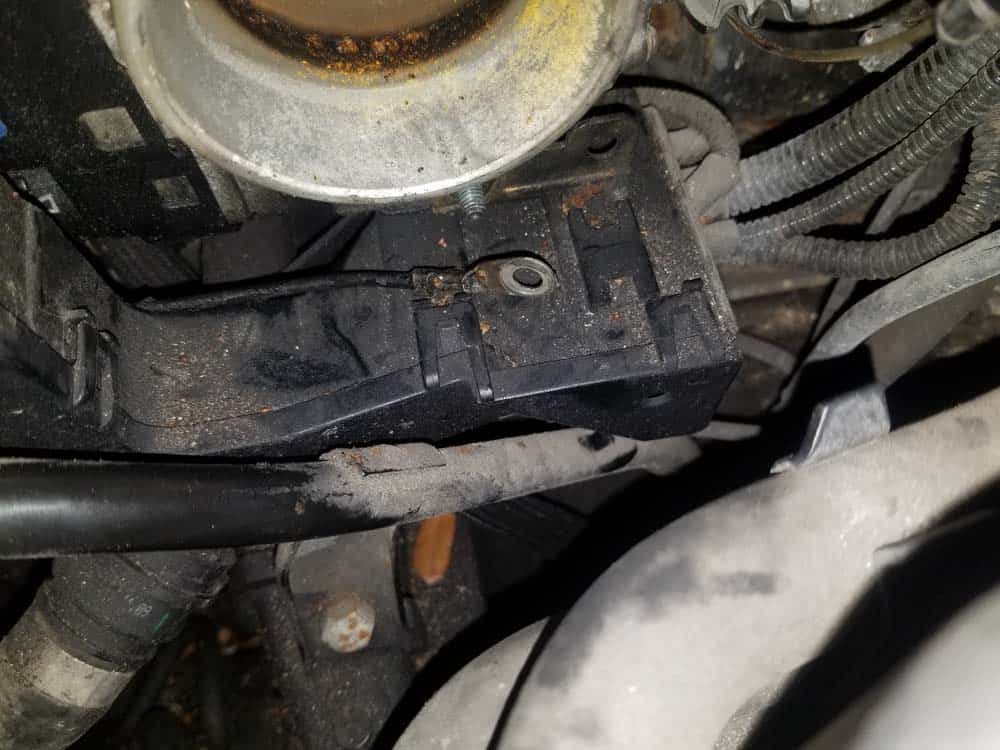
- Remove the 13mm bolt securing the oil dipstick tube to the engine block.
- Gently move the dipstick to the side and slide the wiring harness out of the way of the lower throttle body bolts.
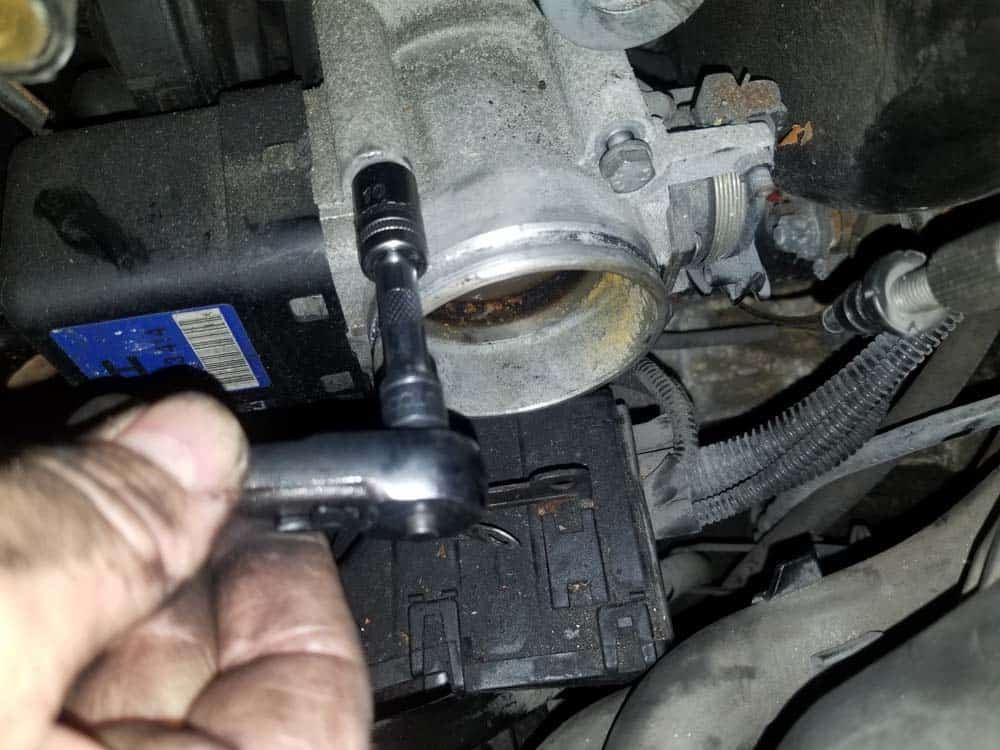
- There is now enough room to remove the throttle body. Use a 10mm socket wrench to remove its four mounting bolts.
- Remove the electrical plug from the throttle body by turning it counterclockwise and pulling it free. You do not need to remove the throttle cable - set the throttle safely to the side out of the work area.
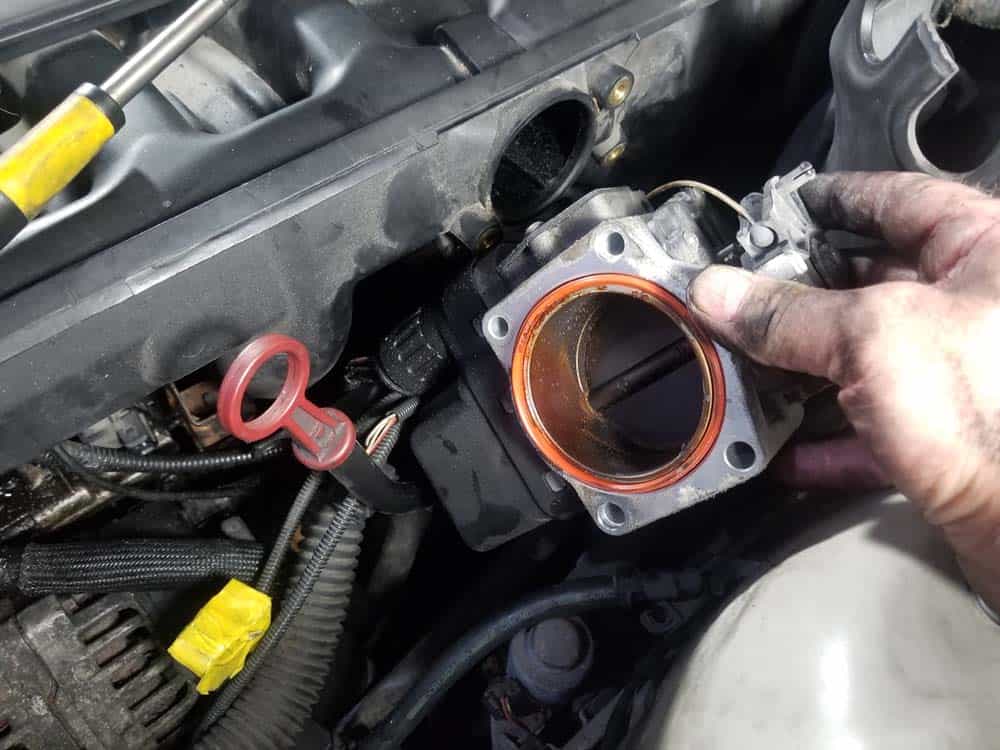
- You can now access the lower mounting nut which will be removed in the next section.
Section 3 - Removing the Intake Manifold
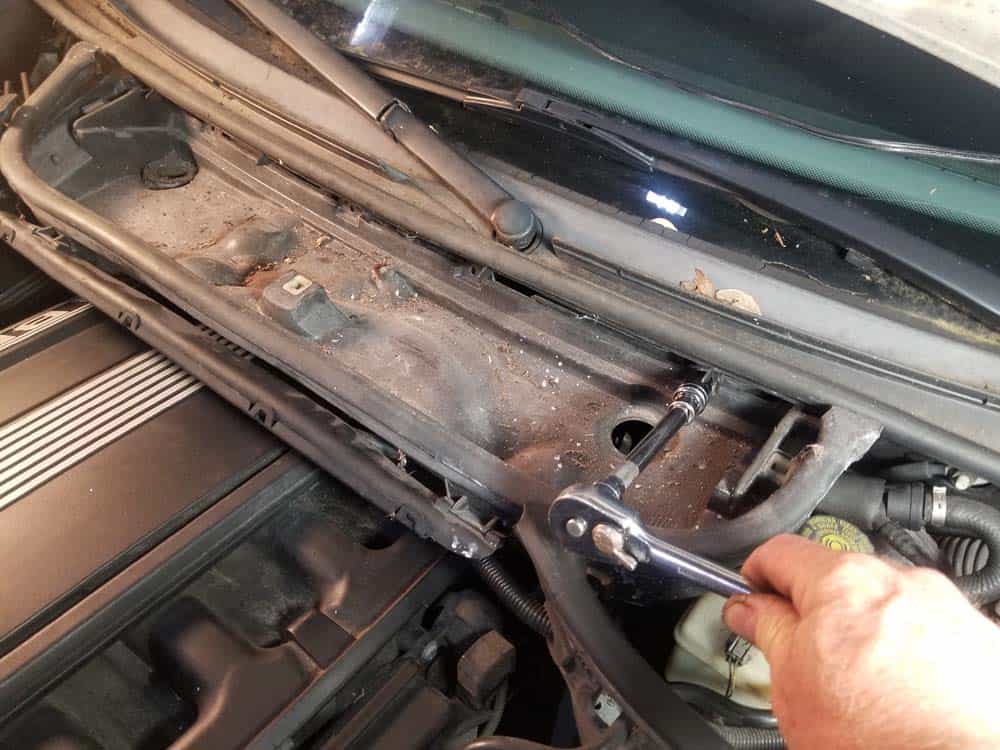
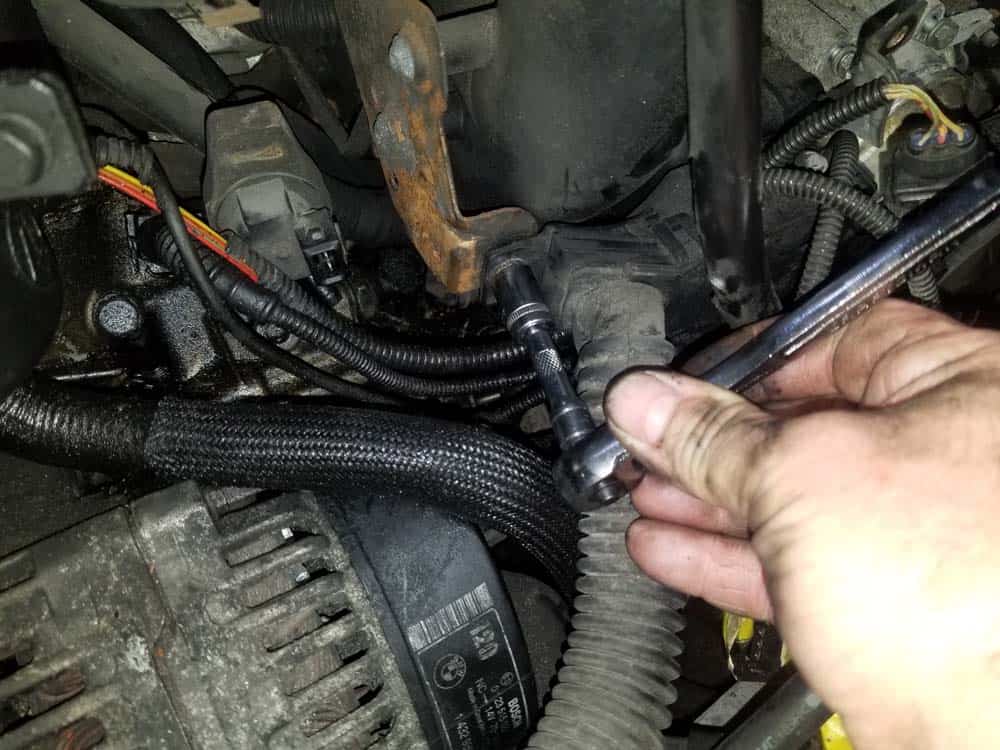
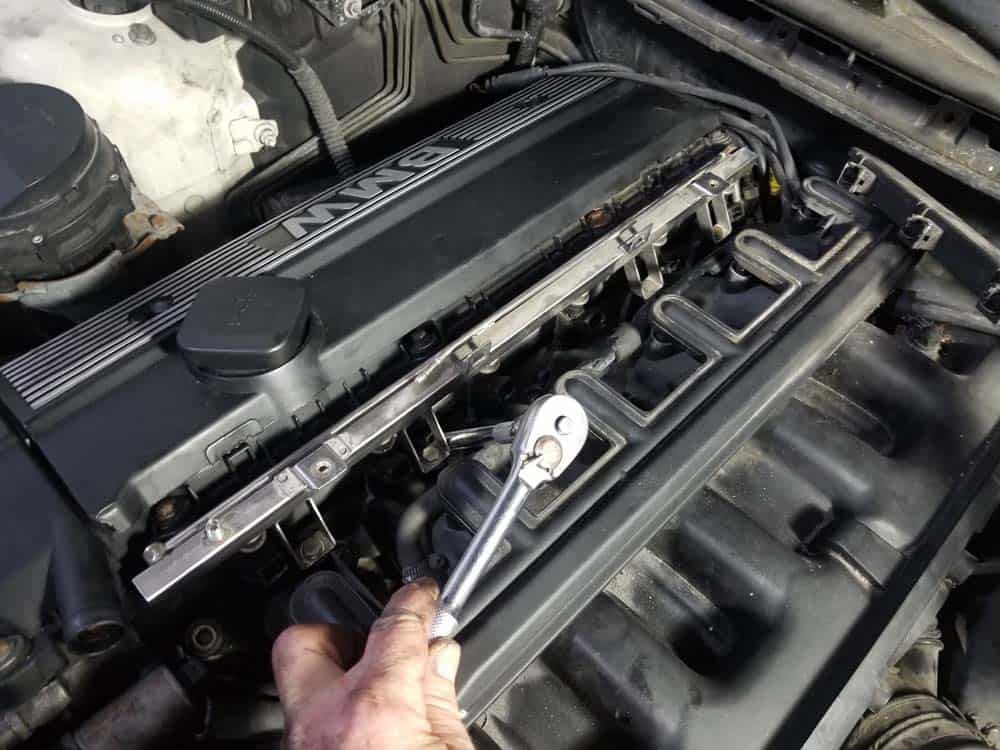
Performing a BMW M52 intake manifold removal from the engine compartment can be tricky. There are a lot of connections, and missing just one of them will not allow the manifold to be pulled free. Further compounding the issue are old and deteriorating vacuum lines that tend to fall apart during the removal process. We give you detailed vacuum connection schematics so you can quickly figure out where broken lines are supposed to go, as well as links to replacement vacuum tubing in our parts section.- Use an 11mm socket wrench to remove the nine nuts securing the intake manifold to the cylinder head.
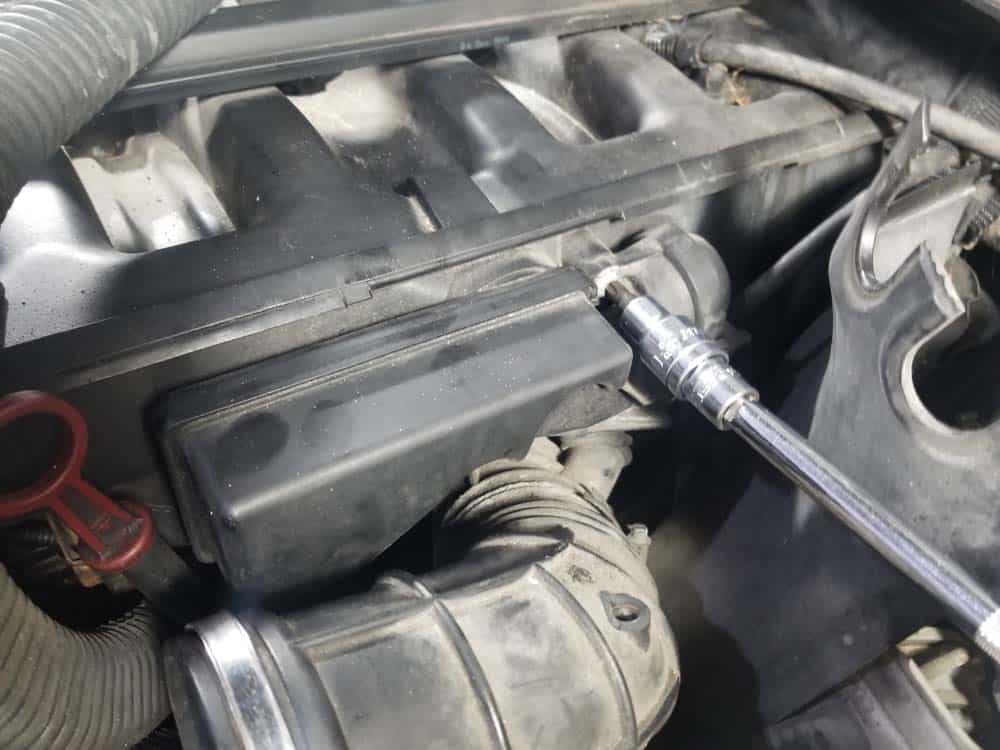
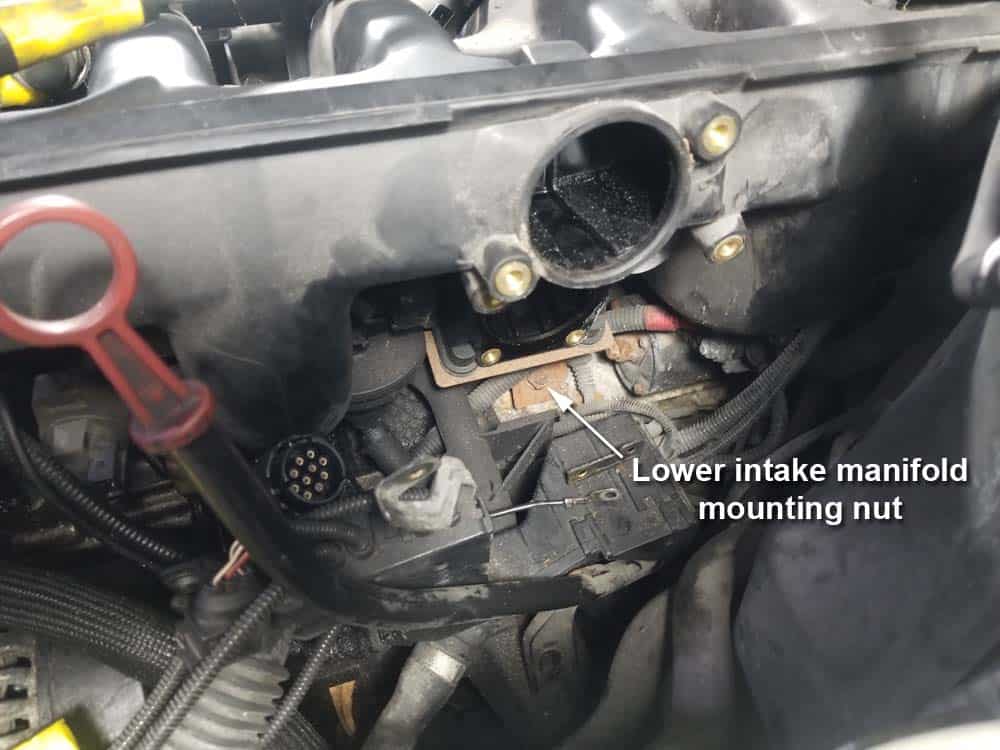
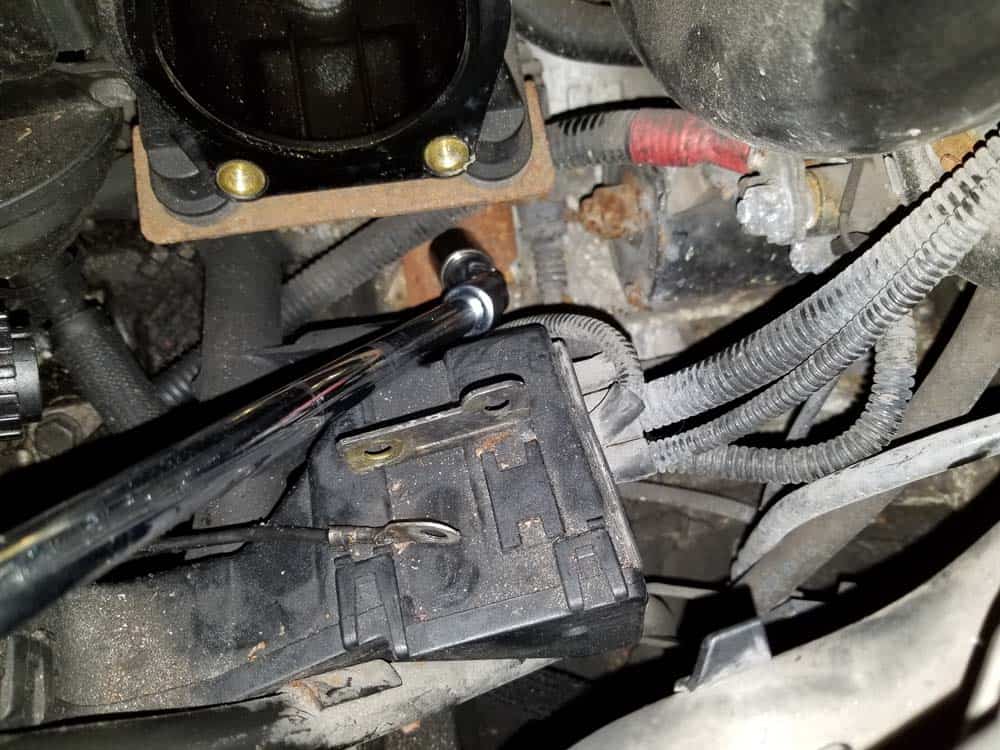
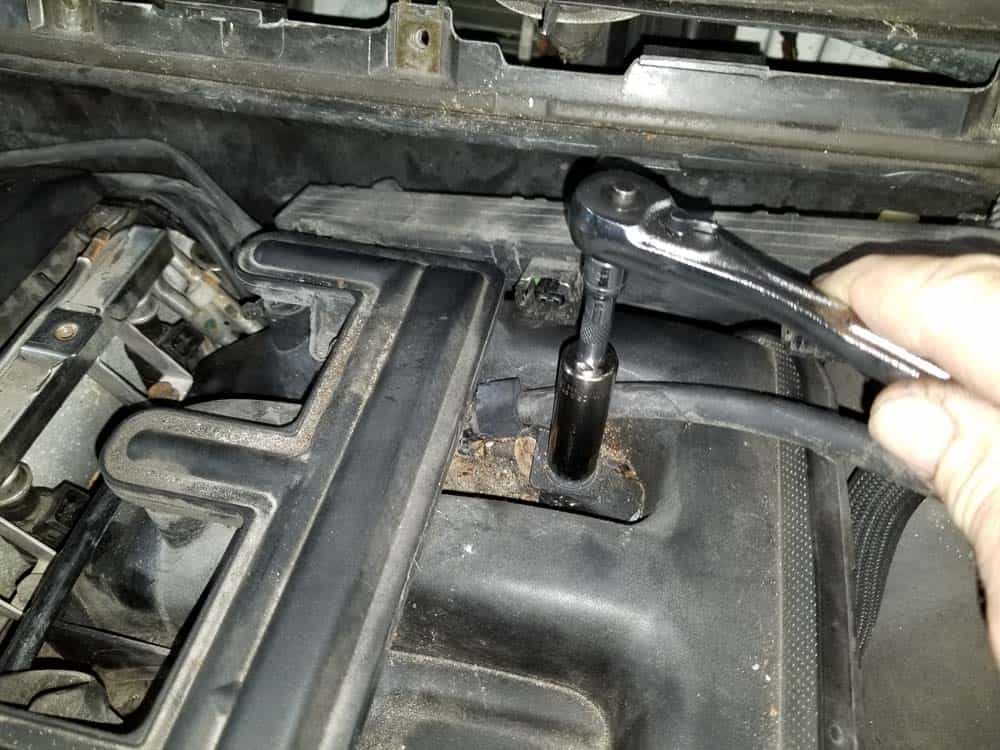
- Use a 16mm socket wrench to remove the lower intake manifold mounting nut. A long socket extension is helpful.
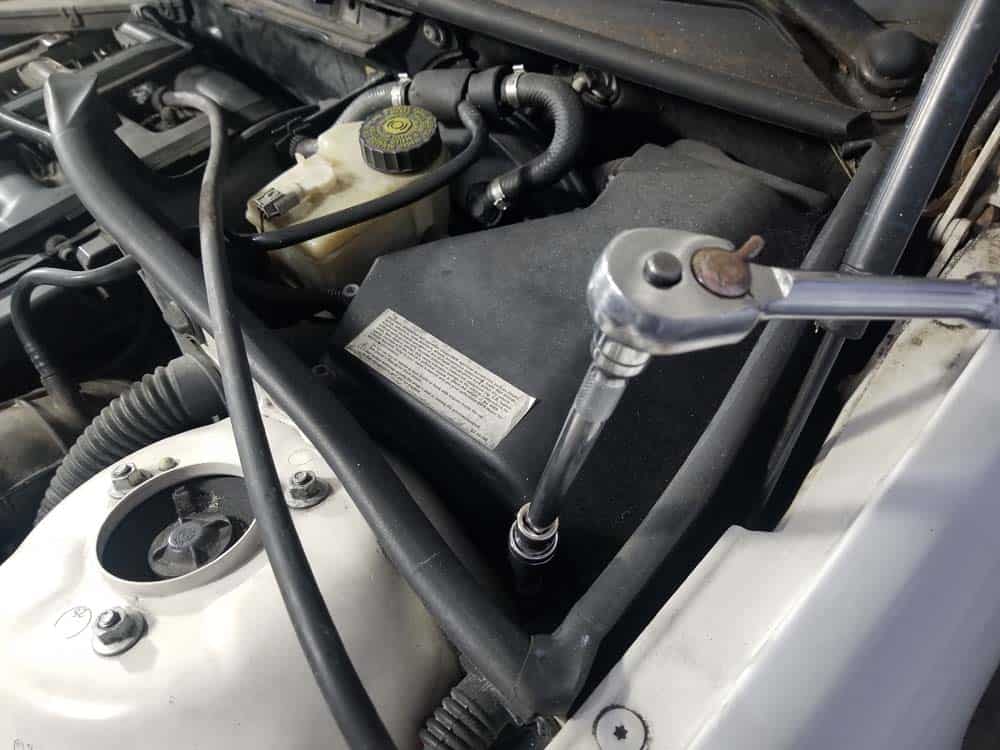
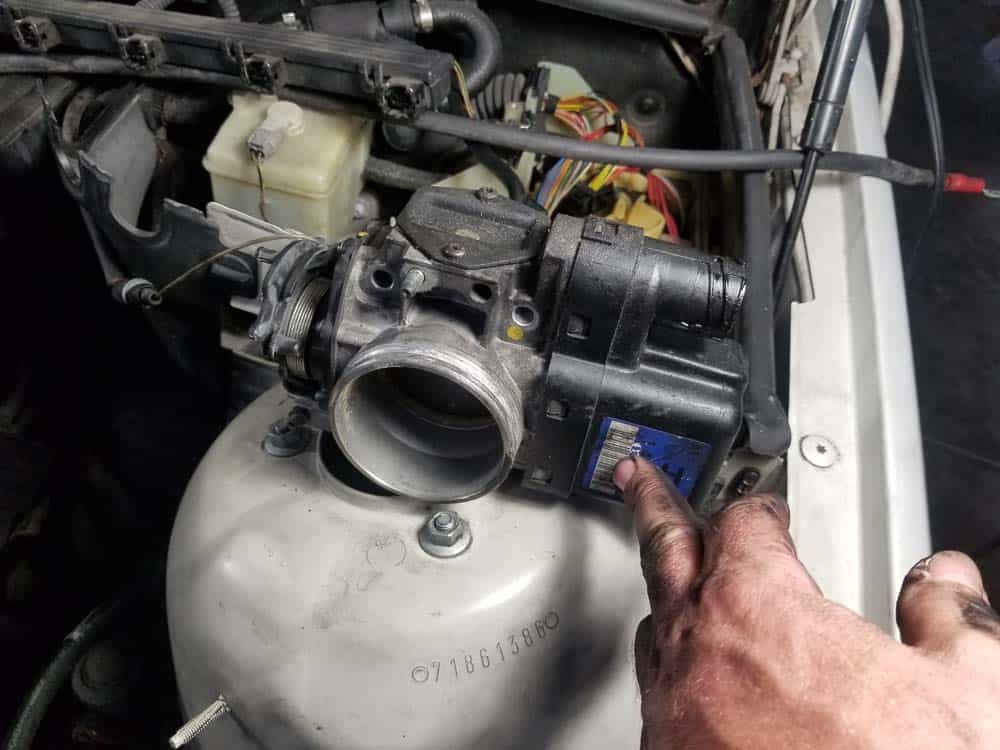
- Use a 12mm socket wrench to remove the plastic nut securing the positive battery cable to the top of the intake manifold.
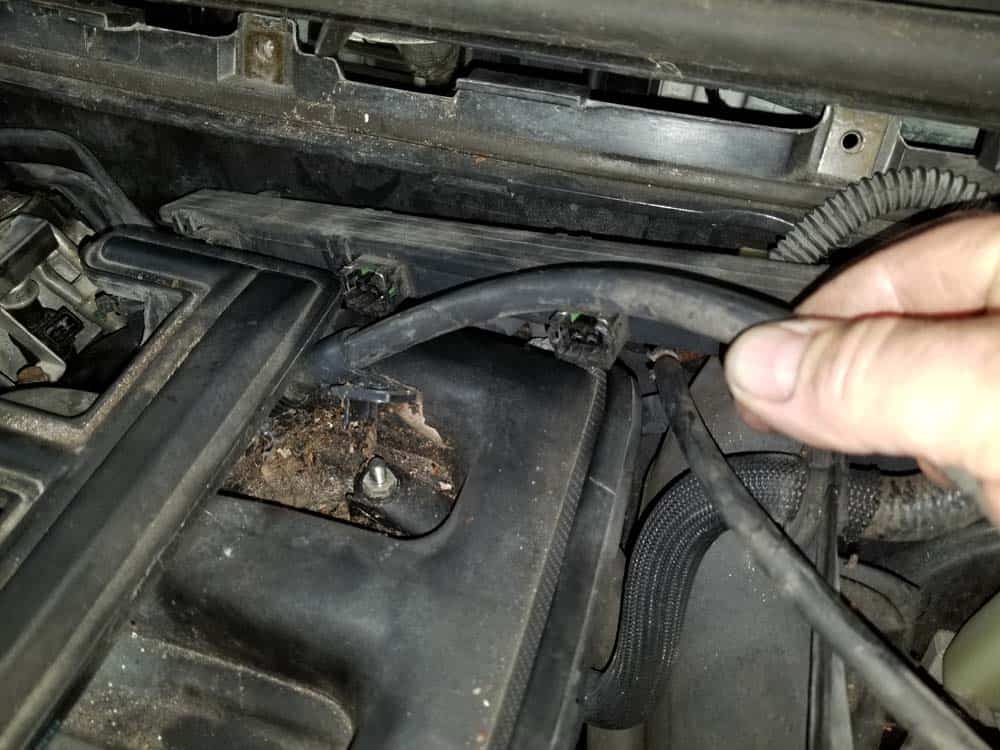
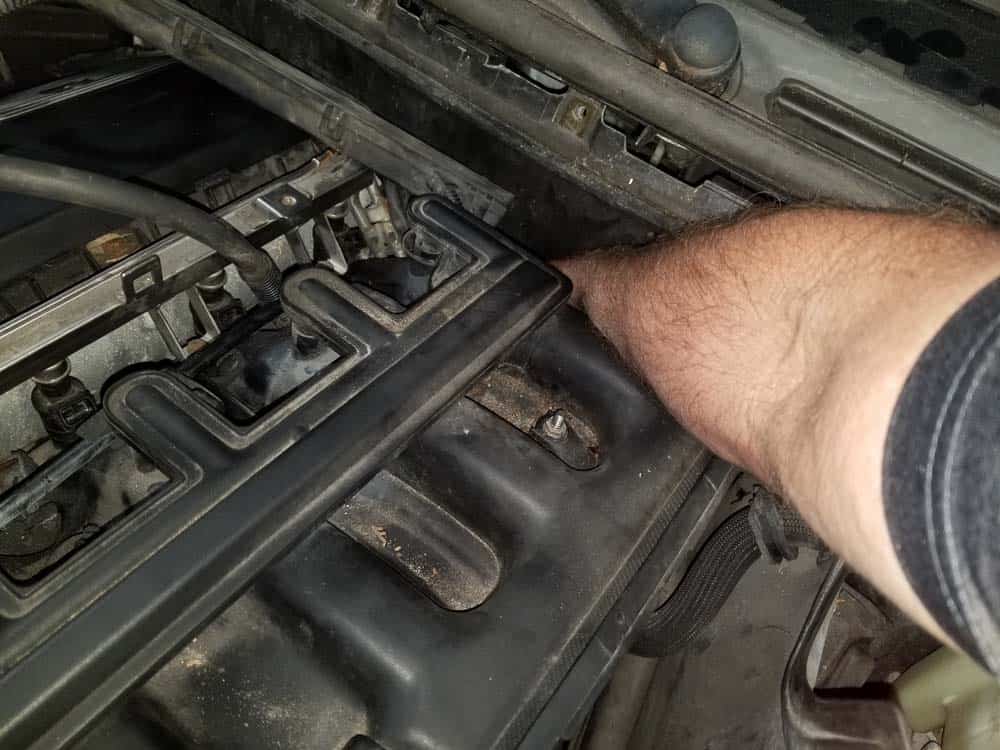
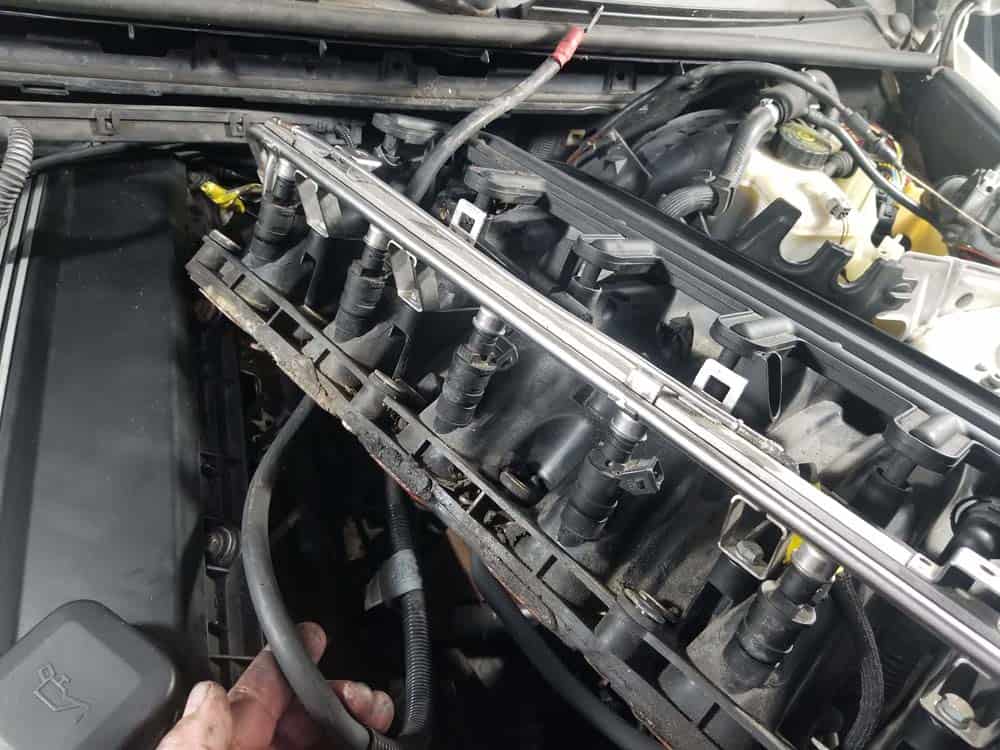
- You can now rock the manifold back and forth. Slowly work it off of the mounting studs until you can get the forward section slightly elevated as shown below.
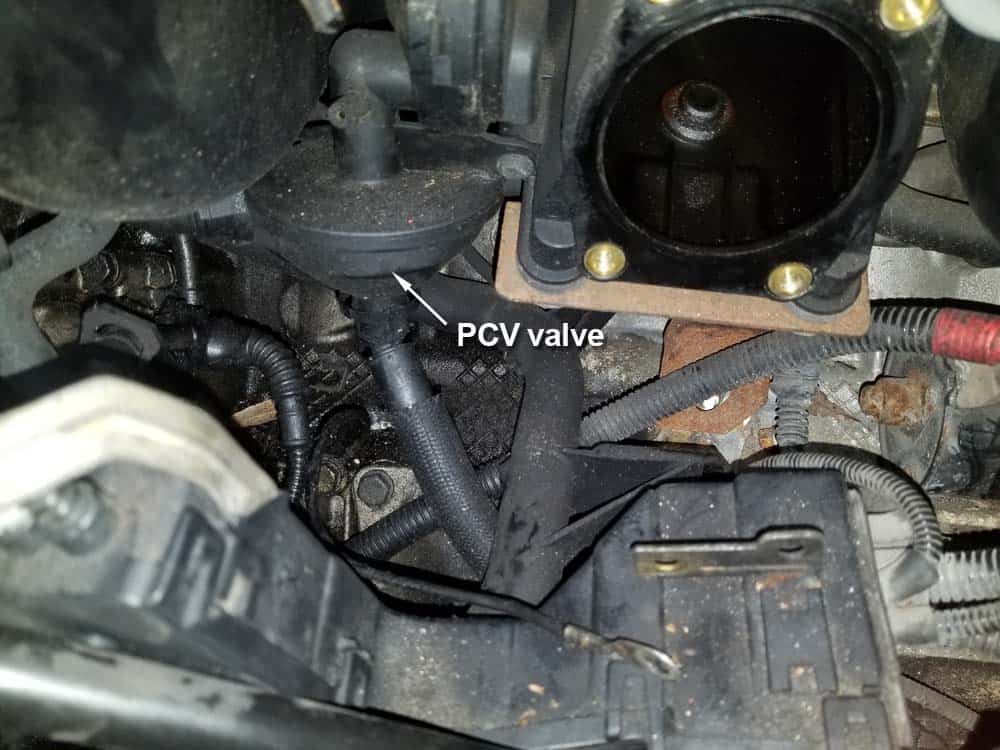
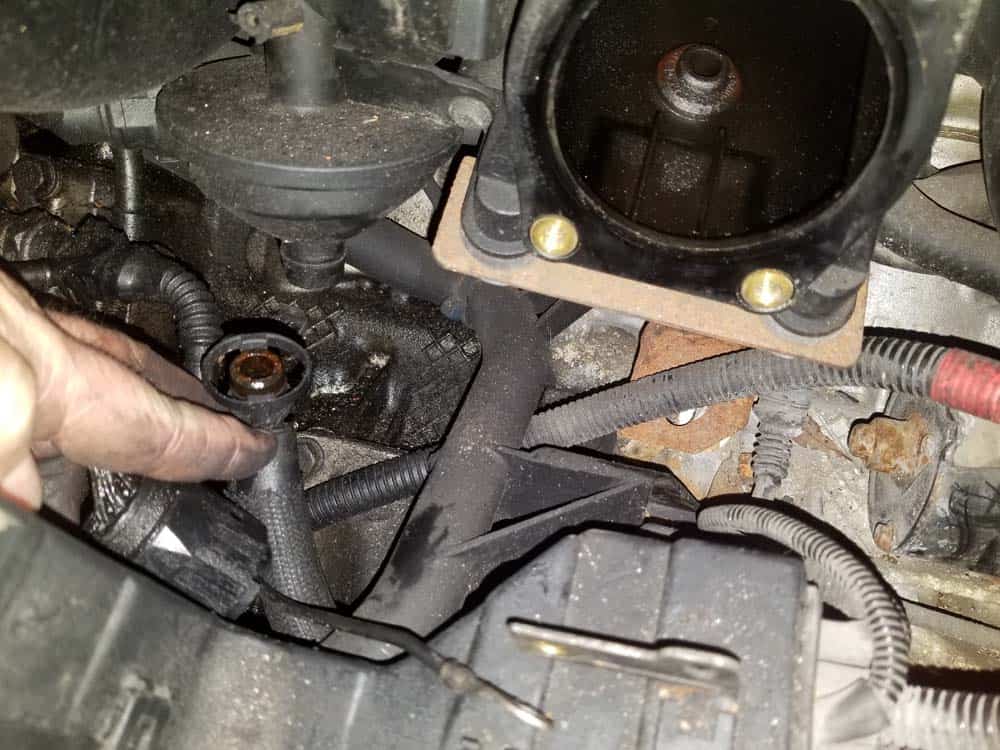
- Locate the PCV valve located under the front of the manifold. Disconnect the lower vent hose (dipstick return line) by squeezing its connection and pulling it free.
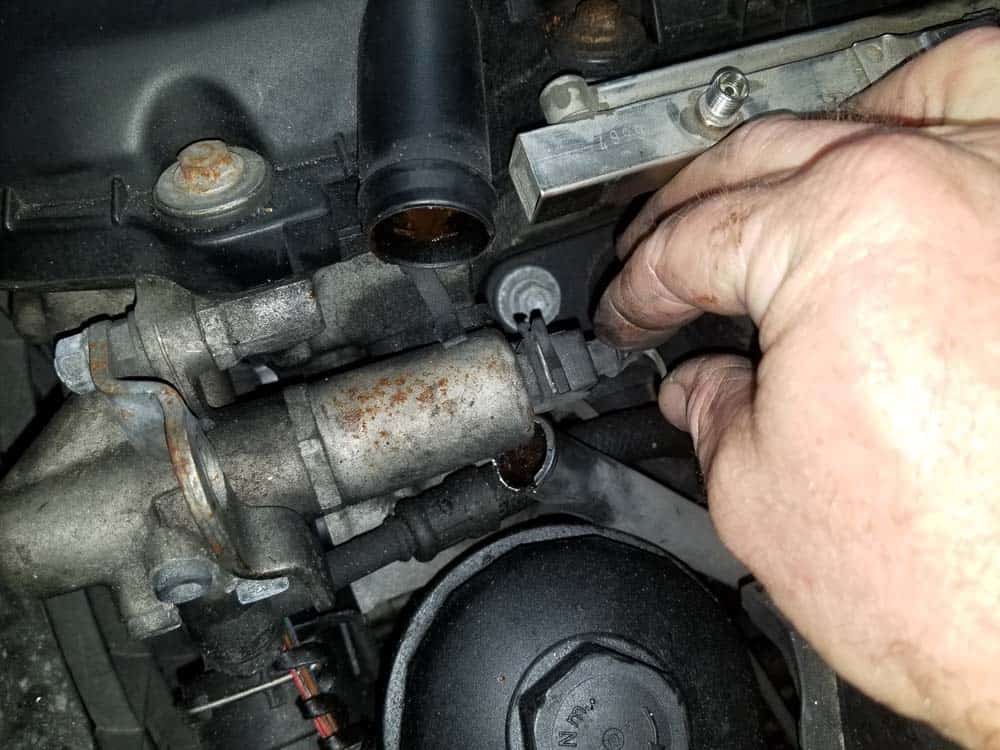
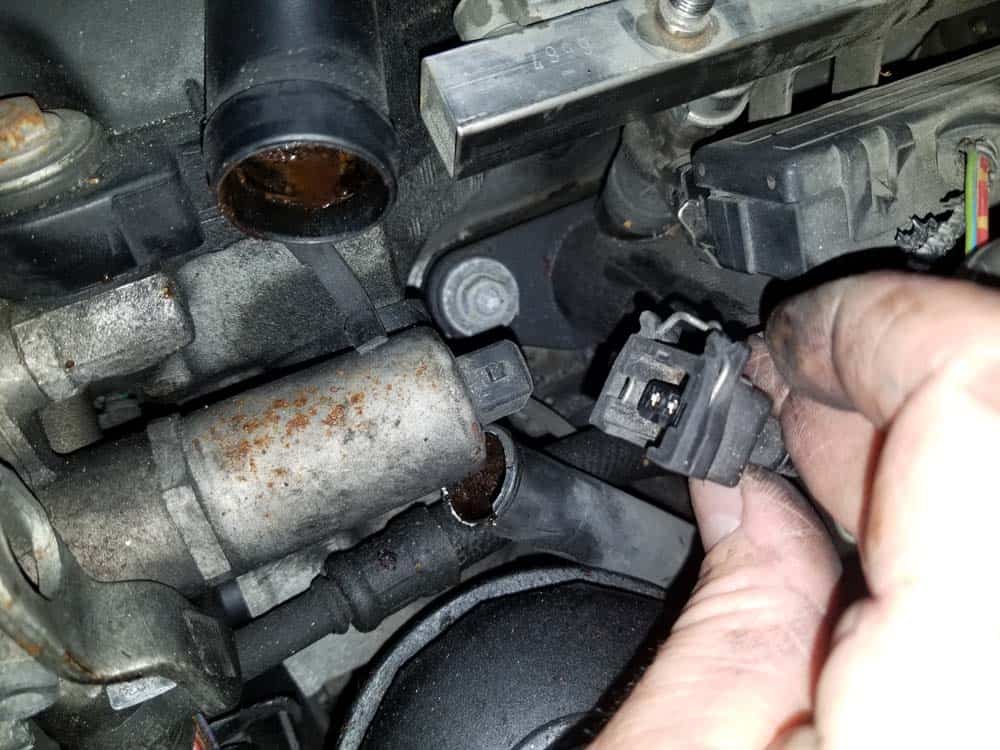
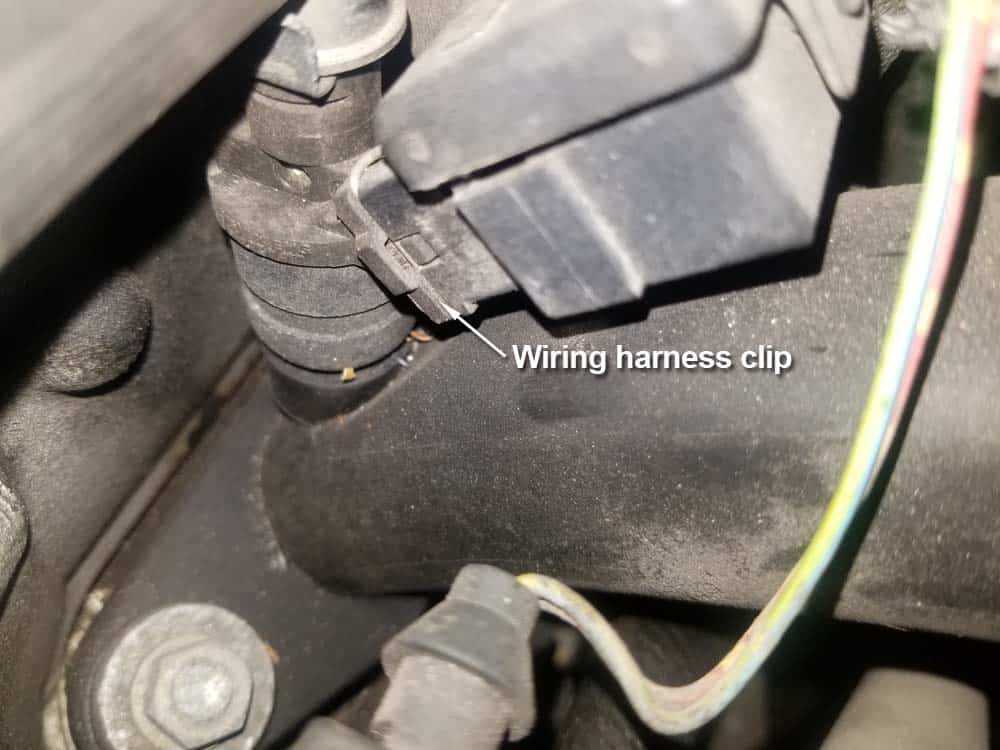
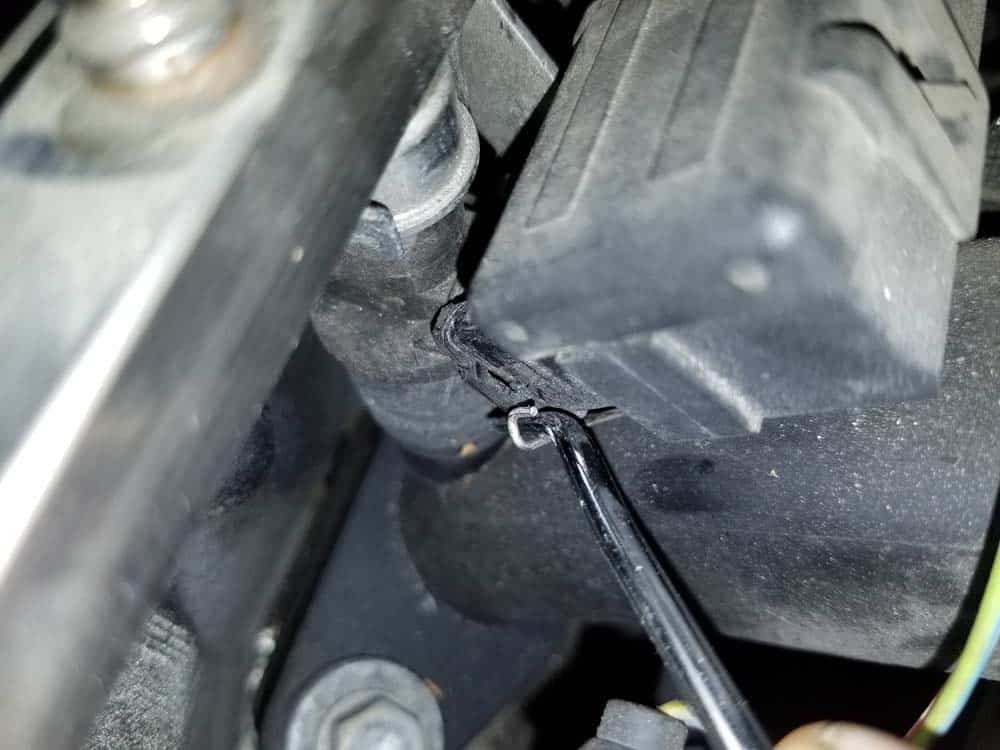
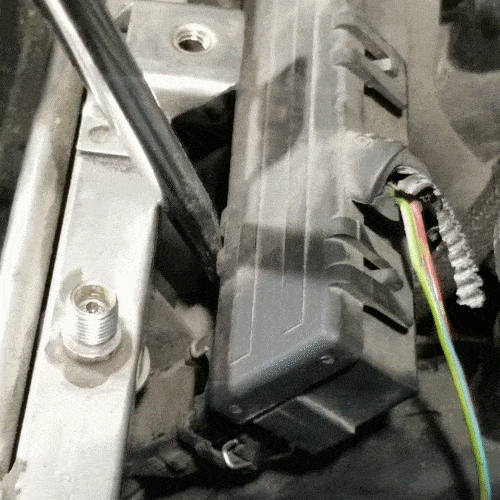
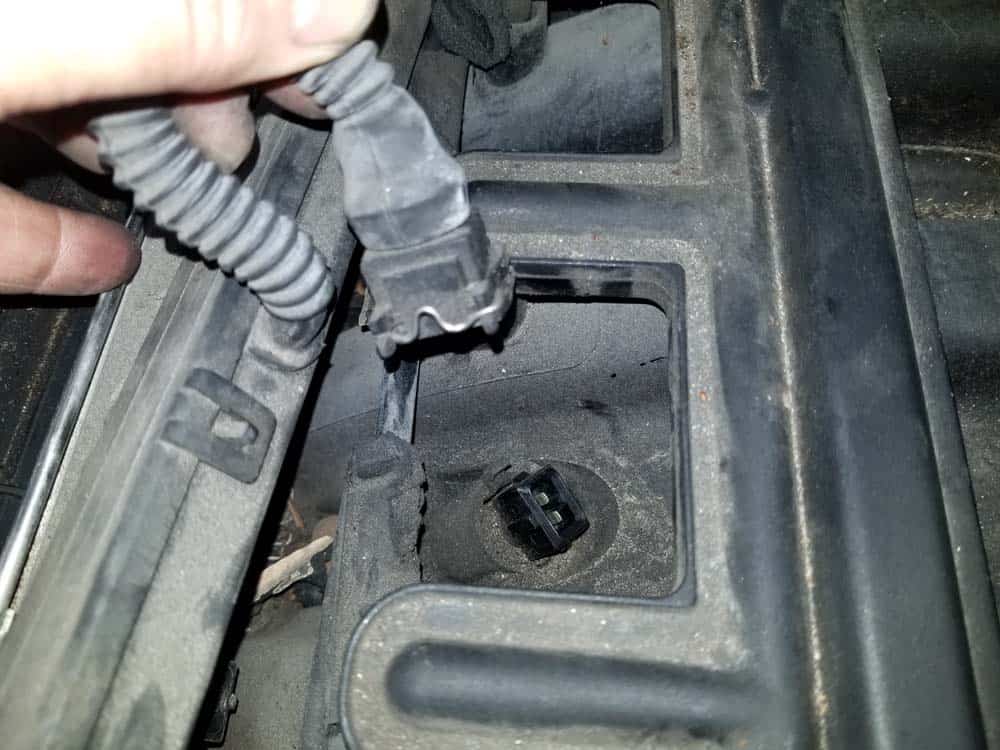
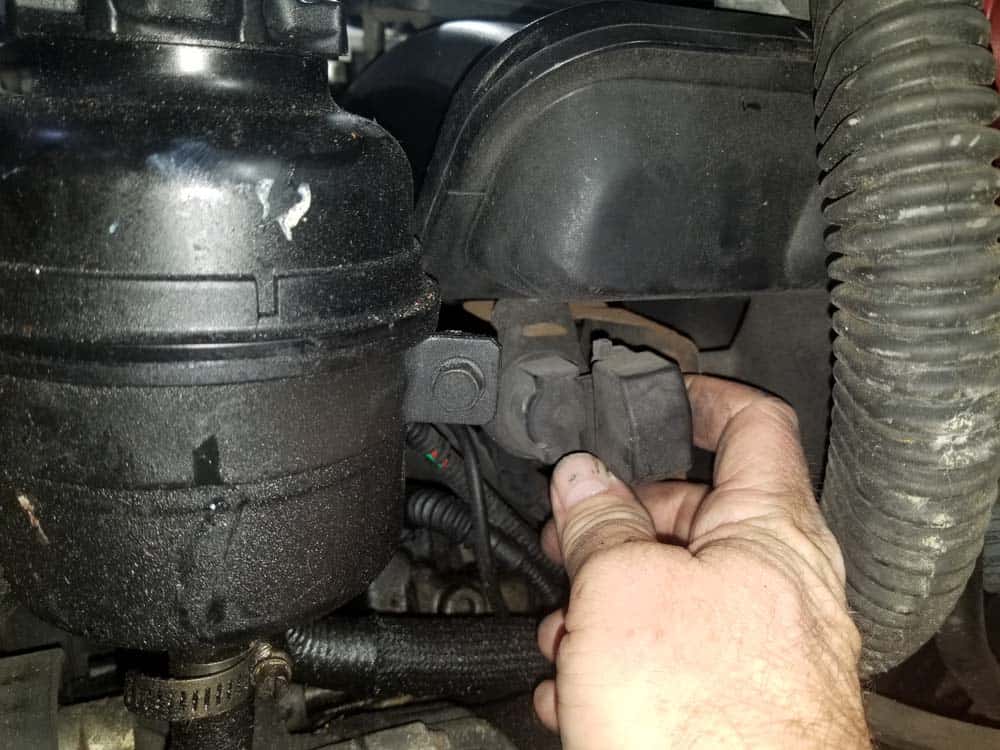
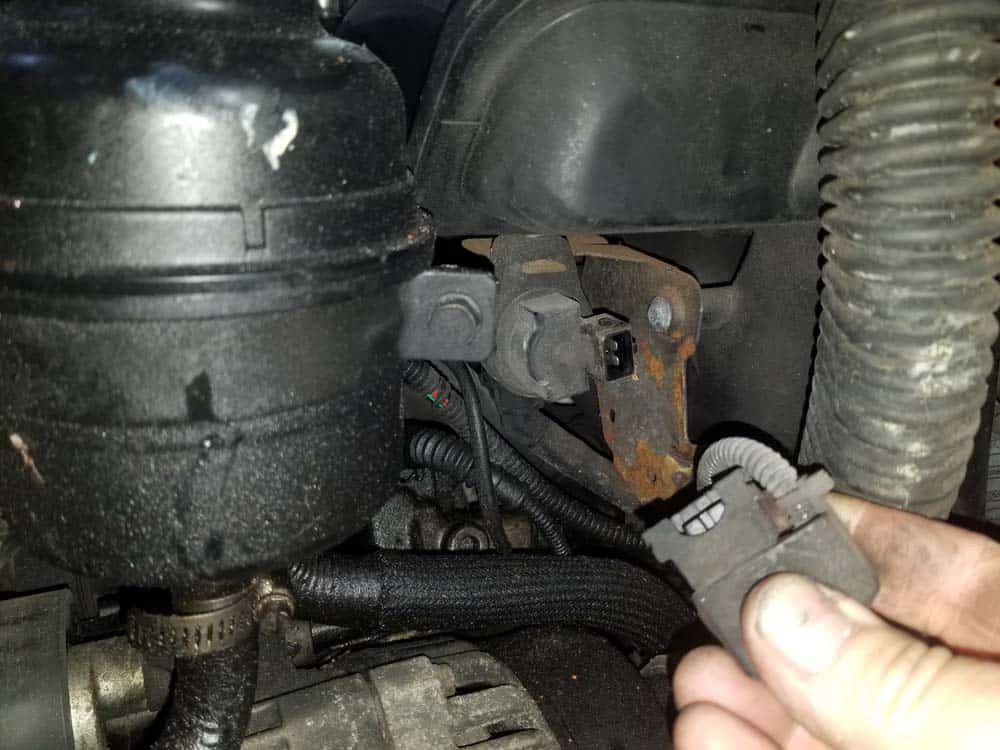
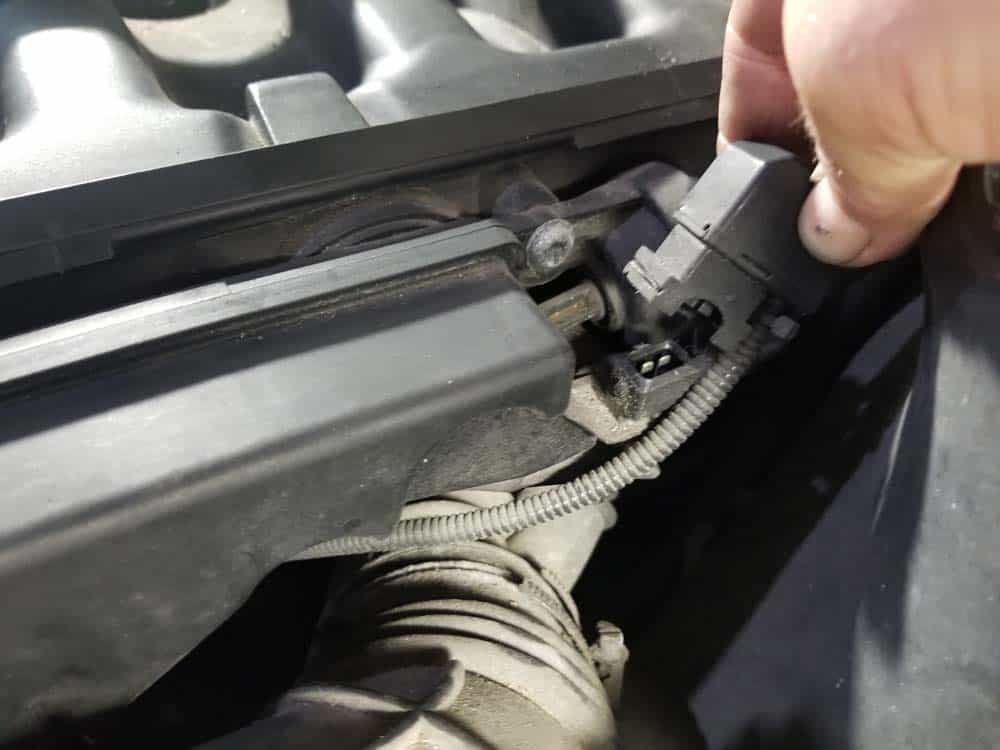
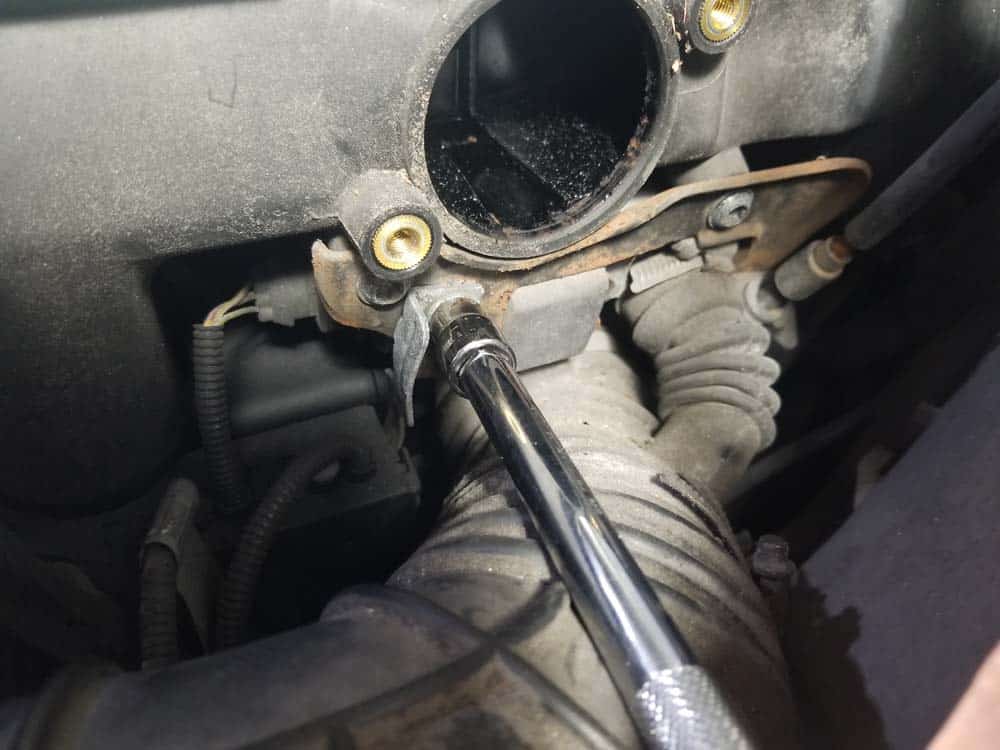
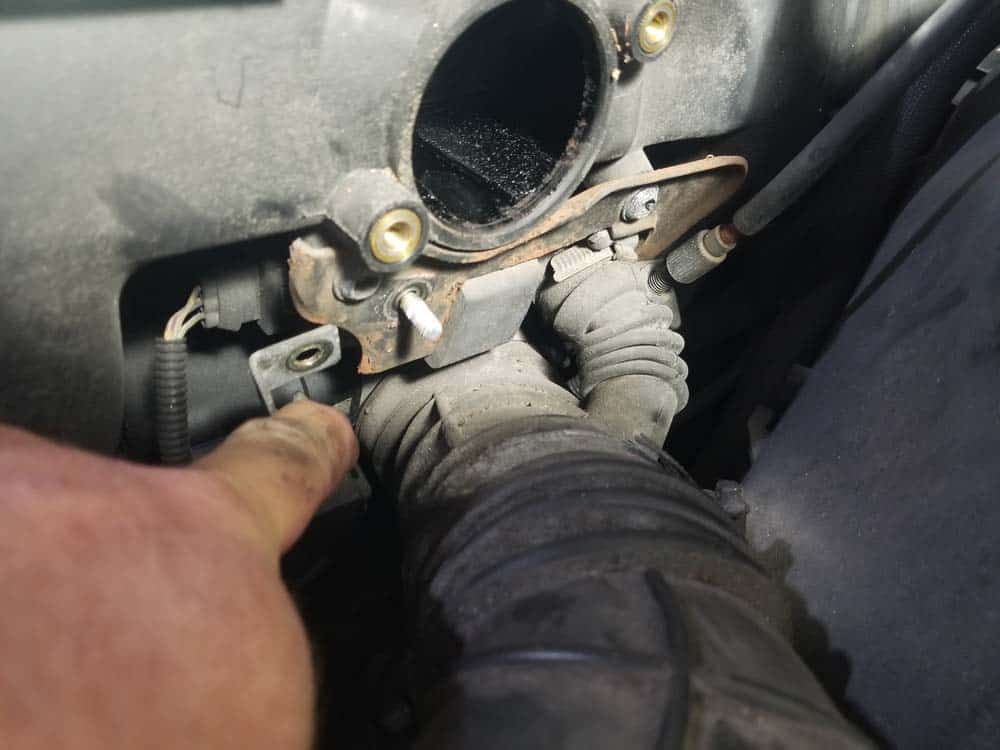
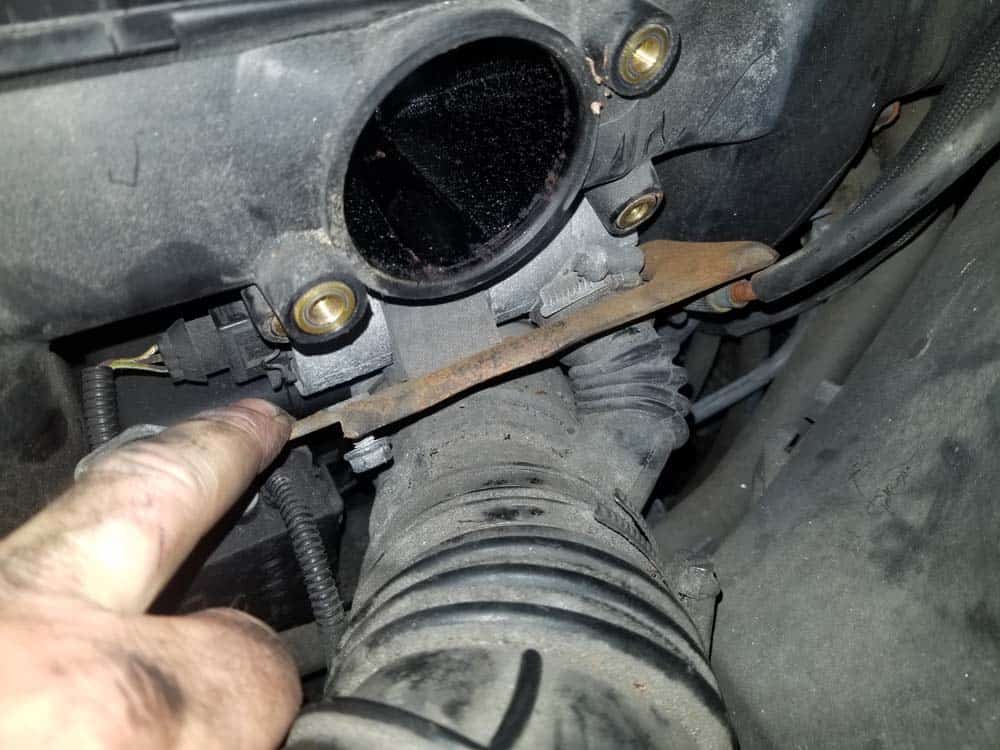
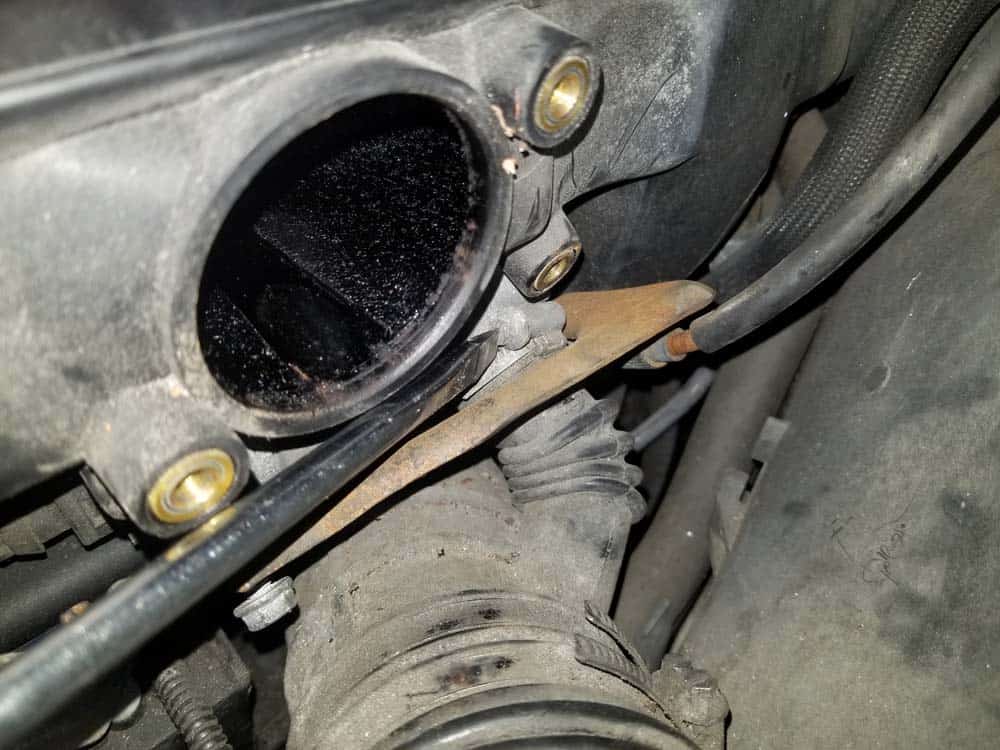
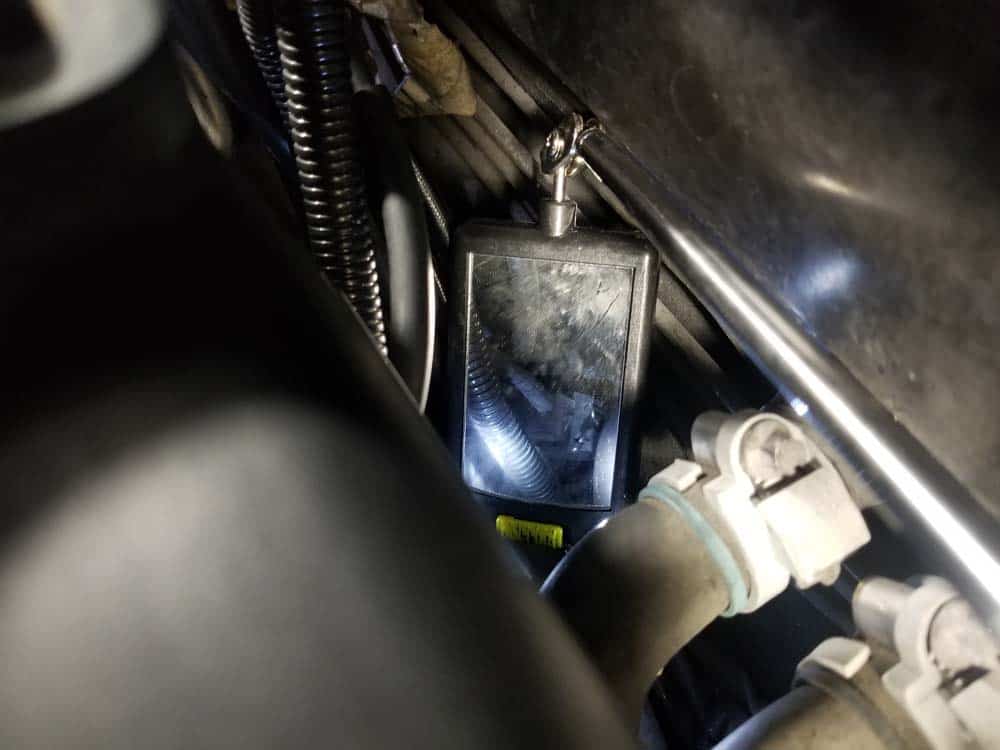
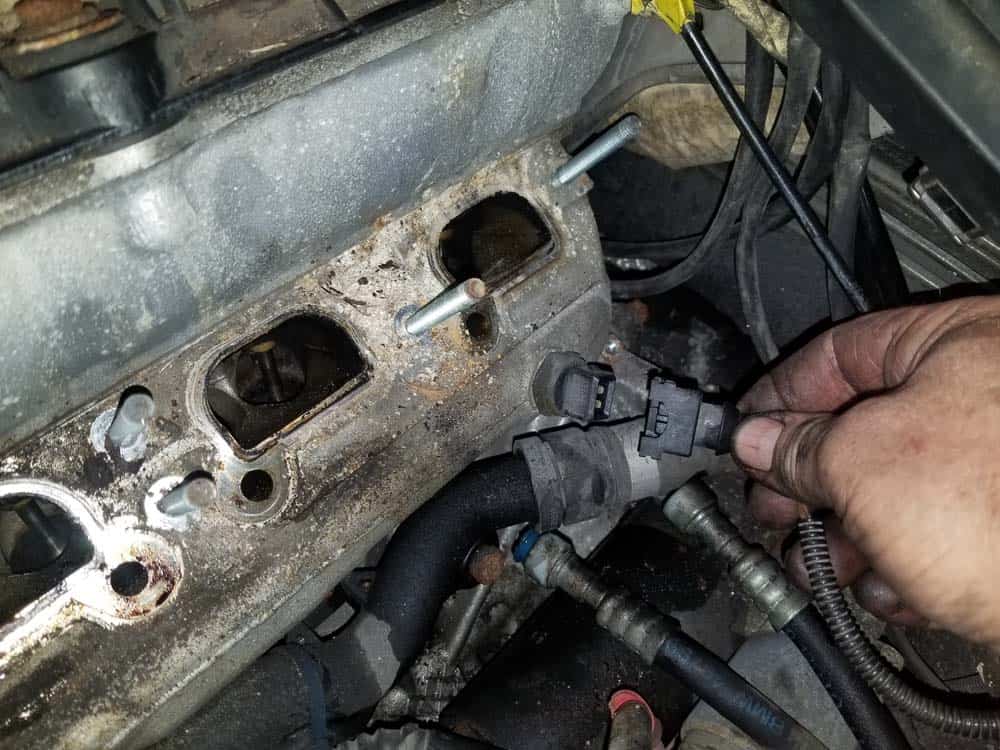
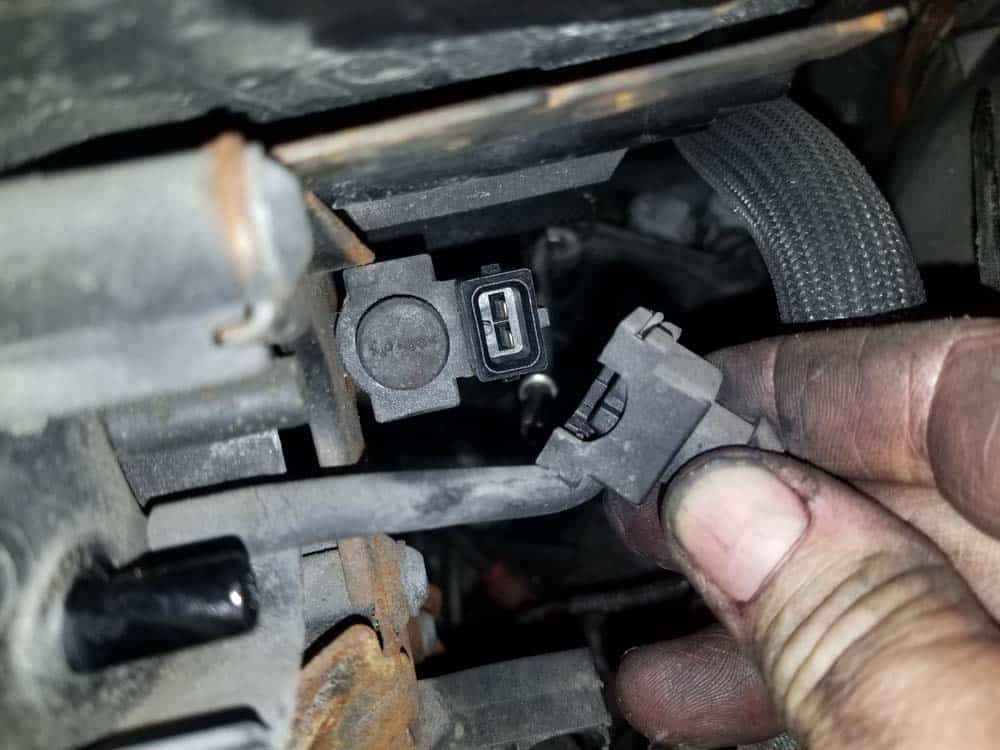
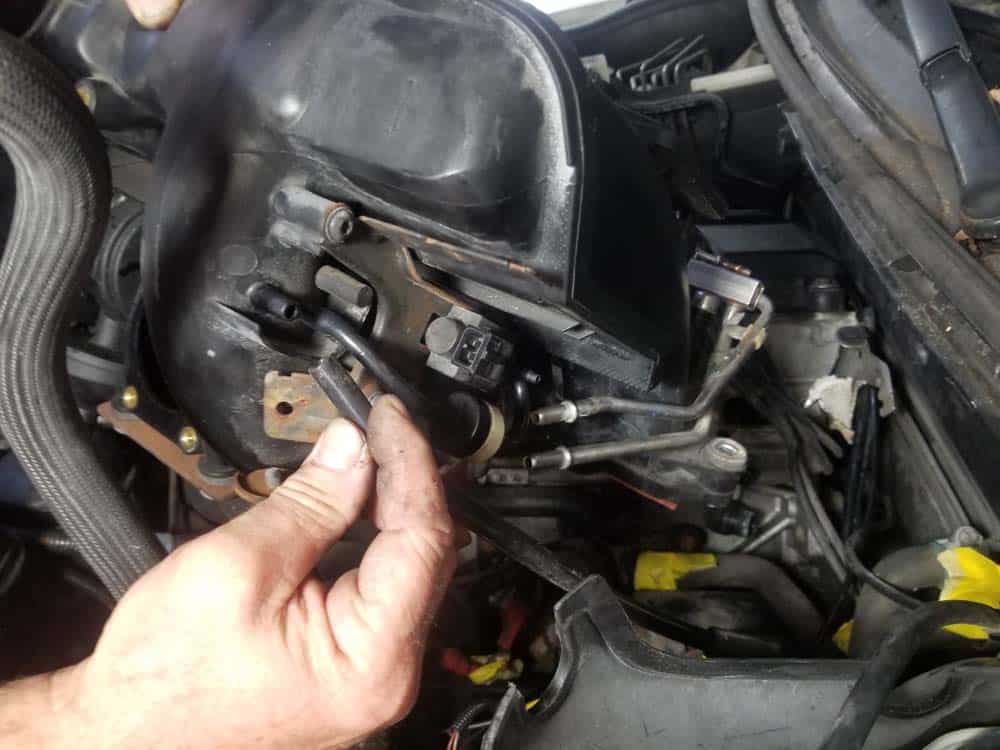
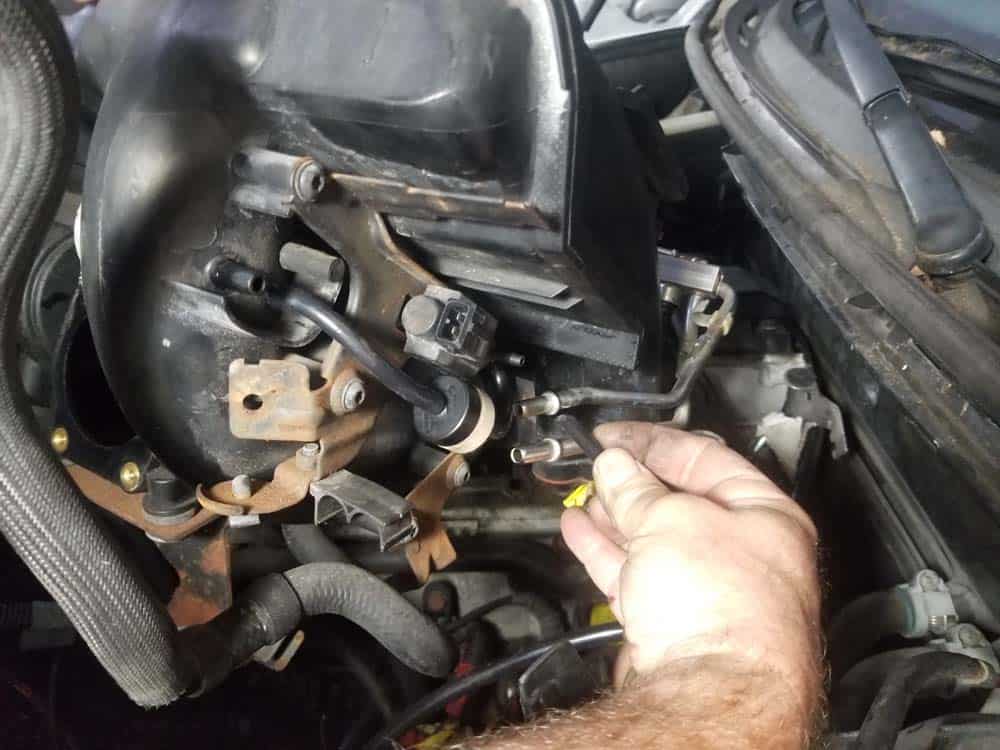
- The next step is difficult...use patience. The fuel injector wiring harness must be unplugged from the coolant temperature sensor in the cylinder head. It is literally done by feeling behind the intake manifold for the connection, then unplugging it. The first set of photos show the location of the coolant temperature sensor plug using your hand and an inspection mirror. The second set of photos show the sensor after the intake manifold is removed. Use all of these photos to help find and disconnect the plug.

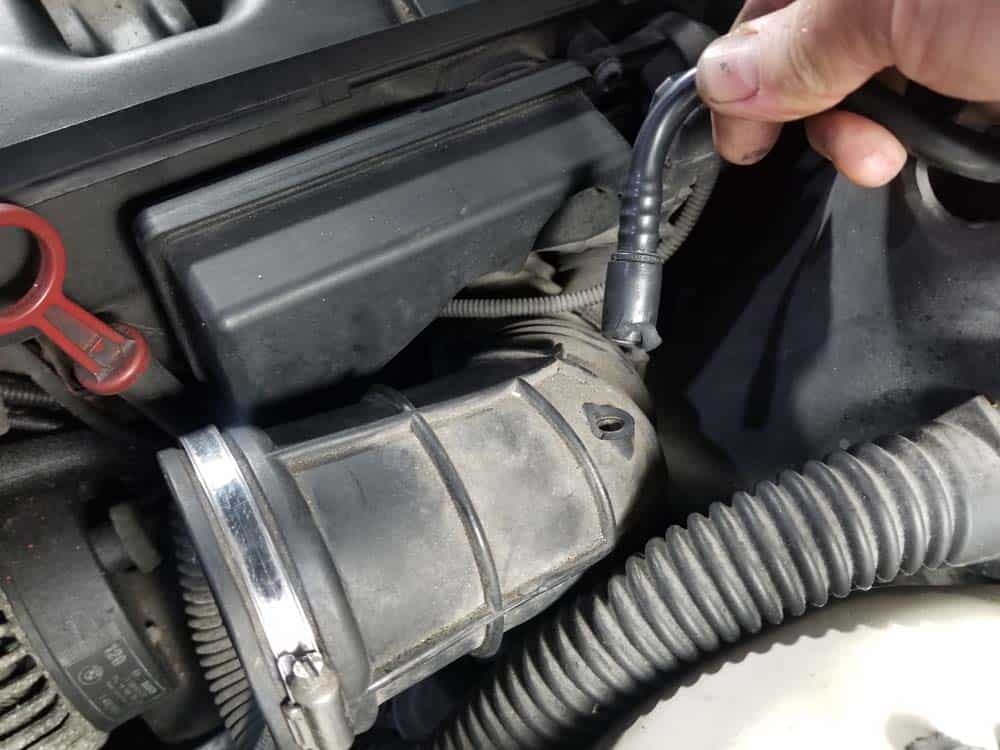
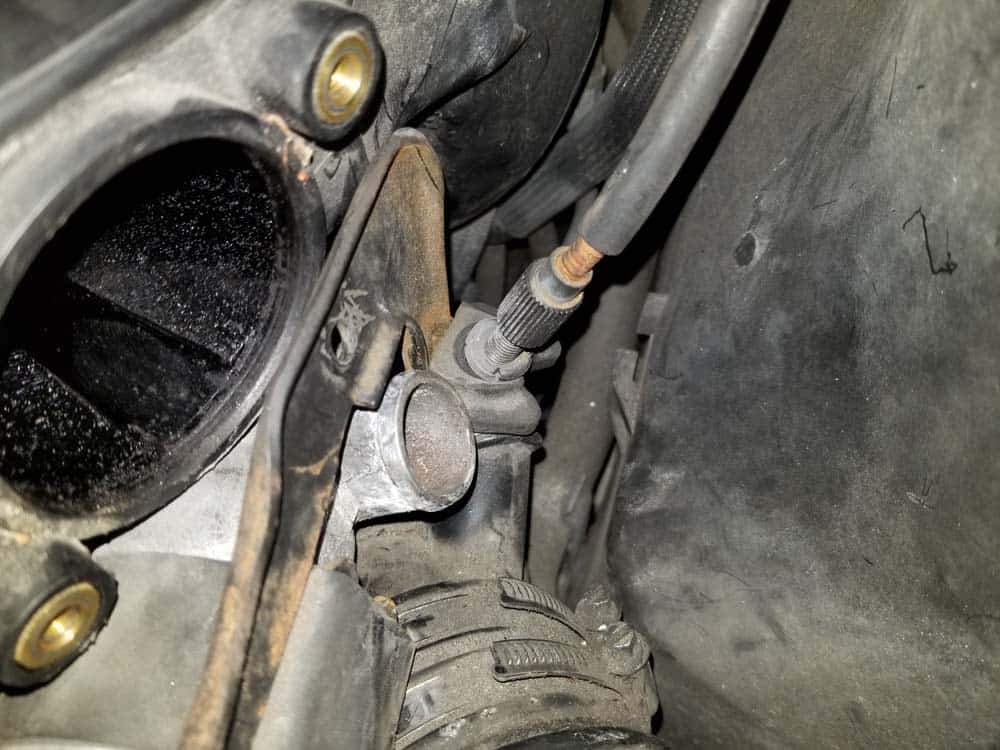
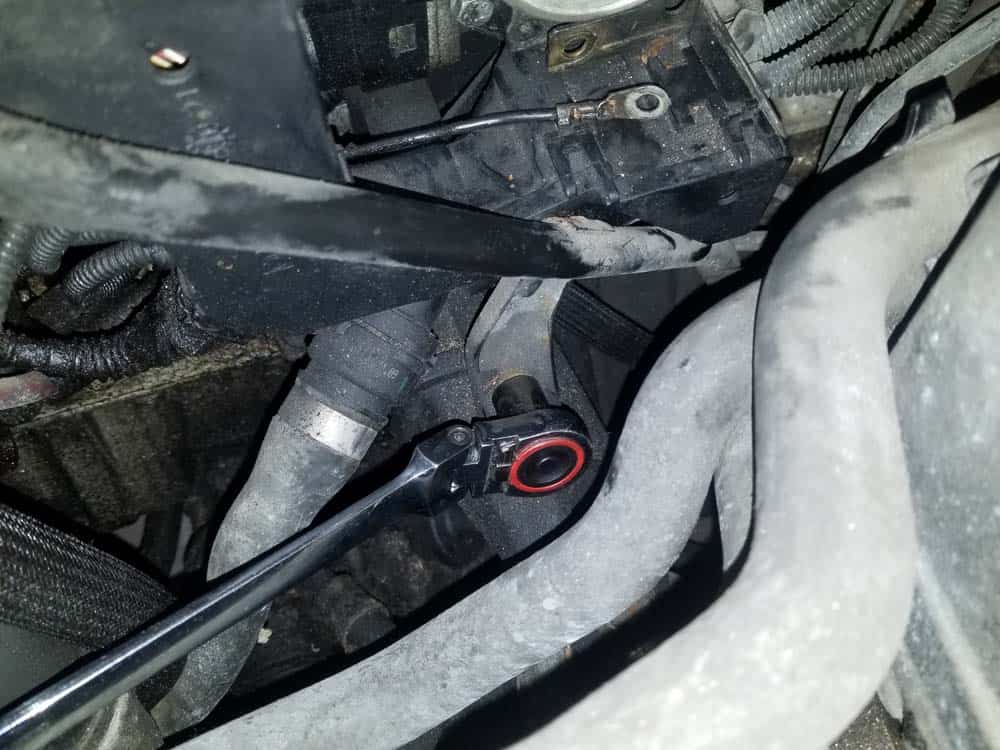
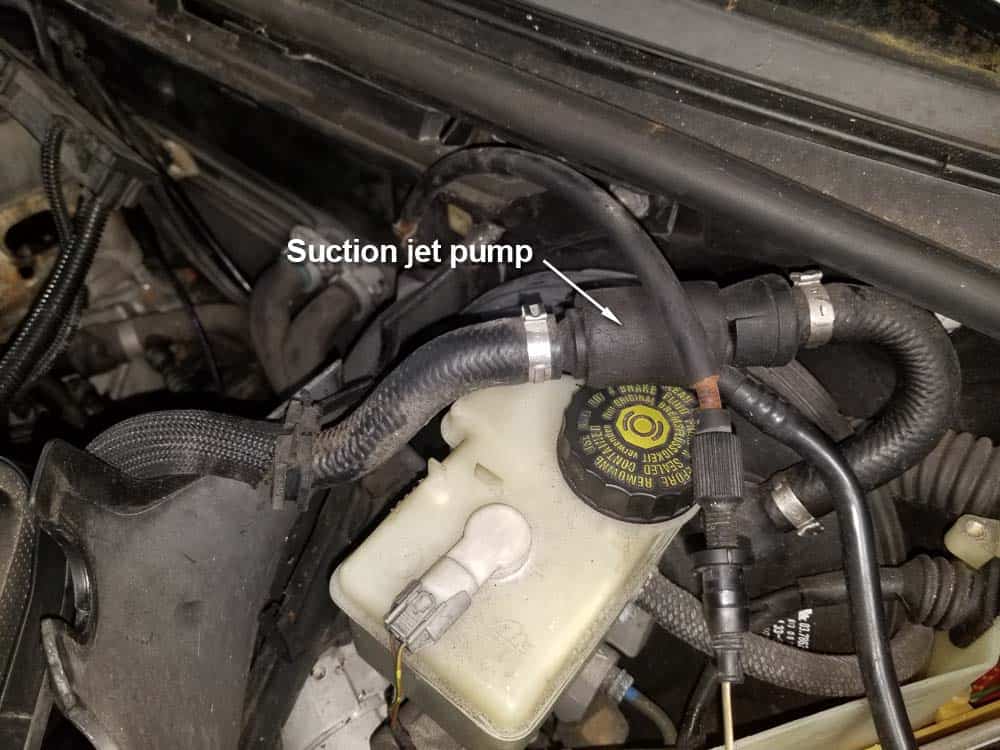
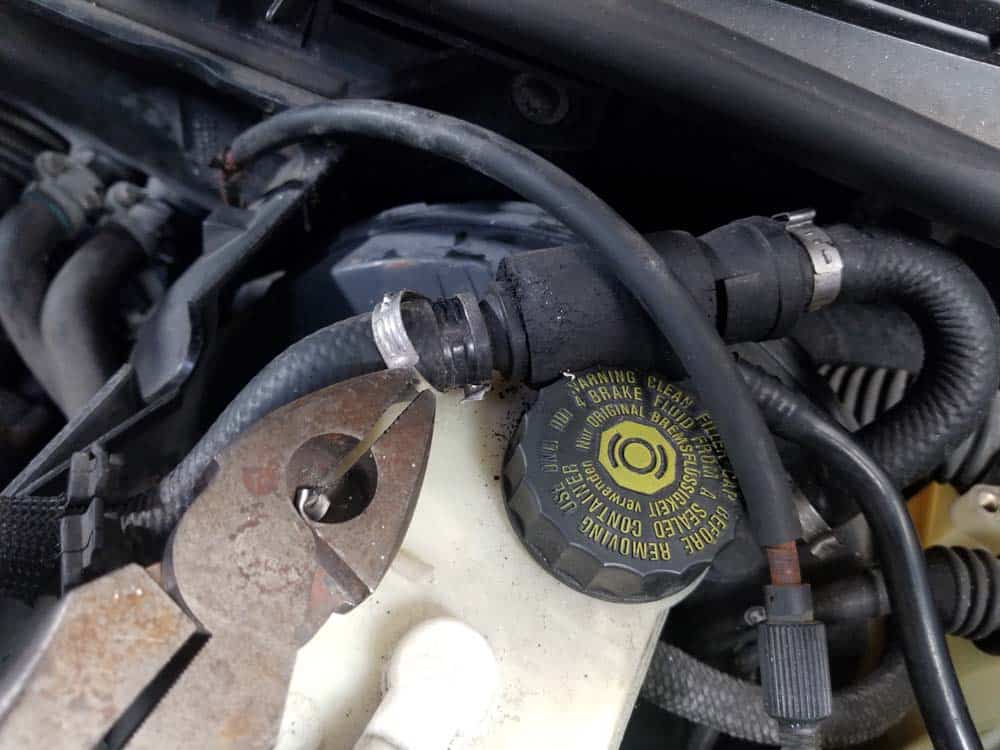
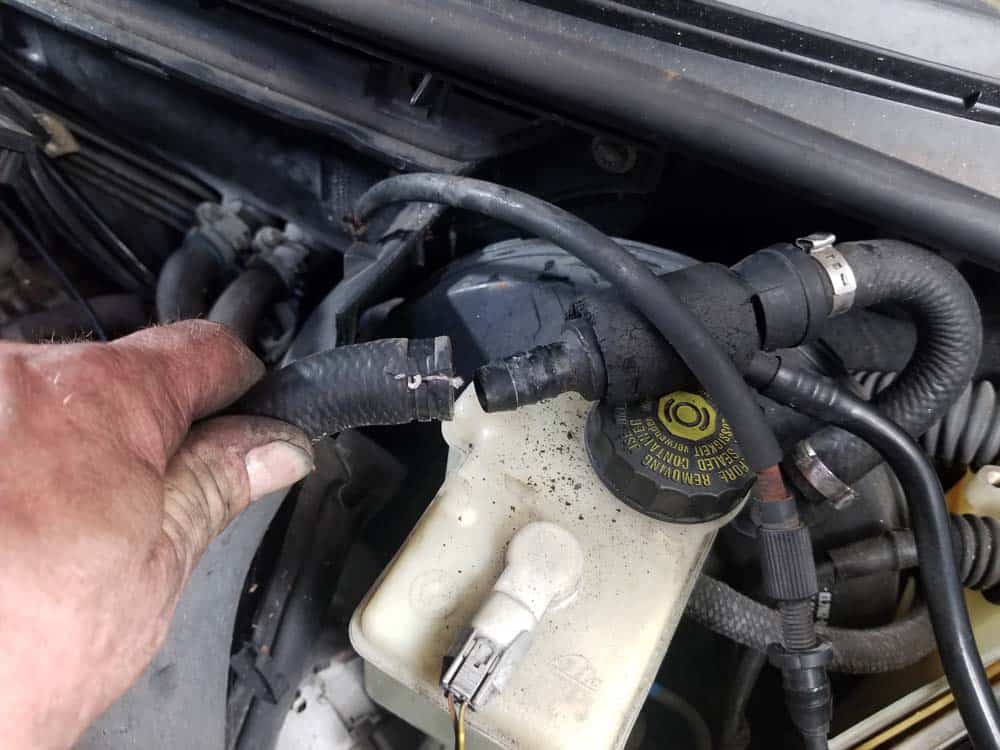
- Disconnect the vacuum hose that connects the bottom of the intake manifold to the suction jet pump as shown below. If the original factory hose clamp is on it, break it off with a pair of pliers - you can replace it with a regular "worm gear" hose clamp during reassembly.
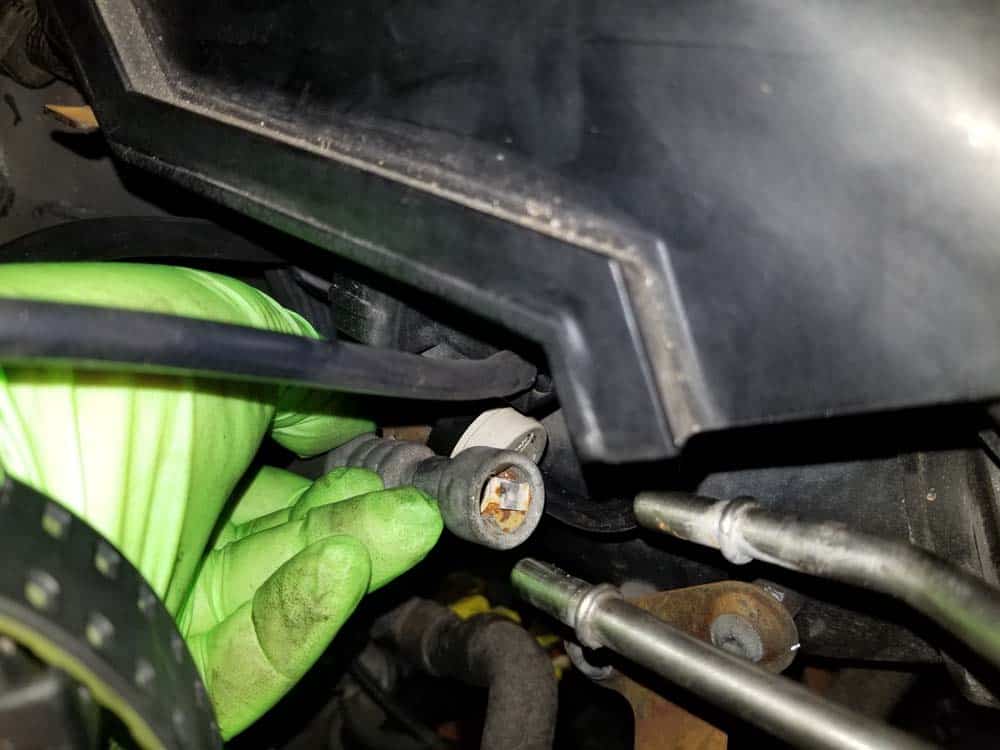
- Unplug the electric vacuum control valve at the rear left corner of the intake manifold.

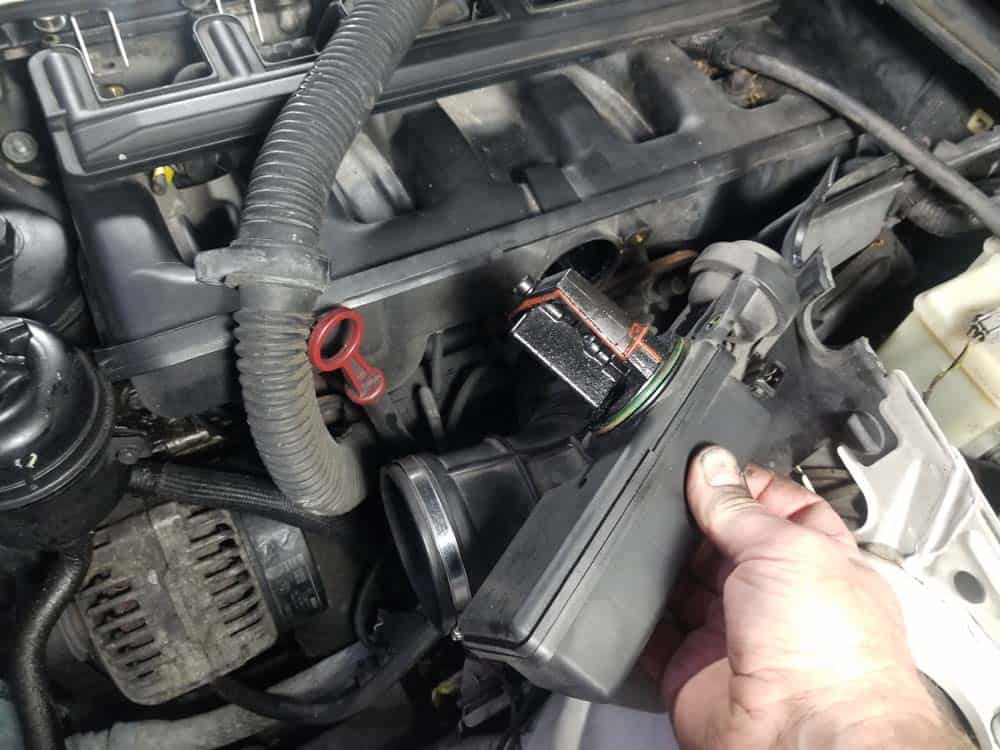
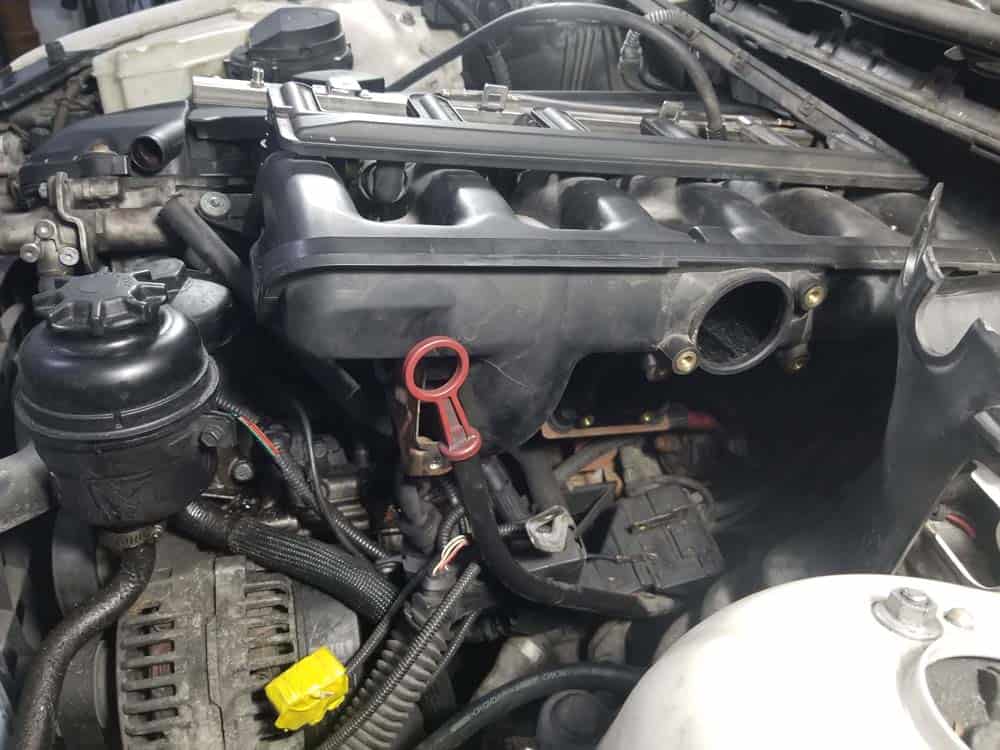
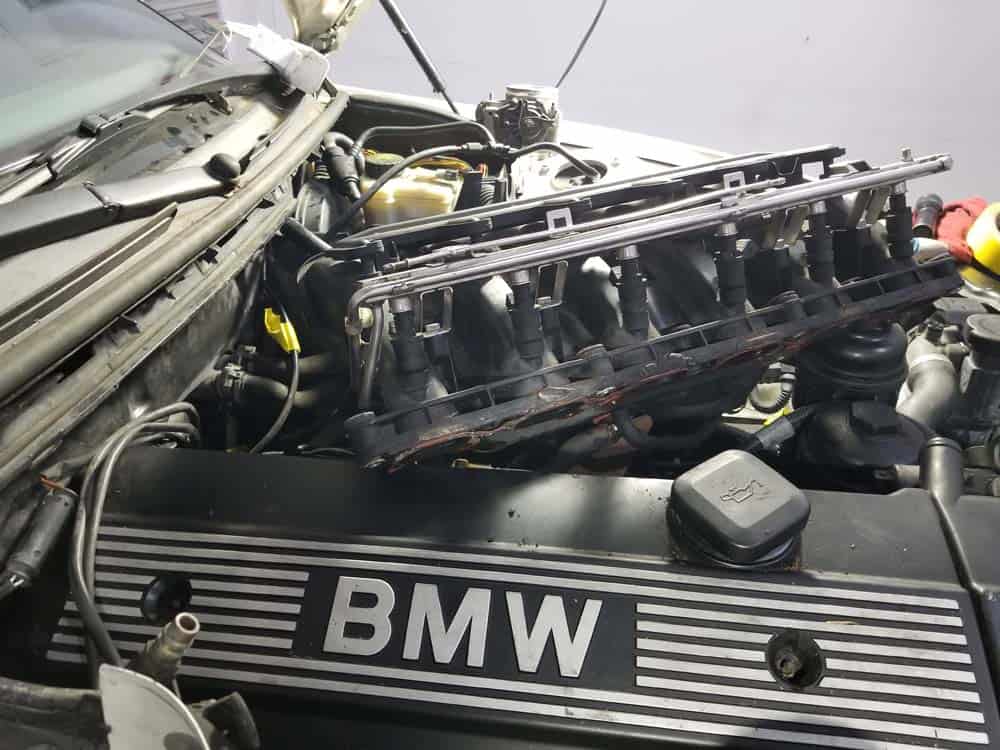
- The intake manifold is now free of all of its lower connections. Grasp the intake manifold with both hands and pull up CAREFULLY until it is free of the engine. Remember there are still vacuum and fuel line connections on the back of the manifold, so be extra careful how you handle it.

- Remove the positive battery cable from the intake manifold.
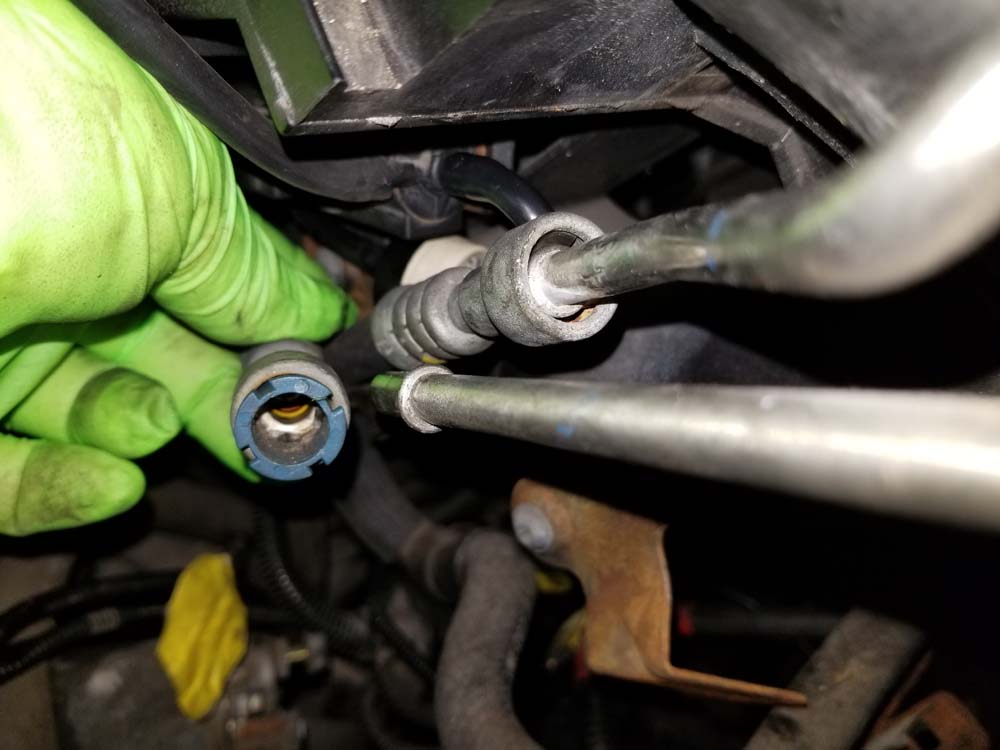
- Turn the intake manifold so the right rear corner can be accessed. Disconnect the two fuel line connections by pressing down on their release collars and pulling them free.
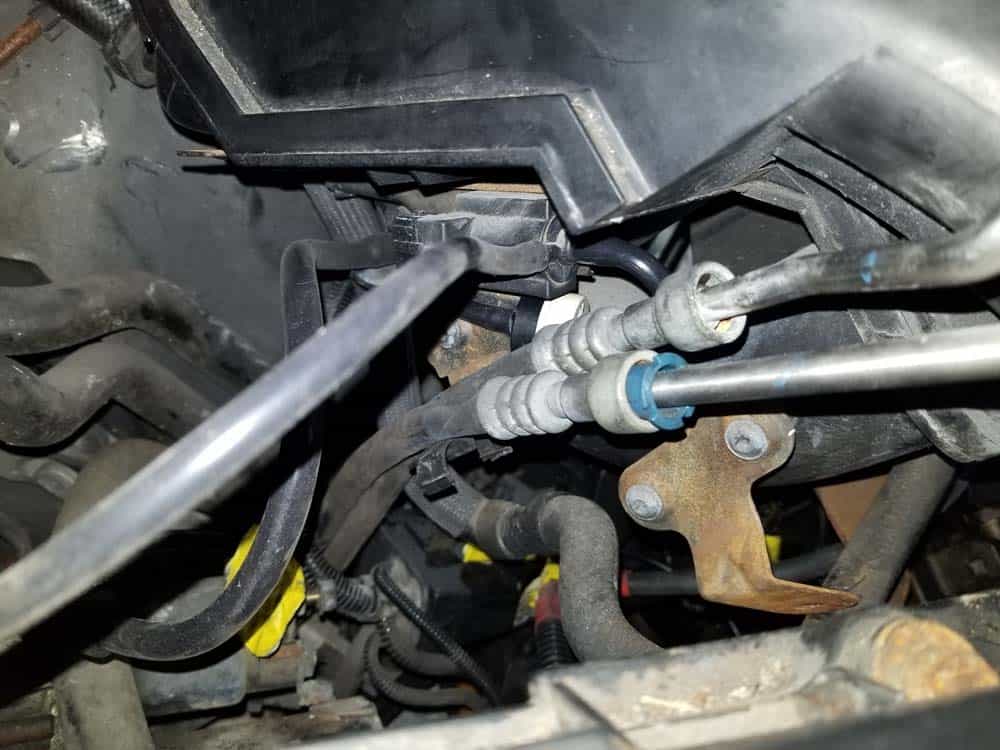
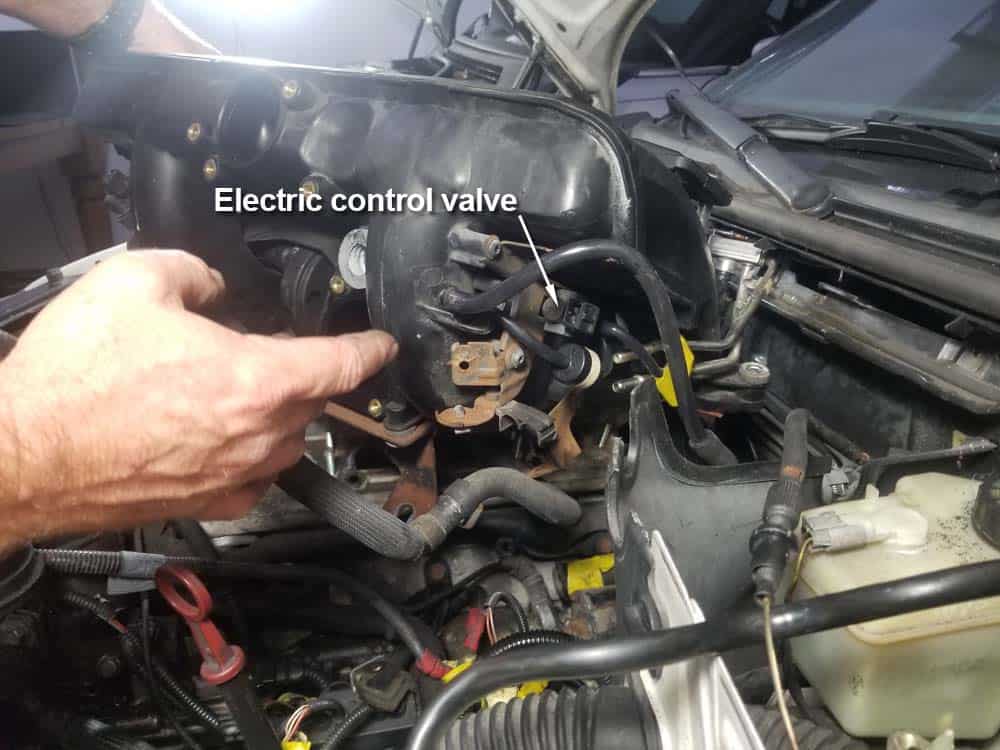
- Now carefully turn the intake manifold the other direction so the left rear corner of it can be accessed. This is the location of electric control valve that the secondary air pump connects to. It is also the location that several other vacuum lines connect to the intake manifold, depending on the model vehicle you are working on.
- Carefully disconnect the vacuum lines. We strongly suggest marking them with a high visibility tape to aid during reassembly. Now is also an excellent time to replace your old vacuum lines. Please see our parts list for the correct size vacuum lines for the M52 engine.
- The intake manifold is now free and can be removed from the vehicle.
Section 4 - Reinstalling the Intake Manifold
Reinstalling the intake manifold is the exact reverse of the above steps. The following is a detailed checklist that you can use which contains critical torque values that you should adhere to. It is VERY important that you check...then double-check...every vacuum line connection to make sure they are secure. A vacuum leak will cause a rough idling engine and instrument cluster error lights. We also strongly encourage you to replace all of your intake manifold gaskets, as well as the throttle body gasket. These are common sources of vacuum leaks and should be replaced every time the intake manifold is removed.BMW M52 Intake Manifold Reassembly Checklist
***The following steps were performed on a 2000 323i...other models may vary.- Reattach the vacuum lines to the rear left corner of the intake manifold.
- Reattach the two fuel lines to the rear right corner of the intake manifold.
- Install the positive battery cable back through the intake manifold. It should be directed through the last opening in the manifold (between ports 5 and 6).
- Carefully lower the intake manifold back into place onto the cylinder head studs. Also verify that it is properly seated on its lower mount.
- Reconnect the electric vacuum control valve at the left rear corner of the manifold.
- Reconnect the intake manifold's vacuum line to the suction jet pump. Secure it with a "worm gear" style hose clamp.
- Reach down behind the intake manifold and reconnect the coolant temperature sensor into the cylinder head.
- Reconnect the PCV valve to the lower vent hose (dipstick return line).
- Reattach the positive battery cable to the top of the intake manifold using the plastic nut. There is no torque value for this nut...just make sure it is snug.
- Double check once again that the manifold is properly lined up on all of its mounting studs, including the lower one.
- Install the lower intake manifold mounting nut. Torque the nut to 47 Nm (34 ft-lb).
- Install the nine cylinder head mounting nuts. Torque the nuts to 15 Nm (11 ft-lb).
- If you are installing a new throttle body gasket, do it now.
- Install the electrical plug back into the throttle body.
- Mount the throttle body back onto the intake manifold. Torque its four mounting bolts to 13 Nm (10 ft-lb).
- Position the wiring harness in front of the intake manifold. Install its front mounting bolt. There is no torque value on this bolt, just make sure it is snug.
- Install the dipstick tube mounting bolt. Torque the bolt to 24 Nm (17 ft-lb).
- Reinstall the rear wiring harness nut. DO NOT FORGET THE GROUNDING STRAP. There is no torque value on this nut.
- Reinstall the intake boot back onto the throttle body. Make sure the intake boot is firmly seated on the throttle body...if it is not it can come loose and cause a vacuum leak. Tighten the throttle body hose clamp.
- Attach the throttle cable back to the idle control air bracket.
- Maneuver the idle control valve into position in front of its mounting hole in the intake manifold.
- Reinstall the electrical plug into the end of the idle control valve.
- Attach the intake boot to the idle control valve. Tighten the hose clamp.
- Install the idle control valve into the intake manifold. Press it in firmly with your hands to ensure it has a good seal.
- Install the two T40 idle control bracket mounting bolts.
- Install the wiring harness support bracket back onto the idle control valve bracket. Install the 10mm nut.
- Reinstall the DISA valve into the intake manifold. Install its two T40 mounting bolts.
- Install the DISA valve electrical plug.
- Plug the vacuum line back into the top of the intake boot.
- Replace the vacuum line back onto fuel tank vent valve.
- Plug the fuel tank vent valve's electrical connection back in.
- Reinstall the MAF sensor into the intake boot and tighten the hose clamp.
- Plug the MAF sensor's electrical connection back in.
- Reinstall the intake muffler and the intake snorkel.
- Plug the wiring harness back into the E-box
- Replace the E-box cover and tighten its T30 bolts
- Attach the positive battery cable to the engine compartment terminal. Tighten the 19mm nut.
- Plug the fuel injector wiring harness into the air temperature sensor on the top of the intake manifold.
- Install the fuel injector wiring harness back on the fuel injectors.
- Install the plug back in the solenoid valve.
- Install the crankcase breather line back into the valve cover
- Reattach the rear vacuum line to fuel rail.
- Reinstall the oxygen sensor clips and the oxygen sensor connections to the top of the intake manifold.
- Reinstall the left engine cover.
BMW M52 Intake Manifold Replacement Finished