
Affiliate link disclosure – The BMW Repair Guide uses affiliate links in their site. For more information on affiliate links, please click here.
Repair Summary
This article gives detailed instructions on replacing the differential bushings in a BMW E36 3 series vehicle. Even though we used a 1996 M3 to perform this repair, this article can be applied to any 1990-1998 3 series vehicle with minor modifications to the repair steps.
See all vehicles this article applies to
E36 3 Series 316i
E36 3 Series 318is
E36 3 Series M3
E36 3 Series 320i
E36 3 Series 325i
E36 3 Series 325is
E36 3 Series 323i
E36 3 Series 328i
E36 3 Series 318i
E36 3 Series 323i 2.4
E36 3 Series 325td
E36 3 Series 325tds
E36 3 Series 318tds
E36 3 Series 316i 1.6
E36 3 Series 323ti
E36 3 Series 318ti
E36 3 Series 316g
E36 3 Series 316i 1.9
A BMW E36 differential bushing replacement removes drivetrain "slop" and creates a more responsive throttle and quicker acceleration.
If you are a "track junky" (like we are here at the BMW Repair Guide), then you are probably stuck in the endless obsession of trying to add more horsepower and torque to your vehicle. The list of possible performance enhancements to your bimmer can become daunting. From software upgrades to aftermarket superchargers, we are on a constant quest to get more power to the rear wheels.
Those rear-wheel power upgrades are great, but it would also be nice to find ways of increasing performance without breaking the bank. Swapping out the old rubber bushings in your BMW E36 differential with new performance style ones can actually add power to the rear wheels, and boost acceleration and throttle response. And all for a relatively inexpensive price.
The downside to upgrading your BMW E36 differential bushings is that the repair is a pain in the rear end (no pun intended). It is not technically difficult...the problem is really about the workspace. Or the lack thereof for the normal home mechanic.
The differential must be removed from the vehicle to replace the bushings and, unless the car is on a lift, this can pose some challenges. Space is restricted under a car on jack stands or ramps, and a mechanic's patience will be tested while trying to unbolt driveshafts and drive axles while lying on their back. When you add in the fact that the rear section of the exhaust (the "cat-back") must also be removed, a recipe for temper tantrums is created. This is not a repair that should be attempted if you are in a hurry. But if you have a few days to complete it and have a zen type of personality, a BMW E36 differential bushing replacement is very doable for the home mechanic. And best of all, the rewards from doing the repair will be immediately experienced once you drive the car.
The BMW E36 differential (also known as the "final drive") serves the sole purpose of transmitting power generated by the transmission to the rear wheels. Unfortunately, a lot of this power is lost by rubber "factory style" bushings that flex under aggressive driving conditions. Older rubber bushings may often flex too much, causing alignment issues with the driveshaft and premature drive-line failures.
A solid performance bushing reduces the flex in your differential and transmits this newfound power to the rear wheels. The result is a more responsive throttle, increased acceleration, and a more aggressive road feel while driving. The drawback to performance bushings is a slightly harsher ride....a small price to pay for more power and acceleration.
Choosing the correct bushing
There are a lot of performance parts manufacturers on the scene right now, and choosing the best product for your BMW E36 differential bushing replacement can be confusing. Keep it simple by asking yourself these questions: What are you using the vehicle for and how much comfort are you willing to sacrifice for performance? These are personal questions that can't always be answered in online forums.
If you are driving your BMW mostly on the street with occasional track use, and want a modest amount of protection against road vibration, we suggest going with a polyurethane bushing equivalent to the Powerflex "purple" street version. If you are spending most of your time on the track and really aren't concerned with road vibration, we suggest purchasing a polyurethane bushing equivalent to the Powerflex "black" track version. If you are driving a dedicated track or race car, or are running a modified high-performance engine that is churning out a huge amount of horsepower, then we suggest going with a solid aluminum bushing that provides zero protection against road vibration. We give you a bunch of great choices in our parts section below.
In this article, we will be installing Proflex Black Series track bushings into our 1996 E36 M3. The BMW Repair Guide uses this car mostly for the track, with a limited amount of city driving. We are running a stock S52 engine with some minor power-producing upgrades.


View the detailed parts diagram for this repair.
Includes detailed part diagrams, part numbers and links to purchase all of the required components needed to complete this repair.
Section 1 - Preparing for Differential Removal
- Jack and support the front of your vehicle using the four corner wheel stand method as shown in our article BMW Jacking and Supporting for Repairs and Maintenance.
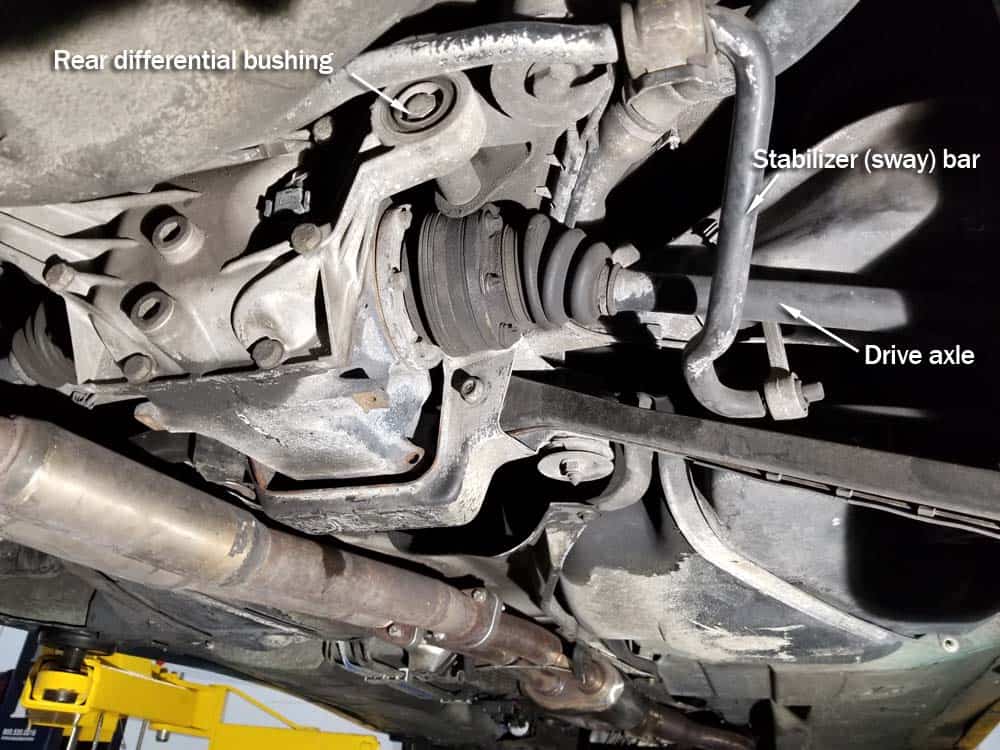
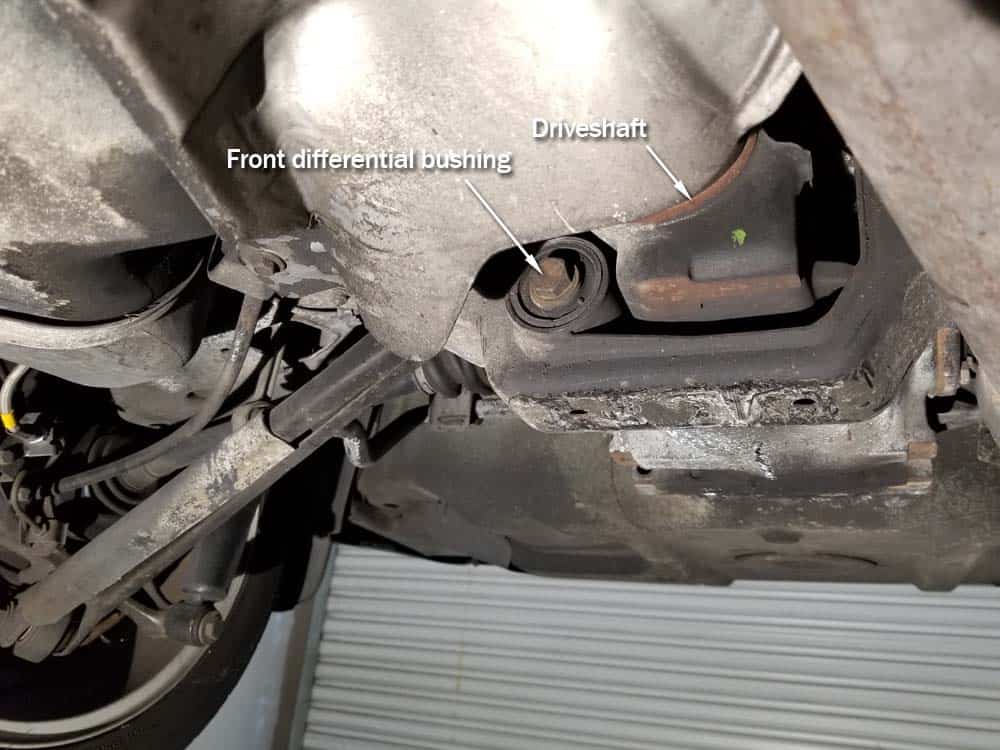
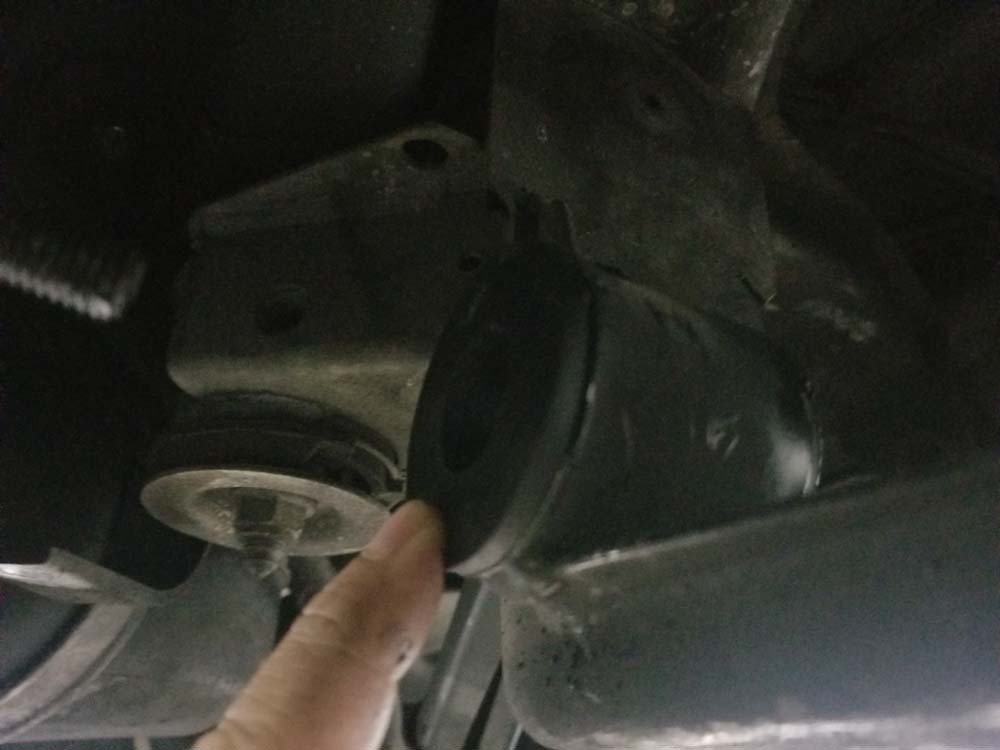
- Before beginning this repair, familiarize yourself with the differential, the surrounding parts connected to it, and the location of the bushings you are going to replace.
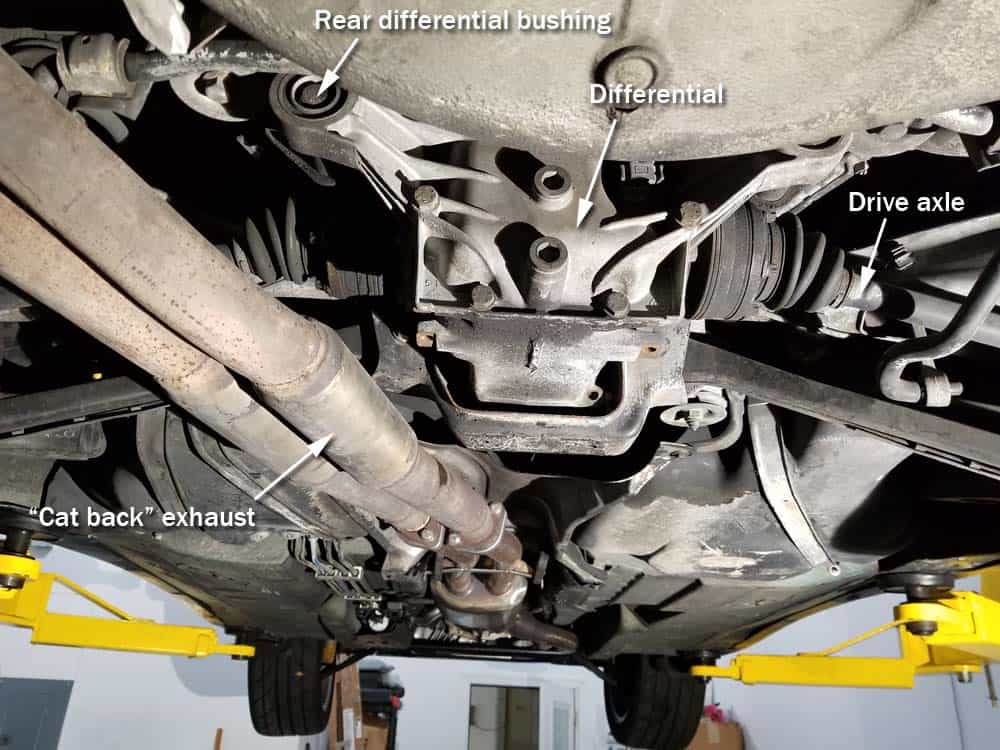
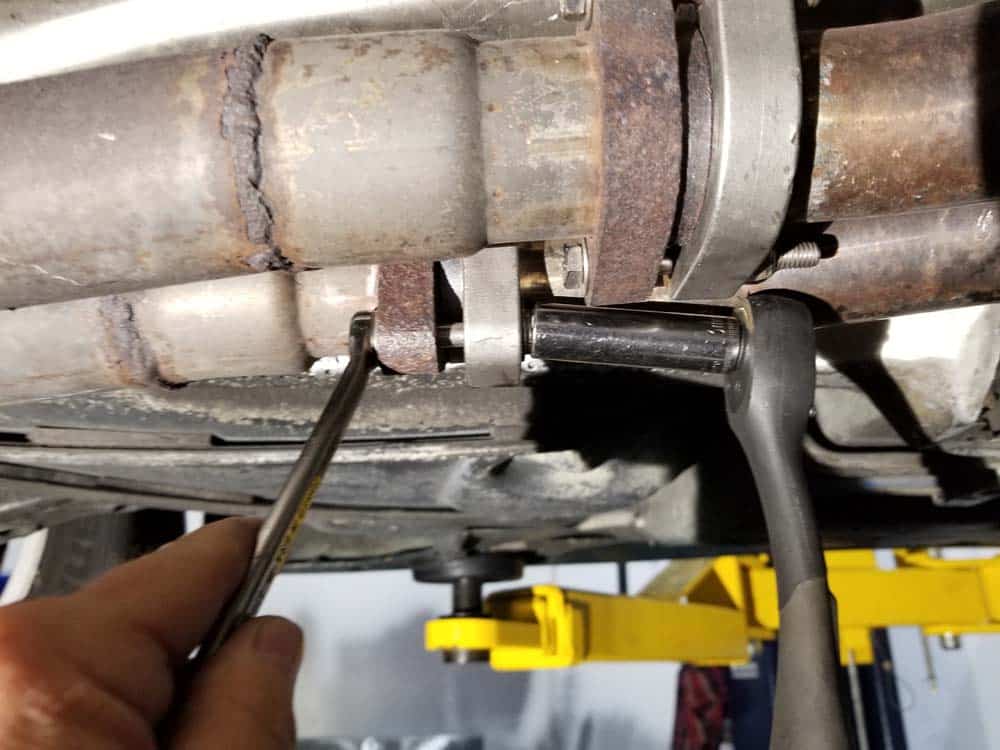
- Start the repair by removing the rear section of the exhaust, also known as the “cat back” section. Since many E36 M3 cars have been fitted with aftermarket exhaust systems over the years (especially those being driven on the track like ours), the removal process may slightly differ between vehicles. The following images show how we removed our aftermarket AC Schnitzer exhaust from the vehicle. Begin by removing the bolts from the exhaust flanges connecting the rear exhaust from it’s mid section. Ours required a 13mm deep socket and a 13mm open end wrench.
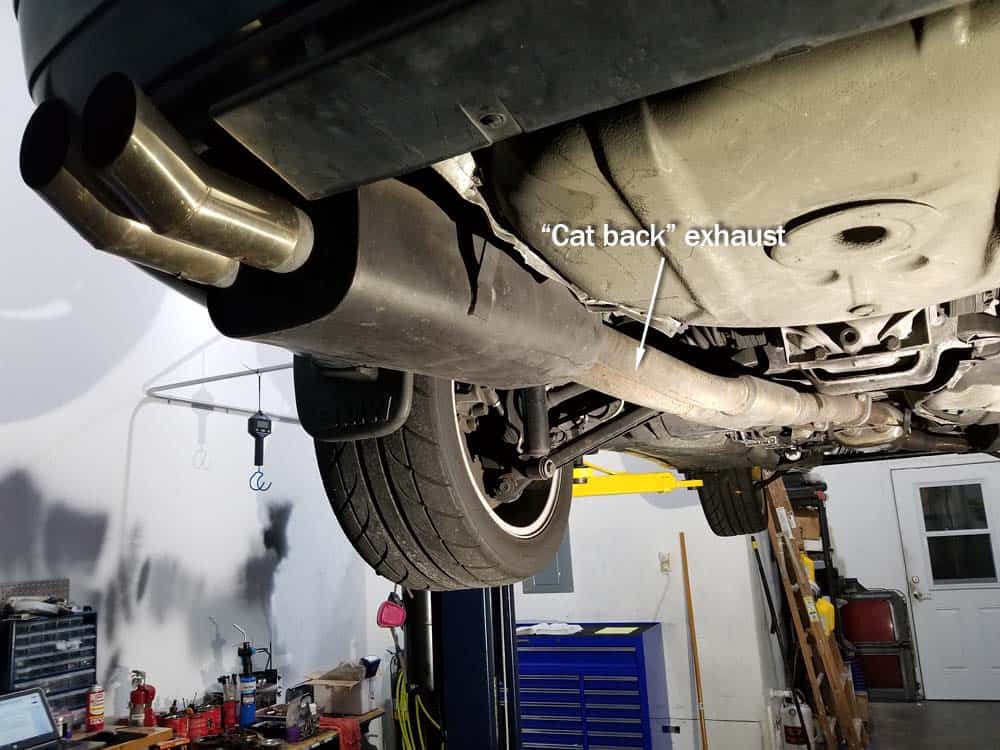
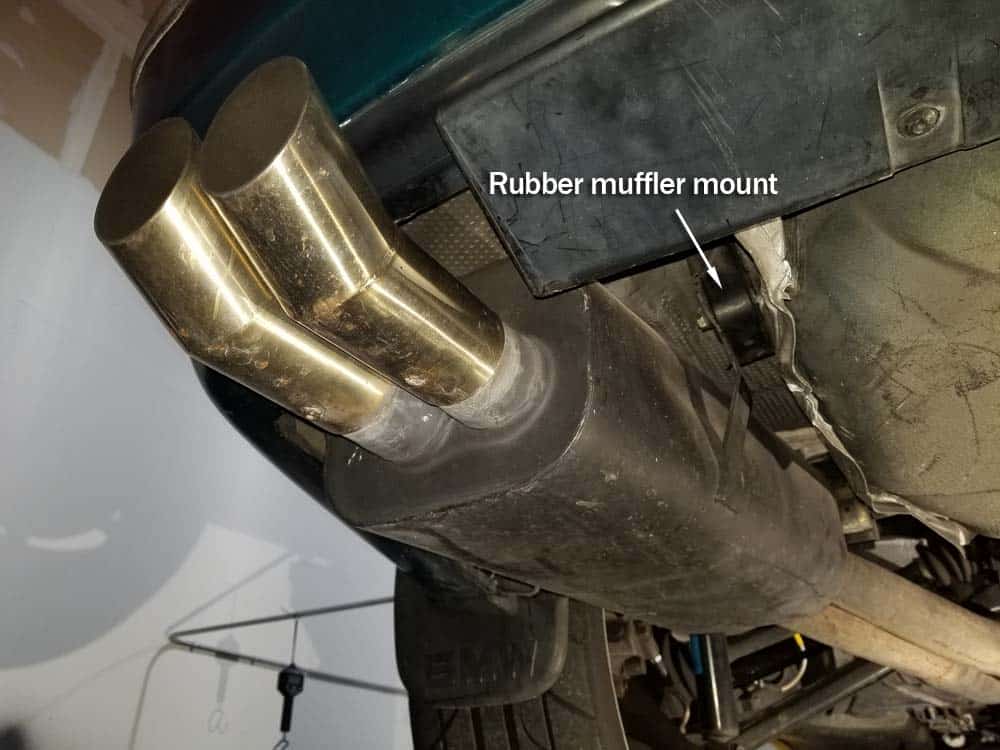
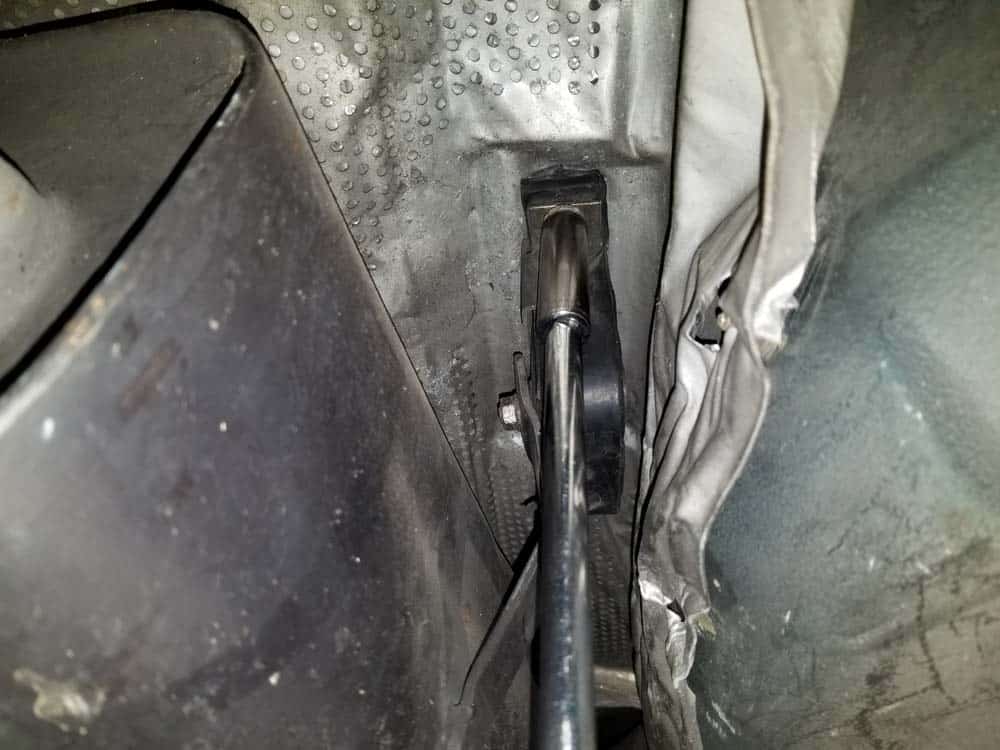
- The muffler is held in place by two rubber mounts that are bolted to the frame. As discussed, this mounting method can vary between vehicles. We used a 13mm socket to remove our rubber mounts. Remember...the muffler is heavy. Be prepared to support it when you remove the mounts. If you don't have a helper, a floor jack always works nicely.
- Remove the cat back section of the exhaust from the vehicle.
- Remove the two mounting bolts anchoring the rear stabilizer bar support brackets to the frame.
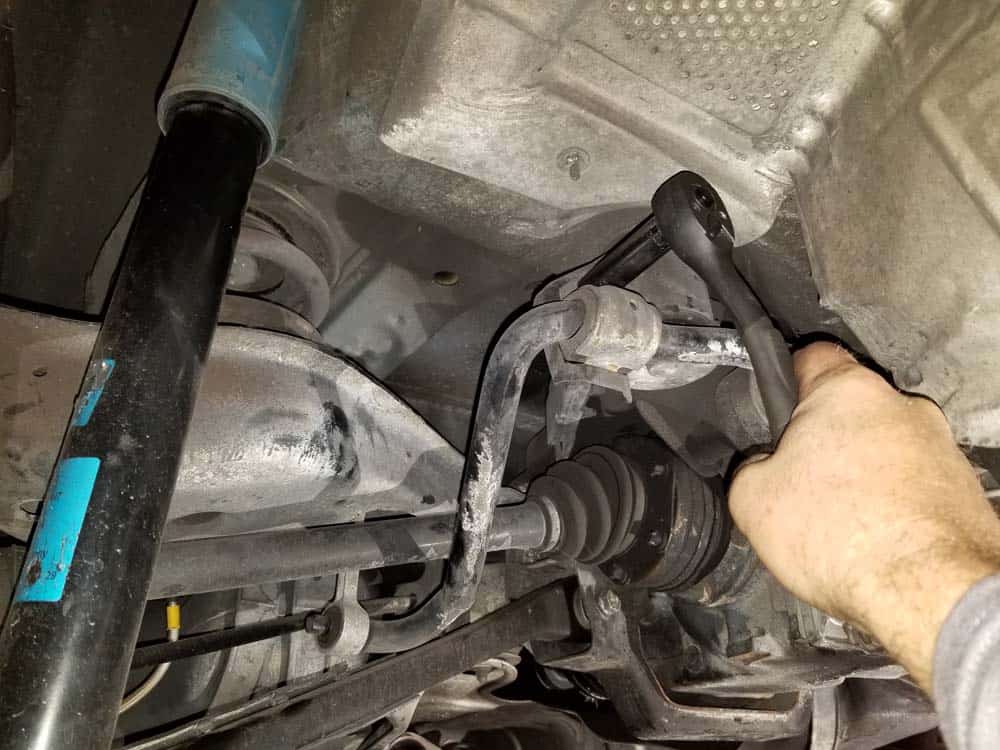
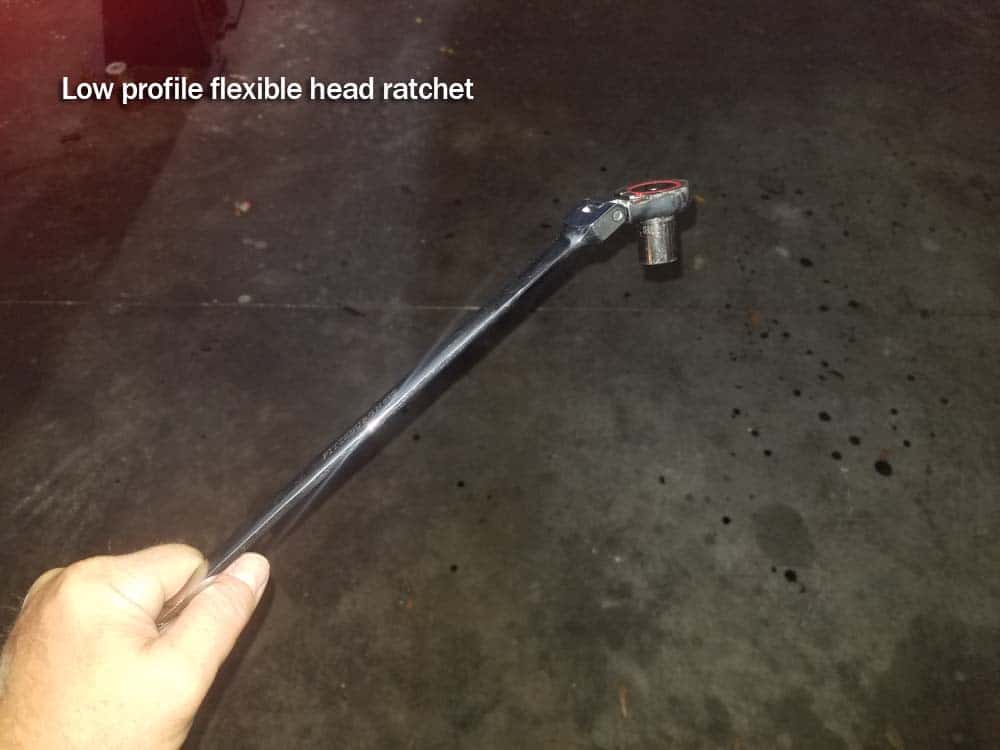
- Use a 13mm low profile flex head socket wrench to remove the nuts anchoring the stabilizer’s swing support brackets to the swing arm. The nuts are located on the top of the swing arms. Note that there is limited space to get to these nuts...you will need to use a low profile flexible head ratchet to get to them...especially on the right side where the metal fuel tank filler pipe is in the way (see image below).

- Remove the stabilizer bar assembly from the vehicle.

Section 2 - Driveshaft and Drive Axle Removal
- You will need to keep the rear wheels from spinning when removing the driveshaft and drive axle bolts. The best way to achieve this is to use the four corner wheel stand method of supporting your vehicle...the rear wheels will be firmly on ramps or wheel stands and therefore will not spin when removing the driveshaft and drive axle nuts and bolts.
- If you are not using the four corner wheel stand method and the vehicle wheels are in the air, you have two other options: if the vehicle has a manual “stick shift” transmission, simply put it into first gear. This will keep the rear wheels from spinning during bolt removal. If the vehicle has an automatic transmission, your only option is to have someone apply the brakes while you loosen the bolts.
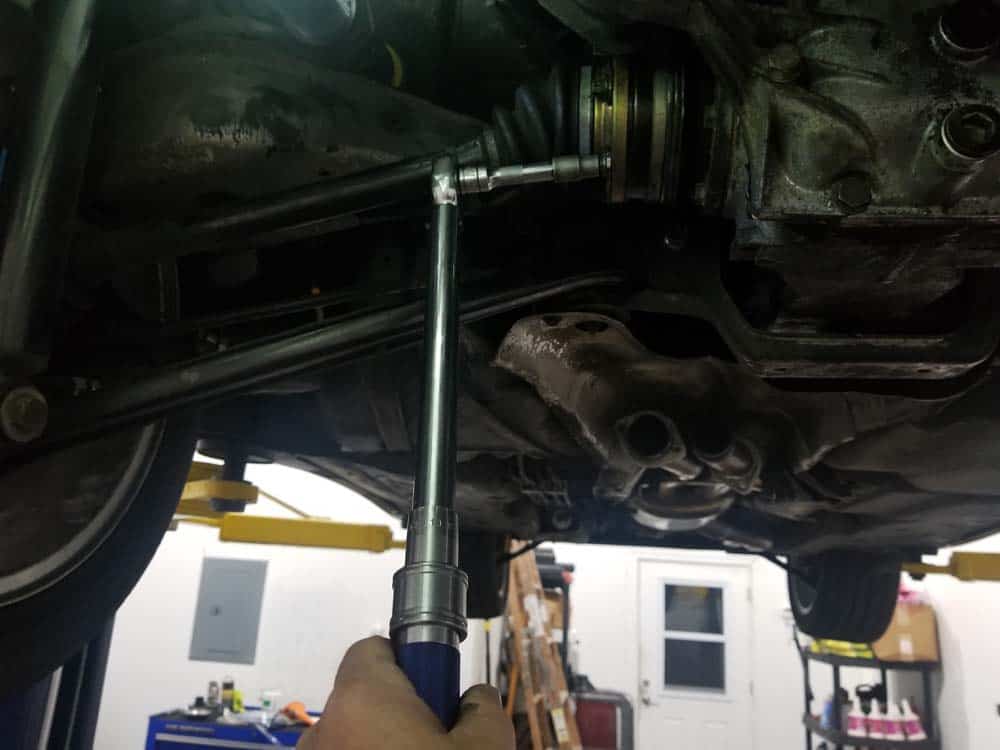
- With the wheels locked and unable to rotate, use a 13mm crows foot socket to remove the driveshaft nuts. Note that you will not be able to get a regular socket on these nuts due to clearance issues. Also note that you will have to spin the rear wheels a quarter turn to reach the final two nuts on the top of the driveshaft.

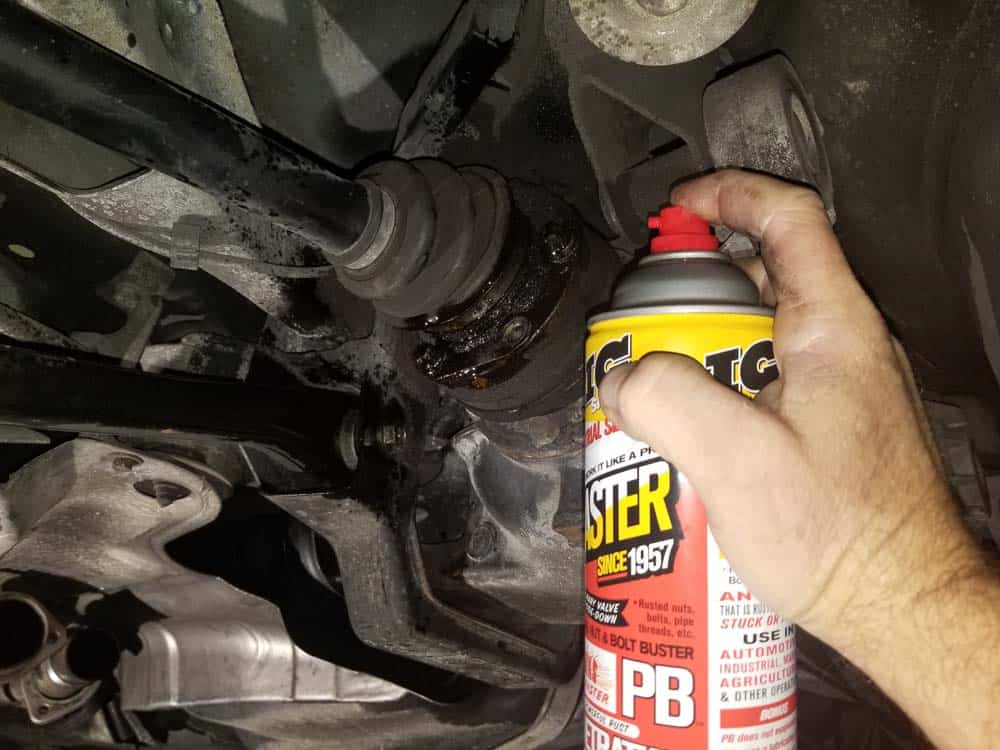
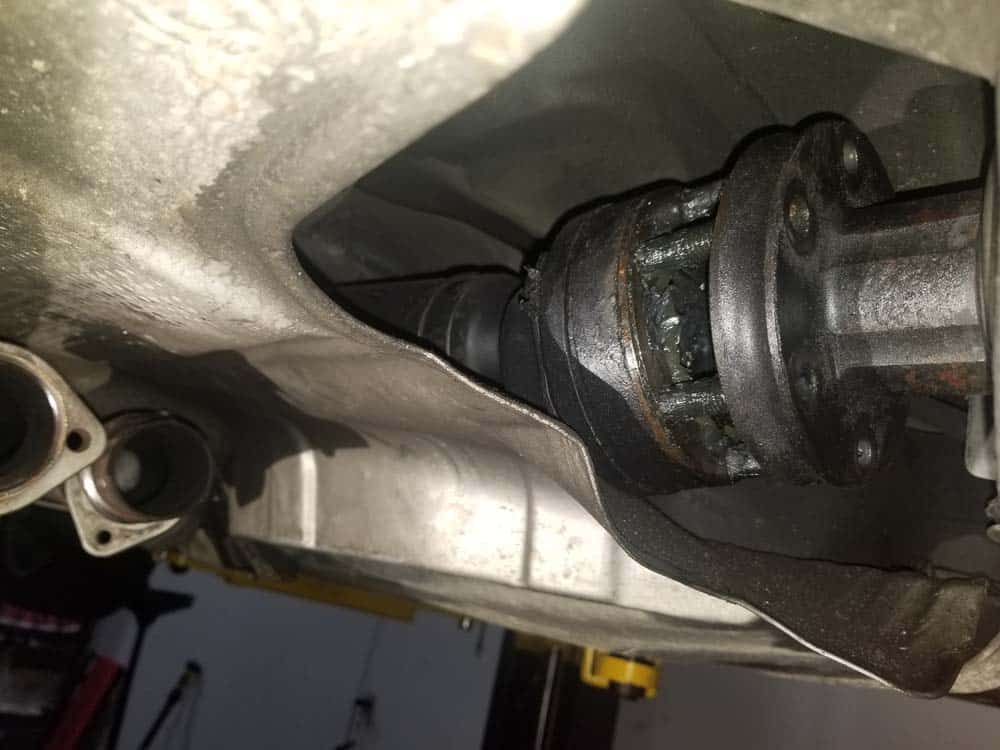
- Soak the drive axle torx bolts with Blaster PB or other penetrating oil, and allow to soak for at least 10 minutes to loosen them. Try and remove as much oil and road grime from them as possible to avoid stripping during the removal process.
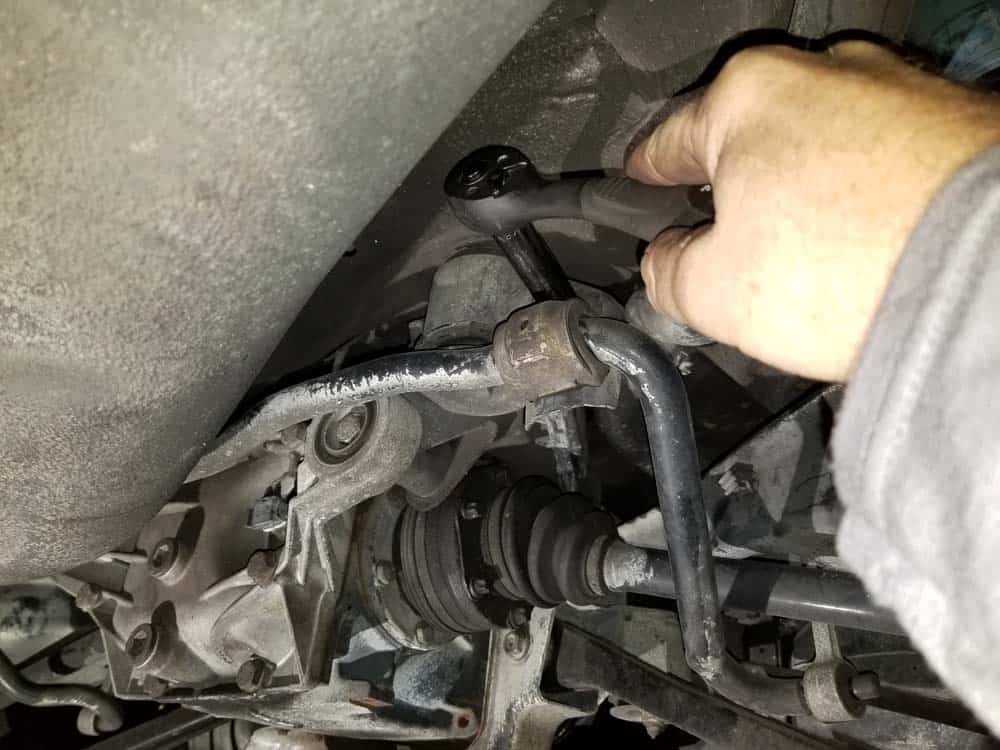
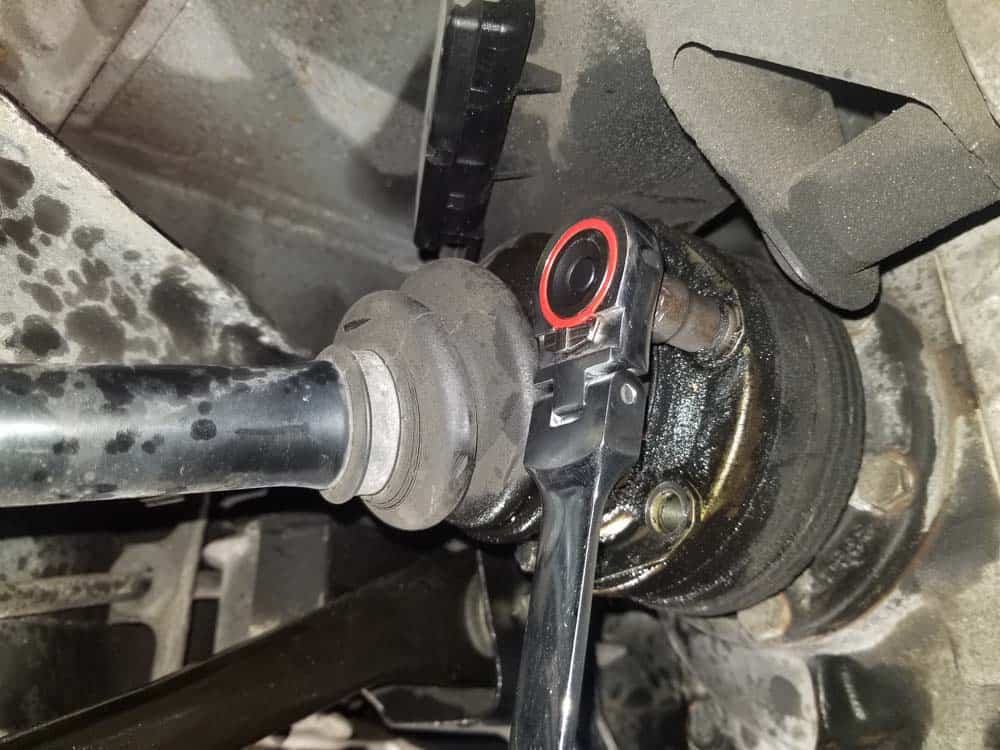
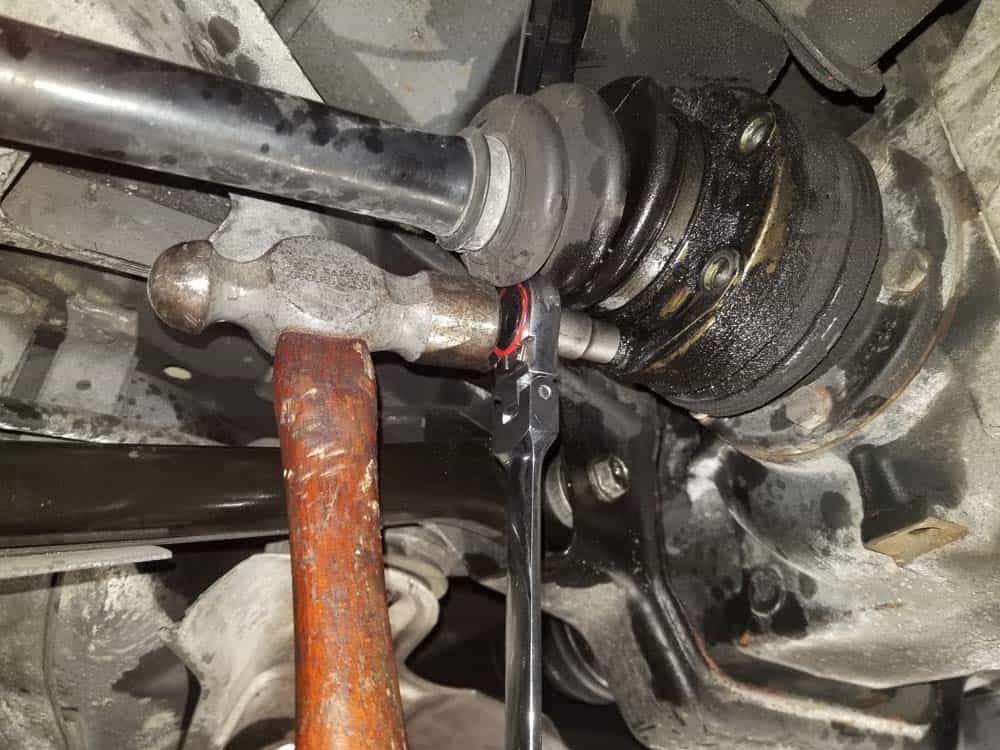
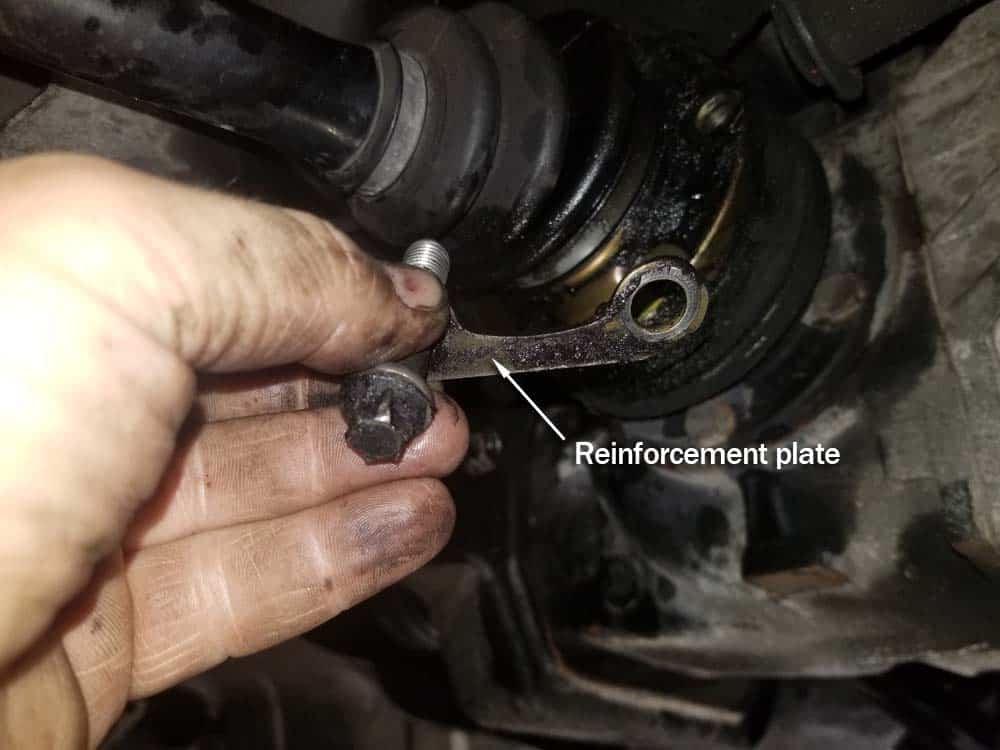
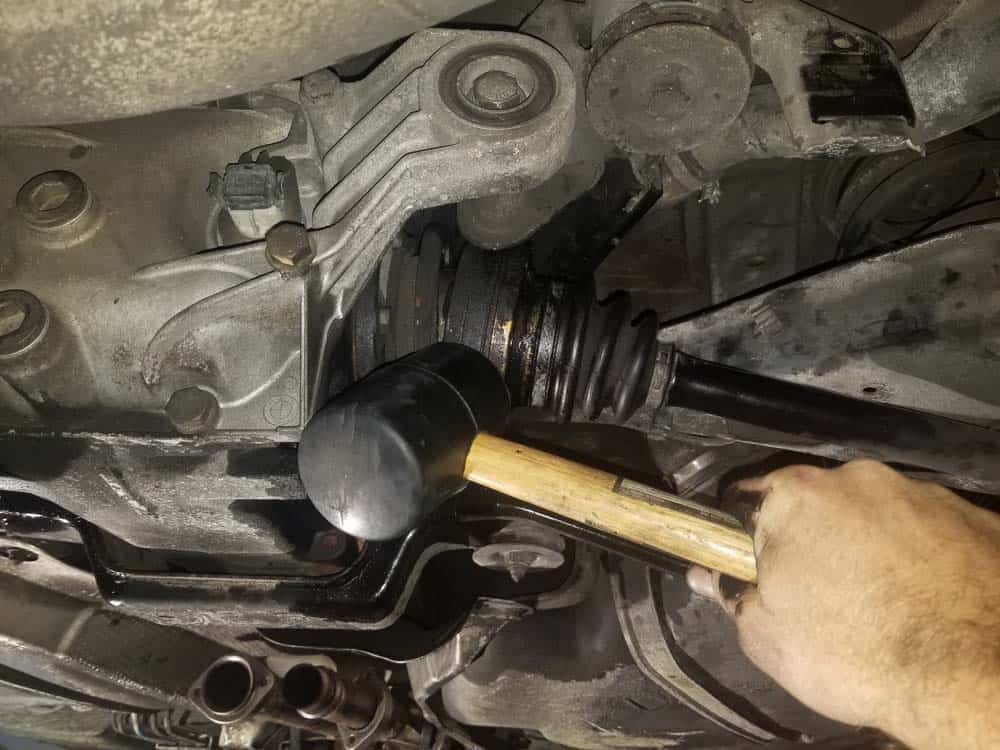
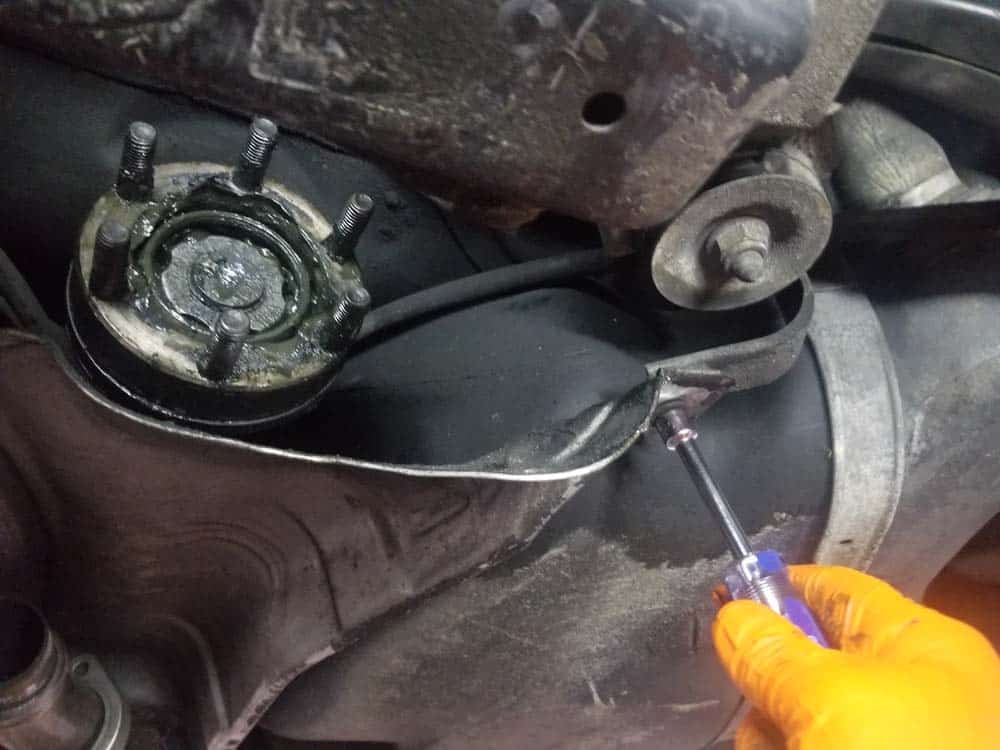
- Use an E12 external torx socket to remove the bolts and the reinforcement plates securing the drive axles to the differential. We suggest using a low profile ratchet like the one used in step 6 above to avoid puncturing the rubber boot. Sometimes a light tap with a hammer will help set the socket firmly on the torx bolt (see image below). Note - This is a very difficult part of the repair...exercise patience and take a break if you become frustrated. You do not want to strip these bolts! Pay extra attention to the rubber CV boot when removing the bolts...you do not want to tear or puncture it with the socket wrench. If you have soaked and cleaned them prior to removal, they will come out easier without a chance of stripping.
- When all of the bolts are removed, grasp the drive axles and pull them loose from the differential. If they won't pull loose, give them a couple light smacks with a rubber mallet.
Section 3 - Removing the Differential
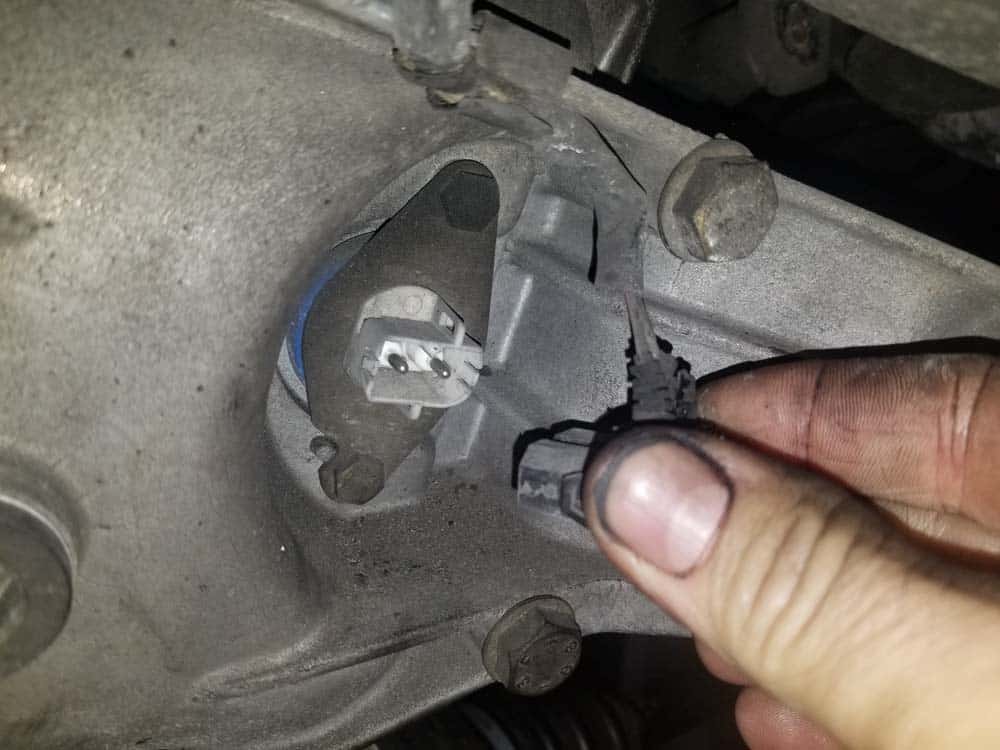
- Begin by removing the speedometer electrical connector from back of differential.
- The differential is held in place by three bolts: one in the front and two in the rear.
- Begin by loosening the three differential mounting bolts with an 18mm socket wrench or breaker bar. DO NOT REMOVE the bolts yet.
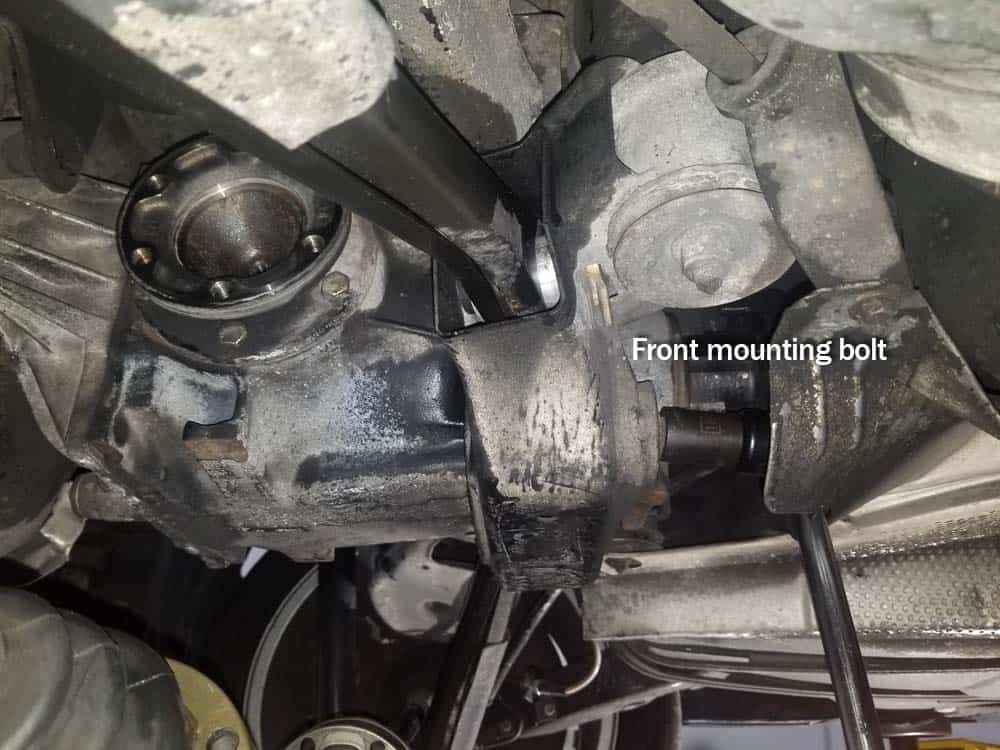
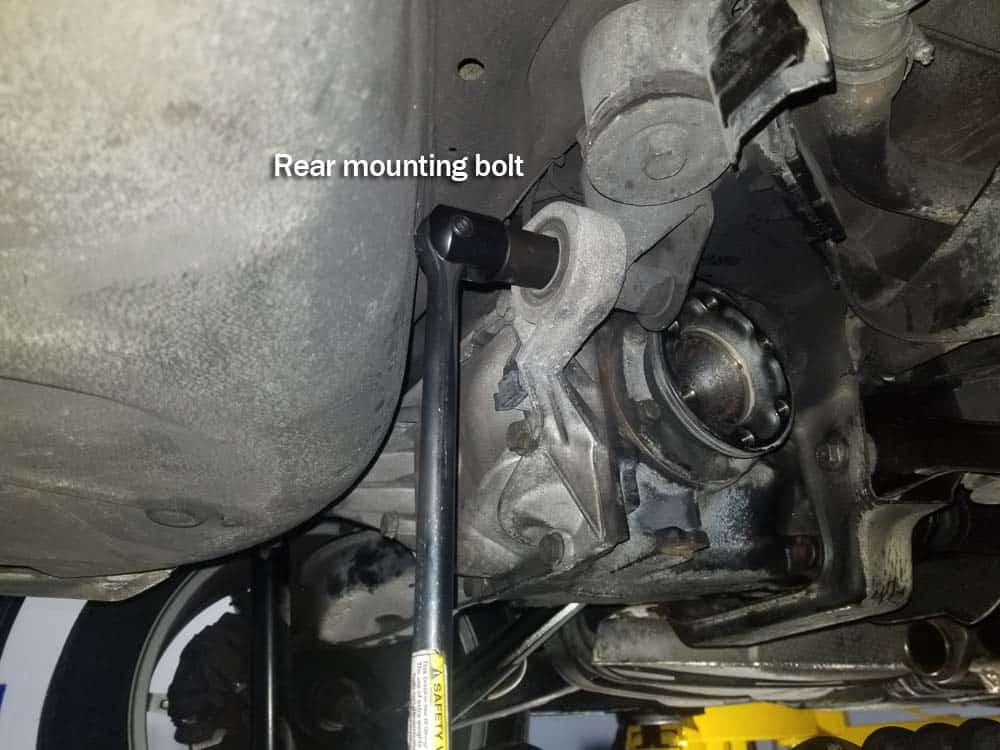
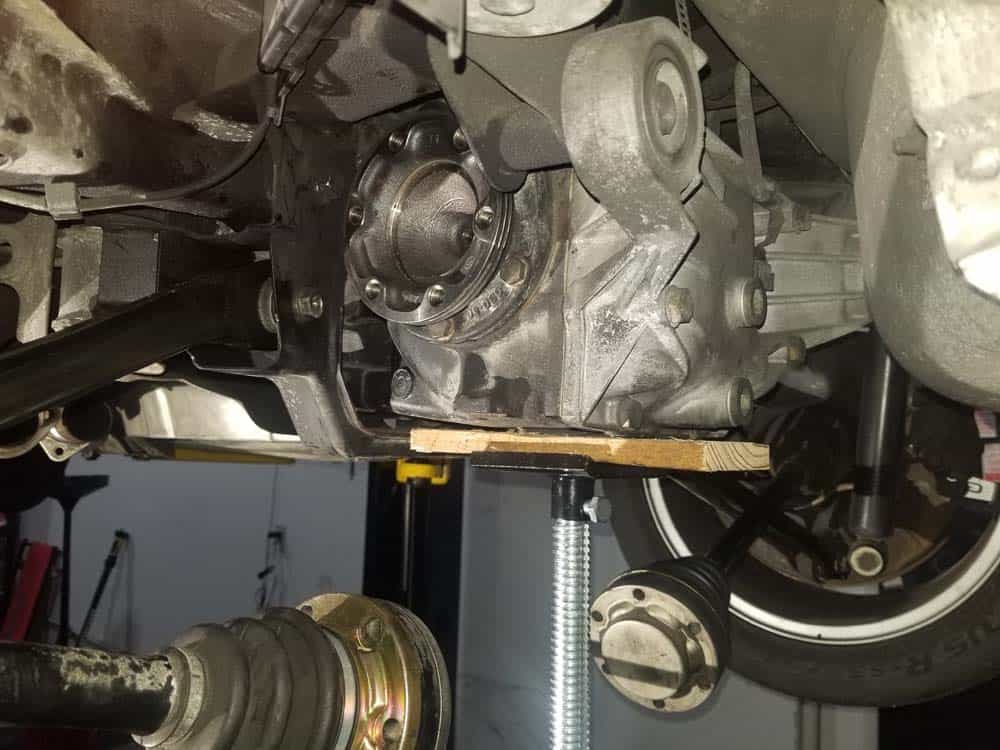
- Once the bolts are loose, position a floor jack or transmission jack under the differential to hold it as the mounting bolts are removed.
- Finish removing the three mounting bolts.
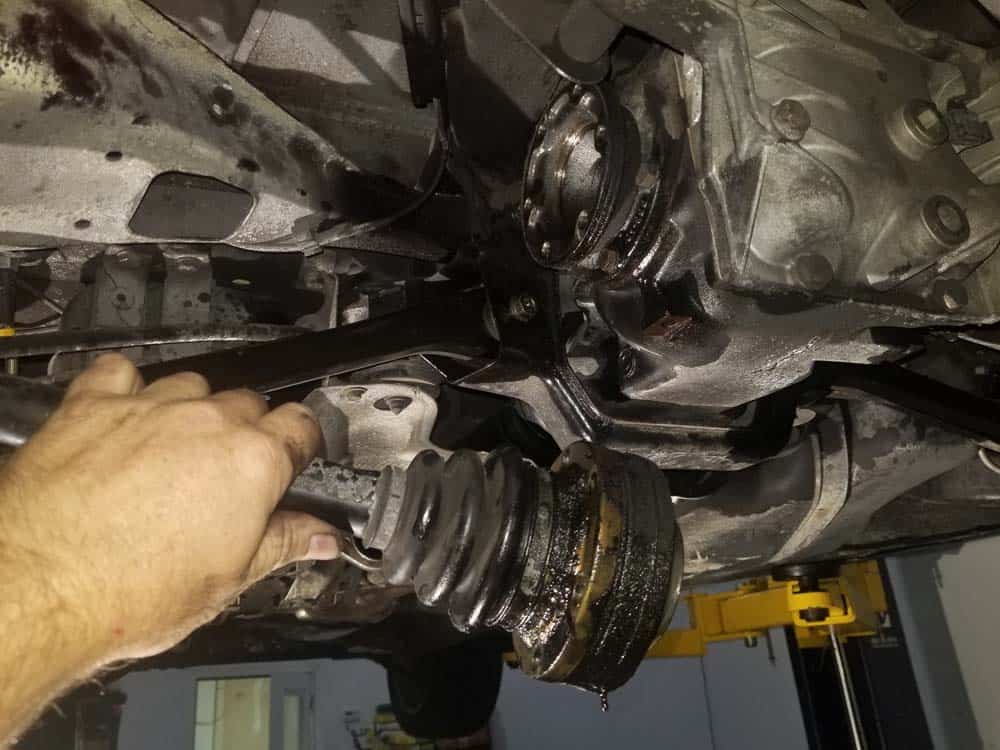
- Grab the differential from the rear and pull it free of the driveshaft studs.
- Tilt the differential down towards the back of the vehicle while slowly lowering the floor jack. Remove the floor jack from underneath vehicle.
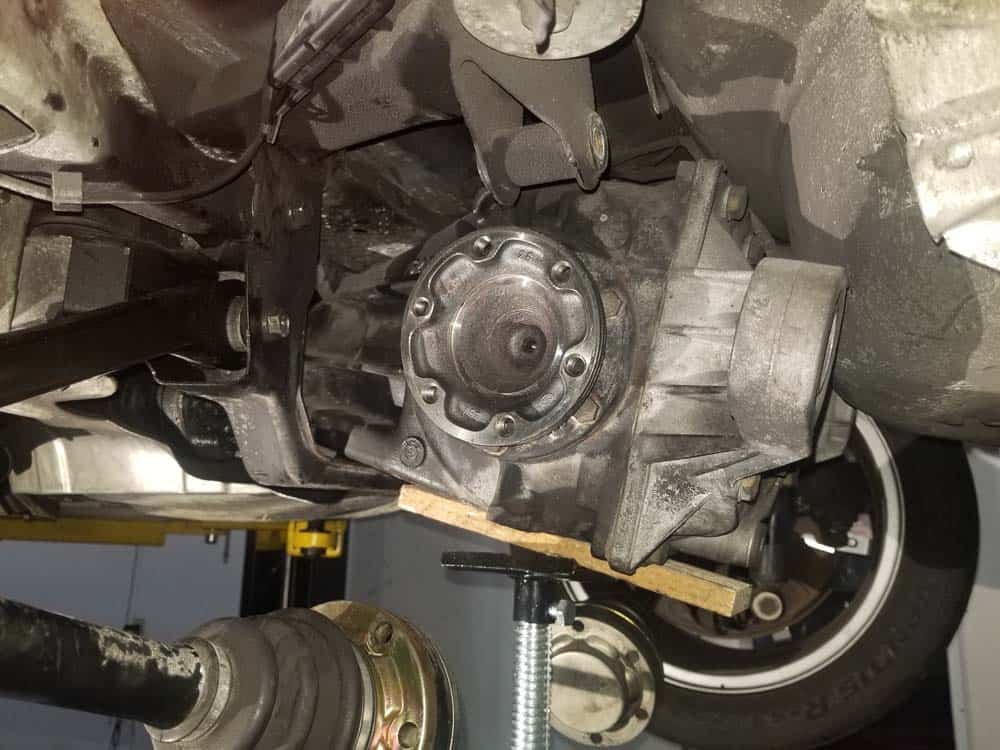
- Grasp the differential firmly and remove from vehicle. Place on a bench for easy removal of bushings.
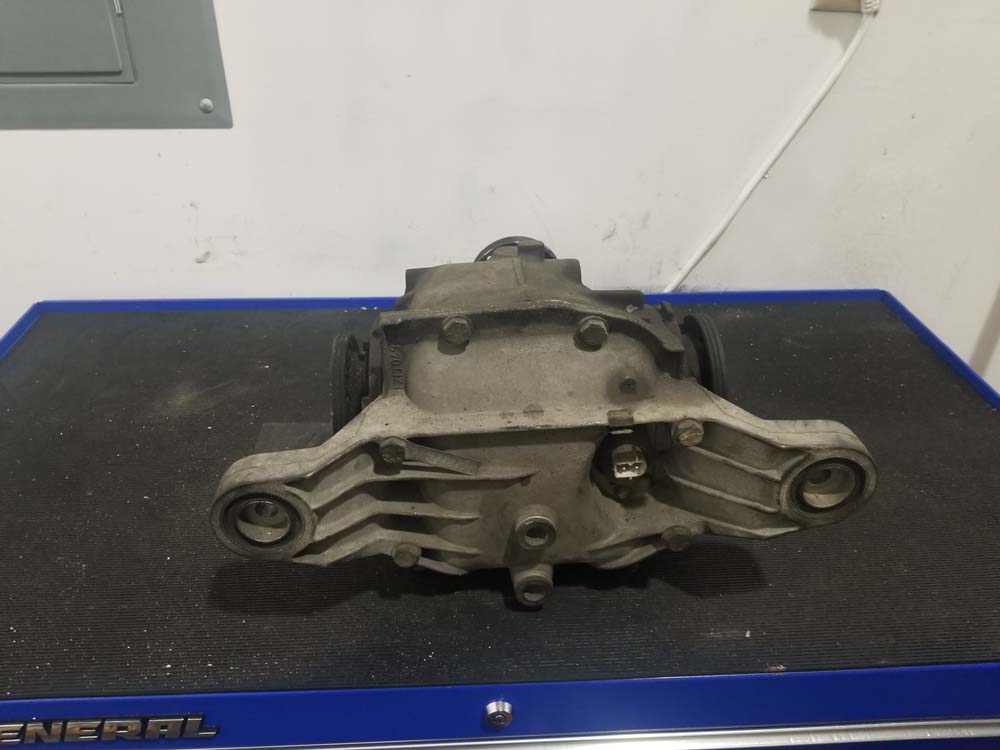
Section 4 - Differential Bushing Replacement
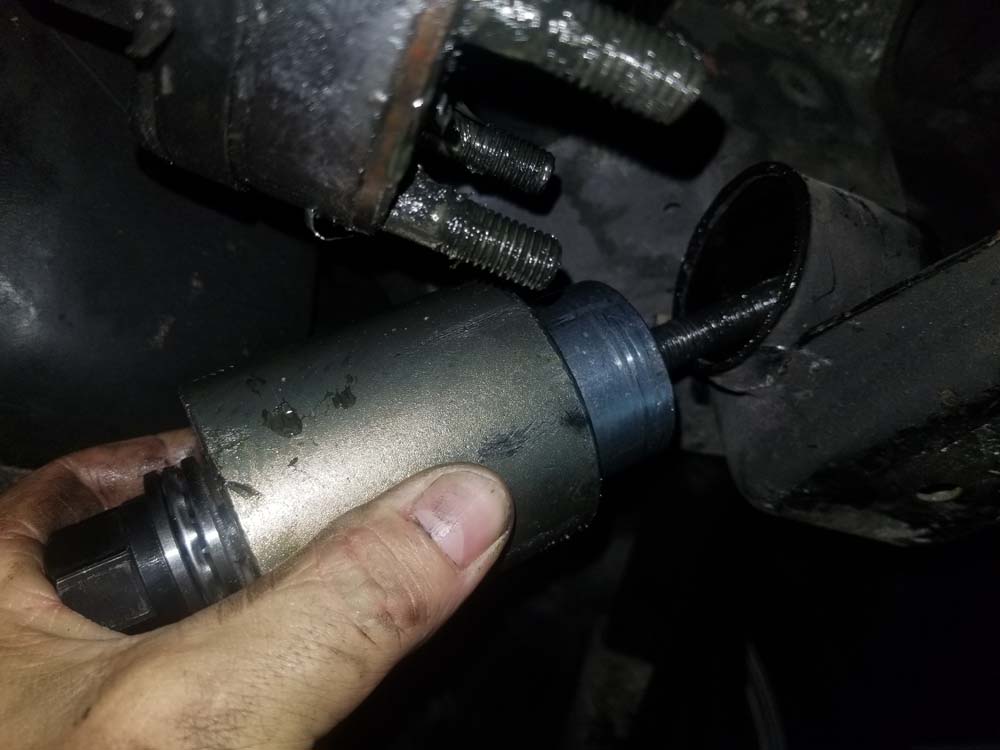
Removing and installing differential bushings is a simple and effortless procedure that is often mistakenly looked upon as a tedious process. The reason why many home mechanics struggle with this step is simple; they are not using their bushing removal tool correctly. Taking a moment to understand how the bushing removal tool works and how to use it correctly will make removing the bushings very easy. Using the tool incorrectly and trying to force a bushing out can be disastrous. The BMW Repair Guide only recommends using a proper bushing remover like the Schwaben Silent Block/Bushing Tool to remove your differential bushings. The bushing removal tool works by “pulling” a steel plunger along a threaded rod that “pushes” the bushing out and into a steel cup. The two common mistakes most mechanics make are a) choosing a plunger that is not smaller than the bushing and/or b) choosing a cup that is not larger than the bushing. If the plunger is not a few millimeters smaller than the bushing, it will not fit through the bushing housing. If the cup is not a few millimeters bigger than the bushing, then the bushing will not be able to be pushed out. Either one (or both) of these conditions will cause the bushing to stop moving and the tool to break as the mechanic gets frustrated and tries to add more force. For more information on how to correctly use a bushing removal/installation tool, please watch the following video: 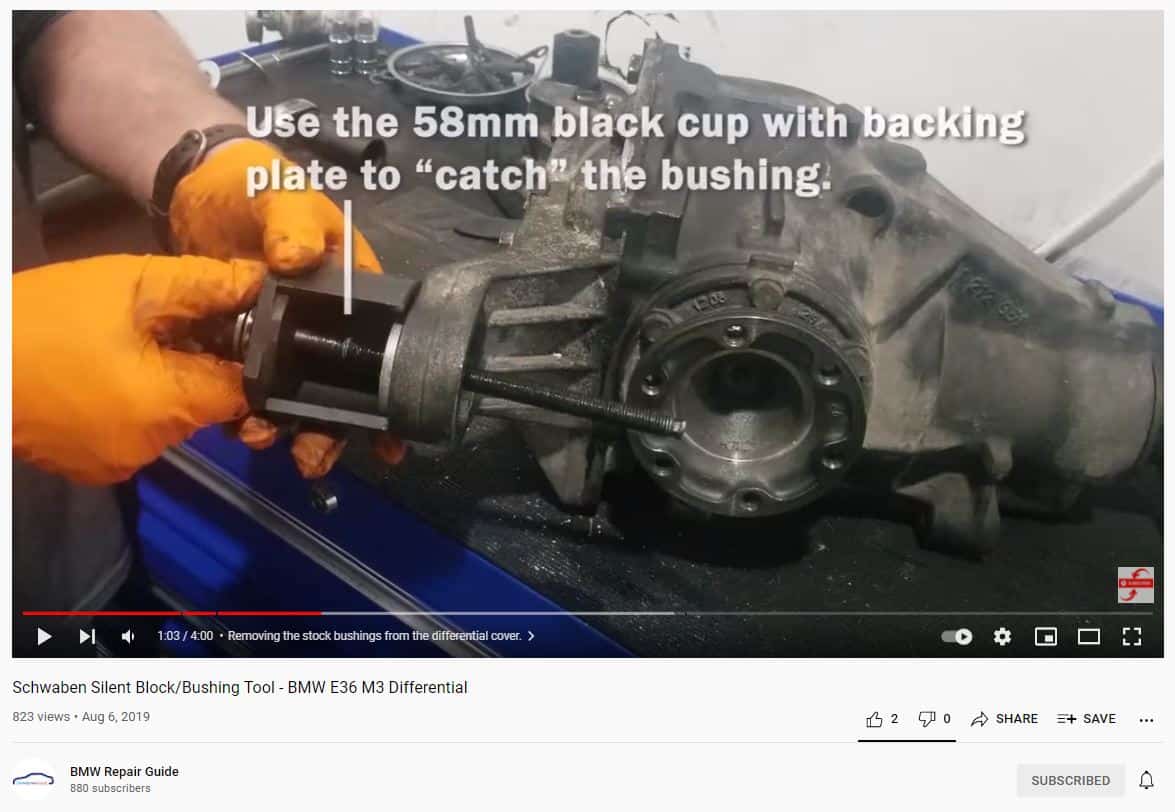 Removing the rear differential cover bushings The two bushings being removed in the BMW E36 differential cover are 50mm in diameter. As discussed above, since we need a plunger that is smaller than the bushing to push them out, we will use the 46mm plunger included in the Schwaben kit. We will need a cup at least a couple millimeters larger than the bushing, so we will use the 58mm black "C" cup with it’s backing plate.
- Place the plate on the back of threaded rod as shown in the image below.
- Place the 58mm black "C" cup on the back of the rod in front of the plate.
- Place the rod through the center of the bushing. Thread the 46mm plunger onto the front of the rod.
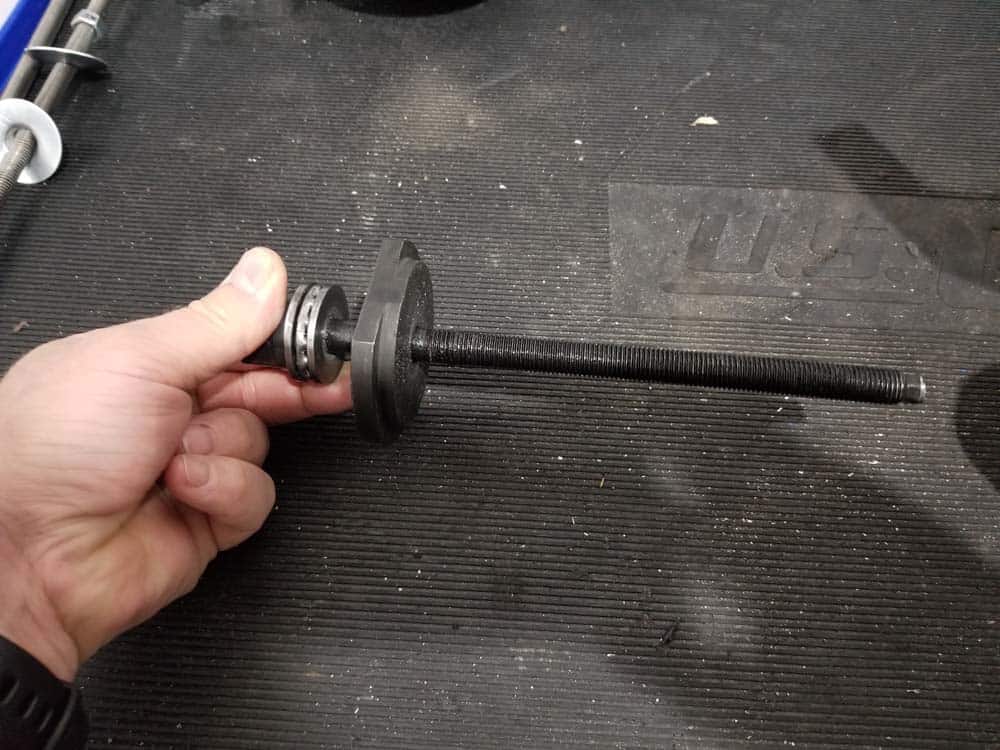
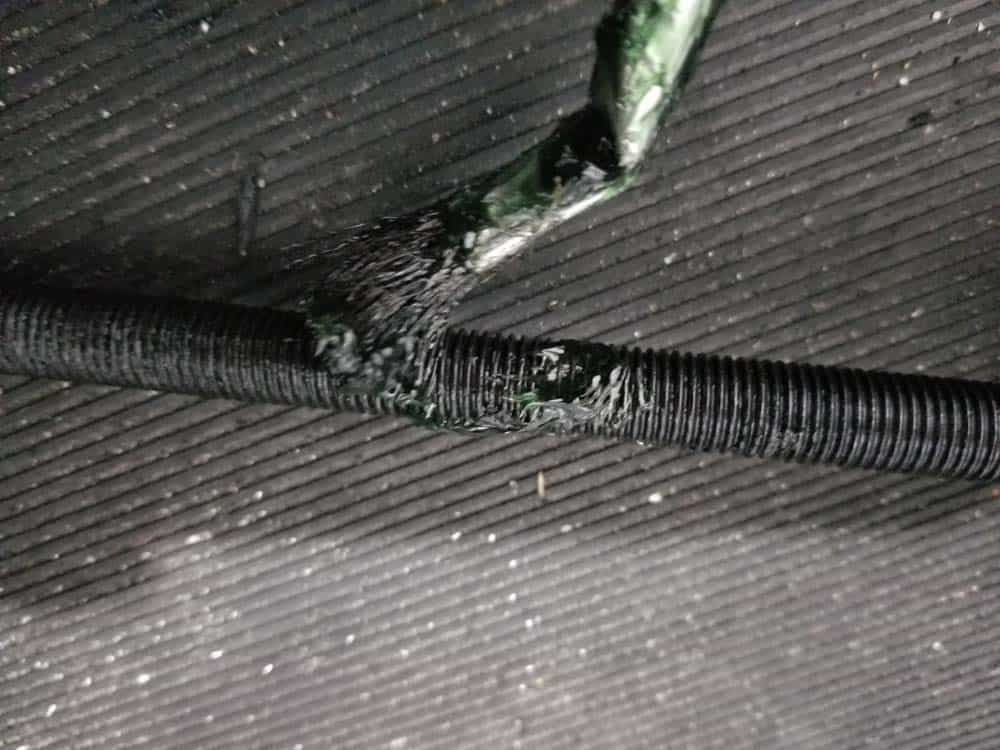
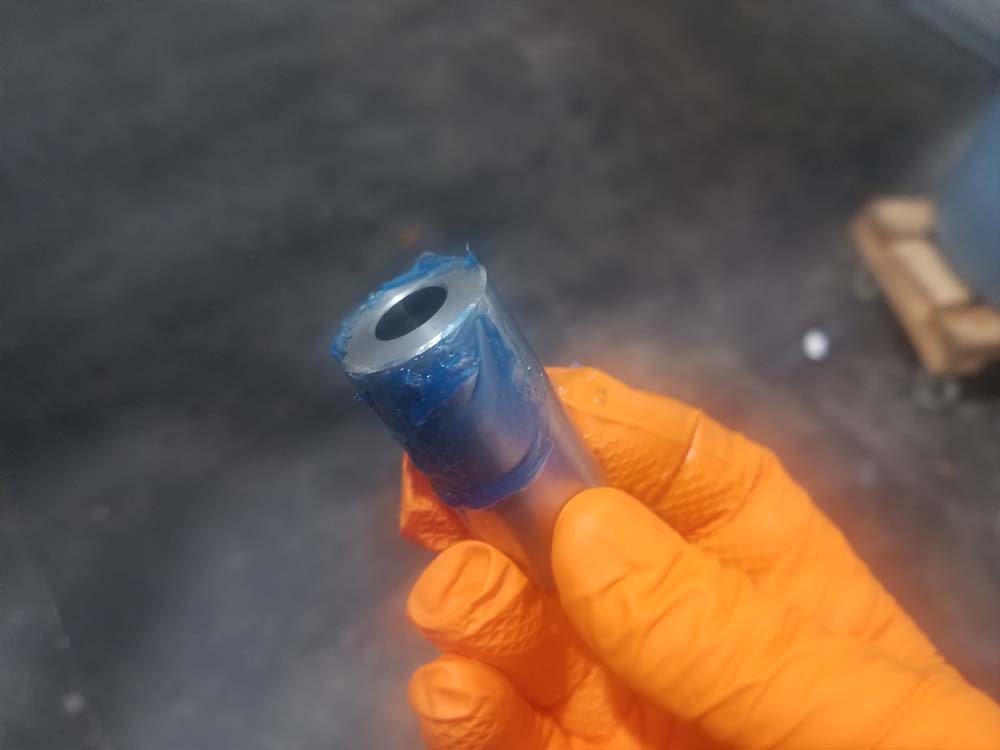
- Use some synthetic grease to lubricate the threaded rod. This should be done for every bushing removal.
- Hand tighten the plunger until it is snug against the bushing.
- Use a 24mm socket wrench to slowly tighten the nut. As you tighten the nut, the threaded rod will pull on the 46mm plunger and slowly push the bushing out of its housing.
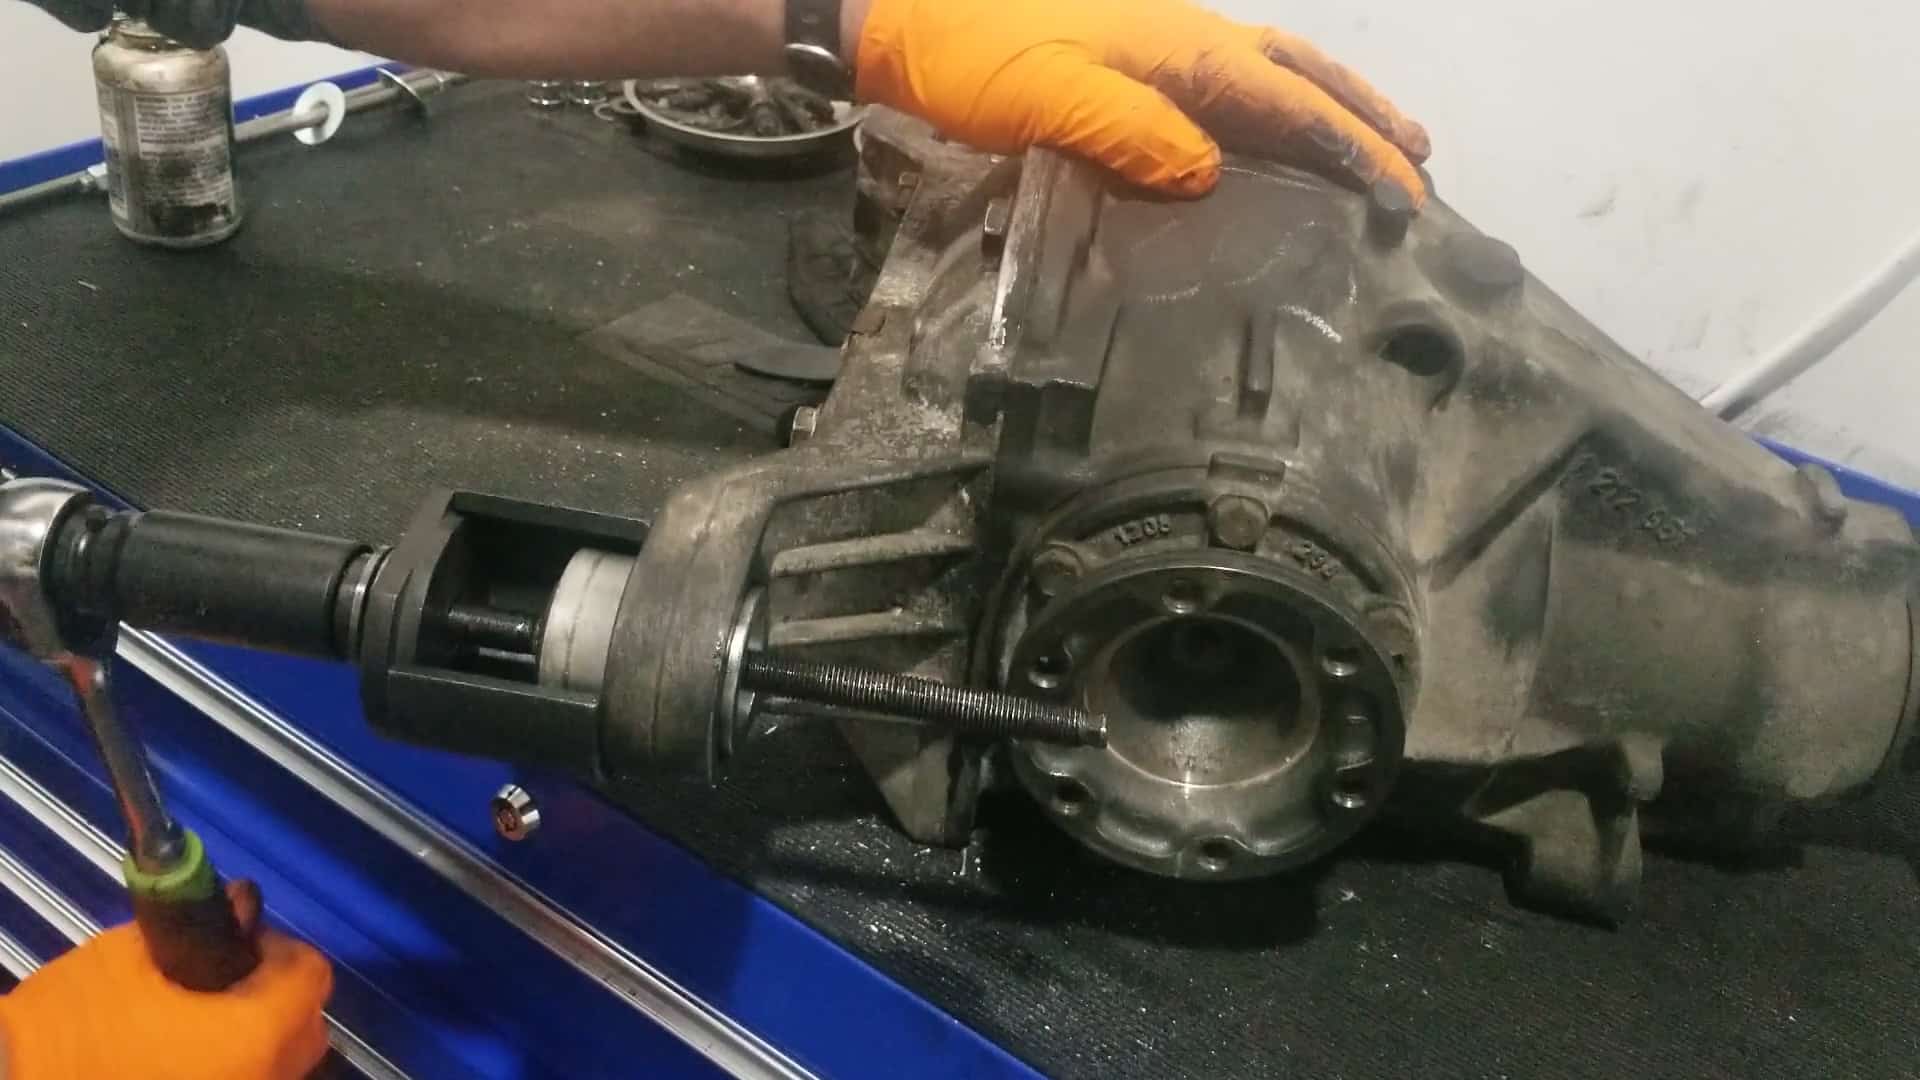
- Keep tightening the nut until the bushing is pulled free of the differential.
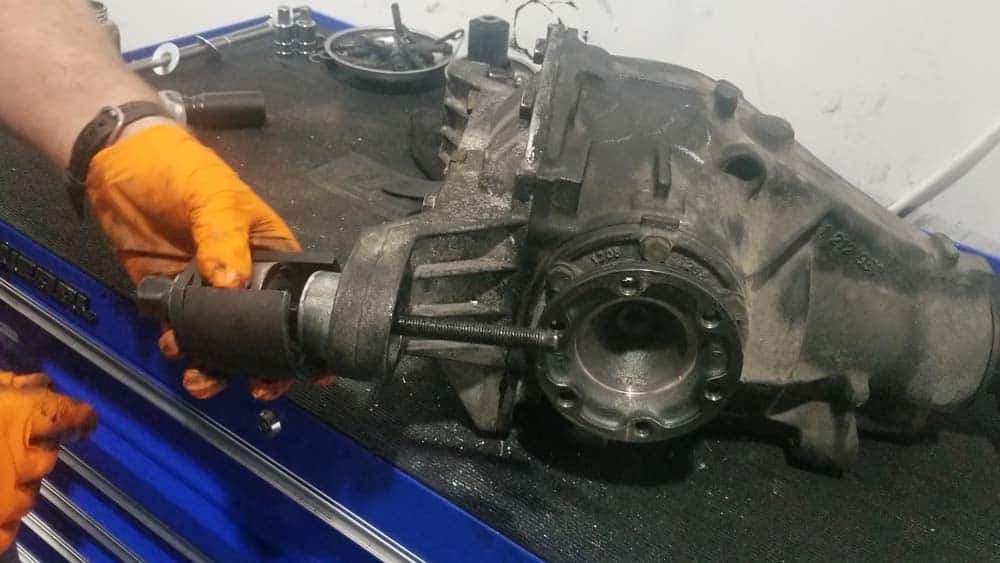
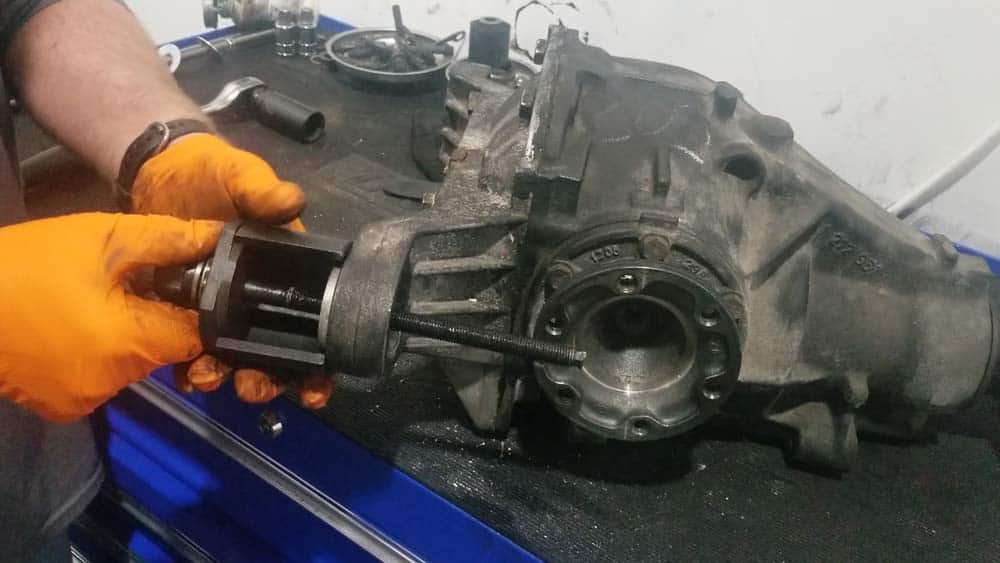
- Remove the bushing tool and thoroughly clean the bushing mounts in the differential cover. Use a dremel with a wire brush wheel to remove any rust and corrosion. You want them to be clean and smooth before installing new bushings.

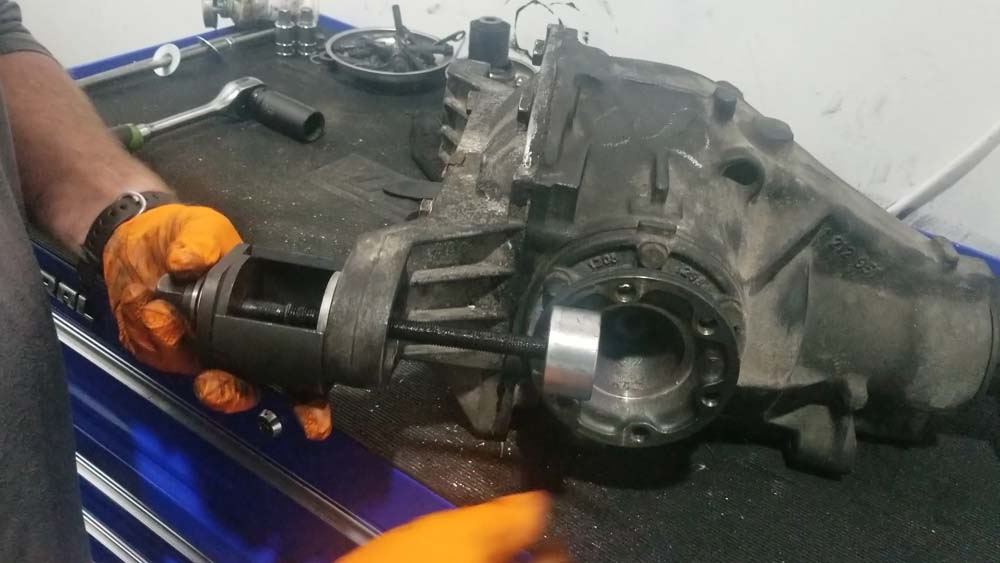
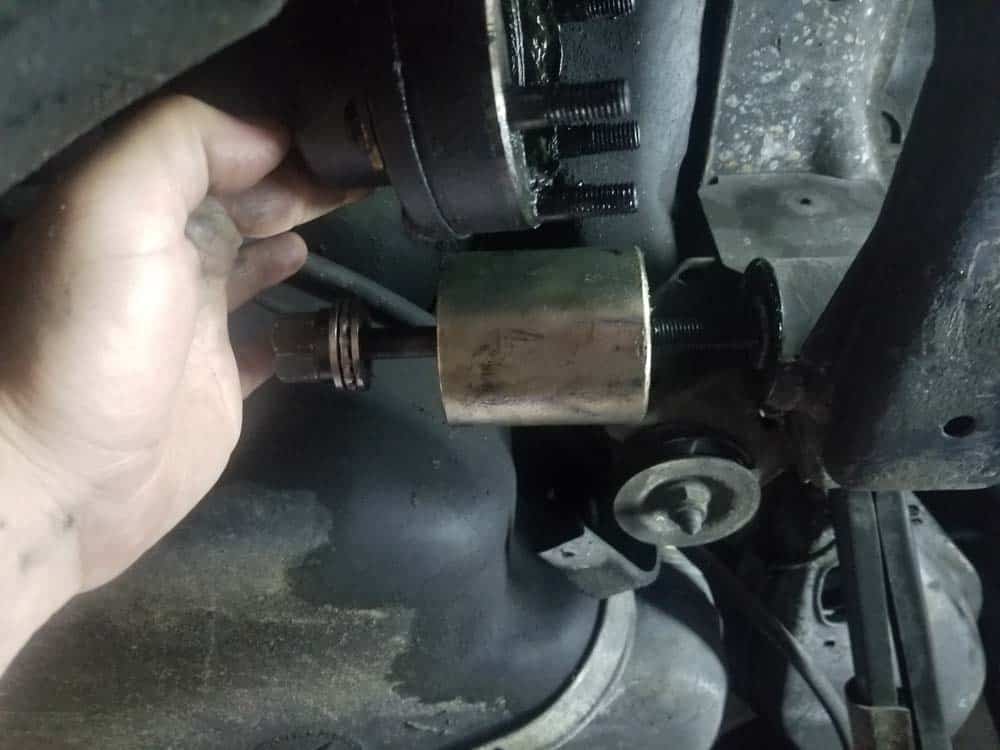
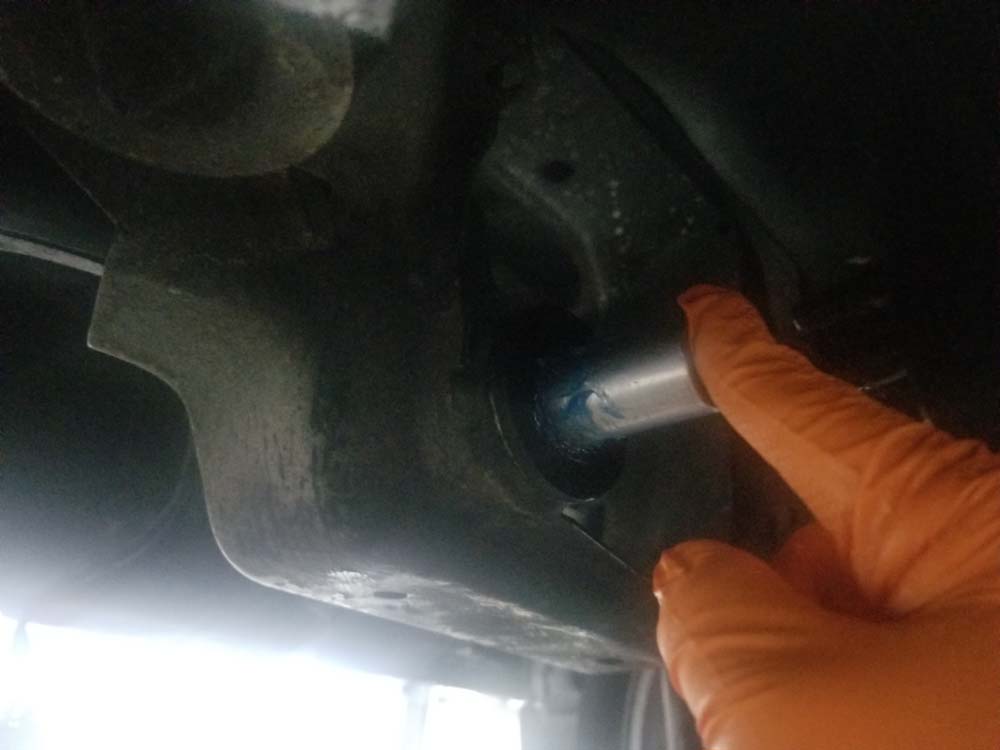
- The bushing must be pulled from the front side of the differential carrier. The 50mm cup will not fit correctly on the back side of the carrier - do not attempt to remove the bushing this way or you will break the tool!
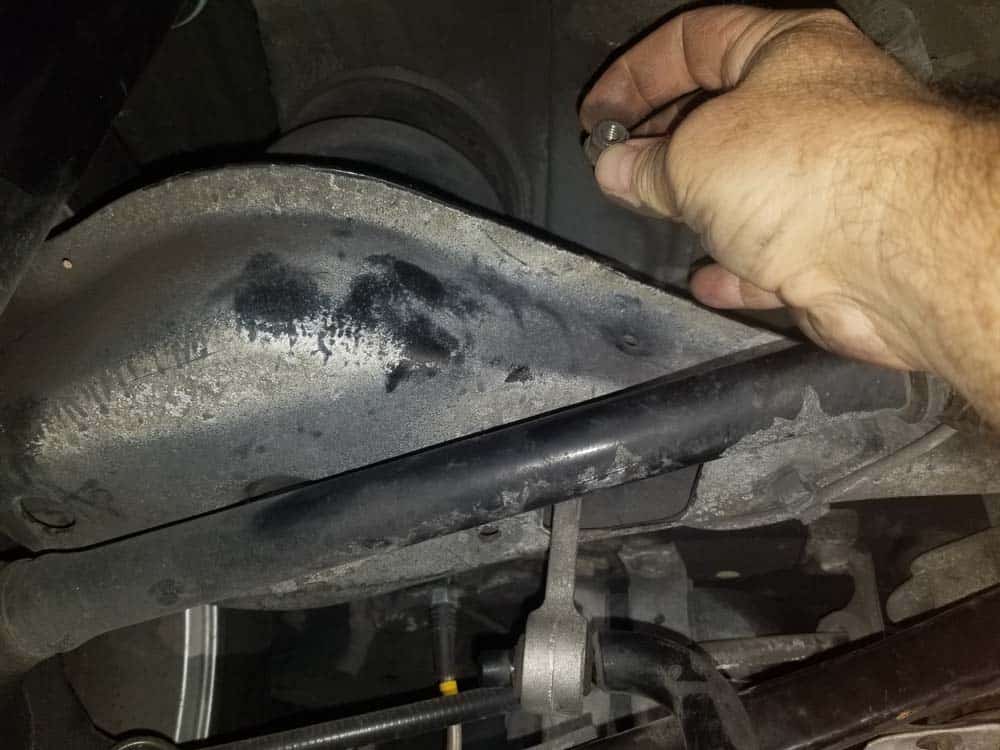
- In order to use the tool correctly, remove the two 10mm screws anchoring the exhaust heat shield to the bottom of the car. Bend the heat shield down and out of the way.
- Install the 50mm cup on the threaded rod and insert through the bushing from the front of the differential carrier.
- Install the 46mm plunger on the end of the threaded rod on the backside of the bushing.
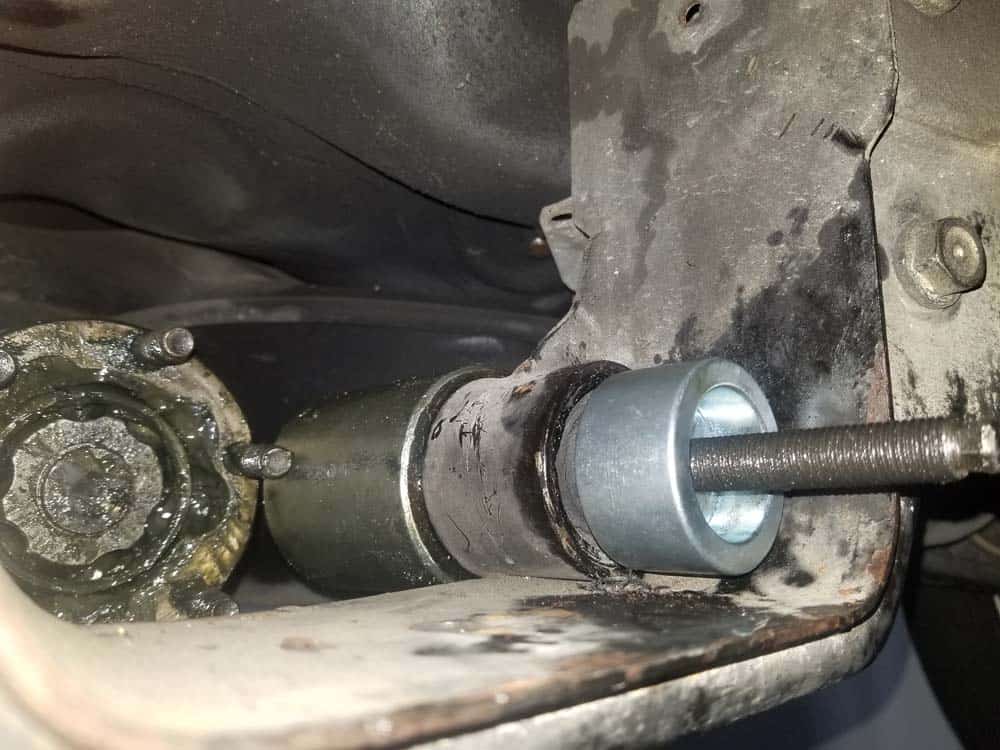
- Turn the threaded rod clockwise with a socket wrench to pull the 46mm plunger and bushing out of its housing. At first you will be met with resistance as the bushing is pulled out of its housing. Once the bushing breaks free it will easily pull out with the tool.
Section 5 - Installing New Polyurethane Bushings
This article was written under the assumption that the reader will be conducting a BMW E36 bushing replacement to upgrade to polyurethane performance track bushings. Install your new polyurethane bushings per the manufacturer's instructions included with the parts. Since we are installing Powerflex Black Series bushings, the following instructions are specific for that brand only.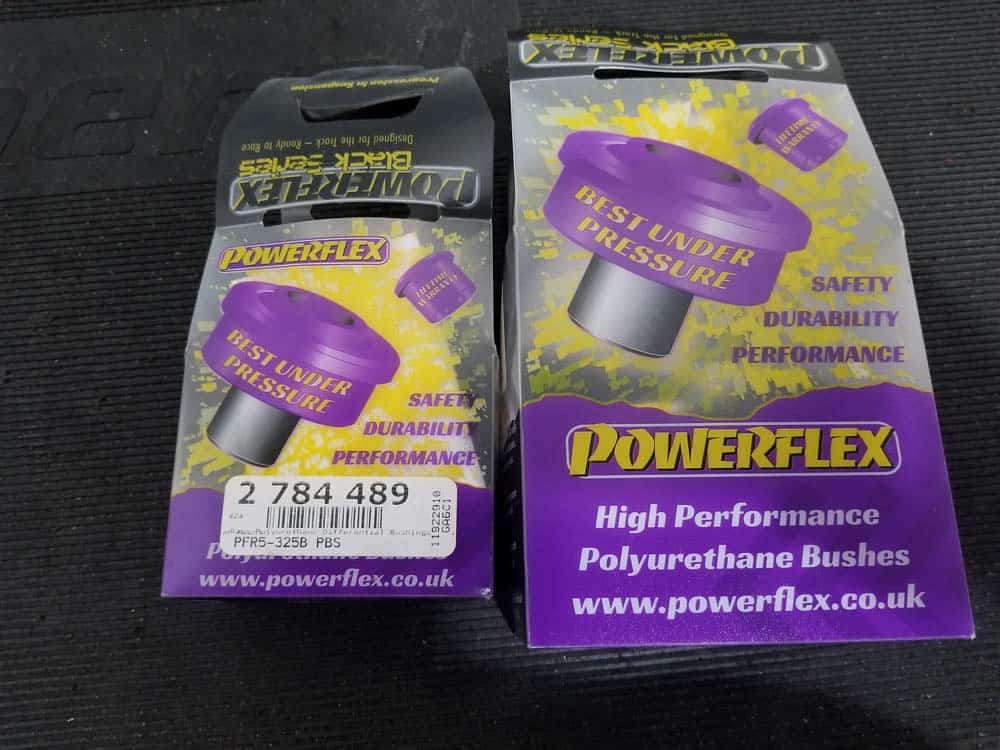
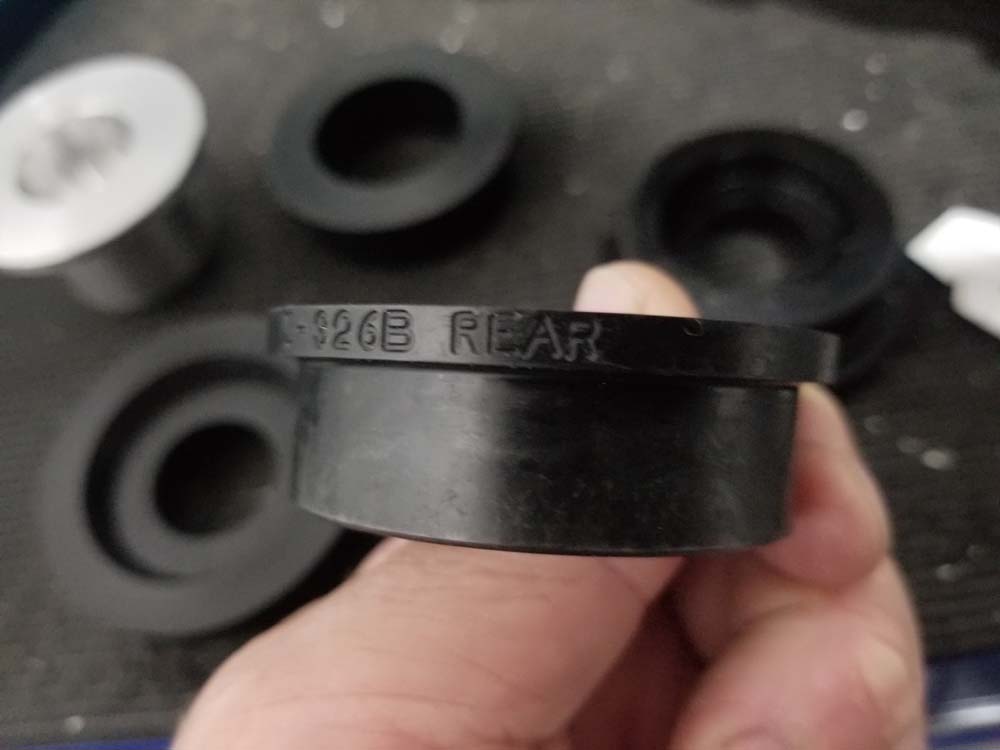
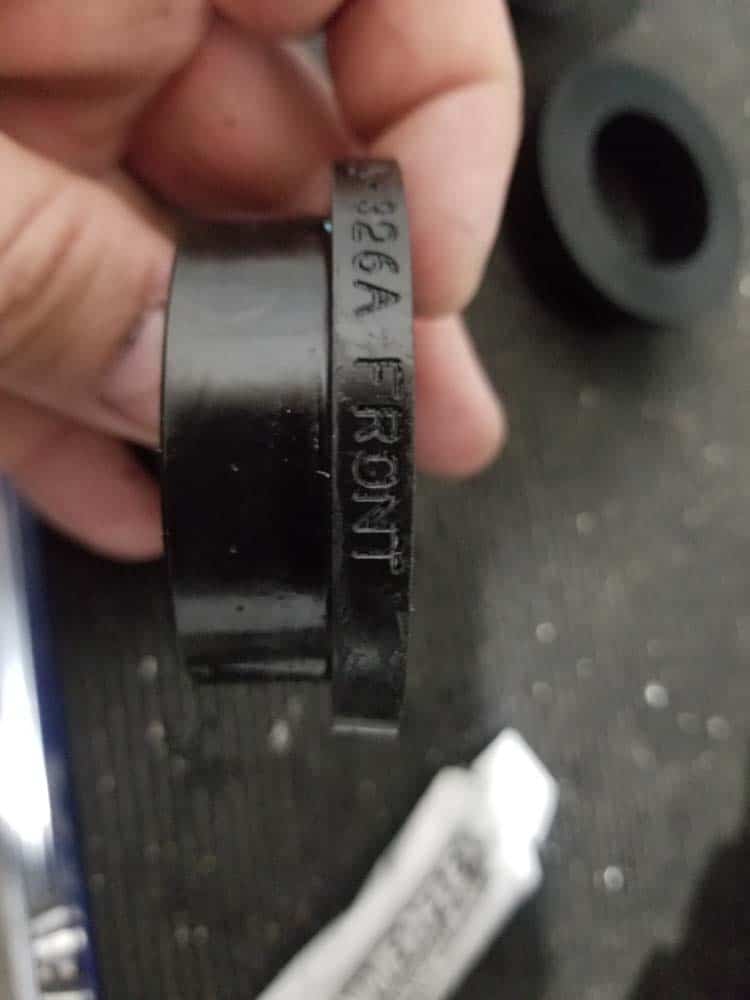
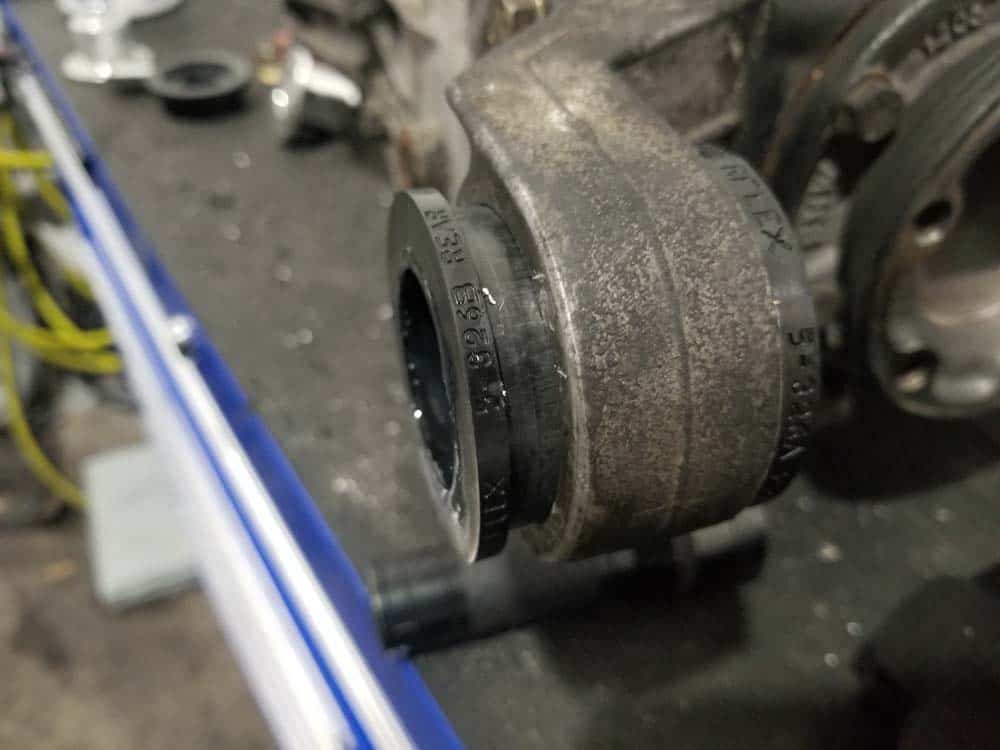
- Starting with the differential cover, identify the front and rear bushing. The letters “front” and “rear” are embossed on the Powerflex bushing so you don’t install them backwards.
- Press the front bushing in all the way with your fingers.
- Next, press the rear bushing in about ¼ way. DO NOT press the bushing in all the way into its housing...you won’t be able to get the metal sleeve in if you do.
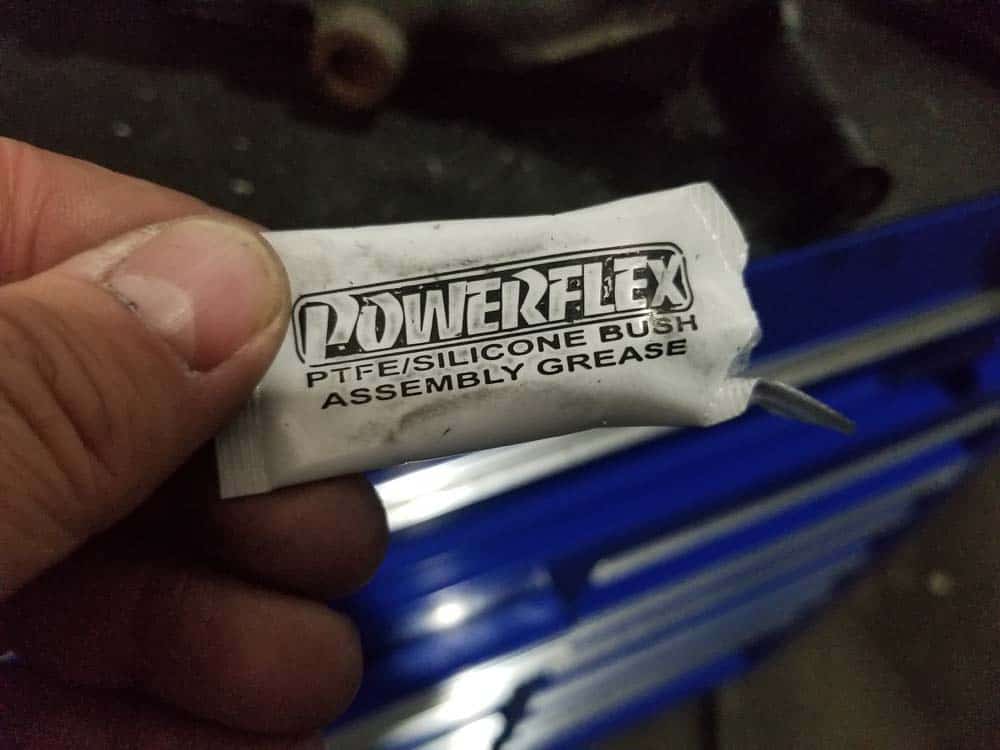
- Apply the supplied assembly lube liberally to the bore and themetal sleeve. If your bushings didnt come with assembly lube, you can use a good high grade waterproof marine grease.
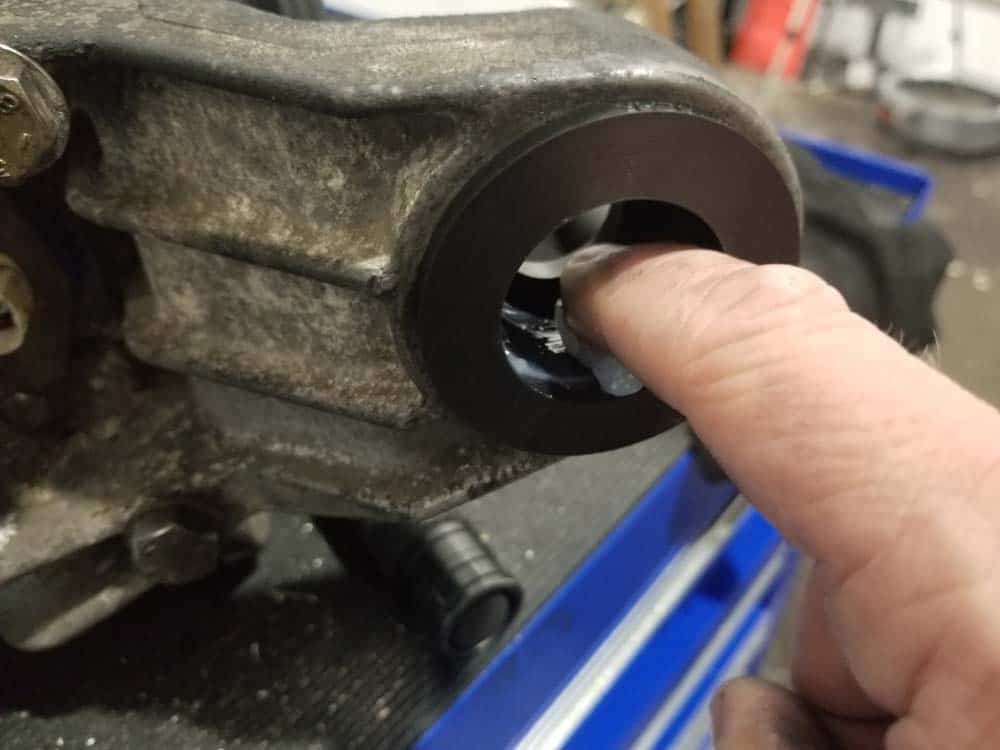
- Insert the metal sleeve into the bushing. Use a rubber mallet to gently pound the bushing into the housing.
- Repeat on the other differential cover bushing.
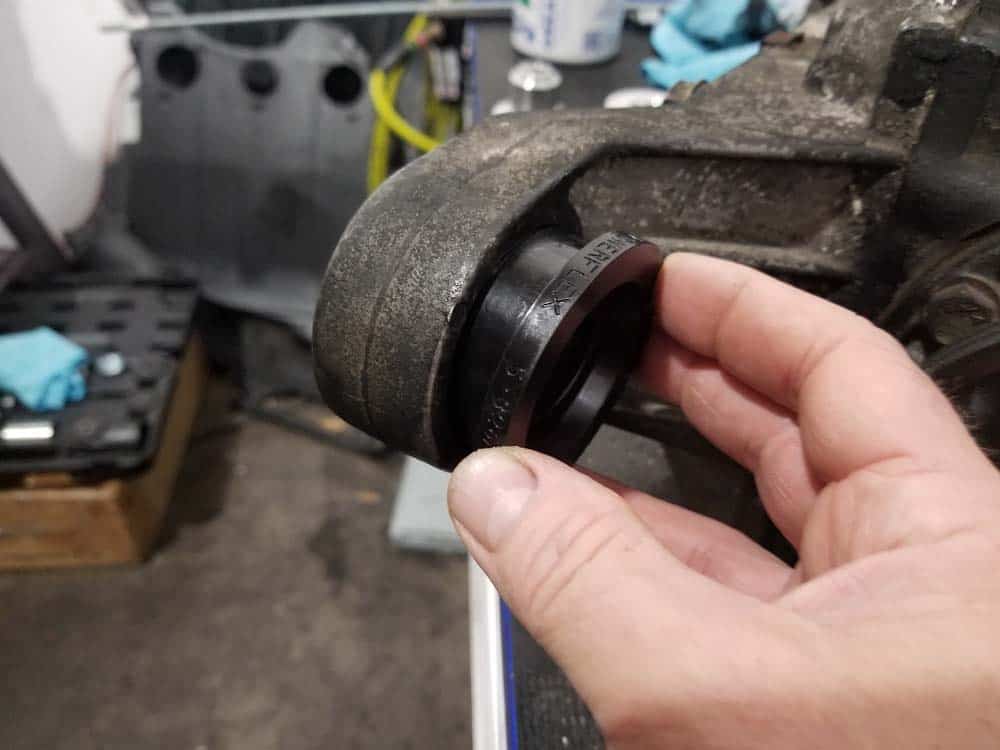
- Moving to the front of the differential carrier, push the polyurethane bushing all the way into the housing.
- Apply assembly lube liberally to the bore of the bushing and to the metal sleeve.
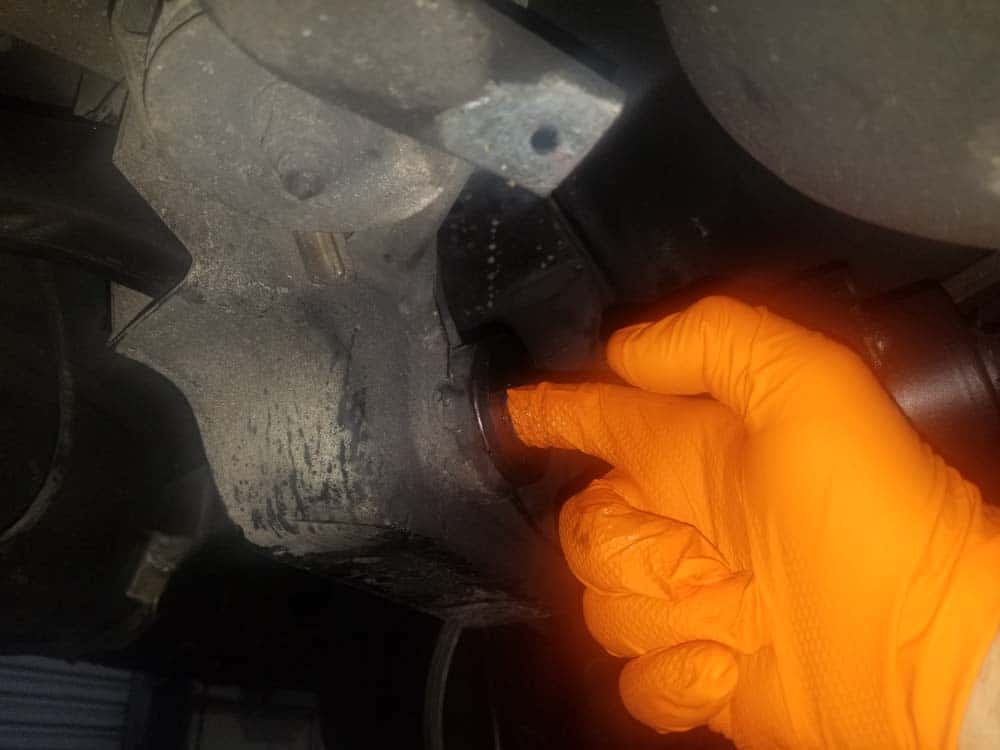
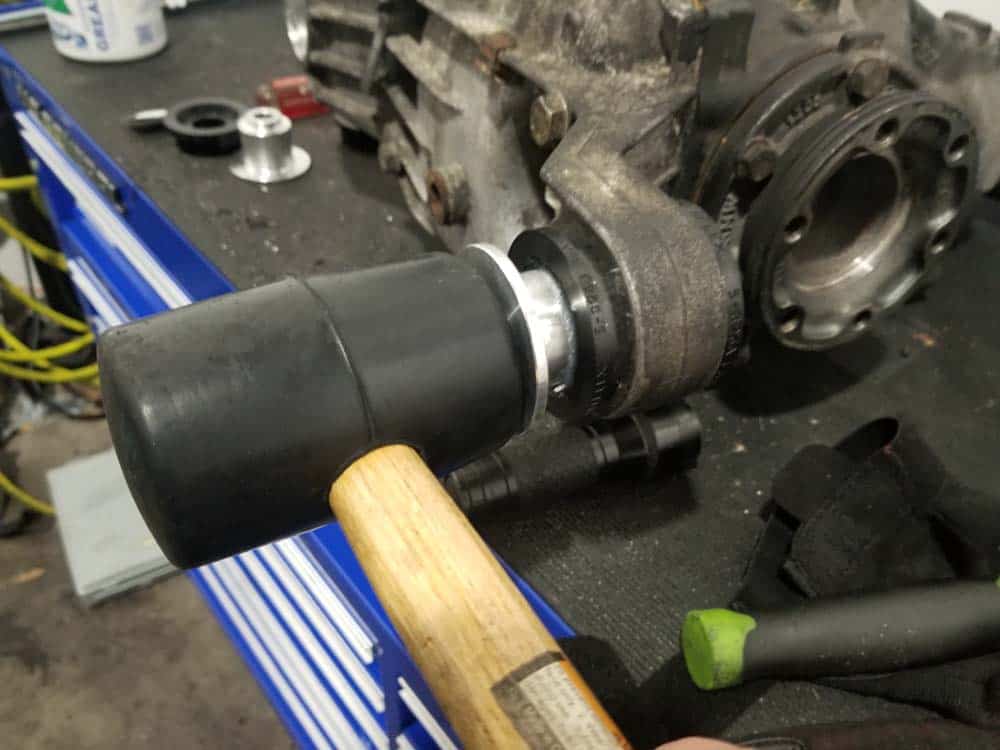
- Insert the metal sleeve into bore of the bushing. Use a rubber mallet to lightly tap it in if you can’t do it by hand.
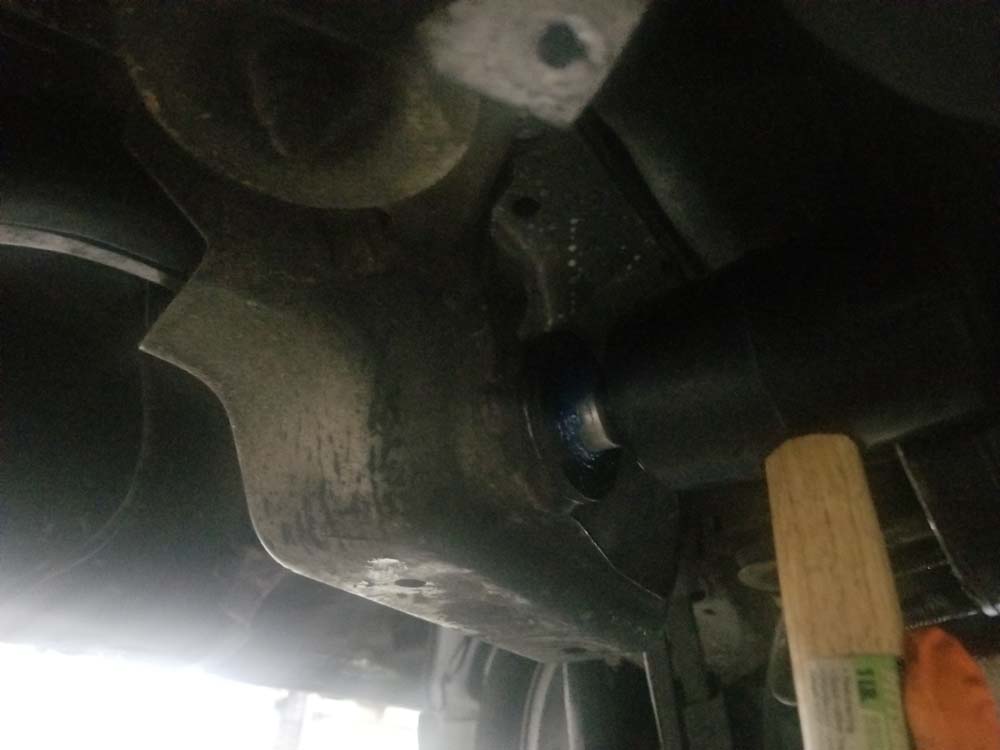
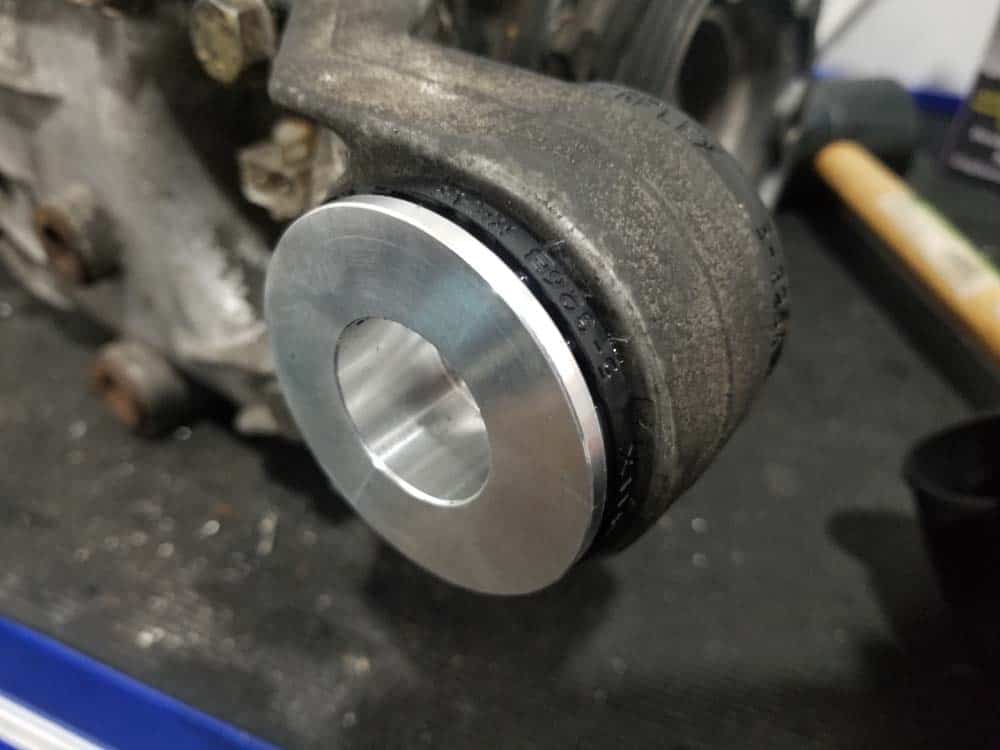
- Don’t forget that the Powerflex differential carrier bushing comes with a large steel washer that will be installed with the bolt. Put it in a safe place until reassembly.

Section 6 - BMW E36 Differential Bushing Replacement: Reassembling the Vehicle
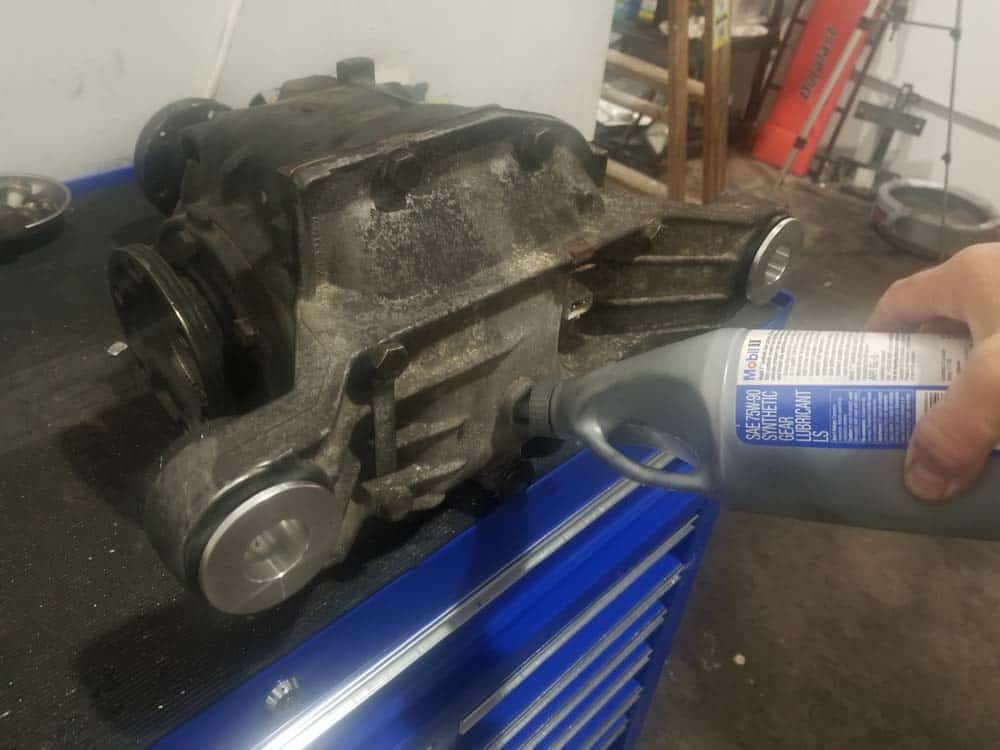
Reassembly of the vehicle is fairly straightforward. One of the steps of concern is reinstalling the drive axles to the differential. This is a notoriously difficult step for several reasons; space under the vehicle is limited making it difficult to torque the bolts, the rear wheels need to be turned to get to the bolts to torque them and the Torx bolt heads have a habit of stripping. There is unfortunately not a shortcut to any of this...you will have to suffer through it like the rest of us. The bolts (especially the first one) are difficult to get in the holes at times and it seems like the rear wheels are never in the right position to get a torque wrench on them. Take your time and try and find a helper for this step. If you get frustrated, take a break and finish later.- If you need to change your differential fluid, now is a great time to do it while the final drive is on your bench. The E36 differential takes 1 qt. of 75w-90 gear lubricant. It's always a good idea to change the fill and drain plug crush washers while you're at it. Torque the drain and fill plug to 72 Nm (52 ft-lb).
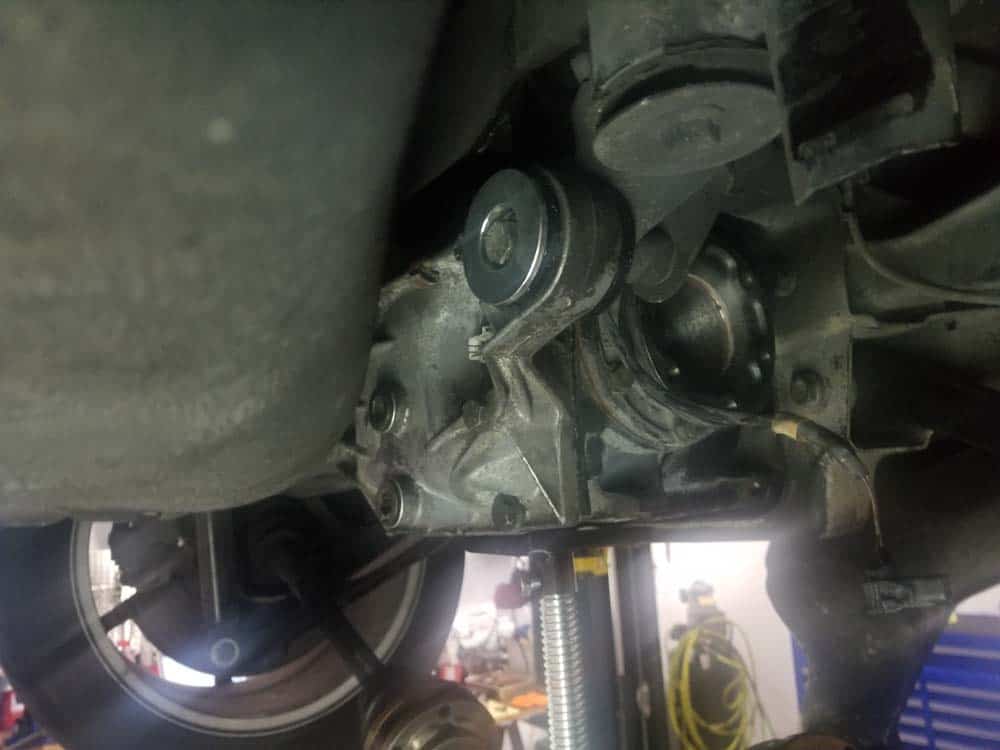
- Put the differential back into its carrier. Guide the drive shaft back into the drive flange on the front of the differential. All of this is best done with a set of extra hands. The differential is heavy.
- Raise the differential with a floor jack and install the two new rear mounting bolts about ¾ way. Do not tighten. ***VERY IMPORTANT - if installing Powerflex bushings, you will need an 18mm thin walled socket to tighten the rear mountingt bolts. A standard 18mm socket will not fit in the bushing.
- Install the front mounting bolt finger tight. Sometimes this bolt is a little tricky...try pushing up on the drive shaft to get it in the hole and while tightening. Don't forget the washer if installing Powerflex bushings!

- Tighten all of the bolts and torque to the following values: front mounting bolt 95 Nm (70 ft-lb), rear mounting bolts 77 Nm (57 ft-lb).
- Reinstall the speedometer electrical connector.
- Reinstall the exhaust heat shield.
- Reinstall the drive axles to the differential. Per our discussion at the beginning of this section, this is the most difficult part of the assembly. Don’t forget the reinforcement plates. Torque the bolts to one of the following values: M10 bolts 100 Nm (74 ft-lb), M8 bolts 64 Nm (47 ft-lb).
Even on our lift this is a difficult step. Use patience when doing this in your garage on your back. - Install the driveshaft nuts and use a 13mm crows foot to torque them to one of the below values. ***Note - a "ribbed" nut has small rib marks around the inside of its flange. A "compressed nut" is a self-locking nut. We have supplied links below to the different nuts if you are not sure which ones you have. M8 nuts - 32 Nm (23 ft-lb) M10 nut (ribbed) - 80 Nm (59 ft-lb) M10 nut (compressed) - 60 Nm (44 ft-lb)
- Reinstall the sway bar.
- Reinstall the cat back exhaust.
BMW E36 Differential Bushing Replacement Finished