")
Affiliate link disclosure – The BMW Repair Guide uses affiliate links in their site. For more information on affiliate links, please click here.
Repair Summary
This article gives detailed instructions on replacing the rear subwoofer speakers in a BMW E64 vehicle. Even though we used a 2005 645ci to perform this repair, this article can be applied to any BMW E64 6 series convertible with minor modifications to the repair steps.
See all vehicles this article applies to
E63 6 Series M6
E63 6 Series 630i
E63 6 Series 645Ci
E63 6 Series 650i
E64 6 Series M6
E64 6 Series 645Ci
E64 6 Series 650i
E64 6 Series 630i
A 6 series subwoofer speaker replacement on an E64 convertible requires removing the rear quarter trim panels. These speakers are known to fail under high use conditions.
"Because you know I'm all about that bass,
'Bout that bass, no treble" - From the album Title by Meghan Trainor
Yep...it's all about that bass these days. And even though Meghan is metaphorically referring to her derrière in this song, the words still resonate with most BMW owners...turn up the bass and enjoy the ride.
Unfortunately, many BMW owners are turning the bass up a little too much. This increased workload, especially on the vehicle's subwoofers, can cause the speaker's cone to separate from the surrounding frame producing an obnoxious "rattling" or "buzz". Sometimes the rattling or buzz is so bad, you will need to lower the system's bass tone settings just to keep yourself from scratching your eyes out. Unfortunately for BMW E64 6 series owners, one of the first speakers to blow is the vehicle's subwoofers.
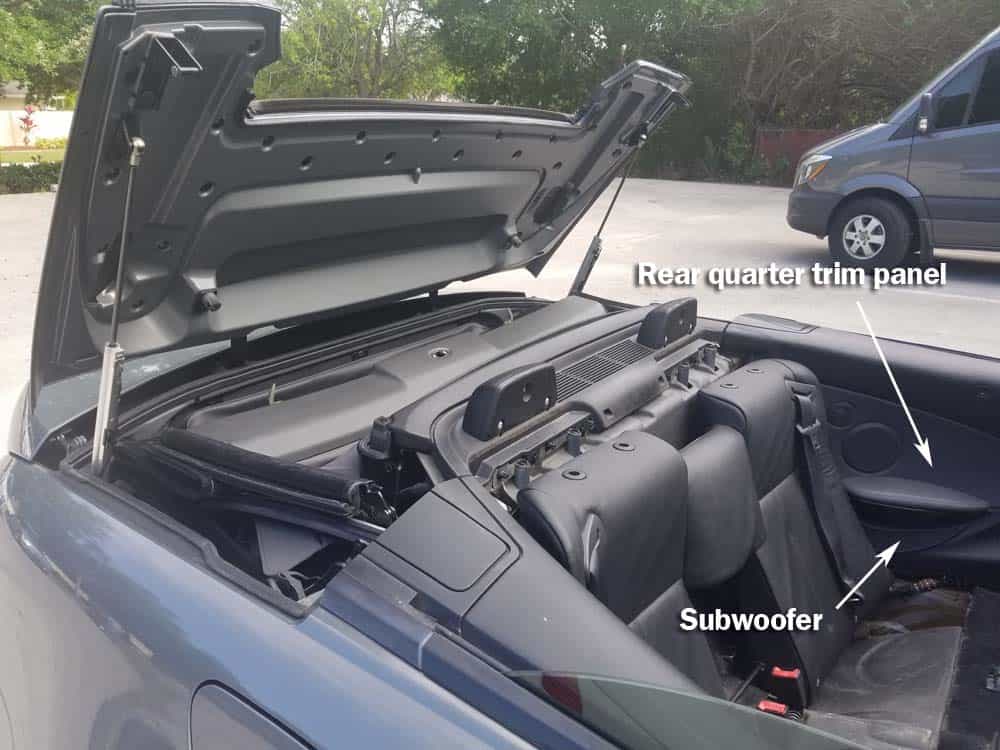
A BMW 6 series subwoofer replacement for the convertible (E64) model is different because the rear speakers are located in the side quarter panels...not in the parcel tray (rear deck). Since the convertible top takes up a huge chunk of space when stowed away, there is no room in the trunk for subwoofers. Therefore to replace damaged subwoofers, the rear passenger side panels (aka - rear quarter trim panels) must be removed. We know, that's a mouthful. The following image will give you a better understanding:

In order to do a BMW 6 series subwoofer replacement, the rear seat must be removed. Believe it or not, this is the simplest part of the repair. Just remember in order to do this repair, the convertible top must be retracted and the convertible top lid in the "open" position. So if you are planning on doing this repair outdoors, make sure it is not going to rain.


View the detailed parts diagram for this repair.
Includes detailed part diagrams, part numbers and links to purchase all of the required components needed to complete this repair.

Before starting this repair, you must have the following required parts.
Section 1 - Rear Quarter Panel Trim Removal
- Retract the convertible top leaving the convertible top lid in the raised position. Note that you will need to keep the engine running in order to keep the lid open (it slowly closes automatically with engine off).
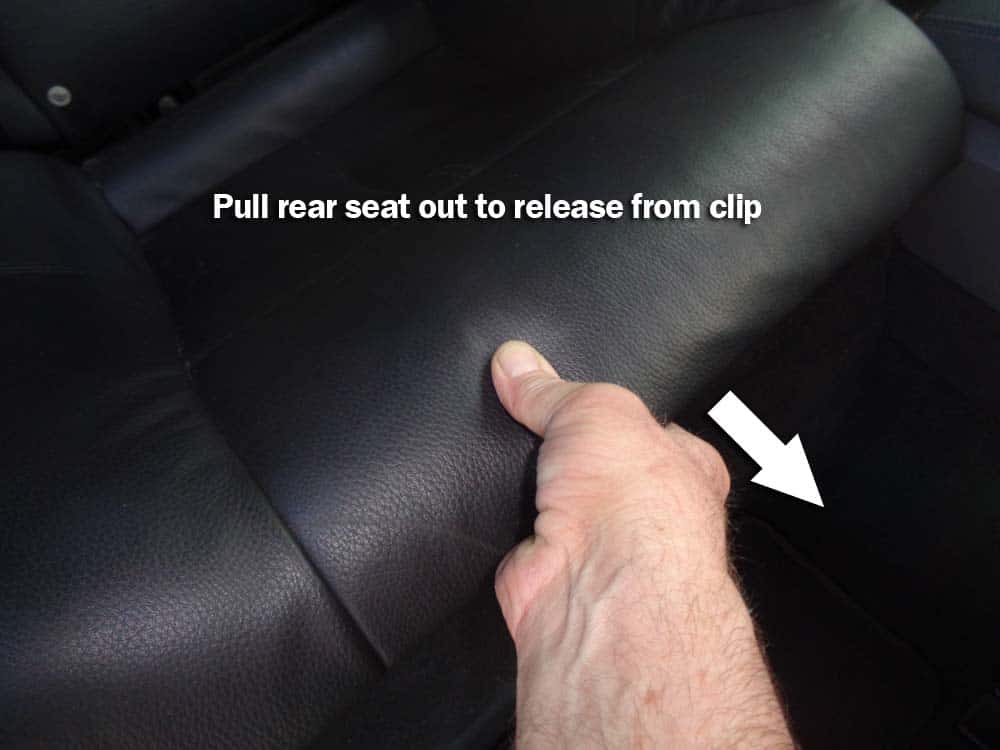
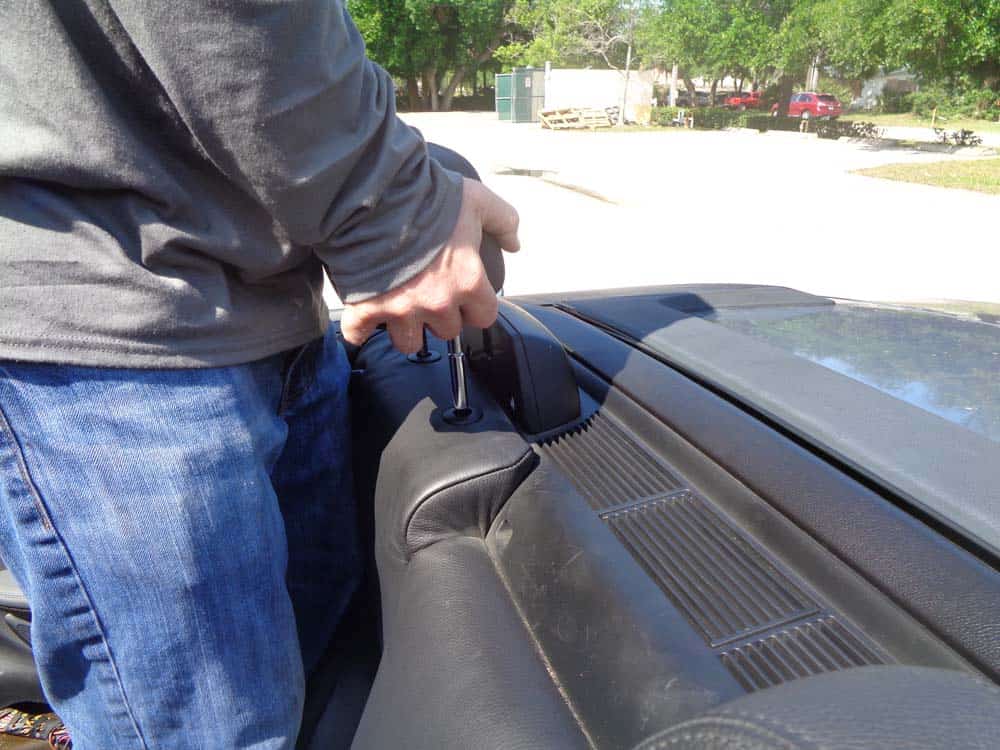
- Grasp the front of the rear seat and pull out and up to release from floor of vehicle. Remove seat from car.
 subwoofer replacement" width="1000" height="750" />
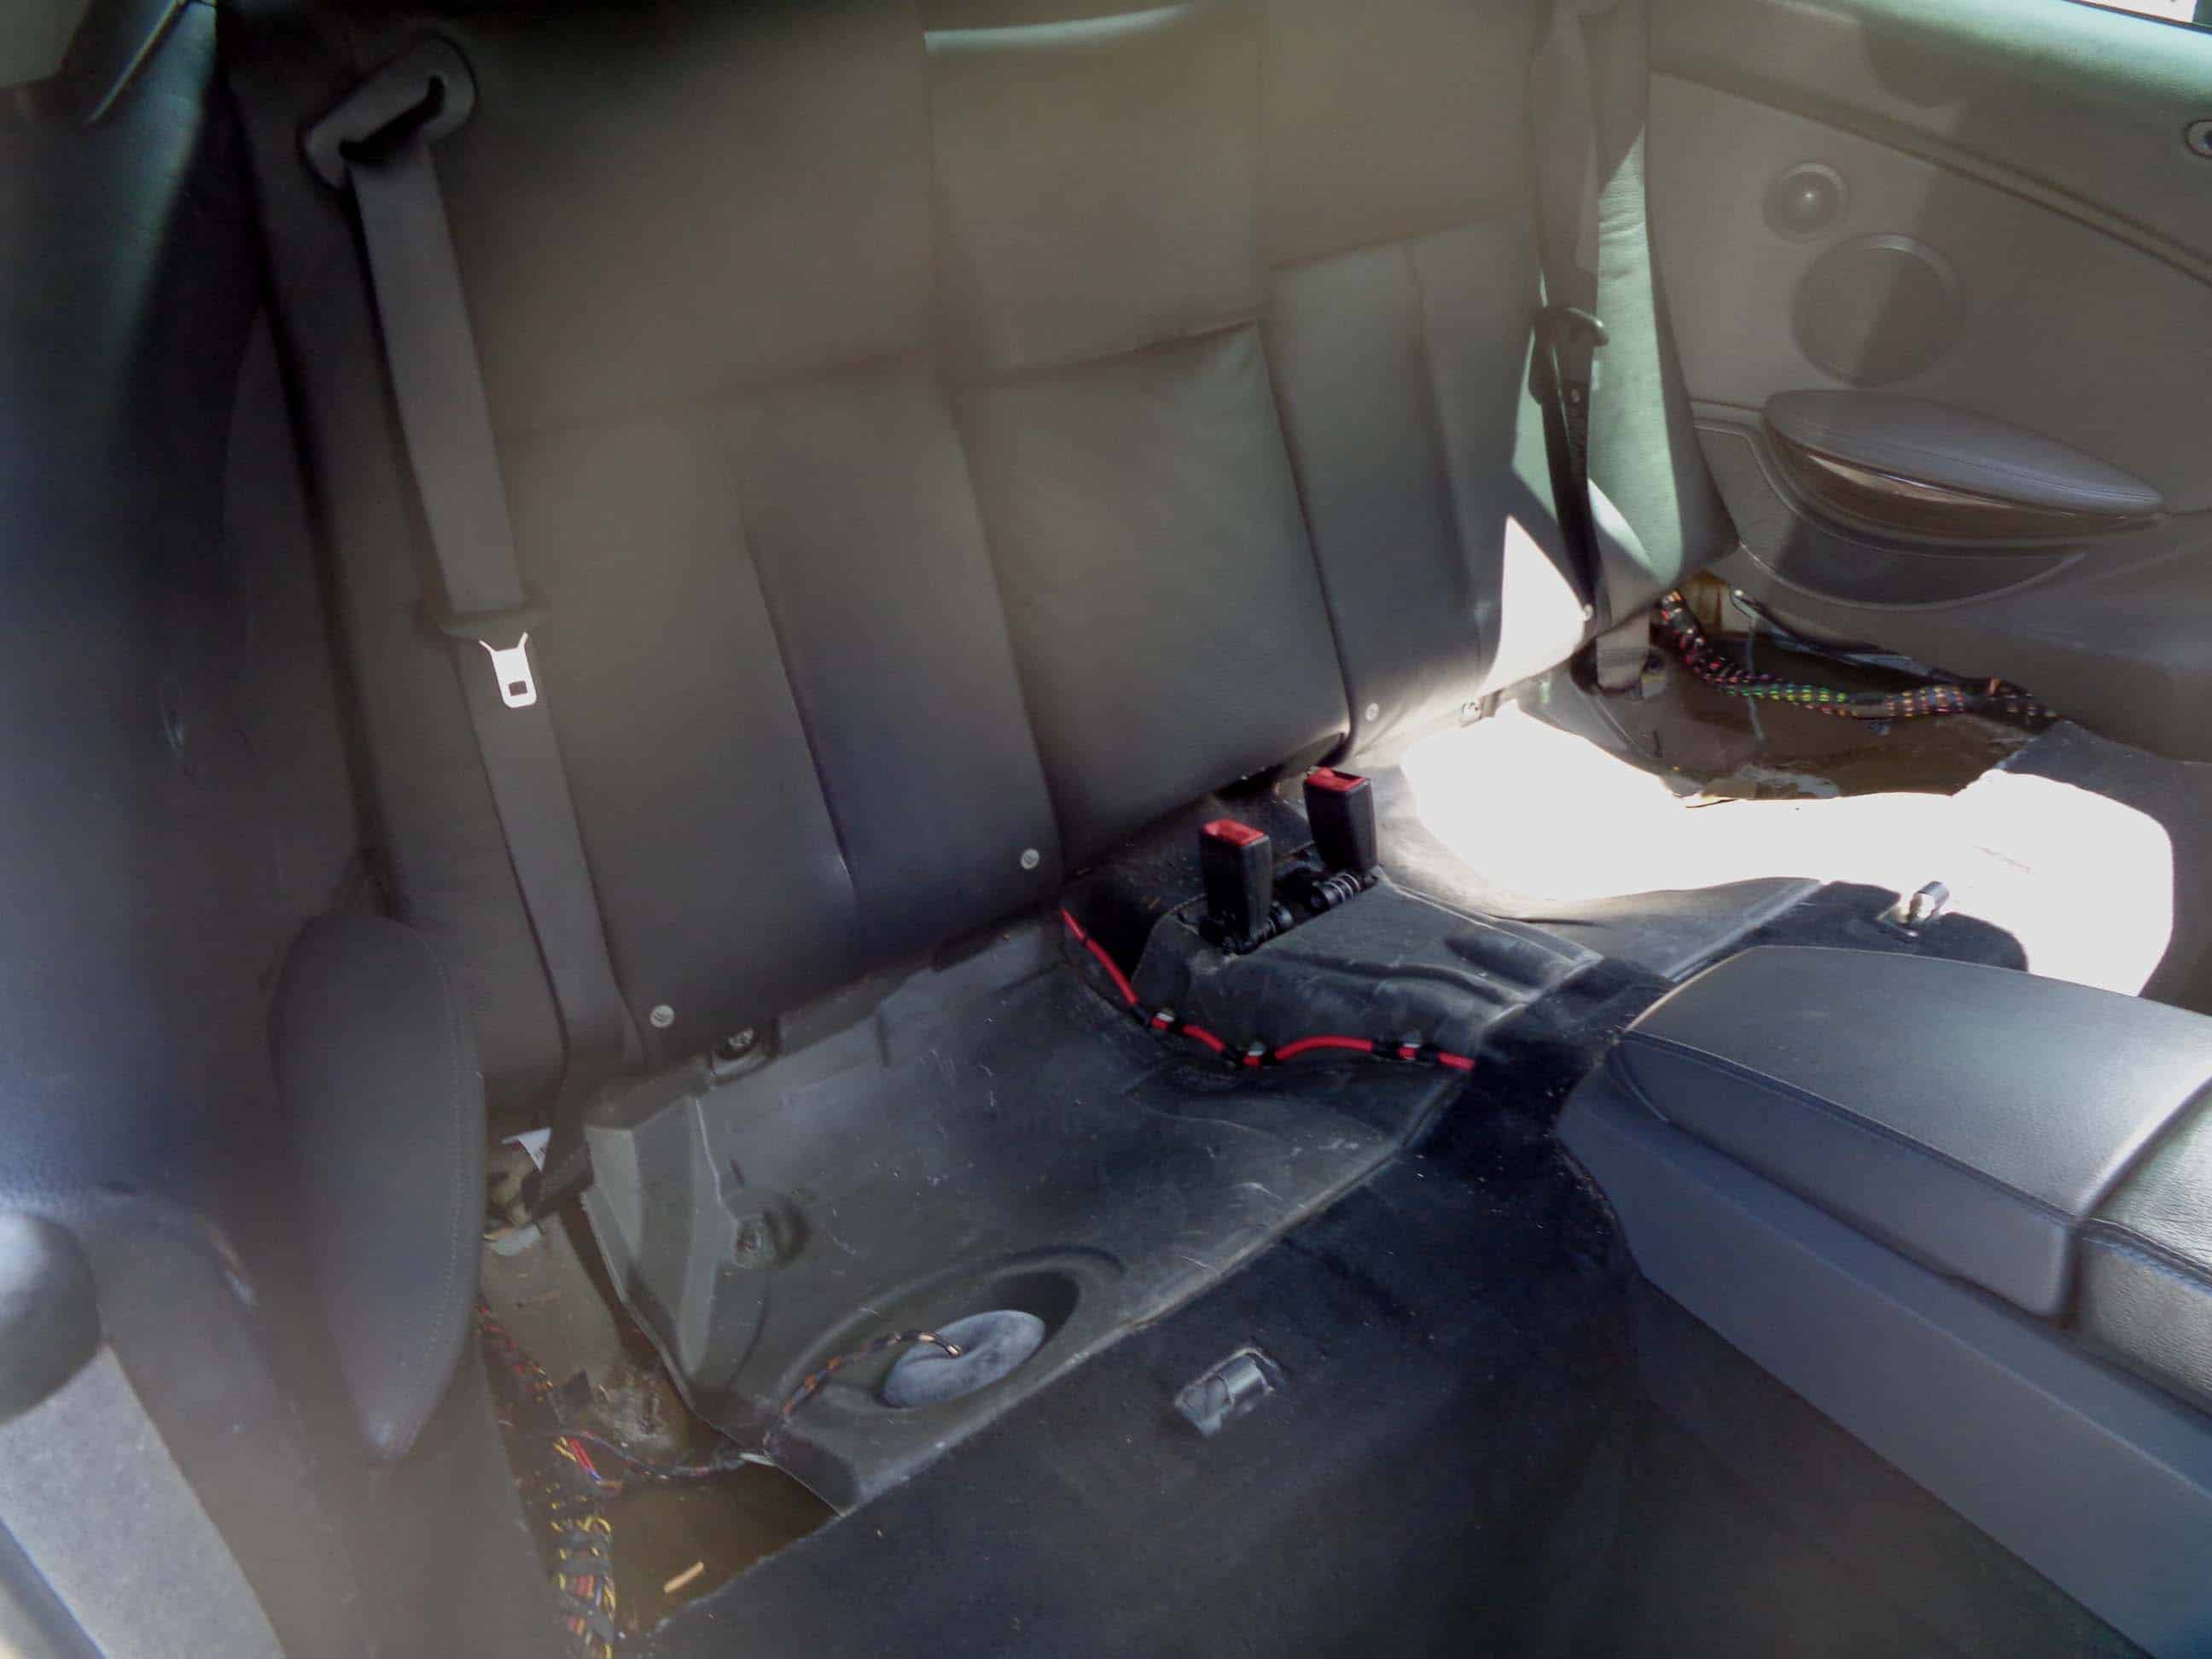
- Use a 10mm nut driver to remove the two nuts securing bottom of seat back to vehicle.
- Remove the two headrests by grasping with both hands and pulling up until they release from seat back (there are no buttons to push...they just pull out.)
 subwoofer replacement" width="1000" height="750" />
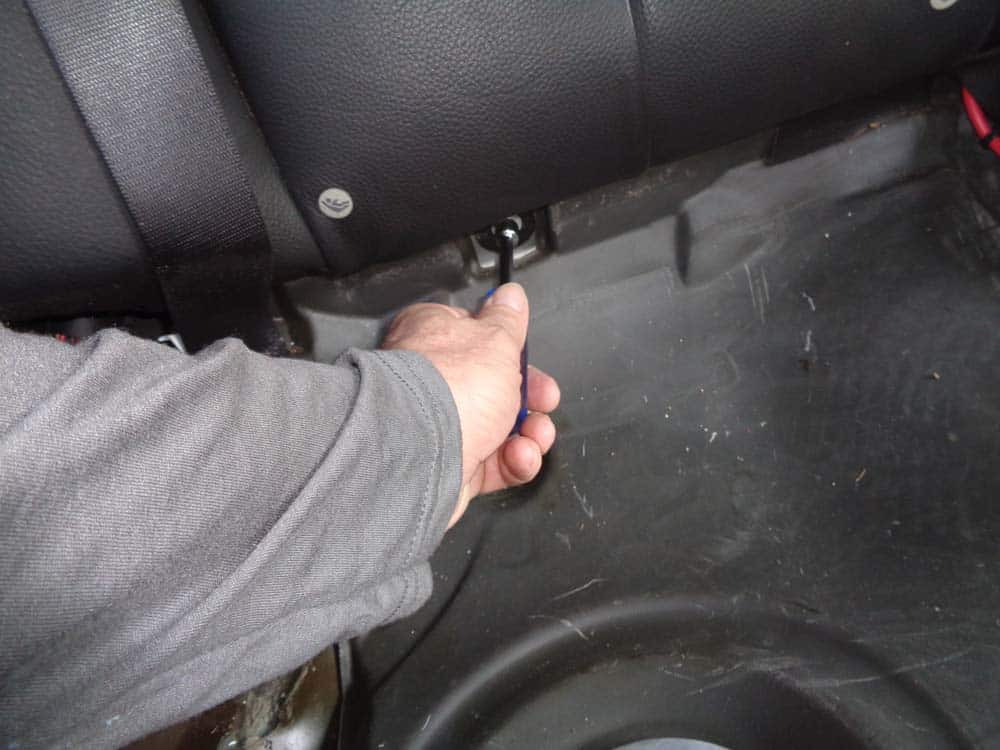
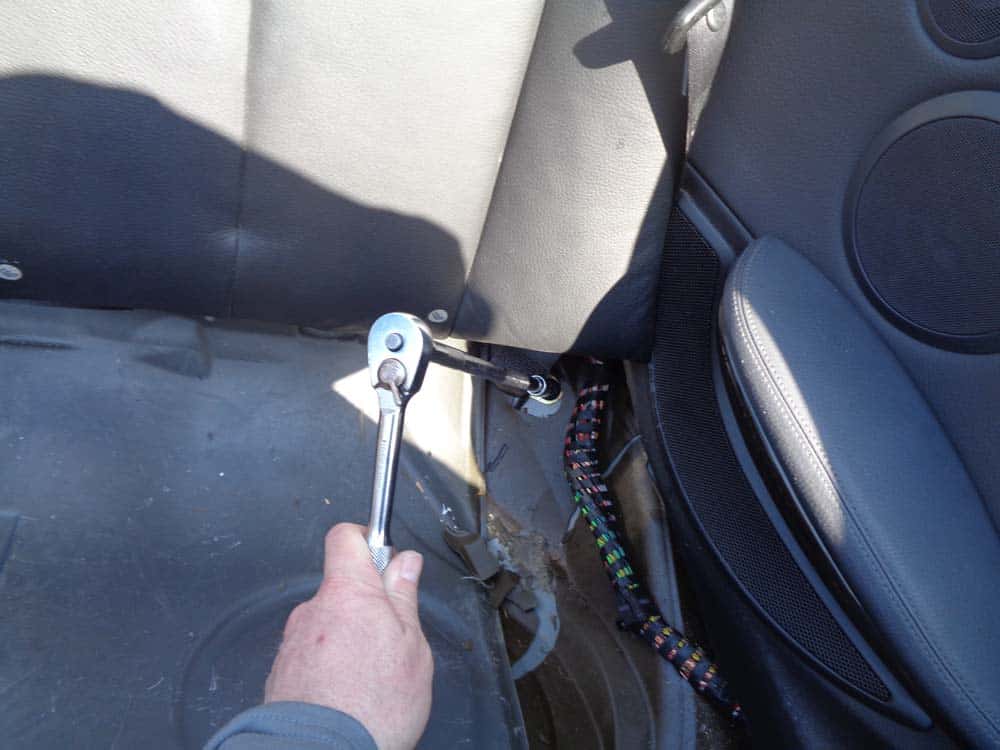
 - Use a T50 torx socket to remove the two lower seat belt bolts.
 subwoofer replacement" width="1000" height="750" />
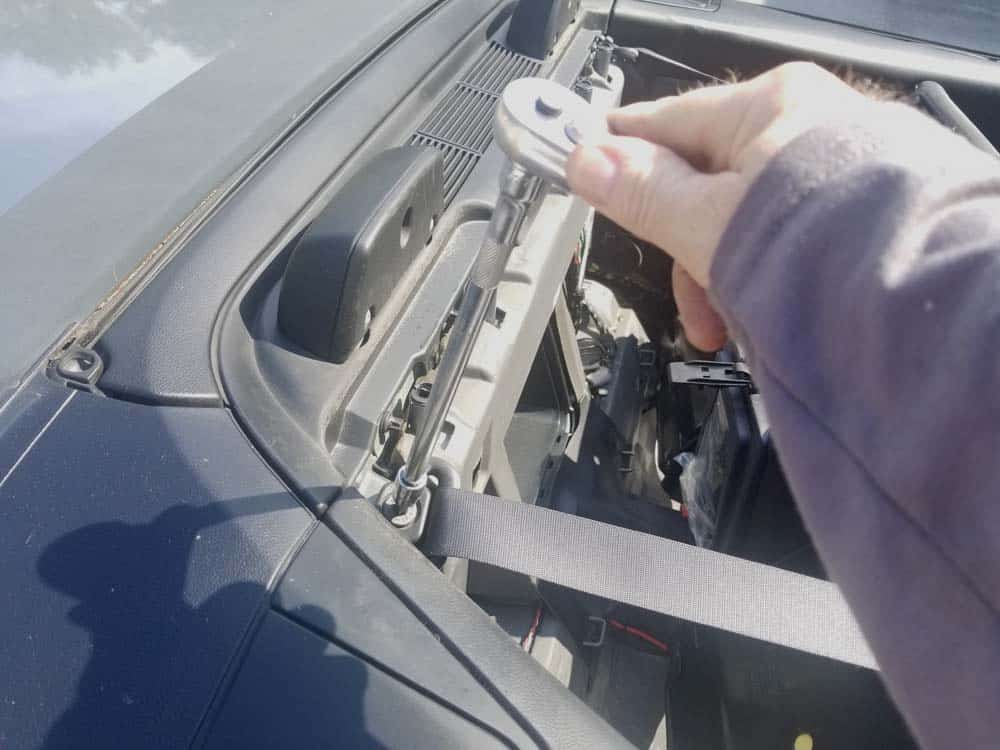
 - Use a T50 torx bit to remove the two upper seat belt bolts.
 subwoofer replacement" width="1000" height="750" />
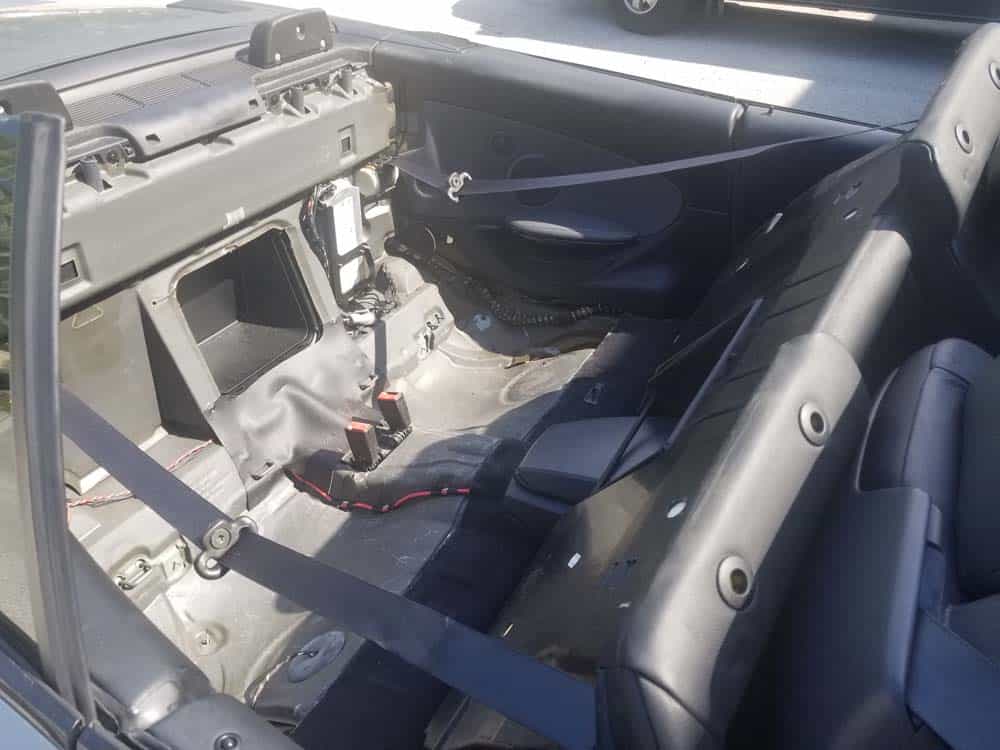
 - Pull the seat back out of the way.
 subwoofer replacement" width="1000" height="750" />
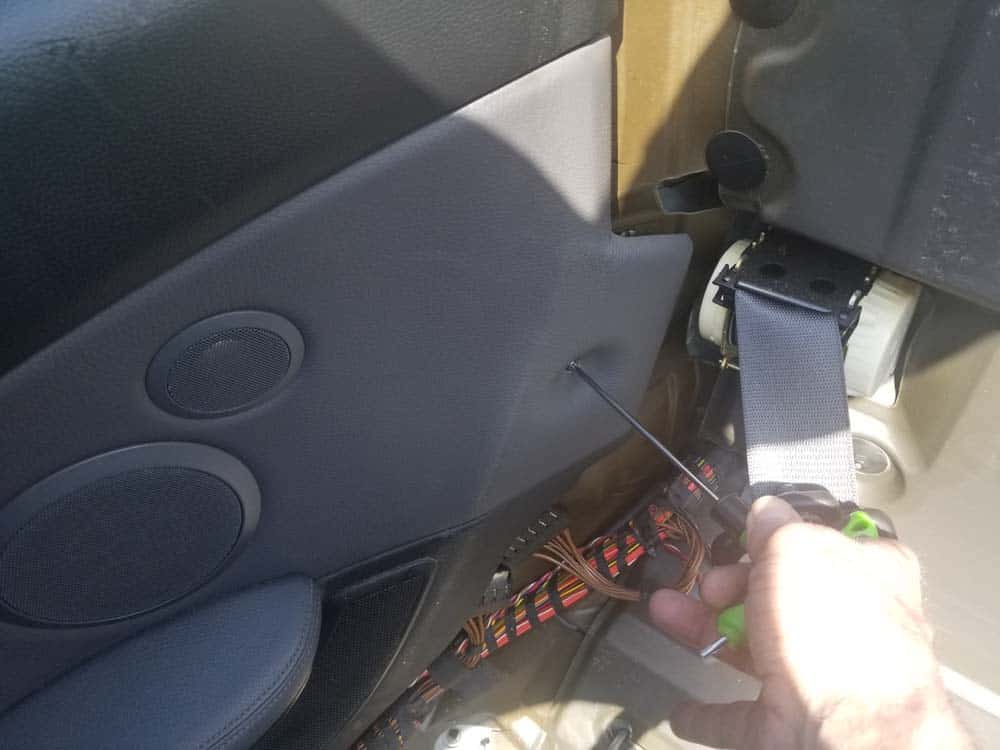
 - Remove the T15 screw from rear quarter trim panel as shown in image below.
 subwoofer replacement" width="1000" height="750" />
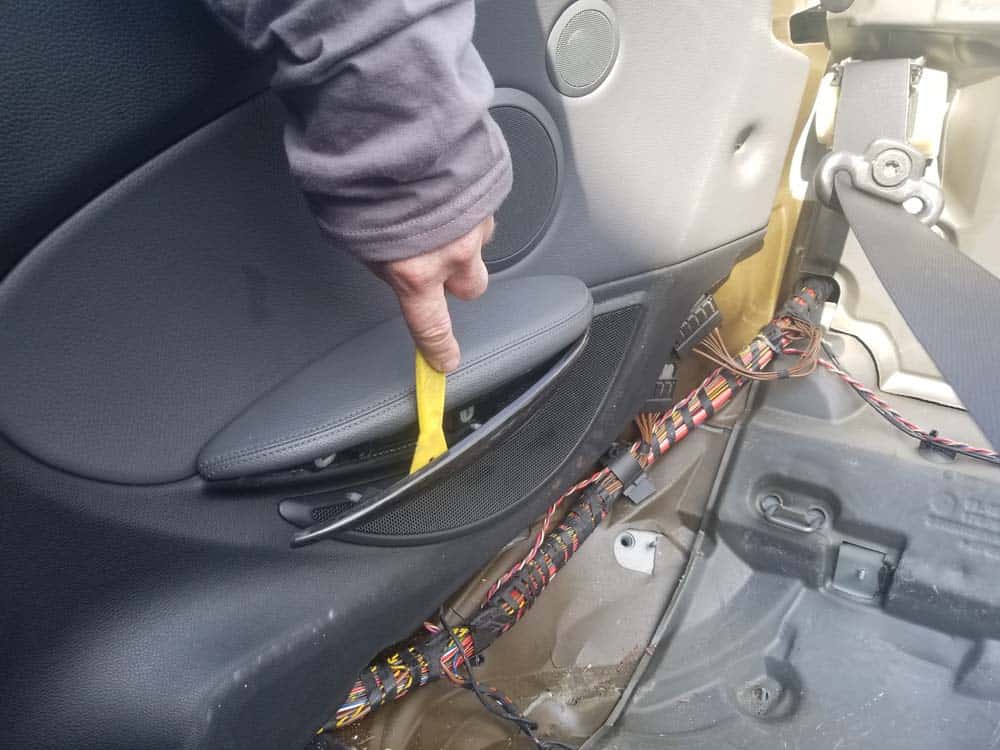
 - Remove the armrest trim moulding with a plastic trim removal tool.
 subwoofer replacement" width="1000" height="750" />
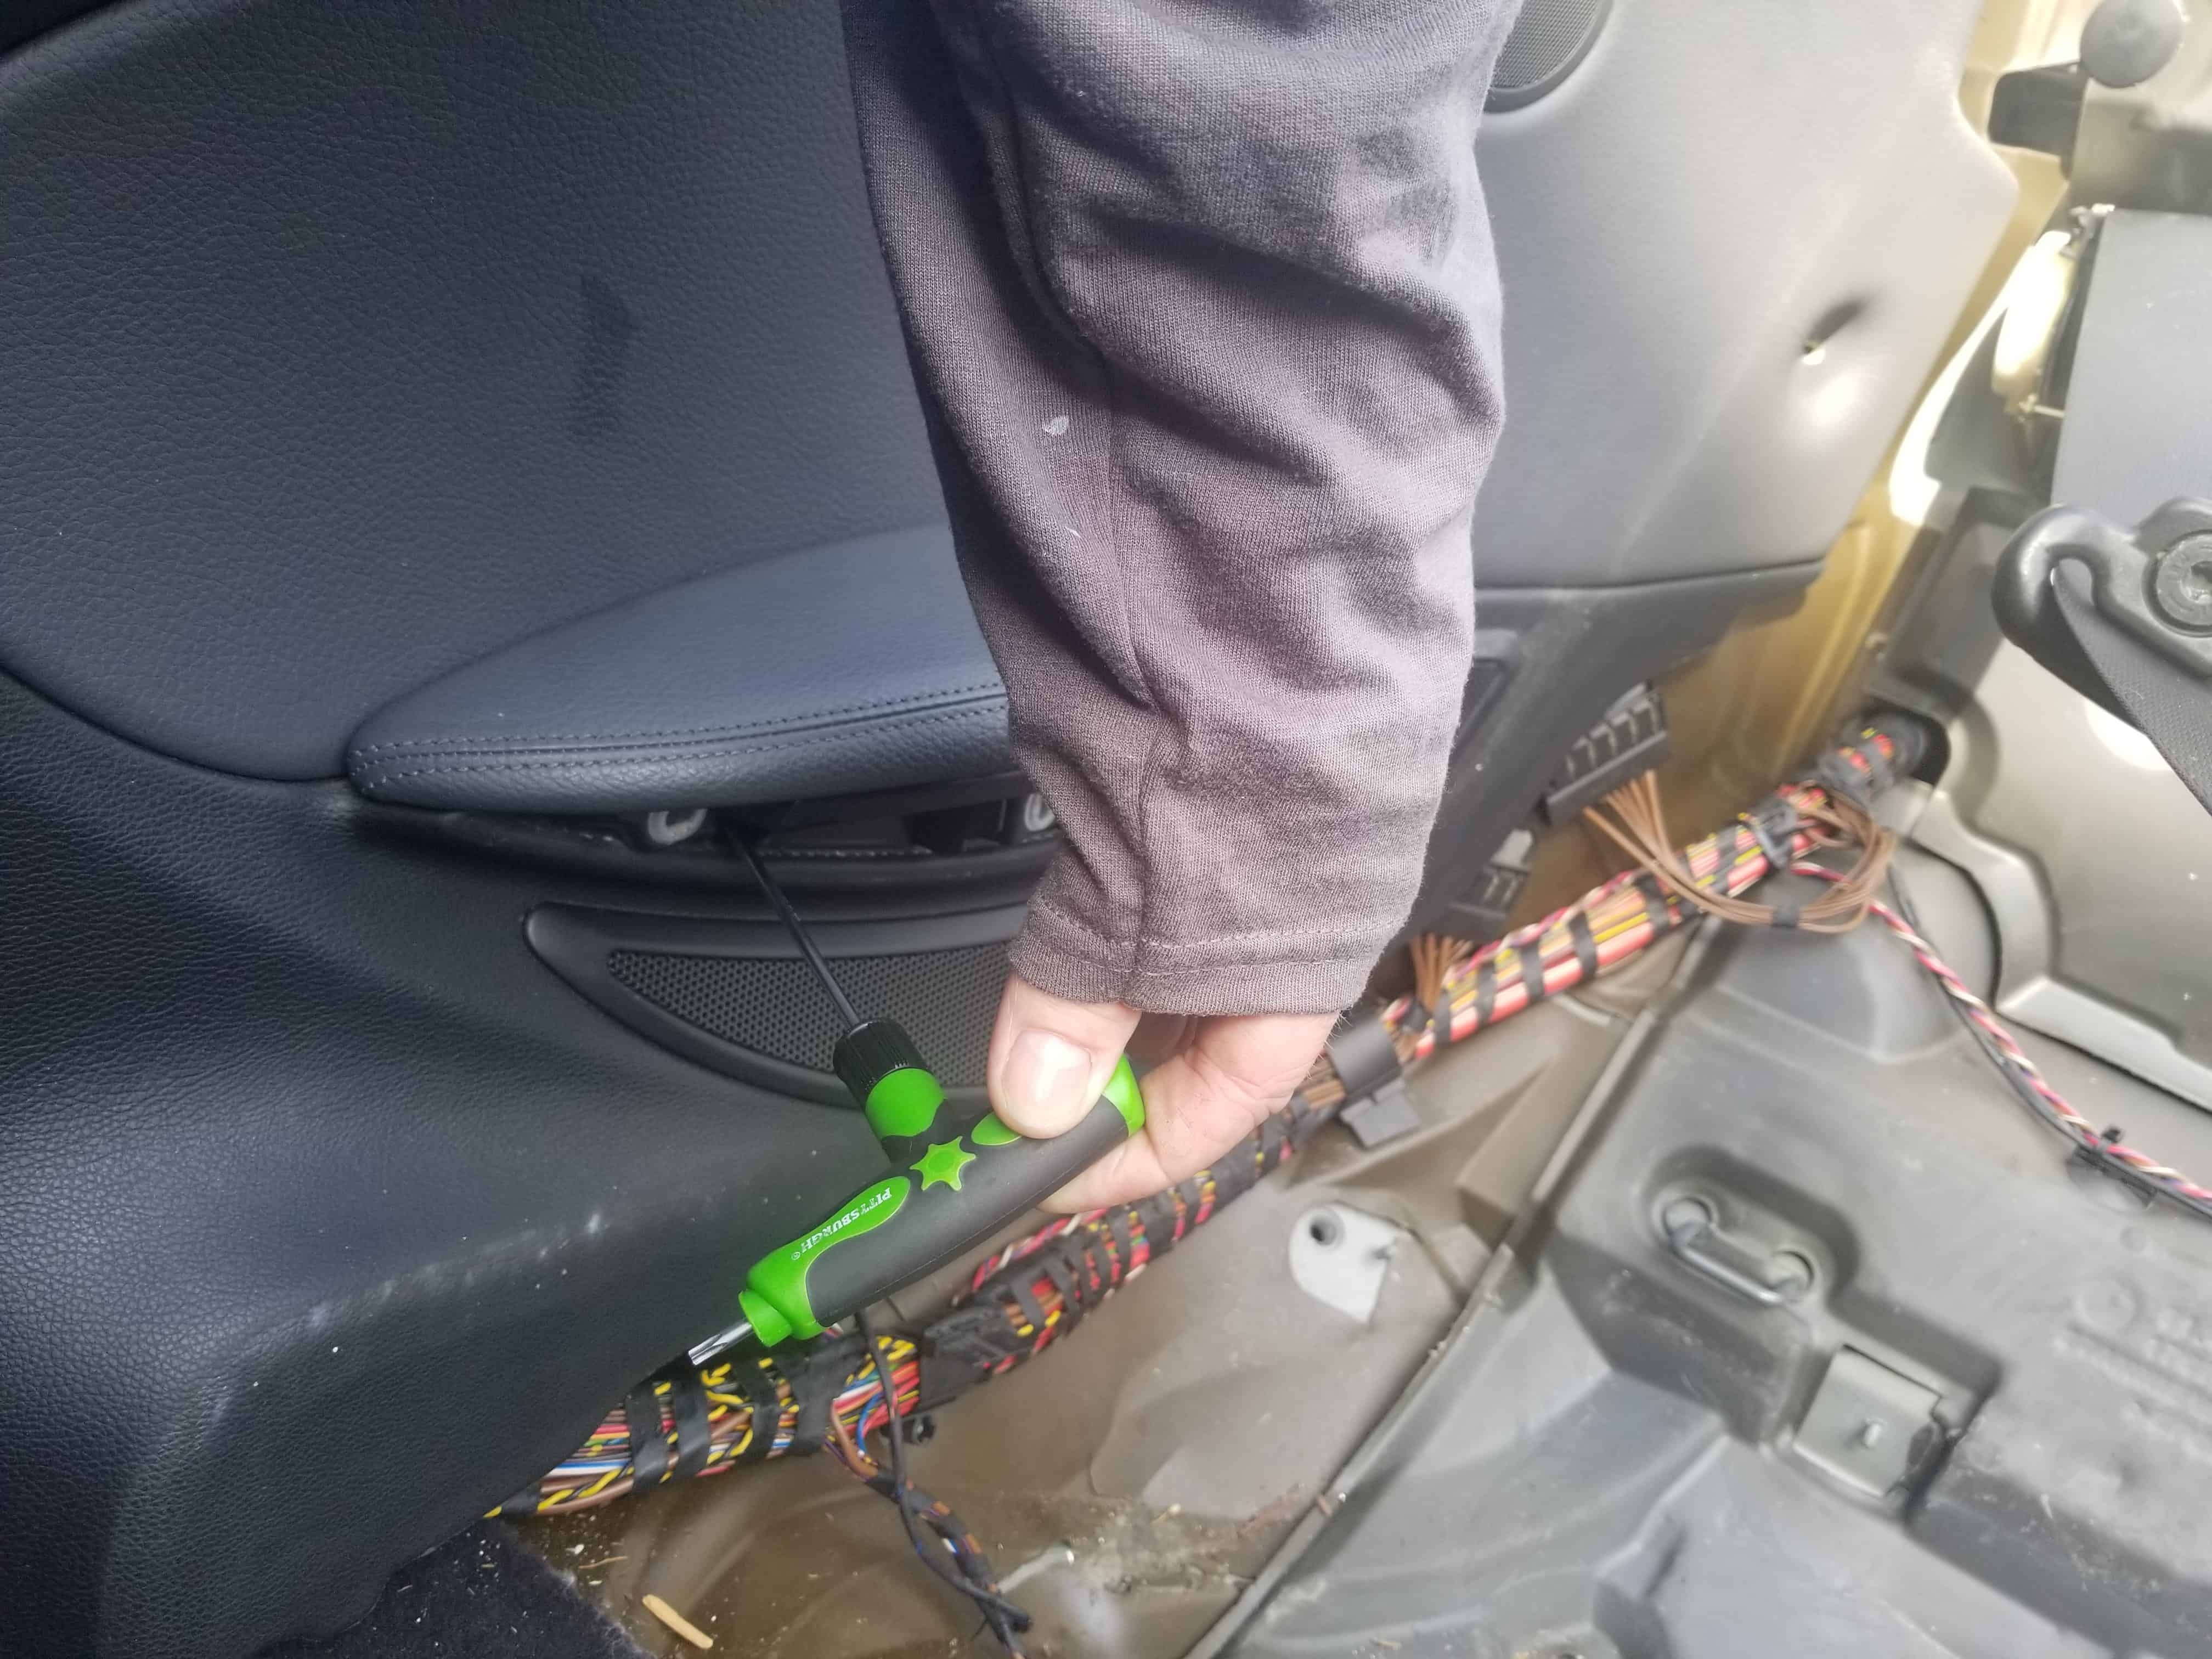
 - Remove the T15 screw located behind the armrest trim moulding.
 subwoofer replacement" width="4032" height="3024" />
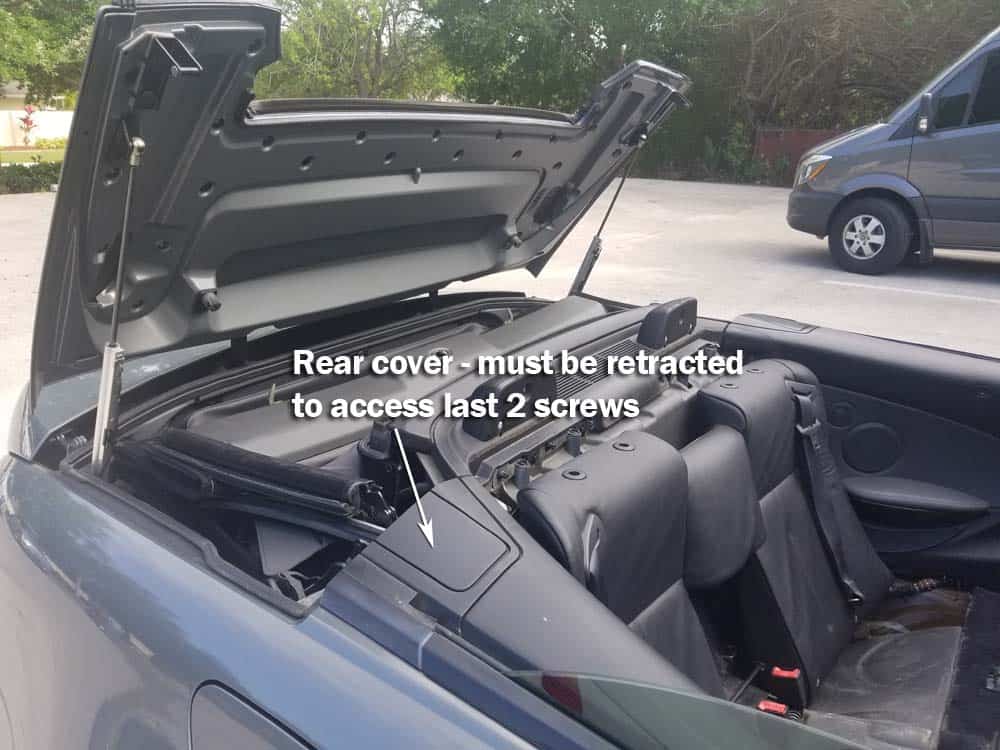
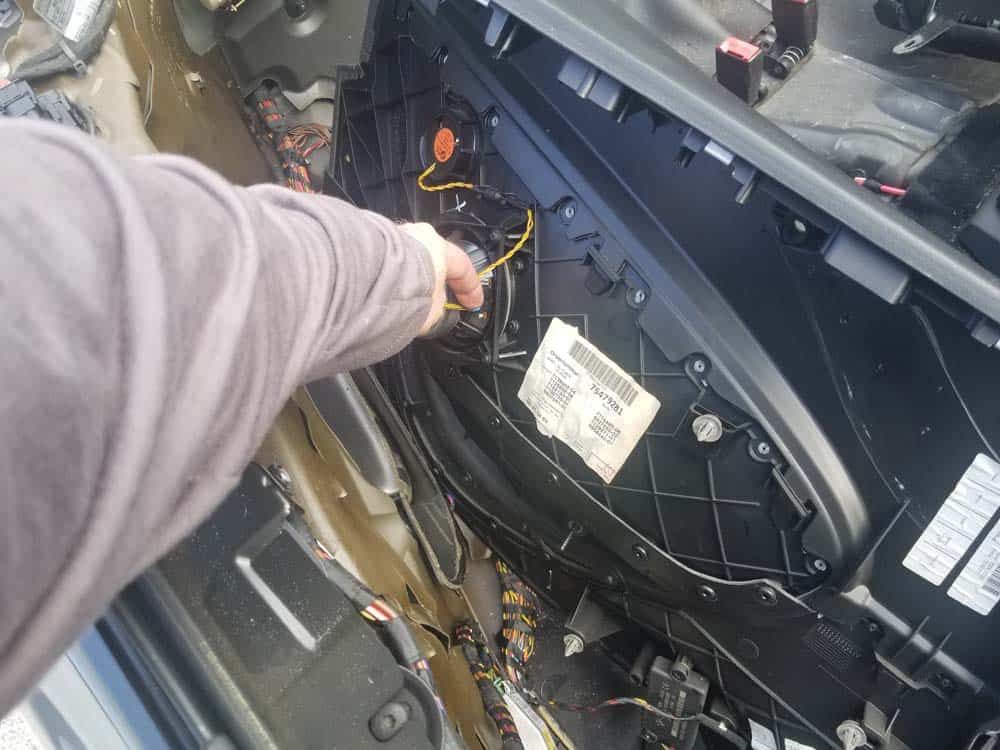
 - There are two more screws that must be removed from inside the rear cover located at the top rear of the quarter trim panel (see images below). In order to retract the rear cover and access the two screws, the convertible top lid MUST be in the raised position. With the lid raised, unhook the cover arm from the convertible top mechanism and pull the cover back (all of this sounds confusing but is very simple...please see images below).
 subwoofer replacement" width="1000" height="750" />
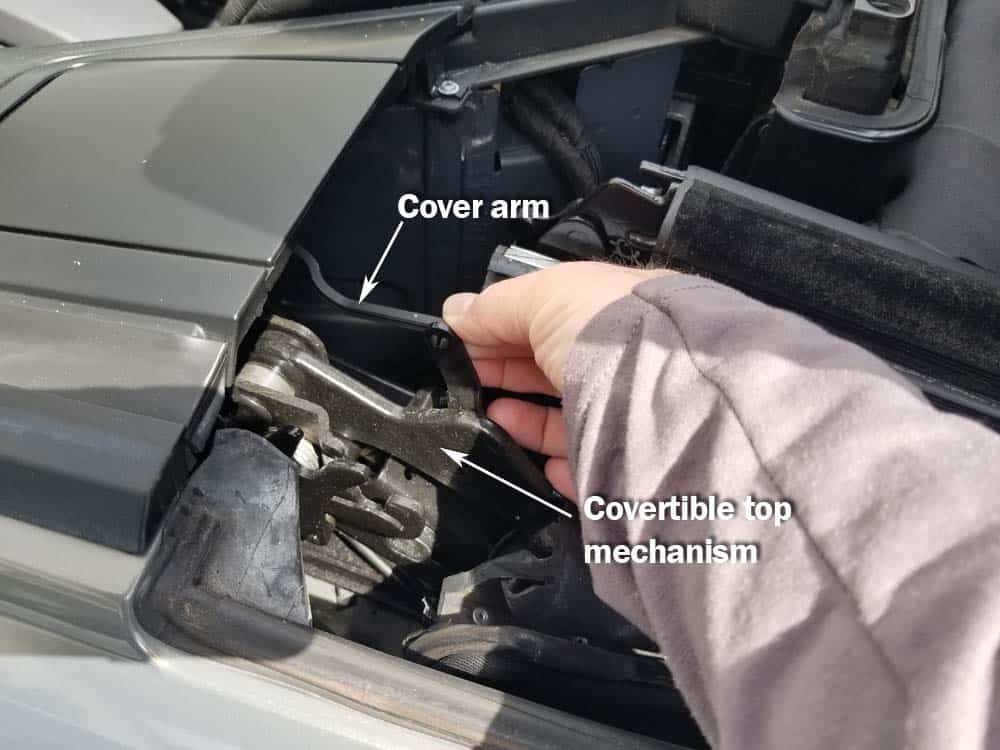 subwoofer replacement" width="1000" height="750" />
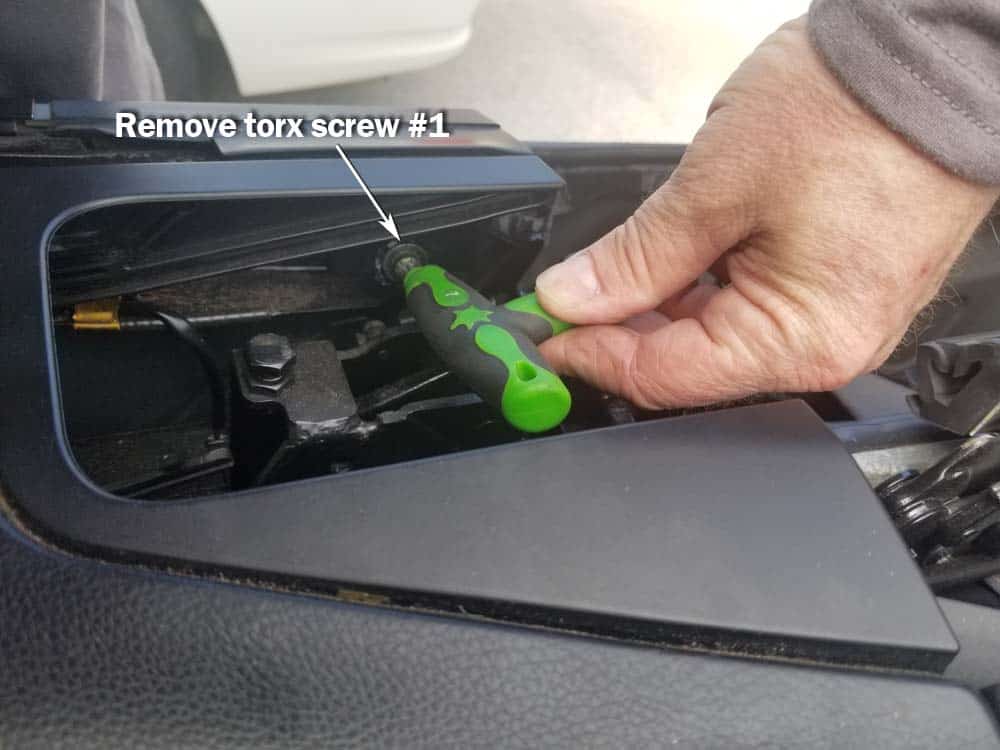 subwoofer replacement" width="1000" height="750" />
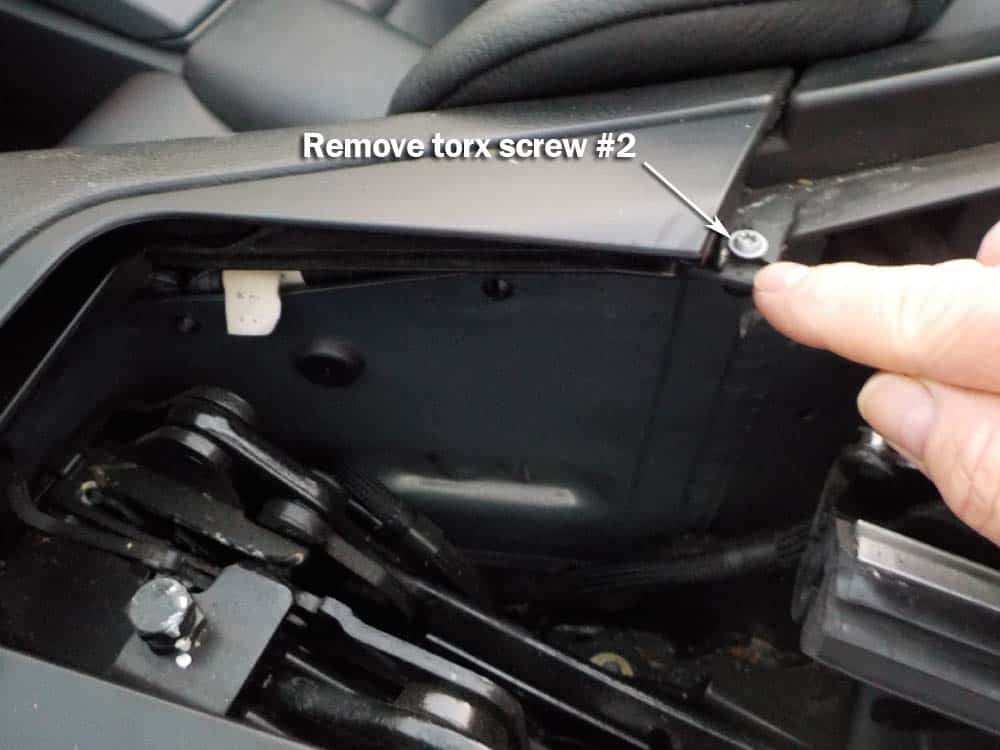 subwoofer replacement" width="1000" height="750" />
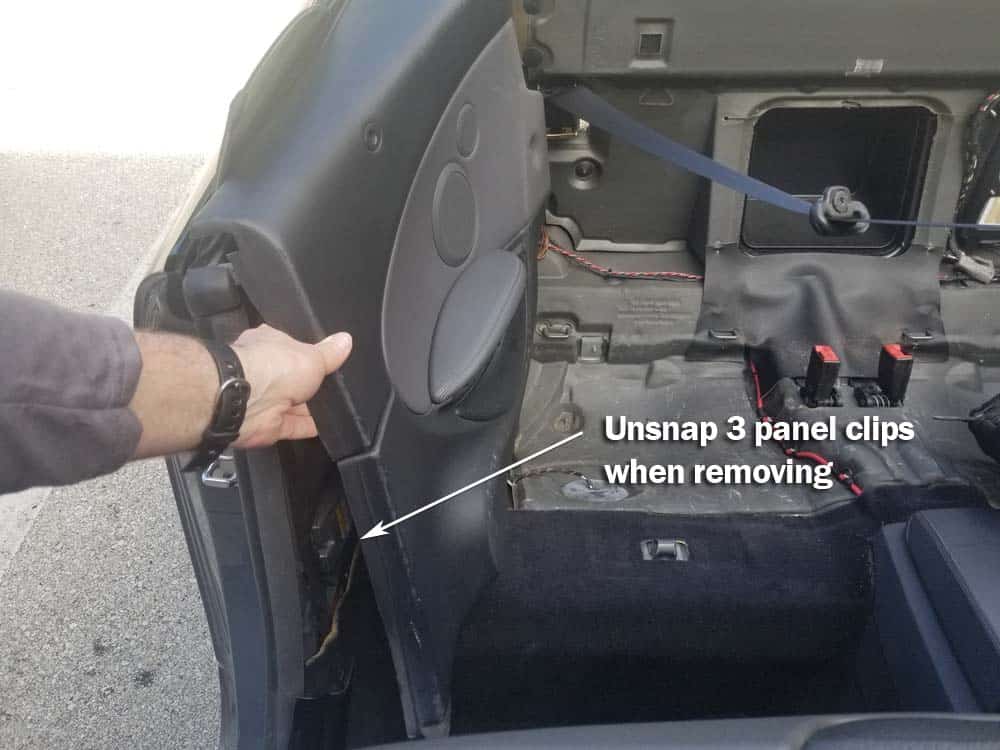
 - You can now grasp the rear quarter trim panel and remove it from the body of the vehicle. There are three panel clips that will unsnap from body when you remove. If you break any of the clips (which is completely normal), re-order by clicking this link: BMW door panel clips.
 subwoofer replacement" width="1000" height="750" />
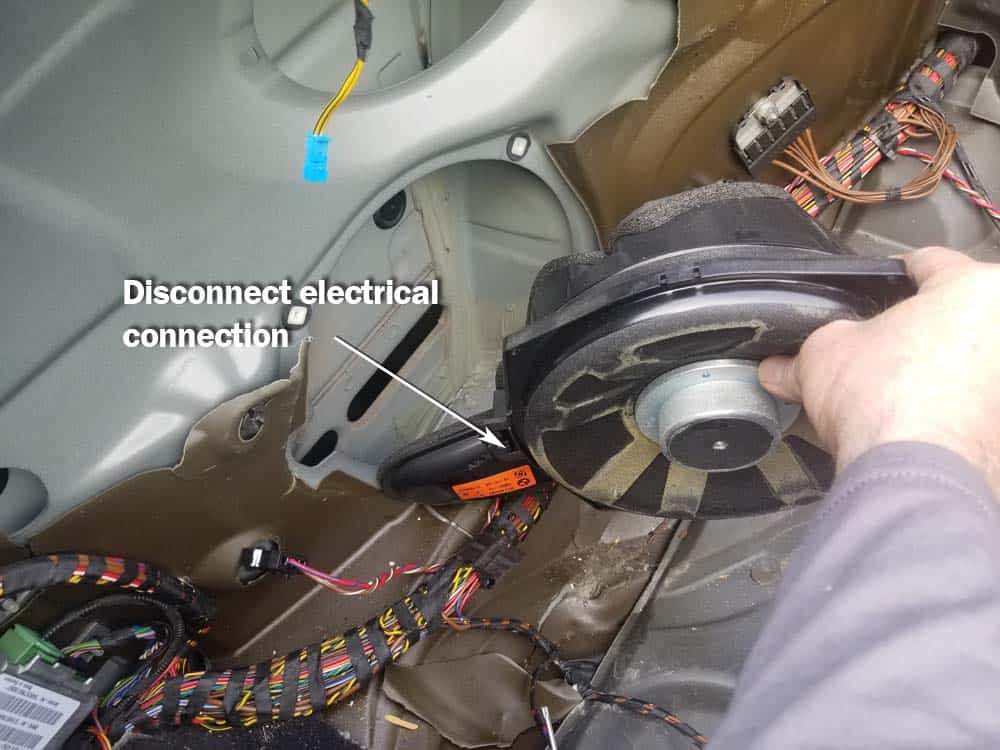
 - Disconnect the speaker electrical connector.
 subwoofer replacement" width="1000" height="750" />
 subwoofer replacement" width="750" height="1000" />
 Section 2 - Rear Subwoofer Removal
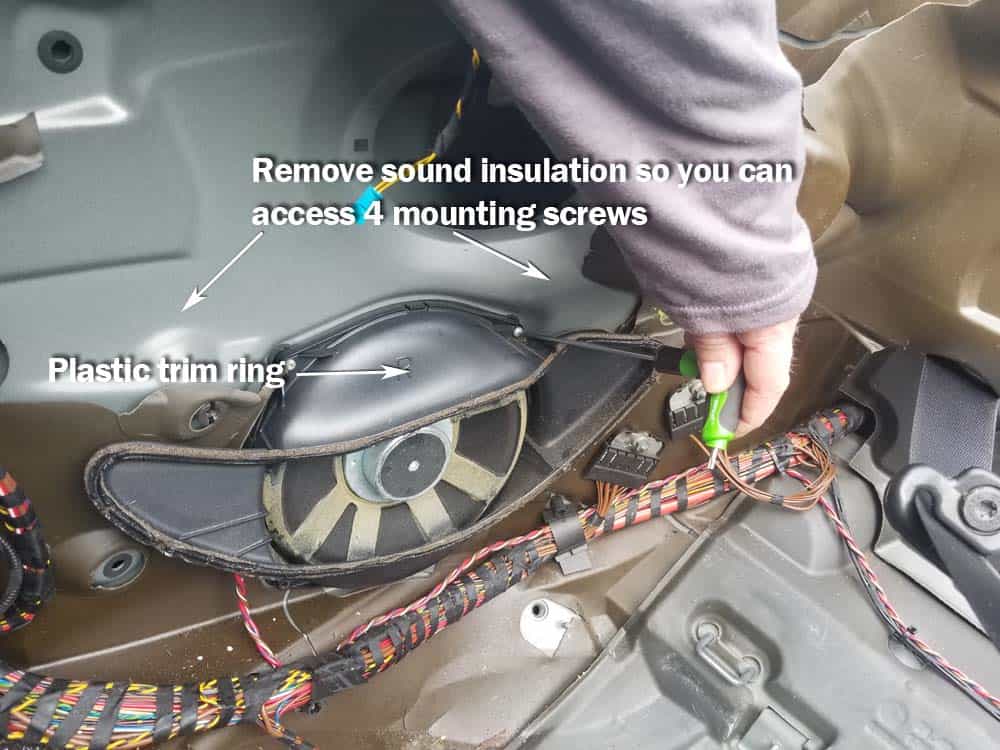
- Remove the sound insulation around the subwoofer. It is most likely very brittle and will just fall apart in your hand. If you wish to replace this small amount of insulation, there are many brands on the market you can use. We didn't replace our sound insulation and there was absolutely no noticeable difference (see next step with removed insulation).
- Remove the four T15 torx screws anchoring the subwoofer to the body. Remove the plastic subwoofer trim ring.
 subwoofer replacement" width="1000" height="750" />
 subwoofer replacement" width="1000" height="750" />
 Section 3 - Reassembly
Reassembly is the exact reverse of the above steps. Please note that when reinstalling the rear quarter trim panel, separate the top panel from the lower panel first (see image below). The reason you want to separate the trim panels is so you can see the plastic clips on the lower panel and guide them into the their holes.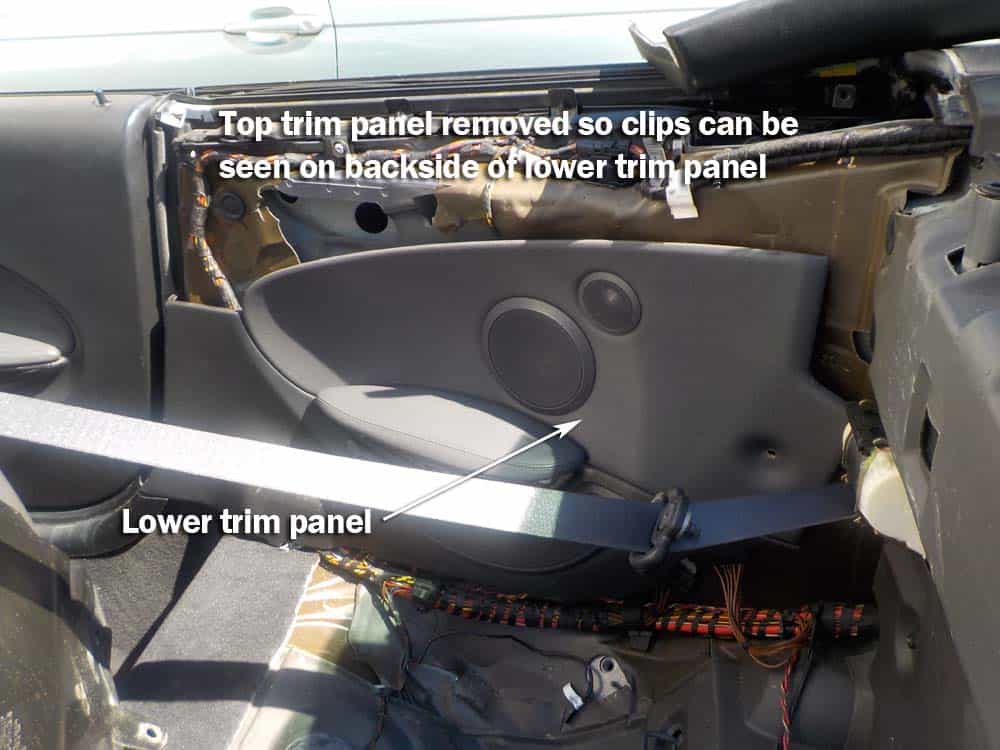 subwoofer replacement" width="1000" height="750" />
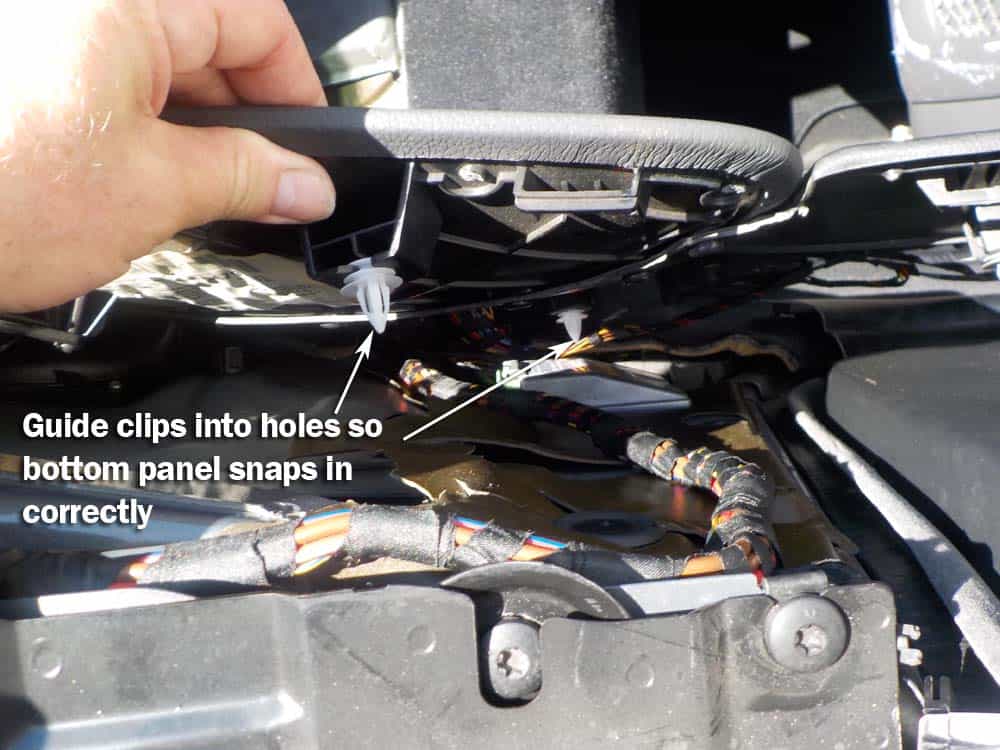 subwoofer replacement" width="1000" height="750" />
 BMW 6 Series Subwoofer Repair Finished