
Affiliate link disclosure – The BMW Repair Guide uses affiliate links in their site. For more information on affiliate links, please click here.
Repair Summary
This article gives detailed instructions on removing the center console trim in a BMW E63/64 vehicle. Even though we used a 2005 645ci to perform this repair, this article can be applied to any BMW 2004-2010 6 Series with minor modifications to the repair steps.
See all vehicles this article applies to
E63 6 Series M6
E63 6 Series 630i
E63 6 Series 645Ci
E63 6 Series 650i
E64 6 Series M6
E64 6 Series 645Ci
E64 6 Series 650i
E64 6 Series 630i
A BMW 6 series trim removal from the center console and dash is necessary for a variety of standard repairs to the 2004-2010 645ci,650i and M6.
One of the greatest deterrents keeping many "Do it Yourself" mechanics from taking on interior repairs to their BMWs is removing trim. Let's face it...trim scares us. There is nothing worse than that disgusting sound of plastic cracking as we try to pry off a piece of dash trim. Who ever gets used to the sound of plastic clips snapping as we attempt to pull off a door panel? We don't...and we have a whole drawer full of spare door clips at the Repair Guide.
Nope...it's not breaking a 20 cent clip that scares us. What scares us is that hidden screw that we didn't know about that shreds the $700 door trim panel when we try to remove it with force. It's the plastic tabs that break off of the $200 piece of A-pillar trim when we don't know which direction to pull on it. And it's cracking the $485 center dash bezel by prying too aggressively with a plastic trim tool while distracted. Starting to get the picture? Yep...it's the kick in our wallet that scares us.
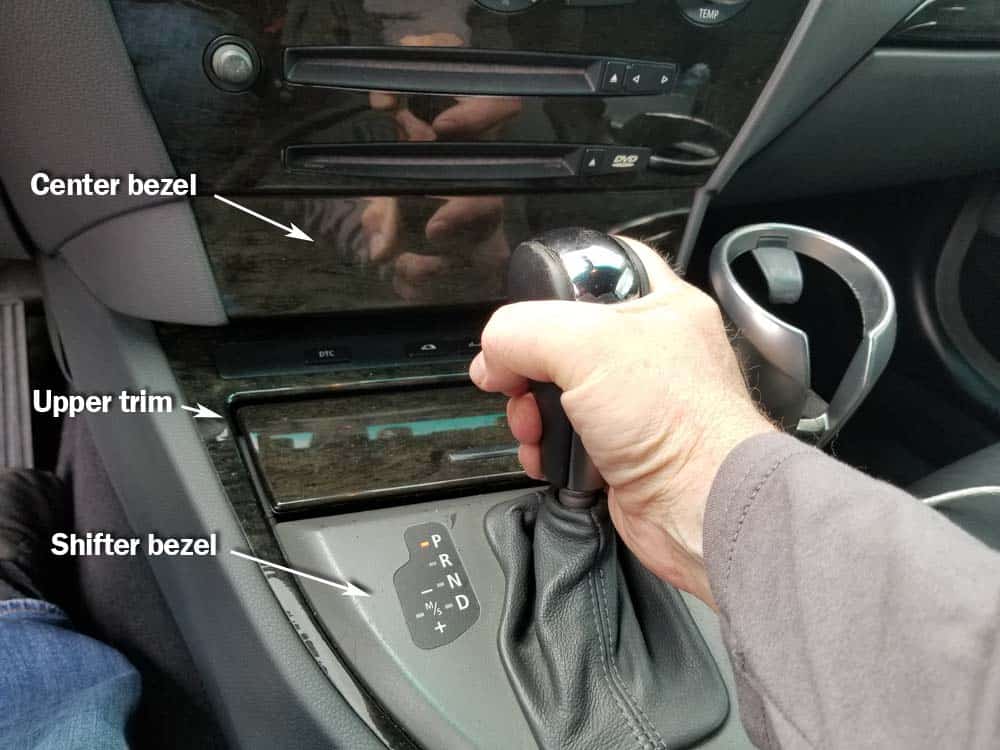
The center console shifter trim and center dash bezel are probably two of the most removed interior trim parts in all BMWs. They are also two of the easiest to break if you don't remove all of the screws or pry the parts out incorrectly. The following repair article deals with the BMW 6 Series trim removal of the shifter and center dash bezel trim parts and applies to all E33/E34 645ci,650i, and M6 models built between 2004 and 2010.


View the detailed parts diagram for this repair.
Includes detailed part diagrams, part numbers and links to purchase all of the required components needed to complete this repair.

Before starting this repair, you must have the following required parts.
Safely remove trim panels and moldings easily without damaging them
Plastic five-piece tool kit removes trim and door panels, moldings, and adhesive backed logos and badges, without damage. Made of impact resistant plastic that will not mar surfaces as metal screwdrivers and pry bars will. Slim design for delicate work in tight areas.
Section 1 - Center Console Trim Removal - Shifter Bezel and Upper Trim
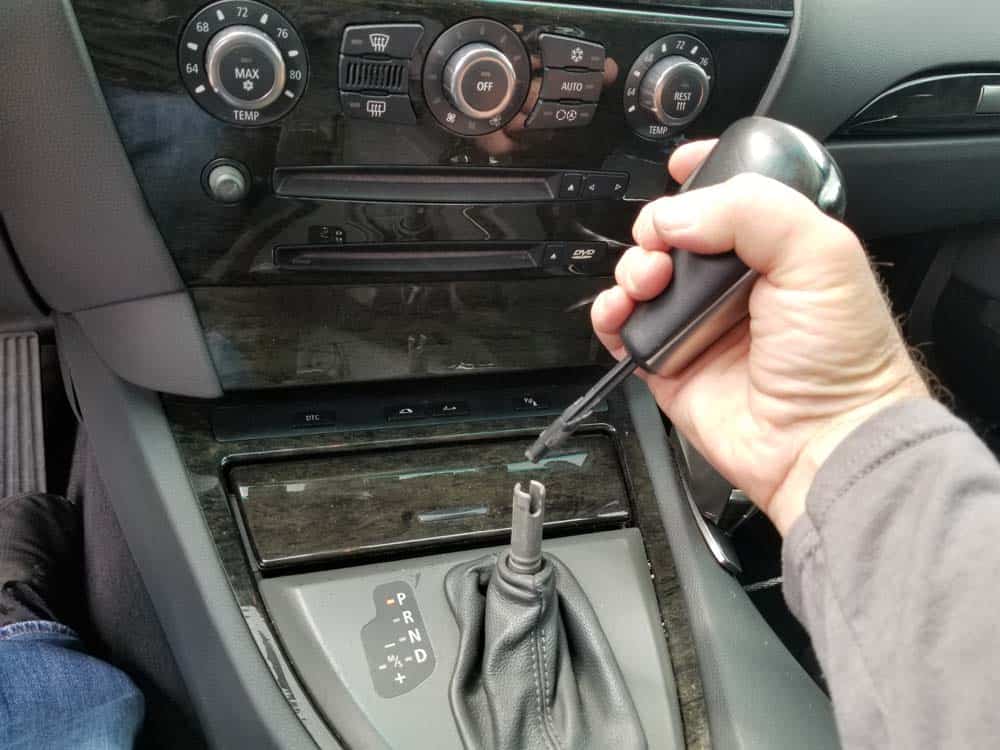
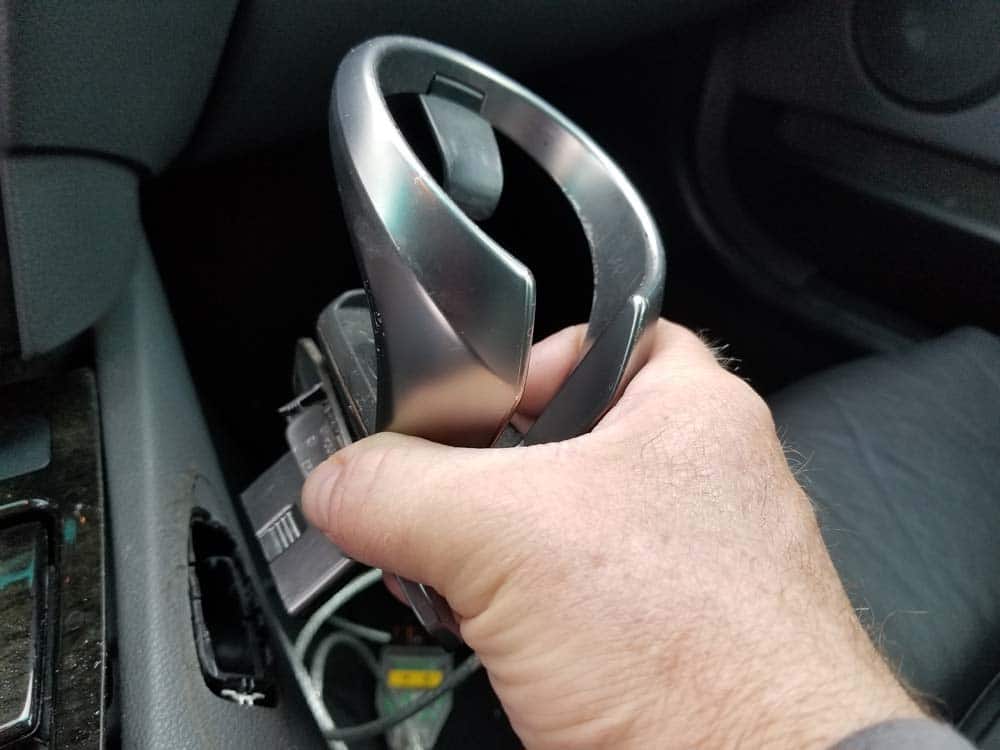
- Grasp the gear shifter with both hands and pull straight up to remove. This may take some time...use patience because it may very well be stuck. Keep pulling straight up and it will finally release.
- Grasp and pull out cup holder from center console.
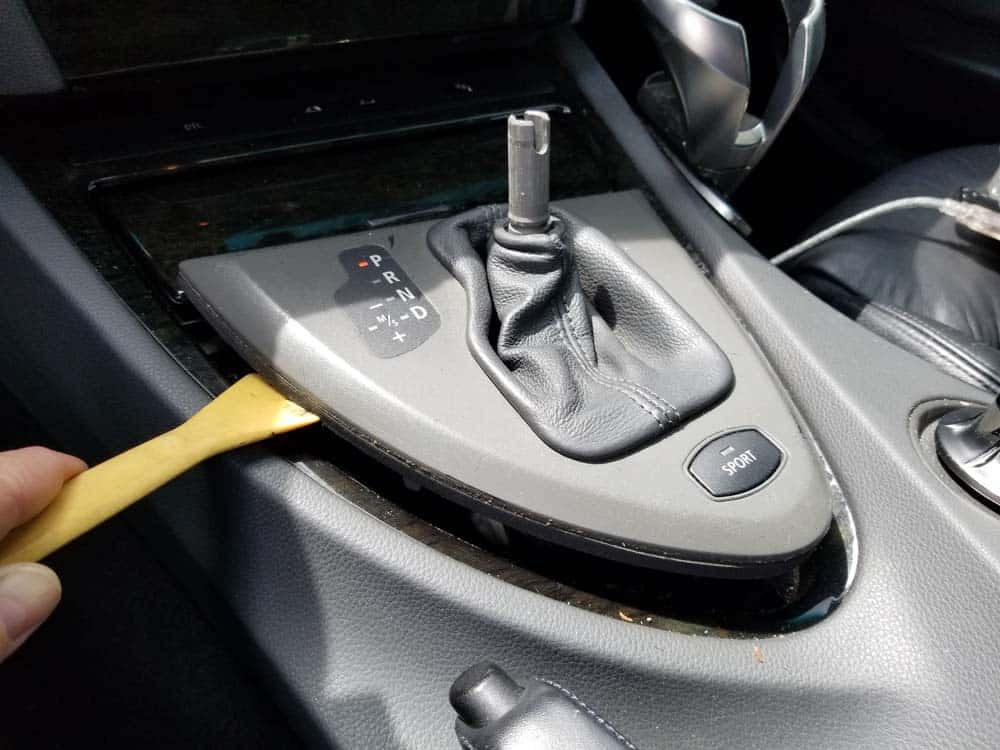
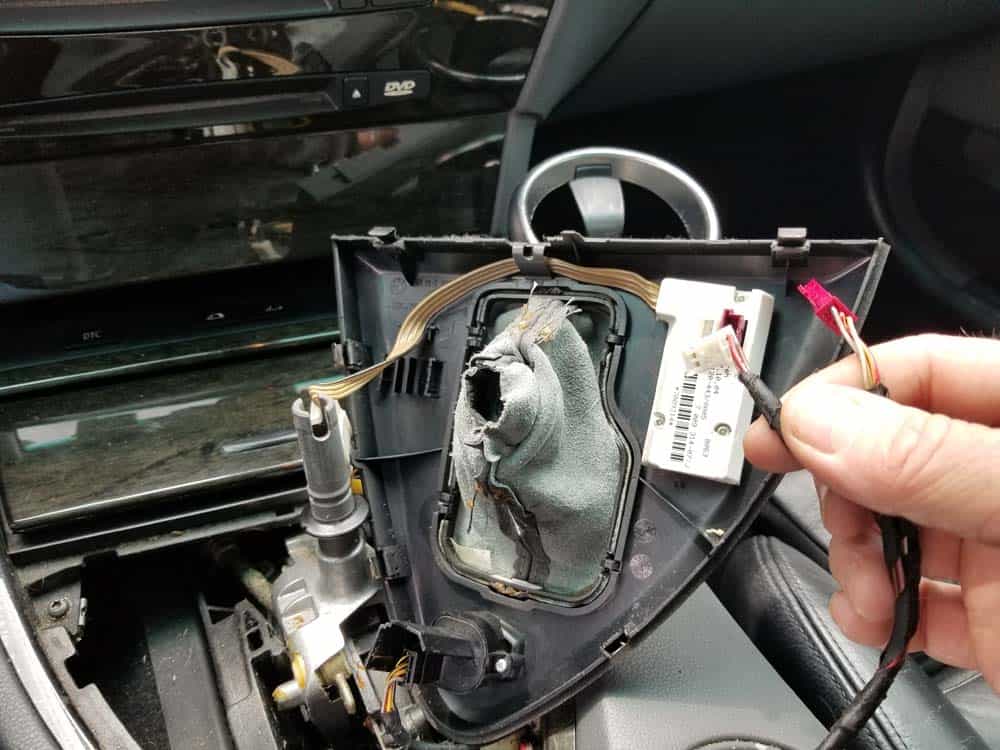
- Use a plastic trim removal tool to remove the shifter bezel.
- Disconnect the four electrical connections from rear of bezel.
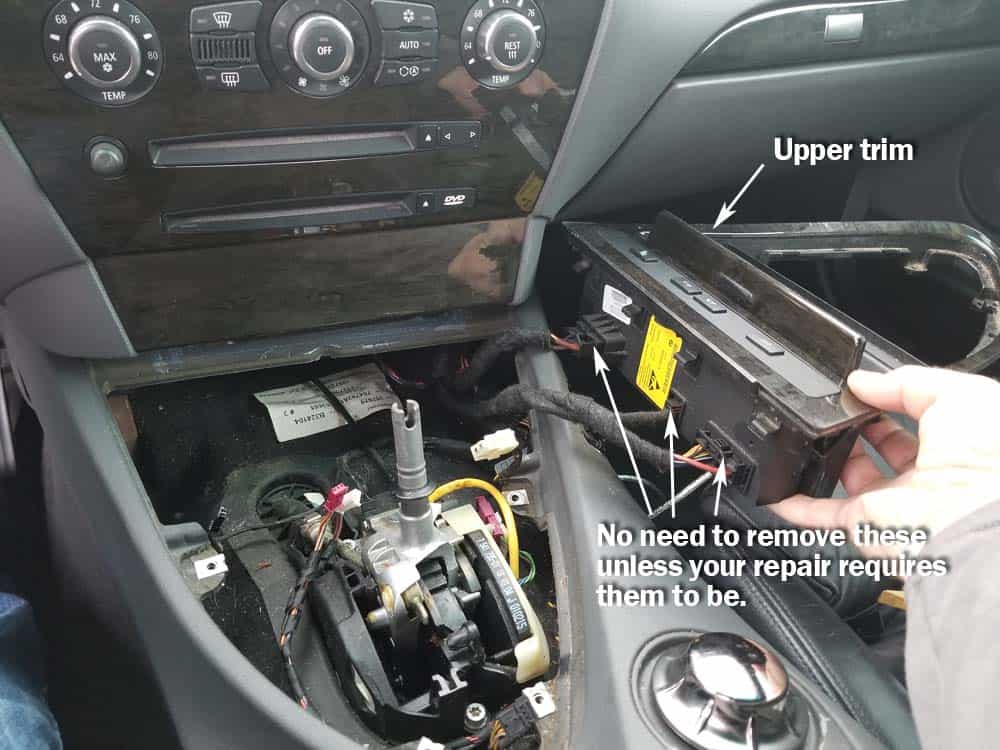
- Remove the four T20 torx screws anchoring the upper trim.
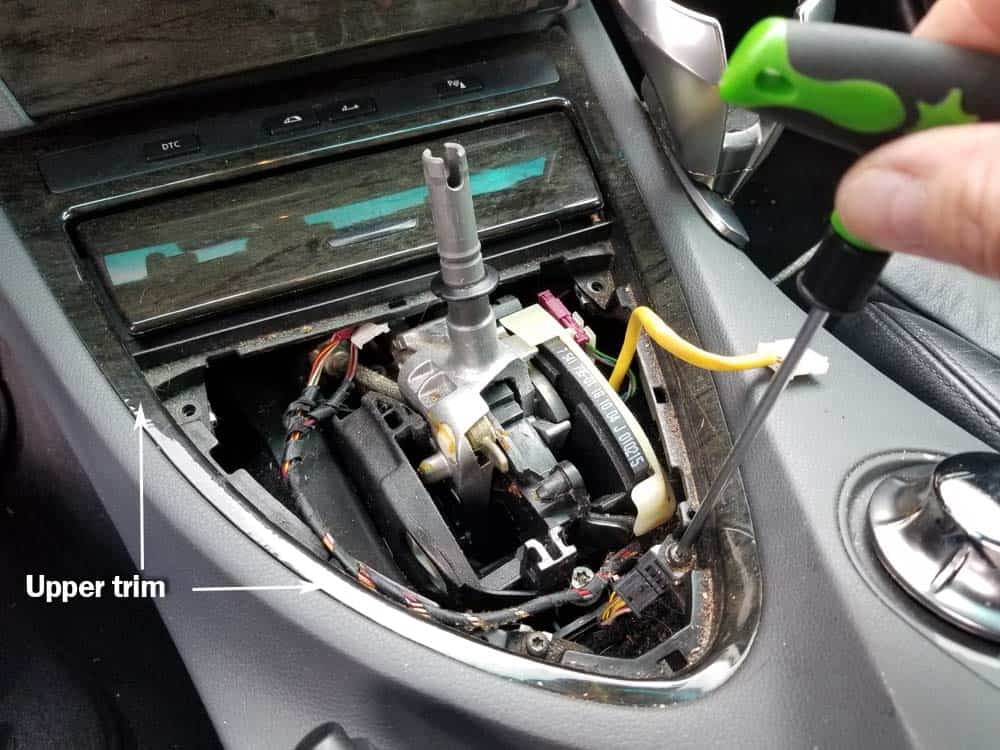
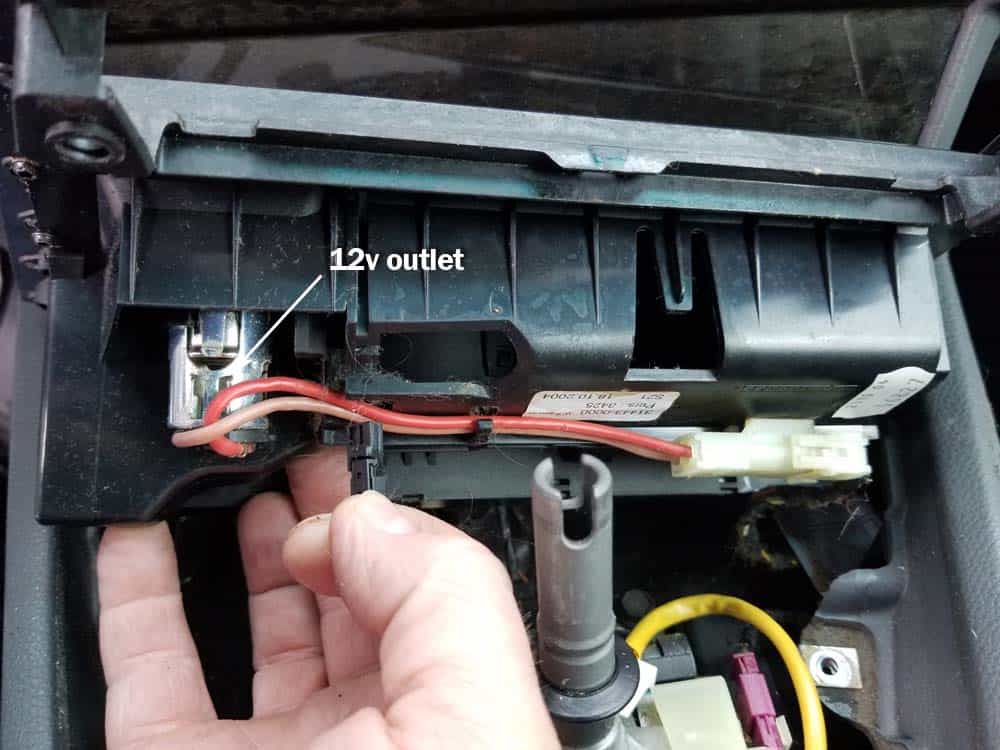
- Carefully lift the upper trim up so access can be gained to the rear electrical connectors. Start by removing the two 12v outlet connectors.
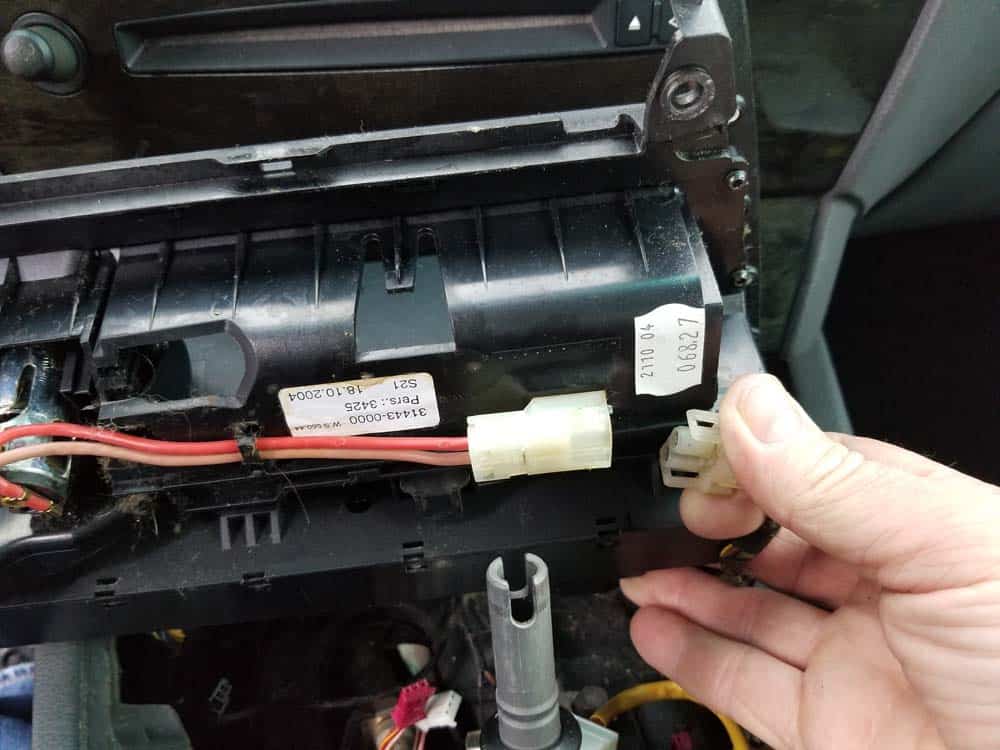
- If you do not need to remove the upper trim from the vehicle for your repair, then you can simply swivel it out of the way without removing the last four electrical connections. Otherwise, they will have to be removed.
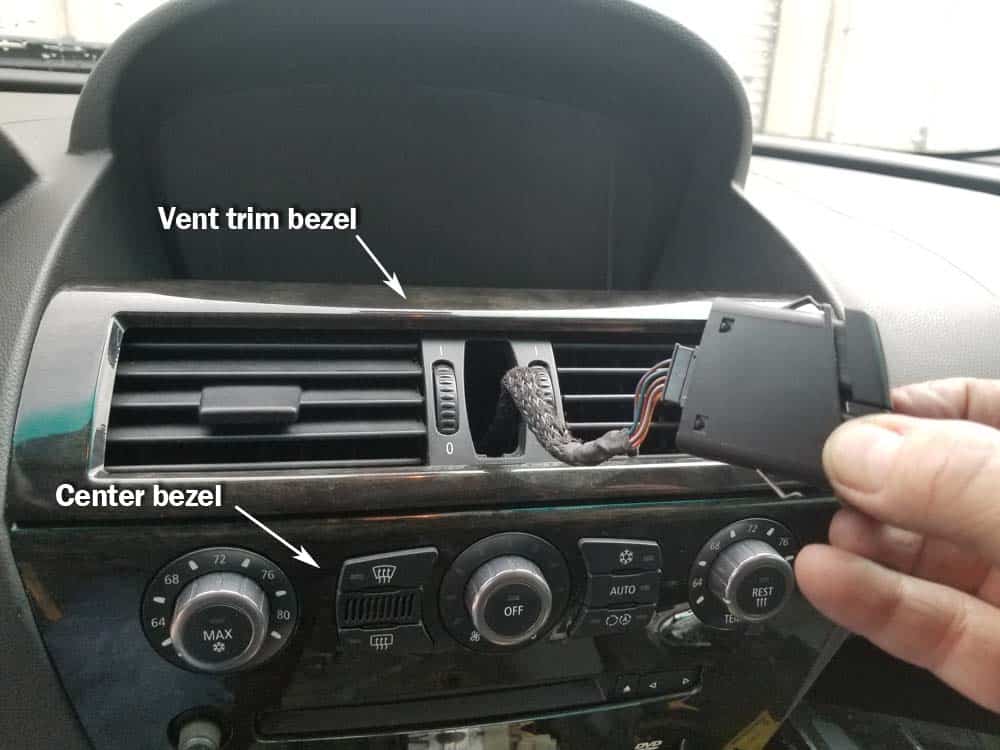
Section 2 - Center Dashboard Trim Removal - Center Bezel and Vent Trim Bezel
- In order to remove the center bezel that surrounds HVAC dash control and the radio/cd/dvd head units, you must remove the vent trim bezel first.
- Start by using a plastic trim removal tool to pry the hazard light/door lock switch out of the a/c vent.

- Disconnect the electrical connector from the back of the switch.
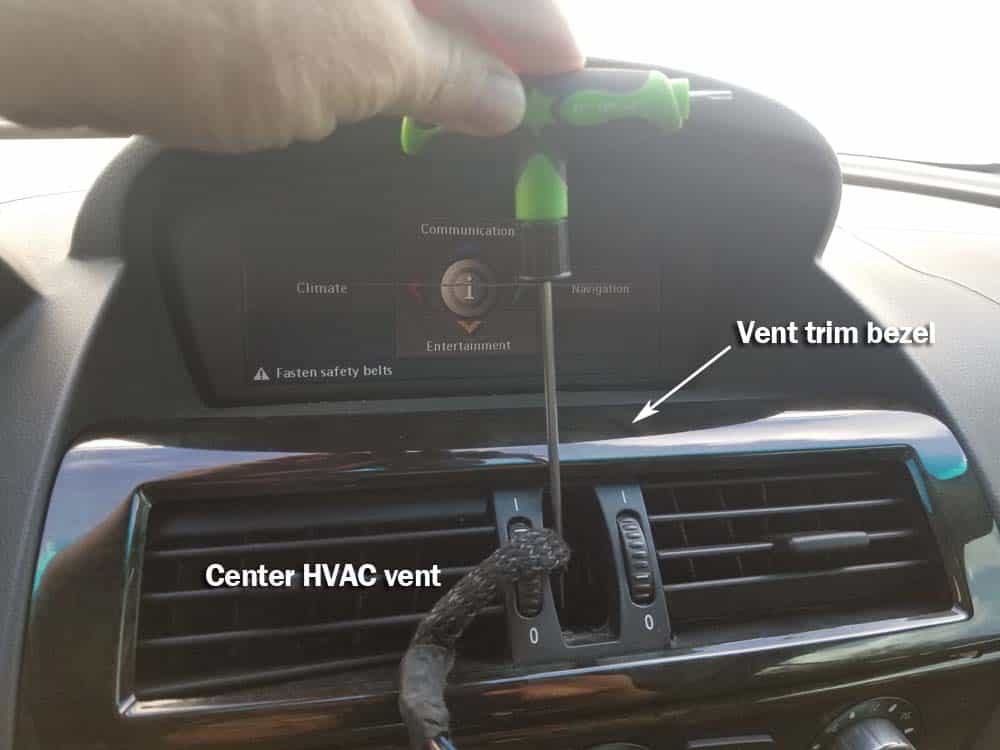
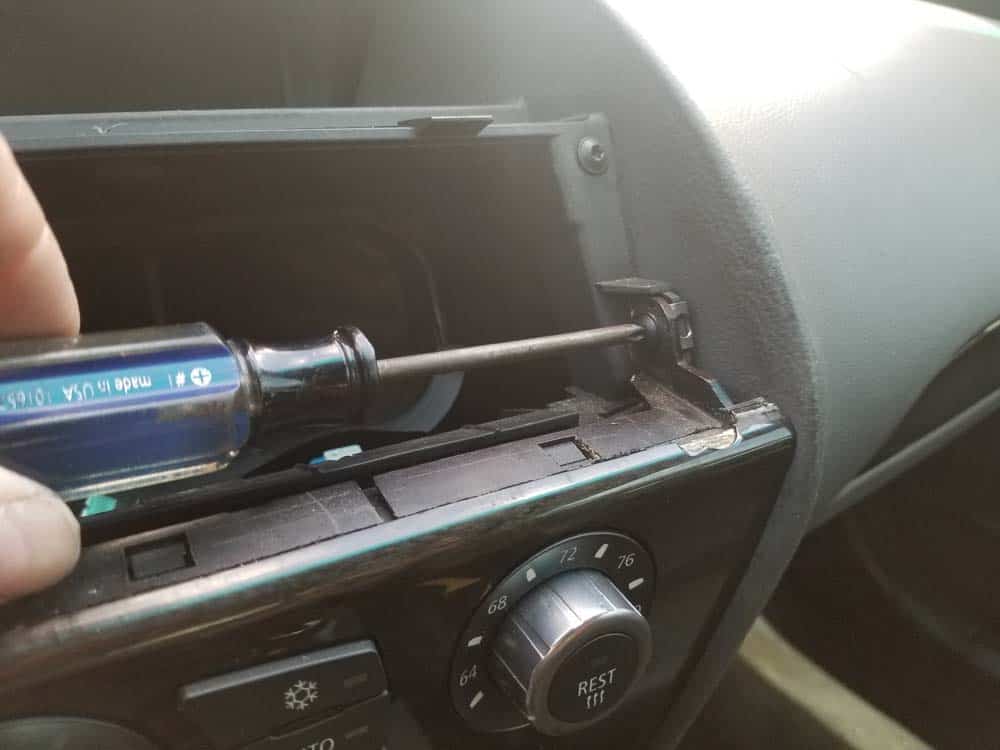
- Use a T15 torx T handle to remove the screw anchoring the center HVAC vent to the dashboard.
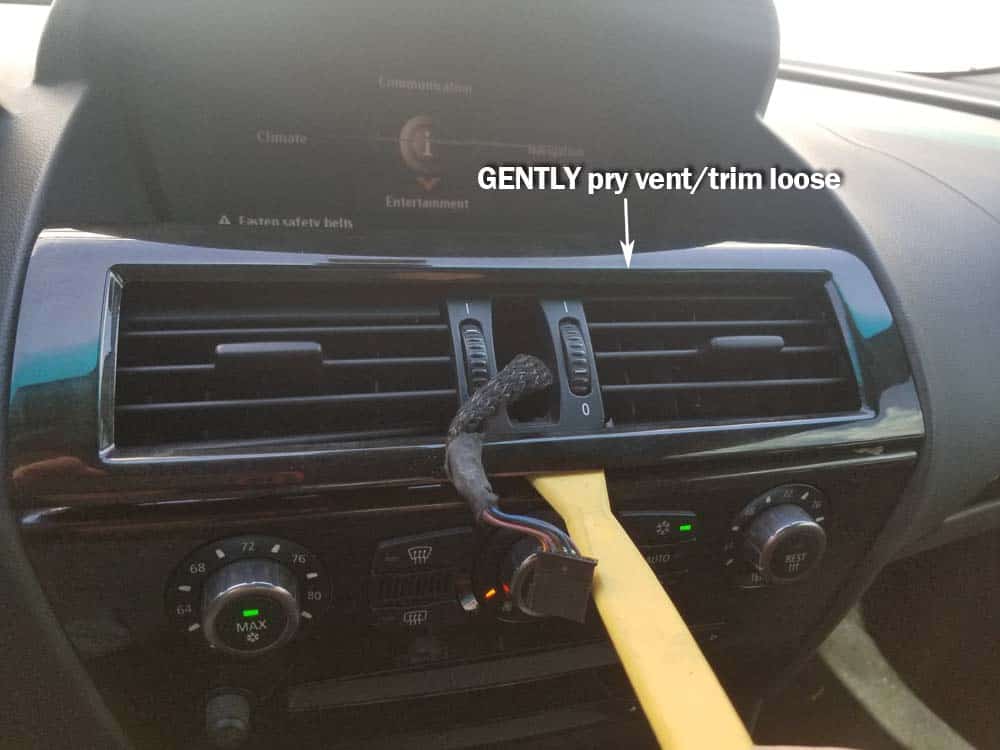
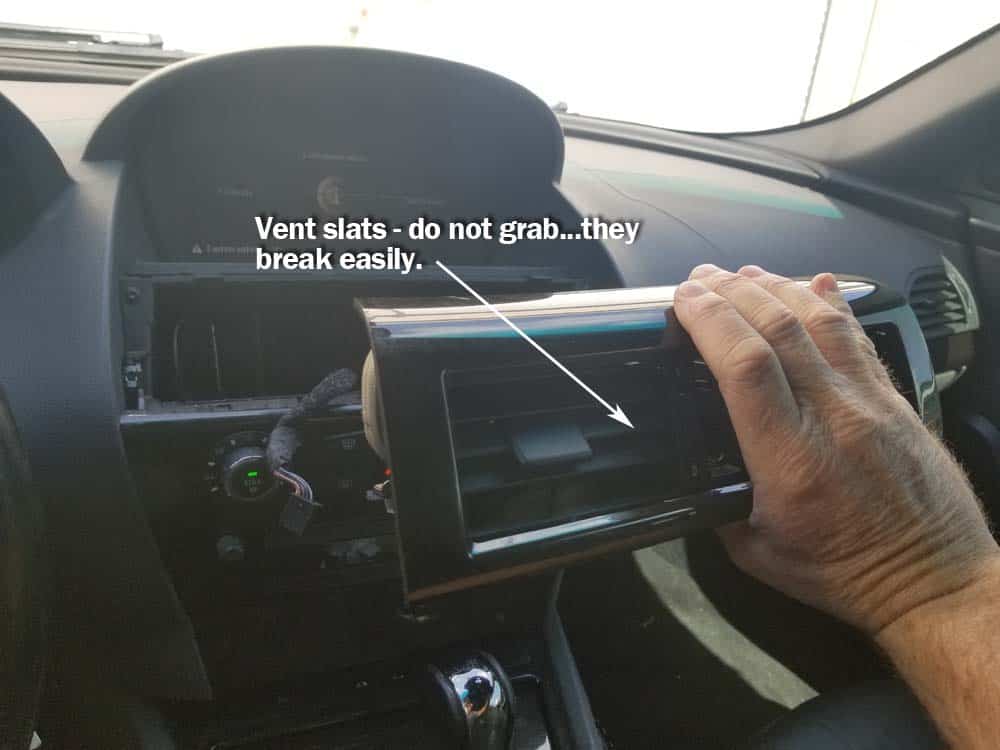
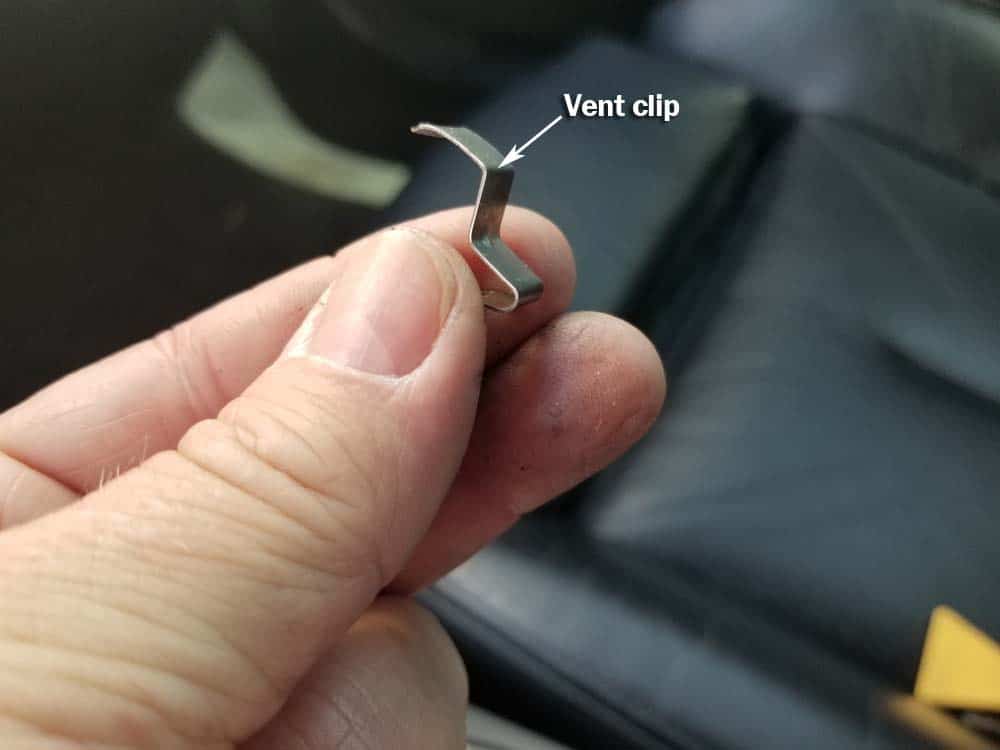
- Please pay close attention to the following step. Use a plastic trim removal tool to gently pry the vent out of the dashboard, starting on the bottom. The vent and the trim come out as one piece. Be careful when pulling out...it takes patience and a little coercing. DO NOT grab the vent by the plastic slats...they break off very easily. It is normal for some of the metal mounting clips to pop off during removal. SAVE THEM...you will need to snap them back on when reinstalling the vent. ***The vent is fragile. It is easy to break...DO NOT get frustrated if you damage it during removal. There are many used replacements on Ebay for less than $50. If you buy a used replacement, keep the metal clips off of your broken vent in case your replacement is shipped without them.

 6. Remove the two phillips screws anchoring the center bezel and HVAC dash control unit to dashboard. Grasp center bezel and remove.
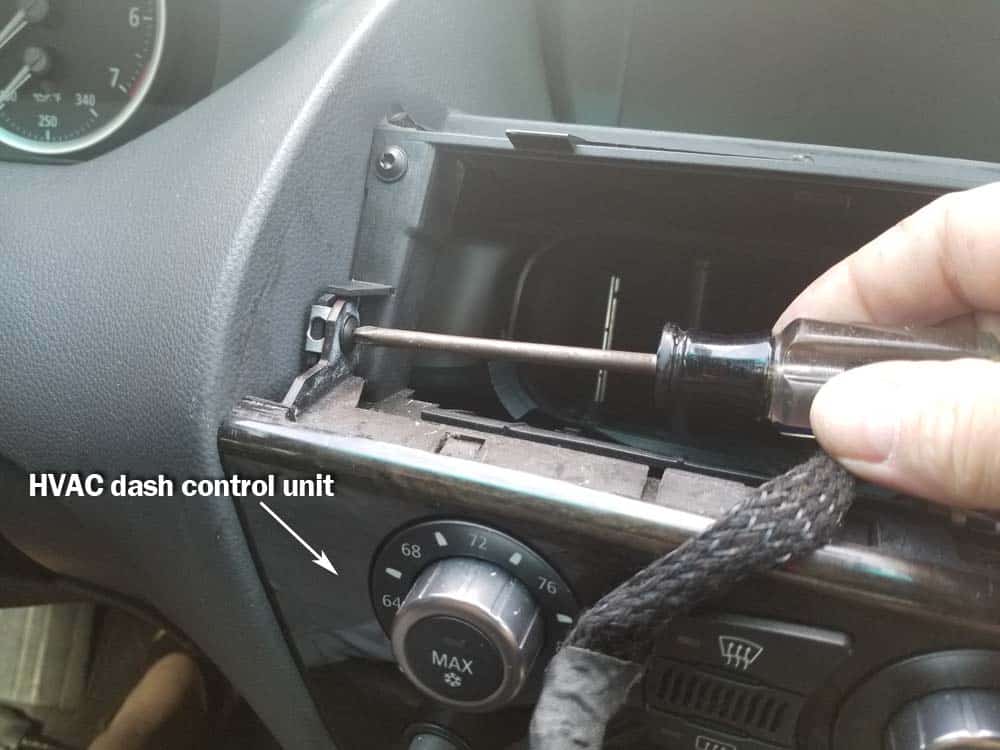
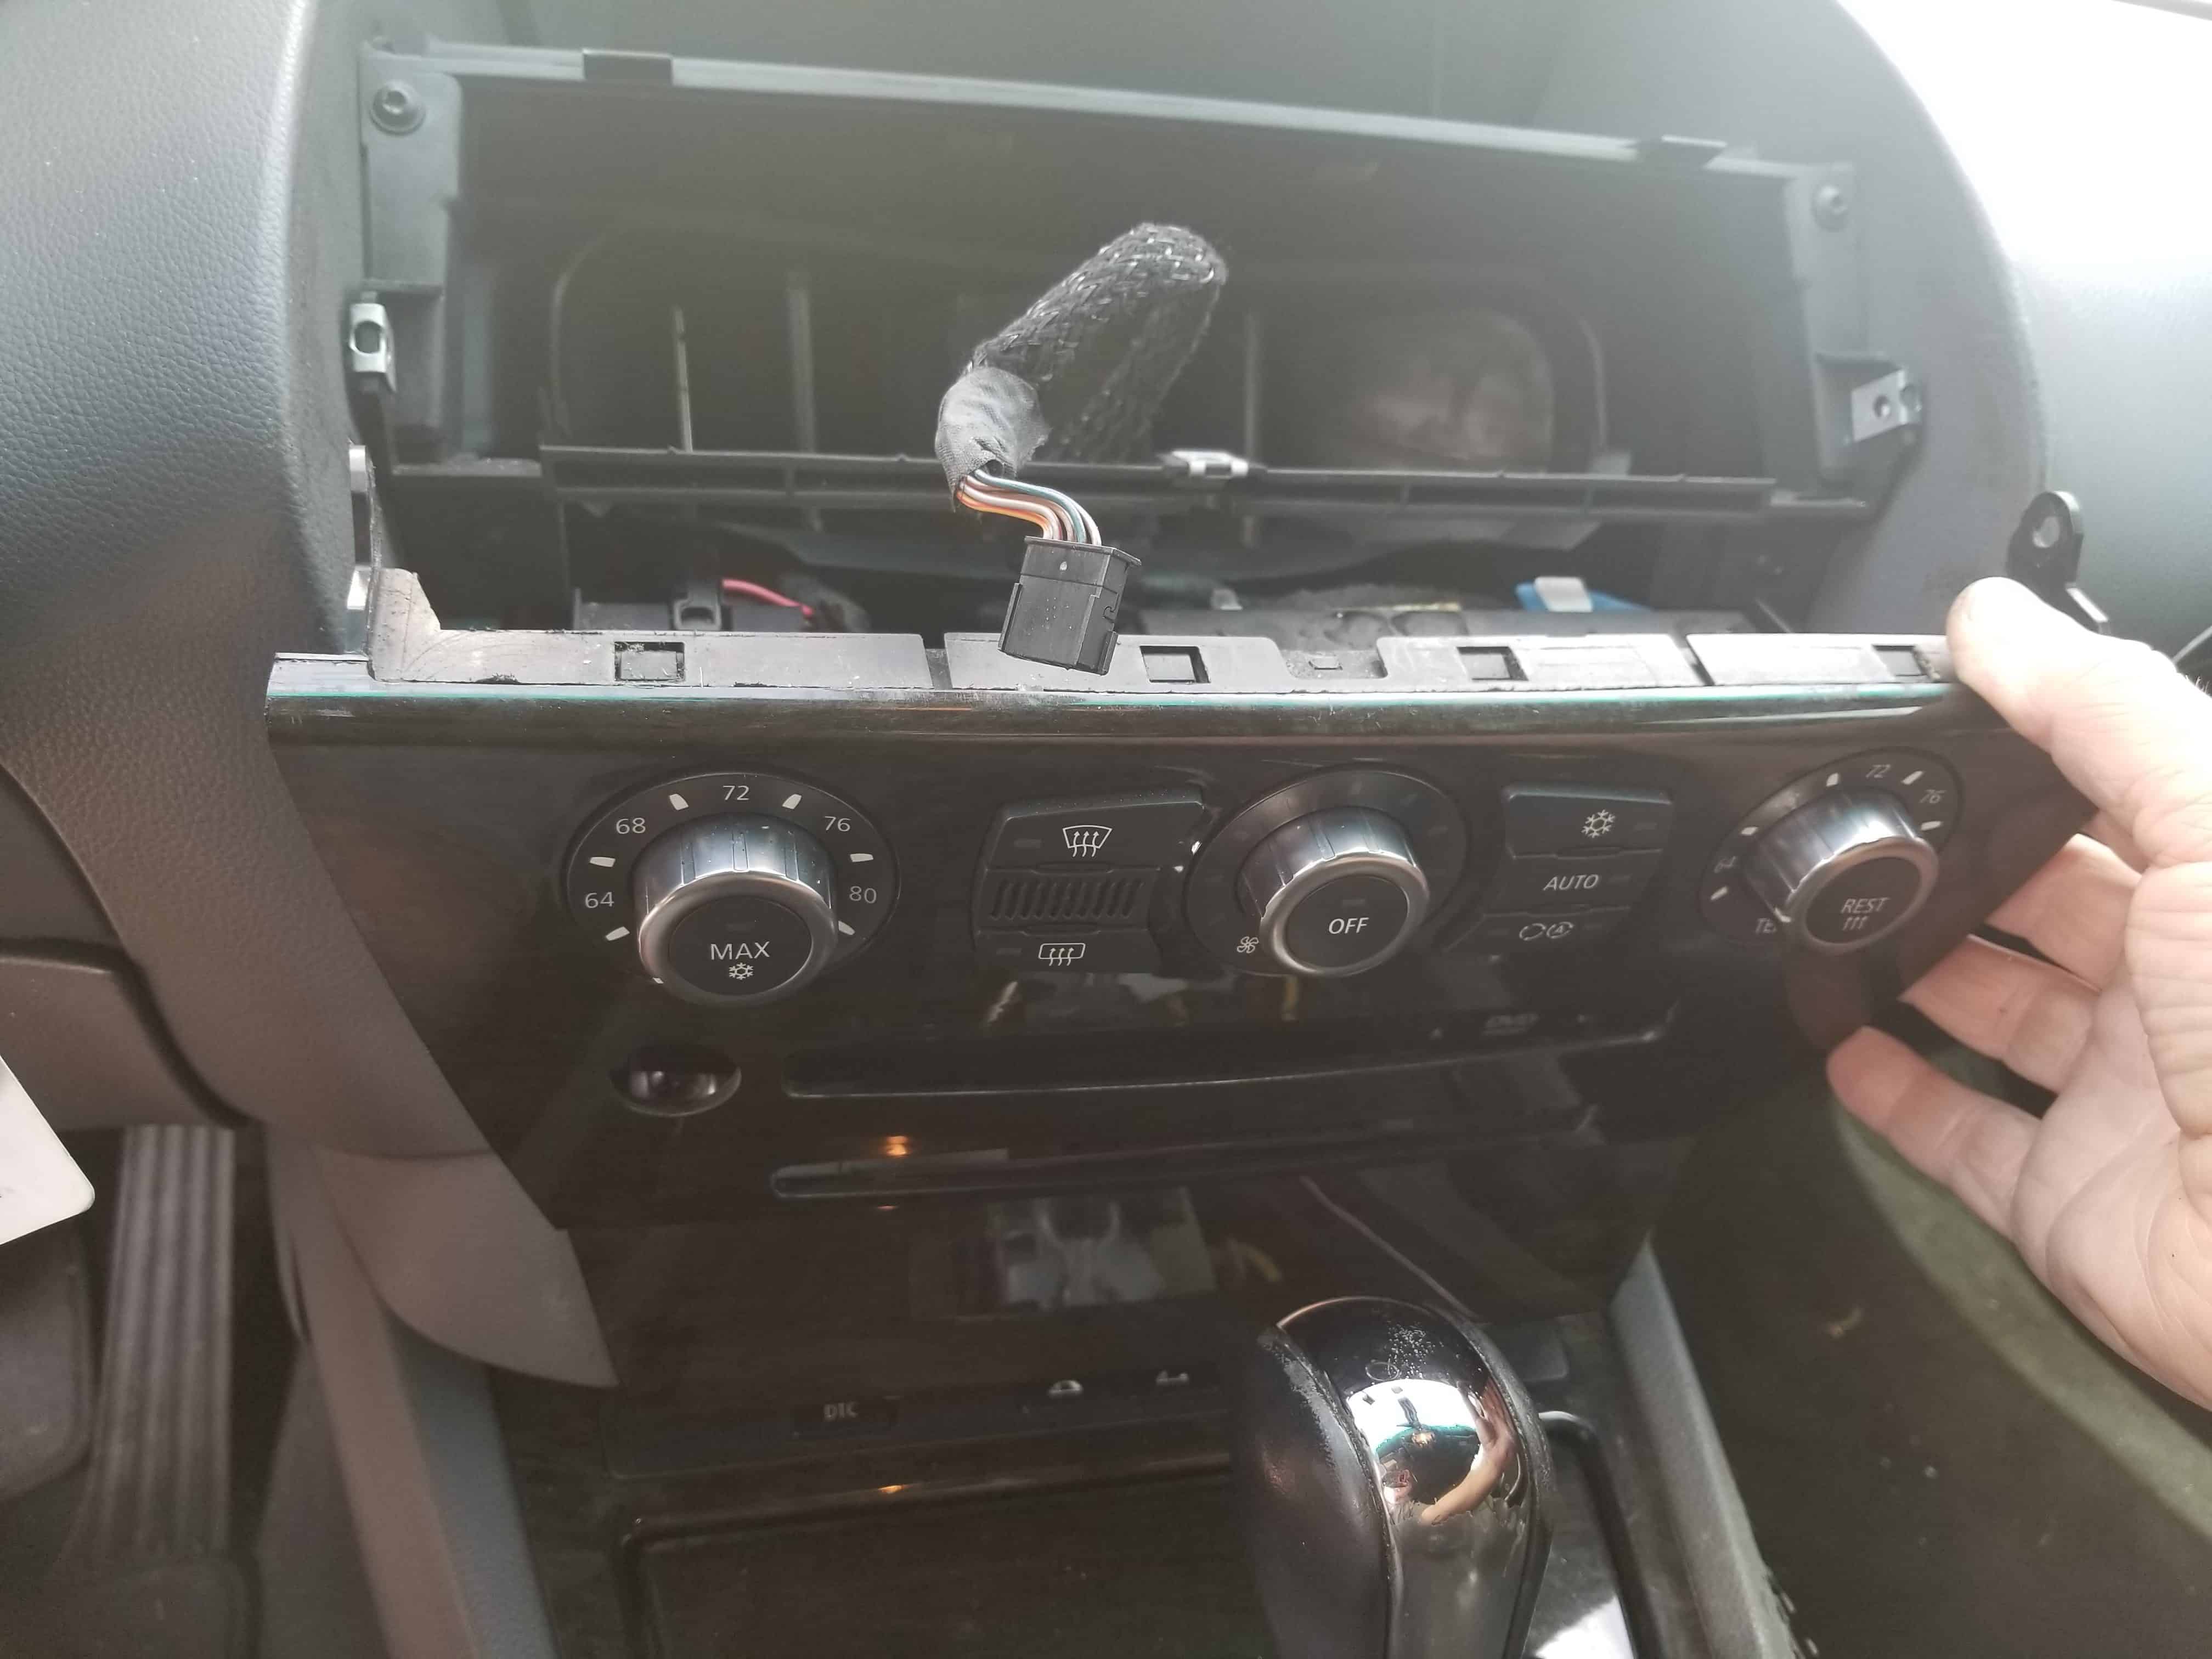
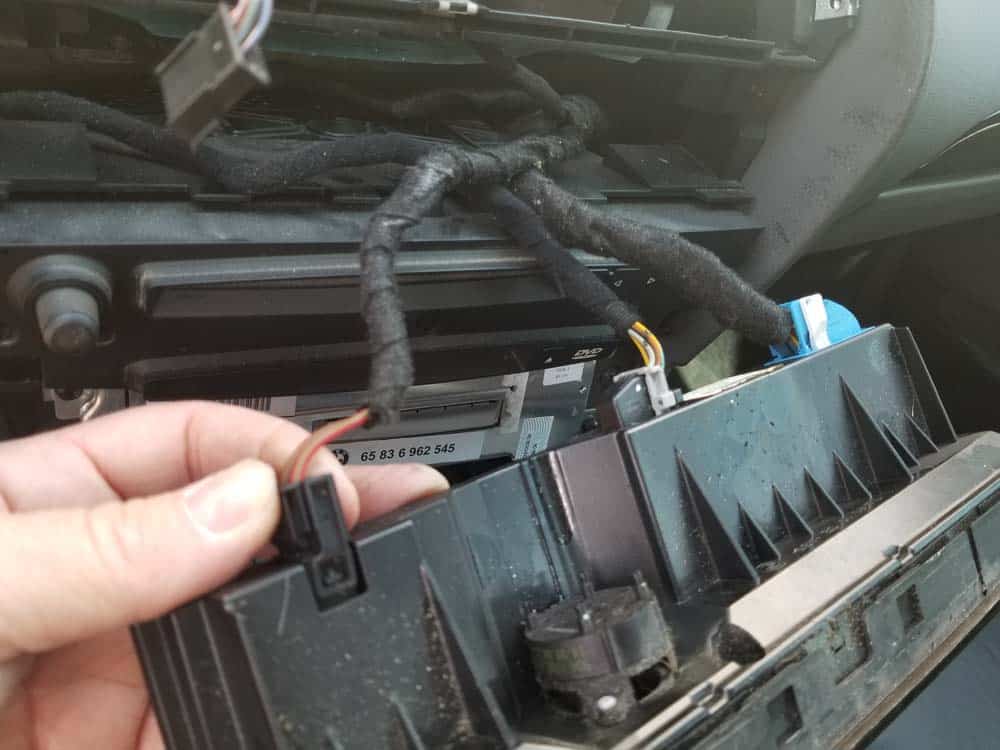
- Disconnect the three electrical connections in the back of the HVAC dash control unit.
BMW 6 Series Trim Removal Finished